Transforming your look with enchanting elf hairstyles has never been more accessible, whether you’re preparing for a fantasy convention, Halloween party, theatrical performance, or simply want to embrace your inner mystical creature.
This comprehensive guide to 25 Step-by-Step Elf Hairstyle Tutorials Anyone Can Try delivers detailed instructions for creating everything from elegant woodland elf braids to dramatic high fantasy updos, each designed with clear steps that work for various hair lengths, textures, and skill levels.
You’ll discover classic techniques like waterfall braids and intricate crown weaves, along with modern interpretations featuring accessories, color placement, and styling tricks that bring ethereal beauty to life.
Every tutorial includes practical tips for securing your style, recommended tools, and modifications to personalize each look, ensuring you can recreate these magical hairstyles with confidence.
Whether you’re a complete beginner or experienced with styling, these tutorials will guide you through creating captivating elf-inspired looks that capture the essence of fantasy and nature.
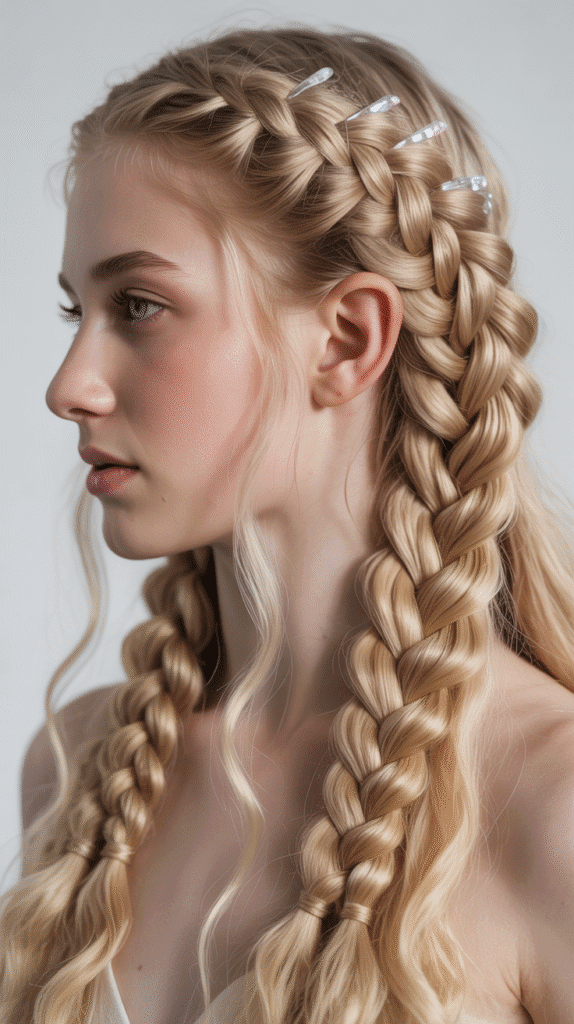
1. Classic Woodland Elf Side Braid
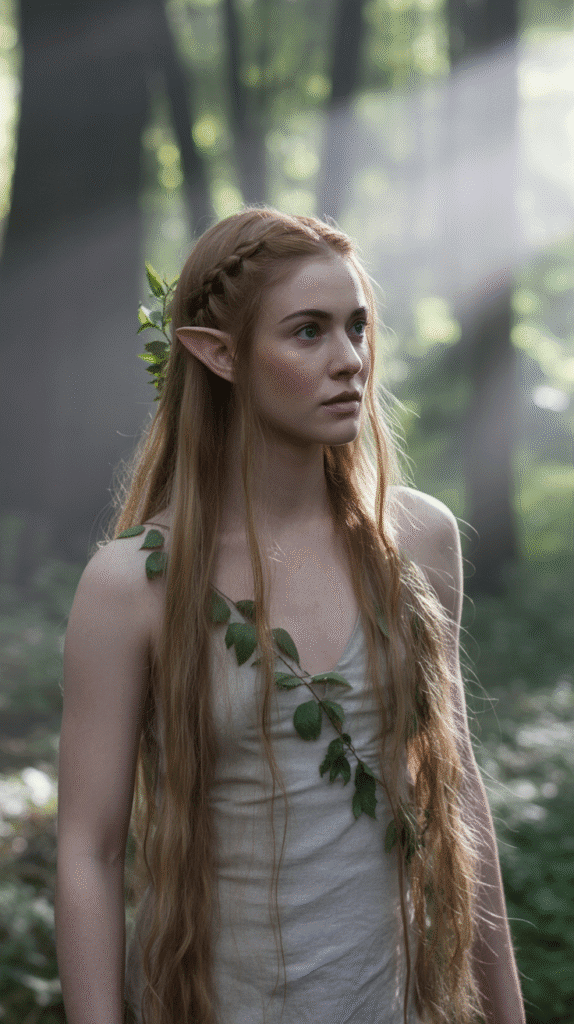
The woodland elf aesthetic embraces natural, flowing beauty with braids that appear effortlessly woven through the hair.
This foundational style works beautifully for medieval festivals, forest-themed events, or everyday wear when you want to channel gentle, earthy elegance.
Steps:
- Prepare your hair by brushing thoroughly to remove all tangles and create a smooth canvas for braiding.
- Create a deep side part on your preferred side, sweeping the majority of hair to one shoulder.
- Take a small section from the front hairline near your part, approximately one inch wide.
- Begin a three-strand braid by dividing this section into three equal parts and crossing the outer strands over the middle alternately.
- Continue braiding loosely down the length of hair, maintaining even tension without pulling too tightly.
- Incorporate small leaves or flower clips between the braid segments if desired for an authentic woodland appearance.
- Secure the end with a clear elastic band or thin ribbon in earth tones like brown or forest green.
- Gently pull at the edges of the braid to create a softer, more voluminous texture that appears naturally undone.
- Apply a light hairspray to maintain the style while preserving movement and touchable softness.
2. High Fantasy Crown Braid
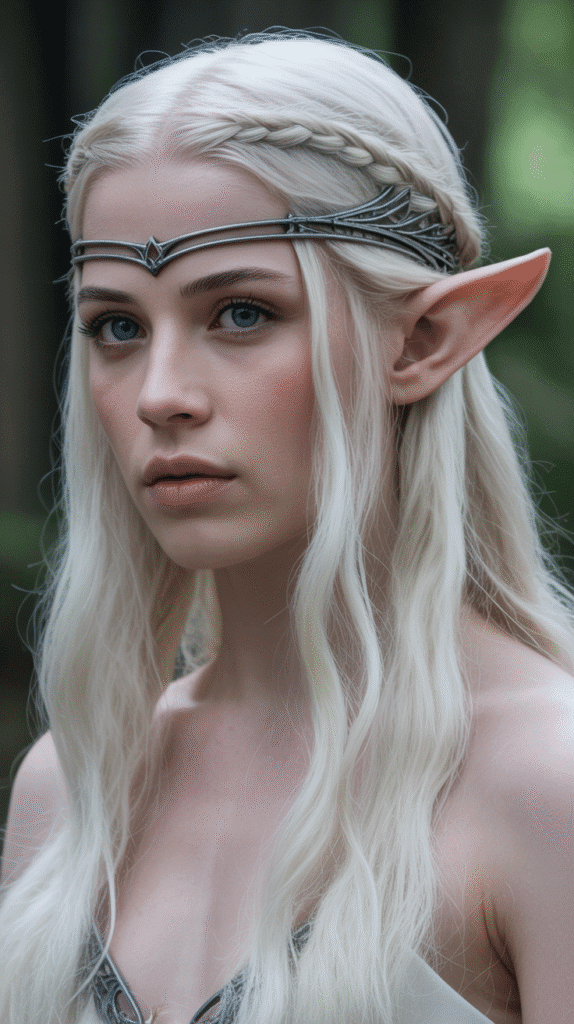
Crown braids represent regal elegance in elf culture, creating a halo effect that suggests nobility and magical prowess.
This sophisticated style elevates any costume and works exceptionally well for characters with leadership roles or royal heritage.
Steps:
- Start with hair that has natural texture or add waves with a curling iron for better grip and dimension.
- Create a horizontal part from ear to ear across the top of your head, sectioning off the crown area.
- Clip the bottom section away to keep it separate while working on the crown.
- Divide the crown section into two equal parts along your center part line.
- Begin a Dutch braid on one side by taking a section at the hairline and crossing strands under rather than over.
- Continue the Dutch braid following the curve of your head from front to back, picking up new hair with each stitch.
- Repeat the process on the opposite side creating a symmetrical braid that mirrors the first.
- Bring both braids to meet at the back center of your head where the crown section ends.
- Secure both braids together with bobby pins tucking the ends underneath to hide them within the style.
- Release the bottom section allowing it to flow freely beneath the crown for contrast.
- Add small metallic hair cuffs or wire-wrapped crystals along the crown braids for an elevated fantasy appearance.
3. Cascading Waterfall Braid
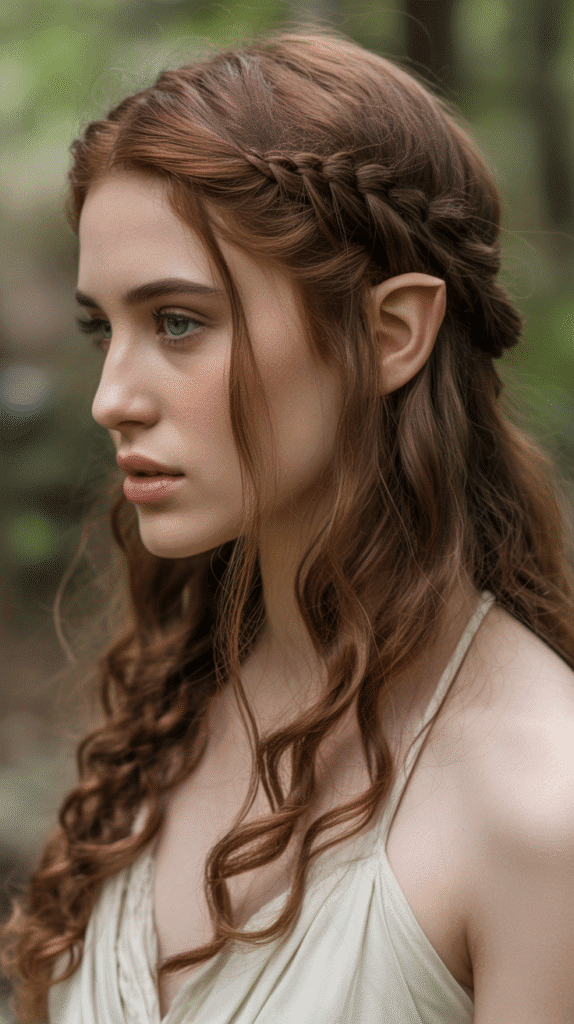
The waterfall braid technique creates the illusion of hair flowing through the braid like water cascading over rocks.
This romantic style perfectly captures the fluid, nature-connected essence of elf aesthetics while remaining surprisingly simple to execute.
Steps:
- Brush hair smooth and create a deep side part to establish the starting point for your waterfall effect.
- Take a three-inch section from the heavy side of your part near the front hairline.
- Divide this section into three equal strands to begin your initial braid formation.
- Cross the back strand over the middle as you would in a regular braid.
- Cross the front strand over the new middle completing one stitch of the braid.
- Drop the front strand completely allowing it to fall freely and become part of the cascading effect.
- Pick up a new section from the hairline to replace the dropped strand and continue the braid.
- Repeat this pattern of braiding and dropping as you work horizontally across the back of your head toward the opposite ear.
- Continue until you reach your desired ending point which can be behind the ear or continuing all the way around.
- Secure with a small clear elastic or incorporate the braid into a larger style.
- Curl the dropped strands with a one-inch curling iron to enhance the flowing, romantic appearance.
- Finish with flexible hold hairspray to maintain the style without stiffening the beautiful cascading pieces.
4. Intricate Elven Rope Twist
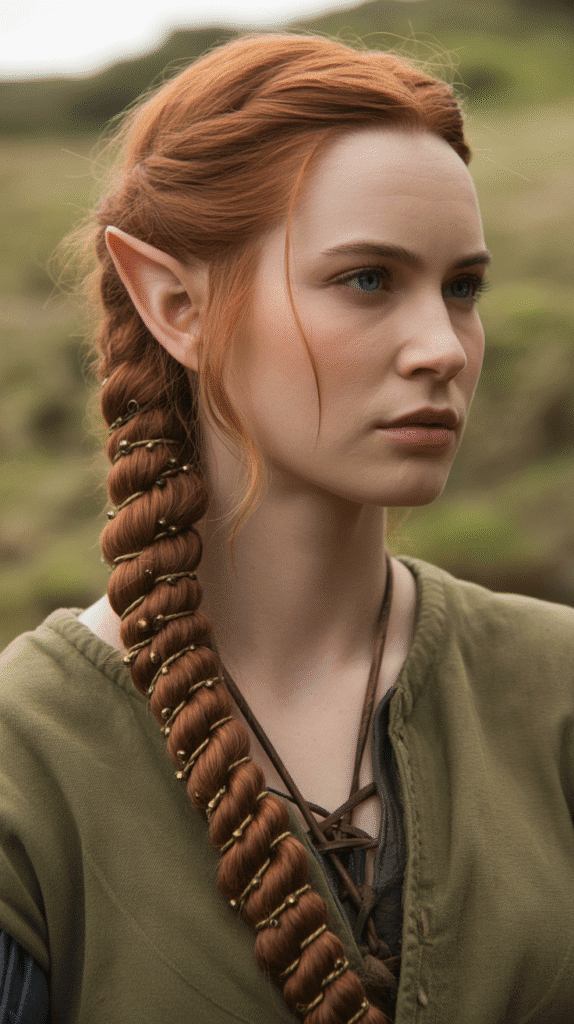
Rope twists offer an alternative to traditional braiding while creating equally stunning texture and dimension.
This technique appears complex but requires minimal skill, making it ideal for those still developing their braiding abilities.
Steps:
- Gather hair into a side ponytail at ear level, securing with a hair elastic that matches your hair color.
- Divide the ponytail into two equal sections holding one in each hand.
- Twist the right section clockwise rotating it multiple times until it begins to coil naturally.
- Maintain tension on this twisted section to prevent it from unraveling while you work.
- Twist the left section clockwise in the same direction using the same rotation technique.
- Cross the two twisted sections over each other counterclockwise wrapping the right section over the left.
- Continue this pattern of crossing which creates a rope-like texture that tightens automatically.
- Work down the entire length until you reach the ends of your hair.
- Secure with another elastic band and optionally wrap a small section of hair around it to conceal the elastic.
- Insert small decorative hairpins along the rope twist for added elven detail and sparkle.
- Gently loosen the twist by pulling softly on the edges to create width and a softer, more romantic appearance.
5. Half-Up Elven Knot
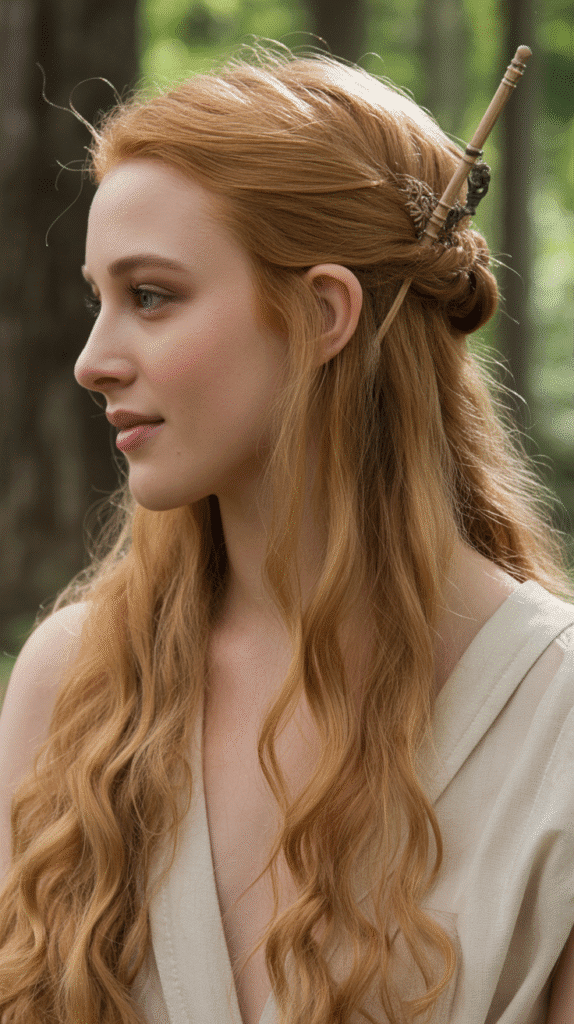
The half-up knot combines practicality with ethereal beauty, keeping hair away from the face while showcasing length and flow.
This style works particularly well for active events where you need security without sacrificing the flowing elf aesthetic.
Steps:
- Section the top half of your hair from temple to temple across the crown of your head.
- Gather this section at the crown bringing it together smoothly without creating bumps.
- Twist the gathered section rotating it several times clockwise to create a rope-like texture.
- Coil the twisted hair around itself forming a bun or knot shape at the crown.
- Secure with bobby pins inserting them through the knot into the hair beneath for stability.
- Pull out small face-framing pieces around your hairline and temples for a softer, more romantic appearance.
- Leave the remaining hair down allowing it to flow naturally over your shoulders and back.
- Add a decorative hair stick or pin through the knot for both security and ornamental appeal.
- Tease the loose hair gently at the crown for added volume and dimension.
- Curl the loose ends with a large-barrel curling iron for graceful, flowing waves.
- Spray with medium-hold hairspray focusing on the knot area to maintain its shape throughout wear.
6. Triple Strand Elven Braid
Triple strand braiding creates dramatic dimension by layering multiple braids together into one cohesive style.
This technique showcases hair artistry and works wonderfully for formal fantasy events or character portrayals requiring elaborate styling.
Steps:
- Divide all hair into three equal vertical sections creating a left, center, and right portion from crown to nape.
- Secure the left and right sections temporarily with clips to keep them separate while working.
- Braid the center section first using a standard three-strand technique from top to bottom.
- Secure the center braid with a clear elastic band at the ends.
- Release the left section and create a second three-strand braid parallel to the first.
- Secure this braid matching the position of the elastic on the center braid.
- Release the right section and complete the third braid to match the others.
- Gather all three braids together at the nape of your neck where they converge.
- Braid the three braids together treating each individual braid as one strand in a larger braid.
- Secure the end with a decorative hair tie or ribbon that complements your costume.
- Pancake each section by gently pulling on the edges to create width and texture throughout all the braids.
- Add small flowers or gems at the connection points where the three braids meet for extra embellishment.
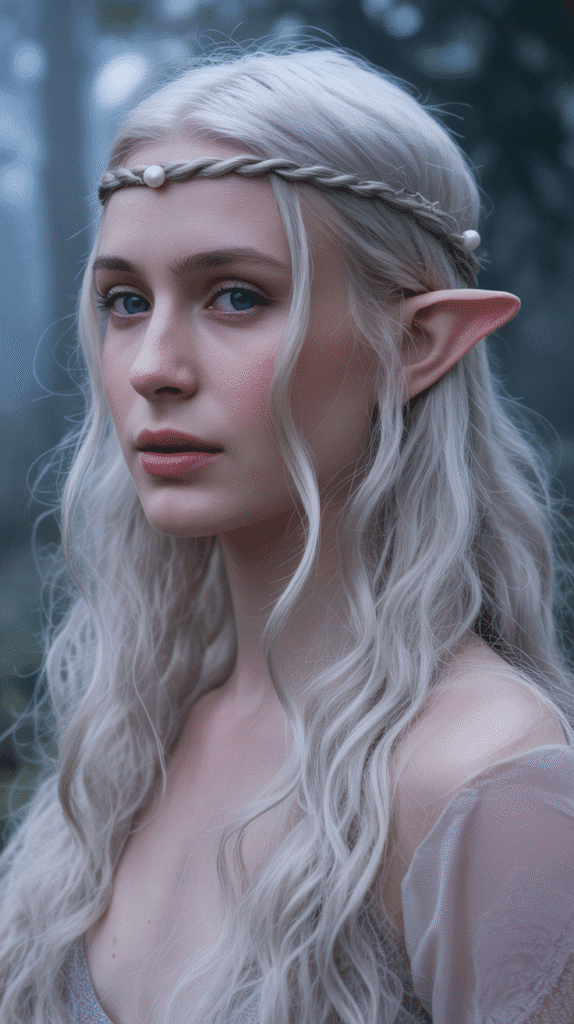
7. Wrapped Headband Braid
Headband braids frame the face beautifully while keeping hair controlled and adding an accessory-like element.
This style requires no actual headband, creating the illusion of one entirely from your own hair.
Steps:
- Create a horizontal part from ear to ear across the top of your head approximately two inches back from the hairline.
- Section off the front portion and clip the back section away temporarily.
- Start a braid at one ear taking a small section from behind the ear at the part line.
- Braid toward the opposite ear following the curve of your head like a headband would sit.
- Use a Dutch or French braid technique to keep the braid flat against your head rather than protruding.
- Pick up small sections as you braid to incorporate hair from the front section into the headband.
- Continue until you reach the opposite ear maintaining consistent tension and thickness.
- Secure behind the ear with bobby pins that match your hair color for seamless blending.
- Release the back section and style it as desired, either leaving it straight, curling it, or creating an additional braid.
- Tuck any loose ends from the headband braid behind your ear or pin them invisibly.
- Add small white flowers or baby’s breath woven into the headband braid for a woodland elf touch.
8. Twisted Back Elf Style

Twisted back styles offer simplicity and elegance, perfect for those who want an elven look without extensive braiding knowledge.
This technique relies on twisting rather than weaving, creating beautiful texture with minimal complexity.
Steps:
- Create a center part dividing your hair into left and right sections from forehead to crown.
- Take a two-inch section from the front right side near your hairline.
- Twist this section away from your face rotating it clockwise while maintaining firm tension.
- Pin the twisted section at the back center of your head with a bobby pin.
- Repeat on the left side taking an equivalent section and twisting counterclockwise away from your face.
- Cross this twist over the first at the back center and secure with another bobby pin.
- Continue taking sections from each side, alternating right and left as you work down.
- Create a crisscross pattern at the back of your head with each twisted section crossing over the previous.
- Leave the bottom portion loose allowing hair to flow naturally from beneath the twisted crown.
- Adjust the twists by gently pulling on them to create softer, more voluminous sections.
- Secure any loose pieces with additional bobby pins hidden within the twists.
- Add a decorative hair vine along the twisted sections for extra elven embellishment.
9. Long Flowing Waves with Braided Accent
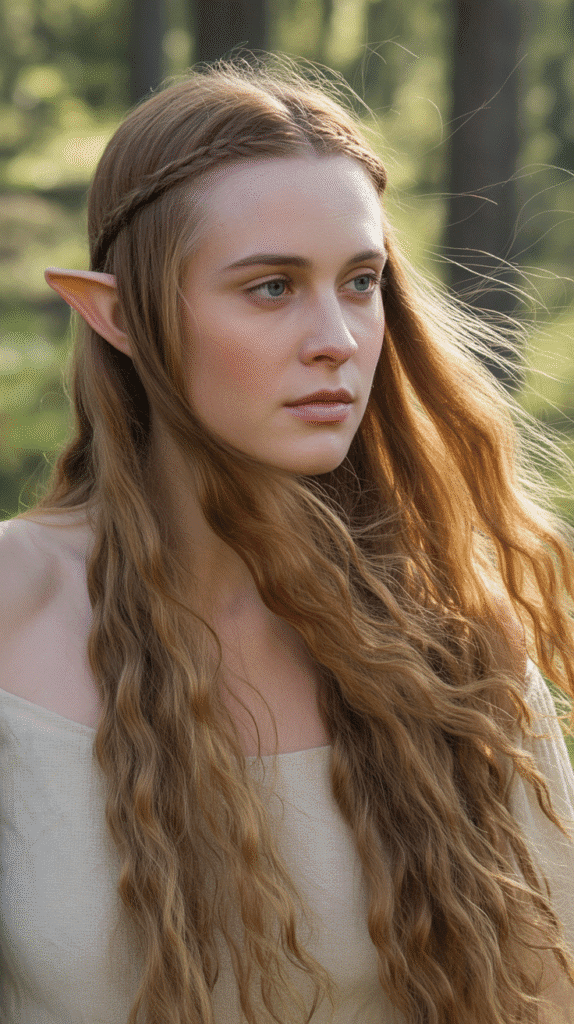
Sometimes simplicity speaks volumes, and this style proves that a single strategic braid can transform ordinary waves into an elven masterpiece.
The contrast between flowing hair and structured braiding creates visual interest without overwhelming the look.
Steps:
- Wash and condition hair using products that enhance natural wave patterns or create artificial waves with styling tools.
- Apply a volumizing mousse to damp hair before blow-drying to create body and texture.
- Use a 1.5-inch curling iron to create loose, natural-looking waves throughout all your hair.
- Alternate the direction of curling, wrapping some sections toward your face and others away for organic movement.
- Allow curls to cool completely before touching them to set the wave pattern effectively.
- Take a small section from above one ear approximately one inch wide.
- Create a simple three-strand braid working down the length of this section.
- Secure with a small elastic that matches your hair color or is transparent.
- Pin the braid across the back of your head to the opposite side, creating a subtle headband effect.
- Leave all other hair loose to flow freely in waves over your shoulders and back.
- Run your fingers through the waves to separate them and create a softer, more tousled appearance.
- Finish with sea salt spray for beachy texture that enhances the natural, effortless elf aesthetic.
10. Bubble Braid Elven Style
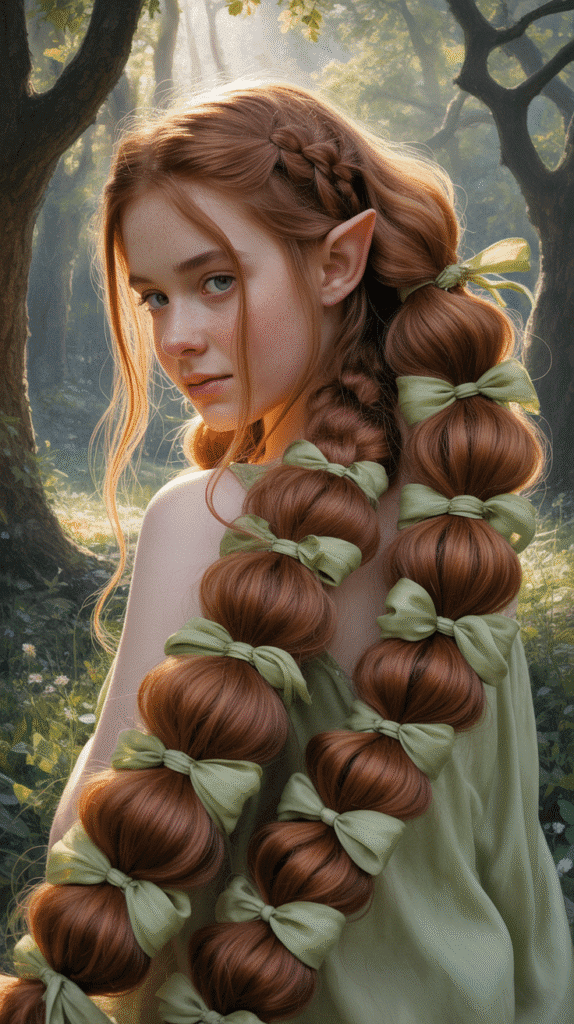
Bubble braids offer a modern twist on traditional elven hairstyles, creating eye-catching dimension through segmented sections.
This playful yet elegant technique works well for younger elf characters or contemporary fantasy interpretations.
Steps:
- Gather hair into a low ponytail at the nape of your neck, securing with a hair elastic.
- Place a second elastic approximately three inches below the first elastic.
- Gently pull the hair between the elastics outward on all sides to create a rounded, bubble-like segment.
- Add a third elastic three inches below the second one, maintaining consistent spacing.
- Create another bubble by pulling the hair outward between the second and third elastics.
- Continue this pattern down the entire length of your ponytail, spacing elastics evenly.
- Adjust each bubble to ensure they’re equally sized and proportioned throughout the style.
- Wrap thin ribbons around each elastic if desired, concealing them while adding decorative elements.
- Insert small flower stems or leafy accents between the elastics for woodland elf embellishment.
- Use bobby pins to secure any shorter layers that may slip out of the bubbles.
- Spray lightly with hairspray to maintain the bubble shapes without creating stiffness.
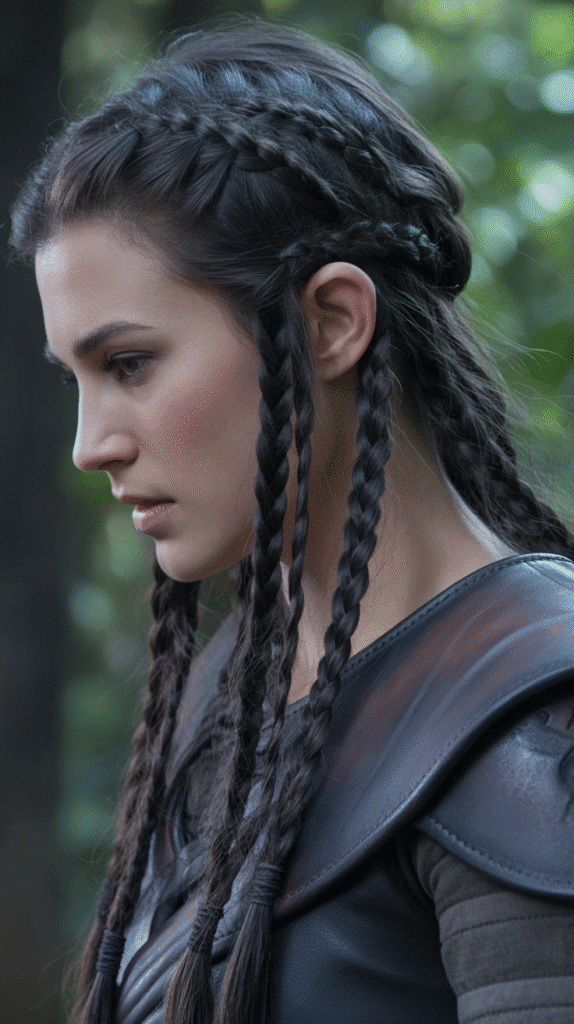
11. Mohawk Braid for Warrior Elves

Warrior elf aesthetics demand bold, practical hairstyles that convey strength while maintaining elven grace.
The mohawk braid achieves this balance, creating a striking centerline braid that’s both functional and fierce.
Steps:
- Section hair down the center creating a wide mohawk strip from forehead to nape, approximately three to four inches wide.
- Clip the side sections away from the center strip to keep them separated during styling.
- Begin a Dutch braid at the front hairline, starting with a small section divided into three strands.
- Cross strands under rather than over which creates a braid that sits on top of your head rather than recessed.
- Add hair from the center section only as you work the braid down the length of your head.
- Keep the braid tight and controlled to create a structured, raised appearance along your crown.
- Continue to the nape incorporating all hair from the center mohawk section.
- Finish with a regular three-strand braid once you’ve run out of hair to add, working down the remaining length.
- Secure the end with a strong elastic band that can withstand movement and activity.
- Style the side sections by either braiding them tightly against your head, shaving them for authenticity, or slicking them back with strong gel.
- Add leather wraps or metal cuffs along the mohawk braid for warrior elf embellishment.
- Apply strong-hold hairspray to ensure the style remains intact during combat choreography or active events.
12. Side-Swept Loose Curls with Braided Detail
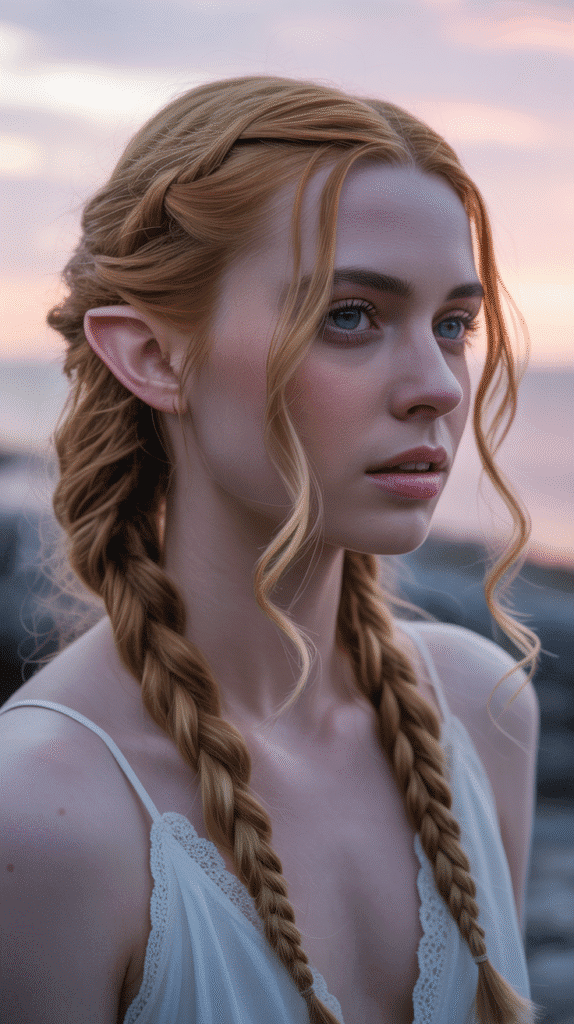
Romantic elf styles often feature hair swept dramatically to one side, creating asymmetry that appears both casual and carefully crafted.
The addition of small braided details elevates this simple style into fantasy territory.
Steps:
- Create a deep side part sweeping the majority of hair to your preferred side.
- Curl all hair using a curling wand or iron, working in sections and alternating directions for natural movement.
- Take a small section from the light side of your part near the hairline.
- Braid this section into a thin, tight three-strand braid working from roots to ends.
- Bring the braid across the back of your head to the heavy side where most hair is gathered.
- Pin the braid behind your ear on the heavy side, securing it invisibly within the curled hair.
- Take another small section from slightly behind the first braid on the light side.
- Create a second parallel braid following the same technique as the first.
- Pin this braid following the path of the first, creating layered braided details.
- Allow all remaining hair to cascade over your shoulder on the heavy side in loose curls.
- Tease the roots lightly at the crown for added volume and romantic height.
- Finish with flexible hairspray that maintains curl definition without creating crunch.
13. Elven Infinity Braid
The infinity braid creates a figure-eight pattern that appears complex and magical, perfectly suited to elven aesthetics.
This advanced technique impresses viewers while remaining secure and long-lasting for extended wear.
Steps:
- Gather hair into a side ponytail positioned at your preferred height and location.
- Divide the ponytail into two equal sections holding one in each hand.
- Take a small piece from the outer edge of the right section approximately a quarter inch wide.
- Cross this piece over the right section and under the left section creating the beginning of your figure-eight pattern.
- Add this piece to the left section incorporating it completely.
- Take a small piece from the outer edge of the left section matching the size of the first piece.
- Cross this piece over the left section and under the right section continuing the weaving pattern.
- Add this piece to the right section and pull gently to tighten the weave.
- Continue alternating sides maintaining consistent piece sizes and tension throughout.
- Work down the entire length until you reach the ends of your ponytail.
- Secure with a clear elastic or decorative tie that complements your overall look.
- Gently pancake the braid pulling on the loops to create width and showcase the infinity pattern.
- Add small jeweled pins at intervals along the braid to enhance the magical appearance.
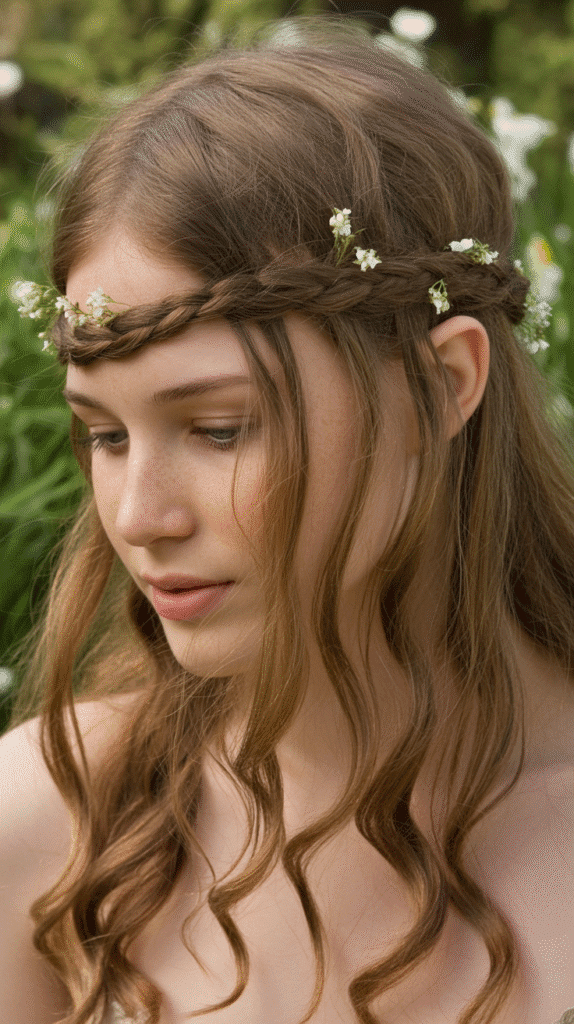
14. Crown of Flowers and Braids
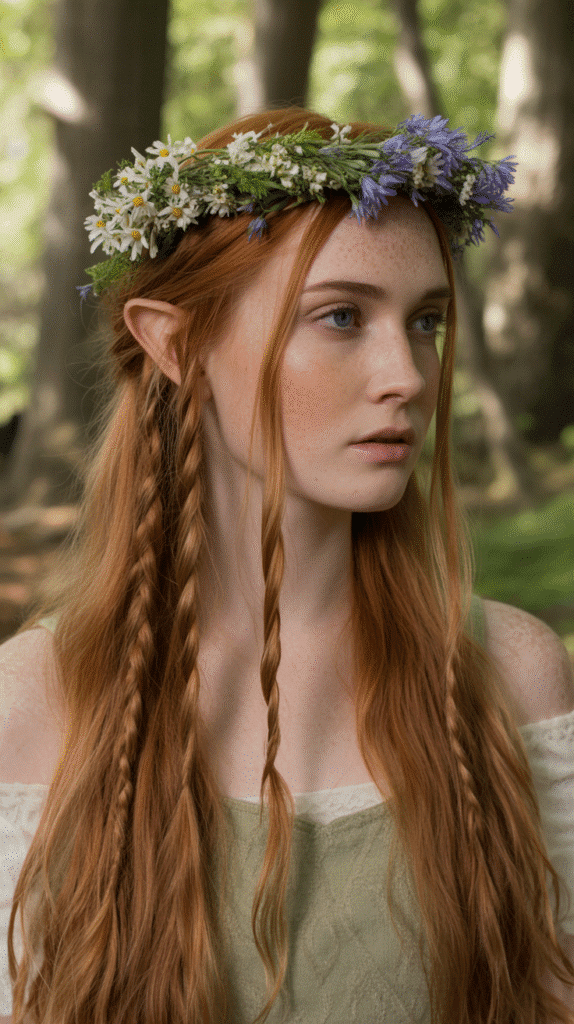
Combining natural elements with braiding techniques creates the quintessential woodland elf aesthetic.
This style works beautifully for spring and summer events, weddings, or any occasion celebrating nature and fantasy.
Steps:
- Create two small braids on each side of your head starting from the temples and working back.
- Keep these braids thin approximately half an inch wide for delicate, feminine detail.
- Bring both braids to meet at the back center of your head at crown level.
- Cross the braids over each other and pin them securely with bobby pins.
- Create a small wreath or crown using fresh flowers, silk flowers, or crafted foam flowers on floral wire.
- Position the flower crown across your forehead and over the crown of your head where the braids meet.
- Secure the flower crown with bobby pins inserted through the floral backing into your hair.
- Weave additional small flowers directly into the braids using their natural stems or wire attachments.
- Leave the remaining hair loose flowing naturally down your back or over your shoulders.
- Add subtle curls or waves to loose hair for added romance and movement.
- Ensure flower colors coordinate with your costume or the natural color palette of your character.
- Spray with hairspray carefully avoiding direct contact with real flowers which can be damaged by chemicals.
15. Pulled-Through Braid Illusion
The pulled-through braid creates the appearance of an elaborate braid without actually braiding at all.
This clever technique uses ponytails and strategic pulling to achieve stunning results with minimal skill required.
Steps:
- Create a half-up ponytail at the crown of your head, securing with a clear elastic.
- Split this ponytail in half vertically creating a hole in the center.
- Take a second section of hair from just below and beside the first ponytail.
- Pull this second section up through the hole in the first ponytail from underneath.
- Secure this second section with another elastic, creating a new ponytail.
- Gently pull on the sides of the first ponytail to create width and a rounded segment.
- Split the second ponytail vertically just like you did the first.
- Take a third section of hair from below the second ponytail.
- Pull this section up through the second ponytail’s hole continuing the pattern.
- Repeat this process working down your head until you run out of hair to pull through.
- Pancake each segment by pulling gently on the edges to create fullness and hide the elastics.
- The final result appears like an intricate braid but was created without any traditional braiding.
- Add decorative elements like small gems or pins at the connection points between segments.
16. Asymmetrical Elven Updo
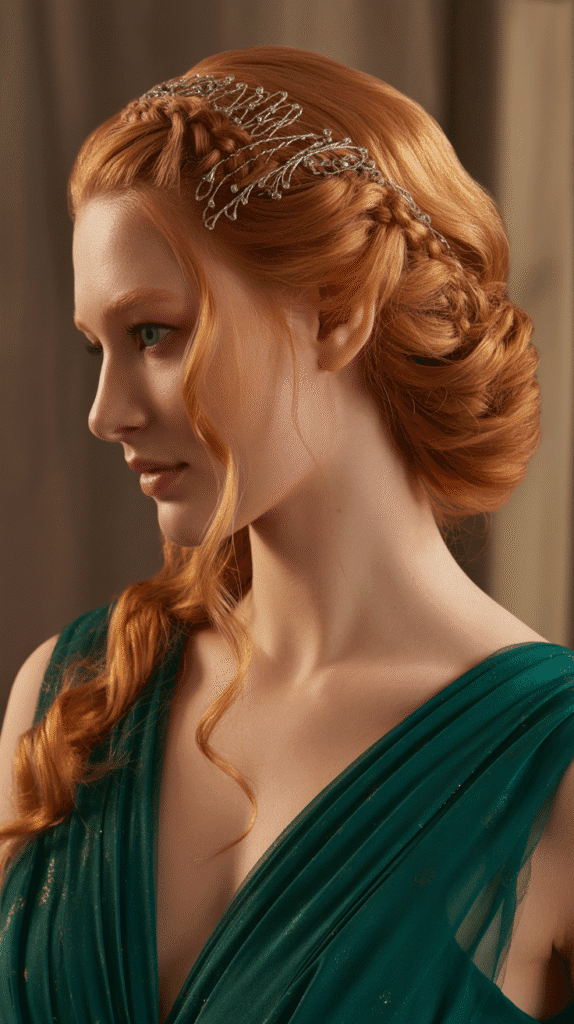
Asymmetrical styling creates visual interest and modern appeal while maintaining fantasy elements.
This updo works particularly well for formal events, combining sophistication with whimsical elf characteristics.
Steps:
- Create a deep side part establishing which side will feature the updo and which will remain adorned but lower.
- Section the heavy side into three horizontal layers from crown to nape.
- Begin with the lowest section twisting it upward and pinning it against your head in a curved sweep.
- Take the middle section and twist it similarly, pinning it above and overlapping the first twisted section.
- Complete with the top section twisting and pinning to create a cascading effect of twisted segments.
- On the light side create two or three small braids starting from the hairline.
- Incorporate these braids into the updo by wrapping them around and through the twisted sections.
- Leave some face-framing pieces loose on both sides for softness and romantic appeal.
- Secure all sections with bobby pins that match your hair color for invisible hold.
- Add a decorative hair comb on the heavy side where the twist formations are most visible.
- Curl the loose face-framing pieces to create soft tendrils that enhance the asymmetry.
- Finish with strong-hold hairspray focusing on the updo areas to maintain the structure throughout wear.
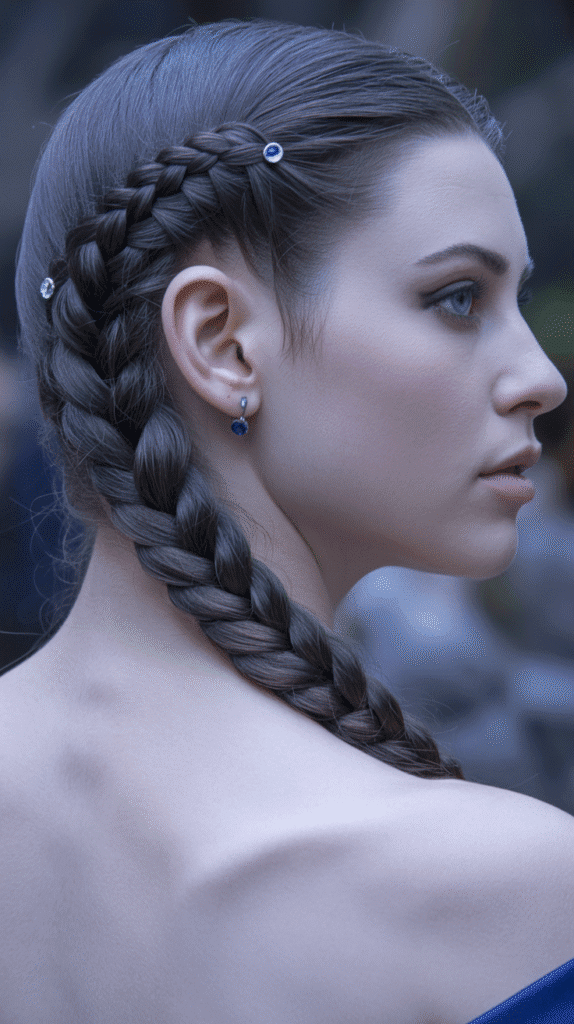
17. Double Dutch Braids into Low Bun
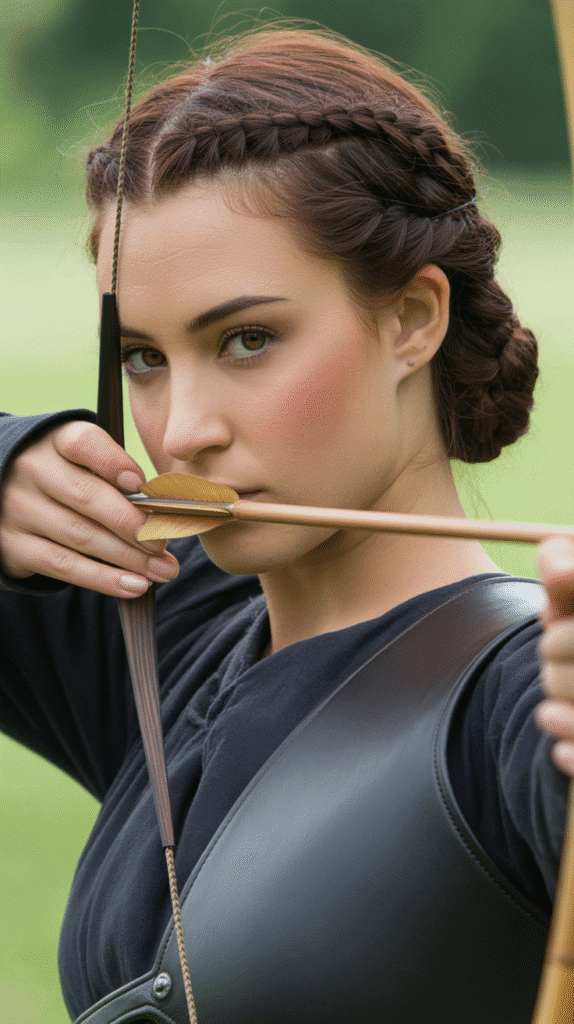
Combining structured braiding with a refined bun creates a look that’s both practical and polished.
This style suits elven archers, scholars, or any character requiring hair completely secured away from their face and neck.
Steps:
- Part hair down the center creating perfectly equal left and right sections.
- Begin a Dutch braid on the right side starting at the front hairline with three small sections.
- Braid backward following the curve of your head from front to nape, adding hair with each stitch.
- Keep the braid tight and close to your scalp for a sleek, controlled appearance.
- Secure temporarily with a clear elastic when you reach the nape.
- Repeat the Dutch braid process on the left side, creating a mirror image of the right braid.
- Remove both elastics once both braids are complete at the nape.
- Combine both braids together with all the remaining loose hair at the nape.
- Twist this combined hair into a rope and coil it around itself to create a bun.
- Secure the bun with bobby pins inserted through the coil and into the hair beneath.
- Use a hair net in a matching color if needed for extra security during active wear.
- Add a leather hair tie or metallic cuff around the base of the bun for decorative detail.
- Apply edge control or gel to any flyaways along the part and braid lines for an immaculate finish.
18. Twisted Half-Crown with Loose Waves
This romantic style balances structure and flow, creating a crown effect without complete commitment.
The twisted crown keeps hair managed while showcasing beautiful loose waves that embody elven grace.
Steps:
- Curl all hair with a large-barrel curling iron to create loose, flowing waves throughout.
- Take a two-inch section from above your right ear at temple level.
- Twist this section backward away from your face, rotating it continuously as you move toward the back of your head.
- Pin the twisted section at the back center of your head with bobby pins.
- Take an equivalent section from above your left ear, matching the size of the right section.
- Twist this section backward meeting the right twisted section at the back center.
- Cross the left twist over the right and secure them together with bobby pins.
- Allow the remaining hair to flow loosely down your back in the curls you created initially.
- Pull gently on the twists to create width and softer, more voluminous sections.
- Add small decorative elements like pearls or crystals where the twists meet for subtle embellishment.
- Tease the crown area slightly above where the twists begin for added height and dimension.
- Finish with light hairspray to maintain the waves and twists without stiffness.
19. Multi-Strand Braid with Ribbons
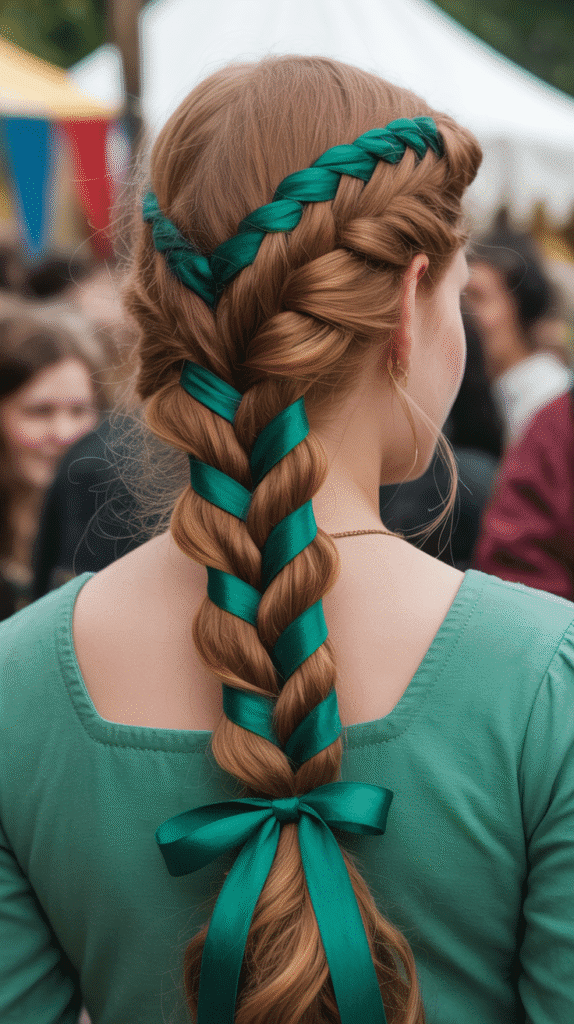
Incorporating ribbons into braiding adds color, texture, and authentic medieval fantasy elements.
This technique works beautifully for festivals, performances, or detailed costume presentations requiring extra visual impact.
Steps:
- Select ribbons in colors that complement your costume, approximately quarter-inch to half-inch width.
- Cut ribbons to lengths that exceed your hair length by at least six inches for tying.
- Gather hair into a ponytail at your desired height and secure with an elastic.
- Fold one ribbon in half and loop it around the elastic, creating two ribbon tails alongside your hair.
- Divide hair and ribbons into five sections total (three hair sections and two ribbon sections, alternating them).
- Begin a five-strand braid by crossing the far right section over its neighbor, then under the middle, following a consistent over-under pattern.
- Continue the five-strand pattern working down the length of your ponytail with the ribbons integrating throughout.
- Maintain even tension on both hair and ribbon sections to create uniform braiding.
- Secure the end with another elastic and tie the ribbon ends in a bow beneath it.
- Pancake the braid sections gently to create width and better showcase the ribbon details.
- Trim ribbon ends at an angle or in a V-shape to prevent fraying and create decorative points.
20. Sleek High Ponytail with Wrapped Base
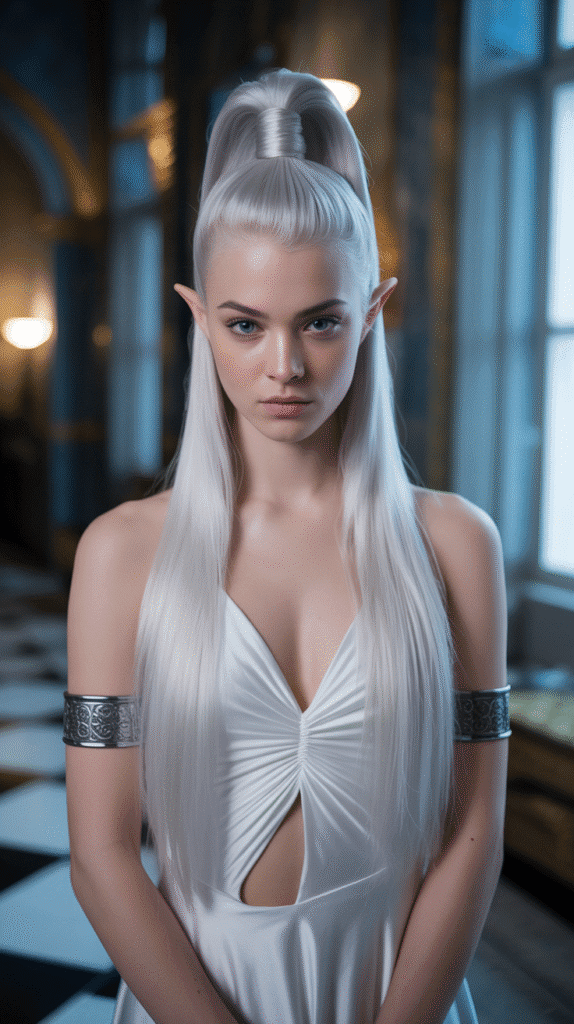
High elven cultures often feature polished, sophisticated styling that emphasizes clean lines and refinement.
This sleek ponytail with decorative wrapping achieves an aristocratic appearance perfect for high fantasy settings.
Steps:
- Brush hair thoroughly until completely smooth without any tangles or texture.
- Apply smoothing serum to damp hair before blow-drying straight with a paddle brush.
- Gather all hair at the crown of your head, pulling it upward and slightly back.
- Secure with a strong elastic that can support the weight of your ponytail without slipping.
- Take a small section from underneath the ponytail, approximately one inch wide.
- Wrap this section around the elastic covering it completely to create a polished finish.
- Secure the wrapped section with a bobby pin inserted vertically through the wrap into the hair beneath the elastic.
- Apply edge control gel along your hairline and part with a small brush to smooth any flyaways.
- Use a flat iron on the ponytail itself to ensure perfect straightness from base to ends.
- Add metal cuffs or wraps at intervals down the length of the ponytail for high elven embellishment.
- Spray with shine spray to enhance the sleek, polished appearance of the style.
- Ensure perfect symmetry by checking all angles and smoothing any imperfections.
21. Messy Bohemian Elf Braid
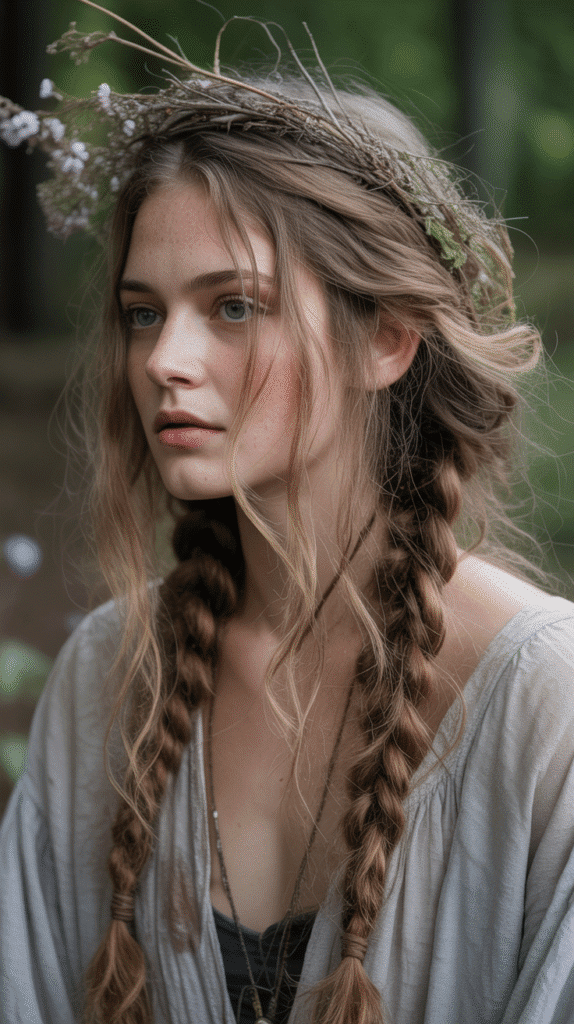
Not all elves maintain perfect, structured hairstyles—some embrace a wilder, more naturalistic aesthetic.
This messy bohemian approach celebrates texture, volume, and carefree beauty while maintaining clear elf inspiration.
Steps:
- Start with unwashed hair or apply dry shampoo to add texture and grip for easier styling.
- Tease the crown area using a fine-tooth comb to create substantial volume and lift.
- Gather hair loosely at the nape without smoothing or controlling the teased volume.
- Divide into three uneven sections intentionally making them different sizes for organic, imperfect texture.
- Braid loosely using the three sections, maintaining relaxed tension that allows movement and softness.
- Pull pieces out intentionally as you braid, creating wisps and tendrils that frame your face randomly.
- Leave the braid very loose so that it appears almost undone but still holds its basic structure.
- Secure the end with a thin leather cord or fabric-wrapped elastic rather than modern hair ties.
- Pancake aggressively pulling large sections from the braid to create maximum width and messy texture.
- Wrap small sections of hair around your fingers and pin them randomly throughout for added chaos.
- Leave several face-framing pieces completely out of the braid on both sides.
- Apply texturizing spray throughout the style to enhance the piecey, undone appearance.
- Weave natural elements like twigs, dried flowers, or feathers into the braid for wild woodland character.
22. Braided Faux Hawk
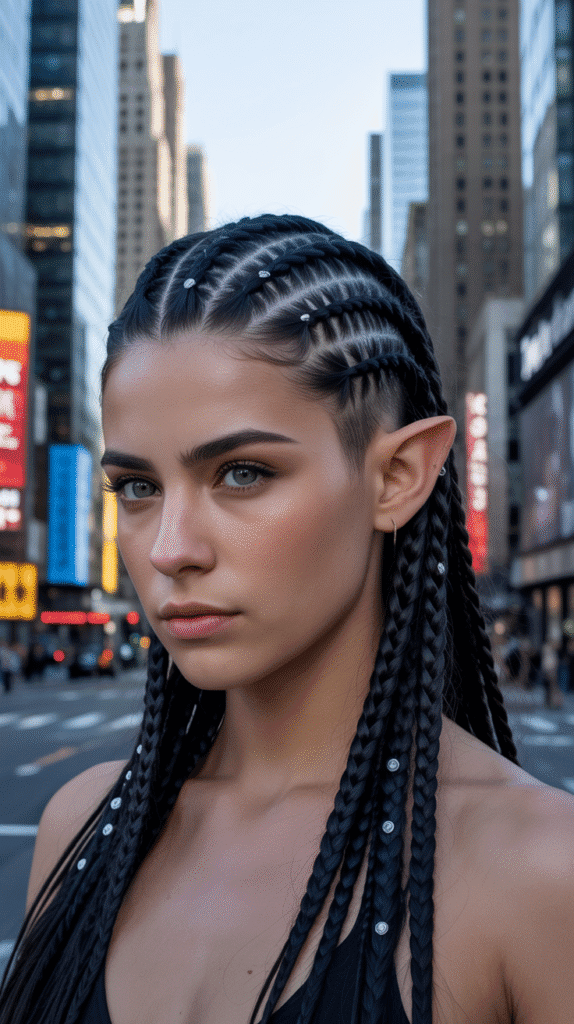
The braided faux hawk combines edgy modern styling with traditional braiding techniques, creating a bold statement perfect for contemporary elf interpretations or rebellious characters.
This style maintains practicality while showcasing creativity and confidence.
Steps:
- Create a center part from forehead to crown, then curve outward on both sides to section off a wide mohawk strip.
- Clip side sections tightly against your head with multiple clips to keep them completely flat.
- Tease the mohawk section at the roots to create volume and height along the center strip.
- Begin a French braid at the front hairline within the mohawk section, starting with a small three-strand base.
- Add hair from the sides of the mohawk strip as you braid backward toward the crown.
- Keep the braid loose allowing it to stand upward rather than lying flat against your head.
- Continue braiding until you reach the crown area where the mohawk section ends.
- Allow the remaining braid to fall naturally down your back or pin it upward for more dramatic height.
- Apply strong-hold gel to the side sections, smoothing them completely flat against your head.
- Pin the side sections back and down using bobby pins for sleek contrast against the textured center.
- Add small spikes or metal studs along the center braid for edgy embellishment.
- Finish with maximum-hold hairspray to maintain the upright structure throughout wear.
23. Low Twisted Chignon
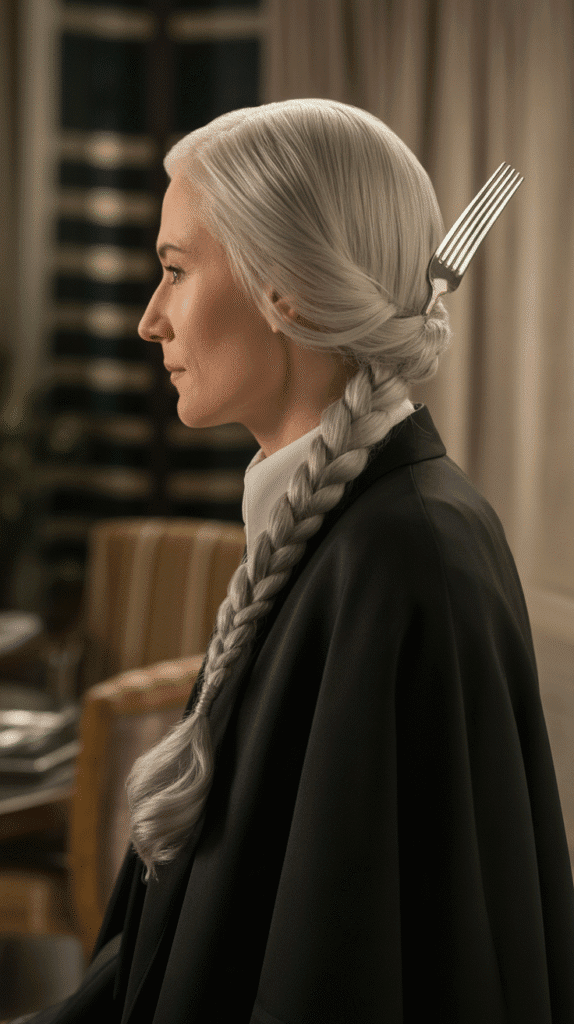
The twisted chignon offers timeless elegance with minimal effort, perfect for formal elven gatherings or characters in diplomatic roles.
This sophisticated updo works across all ages and maintains its structure throughout extended wear.
Steps:
- Brush hair into a low ponytail positioned at the nape of your neck, securing with a hair elastic.
- Divide the ponytail into two equal sections holding one in each hand.
- Twist the right section clockwise rotating it continuously down its entire length.
- Twist the left section clockwise in the same direction as the right section.
- Wrap the right twisted section around the base of the ponytail in a clockwise circular motion.
- Pin the right section as you wrap using bobby pins inserted through the twist into the hair beneath.
- Wrap the left twisted section in the opposite direction (counterclockwise) around the base.
- Pin the left section securing it as you create the circular chignon shape.
- Tuck any remaining ends underneath the chignon and pin them invisibly.
- Smooth the hair leading into the chignon using a brush and light hairspray.
- Add a decorative hair fork or ornamental pins through the chignon for both security and embellishment.
- Pull out a few face-framing tendrils if desired, curling them softly for romantic appeal.
24. Ladder Braid with Flowers

The ladder braid creates an intricate appearance through clever technique that weaves hair like rungs connecting two side braids.
This showstopping style works beautifully for weddings, performances, or detailed fantasy photography.
Steps:
- Section off the top third of your hair from temple to temple across the crown.
- Create two parallel Dutch braids on the left and right sides of this section, leaving space between them.
- Keep these braids relatively tight and close to your scalp for structure.
- Take a small horizontal section from the loose hair between the two braids near the front.
- Weave this section over the right braid, under the center space, and over the left braid like a ladder rung.
- Incorporate this section into the left braid as you continue braiding downward.
- Take another horizontal section from between the braids approximately one inch below the first.
- Weave this section in the opposite direction, over the left braid and incorporating into the right braid.
- Continue alternating these ladder rungs as you work down the length of your head.
- Secure both braids at the nape when the ladder section is complete.
- Combine the remaining hair into one braid or leave it loose in curls.
- Insert small flowers at each ladder rung intersection for romantic woodland embellishment.
- The result creates a corset-like effect that appears incredibly intricate and time-consuming.
25. Spiral Bun with Braided Wrap
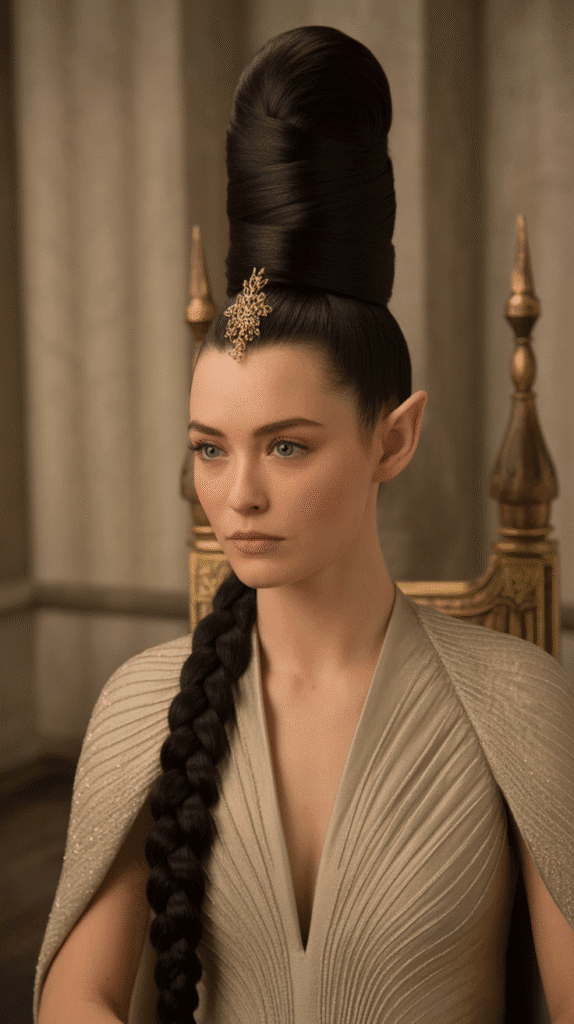
This final tutorial combines multiple techniques into one stunning updo that captures elven elegance perfectly.
The spiral bun creates height and sophistication while braided wrapping adds textural interest and refinement.
Steps:
- Gather hair into a high ponytail at the crown of your head, securing tightly with a strong elastic.
- Divide the ponytail into two unequal sections with approximately two-thirds in one section and one-third in the other.
- Set aside the smaller section clipping it temporarily out of the way.
- Take the larger section and twist it tightly clockwise down its entire length.
- Wrap this twisted section around the base of the ponytail in a spiral pattern, moving upward to create height.
- Pin as you wrap inserting bobby pins through the spiral into the hair beneath for security.
- Create a cone or beehive shape by controlling how tightly you wrap each rotation of the spiral.
- Tuck the end underneath the bun and pin it invisibly.
- Release the smaller section you set aside earlier.
- Braid this section into a three-strand braid working down its entire length.
- Wrap the braid around the base of the spiral bun horizontally, covering where the bun meets your head.
- Pin the braid as you wrap, creating a decorative border around the bun’s foundation.
- Tuck the braid end underneath itself and secure with a final bobby pin.
- Add a jeweled hair pin or decorative element to the front of the bun for focal interest.
- Spray with strong-hold hairspray to maintain the structure and height throughout wear.
Conclusion
These 25 Step-by-Step Elf Hairstyle Tutorials Anyone Can Try provide comprehensive guidance for creating enchanting fantasy hairstyles regardless of your current skill level or hair type.
From simple side braids perfect for beginners to intricate ladder braids that challenge advanced stylists, each tutorial offers clear instructions that transform ordinary hair into extraordinary elven artistry.
The techniques covered span practical warrior styles, romantic woodland aesthetics, sophisticated high fantasy elegance, and bohemian free-spirited looks, ensuring there’s a perfect option for every character interpretation and personal preference.
By practicing these methods and adapting them to your unique hair characteristics, you’ll develop the confidence to experiment with combinations and create your own signature elven hairstyles.
Whether you’re preparing for a cosplay convention, renaissance faire, theatrical production, themed photoshoot, or simply exploring your creative side, these tutorials empower you to embody the magical beauty of elven culture through the transformative art of hairstyling.
Remember that the most authentic elf hairstyles come from understanding the basic techniques and then allowing your creativity to flow naturally, just as the elves themselves embody the harmony between structure and organic beauty found throughout nature.