The holiday season sparkles with endless possibilities, and your hair deserves to shine just as brightly as the twinkling lights adorning every corner.
If you’ve been blessed with medium-length locks, you’re sitting on a goldmine of styling potential that strikes the perfect balance between versatility and manageability.
This comprehensive guide to 27 Chic Christmas Party Hairstyles for Medium Hair That Dazzle will transform your festive look from ordinary to extraordinary, offering everything from elegant updos to cascading waves that capture the magic of the season.
Whether you’re attending an intimate gathering or a glamorous soirée, these meticulously curated hairstyles will ensure you turn heads for all the right reasons.
Get ready to discover professional techniques, styling secrets, and creative twists that will make your medium hair the crown jewel of your holiday ensemble, proving that you don’t need floor-length tresses to achieve red-carpet worthy results.
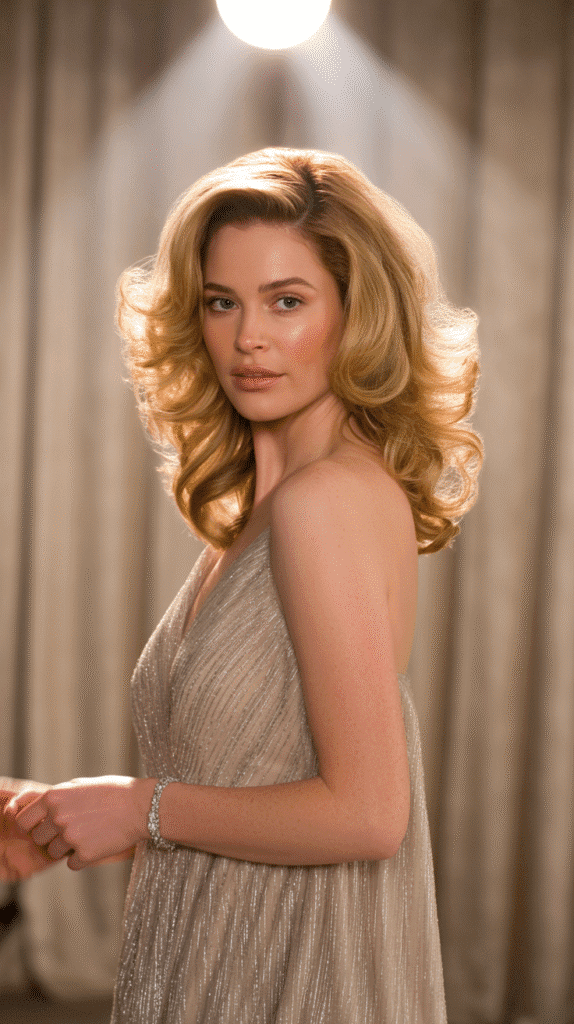
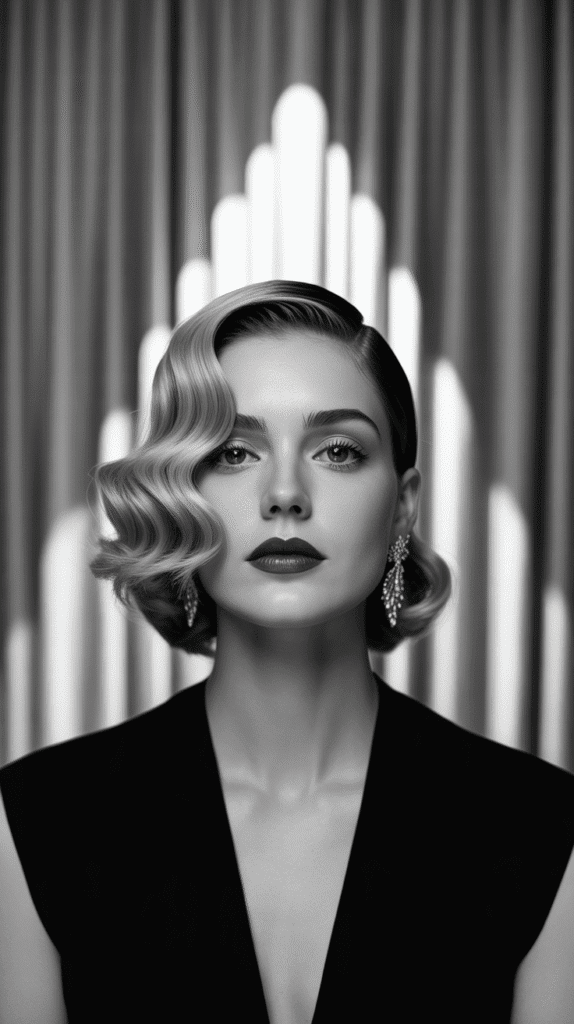
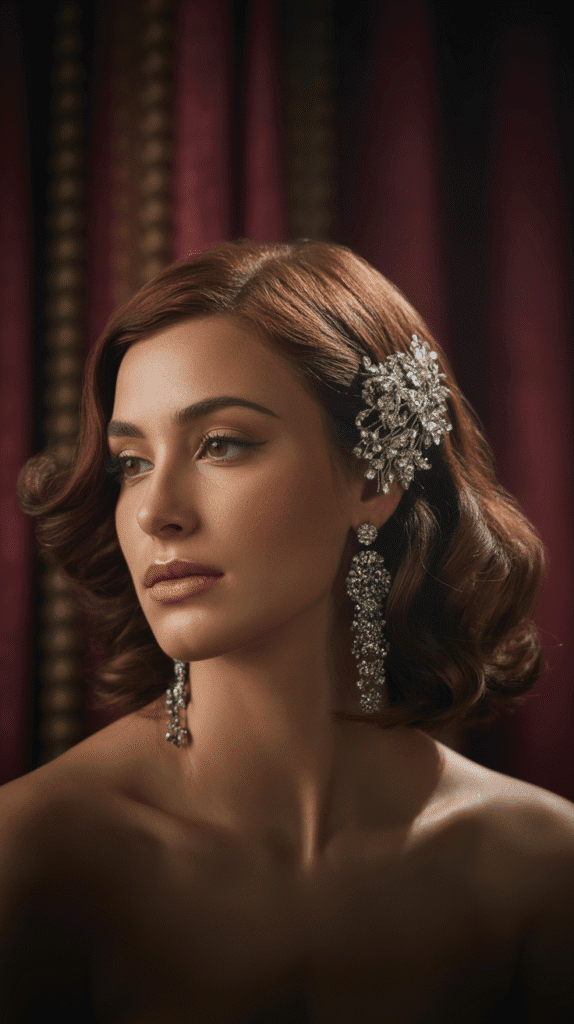
1. Classic Hollywood Waves
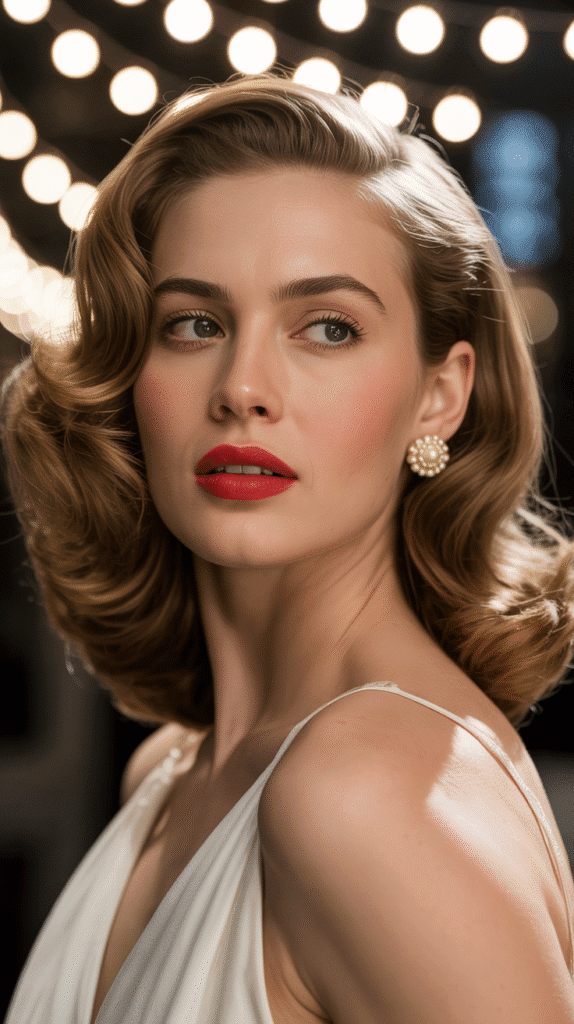
The timeless elegance of Hollywood waves never fails to captivate, making them the quintessential choice for any Christmas celebration where sophistication meets old-world glamour.
This vintage-inspired style works magnificently on medium hair, creating the illusion of luxurious volume while maintaining a polished, refined appearance that photographs beautifully under festive lighting.
- Begin by applying a heat protectant spray to damp hair, ensuring every strand is shielded from the styling tools you’ll be using throughout the process.
- Section your hair into manageable portions, typically three to four layers, which allows for more controlled curling and more uniform wave formation.
- Use a 1.5-inch curling iron or wand, wrapping hair sections away from your face while holding each curl for approximately 10 seconds before releasing gently.
- Once all sections are curled, allow the curls to cool completely for at least 10 minutes, as this setting time is crucial for wave longevity.
- Brush through the curls with a paddle brush or wide-tooth comb, using long, sweeping strokes that transform ringlets into flowing S-shaped waves.
- Set the style with a flexible-hold hairspray that maintains movement while preventing frizz, and add a decorative hair clip on one side for extra Christmas sparkle.
2. Textured Low Bun with Face-Framing Pieces
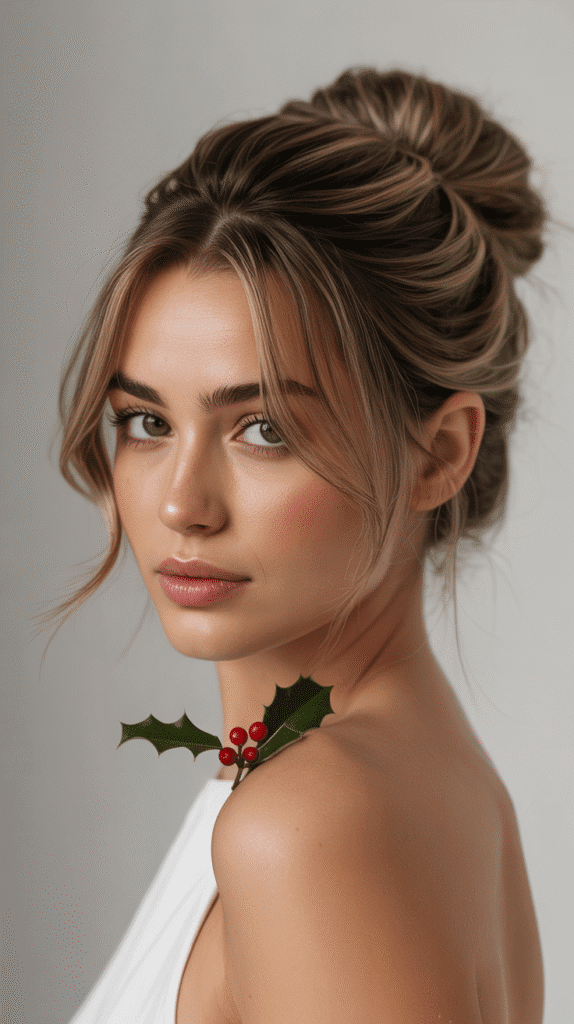
A textured low bun combines effortless chicness with romantic undertones, perfect for those seeking an updo that doesn’t feel overly formal or stiff.
The strategically placed face-framing pieces soften the overall look while the textured finish adds modern dimension that keeps the style from appearing too traditional or dated.
- Start with second-day hair or add texturizing spray to clean hair, as slightly gritty texture helps the bun hold its shape better throughout the evening.
- Pull hair into a low ponytail at the nape of your neck, deliberately leaving out small sections around your face and near your ears for that signature soft finish.
- Gently tease the ponytail with a fine-tooth comb to create volume and fullness before twisting it into a loose, irregular bun shape.
- Secure the bun with bobby pins inserted at various angles, ensuring they’re hidden within the folds while providing maximum hold.
- Pancake sections of the bun by gently pulling on the edges to create a fuller, more voluminous appearance with beautiful texture variations.
- Use a curling wand on the face-framing pieces to add gentle bends, then finish with a light mist of texturizing spray for that coveted undone elegance.
3. Half-Up Twisted Crown
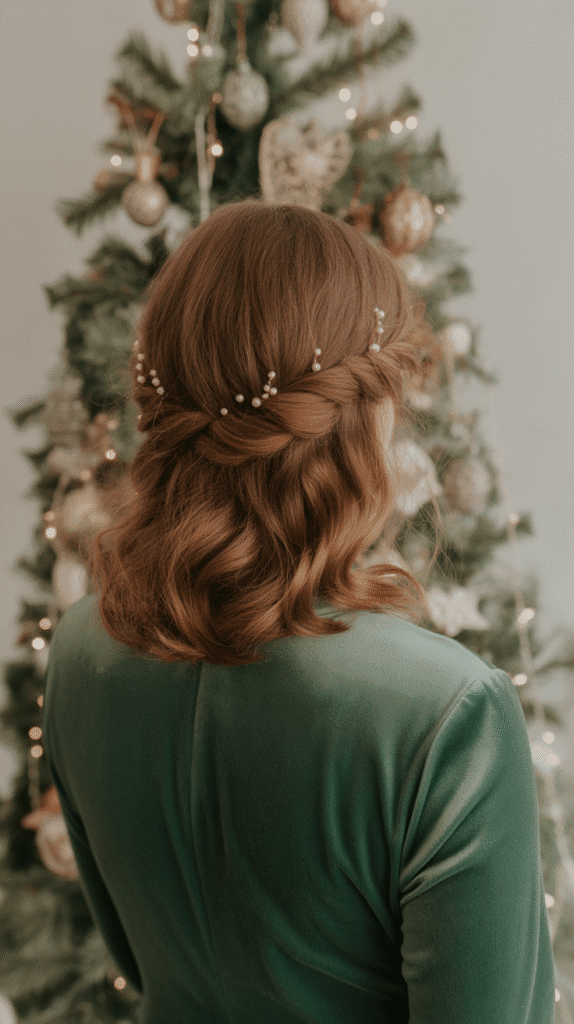
The half-up twisted crown offers the best of both worlds by showcasing your hair’s length while creating an intricate focal point that draws the eye upward.
This romantic style works exceptionally well for Christmas parties because it’s both practical and pretty, keeping hair away from your face while dining or dancing without sacrificing style.
- Part your hair down the middle or slightly off-center depending on your face shape and personal preference for balance.
- Take a two-inch section from one side of your part, beginning at the hairline near your temple area.
- Twist this section tightly as you work backward toward the crown, adding small pieces of hair as you go to create a rope-like effect.
- Repeat the same twisting technique on the opposite side, ensuring both twists are relatively symmetrical in size and tightness.
- Bring both twisted sections to meet at the center back of your head, securing them together with bobby pins or a decorative barrette.
- Leave the remaining hair down in loose waves or straightened, depending on your desired level of formality and the texture you prefer.
- Add a festive touch with small pearl pins or delicate crystal accessories woven throughout the twisted sections for extra holiday shimmer.
4. Sleek Side-Swept Style
Sophistication reaches new heights with a sleek side-swept hairstyle that embodies modern minimalism while delivering maximum impact through its clean lines and glossy finish.
This asymmetrical approach creates visual interest without requiring intricate braiding or complex techniques, making it ideal for those who prefer streamlined elegance.
- Apply a smoothing serum or cream to damp hair, distributing it evenly from roots to ends to eliminate any potential frizz or flyaways.
- Blow-dry your hair using a paddle brush, pulling the brush straight down to encourage smoothness and directing all hair to one side.
- Create a deep side part that extends from your front hairline back to your crown, making the part as clean and precise as possible.
- Use a flat iron on small sections to achieve a mirror-like shine, ensuring the temperature is appropriate for your hair type to prevent damage.
- Sweep all your hair over one shoulder and secure it behind your ear with decorative bobby pins or an ornate comb that complements your outfit.
- Apply a shine spray or lightweight hair oil to enhance the glossy finish, focusing on the top layers and avoiding the roots.
- Set everything in place with a strong-hold hairspray to maintain the sleek appearance throughout hours of celebration and festivities.
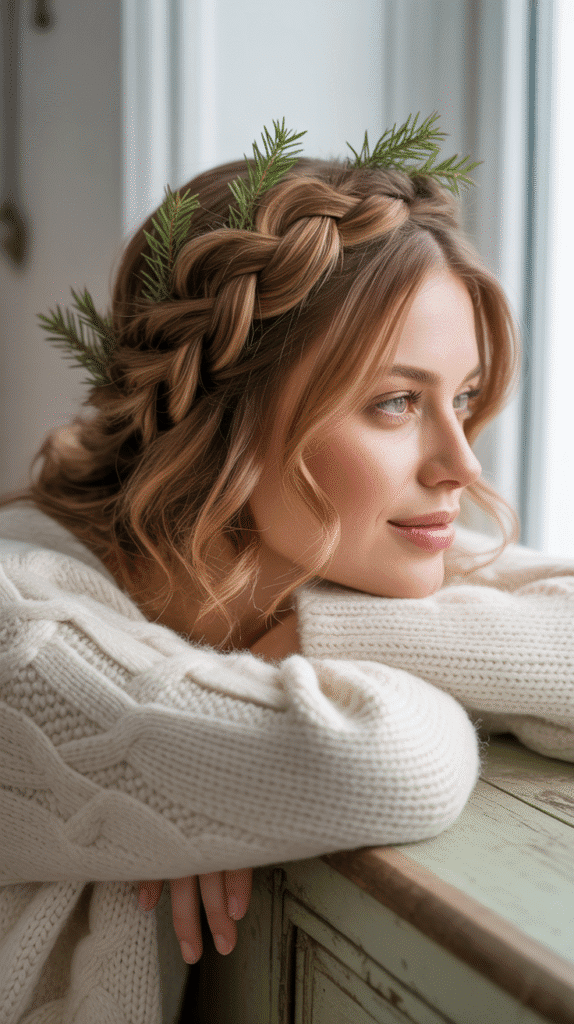
5. Braided Crown with Loose Ends
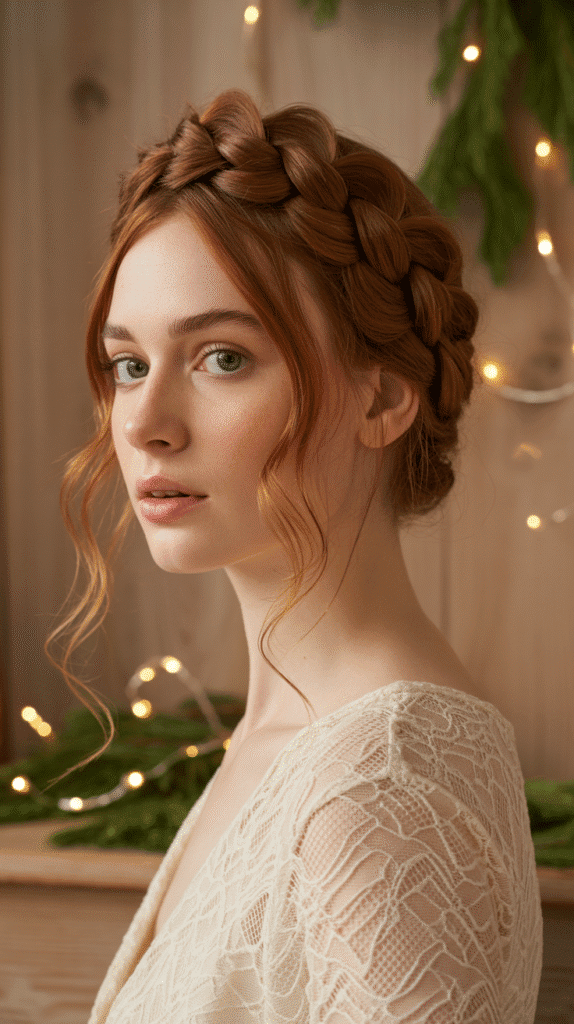
A braided crown transforms you into a modern-day princess, weaving together intricate detail with romantic softness that captures the enchanting spirit of the Christmas season.
This style works particularly well for medium hair because it utilizes your entire length while creating the illusion of a delicate halo that sits beautifully atop your head.
- Start with textured hair that has some grip, either naturally or enhanced with dry shampoo or texturizing spray throughout.
- Part your hair down the middle and separate it into two equal sections for balanced braiding on both sides.
- Beginning at your hairline on one side, create a Dutch braid by crossing sections under rather than over, incorporating new hair as you work around your head.
- Continue the braid along your hairline, following the curve of your head toward the back, maintaining consistent tension for an even appearance.
- Repeat the same braiding technique on the opposite side, ensuring both braids will meet harmoniously at the back center point.
- Connect both braids at the back using clear elastics, then wrap the ends around the connection point to conceal the elastic and create a seamless crown effect.
- Gently pull on the braid edges to create a fuller, more relaxed appearance, and leave any remaining length loose in soft waves or tuck it under for a complete crown.
6. Voluminous Blowout with Flipped Ends
Nothing says effortless glamour quite like a voluminous blowout with perfectly flipped ends that bounce with every movement.
This classic style has stood the test of time because it flatters virtually every face shape while delivering that coveted salon-fresh appearance that makes you feel like you’ve just stepped out of a professional styling chair.
- Wash your hair with volumizing shampoo and conditioner, focusing conditioner only on the mid-lengths and ends to prevent root flatness.
- Apply a root-lifting mousse or volumizing spray to damp hair, concentrating the product at the roots where lift is most needed.
- Rough-dry your hair until it’s about 70 percent dry, using your fingers to lift sections at the roots for initial volume building.
- Section your hair into horizontal layers and use a large round brush to blow-dry each section, rolling the brush outward at the ends.
- As you reach the ends of each section, hold the round brush in place for a few seconds to set the flip before releasing.
- Once completely dry, use a large-barrel curling iron to reinforce the flipped ends, curling away from your face for an open, flattering effect.
- Flip your head upside down and spray volumizing hairspray at the roots, then flip back up and use your fingers to arrange the volume naturally.
7. Messy Top Knot with Wispy Details
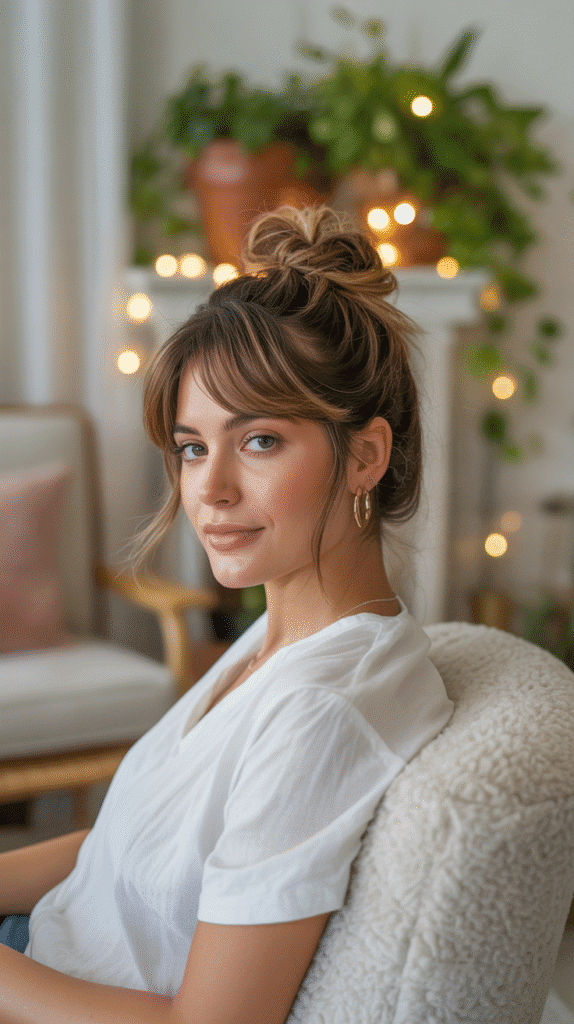
The messy top knot epitomizes modern sophistication with its intentionally undone aesthetic that somehow looks both effortless and carefully crafted.
This elevated casual style works wonderfully for Christmas parties that lean toward the contemporary or bohemian, offering comfort without sacrificing an ounce of style.
- Create texture throughout your hair using dry shampoo or texturizing spray, scrunching it into your strands for maximum grip and body.
- Flip your head upside down and gather all your hair at the crown of your head, using your fingers rather than a brush for that perfectly imperfect gather.
- Twist the ponytail loosely and wrap it around its base in an irregular pattern, avoiding anything too neat or circular in shape.
- Secure the knot with bobby pins inserted at different angles, allowing some pieces to escape naturally rather than pinning everything tightly.
- Pull out small sections around your face and at the nape of your neck to create those signature wispy details that soften the entire look.
- Gently tug on the bun itself to create more volume and texture, making it appear fuller and more deliberately messy.
- Finish with a flexible-hold hairspray and consider adding small metallic hair accessories or a velvet scrunchie at the base for festive flair.
8. Vintage-Inspired Victory Rolls
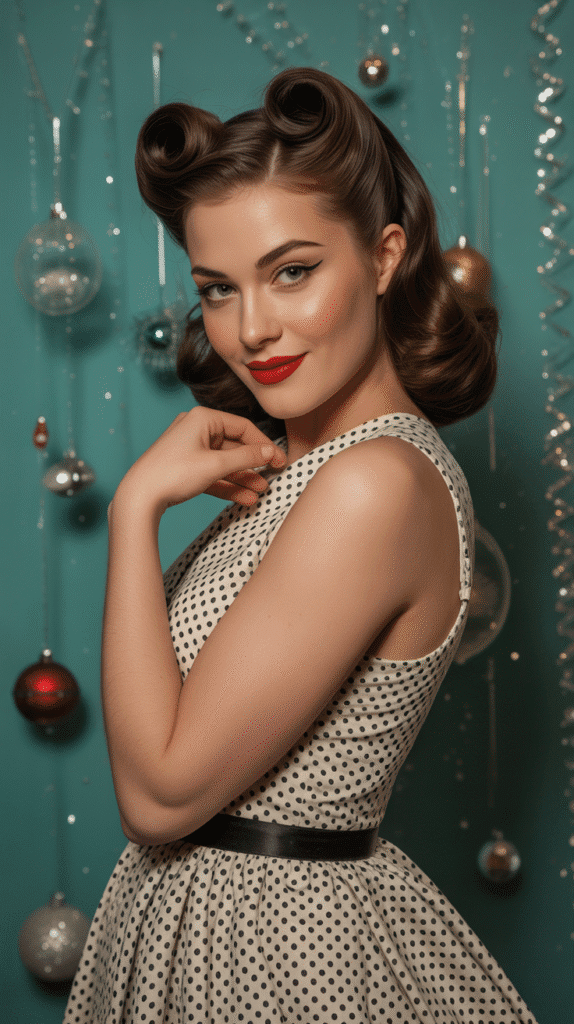
Victory rolls bring unmistakable retro charm and playful sophistication to any Christmas gathering, transporting you straight to the glamorous 1940s era when hair was treated as true artistry.
This statement style requires a bit more technique but delivers show-stopping results that will have everyone asking how you achieved such an iconic look.
- Begin with clean, dry hair and apply a strong-hold mousse throughout, as these rolls require substantial structure to maintain their shape.
- Create a deep side part that extends from your front hairline to approximately the center of your crown area.
- Section the front portion of hair on the heavier side of your part into a rectangular section about three inches wide and four inches deep.
- Backcomb this section thoroughly at the roots to create a cushion of volume that will support the roll’s height and shape.
- Roll this section upward and inward toward your scalp, forming a tube-like shape that curves elegantly away from your face.
- Secure the roll with bobby pins inserted both vertically through the center and horizontally along the base for maximum stability.
- Repeat on the opposite side if desired for double victory rolls, or leave the other side smooth and swept back for asymmetrical interest.
- Set the entire style with a firm-hold hairspray and add a decorative hair accessory like a vintage brooch or festive clip for authentic period flair.
9. Bubble Ponytail with Festive Accessories
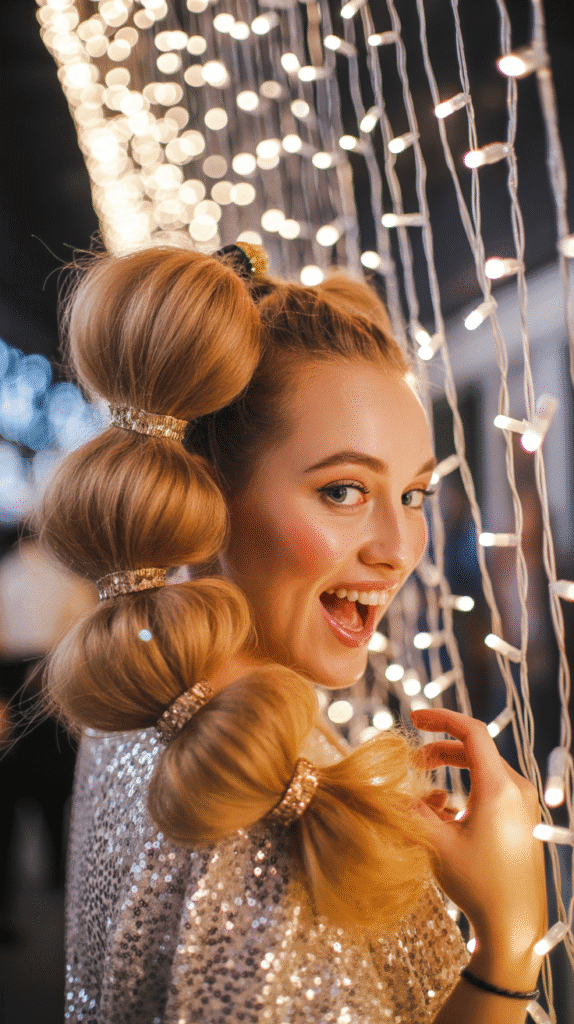
The bubble ponytail takes a simple ponytail and transforms it into a playful, dimensional masterpiece that’s equal parts fun and sophisticated.
This trendy style has taken social media by storm and translates beautifully for holiday parties, especially when enhanced with festive accessories that catch the light.
- Pull your hair into a high, mid, or low ponytail depending on your preference, securing it tightly with a hair elastic that matches your hair color.
- Take a second elastic and place it approximately two to three inches below the first elastic, creating the first “bubble” section.
- Gently pull on the hair between the two elastics, tugging outward and slightly forward to create a rounded, voluminous bubble shape.
- Continue adding elastics down the length of your ponytail at regular intervals, creating as many bubbles as your hair length allows.
- Pancake each bubble section by carefully pulling on the edges to maximize volume and create more dramatic, pronounced bubbles.
- Wrap thin festive ribbon, metallic thread, or use decorative elastics in gold, silver, or red between each section for Christmas-appropriate sparkle.
- Secure any flyaways with a small amount of hairspray or smoothing serum, keeping the focus on the beautiful bubble texture you’ve created.
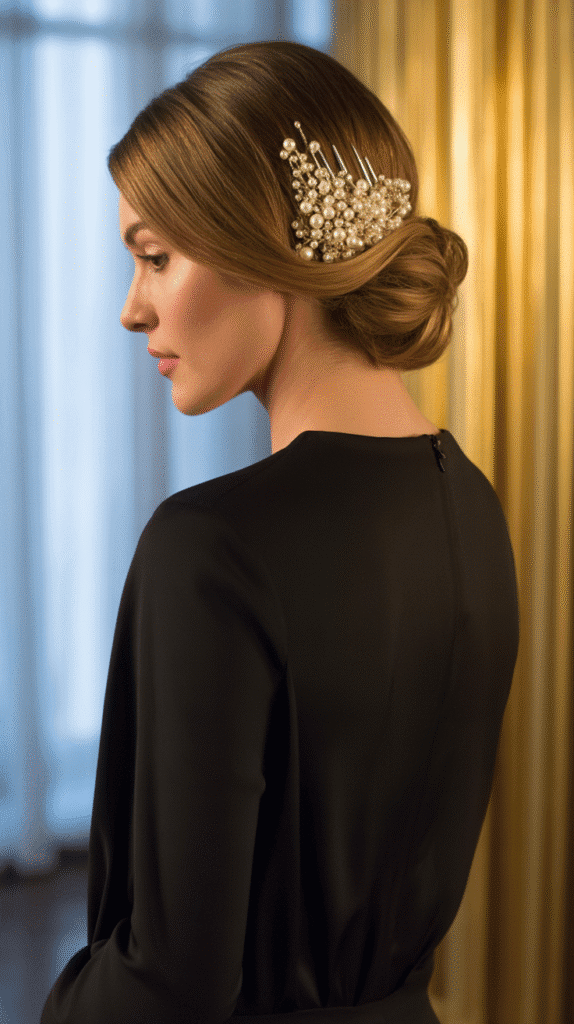
10. Soft Romantic Updo with Braided Details
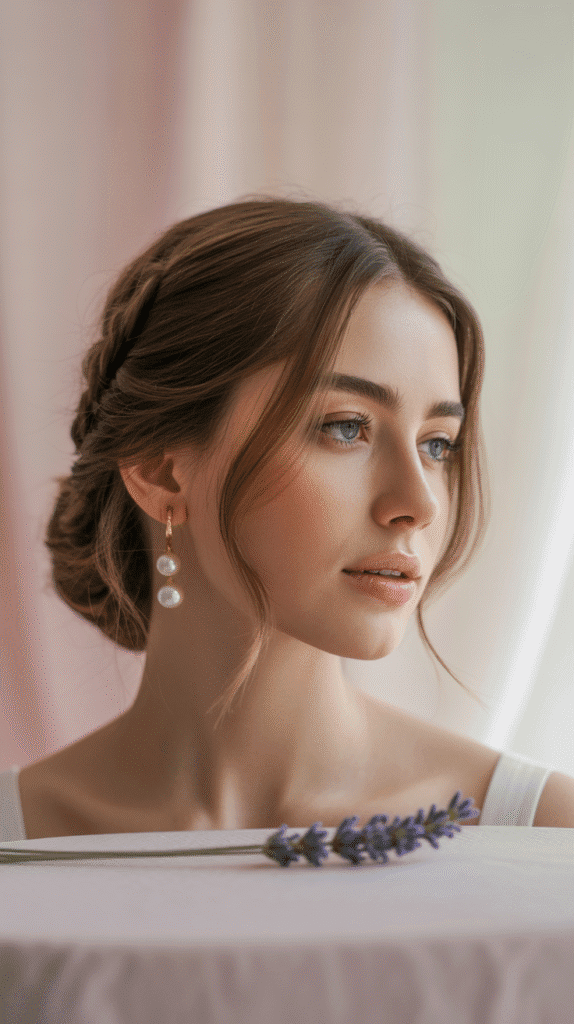
A soft romantic updo with braided details strikes the perfect balance between structured elegance and flowing femininity, creating an ethereal look that seems to float effortlessly while remaining securely in place.
This style works exceptionally well for formal Christmas events where you want to appear polished yet approachable, sophisticated yet warm.
- Start by creating loose waves throughout your hair using a curling iron or overnight braiding technique for natural-looking texture.
- Part your hair to one side and take a small section from the front on the heavier side, creating a simple three-strand braid.
- Continue the braid back toward your ear, keeping it relatively loose and slightly diagonal rather than perfectly horizontal along your hairline.
- Gather the remaining hair into a low side ponytail at the nape of your neck, incorporating the braid into this gathering.
- Twist the ponytail loosely and begin pinning it upward and inward, creating a soft rolled effect rather than a tight, structured bun.
- Allow small pieces to escape naturally, and gently pull on sections of the updo to create that sought-after soft, romantic texture.
- Finish by wrapping the braid around the base of the updo or incorporating it into the rolled sections for seamless integration.
- Mist with flexible-hold hairspray and add delicate flowers, pearl pins, or small crystal accessories for an extra touch of romance.
11. Sleek Low Ponytail with Wrapped Detail
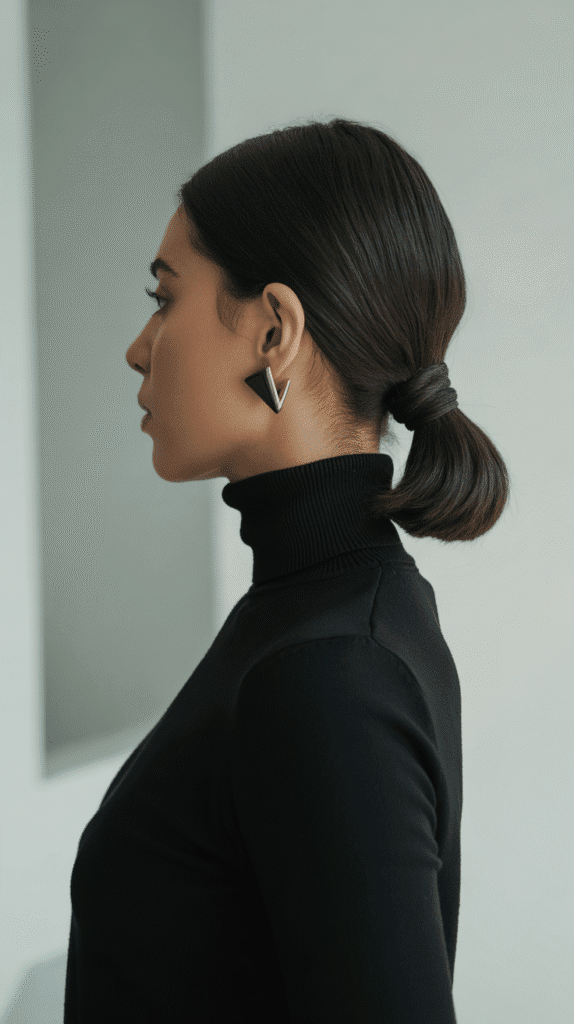
The sleek low ponytail elevated with a wrapped detail demonstrates that simplicity, when executed flawlessly, can rival the most complex hairstyles in terms of impact and sophistication.
This polished look works wonderfully for minimalist fashion sensibilities and allows your outfit and accessories to take center stage while your hair provides a refined, elegant frame.
- Prep hair with a straightening balm or smoothing cream, then blow-dry completely straight using a paddle brush and concentrating airflow downward.
- Create a center or slight off-center part with a fine-tooth comb, ensuring the part line is razor-sharp and perfectly straight.
- Brush all hair back to the nape of your neck, using a boar bristle brush for maximum smoothness and to eliminate any bumps or irregularities.
- Secure the hair with a strong elastic at the desired height, typically positioned at the nape for classic elegance.
- Take a one-inch section from underneath the ponytail and wrap it carefully around the elastic, completely concealing it from view.
- Secure the wrapped section underneath with a bobby pin that’s hidden beneath the ponytail, ensuring the wrap stays in place all evening.
- Run a flat iron over the ponytail itself if needed for extra sleekness, and finish with a shine serum focusing on the wrapped section.
- Consider adding a thin metallic cuff or decorative wrap around the ponytail for a modern, festive twist that catches the light beautifully.
12. Cascading Side Braid
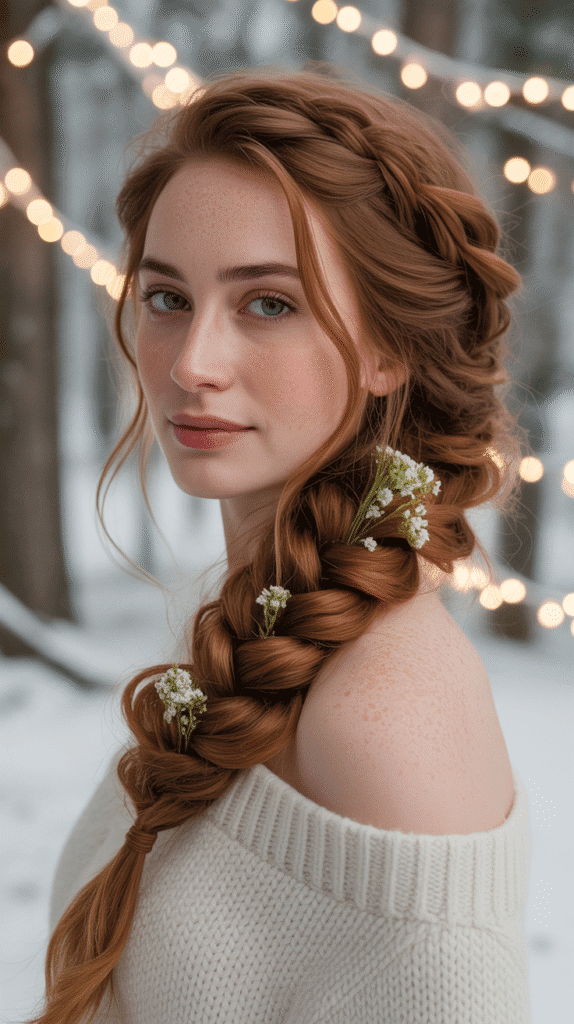
A cascading side braid offers romantic elegance with bohemian undertones, creating a beautiful asymmetrical focal point that drapes gracefully over one shoulder.
This style showcases your hair’s length while keeping it controlled and elegant, making it ideal for Christmas parties where you’ll be moving between indoor and outdoor settings.
- Apply a texturizing spray or mousse to add grip and make the braiding process easier while helping the finished braid maintain its shape.
- Sweep all your hair over one shoulder, deciding whether you prefer the braid to fall over your right or left side.
- Divide the hair into three equal sections at the base where your shoulder meets your neck for optimal braid placement.
- Begin a standard three-strand braid, but keep the tension loose rather than tight to achieve that cascading, romantic effect.
- As you work down the length, periodically pause to gently pull on the edges of the braid sections to create width and dimension.
- Secure the end with a clear elastic or one wrapped with a small section of hair for a seamless finish.
- Pancake the entire braid one more time after completion, pulling strategically to create the most voluminous, cascading appearance possible.
- Finish by pulling out a few face-framing pieces at the front and adding decorative elements like small flowers, ribbons, or jeweled pins throughout the braid.
13. Textured Half-Up Space Buns
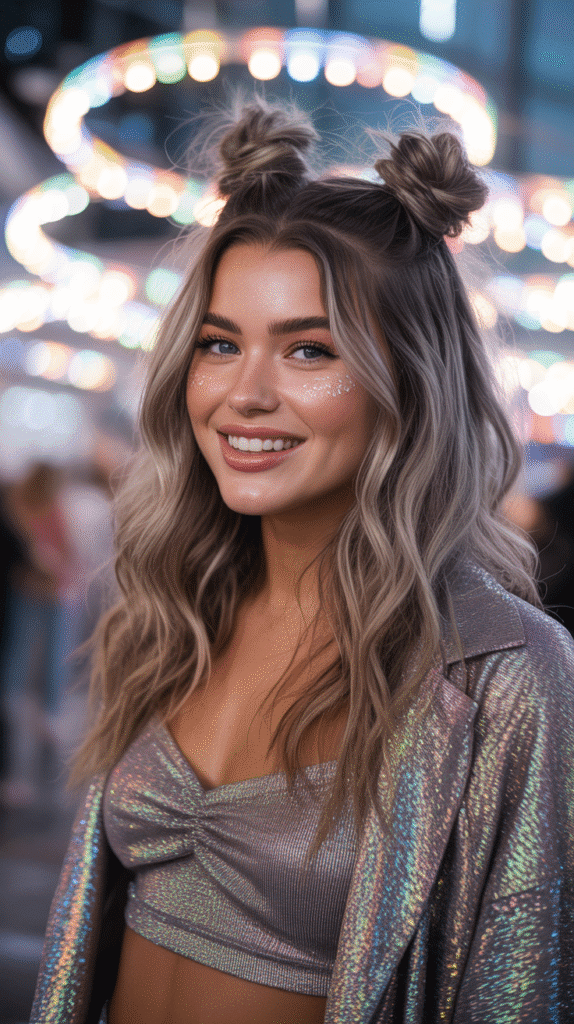
Textured half-up space buns inject playful, youthful energy into holiday festivities while maintaining an unexpectedly chic edge that appeals to fashion-forward party-goers.
This modern style works particularly well for casual Christmas gatherings or creative industry events where personality and individuality are celebrated.
- Create a horizontal part from ear to ear across the crown of your head, sectioning the top half away from the bottom half.
- Divide the top section vertically down the middle, creating two equal portions for symmetrical bun placement.
- Twist each section into a tight coil, then wrap it around itself to form a compact bun shape on each side of your head.
- Secure each bun with multiple bobby pins inserted from different angles, ensuring they’re tight enough to last through dancing and movement.
- Deliberately pull on sections of each bun to create texture and make them appear intentionally messy rather than perfectly smooth.
- Style the bottom section in loose waves, straight, or leave it natural, depending on your hair texture and the overall vibe you’re creating.
- Add glitter spray, metallic temporary hair color, or small decorative pins to the buns for an extra festive touch that embraces the holiday spirit.
14. Elegant French Twist
The French twist epitomizes timeless sophistication and remains one of the most elegant updos in the hairstyling repertoire, perfect for formal Christmas galas and upscale holiday events.
This classic style creates beautiful height and showcases the neck and shoulders while projecting an air of refined, effortless grace.
- Begin with straight or slightly textured hair, applying a light mousse for hold without stiffness or crunchiness.
- Gather all your hair at the back as if creating a low ponytail, but don’t secure it with an elastic.
- Twist the gathered hair upward and inward toward your head, creating a vertical roll that extends from the nape toward the crown.
- As you twist, use your free hand to tuck the ends underneath and into the twist, concealing them completely within the roll.
- Secure the twist with bobby pins inserted vertically along the seam where the twist meets your head, spacing them evenly for stability.
- Use a tail comb to gently lift and smooth the crown area, creating subtle height without disrupting the sleek finish.
- Mist with firm-hold hairspray to set the style, and consider adding a decorative comb, brooch, or jeweled pins along the twist for festive embellishment.
- For a modern variation, deliberately leave the twist slightly loose or pull out a few pieces for a softer, more contemporary interpretation.
15. Beachy Waves with Metallic Hair Accessories

Beachy waves with metallic hair accessories create an intriguing contrast between laid-back texture and glamorous embellishment, resulting in a look that’s both relaxed and party-ready.
This versatile style transitions seamlessly from casual to formal Christmas events depending on how you accessorize and what you wear with it.
- Start with damp hair and apply a sea salt spray or beach wave product, scrunching it into your hair with your hands.
- Allow hair to air-dry partially, or use a diffuser attachment on your blow-dryer to enhance natural wave patterns without creating frizz.
- Once dry, use a curling wand in alternating directions on random sections, wrapping hair loosely around the barrel for varied, natural-looking waves.
- Break up the waves by running your fingers through them, creating that perfectly imperfect beachy texture that looks effortless.
- Apply a light texturizing spray and scrunch again to enhance definition and create piece-y separation throughout the style.
- Add metallic hair accessories strategically throughout—gold bobby pins in a cluster, silver star clips scattered randomly, or a metallic headband.
- Consider incorporating tinsel strands or temporary glitter spray for an extra festive touch that catches the light with every movement.
- Finish with a flexible-hold hairspray that maintains the waves without making them stiff or losing their natural, touchable texture.
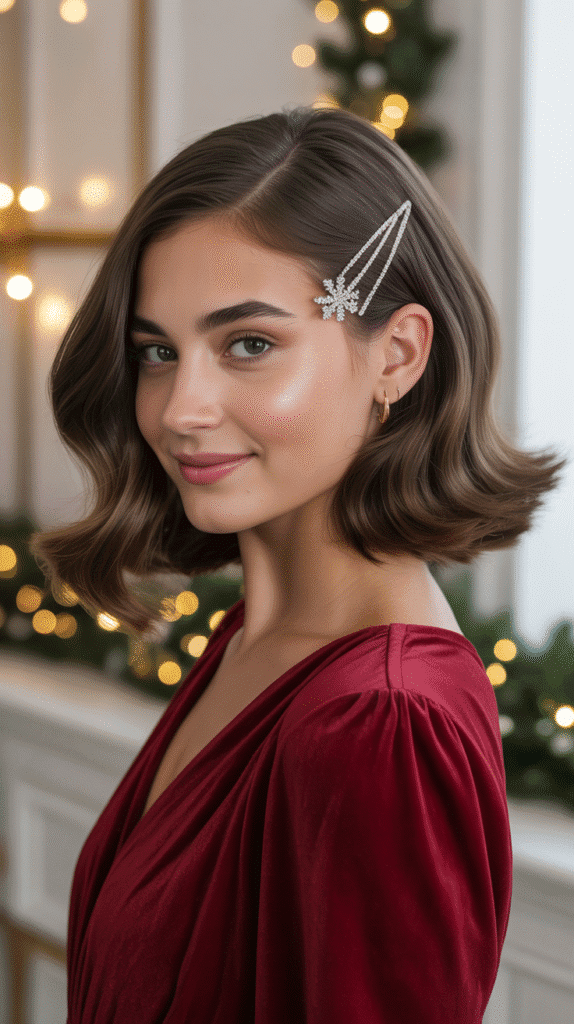
16. Pinned-Back Waves with Vintage Clips
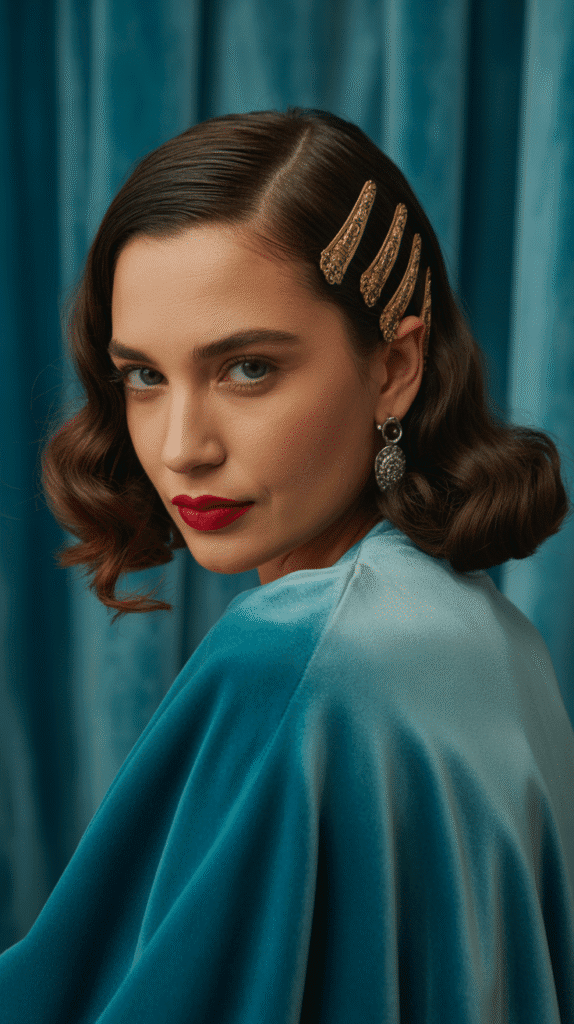
Pinned-back waves with vintage clips offer a sophisticated solution for keeping hair away from your face while maintaining glamorous styling and showcasing beautiful retro-inspired accessories.
This style works wonderfully for Christmas parties where you want to make a statement without committing to a full updo.
- Create smooth, uniform waves throughout your hair using a curling iron or hot rollers for a more traditional wave pattern.
- Part your hair on one side, creating a deep side part that extends from your front hairline to the crown area.
- Take a large section from the front on the heavier side of the part, including all the hair from your temple to behind your ear.
- Sweep this section back smoothly, following the natural curve of your head toward the back and slightly upward.
- Secure this section with multiple vintage-style clips arranged in an eye-catching pattern—try staggered placement or a cluster design.
- Leave the remaining hair down in flowing waves that cascade over your shoulders, creating beautiful movement and volume.
- Consider clips in festive finishes like gold, rose gold, pearl-embellished, or even ones featuring tiny Christmas motifs for holiday-appropriate styling.
- Set the style with a light mist of hairspray, focusing on the pinned section to ensure the clips stay securely in place.
17. Dutch Braid into Low Bun
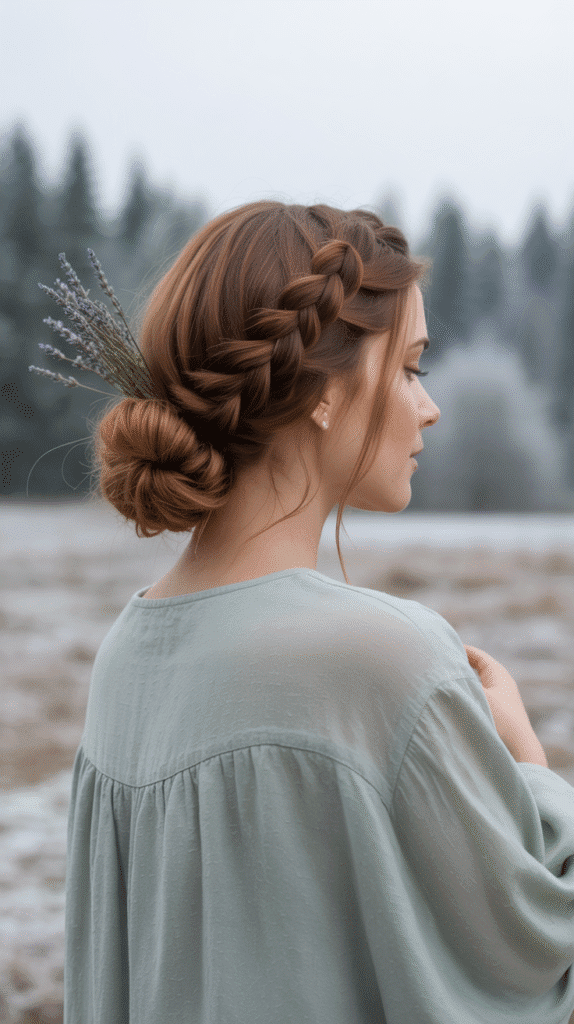
The Dutch braid flowing seamlessly into a low bun combines two beloved hairstyling techniques into one cohesive, elegant look that offers both intricate detail and practical wearability.
This style provides the best aspects of both braiding and updos, creating visual interest that extends from your hairline all the way down to a sophisticated finished bun.
- Start with textured hair that has some grip, using dry shampoo if needed to add hold and workability.
- Begin a Dutch braid at your hairline, crossing sections under rather than over to create that beautiful raised effect.
- Continue the Dutch braid straight down the back of your head, incorporating all your hair as you work from crown to nape.
- When you reach the nape area and have no more hair to incorporate, secure the Dutch braid temporarily with a small elastic.
- Wrap the remaining braid length around itself at the nape, creating a bun shape that sits low and elegant.
- Secure the bun with bobby pins, making sure to hide the elastic from the braid within the bun’s folds.
- Pancake both the Dutch braid and the bun by gently pulling on the edges to create fuller, more dimensional texture throughout.
- Finish with hairspray and consider adding small decorative pins along the braid or a statement hair accessory at the base of the bun.
18. Curled Ends with Pearl-Studded Bobby Pins
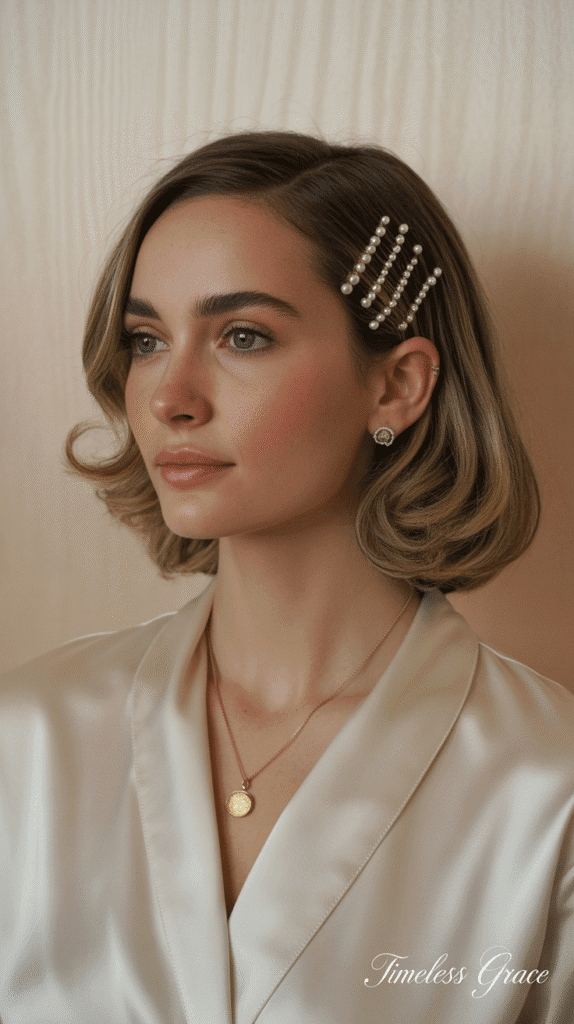
Curled ends with pearl-studded bobby pins represent a beautiful marriage of classic styling and modern accessorizing, creating a look that’s both timeless and on-trend.
This approach allows you to showcase your hair’s length and movement while adding just the right amount of embellishment that feels festive without overwhelming.
- Apply heat protectant throughout your hair, paying special attention to the ends where you’ll be concentrating the most heat styling.
- Use a medium-barrel curling iron to curl just the bottom three to four inches of your hair, leaving the roots and mid-lengths straight.
- Curl all sections away from your face for an open, flattering effect that doesn’t crowd your features or hide your face.
- Allow the curls to cool completely, then gently shake them out or use your fingers to separate and soften them slightly.
- Part your hair as desired—center, side, or slightly off-center depending on your face shape and styling preference.
- Pin back small sections from each side using pearl-studded bobby pins arranged in clusters, geometric patterns, or scattered randomly for a modern effect.
- The pins serve both a functional purpose of keeping hair off your face and a decorative purpose that adds holiday-appropriate elegance.
- Finish with a light hairspray that maintains the curl without weighing down the ends or making them appear stiff or unnatural.
19. Twisted Low Ponytail with Ribbon Wrap

A twisted low ponytail with ribbon wrap transforms an everyday hairstyle into something special and celebration-worthy through the addition of beautiful texture and a festive ribbon accent.
This style offers sophistication without requiring advanced hairstyling skills, making it accessible for anyone looking to create an elegant look at home.
- Brush your hair back smoothly to the nape of your neck, deciding on a center or slightly off-center placement for your ponytail.
- Secure the ponytail with a sturdy elastic that matches your hair color for a seamless foundation.
- Divide the ponytail into two equal sections and twist them around each other, creating a rope-braid effect down the entire length.
- Secure the twisted ponytail at the end with another elastic, making sure the twists remain tight and defined throughout.
- Choose a festive ribbon in a color that complements your outfit—classic red, elegant gold, sophisticated navy, or winter white.
- Starting at the base of the ponytail, wrap the ribbon around the twisted sections in a spiral pattern, weaving between the twists.
- Secure the ribbon at the bottom with a small bow or by tucking and pinning it discreetly, ensuring it won’t unravel during the festivities.
- For extra hold and polish, apply a light shine serum to the ponytail and finish with hairspray to maintain the twisted texture.
20. Finger Waves on One Side
Finger waves on one side create dramatic vintage glamour with a modern asymmetrical twist, offering a unique styling option that’s guaranteed to turn heads at any Christmas gathering.
This retro technique requires patience but delivers absolutely stunning results that photograph beautifully and exude confidence.
- Start with damp, freshly washed hair and apply a generous amount of strong-hold gel throughout, distributing it evenly with a comb.
- Create a deep side part that extends from your front hairline back to your crown area for maximum dramatic effect.
- On the heavier side of the part, use a fine-tooth comb to create an S-shaped wave pattern, working in small sections from front to back.
- Pin each wave in place with duckbill clips or finger wave clips to hold the shape as it dries completely.
- Allow your hair to air-dry or sit under a hooded dryer until completely dry, which is essential for the waves to set properly.
- Once dry, carefully remove all clips and use your fingers to gently soften and arrange the waves without brushing them out.
- Leave the opposite side smooth and sleek, swept back behind your ear or pinned for a striking contrast with the finger-waved side.
- Set the entire style with firm-hold hairspray and add a decorative vintage clip or brooch on the waved side for authentic period styling.
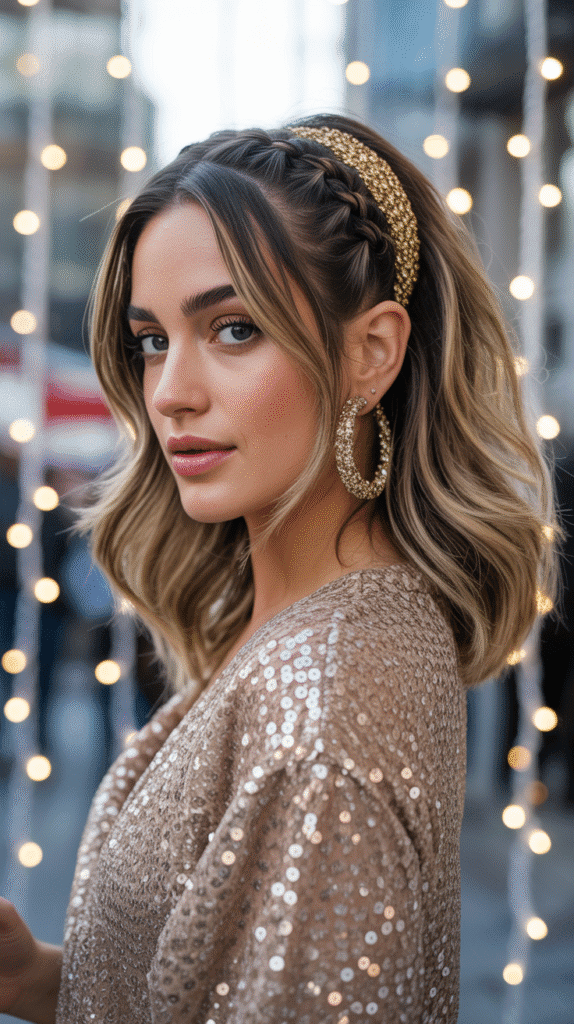
21. Braided Headband with Loose Curls
The braided headband with loose curls combines bohemian charm with romantic elegance, creating a versatile look that works for both casual and semi-formal Christmas celebrations.
This style keeps hair away from your face in the most flattering way while showcasing beautiful, flowing curls that add movement and dimension.
- Begin by curling your hair in large sections using a curling iron or wand, creating loose, bouncy curls throughout the length.
- Take a small section from behind one ear and divide it into three strands for a simple three-strand braid.
- Braid this section while working across the front of your head like a headband, keeping the braid relatively tight and close to your hairline.
- Continue the braid all the way to the opposite side, stopping behind your other ear where it began.
- Secure the braid with a small elastic and tuck the end behind your ear, pinning it securely so it’s hidden from view.
- Gently pull on the edges of the braid to slightly widen it, creating a fuller headband effect that’s more substantial and noticeable.
- Arrange the loose curls below the braided headband, ensuring they cascade freely with volume and movement.
- Add small decorative elements along the braid if desired—tiny flowers, crystal pins, or beaded accessories that complement the holiday theme.
22. High Ponytail with Voluminous Crown
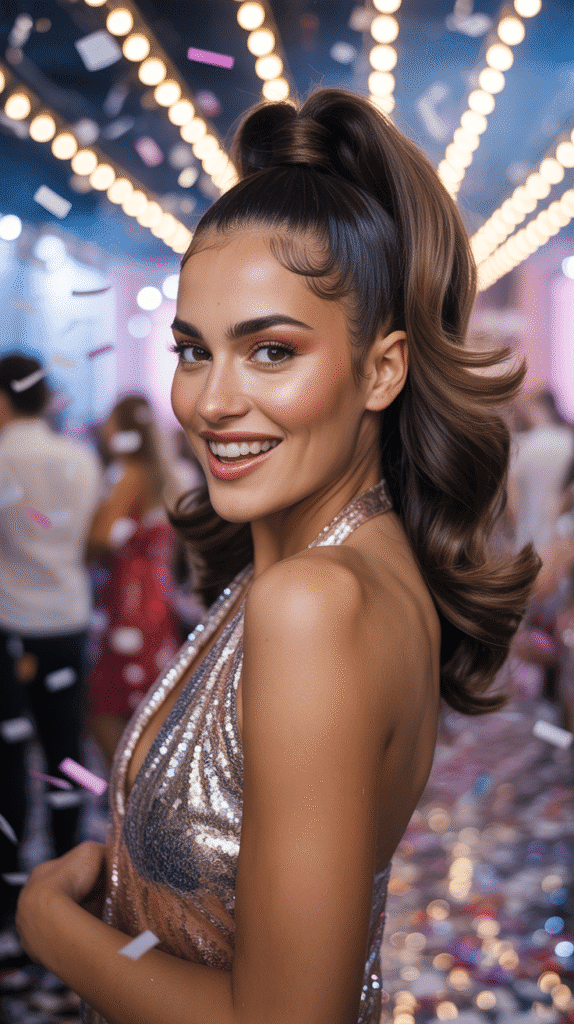
A high ponytail with voluminous crown combines youthful energy with sophisticated styling techniques, creating a look that’s both practical and glamorous for active Christmas celebrations.
This elevated style literally and figuratively raises your look to new heights while ensuring your hair stays perfectly in place through hours of festivities.
- Start by backcombing the crown section of your hair generously, creating substantial volume and height at the top of your head.
- Smooth the very top layer over the backcombed section using a brush, maintaining the volume underneath while creating a polished surface.
- Gather all your hair into a high ponytail at the crown of your head, positioning it where you’ve created the most volume.
- Secure tightly with a strong elastic, making sure the ponytail sits exactly where you want it without any sagging or slipping.
- Take a one-inch section from the ponytail and wrap it around the elastic to conceal it, securing with a bobby pin underneath.
- Spray the crown area with firm-hold hairspray to maintain the volume throughout the evening, focusing on the roots and backcombed sections.
- For extra festive flair, add a sparkly scrunchie at the base or wrap the ponytail with metallic thread that catches the light when you move.
23. Side-Parted Soft Waves with Jeweled Comb
Side-parted soft waves with a jeweled comb deliver effortless elegance enhanced by a single stunning accessory that elevates the entire look from simple to spectacular.
This style works beautifully for those who prefer to let their hair down while still incorporating a dressed-up element that’s appropriate for formal Christmas events.
- Create a deep side part using a tail comb, making the part line clean and extending it from your front hairline to the crown area.
- Apply a heat protectant and curl your hair in medium sections using a 1.25 to 1.5-inch curling iron, alternating directions for natural-looking movement.
- Allow the curls to cool completely, then brush through them gently with a paddle brush or wide-tooth comb to create soft, flowing waves.
- Take a small section from the heavier side of your part, sweeping it back elegantly away from your face toward your ear.
- Insert a jeweled decorative comb just above and behind your ear, securing it firmly while allowing the waves to cascade around and over it.
- The comb should be substantial enough to make a statement—think crystals, pearls, or ornate metallic designs that catch the light beautifully.
- Arrange the waves on the opposite side to fall forward softly, creating asymmetrical interest and framing one side of your face.
- Finish with a flexible-hold hairspray that maintains the wave pattern without creating stiffness, and add shine serum to the mid-lengths and ends.
24. Double Dutch Braids into Low Buns
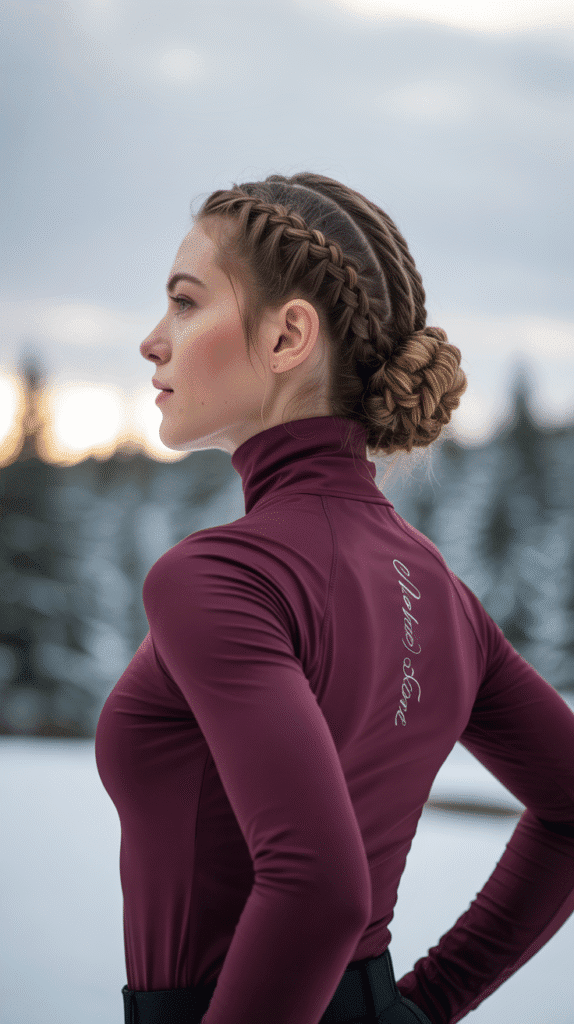
Double Dutch braids flowing into low buns create a symmetrical, intricate style that’s both sporty-chic and surprisingly elegant when executed with attention to detail.
This look offers a fresh, youthful vibe while keeping hair completely secured, making it ideal for active Christmas celebrations or outdoor winter events.
- Part your hair straight down the middle from your front hairline to the nape of your neck, creating two perfectly equal sections.
- Begin a Dutch braid on one side starting at the front hairline, crossing sections under to create that signature raised braid effect.
- Continue the Dutch braid straight down along the side of your head, incorporating all the hair on that side as you work toward the nape.
- Repeat the exact same process on the opposite side, ensuring both braids are similar in tightness and follow parallel paths down your head.
- When both braids reach the nape area with no more hair to incorporate, secure each temporarily with a small elastic.
- Wrap each braid around itself at the nape level, creating two separate low buns positioned side by side.
- Secure both buns with bobby pins, making sure they’re tight enough to last through dancing, movement, and holiday activities.
- Pancake both the braids and buns by gently pulling on the edges to create fuller, more textured dimension, and finish with firm-hold hairspray.
25. Asymmetrical Tucked Style with Accessories

An asymmetrical tucked style with accessories offers modern sophistication through unexpected styling that plays with geometric shapes and creates visual intrigue.
This contemporary look works wonderfully for fashion-forward individuals attending trendy Christmas parties where creative styling is celebrated and appreciated.
- Begin with straight or slightly waved hair, applying a smoothing cream for sleekness and control throughout the styling process.
- Create a deep side part that starts at your front hairline and extends all the way back to create dramatic asymmetry.
- On the lighter side of the part, take all the hair from the part line down to behind your ear and sweep it back smoothly.
- Tuck this entire section behind your ear and secure it with multiple bobby pins arranged vertically along your head, keeping it flat and sleek.
- Leave the hair on the heavier side falling forward naturally, creating a strong contrast between the two sides.
- Add decorative pins, geometric clips, or statement hair jewelry along the tucked side to embellish and secure the style further.
- Consider using multiple small pins in metallic finishes arranged in patterns—diagonal lines, clusters, or scattered placement all work beautifully.
- Finish with shine spray on the visible side and firm-hold hairspray on the tucked side to maintain the crisp, asymmetrical shape throughout the evening.
26. Rope Braid Ponytail with Metallic Thread
A rope braid ponytail with metallic thread weaves together simple technique and eye-catching embellishment, creating a style that’s easy to execute yet delivers impressive visual impact.
This look strikes the perfect balance between practical and party-ready, ensuring your hair looks intentional and festive throughout Christmas celebrations.
- Gather all your hair into a ponytail at your desired height—mid-level works particularly well for this style as it showcases the rope braid beautifully.
- Secure the ponytail with a strong elastic, making sure it’s positioned exactly where you want it without any bumps or irregularities.
- Divide the ponytail into two equal sections and twist each section individually in the same direction, typically clockwise.
- Once both sections are twisted separately, wrap them around each other in the opposite direction, creating a rope-like appearance.
- Secure the end of the rope braid with an elastic, maintaining tension throughout so the twist stays defined and doesn’t unravel.
- Choose metallic thread in gold, silver, rose gold, or copper and begin wrapping it around the rope braid in a spiral pattern.
- Weave the thread between the twisted sections, allowing it to catch the light and add festive shimmer throughout the entire length.
- Secure the thread at the bottom by tying it off or tucking and pinning it, then finish with hairspray to maintain the rope texture.
27. Waterfall Braid with Cascading Curls

The waterfall braid with cascading curls represents the pinnacle of romantic hairstyling, creating a intricate woven detail that allows sections of hair to flow through like water while the rest cascades in beautiful curls.
This stunning style requires practice but delivers absolutely breathtaking results that are perfect for the most special Christmas occasions.
- Start by curling all your hair in medium sections, creating uniform curls that will serve as the cascading element of this style.
- Create a side part and take a small three-strand section from the front on the heavier side, beginning your braid near the hairline.
- As you braid across your head horizontally, drop the bottom strand after each stitch, allowing it to cascade down with the rest of your hair.
- Pick up a new section from the top to replace the dropped strand, continuing this pattern as you work around your head.
- The dropped strands create the “waterfall” effect as they fall through the braid and blend with the curled hair beneath.
- Continue the waterfall braid as far around your head as desired—some prefer it to go all the way around while others stop at the back.
- Secure the braid with a small clear elastic or bobby pins that are hidden within the hair for a seamless finish.
- Arrange the cascading curls beautifully, ensuring they have volume and definition, and finish with flexible-hold hairspray to maintain both the braid and curls.
- Add small decorative pins, crystals, or delicate flowers along the braid pathway for an extra touch of holiday magic.
Essential Styling Tips for Medium Hair Success
Creating stunning Christmas party hairstyles requires more than just following steps—understanding key principles ensures your style stays beautiful throughout the celebration.
- Always start with the right foundation: Clean, properly conditioned hair that’s been treated with appropriate products for your hair type creates the base for any successful style, whether you’re aiming for sleek elegance or textured volume.
- Invest in quality tools: Professional-grade curling irons, straighteners, and blow dryers with adjustable heat settings protect your hair from damage while delivering superior results that last longer than styling with basic tools.
- Master the art of sectioning: Dividing your hair into manageable sections before styling ensures even heat distribution, uniform curl patterns, and more polished finished looks that appear professionally executed.
- Temperature matters tremendously: Fine hair requires lower heat settings around 250-300°F while thicker, coarser hair can handle 350-400°F, and using the wrong temperature either damages hair or fails to create lasting style.
- Practice makes perfect: Try your chosen hairstyle at least once before the actual event to identify any challenges, determine how long it takes, and make adjustments to the technique for your specific hair type and length.
- Strategic product placement: Apply volumizing products at roots, smoothing products on mid-lengths, and nourishing oils on ends rather than coating all hair with the same product for optimal results.
- Don’t underestimate bobby pins: Using multiple pins inserted from different angles provides significantly more hold than a single pin, and crossing pins in an X-pattern creates maximum security for updos and pinned sections.
- Hairspray application technique: Hold hairspray 10-12 inches away from your head and use short bursts rather than continuous spraying to avoid buildup, stiffness, and that unnatural “helmet head” appearance.
Conclusion
The journey through these 27 Chic Christmas Party Hairstyles for Medium Hair That Dazzle reveals that medium-length hair is truly the sweet spot for holiday styling versatility and creativity.
From the timeless elegance of Hollywood waves to the playful sophistication of space buns, from intricate braided masterpieces to sleek minimalist statements, you now have a comprehensive collection of stunning options that prove you don’t need lengthy locks to achieve show-stopping results.
Each style has been carefully selected to offer something special for every personality, skill level, and type of Christmas celebration you might attend this season.
The key to success lies in choosing a style that not only complements your outfit and the event’s formality but also makes you feel confident and beautiful—because when you feel your best, that radiant energy becomes the most dazzling accessory of all.
Remember that these hairstyles are starting points for your creativity, so don’t hesitate to personalize them with your favorite accessories, adapt techniques to suit your hair’s unique texture, and most importantly, enjoy the process of transforming yourself into the best version of you this holiday season.
Whether you’re attending an intimate family gathering or a glamorous New Year’s gala, these expertly crafted hairstyles ensure your medium-length hair will be nothing short of spectacular, making this Christmas one where your confidence and style shine as brightly as the season itself.