The holiday season brings with it a whirlwind of festive gatherings, from elegant office parties to cozy family celebrations, and your hairstyle should be just as memorable as the occasion itself.
Long hair offers endless possibilities for creating stunning looks that capture the magic of Christmas, whether you’re drawn to glamorous Hollywood waves, intricate braided updos, or playfully festive styles adorned with sparkly accessories.
This comprehensive guide to 27 Easy Christmas Party Hairstyles for Long Hair Perfect for the Holidays will walk you through an exciting collection of hairstyles that range from effortlessly simple five-minute styles to show-stopping elaborate creations, ensuring you’ll find the perfect look for every holiday event on your calendar.
Each hairstyle has been carefully selected to complement the festive spirit while remaining achievable at home, with clear instructions and styling tips that work for various hair textures and skill levels.
Get ready to transform your long locks into a crowning glory that will have you feeling confident and camera-ready throughout the entire holiday season.
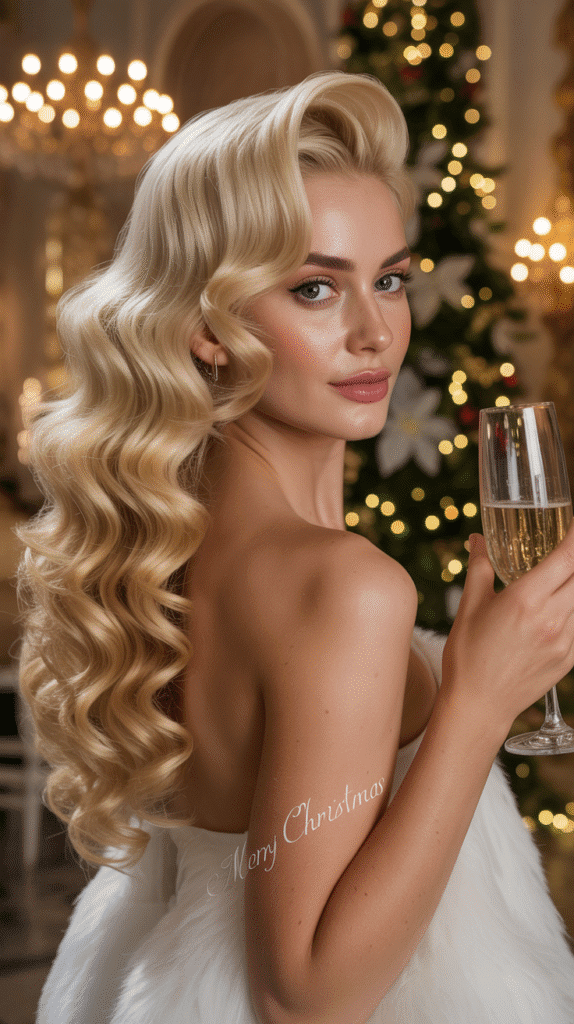
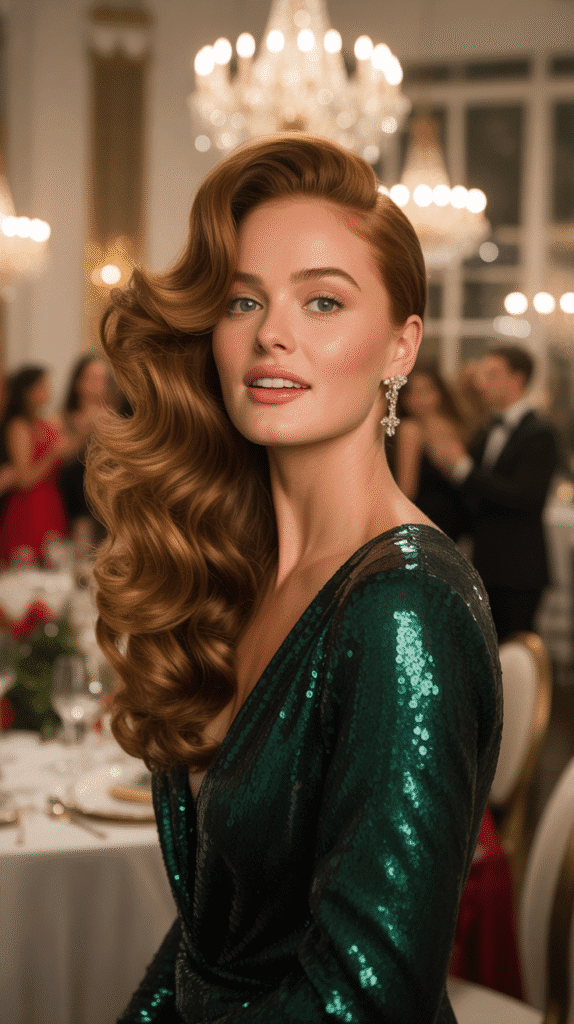
1. Classic Hollywood Waves
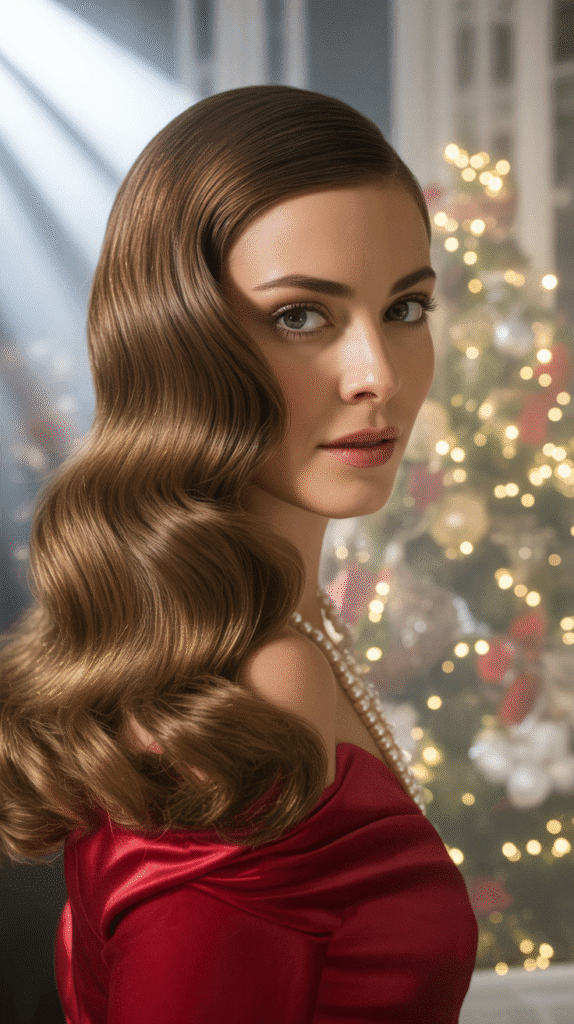
Hollywood waves bring timeless Old Hollywood glamour to your Christmas party look, creating an elegant and sophisticated appearance that never goes out of style.
- Start by applying a heat protectant spray throughout your freshly washed and dried hair to prevent damage from styling tools.
- Create a deep side part using a fine-toothed comb, positioning it about two inches from your natural center part.
- Section your hair into 2-inch horizontal layers, starting from the bottom and clipping the upper sections away.
- Use a 1.5-inch curling iron to curl each section away from your face, holding for 8-10 seconds before releasing.
- Allow the curls to cool completely in their coiled shape by pinning them against your head with large bobby pins or clips.
- Once all curls have cooled for at least 15 minutes, remove the pins and gently brush through the curls with a paddle brush to create smooth waves.
- Define the wave pattern by pinning the curves in place with flat clips and misting with strong-hold hairspray.
- After 10 minutes, remove the clips and finish with a shine serum for that signature glossy Hollywood finish.
2. Elegant Low Chignon

The low chignon offers sophisticated simplicity that works beautifully for formal Christmas events while keeping your hair secure throughout the evening.
- Begin with second-day hair or apply dry shampoo to add texture and grip to freshly washed hair.
- Brush your hair back into a low ponytail at the nape of your neck, securing it with a hair elastic that matches your hair color.
- Divide the ponytail into two equal sections and twist them around each other to create a rope braid.
- Wrap the twisted ponytail around the base in a circular motion, tucking the ends underneath the bun.
- Secure the chignon with bobby pins inserted vertically around the perimeter, ensuring they catch both the bun and your head.
- Smooth any flyaways with a small amount of hair gel or pomade applied with a toothbrush.
- Add decorative hair pins or a jeweled clip for extra holiday sparkle.
- Finish with a light mist of flexible-hold hairspray to maintain the polished look without stiffness.
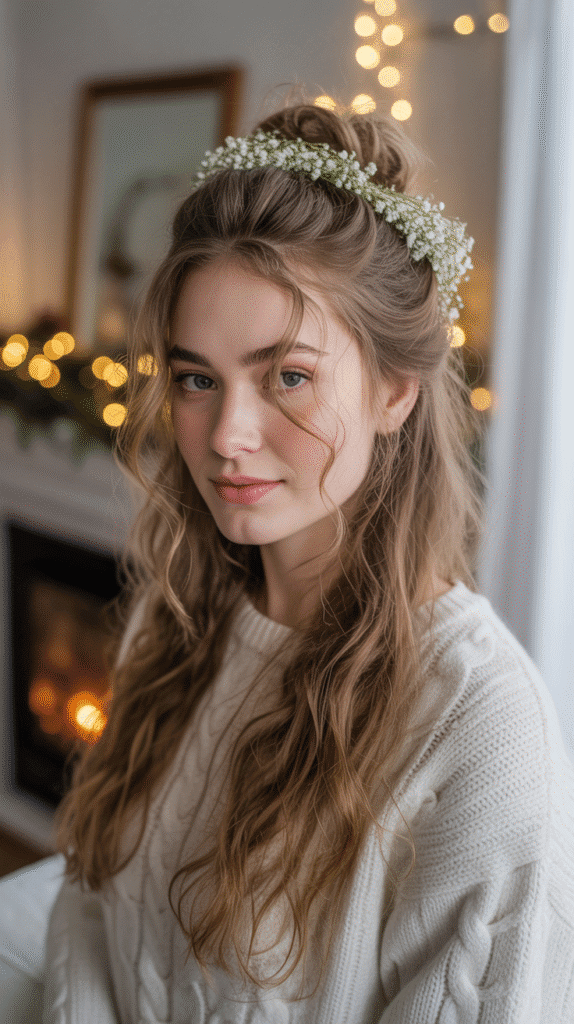
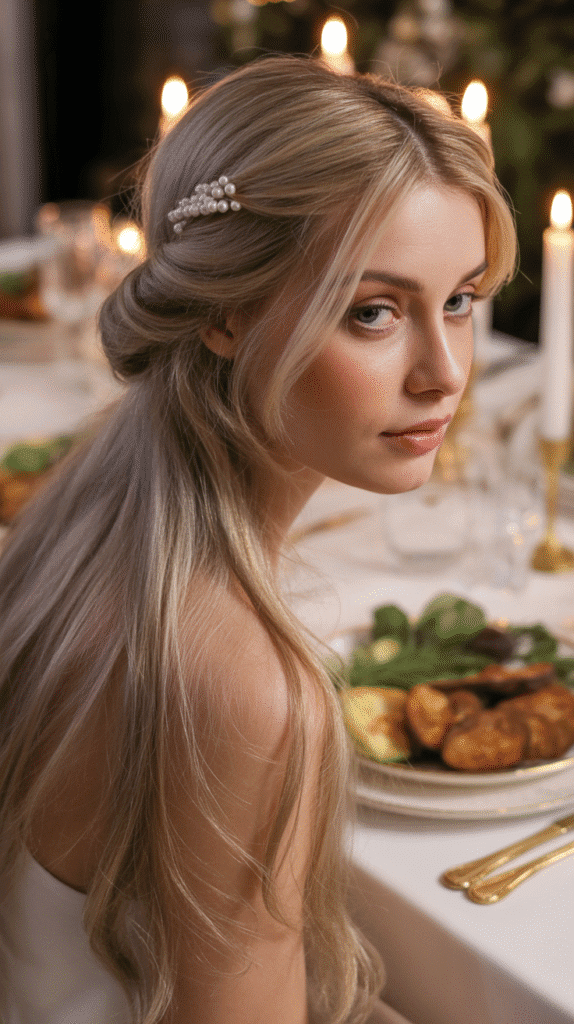
3. Romantic Half-Up Twisted Crown
This romantic style combines the elegance of an updo with the flowing beauty of long hair, creating a princess-worthy look for your holiday celebrations.
- Start by curling the bottom half of your hair with a 1-inch curling wand for added volume and texture.
- Take a 2-inch section of hair from behind your right ear and divide it into two equal strands.
- Twist these two strands around each other while gradually adding small pieces of hair from above, creating a twisted rope effect.
- Secure the twist temporarily with a clip when you reach the center back of your head.
- Repeat the same twisting process on the left side, working toward the center.
- Join both twisted sections at the back and secure them together with bobby pins in an X-pattern for maximum hold.
- Gently pull on the edges of the twists to create a fuller, more voluminous appearance.
- Add small decorative elements like pearl pins or tiny festive ornaments along the twisted crown for holiday flair.
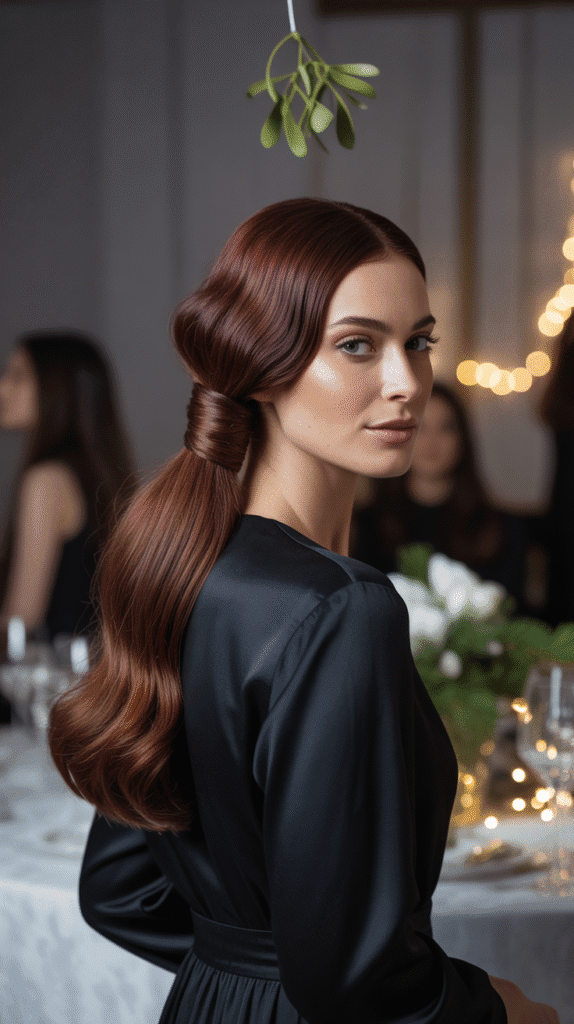
4. Sleek High Ponytail with Wrap
A sleek high ponytail delivers modern sophistication with a polished finish that showcases your facial features and statement earrings.
- Wash your hair and blow-dry it completely straight using a paddle brush and concentrating the nozzle downward.
- Apply a smoothing serum or anti-frizz cream throughout your hair while it’s still slightly damp.
- Use a fine-toothed comb to brush all your hair up to the crown of your head, smoothing any bumps.
- Secure with a strong elastic band, positioning the ponytail at the highest point of your head.
- Take a 1-inch section from underneath the ponytail and wrap it around the elastic to conceal it.
- Secure the wrapped section with a bobby pin hidden underneath the ponytail.
- Run a flat iron through the ponytail length for extra sleekness and shine.
- Finish with a shine spray and use an edge control product on your hairline for a perfectly polished look.
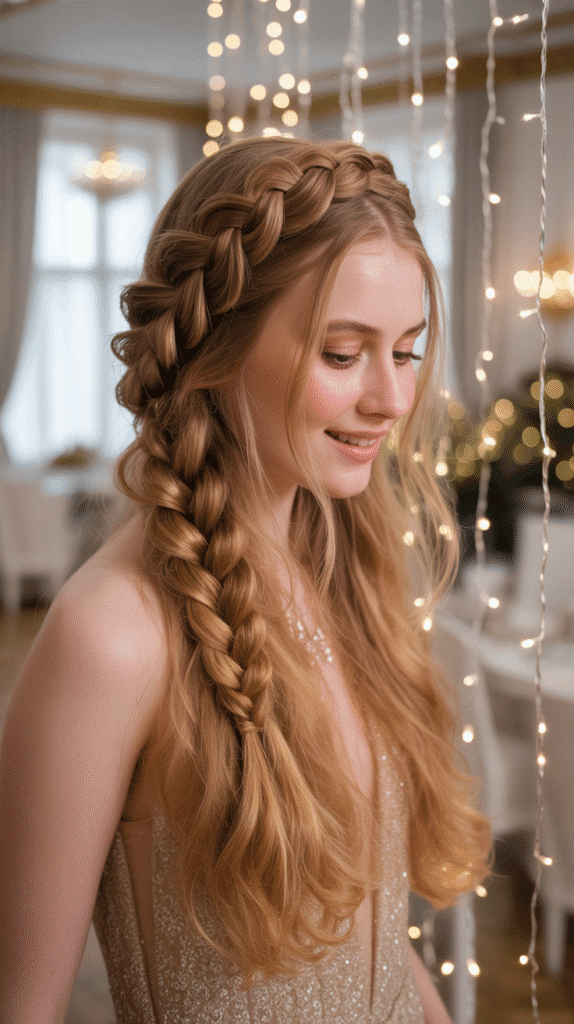
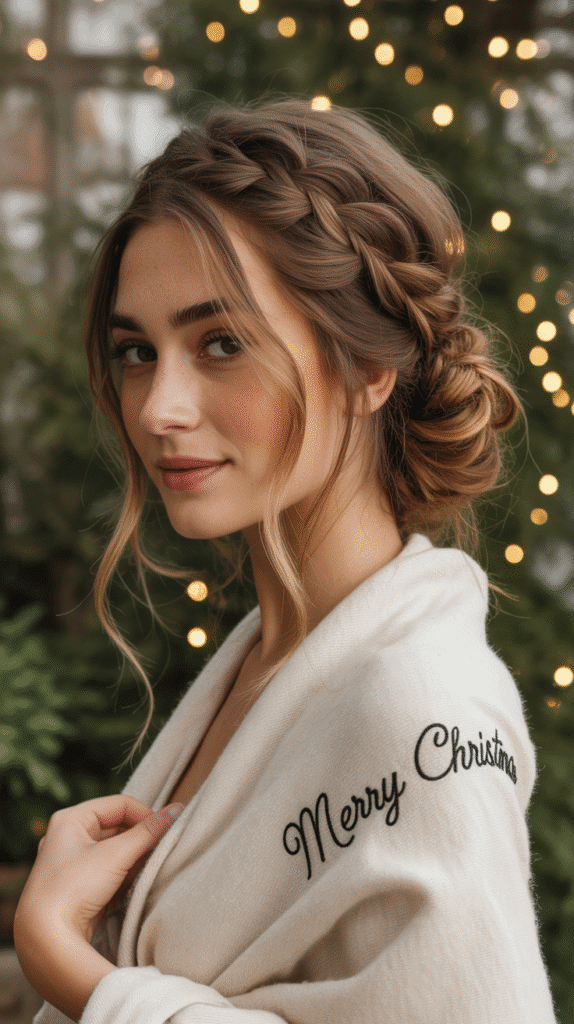
5. Braided Crown with Loose Curls

This enchanting style combines the intricacy of braiding with the softness of cascading curls, perfect for creating a fairy-tale Christmas look.
- Curl the bottom two-thirds of your hair with a 1.25-inch curling iron before starting the braid.
- Create a deep side part and begin a Dutch braid (reverse French braid) at the front hairline.
- Braid along your hairline toward the back, adding sections of hair from above and below as you work.
- Continue braiding around the head like a crown, following the curve of your head.
- When you reach the starting point, continue the braid without adding more hair and secure the end with a small elastic.
- Tuck the braid tail underneath the crown and pin it securely out of sight.
- Gently pancake the braid by pulling on the outer edges to create fullness and texture.
- Spray with flexible-hold hairspray and add festive accessories like small ornament clips or glitter pins throughout the braid.
6. Voluminous Blowout

A voluminous blowout creates bouncy, full-bodied hair that moves beautifully and photographs exceptionally well at holiday parties.
- Apply a volumizing mousse to damp hair, focusing on the roots for maximum lift.
- Blow-dry your hair in sections using a large round brush, rolling the brush away from your face.
- Start at the roots and slowly pull the brush through to the ends while directing heat from the dryer onto the brush.
- For extra volume, clip the crown section up and dry it last while bending forward.
- Once completely dry, flip your head upside down and blast cool air from the dryer to set the volume.
- Take 2-inch sections and quickly run them over a large-barrel curling iron (without holding) for subtle bends.
- Finish by backcombing the crown area gently with a teasing brush for added height.
- Set everything with a volumizing hairspray, spraying from underneath for lift that lasts all evening.
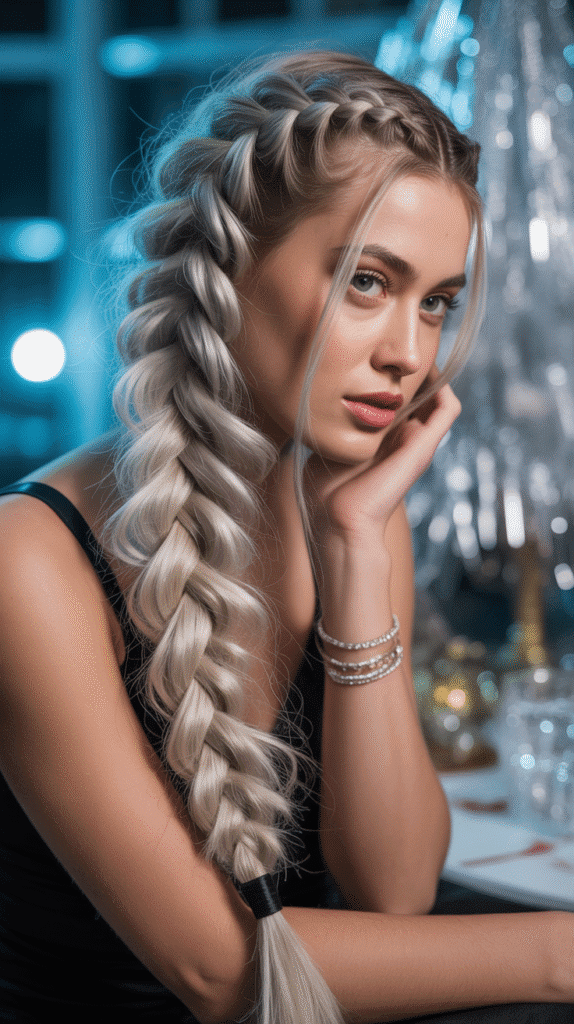
7. Fishtail Braid Side Sweep
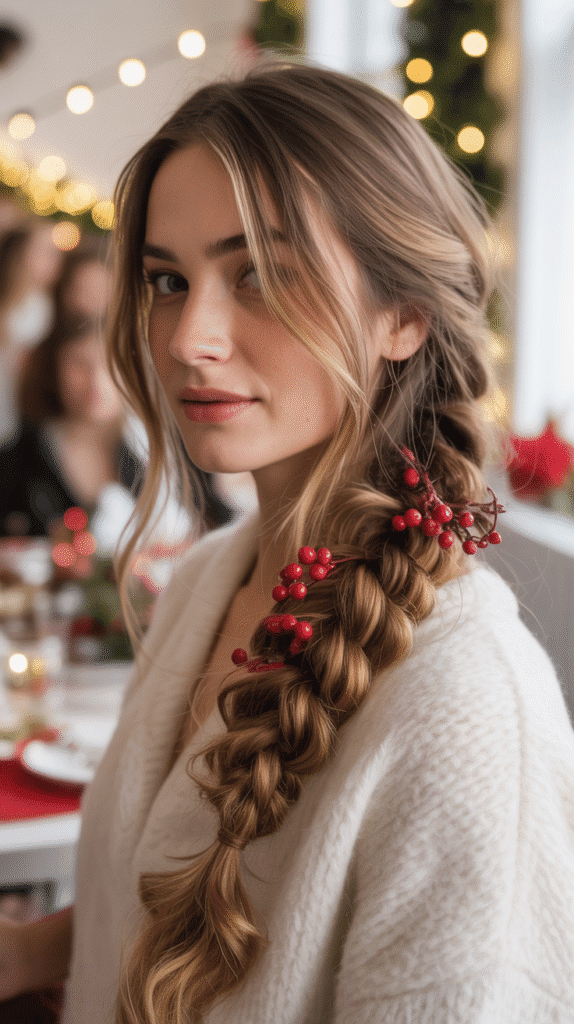
The fishtail braid swept to one side creates an effortlessly romantic look that’s both intricate-looking and surprisingly easy to achieve.
- Brush all your hair to one side (whichever you prefer) and secure it loosely with your hand at the nape.
- Divide your hair into two equal sections instead of the traditional three for braiding.
- Take a thin strand from the outer edge of the left section and cross it over to join the right section.
- Then take a thin strand from the outer edge of the right section and cross it to the left.
- Continue this alternating pattern all the way down, keeping the sections you’re crossing thin for a more defined fishtail pattern.
- Secure the end with a clear elastic band that won’t distract from the braid pattern.
- Gently pull on the outer edges of the braid to create a fuller, more relaxed appearance.
- Tuck small festive elements like tiny pinecones, berries, or sparkly pins throughout the braid for holiday charm.
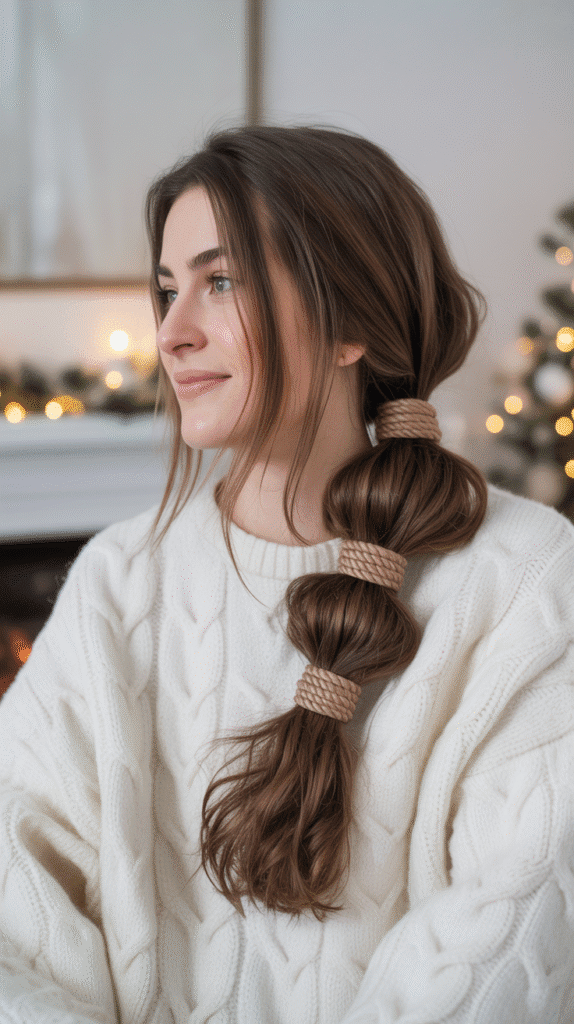
8. Bubble Ponytail Glam
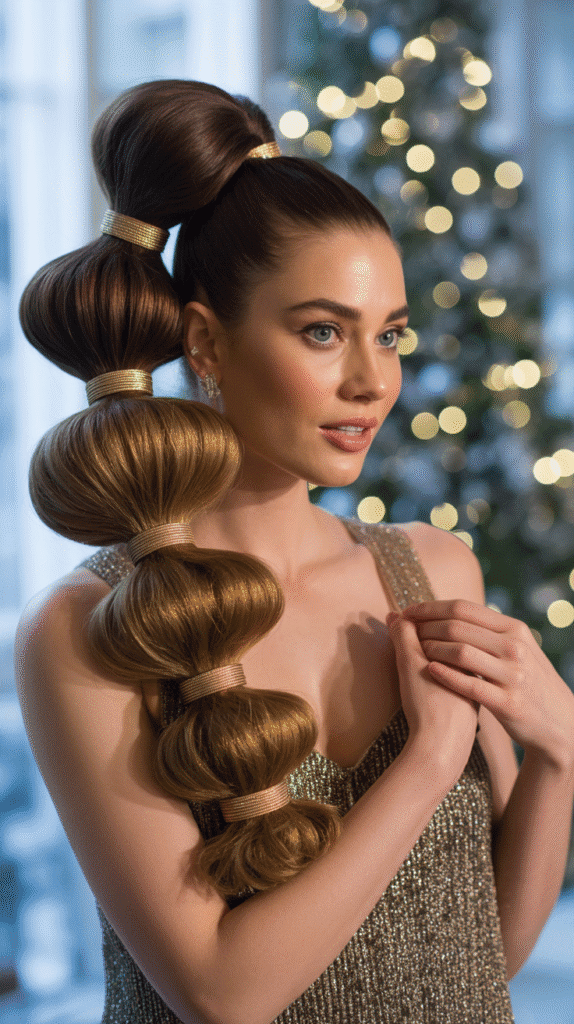
The bubble ponytail adds a playful yet sophisticated twist to the classic ponytail, creating dimension and visual interest.
- Create a high or mid-level ponytail, securing it tightly with a strong elastic band.
- Smooth the hair leading into the ponytail with gel or pomade for a sleek contrast.
- Place another elastic band 3-4 inches below the first one, securing it tightly.
- Gently pull on the hair between the two elastics, teasing it outward to create a bubble effect.
- Continue adding elastic bands every 3-4 inches down the length of the ponytail.
- Create bubbles between each set of elastics by carefully pulling the hair outward from all angles.
- For added glamour, wrap thin ribbon or metallic cord around each elastic to conceal it.
- Finish with hairspray to maintain the bubble shape and add decorative pins to some of the elastics for festive sparkle.
9. Twisted Low Bun with Accessories
This elegant twisted bun sits gracefully at the nape and provides the perfect canvas for showcasing beautiful hair accessories.
- Part your hair down the middle or on the side, depending on your preference.
- Leave out two small sections at the front to frame your face softly.
- Gather the rest of your hair into a low ponytail at the nape and secure with an elastic.
- Divide the ponytail into two equal sections and twist each section individually in the same direction.
- Then twist these two sections around each other in the opposite direction to create a rope twist.
- Wrap the twisted rope around the base of the ponytail to form a bun shape.
- Secure with bobby pins placed vertically around the bun, ensuring they’re hidden within the twists.
- Insert a decorative hair comb, jeweled pins, or a festive hair accessory into the bun and curl the face-framing pieces with a small curling iron.
10. Cascading Curls with Side Part
Cascading curls with a dramatic side part create red-carpet glamour that’s perfect for making a statement at holiday gatherings.
- Apply a heat protectant and volumizing spray to dry hair before styling.
- Create a deep side part, positioning it far to one side for maximum drama.
- Section your hair into 1-inch pieces and curl each section with a 1-inch curling iron, holding vertically.
- Curl all sections away from your face, wrapping the hair around the barrel and holding for 10 seconds.
- Allow each curl to cool in your hand before releasing it for longer-lasting curls.
- Once all sections are curled, flip your head upside down and gently shake out the curls with your fingers.
- Sweep all the hair to the heavier side of your part, letting it cascade over one shoulder.
- Finish with a flexible-hold hairspray and add a jeweled barrette on the lighter side to secure the style in place.
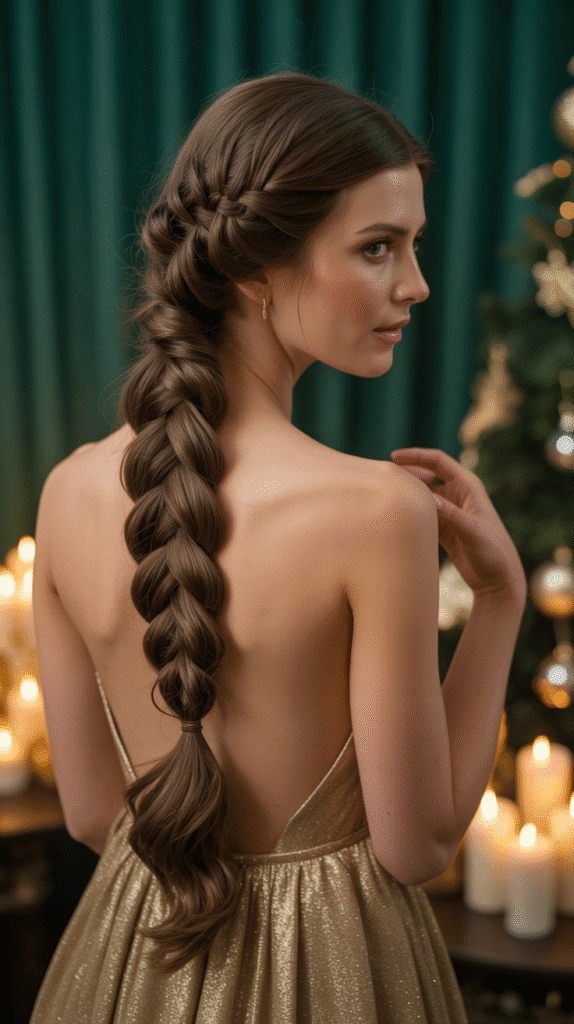
11. Braided Ponytail Perfection
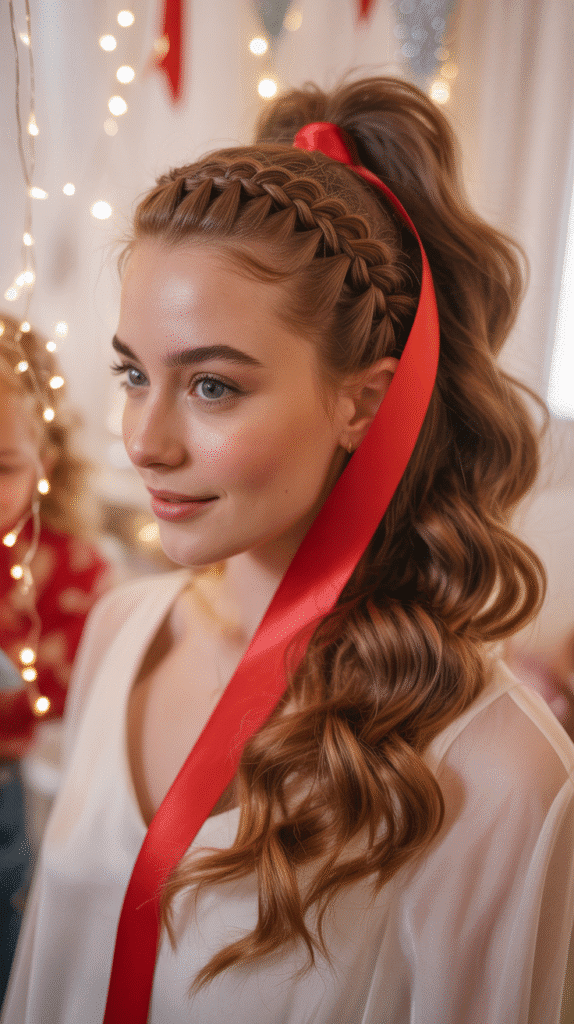
A braided ponytail combines the sportiness of a ponytail with the elegance of braiding for a versatile holiday style.
- Begin by creating a Dutch braid starting at your forehead and working backward toward the crown.
- As you braid, add hair from the sides to create that raised, 3D effect characteristic of Dutch braids.
- When you reach the crown of your head, stop adding new hair and gather all remaining hair into a high ponytail.
- Secure the ponytail with a strong elastic, incorporating the braid seamlessly into it.
- Take a small section from the underside of the ponytail and wrap it around the elastic to hide it.
- Curl the ponytail length with a curling wand for added texture and movement.
- Gently pancake the braid section by pulling on the edges to create more volume and visual impact.
- Add a festive ribbon woven through the braid or tie a velvet bow around the ponytail base for holiday flair.
12. Messy Side Bun with Tendrils
This effortlessly chic messy bun positioned to the side creates a relaxed yet elegant look perfect for casual holiday parties.
- Start with second-day hair or add texturizing spray to clean hair for better grip and hold.
- Gather your hair to one side at ear level, leaving out some face-framing pieces intentionally.
- Twist the gathered hair loosely and wrap it around itself to create a bun shape.
- Secure with bobby pins inserted randomly rather than in a structured pattern for that messy aesthetic.
- Pull out small pieces from the bun to create texture and a deliberately undone appearance.
- Use your fingers to gently loosen the bun, making it look fuller and more relaxed.
- Curl the face-framing tendrils with a small curling iron for soft, romantic waves.
- Finish with a light-hold hairspray and tuck in small flowers or festive pins for a holiday touch without overwhelming the relaxed vibe.
13. Double Dutch Braids into Low Bun
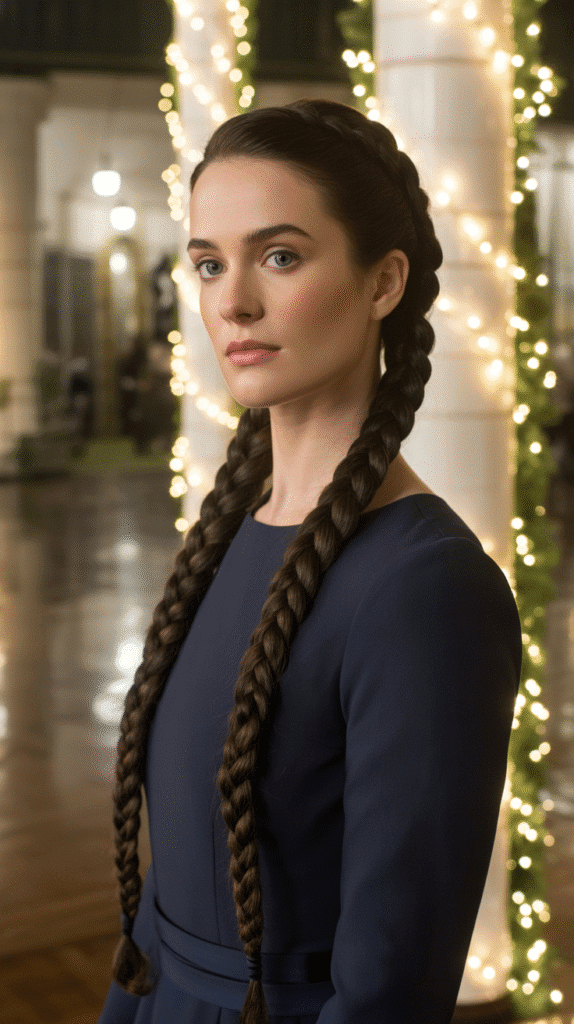
Double Dutch braids leading into a low bun create an athletic-meets-elegant style that’s both practical and beautiful.
- Part your hair down the center from forehead to nape, creating two equal sections.
- Begin a Dutch braid on the right side, starting at the hairline and braiding straight back.
- Keep the braid close to the part line, adding hair from both sides as you work toward the back.
- Repeat the same process on the left side, ensuring both braids are symmetrical.
- When both braids reach the nape, gather all remaining hair including the braid tails together.
- Twist all the hair together and wrap it into a low bun at the nape of your neck.
- Secure the bun with bobby pins, making sure the braid endings are tucked neatly inside.
- Smooth any flyaways with a small amount of gel and finish with hairspray for a polished, long-lasting hold.
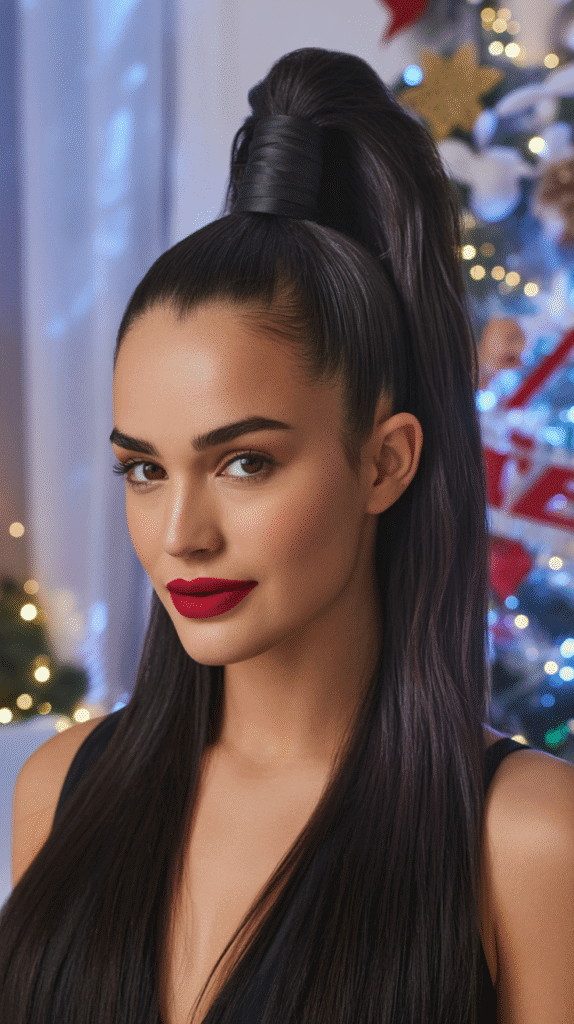
14. Glamorous Top Knot
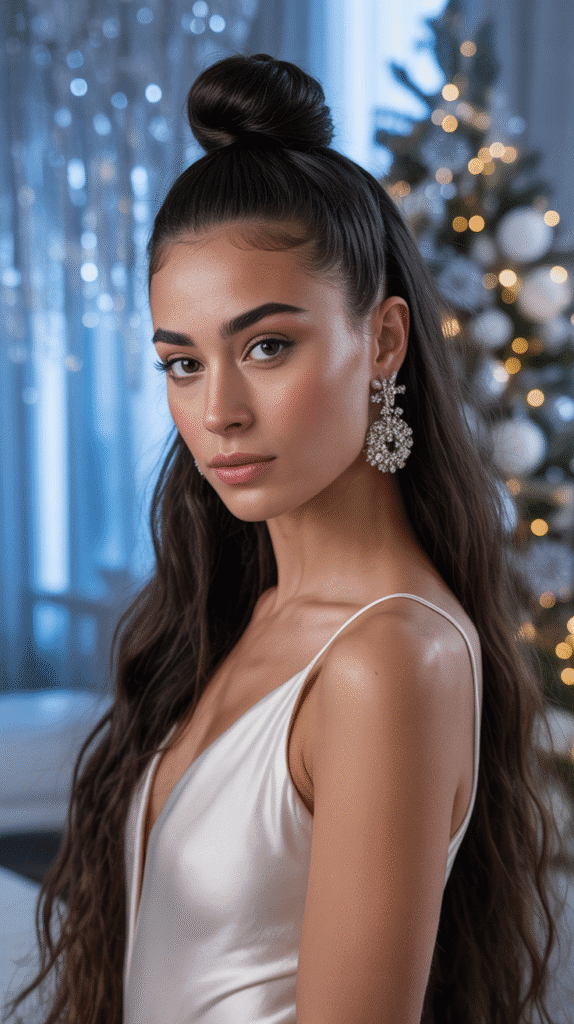
The top knot positioned high on the head creates a sophisticated, fashion-forward look that showcases your neck and jewelry.
- Brush all your hair straight up toward the crown of your head, using a fine-toothed comb for smoothness.
- Secure your hair in a very high ponytail at the crown, making sure there are no bumps.
- Apply gel or pomade to the hair leading into the ponytail for a super sleek finish.
- Twist the entire ponytail tightly from base to ends.
- Wrap the twisted ponytail around the base in a spiral, keeping it tight and controlled.
- Secure the knot with bobby pins inserted horizontally through the bun and into your head.
- Use additional pins in an X-pattern around the base for extra security.
- Spray with strong-hold hairspray and use edge control on your hairline for an ultra-polished, sophisticated finish.
15. Waterfall Braid Half-Up
The waterfall braid creates a cascading effect that looks intricate and romantic, perfect for showing off your long hair length.
- Start with loosely curled hair using a 1.25-inch curling iron for the full length.
- Take a section of hair near your temple and divide it into three strands to begin a regular braid.
- After the first stitch of the braid, drop the bottom strand and pick up a new section of hair from above to replace it.
- Continue braiding while consistently dropping the bottom strand and replacing it with new hair from the top.
- The dropped strands will cascade down like a waterfall, creating the signature effect.
- Continue the waterfall braid around the back of your head toward the opposite ear.
- Secure the braid with a small clear elastic or bobby pins hidden in the hair.
- The dropped strands will blend beautifully with your curled hair below, creating a seamless, romantic look enhanced with sparkly pins along the braid path.
16. Sleek Wrapped Ponytail
This modern ponytail features a wrapped section that conceals the elastic while creating a polished, sophisticated appearance.
- Straighten your hair completely using a flat iron for a sleek, polished foundation.
- Apply shine serum throughout your hair while it’s still warm from straightening.
- Gather your hair into a ponytail at your desired height (mid-level works best for this style).
- Secure tightly with a strong elastic band that matches your hair color.
- Take a 2-inch section from underneath the ponytail before you wrap it.
- Wrap this section around the elastic multiple times, covering it completely.
- Secure the end of the wrapped section with a bobby pin hidden underneath the ponytail.
- Run the flat iron through the ponytail length once more for extra sleekness and finish with shine spray for a glossy, camera-ready finish.
17. Romantic Low Ponytail with Twist
This softly twisted low ponytail combines simplicity with elegance, creating a romantic style that works for various holiday occasions.
- Curl your hair lightly with a large-barrel curling iron for soft, loose waves.
- Create a center or side part according to your preference.
- Take the front sections of hair from both sides and twist them back toward the center.
- Cross the twisted sections over each other at the back of your head.
- Gather all your hair including the twisted sections into a low ponytail at the nape.
- Secure with a covered elastic band that won’t snag your hair.
- Pull out a few face-framing pieces and curl them for a softer, more romantic look.
- Add small pearl or crystal pins along the twisted section and finish with a light mist of flexible-hold hairspray that maintains movement.
18. Faux Hawk Braid
The faux hawk braid brings edgy sophistication to your holiday look, perfect for those wanting to make a bold statement.
- Apply strong-hold gel to the sides of your hair, slicking them back tightly toward the center.
- Secure the slicked sides with bobby pins placed horizontally along the sides of your head.
- Leave the center section (about 3-4 inches wide) loose from front to back.
- Create a French braid or Dutch braid down the center section, starting at the hairline.
- Make the braid quite tight and raised to create that faux hawk effect.
- When you reach the nape, continue braiding the remaining length without adding new hair.
- Gently pull on the outer edges of just the braid to make it wider and more prominent.
- Add metallic hair cuffs, rings, or edgy accessories along the braid and finish with strong-hold hairspray to keep the sides sleek all night.
19. Vintage Victory Rolls
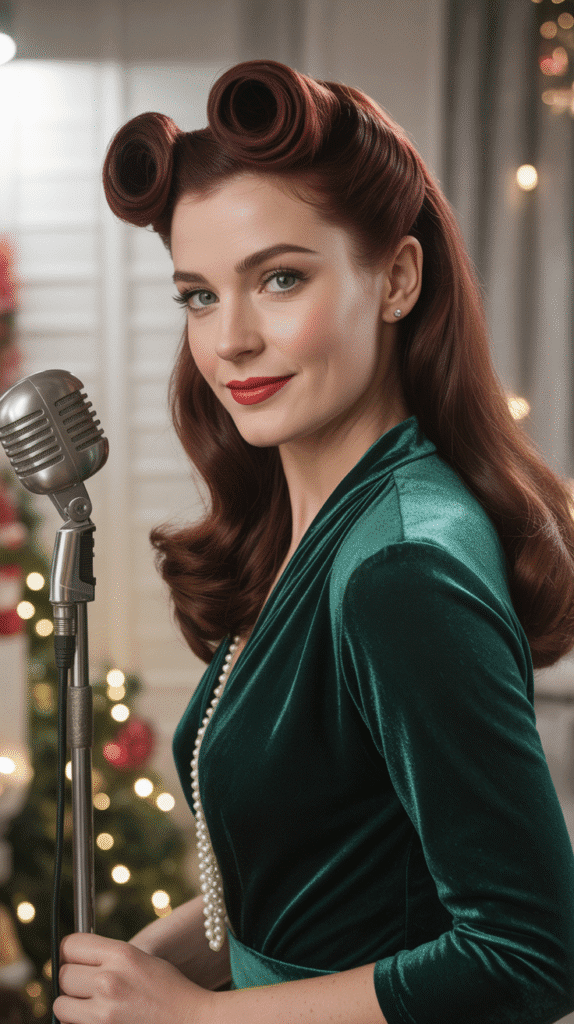
Victory rolls bring 1940s glamour to your Christmas party, creating a distinctively vintage look that’s full of personality.
- Start with dry hair that has some texture (second-day hair works perfectly for this style).
- Create a deep side part and separate the front sections from the rest of your hair.
- Take a 3-inch section on the heavy side of your part and backcomb it thoroughly for volume.
- Roll this section backward toward your scalp, creating a tube shape that sits on top of your head.
- Secure the roll with bobby pins inserted horizontally into the roll and vertically into your scalp.
- Repeat on the other side with a smaller section, creating an asymmetrical look typical of victory rolls.
- Style the remaining hair in loose waves or curls using a curling iron.
- Set everything with strong-hold hairspray and add a vintage hair accessory like a decorative clip or small fascinator for authentic 1940s holiday glamour.
20. Infinity Braid Ponytail
The infinity braid (figure-eight braid) creates a unique, eye-catching pattern that elevates a simple ponytail into something special.
- Create a high ponytail and secure it tightly with a strong elastic band.
- Divide the ponytail into two equal sections.
- Take a small piece from the outer edge of the right section and cross it over to the left section in a figure-eight motion.
- Then take a small piece from the outer edge of the left section and cross it to the right in the same figure-eight pattern.
- Continue this alternating pattern, keeping the crossed sections small for a more defined infinity design.
- The key is to maintain tension and consistency in the size of the sections you’re crossing.
- Secure the end with a clear elastic when you reach the bottom.
- Gently pull on the outer edges of the braid to create more dimension and make the infinity pattern more visible, finishing with hairspray.
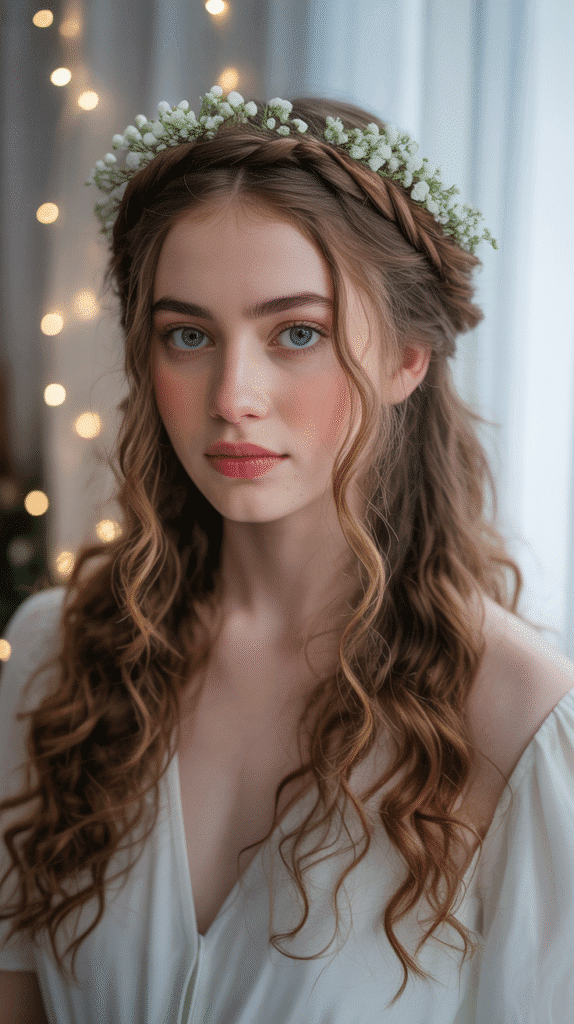
21. Braided Headband with Loose Hair
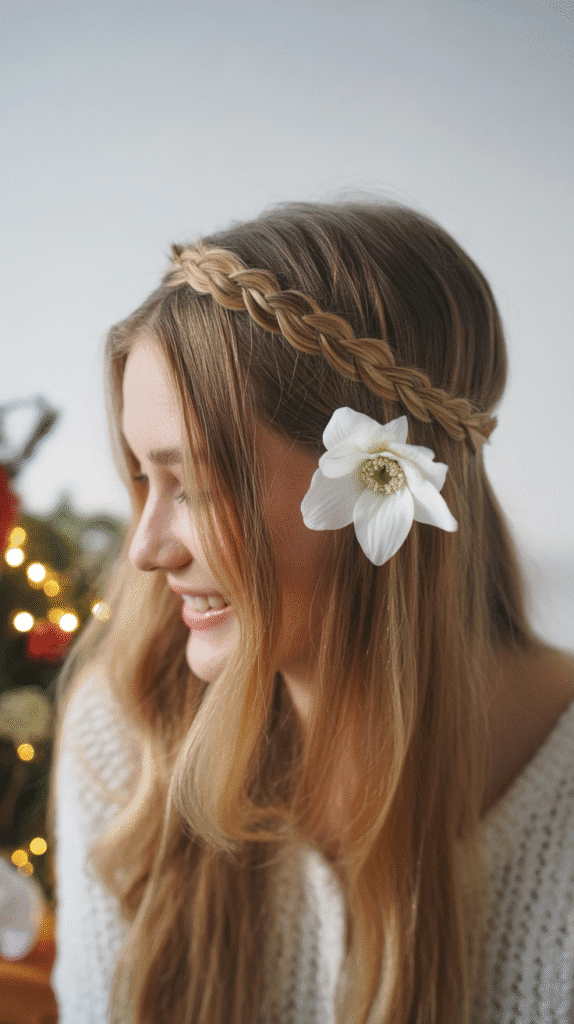
A braided headband made from your own hair creates a bohemian-chic look while keeping hair out of your face elegantly.
- Start with textured or wavy hair (add waves with a curling iron if needed).
- Take a 1-inch section of hair from behind your right ear.
- Create a simple three-strand braid with this section, braiding tightly for durability.
- Continue braiding all the way to the ends and secure with a small clear elastic.
- Bring the braid across the top of your head like a headband, positioning it where you’d wear an actual headband.
- Secure the braid behind your left ear with bobby pins that match your hair color.
- Tuck the tail of the braid behind your ear or pin it underneath for a seamless look.
- Add small festive accessories like tiny flowers or sparkly pins along the braid and finish by curling any straight sections for a cohesive, romantic style.
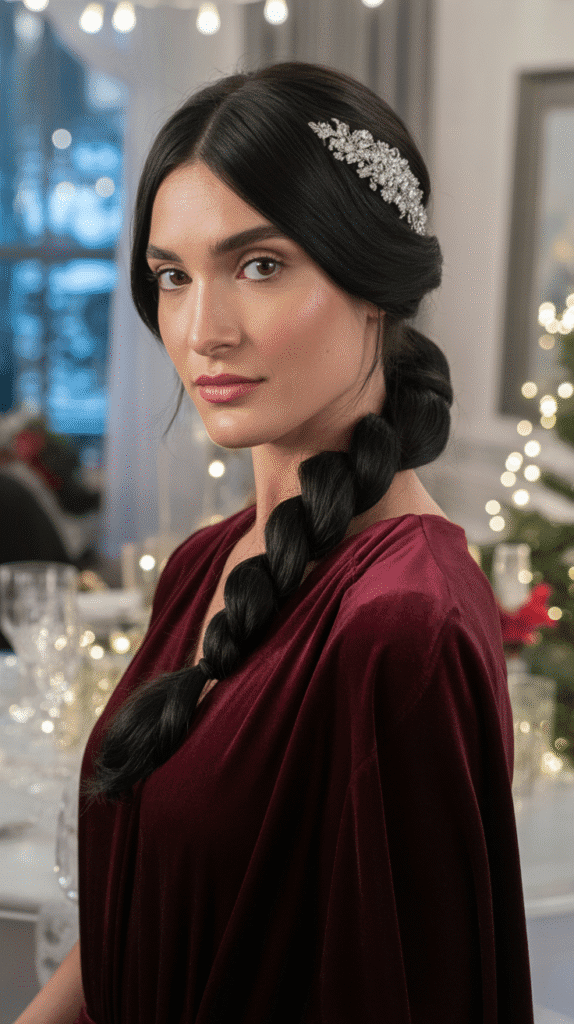
22. Low Twisted Ponytail
This textured twisted ponytail adds dimension and interest to a classic style without requiring advanced skills.
- Create a low ponytail at the nape of your neck and secure with an elastic.
- Divide the ponytail into two equal sections.
- Twist the right section clockwise until it’s tightly twisted from base to ends.
- Twist the left section clockwise in the same direction.
- Now twist both sections together in a counter-clockwise direction (opposite to how you twisted them individually).
- This creates a rope-twist effect that won’t unravel easily.
- Secure the end with another elastic band.
- Gently pull on the outer edges of the twisted ponytail to create more volume and texture, making it appear fuller and more dimensional.
23. Half-Up Bow Bun
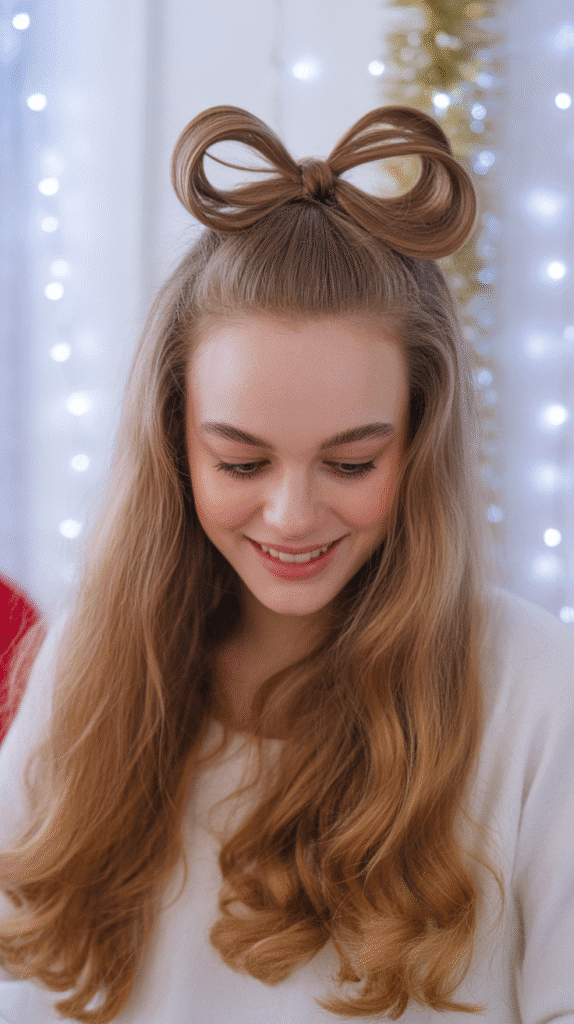
A bow-shaped bun creates a playful yet elegant look that’s perfect for adding a festive touch to your holiday hairstyle.
- Curl the bottom half of your hair with a curling iron before starting the bow.
- Take the top half of your hair and pull it into a high half-ponytail.
- On the last pull-through of the elastic, don’t pull the hair all the way through—leave a loop.
- Divide the loop into two equal sections (these will be your bow loops).
- Take the tail end of the ponytail and bring it up and over the center where the loops divide.
- Secure this center piece with bobby pins to create the middle of the bow.
- Adjust the two loops to make them even and full, pinning them in place if needed.
- Finish with hairspray to maintain the bow shape and add a sparkly clip at the center for extra holiday sparkle.
24. Loose Braided Updo
This romantically undone braided updo creates an effortlessly elegant look perfect for formal holiday events.
- Create loose waves throughout your hair with a 1.5-inch curling iron.
- Divide your hair into three sections: one at each side and one at the back.
- Create a loose three-strand braid with each section, pancaking them as you go for fullness.
- Take the right braid and pin it across the back of your head with bobby pins.
- Take the left braid and pin it across the back, overlapping with the right braid.
- Gather the back section and twist it loosely, then wrap it into a low bun shape.
- Secure everything with bobby pins, intentionally leaving the style loose and textured.
- Pull out small face-framing pieces and a few strands from the updo for a soft, romantic finish enhanced with small flowers or pearl pins.
25. Sleek Center Part with Straight Hair
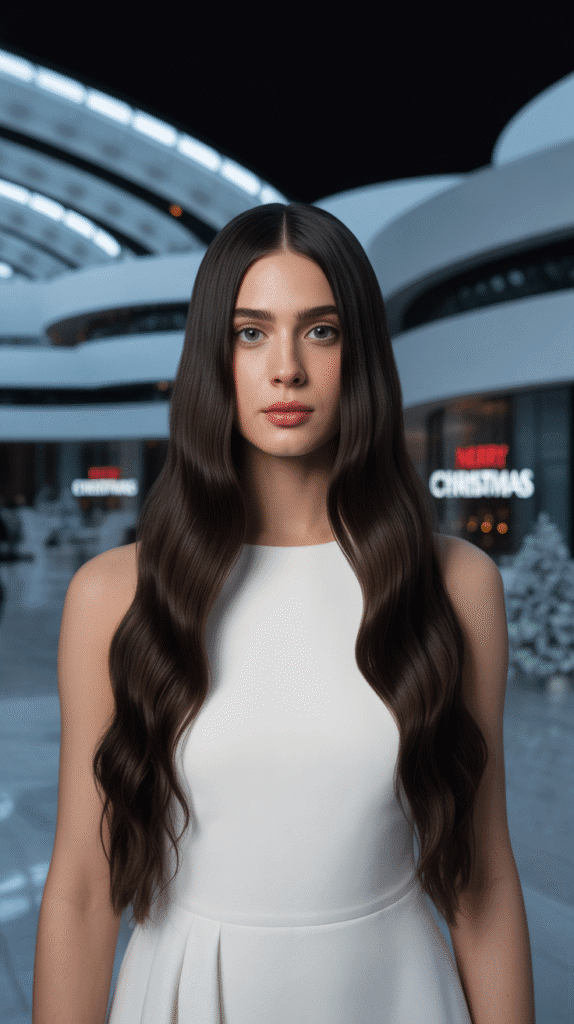
Sometimes simplicity is the ultimate sophistication—sleek, straight hair with a perfect center part creates modern elegance.
- Wash your hair and apply a smoothing cream or serum to damp hair.
- Blow-dry your hair straight using a paddle brush and directing the nozzle downward to seal the cuticle.
- Once completely dry, create a precise center part using a rat-tail comb.
- Section your hair and run a flat iron through each section, moving slowly for maximum smoothness.
- Go over each section twice if necessary, ensuring poker-straight results.
- Apply a few drops of shine serum to your palms and run through the mid-lengths and ends.
- Use an edge control product or gel on a toothbrush to smooth your hairline and part.
- Finish with a shine spray for that glossy, mirror-like finish that photographs beautifully and tuck one side behind your ear to show off statement earrings.
26. Voluminous Side Swept Curls
Side-swept curls create dramatic glamour with all the volume concentrated on one side for red-carpet-worthy impact.
- Apply volumizing mousse to damp hair and blow-dry with maximum volume.
- Create a deep side part positioned far to one side.
- Section your hair and curl it with a 1.25-inch curling iron, alternating curl directions.
- Allow all curls to cool completely before touching them.
- Sweep all your hair to one side (the heavier side of your part).
- Secure the hair behind your ear on the opposite side with several bobby pins.
- Use your fingers to gently separate the curls on the heavy side, creating volume.
- Spray with strong-hold hairspray on the light side to keep hair secured behind your ear, and add a decorative barrette or clip for extra hold and festive sparkle.
27. Textured Beach Waves
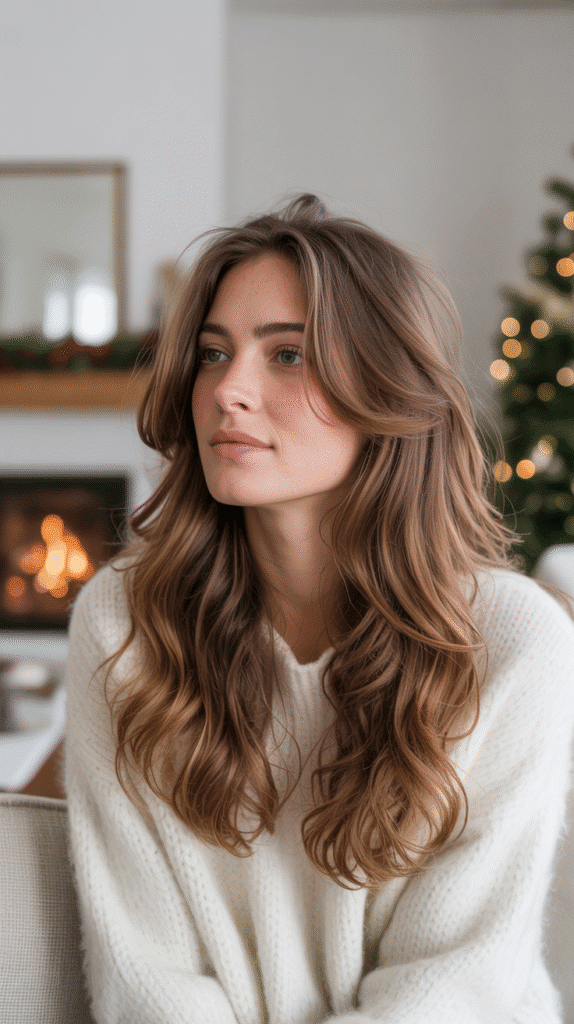
Effortless textured beach waves create a relaxed yet polished look perfect for casual holiday gatherings.
- Start with damp hair and apply sea salt spray throughout for texture.
- Divide your hair into four large sections.
- Twist each section tightly and blow-dry while twisted to create natural wave patterns.
- Once dry, untwist the sections and shake out your hair with your fingers.
- Take random 2-inch sections and wrap them around a 1-inch curling iron, holding for just 3-5 seconds.
- Alternate the direction you curl each section for a more natural, undone look.
- Run your fingers through your hair to break up the curls into soft waves.
- Scrunch in a small amount of texturizing cream or spray and finish with a light mist of flexible-hold hairspray that maintains movement and touchable texture throughout your celebration.
Conclusion
These 27 Easy Christmas Party Hairstyles for Long Hair Perfect for the Holidays offer something special for everyone, whether you’re attending a black-tie gala or a casual gathering with loved ones.
From the timeless elegance of Hollywood waves and sophisticated chignons to the playful charm of bow buns and the edgy appeal of faux hawk braids, you now have a complete arsenal of festive hairstyles at your fingertips.
The beauty of long hair lies in its versatility, and these styles prove that you don’t need to be a professional hairstylist to create stunning looks that capture the magic and sparkle of the season.
Remember that the best hairstyle is one that makes you feel confident and comfortable, so don’t be afraid to adapt these ideas to suit your personal style, hair texture, and the specific demands of your holiday calendar.
With these techniques mastered, you’ll be ready to step into every Christmas celebration with a gorgeous hairstyle that complements your festive spirit and creates memories that will shine as brightly as the holiday lights themselves.