Step into a world where golden threads are woven into crowns of hair, and every strand tells a story of royal elegance.
Medieval updo hairstyles for princesses weren’t just beautiful arrangements—they were symbols of status, femininity, and courtly grace that captured the imagination of entire kingdoms.
Whether you’re preparing for a Renaissance faire, a themed wedding, a costume party, or simply want to channel your inner royalty for a special occasion, these timeless hairstyles offer the perfect blend of historical authenticity and romantic charm.
From intricate braided coronets to jewel-adorned coiled buns, the hairstyles in this article span various medieval periods and social ranks, each carrying its own unique character and sophistication.
In “27 Elegant Medieval Updo Hairstyles for Princesses,” you’ll discover detailed styling techniques, historical context, and modern adaptations that will transform your look into something truly regal.
Get ready to explore cascading braids wrapped with ribbons, elaborate twisted updos secured with ornamental pins, and veiled arrangements that would make any medieval princess envious—each style carefully curated to bring the magic of the Middle Ages into your contemporary beauty routine.
1. The Classic Braided Crown

The braided crown represents one of the most iconic and timeless medieval hairstyles, where thick braids are wrapped around the head to create a natural coronet.
This style was particularly popular among noblewomen during the 12th and 13th centuries, symbolizing purity and royal status.
- Begin by parting your hair down the middle to create two equal sections that will form the foundation of your crown.
- Braid each section into a tight, three-strand braid, ensuring even tension throughout to maintain a uniform appearance.
- Wrap the first braid across the top of your head from one ear to the other, securing it with bobby pins every few inches.
- Take the second braid and wrap it around the back of your head, meeting the first braid to complete the circular crown effect.
- Secure all loose ends underneath the braids with additional pins, tucking them completely out of sight.
- For added authenticity, weave thin ribbons or metallic threads through the braids before wrapping them around your head.
- Finish with a light hairspray to keep flyaways in place while maintaining the natural texture of the braids.
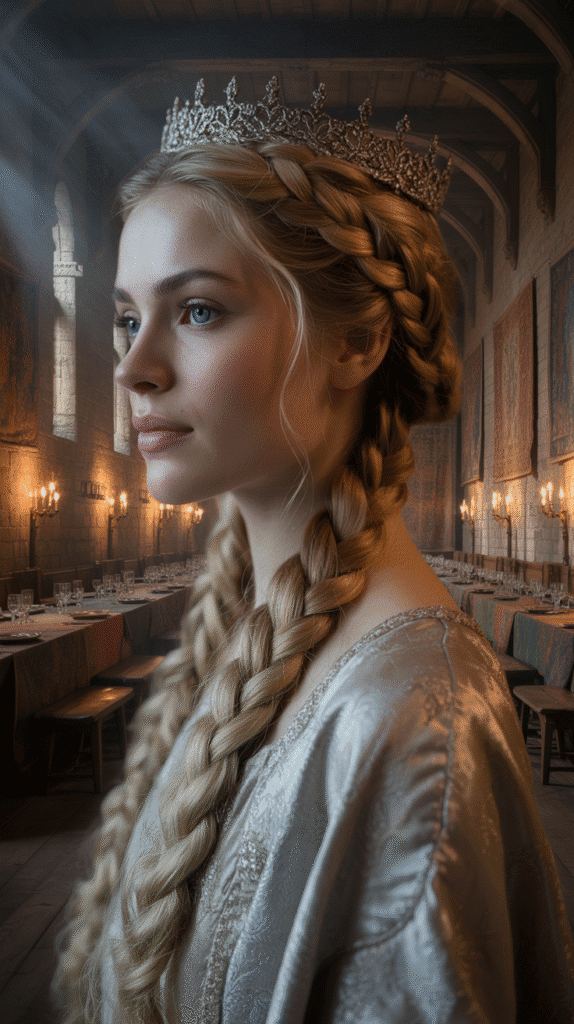
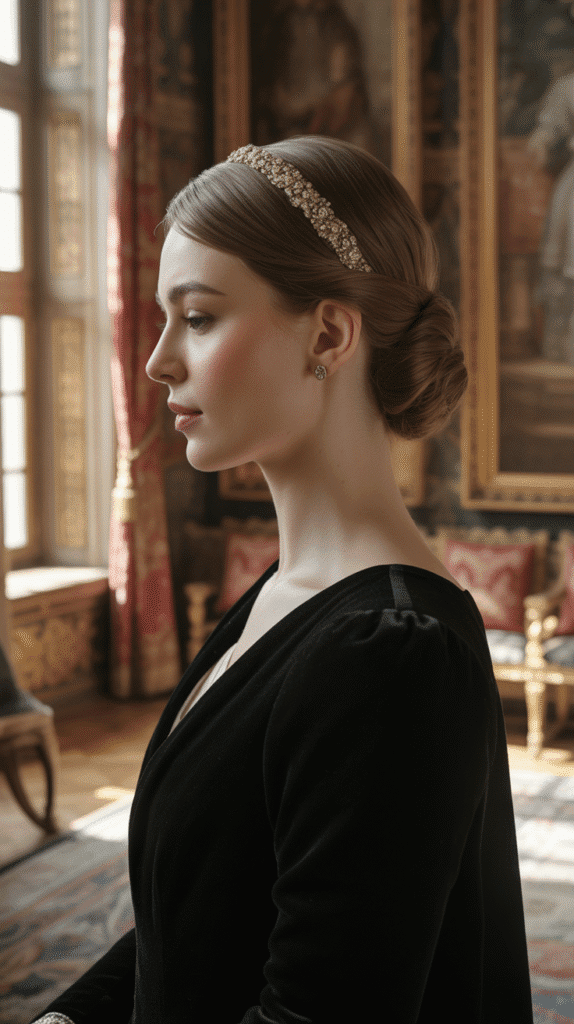
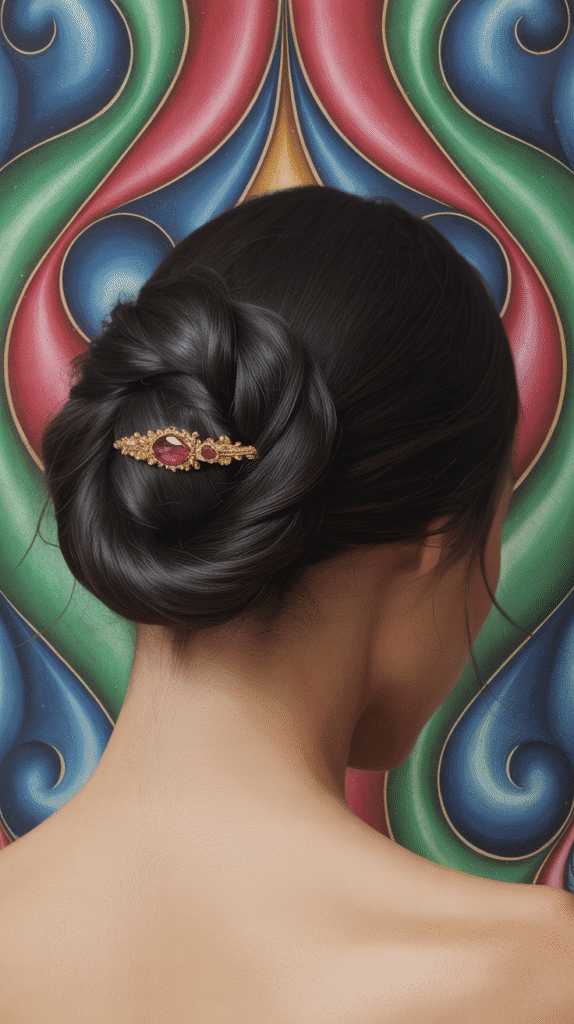
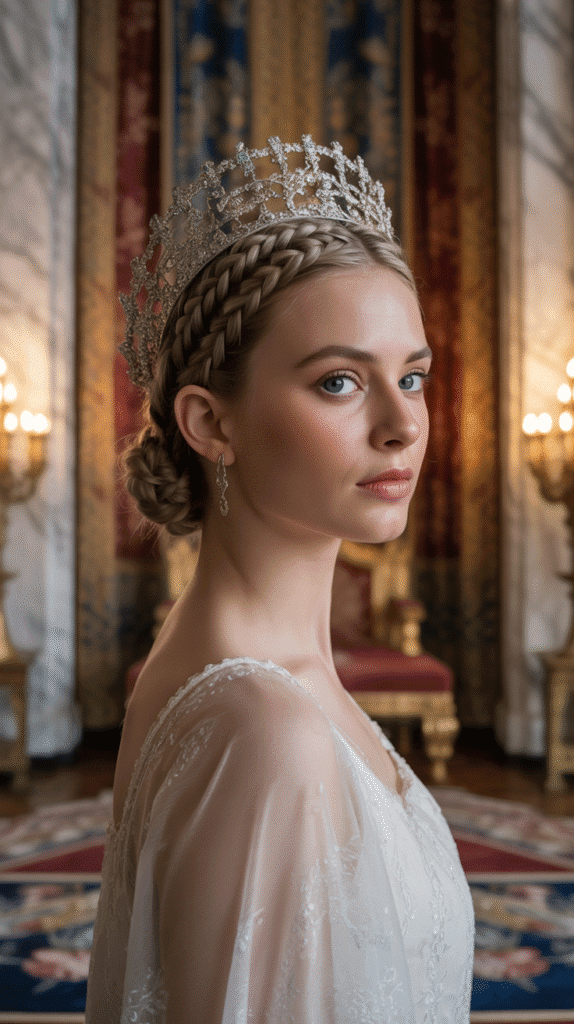
2. The Jeweled Coiled Bun
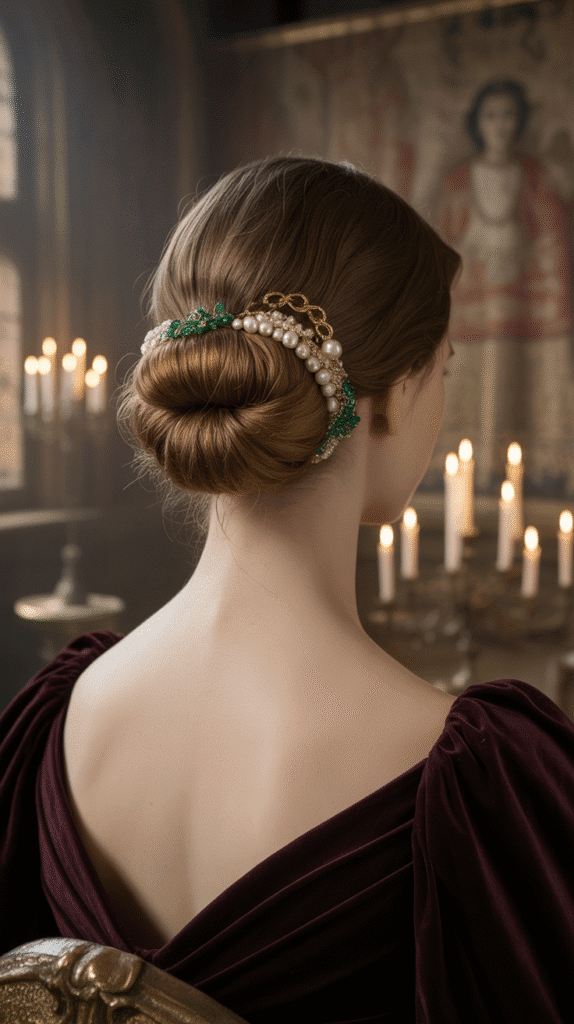
This sophisticated updo features hair coiled into an elegant bun at the nape of the neck, adorned with jewels, pins, and ornamental accessories that reflect light and status.
Medieval ladies of high rank often displayed their wealth through elaborate hair decorations.
- Brush your hair thoroughly to remove all tangles and create a smooth, sleek base for styling.
- Gather all hair at the nape of your neck, securing it with an elastic band to create a low ponytail.
- Twist the ponytail tightly in one direction until it begins to coil naturally upon itself.
- Wrap the twisted hair around the base of the ponytail, forming a neat spiral bun shape.
- Secure the bun with multiple bobby pins, inserting them at various angles to ensure stability.
- Insert decorative jeweled pins, vintage brooches, or pearl-headed pins throughout the bun for royal embellishment.
- Consider adding a delicate chain or jeweled hair vine that drapes across the bun for extra medieval glamour.
- Set the style with a medium-hold hairspray to maintain the polished appearance throughout the day.
3. The Romantic Side Braid Sweep
The side braid sweep creates an asymmetrical, romantic look where all hair is gathered to one side and intricately braided before being pinned up.
This style was favored during courtly love traditions and medieval festivals.
- Create a deep side part on whichever side you prefer, sweeping the majority of hair to the opposite shoulder.
- Begin a French braid or Dutch braid starting from the heavier side of the part, incorporating hair as you work downward.
- Continue braiding past the ear and down toward the shoulder, gathering all loose hair into the braid.
- Once you reach the ends, secure the braid with a small elastic that matches your hair color.
- Lift the braid upward and pin it in an elegant swooping motion behind the ear or at the crown.
- Allow a few face-framing tendrils to escape near the temples for a softer, more romantic appearance.
- Wrap a silk ribbon around the base of the pinned braid or weave it throughout the braid itself.
- Finish by gently pulling at the edges of the braid to create volume and a fuller, more dimensional look.
4. The Double Twisted Coronet
This refined style features two twisted sections of hair that meet at the crown to form a coronet effect, perfect for princesses seeking a less structured alternative to braids.
The twisted texture adds visual interest and medieval charm.
- Divide your hair down the center from forehead to nape, creating two perfectly equal sections.
- Take the right section and divide it into two smaller strands, twisting them around each other like a rope.
- Continue twisting until you reach the ends, then secure temporarily with a clip.
- Repeat the twisting process on the left section, ensuring both twists have similar tension and size.
- Bring the right twist across the top of your head toward the left ear, pinning it securely.
- Take the left twist and bring it across the top of your head to the right ear, crossing over the first twist.
- Pin both twists securely where they intersect at the crown, creating a beautiful crisscross pattern.
- Tuck any remaining lengths underneath the twists and secure with additional bobby pins.
- Spray with hairspray and add small decorative flowers or pins at the crossing point for embellishment.
5. The Veiled Low Chignon
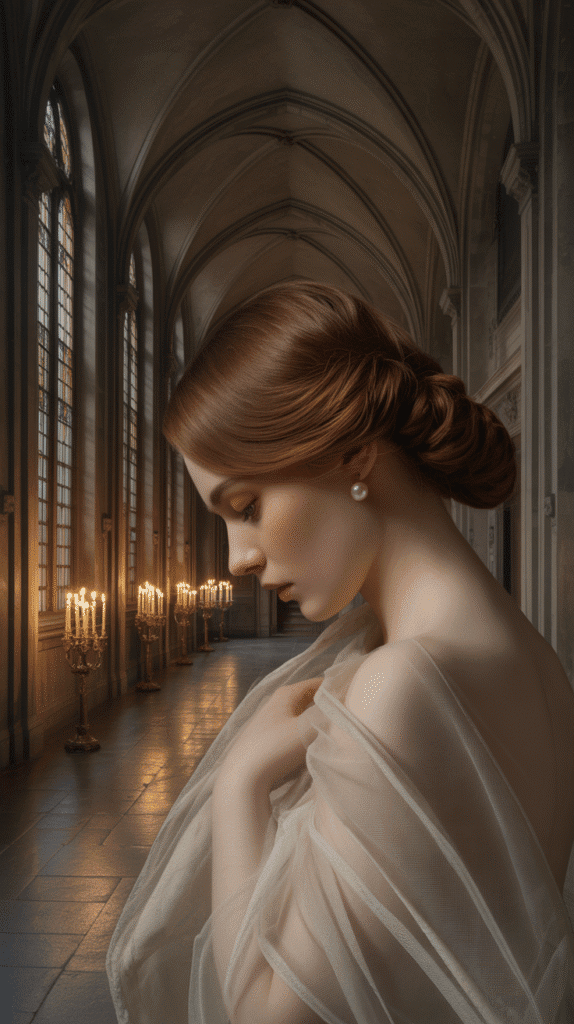
The veiled low chignon combines a classic low bun with a sheer veil or fabric overlay, creating mystery and medieval sophistication.
This style was particularly popular among married noblewomen during the Gothic period.
- Gather all hair at the nape of your neck and smooth it with a brush for a sleek foundation.
- Twist the gathered hair loosely and coil it into a low bun, securing with pins.
- Keep the bun slightly loose rather than tight to create a softer, more period-appropriate silhouette.
- Drape a sheer veil, silk scarf, or lace fabric over the crown of your head, allowing it to cascade over the bun.
- Secure the veil with decorative pins at the crown or use a small circlet or headband to hold it in place.
- Arrange the veil so it falls gracefully around your face and shoulders, creating an ethereal effect.
- Pull out a few wisps of hair around the hairline to soften the look and frame your face.
- The combination of the structured bun and flowing veil creates a perfect balance of elegance and modesty.
6. The Herringbone Braided Updo
The herringbone braid, also known as a fishtail braid, creates an intricate, scaled appearance that was considered extremely sophisticated in medieval courts.
When arranged into an updo, it becomes a true crown jewel.
- Start with completely dry hair, adding texturizing spray if your hair is very fine or slippery.
- Gather all hair into a high ponytail at the crown and secure with an elastic band.
- Divide the ponytail into two equal sections to begin the herringbone braiding technique.
- Take a small piece from the outer edge of the right section and cross it over to join the left section.
- Repeat on the opposite side, taking a small piece from the outer edge of the left section and crossing it to the right.
- Continue this alternating pattern down the entire length of the ponytail, keeping the sections tight and even.
- Secure the end with a small elastic, then wrap the entire braid around the base of the ponytail.
- Pin the wrapped braid securely to create a textured, dimensional bun at the crown.
- Gently pull at the braid sections to create width and fullness, giving it a more voluminous appearance.
- Add a jeweled hairpin or small crown at the base for authentic medieval flair.
7. The Wrapped Ribbon Twist
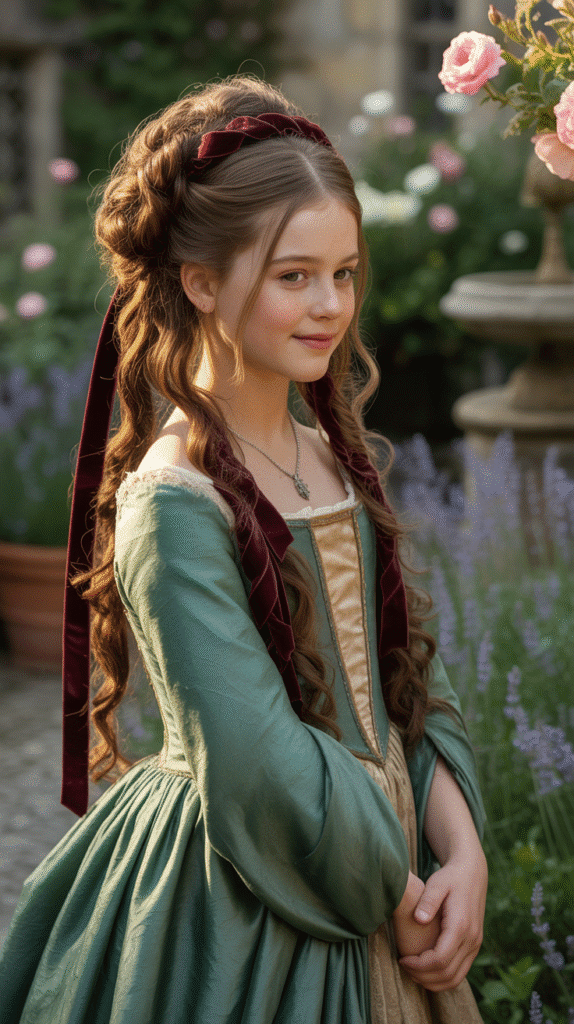
This charming style incorporates colorful ribbons woven throughout twisted hair sections, creating a playful yet elegant look perfect for younger princesses or festive occasions.
Ribbon decoration was a hallmark of medieval fashion.
- Section your hair into four to six equal portions from the front of your head to the nape.
- Take the first section and begin twisting it while simultaneously wrapping a ribbon around the twist in a spiral motion.
- Secure the ribbon-wrapped twist temporarily with a clip while you work on the remaining sections.
- Repeat the ribbon-wrapping process with each section, using ribbons in coordinating or contrasting colors.
- Once all sections are wrapped, gather them together at the crown or nape, depending on your preferred style.
- Arrange the ribbon-wrapped twists into a cluster, pinning them securely to create an updo formation.
- Allow the ribbon ends to cascade down or tie them into small bows for additional decorative appeal.
- This style works beautifully with velvet ribbons for autumn events or silk ribbons for spring and summer occasions.
8. The Celtic Knot Bun
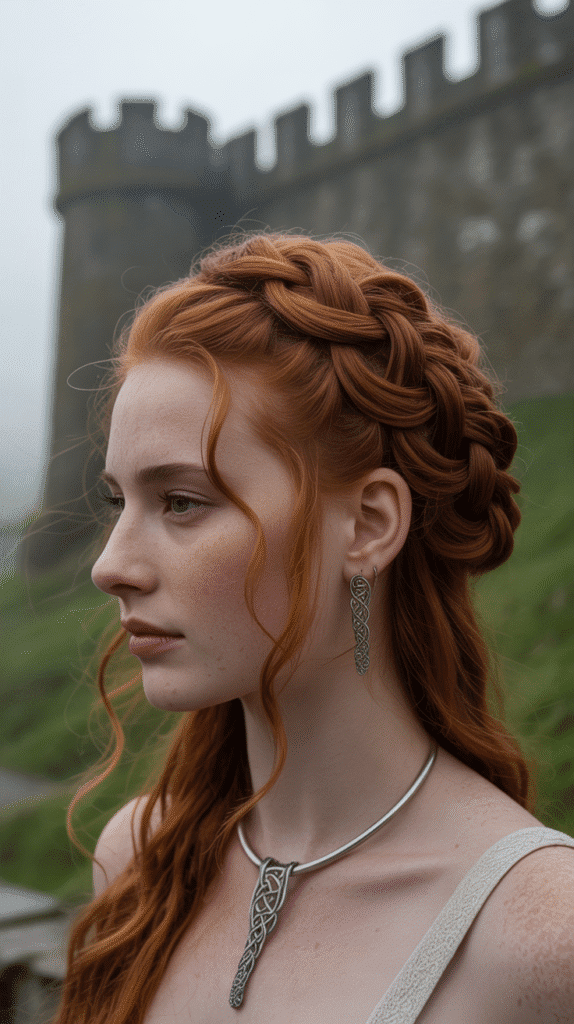
Inspired by intricate Celtic knotwork designs, this artistic updo creates the illusion of interwoven hair sections that form a decorative knot pattern.
This style requires patience but produces stunning, conversation-worthy results.
- Divide your hair into three equal sections at the back of your head.
- Braid each section into a simple three-strand braid and secure each with a small elastic.
- Begin weaving the first braid over and under the second braid, creating the foundation of the knot pattern.
- Bring the third braid through the spaces created by the first two, following over-under weaving principles.
- Continue weaving the braids together until they form a cohesive, knot-like design.
- Tuck the ends of each braid underneath the woven pattern and secure with bobby pins.
- Adjust the woven sections to ensure the pattern is visible and properly balanced.
- This style may require practice but creates an authentically Celtic-inspired medieval appearance.
- Enhance the look with Celtic-style brooches or hairpins featuring knotwork designs.
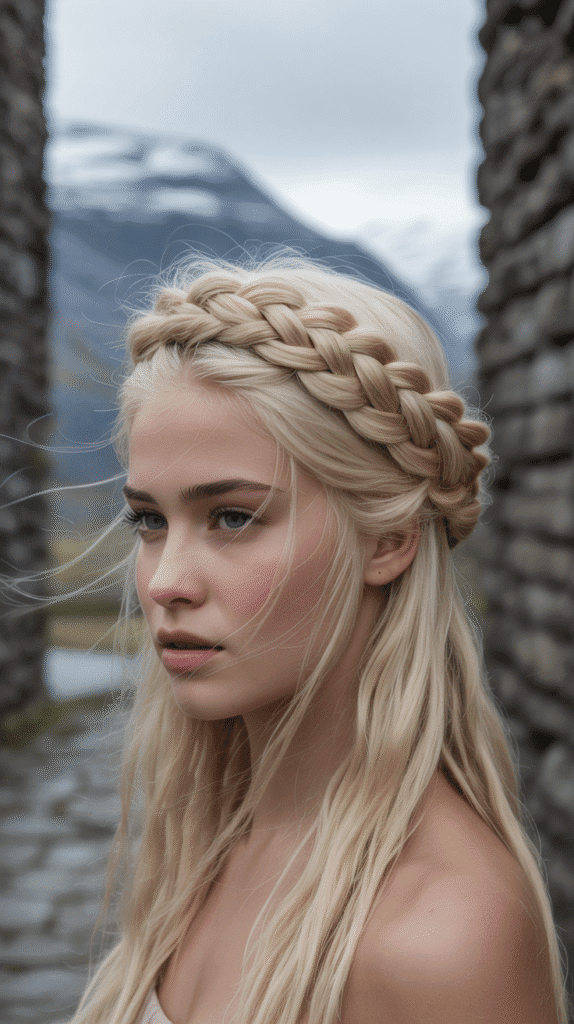
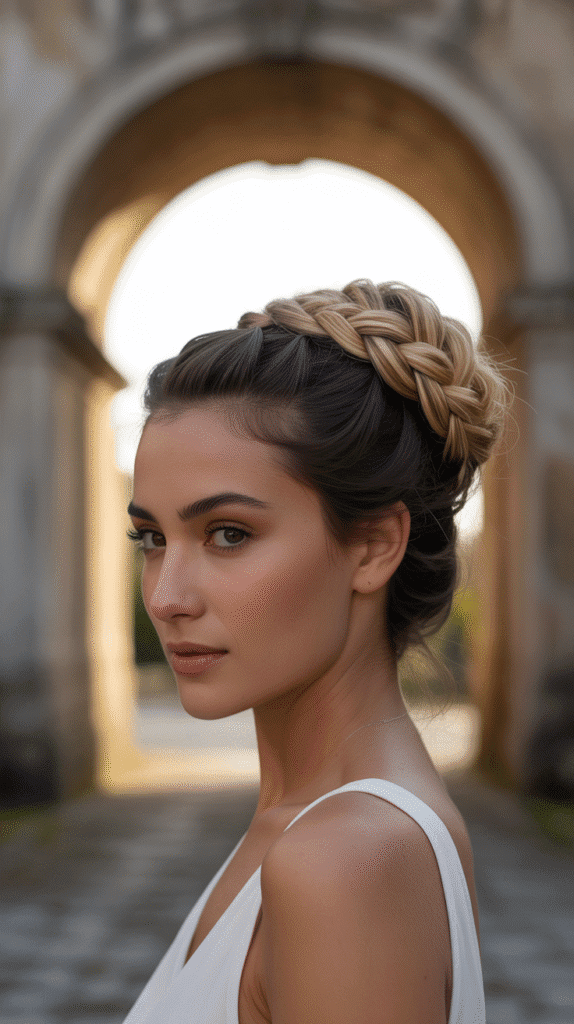
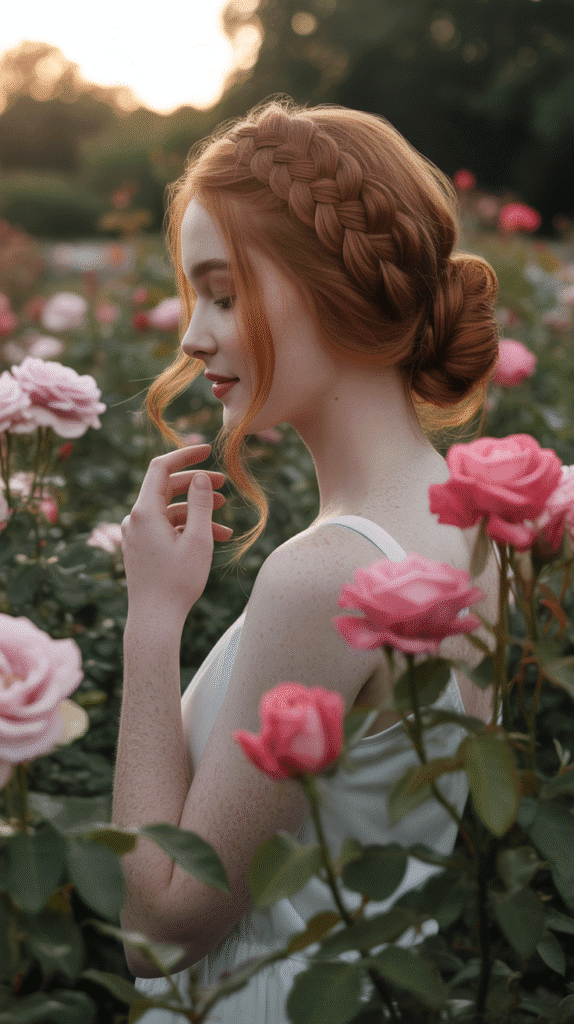
9. The Milkmaid Braid Crown
The milkmaid braid crown creates a halo effect using two braids that wrap around the head in opposite directions.
Despite its simple name, this style exudes royal elegance and was worn by nobility and commoners alike.
- Part your hair down the middle from front to back, creating two equal sections.
- Braid each section into a regular three-strand braid, securing the ends with small elastics.
- Take the right braid and bring it across the top of your head like a headband, pinning it behind the left ear.
- Bring the left braid across the back of your head, following below the first braid, and pin it behind the right ear.
- Tuck all visible elastic bands and braid ends underneath the opposite braid to hide them completely.
- Pin the braids securely in multiple places to ensure they stay in position throughout the day.
- For a fuller appearance, gently tug at the edges of both braids to create width and texture.
- Add small flowers, decorative pins, or a delicate chain across the crown for embellishment.
10. The Spiral Pin Curl Updo
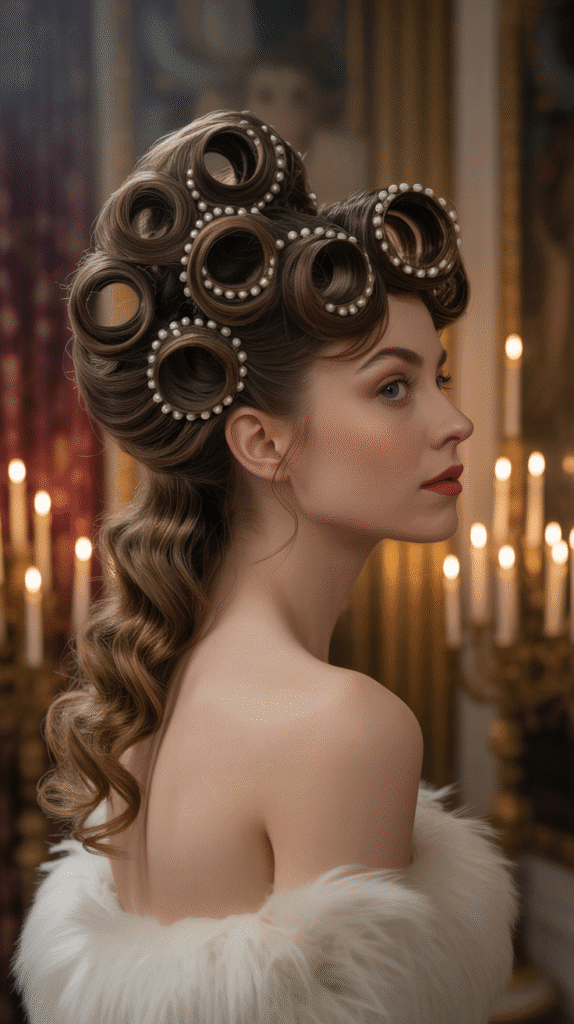
This elegant style features individual sections of hair curled into spiral pin curls and arranged artfully at the back of the head.
Popular during the later medieval period, this updo showcases careful craftsmanship and attention to detail.
- Begin with slightly damp hair or use a curl-enhancing product on dry hair for better hold.
- Divide your hair into one-inch sections, working systematically from the nape upward.
- Take each section and wrap it around your finger in a circular motion to create a flat, spiral curl.
- Pin each curl flat against your head using bobby pins in an X-shape to secure it firmly.
- Continue creating pin curls over the entire back and sides of your head, arranging them in rows or patterns.
- Once all hair is pinned, allow the curls to set (use heat from a dryer for faster results).
- After the curls have set and cooled, carefully remove the pins and arrange the spiral curls into an updo formation.
- Pin the arranged curls to create clusters and layers, building height and dimension.
- Finish with hairspray and add pearl pins or jeweled accessories between the curls for authentic period detail.
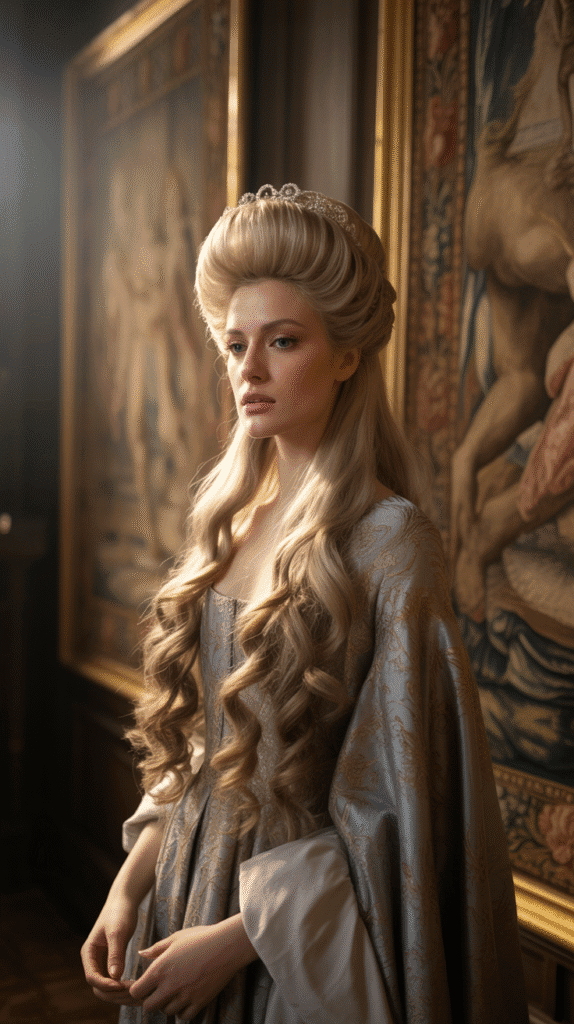
11. The Gothic Cathedral Bun
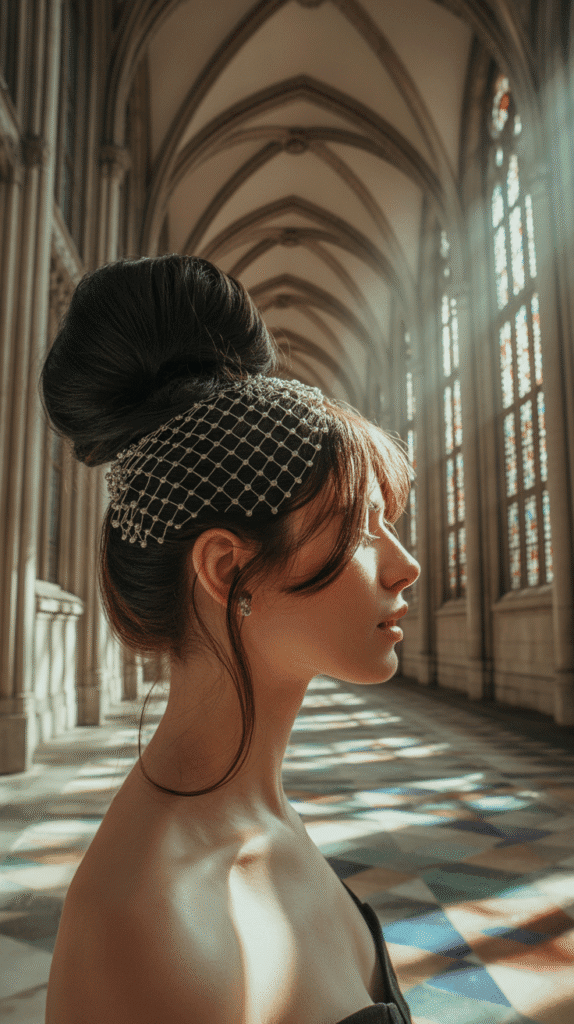
Named for its architectural height and dramatic structure, the Gothic cathedral bun sits high on the head and often incorporates wire frames or padding to achieve impressive height.
This style epitomizes high medieval fashion.
- Tease the crown section of your hair at the roots to create volume and height.
- Gather all hair into a very high ponytail at the crown of your head.
- For authentic height, place a small hair doughnut or padding at the base of the ponytail.
- Spread the hair from the ponytail evenly around the doughnut to cover it completely.
- Secure the spread hair with another elastic band placed around the base of the covered doughnut.
- Take the remaining lengths and wrap them around the base, or braid them and wrap for added texture.
- Pin everything securely, ensuring the structure feels stable and won’t collapse.
- The finished bun should sit prominently on top of your head like a crown or architectural feature.
- Embellish with a jeweled net, decorative pins, or a small coronet for maximum medieval drama.
12. The Waterfall Braid Updo
The waterfall braid creates the illusion of hair cascading through the braid like water, and when incorporated into an updo, it adds romantic movement and visual interest.
This style combines technical skill with ethereal beauty.
- Begin a French braid at one temple, taking a small section of hair and dividing it into three strands.
- As you braid, drop the bottom strand and pick up a new section from below to replace it.
- Continue this dropping and picking-up motion as you work the braid across the back of your head.
- The dropped strands create the “waterfall” effect that cascades down.
- Once you reach the opposite temple, secure the braid with a small elastic or pin.
- Gather all the dropped strands along with remaining loose hair and create a low bun or twisted chignon.
- Secure the bun with pins, ensuring the waterfall braid remains visible across the crown.
- Curl the loose ends before securing them in the bun for added texture and romance.
- This style works exceptionally well for medieval-themed weddings or formal events.
13. The Netted Coif Style
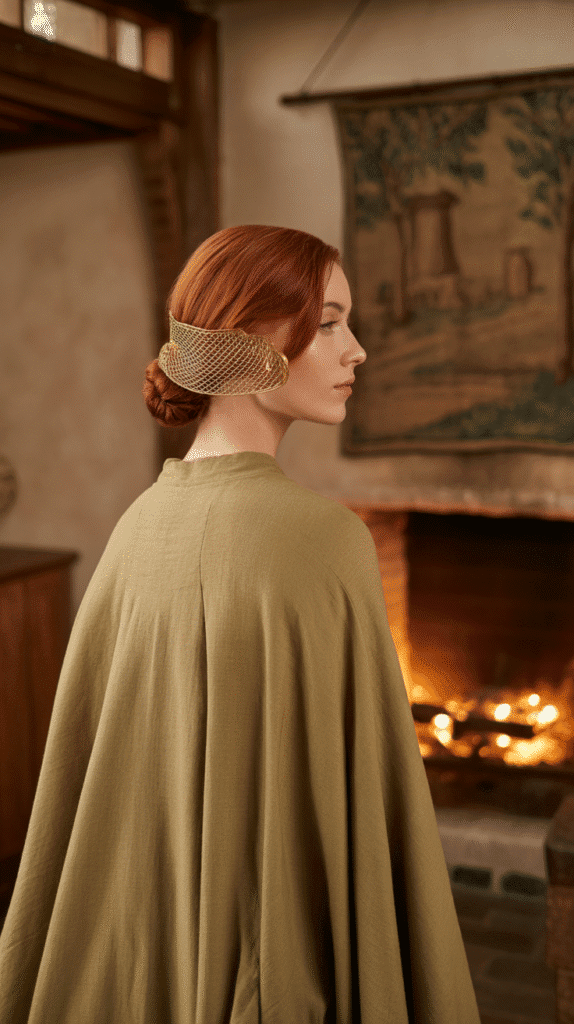
Medieval coifs were fabric or net caps that covered the hair, and this modern interpretation uses decorative netting or crochet work over a simple bun.
This modest yet elegant style was essential for proper medieval ladies.
- Create a smooth, low bun at the nape of your neck, keeping it flat rather than voluminous.
- Ensure the bun is tightly secured and all hair is contained within it for a neat appearance.
- Place a decorative hair net, crocheted cap, or metallic mesh net over the bun and head.
- The netting should cover from the crown down to the nape, encasing the bun completely.
- Secure the net or coif with pins at the front, temples, and behind the ears.
- Adjust the netting to ensure it lies smoothly against your head without wrinkles or bunching.
- For added authenticity, choose netting in gold, silver, or colors that match your costume or dress.
- This style can be embellished with small pearls or beads sewn onto the netting itself.
- The netted coif represents historical accuracy and works perfectly for medieval reenactments.
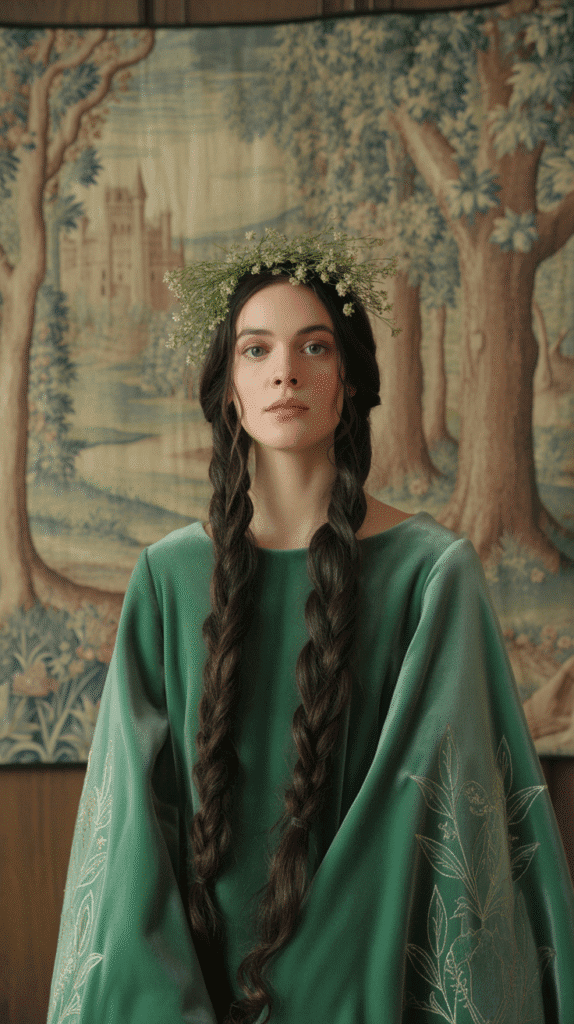
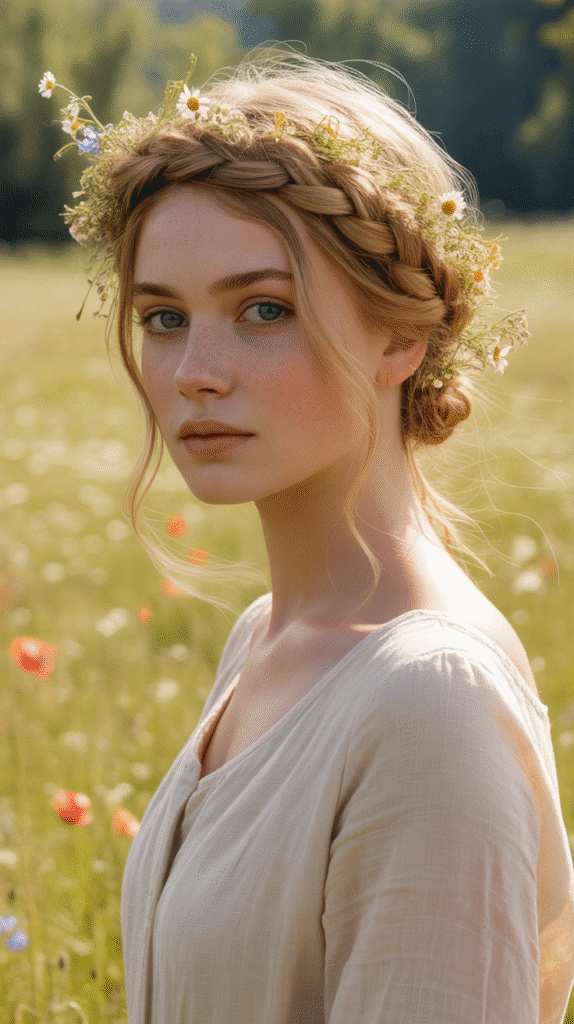
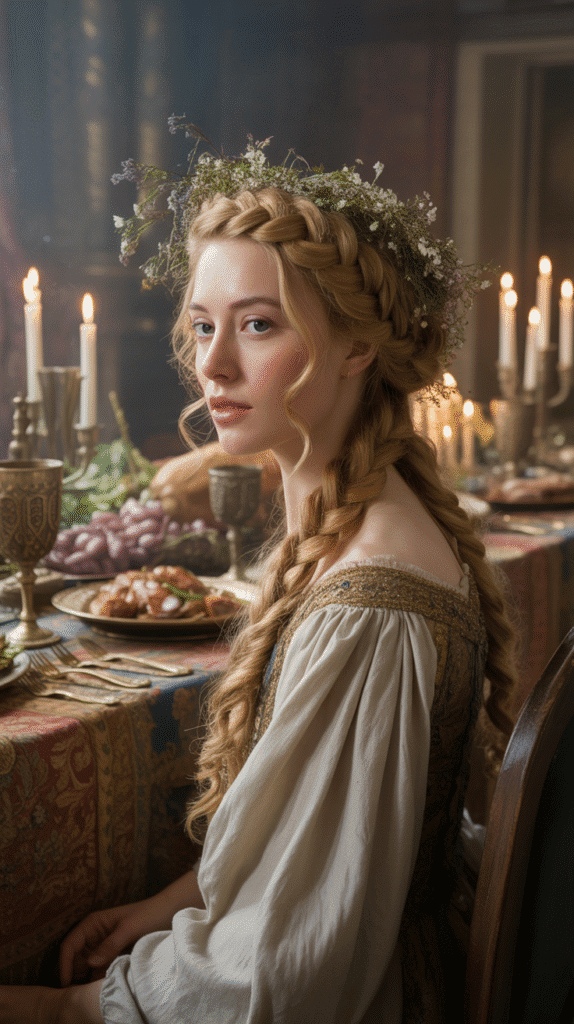
14. The Twisted Halo with Flowers
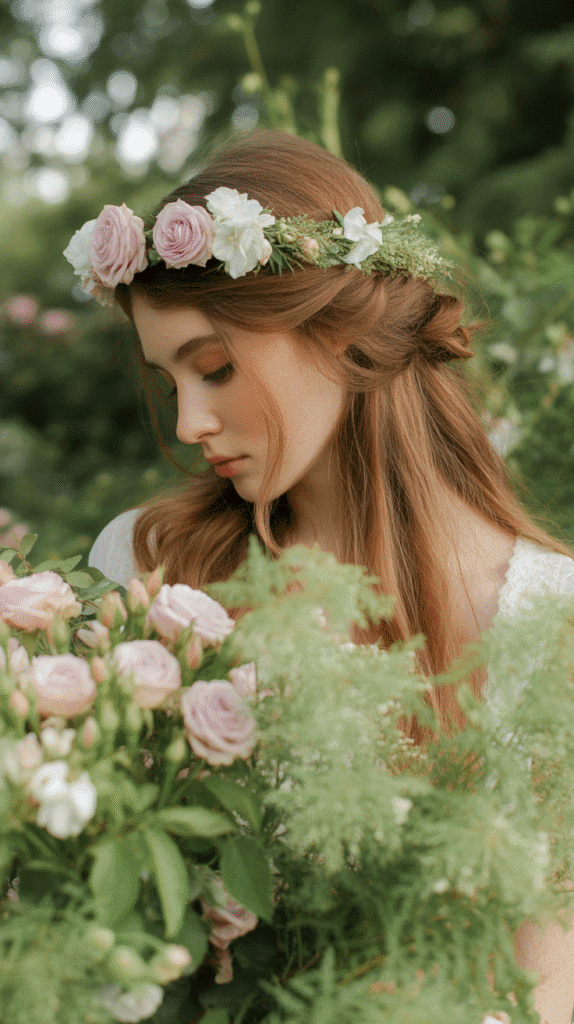
This romantic updo features twisted sections of hair arranged in a circular halo pattern around the head, adorned with fresh or silk flowers.
The combination of structure and natural beauty creates an enchanting princess look.
- Section your hair from ear to ear across the top of your head, clipping the back section away.
- Divide the front section into two parts and twist each section away from your face.
- Bring the twisted sections to the back of your head and pin them to create the beginning of a halo shape.
- Release the back section and divide it into two parts as well, twisting each section.
- Wrap these twisted sections upward and around to meet the front sections, completing the halo circle.
- Pin all twisted sections securely where they meet, creating a continuous circular pattern.
- Tuck any loose ends underneath the twists to hide them from view.
- Weave fresh flowers such as roses, daisies, or baby’s breath throughout the twisted halo.
- Alternatively, use silk flowers or flower crown elements for a longer-lasting style.
- This style is perfect for outdoor medieval festivals, fairy-tale weddings, or spring celebrations.
15. The Triple Braid Crown Stack
This dramatic style layers three separate braids on top of each other to create impressive height and dimension.
The stacked effect was particularly popular among Germanic and Nordic medieval nobility.
- Divide your hair horizontally into three sections: top, middle, and bottom.
- Braid each section separately into tight three-strand braids and secure with elastics.
- Starting with the bottom braid, wrap it around your head like a headband and pin it securely.
- Take the middle braid and wrap it directly above the first braid, pinning it in place.
- Finally, wrap the top braid above the other two, creating a stacked, layered effect.
- Ensure each braid is pinned securely and the layers are evenly distributed around your head.
- Tuck any visible elastic bands underneath the braids to maintain a clean appearance.
- For added dimension, pancake each braid by gently pulling at the edges before wrapping them.
- This style creates impressive height and works wonderfully with hair accessories placed at the front or temples.
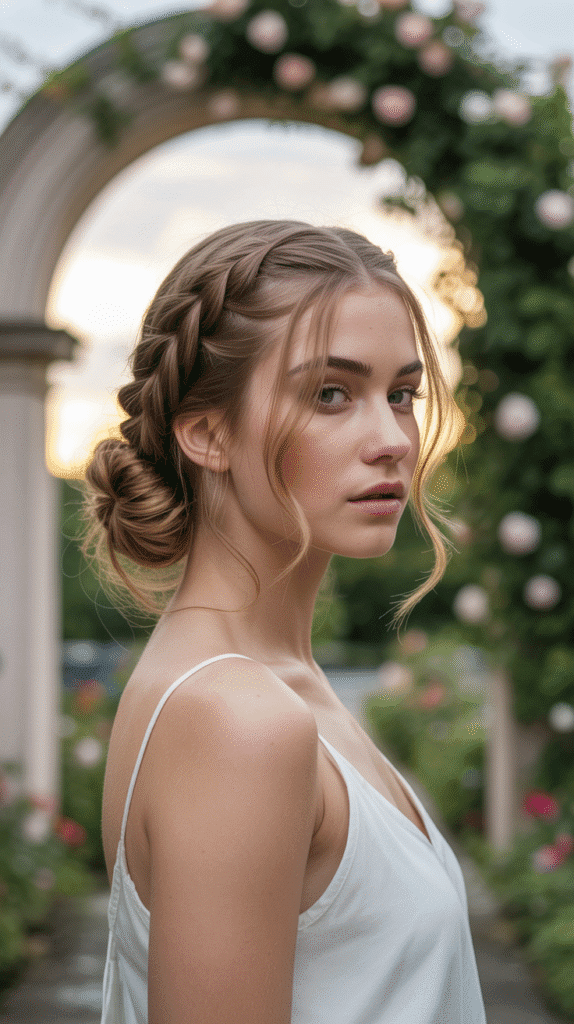
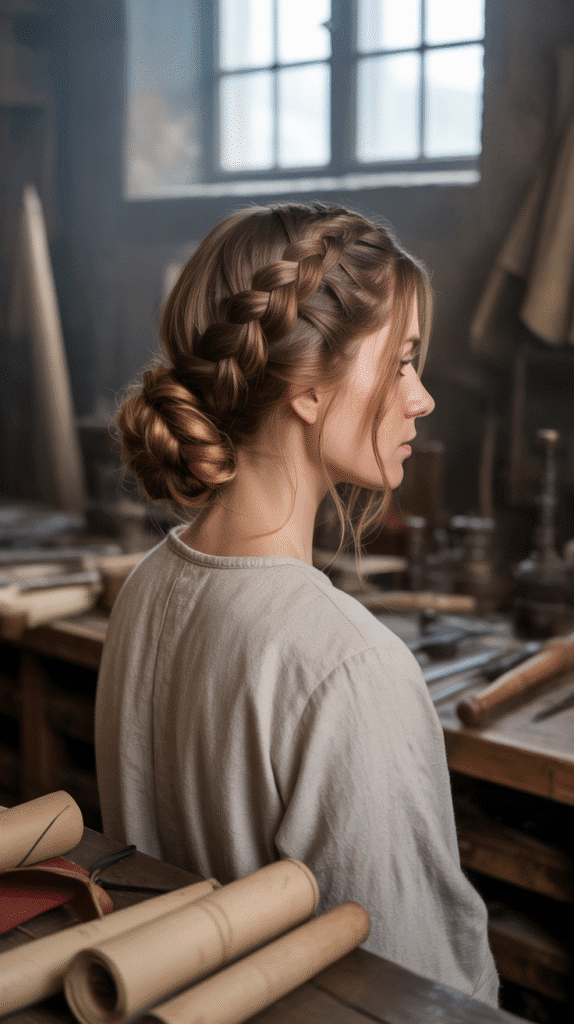
16. The Side-Swept Braided Bun
This asymmetrical style features braids that sweep dramatically from one side of the head to the other before being formed into a bun.
The diagonal line creates visual interest and highlights the braiding work.
- Create a deep side part, sweeping the majority of hair to the opposite side.
- Begin a Dutch braid or French braid starting from the heavy side of the part.
- Braid diagonally across the back of your head toward the opposite shoulder, incorporating all hair.
- Once you’ve gathered all hair into the braid, continue braiding down to the ends.
- Coil the entire braid into a bun at the nape on the opposite side from where you started.
- Pin the bun securely, ensuring the diagonal braid remains visible and prominent.
- Leave a few face-framing pieces on the lighter side of the part for a softer look.
- Add a decorative comb or hairpin where the braid transitions into the bun.
- This style works beautifully for formal medieval events and creates elegant asymmetry.
17. The Byzantine Wrapped Bun
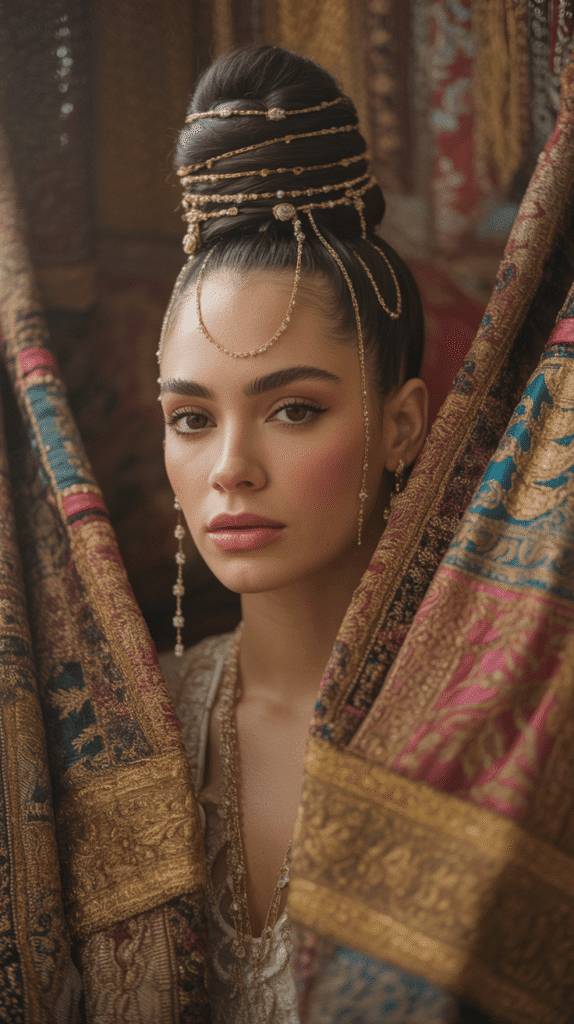
Inspired by Eastern influences that reached medieval Europe through trade routes, this style features fabric or metallic chains wrapped around a high bun.
The Byzantine influence added exotic elegance to Western medieval courts.
- Create a high, smooth ponytail at the crown of your head.
- Twist the ponytail tightly and wrap it around the base to form a neat, round bun.
- Pin the bun securely from multiple angles to ensure stability.
- Take a long piece of decorative chain, metallic cord, or embroidered ribbon.
- Wrap the chain or fabric around the bun in a crisscross or spiral pattern.
- Secure the wrapping material with pins hidden underneath the layers.
- The metallic or jeweled elements should catch light and add dimension to the bun.
- For authentic Byzantine flair, choose gold chains, jeweled bands, or richly colored silk ribbons.
- This style represents the multicultural influences present in medieval fashion and trade.
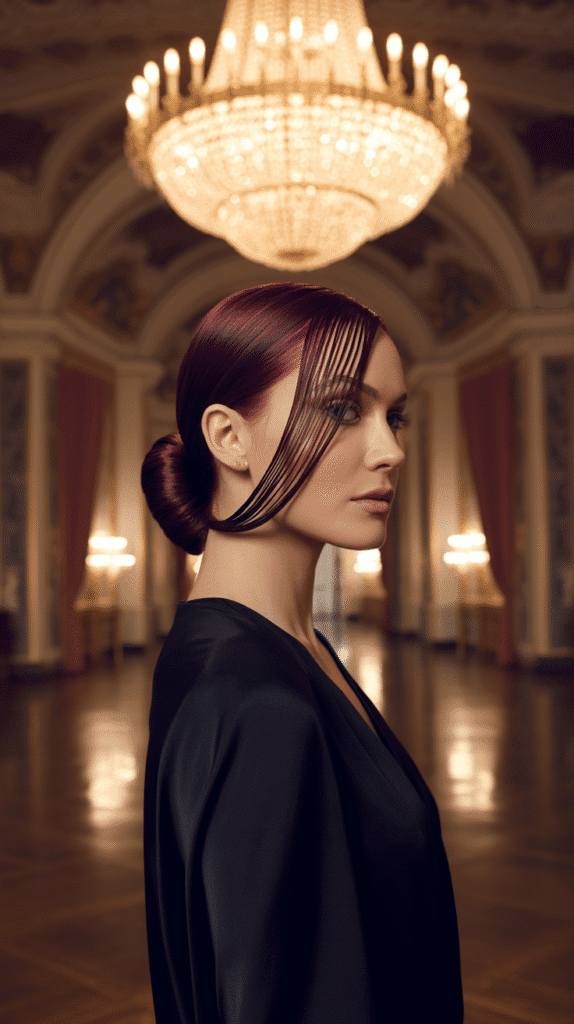
18. The French Hood Inspired Updo
The French hood was a fashionable headpiece in later medieval and Tudor periods, and this updo recreates its elegant, structured appearance using only hair.
The smooth, pulled-back style showcases facial features beautifully.
- Brush all hair straight back from your face, creating a very smooth, sleek appearance.
- Apply styling gel or smoothing cream to eliminate any flyaways or bumps.
- Gather hair at the crown and create a low ponytail at the nape of your neck.
- Twist the ponytail and coil it into a neat, flat bun at the nape.
- Pin the bun securely, keeping it as close to the head as possible for the characteristic streamlined look.
- Ensure the front and sides are perfectly smooth, slicked back without any volume or height.
- For authentic detail, add a decorative curved band or jeweled headpiece across the crown.
- This style emphasizes bone structure and creates a regal, composed appearance.
- The sleek simplicity represents late medieval elegance transitioning into Renaissance fashion.
19. The Ladder Braid Updo
The ladder braid creates a unique visual effect where horizontal strands appear to form rungs across a vertical braid, resembling a ladder.
When formed into an updo, this technical braid becomes a stunning focal point.
- Section off a wide panel of hair from the front of your head down to the nape.
- Divide this section into three strands and begin a regular braid for a few inches.
- Take small horizontal pieces from the sides and weave them through the braid to create the ladder effect.
- Continue the ladder braiding technique down the length of your hair, maintaining consistent spacing.
- Once the ladder braid is complete, coil it into a bun at the nape or crown.
- Pin the bun securely, ensuring the ladder pattern remains visible from the side or back.
- The horizontal “rungs” should be clearly defined and evenly spaced throughout.
- This intricate style showcases advanced braiding skills and creates conversation-worthy elegance.
- Perfect for demonstrating the mathematical precision and artistry that medieval craftspeople valued.
20. The Crimped Volume Updo
Medieval noblewomen sometimes created texture in their hair using heated irons, and this modern interpretation uses crimping to add volume before arranging hair into an updo.
The added texture creates fuller, more dramatic results.
- Use a crimping iron on small sections of hair throughout your entire head to create zigzag texture.
- The crimped texture adds significant volume and makes thin hair appear much fuller.
- Once all hair is crimped, gather it at the crown or nape depending on your preferred style.
- The textured hair will naturally have more grip, making it easier to pin and style.
- Arrange the crimped hair into a voluminous bun, allowing the texture to create natural fullness.
- Pin sections strategically while allowing the crimped texture to show through.
- This style works especially well for those with fine or thin hair who want more dramatic presence.
- The textured, voluminous result mirrors the elaborate, substantial hairstyles favored in medieval courts.
- Add a circlet or crown on top to complete the regal, textured look.
21. The Rope Braid Bun
Rope braids, created by twisting two sections of hair around each other, provide a different texture than traditional three-strand braids.
When formed into a bun, the rope texture creates beautiful spiral patterns.
- Divide your hair into two equal sections at the back of your head.
- Twist the right section clockwise several times until it’s tightly wound.
- Twist the left section clockwise as well, keeping the same tension.
- Now wrap the two twisted sections around each other in a counterclockwise direction.
- The opposing twist directions create tension that holds the rope braid together.
- Continue rope braiding down to the ends and secure with an elastic.
- Coil the rope braid around itself at the crown or nape to form a bun.
- Pin the bun securely, ensuring the spiral rope texture is visible and prominent.
- The rope texture adds visual interest and authenticity to medieval styling.
- Embellish with ribbons woven through the rope braid before forming the bun.
22. The Heart-Shaped Braid Updo
This romantic style creates a heart shape using braids at the back of the head, perfect for expressing courtly love ideals central to medieval romance.
The heart motif was a powerful symbol in medieval art and fashion.
- Part your hair down the center and section off the top third of your hair.
- Divide this top section into two parts, one on each side of the center part.
- Braid each side section down a few inches, then curve each braid inward toward the center back.
- Pin the two braids together at the center back where they meet at a point, forming the bottom of the heart.
- The curved braids should form the two upper lobes of the heart shape.
- Gather the remaining loose hair below the heart shape into a low bun or ponytail.
- Secure everything with bobby pins, ensuring the heart shape is clearly visible and symmetrical.
- This style works beautifully for Valentine’s Day events, medieval weddings, or romantic occasions.
- Add small red flowers or ribbon at the point of the heart for enhanced romantic symbolism.
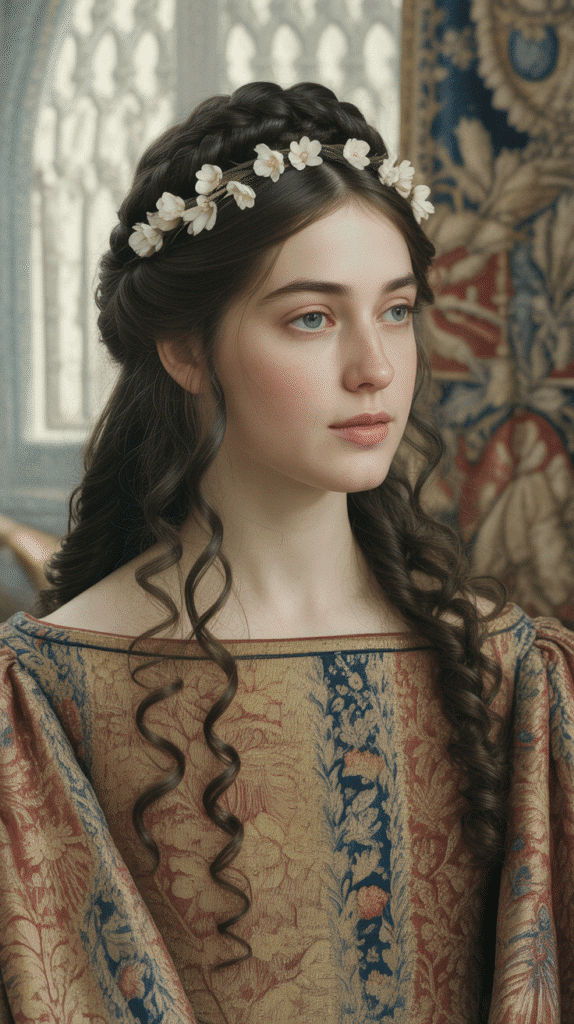
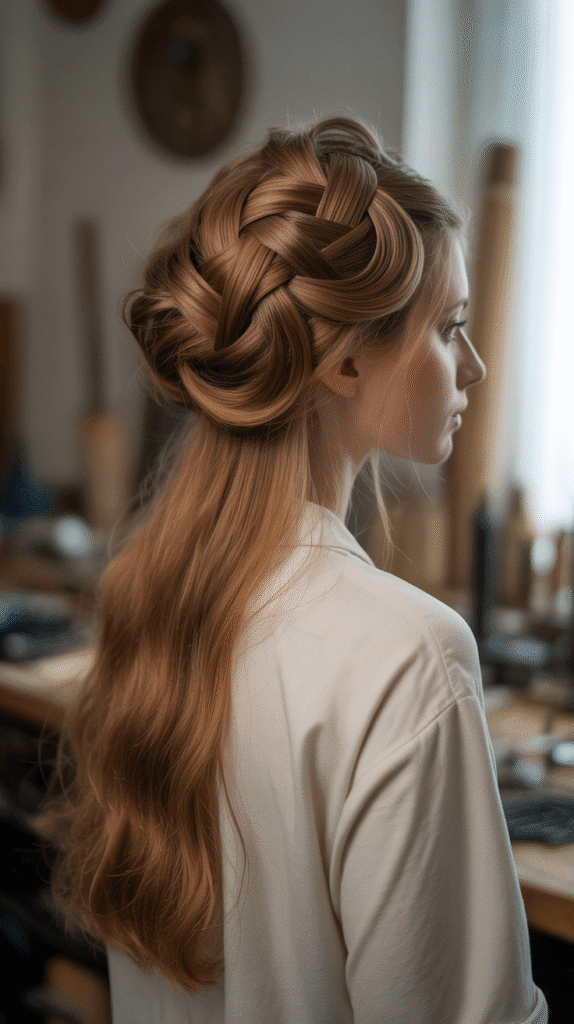
23. The Plaited Crown with Loose Curls
This style combines the structure of a plaited crown with the softness of loose curls cascading down, though the curls are ultimately pinned up for a formal updo effect.
The contrast between structured and flowing elements creates romantic dimension.
- Create a Dutch braid or French braid starting at one temple and working across the crown like a headband.
- Continue the braid to the opposite temple, incorporating hair along the crown as you work.
- Secure the braid and leave the remaining hair loose at the back.
- Curl the loose hair using a curling iron, creating soft, romantic ringlets.
- Gather the curls loosely and pin them at the nape or back of the head in a cascading cluster.
- Allow some curls to escape and frame the face for softness.
- The braided crown provides structure while the pinned curls add romantic volume and movement.
- This style perfectly captures the medieval aesthetic of combining order with natural beauty.
24. The Figure-Eight Bun
This artistic bun creates the shape of the number eight or infinity symbol, representing eternal beauty and the cyclical nature of medieval cosmology.
The unique shape sets this style apart from standard circular buns.
- Gather your hair into a high ponytail at the crown of your head.
- Divide the ponytail into two equal sections.
- Take the right section and loop it into a circle, pinning it at the base to form the top loop of the figure-eight.
- Take the left section and loop it in the opposite direction below the first loop, forming the bottom of the figure-eight.
- Pin where the two loops connect in the center, creating the distinctive figure-eight shape.
- Tuck any loose ends underneath the loops and secure with additional pins.
- The finished style should show two distinct circular loops connected in the middle.
- This geometric approach to hairstyling reflects the medieval appreciation for mathematics and symbolism.
- Add pins or a decorative brooch at the center connection point for embellishment.
25. The Basket Weave Updo
This advanced technique creates the appearance of a woven basket in the hair, with strands interlacing over and under each other in a complex pattern.
The basket weave represents the medieval values of craftsmanship and skilled handiwork.
- Section your hair into multiple vertical strips from the front of your head to the nape.
- Begin weaving by taking one strip over the adjacent strip, then under the next, creating a weaving pattern.
- Continue the over-under pattern across all sections, working systematically from one side to the other.
- Once the weaving is complete, gather all woven sections at the nape.
- Pin the woven sections into an updo formation, maintaining the basket weave pattern’s visibility.
- This technique requires patience and practice but produces stunning, unique results.
- The woven texture catches light differently than braids, creating dimensional interest.
- This style demonstrates the pinnacle of medieval hair artistry and the value placed on intricate handwork.
26. The Circlet-Anchored Braided Updo
This style uses a physical circlet or crown as an anchor point for braids that are woven through and around it.
The combination of jewelry and hair creates an inseparable, regal whole.
- Place a metal circlet, crown, or decorative headband on your head at the desired position.
- Section your hair into multiple parts radiating from around the circlet.
- Create braids from each section, working them through, around, or over the circlet structure.
- The braids can be woven through openings in the circlet or wrapped around its bands.
- Gather all braids at the back of the head and secure them into a central bun or cluster.
- Pin everything securely, ensuring both the circlet and braids are stable.
- The circlet becomes an integral part of the hairstyle rather than just an accessory.
- This style represents the fusion of jewelry and hairdressing common in medieval court fashion.
- Choose circlets with open metalwork or decorative elements that hair can be woven through.
27. The Stacked Coiled Buns
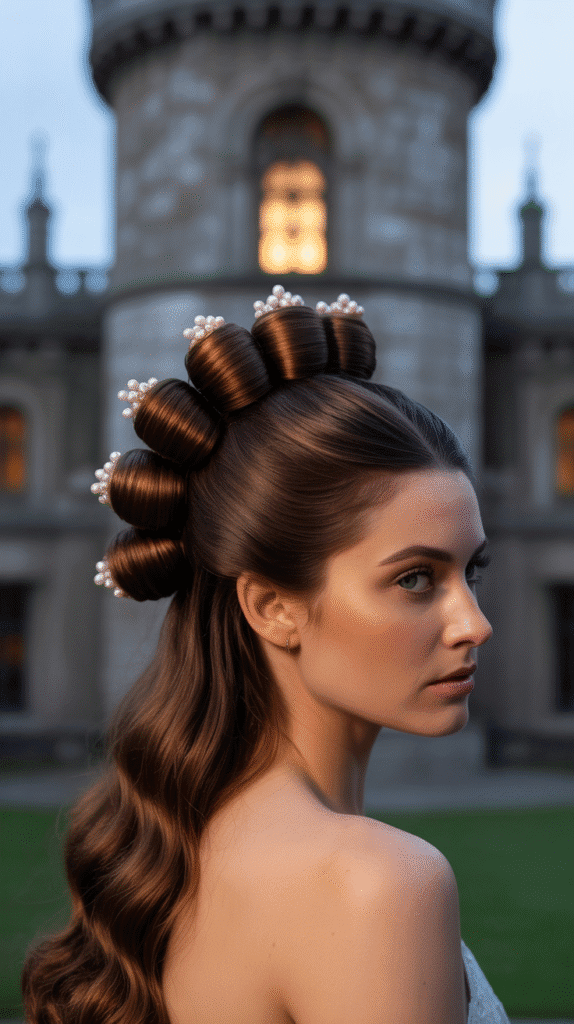
This architectural style features multiple small buns stacked vertically or arranged in a cluster, creating impressive height and dimension.
The multiple coils represent abundance and the elaborate styling available to those of high rank.
- Divide your hair into four to six sections, depending on thickness and desired effect.
- Create a small, tight bun from each section, coiling the hair and pinning it securely.
- Alternatively, cluster the buns together in a horizontal or diagonal arrangement for different visual effects.
- Pin each bun independently, then add additional pins where the buns connect to ensure stability.
- The multiple buns create texture and dimension that catches light from various angles.
- This style works particularly well with hair extensions or padding to create fuller, more dramatic buns.
- Embellish each bun with small jeweled pins, pearls, or decorative hairpins for maximum royal impact.
- The stacked effect mirrors the architectural elements of medieval castle towers and gothic spires.
- This complex updo showcases the time and care that medieval ladies-in-waiting devoted to their mistresses’ appearances.
Styling Tips and Historical Context
Understanding the historical background and practical considerations can help you achieve more authentic and successful medieval updo hairstyles for your princess transformation.
Essential Styling Products and Tools
- Bobby pins and hairpins: Stock both matching your hair color and decorative metallic versions for dual functionality and embellishment.
- Clear elastic bands: These secure ponytails and braids invisibly, maintaining the illusion that hair is held only by pins and artistry.
- Texturizing spray or dry shampoo: Creates grip in slippery, freshly washed hair, making it easier to braid and pin securely.
- Strong-hold hairspray: Medieval ladies didn’t have aerosol sprays, but you can use them to ensure your updo lasts through long events.
- Hair padding or doughnuts: Creates the dramatic height and volume characteristic of high-status medieval hairstyles.
- Decorative elements: Ribbons, chains, flowers, jeweled pins, circlets, and nets add authenticity and personal style to any updo.
- Styling comb with pointed end: The pointed tip helps create clean parts and tuck away loose ends for polished results.
Hair Type Adaptations
- Fine or thin hair: Use crimping, teasing, or volumizing products before styling to create the fullness that medieval updos require; consider clip-in extensions for added thickness.
- Thick or heavy hair: Section hair more thoroughly and use extra-strong bobby pins; you may need to create multiple smaller braids rather than fewer large ones for manageability.
- Curly or textured hair: Embrace your natural texture by stretching curls before braiding, or work with your hair’s natural pattern to create fuller, more textured updos.
- Short hair: Many medieval styles can be adapted using hair extensions, falls, or by focusing on the front sections while using decorative headpieces to cover shorter back sections.
Modern Occasions for Medieval Hairstyles
- Renaissance faires and medieval festivals where period accuracy enhances the immersive experience
- Themed weddings, whether you’re the bride, bridesmaid, or guest at a castle venue or historical celebration
- Costume parties, Halloween events, or cosplay conventions where attention to detail in hair elevates your entire look
- Theater productions, film projects, or historical reenactments requiring authentic period styling
- Formal events where you want to stand out with a unique, conversation-starting hairstyle
- Photo shoots with medieval, fantasy, or fairy-tale themes that require authentic hair styling
- Prom or formal dances where an unexpected historical twist creates memorable elegance
Care and Preparation
- Start with day-old hair that has natural oils and texture, as freshly washed hair can be too slippery to hold intricate styles securely.
- Practice your chosen style several times before the actual event to build confidence and refine your technique.
- Work with a friend or stylist for styles that require braiding or pinning at the back of your head where you can’t easily see.
- Take photos from multiple angles during practice sessions to identify any gaps, loose sections, or areas needing improvement.
- Allow extra time on the day of your event—complex medieval updos can take anywhere from 30 minutes to two hours depending on complexity.
- Keep a small emergency kit with extra bobby pins, hairspray, and a small mirror for touch-ups throughout your event.
Adding Personal Touches
- Choose accessories that reflect your personal style or event theme, whether that’s romantic flowers, dramatic jewels, or Celtic metalwork.
- Consider your costume or dress color when selecting ribbons, flowers, or decorative elements to create a cohesive overall appearance.
- Don’t be afraid to combine elements from multiple hairstyles to create your own unique medieval-inspired updo.
- Research specific historical periods or regions if you want to match your hairstyle to a particular medieval culture or time frame.
- Add face-framing elements like small braids or twisted sections around your hairline to soften the look and flatter your facial features.
Conclusion
The enchanting world of medieval hairstyling offers endless possibilities for creating regal, romantic looks that transport you to an era of castles, courts, and timeless elegance.
Throughout this exploration of “27 Elegant Medieval Updo Hairstyles for Princesses,” we’ve journeyed through intricate braided crowns, jewel-adorned coiled buns, architectural Gothic updos, and romantic flower-woven styles that capture the essence of medieval beauty.
Each hairstyle carries its own historical significance and unique character, from the modest veiled chignons worn by noblewomen to the dramatic stacked buns that showcased wealth and status.
Whether you’re preparing for a Renaissance faire, planning a medieval-themed wedding, creating a costume for a special event, or simply exploring historical beauty techniques, these twenty-seven styles provide comprehensive options for every skill level and hair type.
The techniques you’ve learned—from basic three-strand braiding to advanced basket weaving and ladder braids—represent not just hairstyling methods but connections to centuries of beauty traditions and feminine artistry.
As you recreate these princess-worthy updos, remember that medieval ladies spent hours perfecting their appearance, so patience and practice will reward you with stunning results.
Embrace the creativity, symbolism, and craftsmanship that these elegant medieval updo hairstyles represent, and let them crown you with the timeless beauty and grace of a true princess from ages past.