There’s something undeniably magical about combining the ethereal beauty of elven aesthetics with the natural texture and movement of curly hair.
Whether you’re preparing for a fantasy convention, a themed photoshoot, a Renaissance fair, or simply want to embrace your inner mystical being in everyday life, curly hair offers a unique advantage when creating enchanting elf-inspired looks.
The natural volume, dimension, and flowing quality of curls perfectly complement the otherworldly grace that defines elven beauty in fantasy literature and film.
This comprehensive guide explores 27 Gorgeous Elf Hairstyles for Curly Hair Full of Fantasy Charm, offering detailed instructions, styling tips, and creative variations that celebrate both your natural texture and your love for fantasy aesthetics.
From intricate braided crowns that evoke woodland royalty to loose, romantic styles that capture the free-spirited essence of forest dwellers, each hairstyle has been carefully selected to work beautifully with curly hair patterns ranging from loose waves to tight coils.
You’ll discover how to incorporate traditional elven elements like delicate braids, twisted sections, decorative accessories, and strategic half-up styles while maintaining the health and integrity of your curls.
Beyond just styling techniques, this article provides practical advice on preparation, products that enhance rather than fight your natural texture, and how to adapt each look for different curl types and lengths.
Whether you’re a seasoned fantasy enthusiast or newly exploring the enchanting world of elven hairstyles, these 27 gorgeous options will inspire you to create looks that are both authentically elven and uniquely yours.
1. Waterfall Braid Crown with Cascading Curls
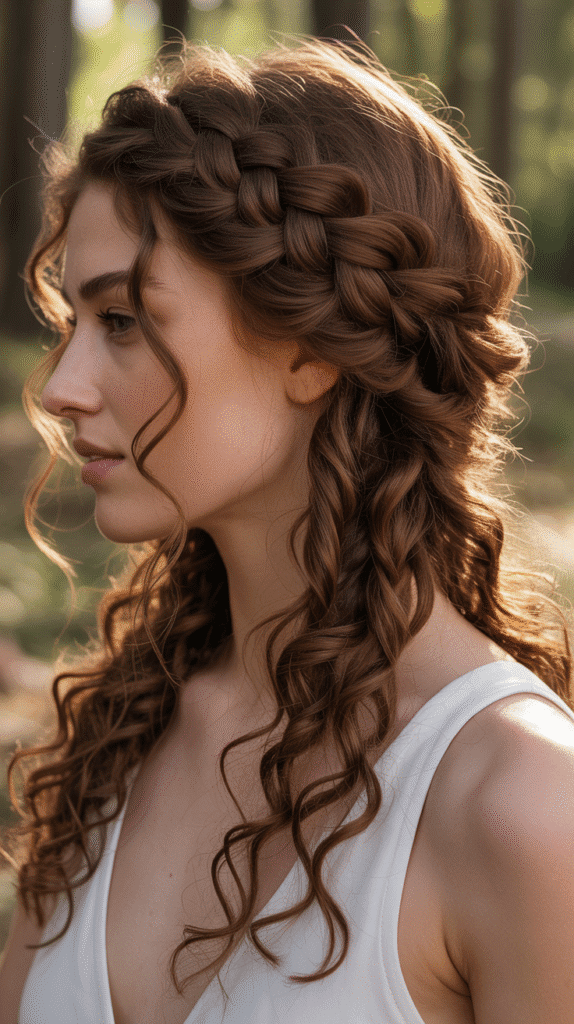
The waterfall braid crown represents one of the most quintessentially elven hairstyles, combining intricate braiding technique with the natural beauty of flowing curls.
This style works exceptionally well for those with medium to long curly hair, as it showcases your curl pattern while adding structured elegance.
The technique involves creating a crown-like braid around the head where sections of hair are continuously dropped through the braid, creating a cascading waterfall effect that beautifully frames the face.
Styling Steps:
- Begin with second-day curls or refresh your curls with a light mist of water mixed with leave-in conditioner to make them more manageable.
- Part your hair deeply on one side and start the waterfall braid just above your ear on the heavier side.
- Take a three-strand section and begin a regular braid, but after the first stitch, drop the bottom strand and pick up a new section from the top.
- Continue this pattern around your head like a crown, letting the dropped sections fall naturally with your curls.
- Secure the braid behind the opposite ear with bobby pins that match your hair color.
- Gently pull and pancake the braid to make it appear fuller and more romantic.
- Allow the remaining curls to cascade freely down your back and over your shoulders.
- Finish with a light-hold hairspray or curl-enhancing spray to maintain definition without crunchiness.
2. Half-Up Twisted Rope Braids with Volume

This style perfectly balances structure and freedom, a hallmark of elven aesthetics that represents both strength and grace.
The twisted rope braids create clean, defined lines that beautifully contrast with the natural volume and texture of curly hair below.
This versatile style works for all curl types and can be dressed up with accessories or kept simple for everyday elven elegance.
Styling Steps:
- Start with moisturized, defined curls by applying your favorite curl cream or gel to damp hair and allowing it to air dry or diffuse.
- Take a horizontal section of hair from temple to temple, approximately two inches back from your hairline.
- Divide this section into two equal parts at the center of your head.
- Create rope braids on each side by splitting each section into two strands and twisting them around each other while keeping each individual strand twisted in the same direction.
- Pull the rope braids back toward the center and secure them together with a clear elastic or decorative hair tie.
- Gently tug on the twists to create more width and a softer, more romantic appearance.
- Allow the remaining curls to maintain their natural volume and bounce.
- Add small decorative elements like tiny flowers, crystals, or elven-style hair jewelry where the braids meet for extra fantasy charm.
3. Side-Swept Elven Braid with Loose Curls
The side-swept elven braid embodies romantic asymmetry and showcases the beautiful interplay between structured braiding and free-flowing curls.
This style draws attention to the face while creating an elegant, off-balance composition that feels both intentional and effortlessly beautiful.
It’s particularly flattering for those with oval or heart-shaped faces and works wonderfully for formal fantasy events.
Styling Steps:
- Deep condition your curls the night before to ensure maximum softness and definition.
- Create a deep side part, leaving approximately 70% of your hair on one side.
- On the heavier side, take a section near your part and begin a Dutch braid (an inverted French braid where you cross sections under rather than over).
- Braid along your hairline, incorporating new sections as you move toward your ear and then down toward your shoulder.
- As you reach your shoulder, transition to a regular three-strand braid and continue to the ends.
- Secure with a small elastic and gently pancake the braid for dimension.
- Sweep all your hair over the braided side, allowing curls to cascade over your shoulder.
- On the opposite side, pin a small section behind your ear to keep that side sleek and showcase the asymmetry.
- Finish by scrunching in a curl-enhancing serum to add shine and definition to the loose curls.
4. Double Dutch Braids into Low Curly Bun
This style combines the warrior-like practicality of Dutch braids with the soft femininity of a curly bun, making it perfect for active elven characters or those who need their hair secured but still want fantasy elegance.
The double braids create beautiful framing while the low bun showcases your curl texture in a sophisticated way.
Styling Steps:
- Start with refreshed curls that have been lightly dampened and treated with a curl-defining product.
- Create a center part from your forehead to the crown of your head.
- Beginning on one side, take a section at your hairline and start a Dutch braid, crossing sections under the middle strand.
- Continue braiding along your hairline and down the side of your head, stopping at the nape of your neck.
- Repeat the exact process on the other side, ensuring both braids are symmetrical.
- Gather all remaining hair, including the ends of both braids, at the nape of your neck.
- Twist the gathered hair loosely and wrap it into a low bun, securing with bobby pins.
- Pull out a few face-framing curls on each side to soften the look.
- Gently pull apart the bun slightly to create a fuller, more textured appearance that showcases your curls.
- Secure any flyaways with a light-hold hairspray or smoothing serum on your edges only.
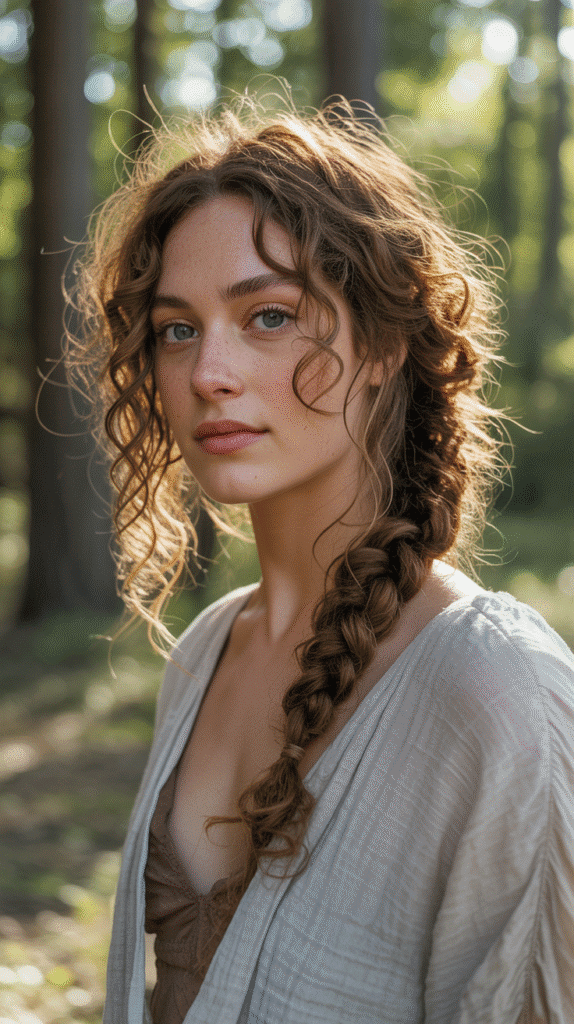
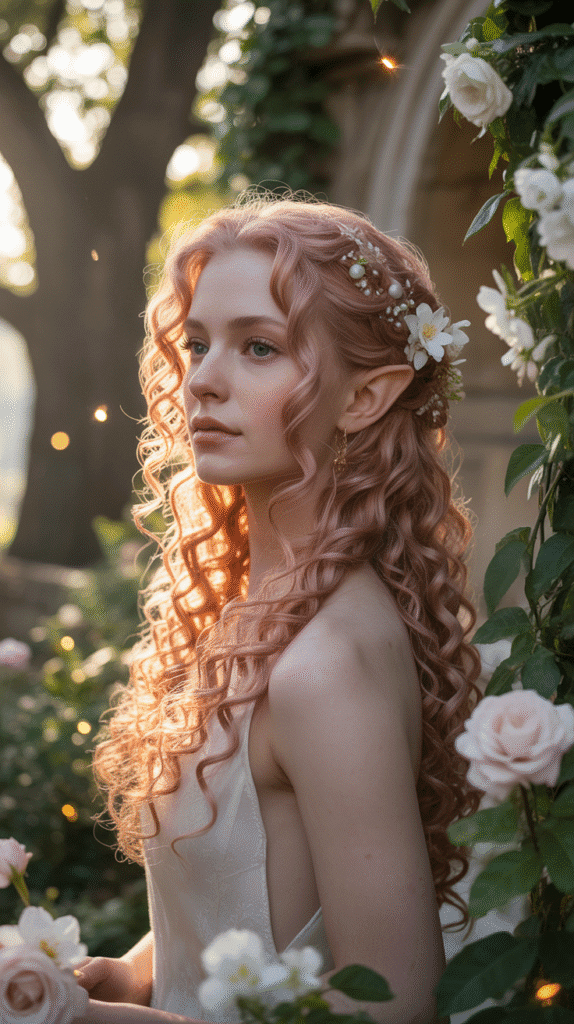
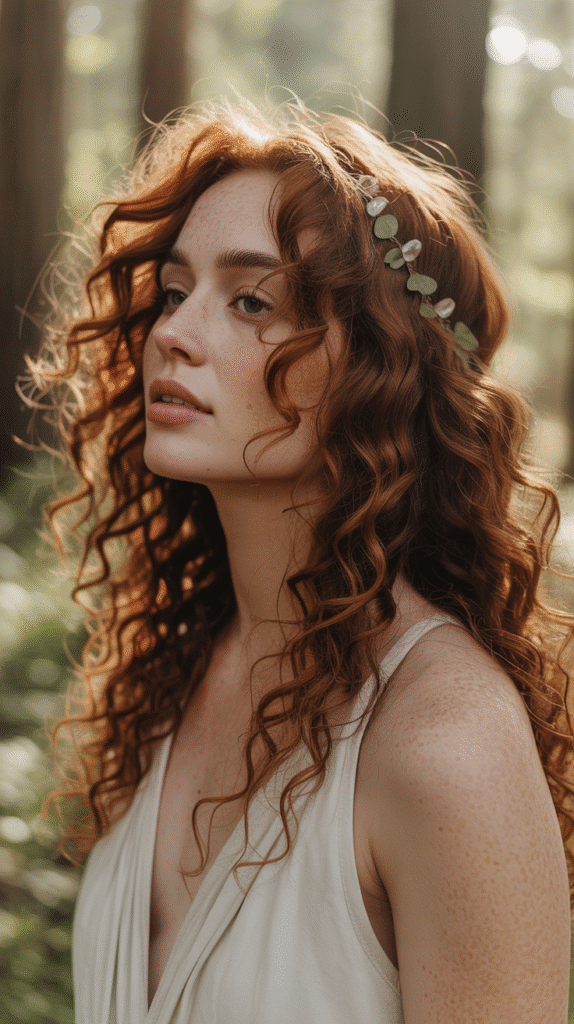
5. Flower Crown with Free-Flowing Curls
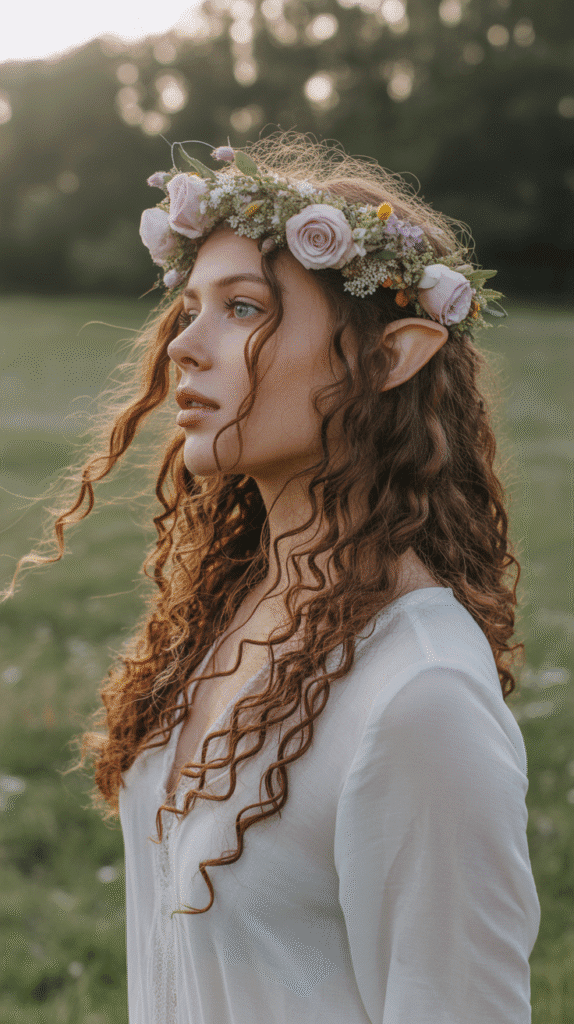
Perhaps one of the most iconic elven looks, the flower crown with free-flowing curls captures the essence of nature-connected fantasy beings.
This style requires minimal manipulation of your natural curl pattern while adding enchanting embellishment that connects the wearer to the natural world.
It’s ideal for festivals, weddings, photoshoots, or any occasion where you want to channel woodland royalty.
Styling Steps:
- Enhance your natural curl pattern by applying a curl cream to damp hair and allowing it to dry naturally or with a diffuser on low heat.
- Once completely dry, gently separate larger curl clumps with your fingers to create more volume without creating frizz.
- Create a flower crown using fresh flowers, artificial flowers, or purchase a pre-made crown from craft stores or online retailers like Etsy.
- If making your own, use floral wire and tape to secure small blooms, greenery, and delicate filler flowers into a circular crown shape.
- Position the flower crown approximately one to two inches back from your hairline, resting it where a natural crown would sit.
- Secure the flower crown with bobby pins inserted through the crown base and into your hair at multiple points.
- Allow your curls to flow naturally and freely, falling past your shoulders and down your back.
- Pull a few small sections of curls forward over your shoulders for a romantic, dimensional look.
- Consider adding small matching flowers or greenery tucked into random curls throughout your hair for a cohesive, enchanted appearance.
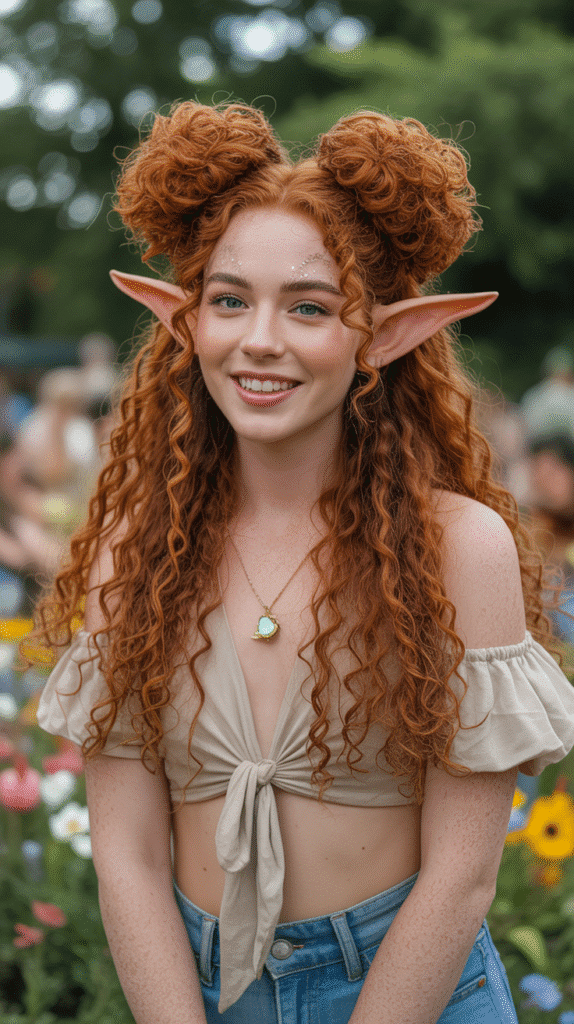
6. Elven Ear Braids with Central Volume
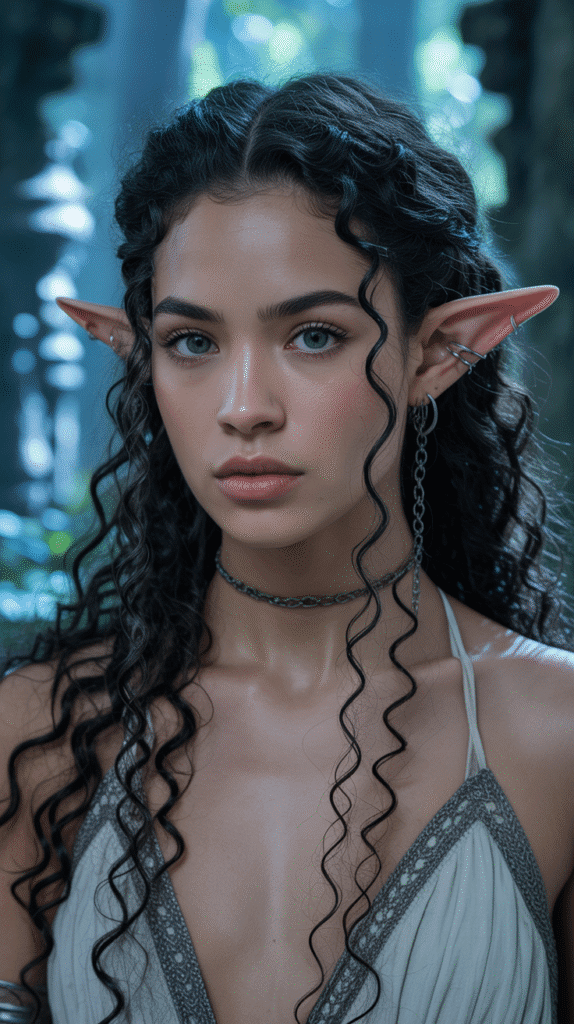
This distinctive style features small decorative braids that frame the ears while maintaining maximum volume through the crown and length.
The ear braids can showcase pointed elf ears (whether prosthetic or natural) while the voluminous curls create a dramatic, eye-catching silhouette.
This look works particularly well for those with high-volume curly hair who want to keep their curls as the focal point.
Styling Steps:
- Begin with fully defined, dry curls that have been styled with your preferred curl-enhancing products.
- Section your hair by taking a vertical parting from your forehead to the nape of your neck on both sides, approximately two inches from your ears.
- Clip away the center section to maintain volume and keep it out of the way.
- On each side, take small sections near your temples and create thin three-strand braids that travel down along the front of your ears.
- These braids should be tight enough to stay secure but not so tight that they cause tension.
- Secure each ear braid with a small, clear elastic at approximately jaw level.
- Release the center section and shake out your curls to maximize volume at the crown.
- Arrange the voluminous center section so it slightly overlaps the ear braids, creating depth and dimension.
- Weave small decorative elements like metal cuffs, ear chains, or tiny crystal beads into the ear braids for added elven aesthetic.
7. Bohemian Messy Crown Braid
The bohemian messy crown braid embraces the more relaxed, free-spirited side of elven aesthetics, perfect for wood elves or nature-dwelling fantasy characters.
This style intentionally incorporates texture and “imperfection” to create an effortlessly beautiful look that celebrates the wild, untamed quality of natural curls while still incorporating traditional braiding elements.
Styling Steps:
- Work with second or third-day curls that have natural texture and aren’t freshly washed, as this provides better grip for braiding.
- Create a center part and divide your hair into two equal sections from the center part down to behind your ears.
- Starting on one side, create a loose three-strand braid beginning at your hairline and working horizontally across your head like a headband.
- Intentionally leave the braid loose and allow small curls to escape as you work for that bohemian texture.
- When you reach the opposite side, secure the braid temporarily with a clip.
- Repeat the process on the second section, braiding in the opposite direction.
- Cross the ends of both braids at the back of your head and tuck them under the opposite braid, securing with bobby pins.
- Gently pull and loosen the braids even more to create a soft, messy halo effect.
- Allow remaining curls at the nape and underneath to flow freely and naturally.
- Pull out a few additional face-framing pieces and curl-defining cream to enhance the bohemian aesthetic.
8. High Ponytail with Braided Wrap
This style combines the practical elegance of a high ponytail with decorative braiding that conceals the hair elastic and adds fantasy flair.
The elevated placement creates a fountain-like cascade of curls that emphasizes curl pattern and volume while the braided wrap adds an intentional, polished detail that elevates the look from simple to sophisticated.
Styling Steps:
- Refresh your curls with a curl reactivating spray or water mixture, then scrunch in a curl cream for definition.
- Flip your head upside down and gather all your hair at the crown of your head for maximum lift.
- Secure with a strong, snag-free elastic that can handle the weight of curly hair.
- Once secured, take a small section from the underside of the ponytail (approximately one inch wide).
- Create a tight three-strand braid with this section, braiding all the way to the ends.
- Wrap this braid around the elastic base of the ponytail, covering it completely.
- Secure the end of the braid underneath the ponytail with a bobby pin that matches your hair color.
- Fluff and arrange the curly ponytail to create maximum volume and dimension.
- Allow a few curly tendrils to fall naturally around your face for a softer appearance.
- Apply a light shine serum or oil to the curls in your ponytail to enhance definition and add luminosity.
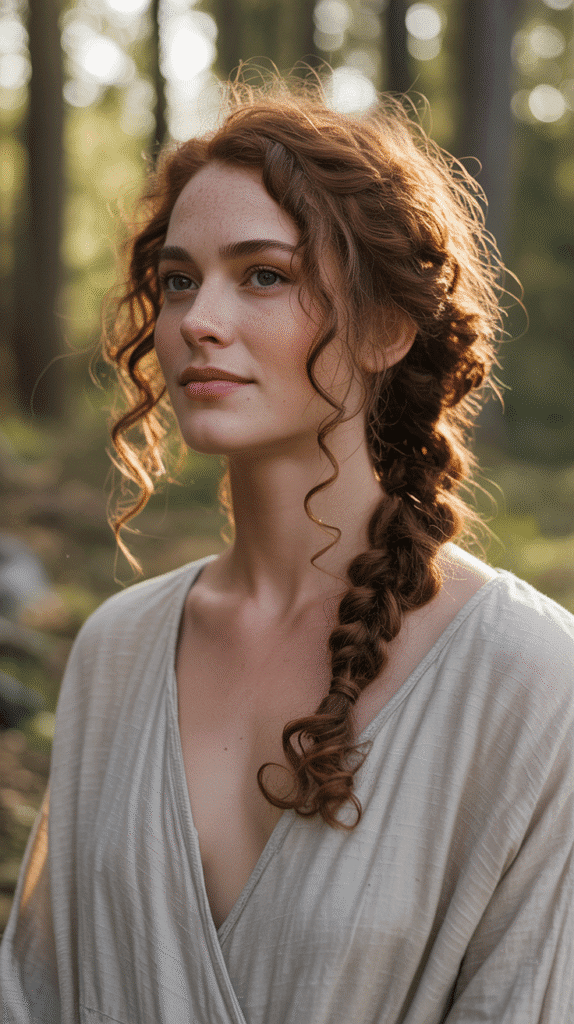
9. Intricate Side Braid with Curl Framing
This asymmetrical style showcases advanced braiding skills while allowing your natural curls to shine.
The intricate side braid can incorporate multiple braiding techniques—French, Dutch, fishtail, or combinations—creating visual interest and texture that complements rather than competes with your curl pattern.
This look is particularly stunning for formal fantasy events or character cosplay.
Styling Steps:
- Prepare your curls by applying a strong-hold curl cream to damp hair and allowing it to dry completely for maximum definition.
- Create a deep side part with approximately 80% of your hair on one side.
- On the heavier side, take a large section from your part down to your ear.
- Begin with a Dutch braid at the part, incorporating new sections as you braid along your hairline.
- After several stitches, transition into a fishtail braid by dividing the section into two pieces and alternately crossing small sections from outside to center.
- Continue the fishtail braid down past your shoulder, working with your natural curl pattern rather than pulling too tight.
- Secure the end with a small elastic and pancake the braid gently for width and dimension.
- On the opposite side, pin a small section behind your ear, leaving a few curly tendrils to frame your face.
- Allow the remaining curls to fall naturally over the opposite shoulder from the braid.
- Add small decorative elements like hair jewelry or metallic thread woven through the braid for extra fantasy detail.
10. Half-Up Top Knot with Flowing Curls
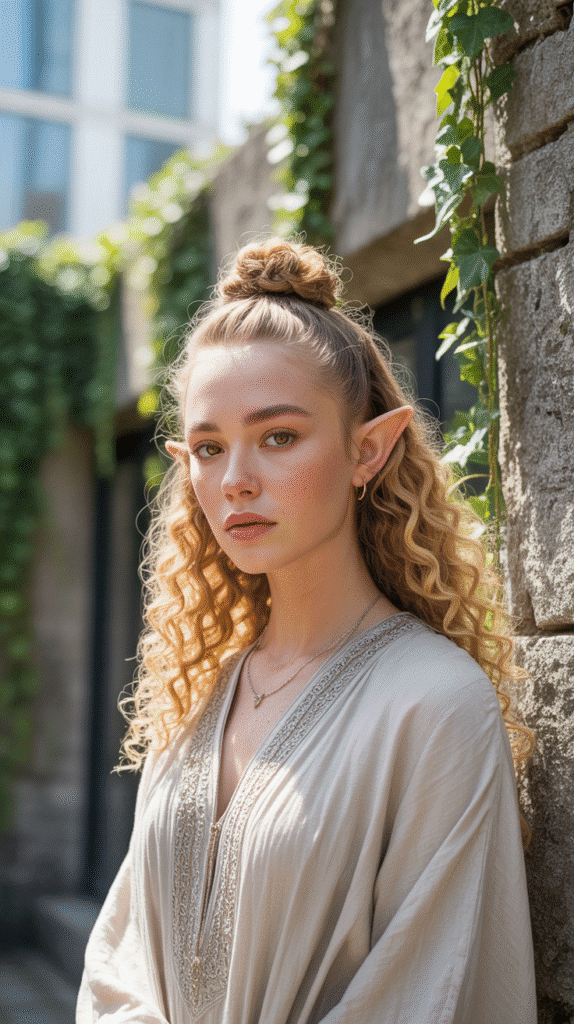
This contemporary take on elven hairstyling combines modern trends with fantasy aesthetics, creating a look that feels both current and timelessly magical.
The half-up top knot provides structure and interest at the crown while allowing the majority of your curls to flow freely, creating a beautiful contrast between the secured and loose sections.
Styling Steps:
- Start with well-defined curls that have been styled with a curl-enhancing gel or mousse for hold.
- Section hair horizontally from temple to temple, approximately three inches back from your hairline.
- Gather this top section at the crown of your head where you want the top knot positioned.
- Twist the gathered section several times to create a rope-like texture.
- Wrap the twisted section around itself to form a small, textured bun or knot.
- Secure the top knot with bobby pins inserted from various angles for maximum security.
- Pull small pieces from the knot to create a deliberately messy, textured appearance.
- Allow the remaining curls to maintain their natural volume and definition.
- Pull a few small curly sections from the hairline to frame your face softly.
- Optionally wrap a small braid or decorative hair jewelry around the base of the top knot for added elven detail.
11. Twisted Halo with Cascading Ringlets
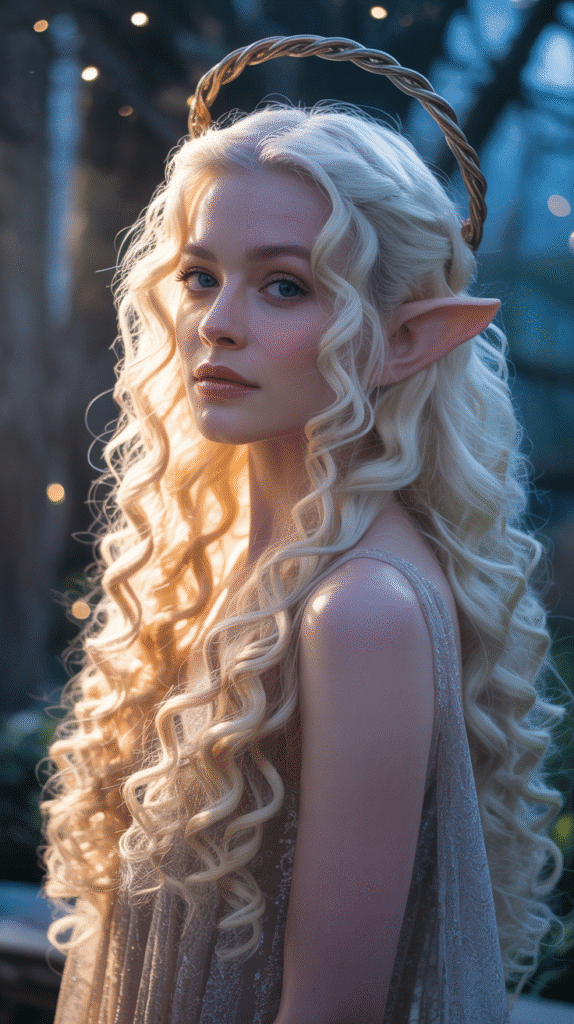
The twisted halo creates an angelic, crown-like effect that’s deeply rooted in elven aesthetics while being surprisingly simple to achieve.
This style works exceptionally well for those with medium to long curls, as it creates a beautiful frame for the face while showcasing your curl definition in the length.
The halo effect evokes royalty and ethereal beauty without requiring complex braiding skills.
Styling Steps:
- Begin with second-day curls that have been lightly refreshed with a water and leave-in conditioner mixture.
- Create a deep center part and divide your hair into two equal sections.
- Starting on one side at your part, take a two-inch section and divide it into two strands.
- Twist these two strands around each other while keeping each individual strand twisted in the same direction.
- Continue adding small sections to the twist as you work along your hairline, similar to a French twist technique.
- Bring the twist around the back of your head like a headband or halo.
- Repeat the process on the other side, meeting the first twist at the back center.
- Pin both twists together securely, tucking the ends underneath.
- Allow all remaining curls to cascade naturally down your back.
- Gently pull on the twists to create width and a softer, more romantic appearance.
- Finish by scrunching a lightweight curl-defining cream through the loose ringlets for added definition and shine.
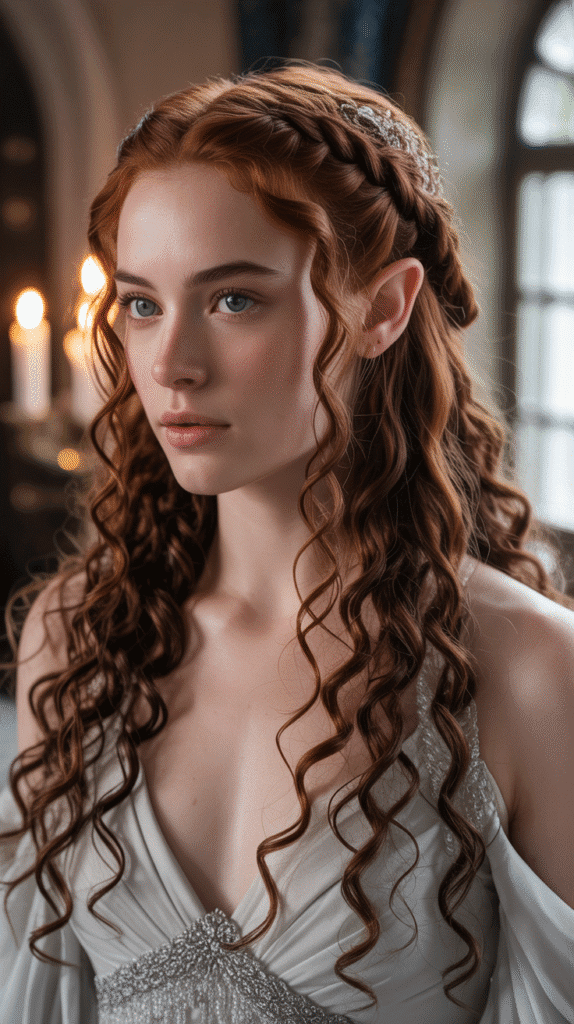
12. Braided Half-Crown with Pinned Curls
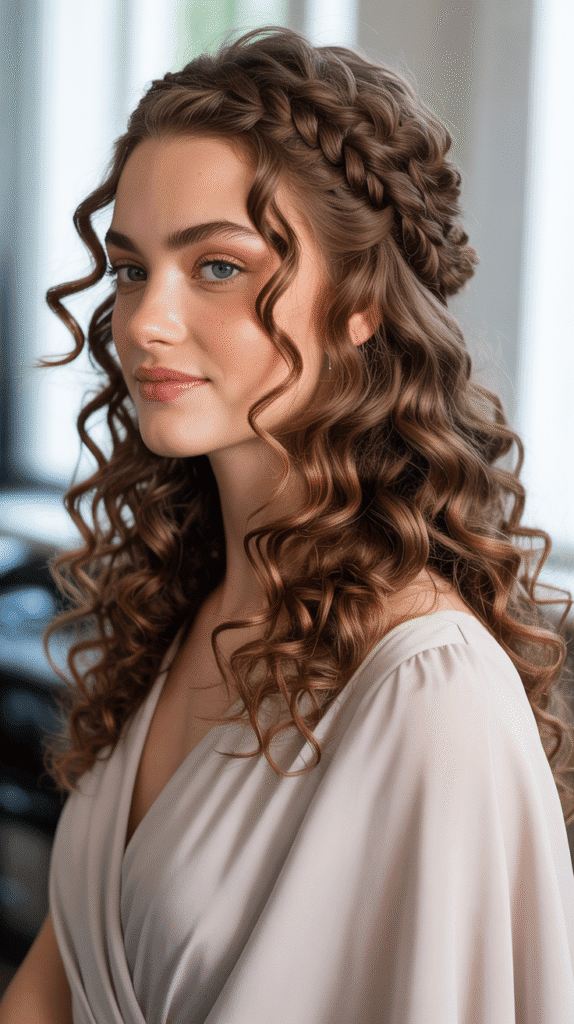
This sophisticated style combines the elegance of a braided crown with strategically pinned curls that create volume and dimension while keeping hair beautifully controlled.
It’s ideal for formal fantasy occasions and works particularly well for those who want a structured look that still celebrates their natural curl texture.
The combination of braided and pinned elements creates visual interest from all angles.
Styling Steps:
- Prepare curls with a strong-hold styling product to ensure they maintain their shape when pinned.
- Create a horizontal part from ear to ear across the top of your head, approximately three inches back from your hairline.
- Divide this front section into two parts at the center.
- Create a Dutch braid on each side, starting at the center and working outward toward each temple.
- Stop the braids at your temples and secure them temporarily with clips.
- Take small sections of curls from the remaining hair and pin them up against the head, creating a textured, voluminous arrangement.
- Use bobby pins that match your hair color, crossing them in an X pattern for security.
- Continue pinning curls up the back of your head, working toward where the braids end.
- Secure the ends of the braids into the pinned curls, concealing where they end.
- Pull gently on the braids to create width and dimension.
- Leave a few curls unpinned at the nape or around the face for a softer, more romantic finish.
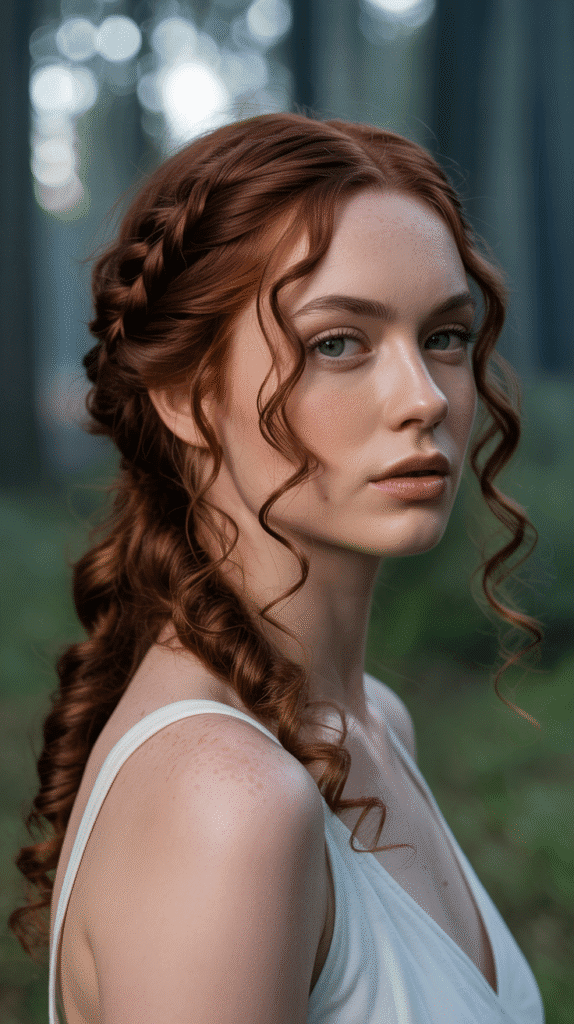
13. Loose Rope Braid Down the Back
This effortlessly beautiful style showcases length while incorporating just enough structure to feel intentionally styled.
The loose rope braid is one of the easiest braiding techniques to master and works wonderfully with curly hair because it doesn’t fight against your natural texture.
Instead, it incorporates your curl pattern into the braid itself, creating a dimensional, textured effect.
Styling Steps:
- Start with defined, dry curls that have been styled with your preferred curl products.
- Gather all your hair at the nape of your neck as if creating a low ponytail, but don’t secure it yet.
- Divide the gathered hair into two equal sections.
- Take the right section and twist it clockwise several times until it begins to coil on itself.
- Take the left section and twist it clockwise as well (both sections twist in the same direction).
- Now wrap the two twisted sections around each other in a counter-clockwise direction (opposite to how you twisted the individual sections).
- This creates a rope braid that naturally wants to stay together due to the opposing tension.
- Secure the end with a hair elastic, leaving several inches of curly ends loose.
- Gently pull on the rope braid to loosen it and create more width and volume.
- Pull out small curls and tendrils around your face and hairline for a softer appearance.
- Apply a light oil or shine serum to enhance the definition and add luminosity to your curls.
14. Asymmetrical Braid with Undone Texture
This contemporary elven style embraces the beauty of asymmetry and intentionally imperfect texture.
The undone aesthetic creates a more relaxed, approachable version of traditional elven formality while still maintaining fantasy charm.
This look is perfect for those who want an elven-inspired style without excessive time investment or rigid structure.
Styling Steps:
- Work with naturally textured, unwashed curls (second or third day) for better grip and that lived-in appearance.
- Create an off-center part, positioning it approximately three inches from your temple on one side.
- On the side with more hair, take a section from the part and begin a loose French braid.
- Intentionally leave the braid loose and allow curls to escape naturally as you work.
- Braid only halfway down the section, then secure with a small elastic and leave the rest loose.
- Allow the braid to rest naturally along the side of your head without pulling it too tight against your scalp.
- On the opposite side, simply tuck hair behind your ear or leave it flowing naturally across your face.
- Scrunch additional curl-defining product through the loose sections to enhance texture.
- Gently pull apart the braid even more to create maximum looseness and dimension.
- Embrace any flyaways or pieces that escape the braid as part of the intentionally undone aesthetic.
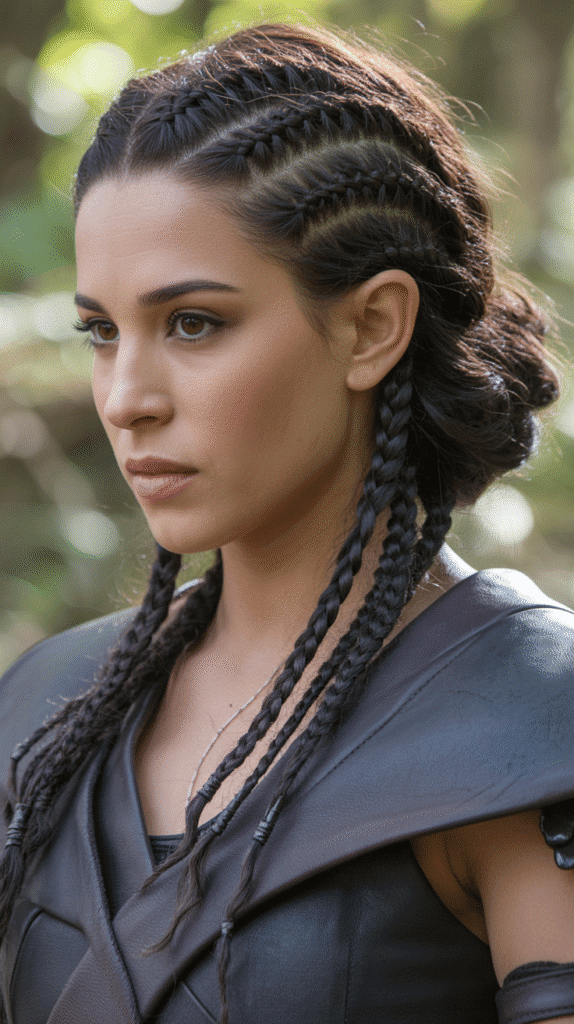
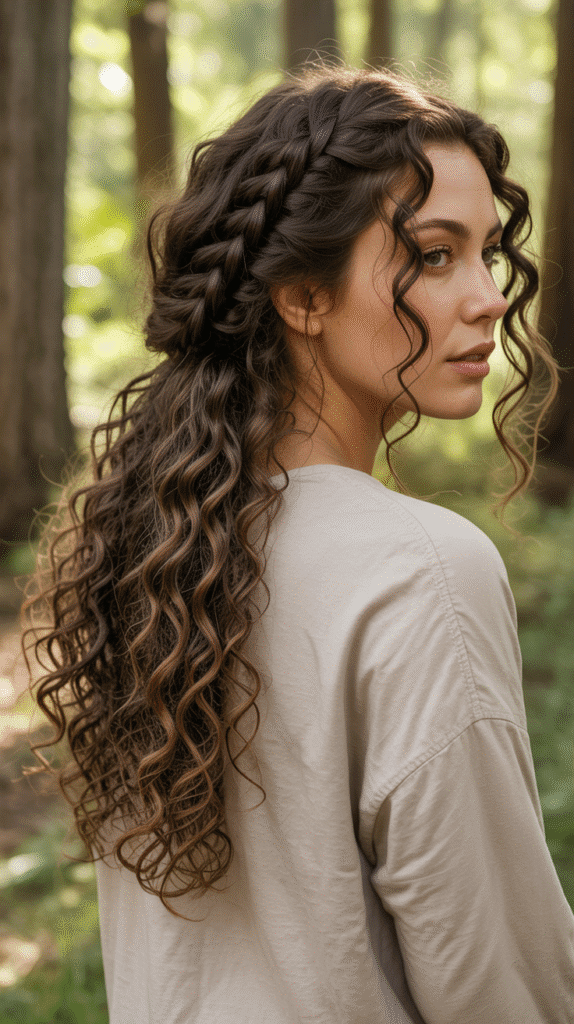
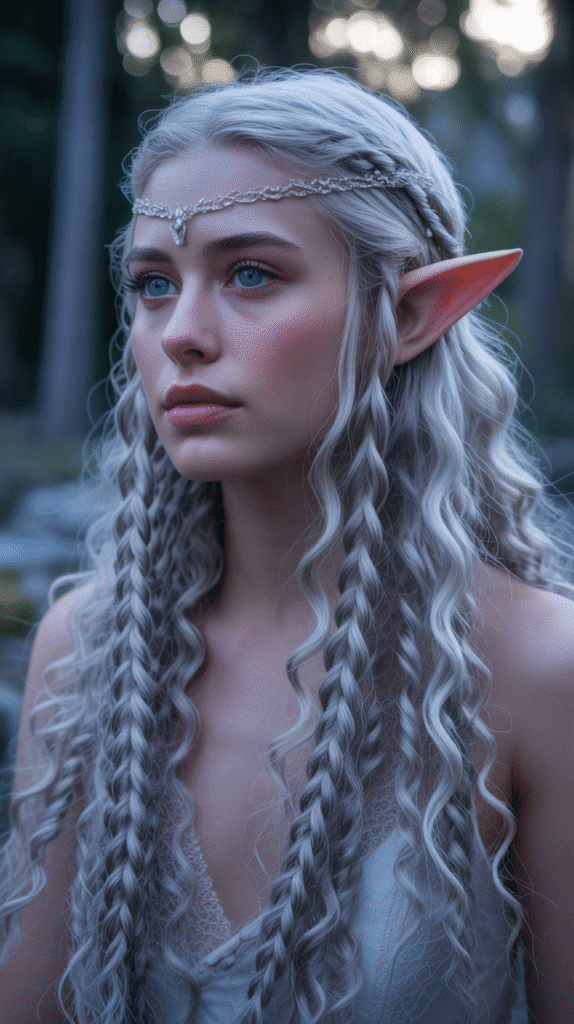
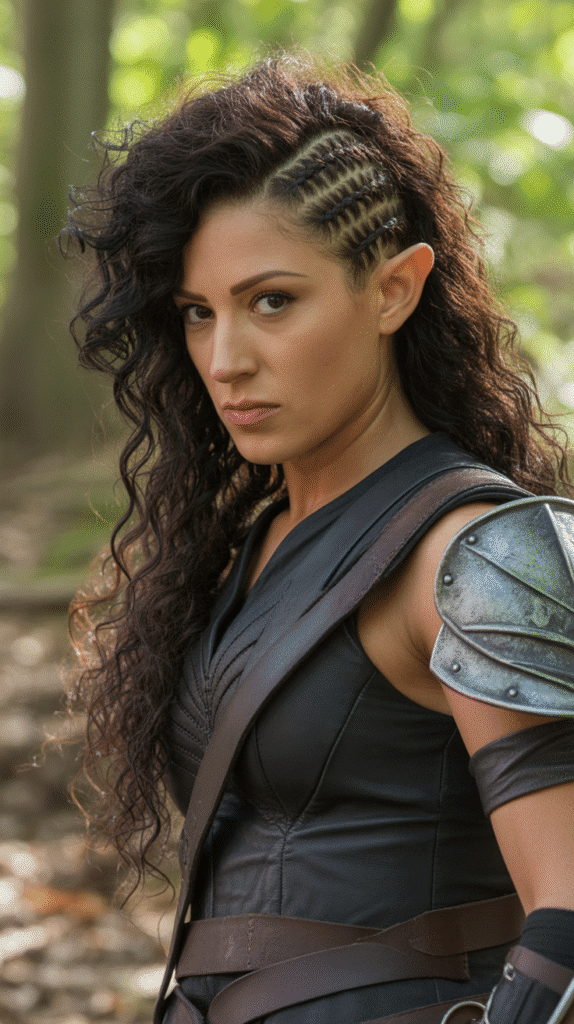
15. Multiple Small Braids with Curl Integration
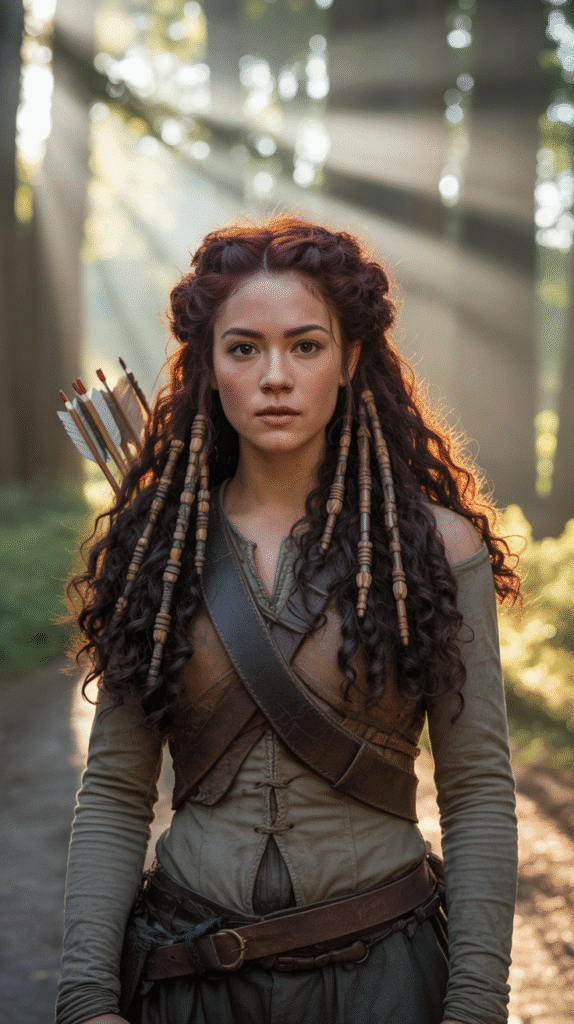
This style celebrates the versatility of combining numerous small braids throughout your curls, creating visual interest and fantasy detail without completely constraining your hair.
Drawing inspiration from elven warriors and rangers, this look is both decorative and practical.
The multiple braids can be placed randomly or in intentional patterns, allowing for personalization and creativity.
Styling Steps:
- Begin with defined curls that have been moisturized and styled with a curl cream or gel.
- Section your hair loosely, deciding where you want to place your small braids.
- Create 5-10 small three-strand braids in various locations throughout your hair—some at the hairline, some at the temples, some within the main body of curls.
- Vary the width of the braids from very thin (pencil-width) to slightly thicker (finger-width) for visual diversity.
- Secure each small braid with a tiny clear elastic or small decorative bead.
- Allow the majority of your curls to remain loose and free-flowing between and around the braids.
- The braids should feel integrated into your curls rather than sitting separately from them.
- Gently pull on some of the braids to loosen them and create a more organic, lived-in appearance.
- Add small decorative elements like metal beads, leather wraps, or colored thread to random braids for extra detail.
- Finish by scrunching a curl-refreshing spray through the loose sections to re-activate curl definition.
16. Low Braided Bun with Wispy Curls
This elegant style combines sophistication with softness, perfect for formal fantasy occasions or events where you need your hair secured but still want to showcase your curl texture.
The low placement creates an elongated neckline while the braided element adds structure and visual interest.
Wispy curls escaping around the face prevent the style from looking too severe or buttoned-up.
Styling Steps:
- Start with curls that have been defined with styling products and are completely dry.
- Leave out small sections of curls around your hairline and face before gathering the remaining hair.
- Collect all remaining hair at the nape of your neck and create a low ponytail.
- Divide the ponytail into three sections and create a loose three-strand braid.
- Secure the end of the braid with a small elastic.
- Wrap the braid around the base of the ponytail to form a bun shape.
- Secure the bun with bobby pins inserted from multiple directions.
- Gently pull on the braid within the bun to create more volume and texture.
- Allow the face-framing curls you left out to fall naturally, creating a soft, romantic border.
- Pull out a few additional small curls from the bun and around the nape for added dimension.
- Finish with a flexible-hold hairspray to keep the style secure without making it stiff.
17. Braided Headband with Maximum Volume
This style creates the appearance of a braided headband without actually using an accessory, keeping all the focus on your natural hair.
The braided sections frame the face beautifully while the voluminous curls behind create dramatic dimension and movement.
This look works particularly well for those with high-volume curly hair who want to keep their curls as the main feature.
Styling Steps:
- Begin with fully dry, defined curls that have maximum volume (avoid products that weigh hair down).
- Create a horizontal part from ear to ear approximately two inches back from your hairline.
- Divide this front section into two parts at the center of your head.
- On one side, create a Dutch braid starting at the center and working toward your temple.
- Continue the braid just behind your ear and down about two inches, then secure with a small elastic.
- Repeat on the other side, creating a symmetrical Dutch braid.
- These two braids should create a headband effect across the front of your head.
- Leave all remaining hair completely loose and maximize volume by gently separating curl clumps.
- Fluff the crown area to create even more height and dimension.
- Tuck the ends of the braids into the voluminous curls behind them, concealing where they end.
- Apply a volumizing spray or mousse to the roots and scrunch for added lift.
18. Twisted Side Updo with Loose Curls
This romantic asymmetrical style combines twisted sections that are pinned on one side with beautifully loose curls cascading over the opposite shoulder.
The twisted updo creates visual interest and structure on one side while the flowing curls provide balance and showcase your natural texture.
This style is ideal for weddings, photoshoots, or any occasion requiring elegant fantasy aesthetics.
Styling Steps:
- Start with defined curls that have been enhanced with a curl cream and are completely dry.
- Create a deep side part, leaving approximately 75% of your hair on one side.
- On the side with less hair, take a section at your temple and divide it into two strands.
- Twist these two strands around each other, adding small sections as you work back toward your ear.
- Pin this twisted section behind your ear with bobby pins.
- Take another section from behind the first twist and repeat, creating a second twist.
- Continue creating 2-3 twisted sections on this lighter side, pinning each one as you work toward the back.
- The heavier side with more hair should remain completely loose and free-flowing.
- Sweep all the loose curls over the opposite shoulder from the twisted side.
- Arrange and fluff the loose curls to create maximum volume and dimension.
- Add small flowers, crystals, or elven hair jewelry to the pinned side for additional decoration.
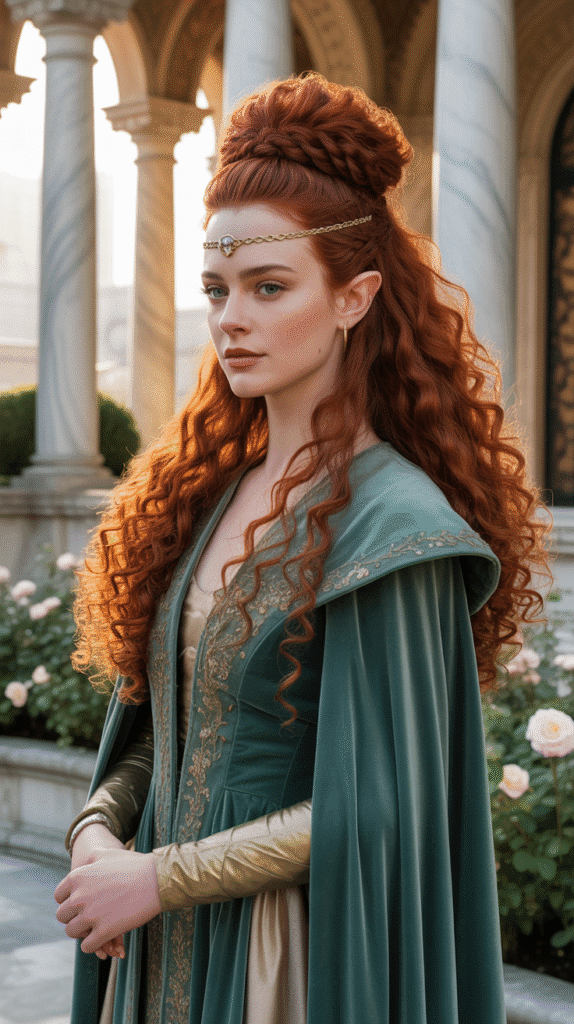
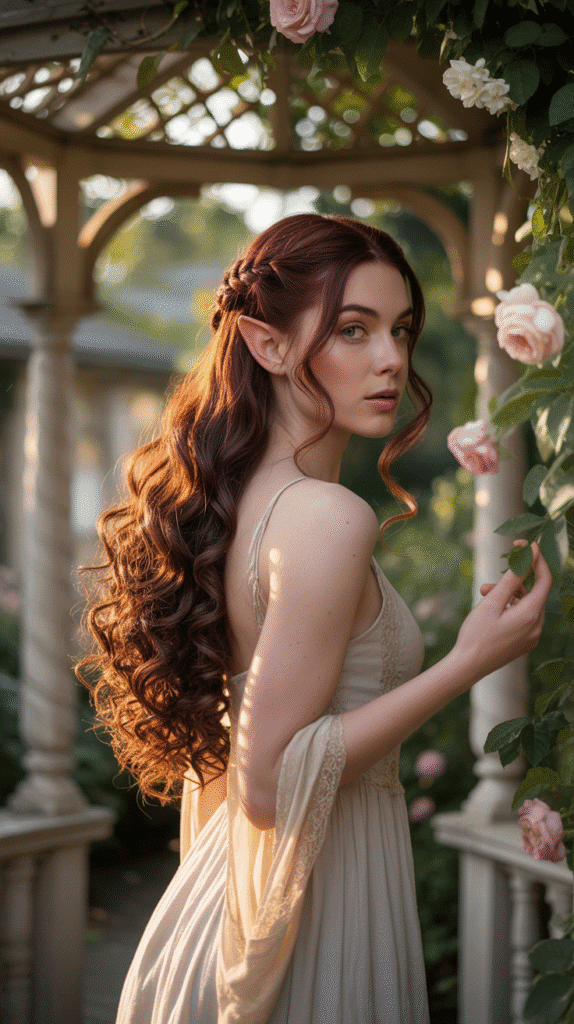
19. Crown Braid with Center Part and Cascading Curls
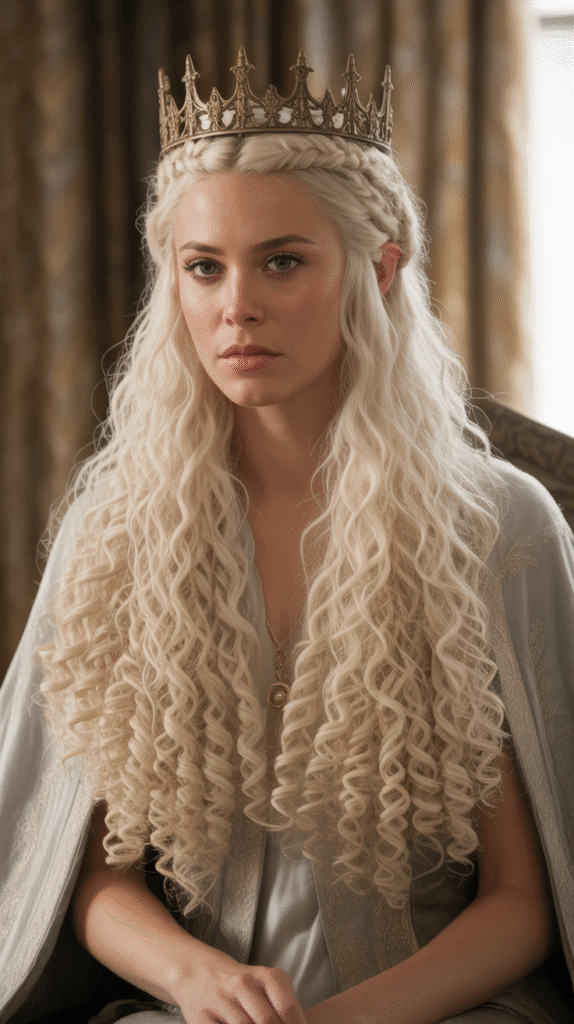
This regal style features two braids that meet at the crown like a living tiara, creating the perfect foundation for showcasing your natural curls.
The center part adds symmetry and balance while the cascading curls provide movement and drama.
This look is particularly effective for those portraying high elves or elven royalty, as it conveys both elegance and authority.
Styling Steps:
- Prepare your curls with strong-hold styling products to ensure they maintain definition throughout wear.
- Create a precise center part from your forehead straight back to the crown of your head.
- On one side, begin a Dutch braid at the hairline near your temple.
- Braid upward and back, following the curve of your head toward the center part at your crown.
- Incorporate new sections as you braid to keep it flush against your head.
- When you reach the crown, continue braiding the remaining length without adding new sections, then secure with a small elastic.
- Repeat the exact process on the other side, ensuring symmetry.
- Bring both braids together at the crown and pin them to create a meeting point.
- Allow all remaining hair to cascade naturally from this central point.
- Arrange the curls flowing from the crown to maximize volume and create a fountain-like effect.
- Gently pull on both braids to create width and a more substantial crown appearance.
20. Messy Side Braid with Pulled-Out Curls
This deliberately imperfect style embraces the beauty of undone texture while still incorporating traditional braiding elements.
The messy side braid feels relaxed and approachable, perfect for everyday elven aesthetics or casual fantasy events.
The pulled-out curls add dimension and prevent the braid from looking too tight or controlled, creating a beautiful balance between structure and freedom.
Styling Steps:
- Work with second or third-day curls that have natural texture and aren’t freshly styled for better grip.
- Sweep all your hair over one shoulder, deciding which side will feature the braid.
- Create a very loose three-strand braid beginning at your shoulder level.
- Keep the braid intentionally loose from the start rather than trying to loosen it later.
- Braid down to approximately mid-length, leaving several inches of curly ends loose and unbraided.
- Secure with a hair elastic, preferably one that matches your hair color or a decorative one.
- Go back through the braid and pull out small sections, especially from the outer edges.
- Gently tug larger curls partially out of the braid to create that deliberately messy appearance.
- Allow some curls to escape completely from the braid structure.
- Leave the opposite side of your head natural with just a few pieces tucked behind your ear.
- Finish by scrunching a texturizing spray or curl cream through both the braided and loose sections.
21. Double Waterfall Braids with Intertwined Sections
This advanced style takes the classic waterfall braid to the next level by creating two layers of cascading sections that interweave beautifully through your curls.
The double waterfall creates incredible depth and dimension while maintaining the ethereal, flowing quality essential to elven aesthetics.
This intricate style is perfect for special occasions and showcases both technical skill and the natural beauty of curly hair.
Styling Steps:
- Begin with well-defined curls that have been styled with a medium-hold curl cream for manageability.
- Start the first waterfall braid about one inch back from your hairline on one side.
- Create the waterfall effect by dropping the bottom strand after each stitch and picking up a new section from the top.
- Continue this first waterfall braid across your head like a headband, ending behind the opposite ear.
- Secure temporarily with a clip while you work on the second layer.
- Start a second waterfall braid about two inches below and parallel to the first one.
- As you create this second waterfall, intentionally pick up some of the dropped strands from the first braid.
- This interweaving creates a beautiful lattice effect through your curls.
- Secure the second braid behind your ear near where the first one ended.
- Pin both braid ends together, tucking them into your curls to conceal where they finish.
- Gently pancake both braids to create width and a more romantic, dimensional appearance.
- Allow all remaining curls to flow naturally, showcasing the cascading sections created by both waterfall braids.
22. Half-Up Space Buns with Curly Texture
This playful yet elegant style brings a contemporary twist to elven hairstyling by incorporating the trendy space bun aesthetic with fantasy charm.
The dual buns create visual interest and whimsy while the flowing curls below maintain that essential elven grace.
This look is particularly popular for festival settings, cosplay events, or for portraying younger, more spirited elven characters.
Styling Steps:
- Start with defined curls that have been styled with a strong-hold product to maintain structure in the buns.
- Create a horizontal section from temple to temple, approximately three inches back from your hairline.
- Divide this top section into two equal parts with a center part.
- Gather the right section and twist it several times before wrapping it into a small bun at the crown.
- Secure this first bun with bobby pins inserted from multiple angles.
- Repeat the process on the left side, ensuring both buns are symmetrical and positioned at the same height.
- Gently pull small sections from each bun to create texture and a slightly messy appearance.
- Allow the remaining curls below to maintain their natural volume and definition.
- Pull out a few small curly sections around your face to soften the look.
- Wrap small braids around the base of each bun for added elven detail, or leave them simple for a cleaner appearance.
- Add small decorative elements like flowers, crystals, or elven ear cuffs to enhance the fantasy aesthetic.
23. Braided Mohawk with Loose Curly Sides
This bold style combines edgy contemporary aesthetics with traditional elven braiding, creating a look that’s perfect for warrior elves or characters with a more rebellious spirit.
The braided mohawk creates dramatic height and structure through the center while the loose curly sides provide softness and femininity.
This style works particularly well for those with thick, high-volume curly hair.
Styling Steps:
- Begin with fully dry, defined curls that have been styled with strong-hold products.
- Create a mohawk section by parting from your forehead to the nape of your neck, approximately three inches wide.
- Clip the side sections away to keep them separate while you work on the center.
- Starting at your forehead, create a Dutch braid down the center mohawk section.
- As you braid, gently pull on the outer edges of each stitch to create maximum width and height.
- Continue the Dutch braid all the way down to the nape of your neck.
- Secure the end with a small elastic and continue with a regular three-strand braid through the remaining length.
- Release the side sections and allow those curls to flow naturally and freely.
- Maximize the height of the braided mohawk by gently pulling it upward and adding volume.
- Pin the sides loosely behind your ears if desired, or leave them completely loose.
- Add decorative elements like leather wraps, metal beads, or colored thread woven through the center braid.
- Finish with a strong-hold hairspray on the braided section only to maintain height.
24. Romantic Low Side Ponytail with Wrapped Braid
This elegantly simple style combines the ease of a ponytail with decorative braiding that elevates it into fantasy territory.
The low side placement creates a soft, romantic silhouette while the wrapped braid adds intentional detail that transforms a basic style into something special.
This look works beautifully for those who want elven elegance without excessive time investment.
Styling Steps:
- Prepare your curls with curl-enhancing products and allow them to dry completely for maximum definition.
- Sweep all your hair over one shoulder, positioning it at the side of your neck rather than directly behind.
- Gather the hair into a low side ponytail and secure with a hair elastic.
- Take a section from the underside of the ponytail, approximately one to two inches wide.
- Create a three-strand braid with this section, braiding all the way to the ends.
- Wrap this braid around the elastic base of the ponytail, circling it multiple times if length allows.
- Secure the end of the braid underneath the ponytail with bobby pins.
- Gently pull on the wrapped braid to create more width and texture.
- Arrange the curly ponytail to cascade over your shoulder with maximum volume.
- Pull out a few face-framing curls on both sides for softness.
- Add small decorative elements like pearls, flowers, or ribbon woven through the wrapped braid for extra romance.
25. Textured Faux Hawk with Pinned Curls
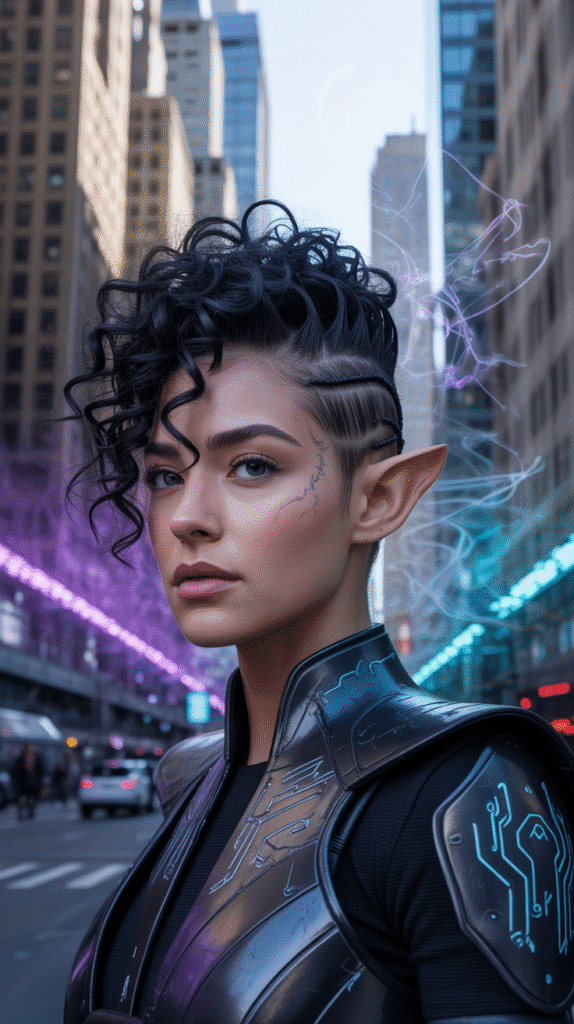
This contemporary style creates the illusion of a faux hawk without any shaving or cutting, using strategic pinning and teasing to achieve dramatic height through the center.
The faux hawk pairs edgy modern aesthetics with fantasy elements, creating a look that’s perfect for futuristic or urban fantasy elven characters.
The pinned curls on the sides add dimension while keeping the focus on the textured center section.
Styling Steps:
- Start with curls that have been styled with volumizing products and are completely dry.
- Create a mohawk section approximately four inches wide from forehead to nape.
- Tease the roots of the center section using a fine-tooth comb to create height and volume.
- Smooth the outer surface of the teased section with a boar bristle brush while maintaining interior volume.
- Use bobby pins to secure the center section upward, creating a ridge-like appearance.
- Take the hair on one side and pin it flat against your head, securing curls close to the scalp.
- Repeat on the opposite side, ensuring both sides are symmetrical.
- The pinned sides should create contrast with the voluminous center section.
- Apply strong-hold hairspray to the center section to maintain height throughout wear.
- Pull out small decorative curls around the hairline to soften the severe sides.
- Add metallic hair cuffs, chains, or geometric accessories along the center section for enhanced urban fantasy aesthetics.
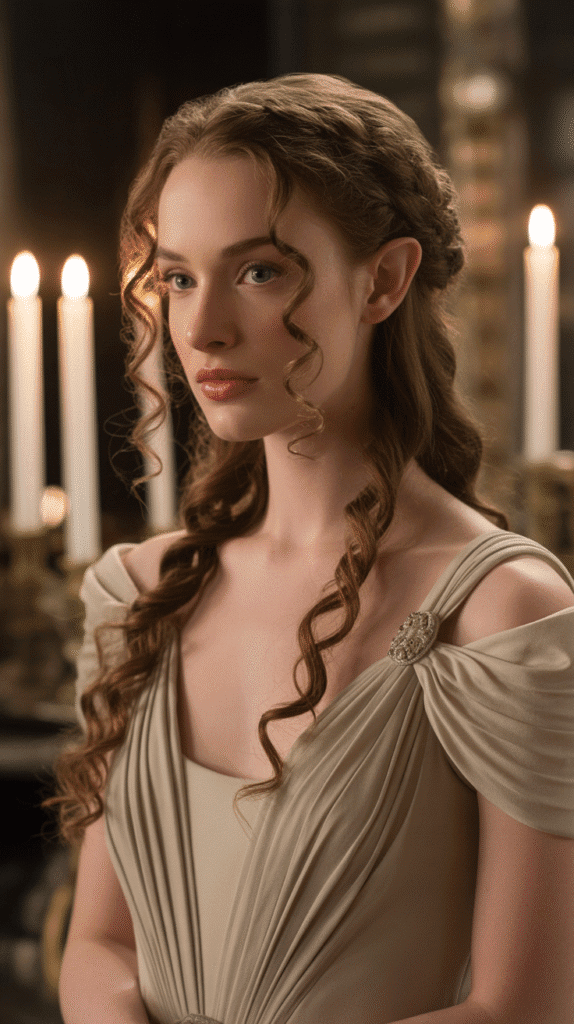
26. Grecian-Inspired Twisted Updo with Curly Tendrils
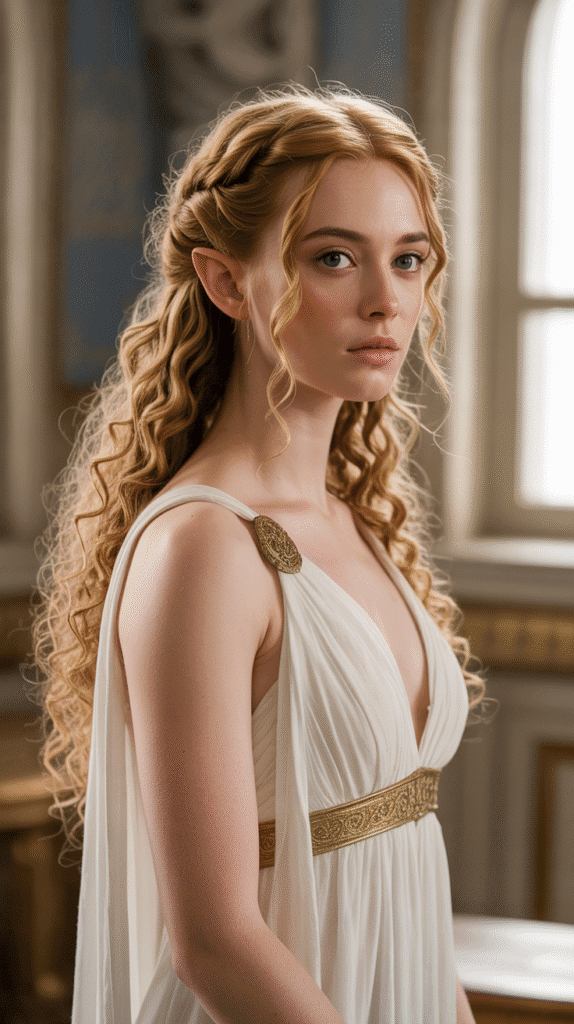
This classically beautiful style draws inspiration from ancient Grecian hairstyles while maintaining distinctly elven elegance.
The twisted updo creates sophisticated structure while strategically placed curly tendrils soften the look and add romantic movement.
This style is ideal for formal fantasy events, weddings, or occasions requiring timeless elegance with a mystical touch.
Styling Steps:
- Begin with defined curls that have been styled with a medium-hold product for workability.
- Leave out face-framing sections on both sides before gathering the remaining hair.
- Create a low ponytail at the nape of your neck and secure with a hair elastic.
- Divide the ponytail into several sections (approximately 4-6 depending on hair thickness).
- Take each section, twist it loosely, and pin it upward and around the elastic base in various directions.
- Create a textured, dimensional updo by pinning the twisted curls at different angles and heights.
- Allow the natural curl texture to remain visible within the twisted sections.
- Secure everything with bobby pins, using as many as needed for security.
- Pull out small curls from the updo to create a softer, more romantic texture.
- Allow the face-framing sections to fall naturally in loose curls or ringlets.
- Weave a delicate chain, ribbon, or small flowers through the twisted updo for enhanced elegance.
- Finish with a flexible-hold hairspray to maintain the style while preserving movement.
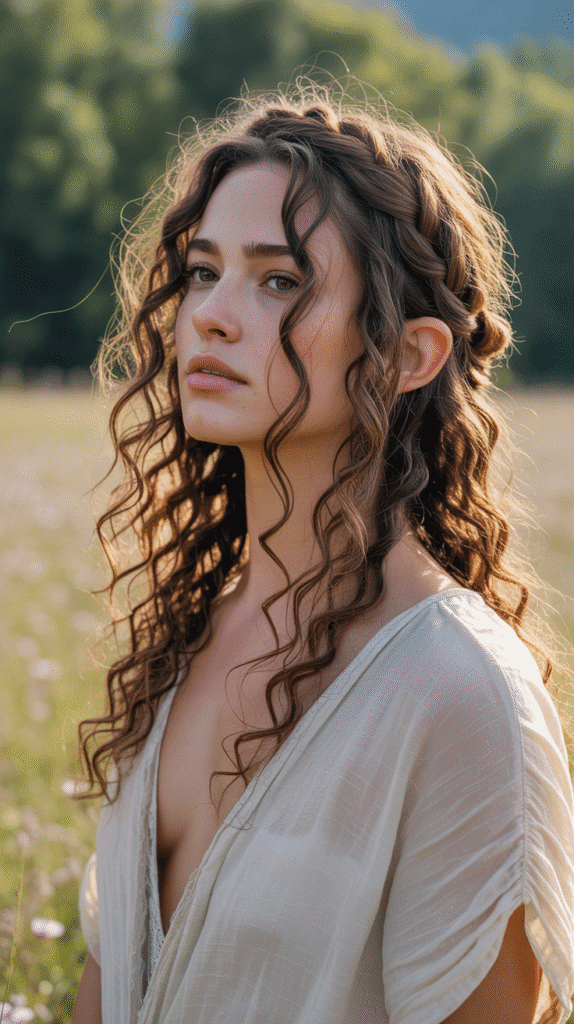
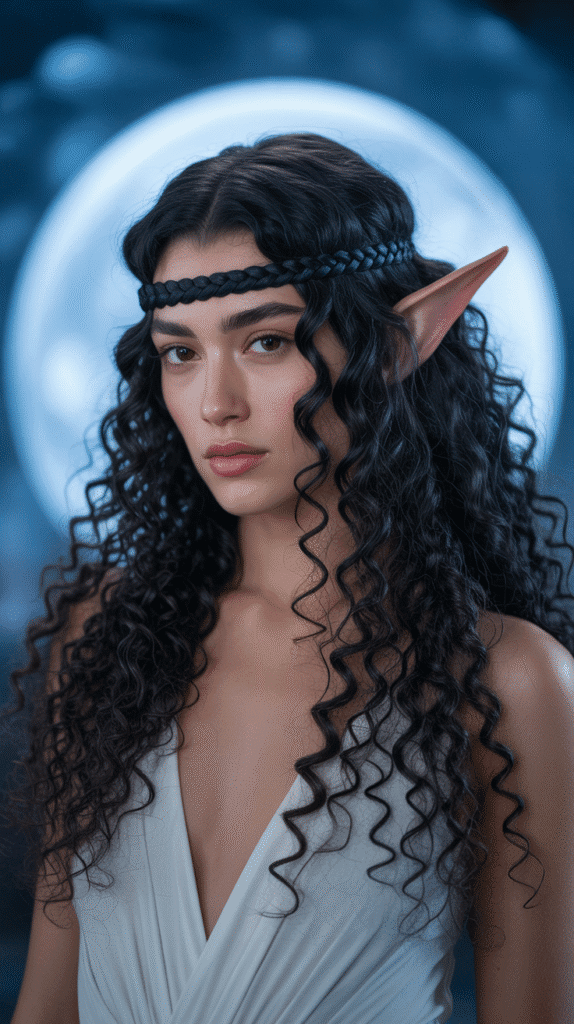
27. Natural Crown of Curls with Minimal Styling
This final style celebrates the inherent beauty of natural curls with minimal manipulation, embodying the philosophy that sometimes the most magical look is simply allowing your hair to exist in its natural state.
Strategic placement of a few small decorative elements transforms everyday curls into an elven masterpiece.
This approach is perfect for those who want to embrace their natural texture while still channeling fantasy aesthetics.
Styling Steps:
- Start with your regular curl care routine, using your preferred products for definition and moisture.
- Allow your curls to dry naturally or use a diffuser on low heat to maintain curl pattern.
- Once completely dry, gently separate larger curl clumps with your fingers to create more volume.
- Fluff the roots by lifting sections and shaking gently at the scalp.
- Create a subtle side part or center part based on your preference and face shape.
- Take one or two small sections near your temples and create thin braids if desired (completely optional).
- Add decorative elements like small crystal pins, delicate flowers, or metallic leaf clips randomly throughout your curls.
- Place these accessories strategically to catch light and add fantasy sparkle without overwhelming your natural texture.
- Pull forward a few curls over your shoulders while allowing the rest to flow naturally down your back.
- Apply a light shine serum or oil to your palms and gently smooth over the surface of your curls.
- Scrunch in a curl-refreshing spray if any sections need revitalization.
- Embrace your natural curl pattern, volume, and texture as the foundation of this effortlessly magical look.
Essential Products for Elven Curly Hairstyles
Creating and maintaining these fantasy-inspired styles requires the right products that work with your curl pattern rather than against it.
Understanding which products support your styling goals will make achieving these elven looks significantly easier and longer-lasting.
Leave-In Conditioners and Curl Creams:
- These products provide essential moisture and definition that form the foundation of any curly hairstyle.
- Apply to damp hair before styling to ensure curls are hydrated and manageable.
- Look for products with ingredients like shea butter, coconut oil, or aloe vera that enhance curl formation.
- Curl creams with medium hold work best for styles requiring structure like braids and twists.
Strong-Hold Gels and Mousses:
- Essential for styles that need to last throughout events or photoshoots without losing definition.
- Apply to soaking wet hair and scrunch upward to encourage curl formation.
- Once dry, scrunch out any crunchiness by gently squeezing curls with your hands.
- Gels are particularly important for braided styles as they provide grip and prevent frizz.
Texturizing Sprays and Sea Salt Sprays:
- Perfect for creating that deliberately undone, bohemian aesthetic seen in many elven styles.
- Add volume and piece-y texture to curls without weighing them down.
- Apply to dry hair and scrunch for enhanced texture and movement.
Shine Serums and Oils:
- Add luminosity and finish to completed styles, creating that otherworldly elven glow.
- Apply sparingly to avoid weighing down curls or creating greasiness.
- Focus application on mid-lengths and ends rather than roots.
- Argan oil, jojoba oil, and lightweight silicone serums work particularly well for curly hair.
Strong-Hold Hairspray:
- Necessary for securing braided sections and maintaining height in updos throughout wear.
- Choose flexible-hold formulas that provide security without creating stiffness.
- Apply from 8-10 inches away to avoid concentrated wet spots.
For more detailed information about curl care products and techniques, resources like Naturally Curly provide extensive guides for different curl types and styling needs.
Tips for Maintaining Curl Health While Styling
While creating these beautiful elven hairstyles, maintaining the health and integrity of your curls should remain a priority.
Frequent styling, manipulation, and the use of accessories can potentially cause damage if not approached mindfully.
Minimize Heat Damage:
- Air-dry whenever possible or use a diffuser on low heat settings to preserve curl pattern.
- If heat styling is necessary, always use a heat protectant spray beforehand.
- Keep hot tools at or below 350°F to prevent damage to the hair cuticle.
Avoid Over-Manipulation:
- Excessive touching, brushing, or combing can disrupt curl formation and cause frizz.
- Detangle only when hair is wet and coated with conditioner, using a wide-tooth comb or fingers.
- Complete your styling and then leave your hair alone to allow curls to set properly.
Use Protective Accessories:
- Choose bobby pins and hair elastics that are snag-free and gentle on curls.
- Avoid rubber bands that can break hair and cause damage.
- Remove all accessories carefully at the end of the day to prevent breakage.
Deep Condition Regularly:
- Curly hair tends to be drier than straight hair due to its structure, requiring additional moisture.
- Use deep conditioning treatments or hair masks at least once weekly.
- Focus treatment on mid-lengths and ends where hair is oldest and most prone to damage.
Protect Curls While Sleeping:
- Use a silk or satin pillowcase to reduce friction and prevent frizz.
- Consider protective styles like loose braids or a satin bonnet for overnight curl protection.
- Refresh curls in the morning with water and leave-in conditioner rather than restyling from scratch.
The Curly Girl Method website offers comprehensive information about maintaining curl health through proper care techniques and product selection.
Adapting Styles for Different Curl Types
Not every hairstyle works identically across all curl patterns, and understanding how to adapt these elven looks for your specific curl type will yield the best results.
These modifications ensure each style works beautifully with your unique texture.
For Loose Waves (Type 2A-2C):
- These curl types benefit from styles that add structure and definition to naturally softer wave patterns.
- Use stronger-hold products to maintain braids and prevent them from loosening throughout wear.
- Consider adding hot tool curls to specific sections for more defined ringlets in styles showcasing loose curls.
- Texturizing products work particularly well to enhance the bohemian, undone aesthetic.
For Classic Curls (Type 3A-3C):
- This curl type typically works beautifully with almost all elven hairstyles presented.
- Focus on maintaining moisture to prevent frizz during manipulation and braiding.
- These curls hold braided styles exceptionally well while still showcasing beautiful curl definition.
- Experiment with different product combinations to find what provides the right balance of hold and softness.
For Coily and Kinky Hair (Type 4A-4C):
- These tighter curl patterns create stunning volume and dimension in elven hairstyles.
- Stretching hair slightly through banding or braiding overnight can make some styles easier to achieve.
- Use generous amounts of moisturizing products to maintain hair health during manipulation.
- Protective styles that minimize tension on edges while still creating fantasy aesthetics should be prioritized.
- These curl types particularly excel in styles celebrating natural volume like the braided mohawk or natural crown of curls.
For Mixed Curl Patterns:
- Many people have multiple curl patterns throughout their head, requiring adaptive techniques.
- Style each section according to its specific curl type for best results.
- Use different product combinations in different areas if necessary.
- Embrace the natural variation as part of your unique hair texture and incorporate it into your elven aesthetic.
Conclusion
The enchanting world of 27 Gorgeous Elf Hairstyles for Curly Hair Full of Fantasy Charm offers endless possibilities for expressing your love of fantasy aesthetics while celebrating your natural curl texture.
From intricate braided crowns that evoke ancient elven royalty to effortlessly flowing styles that capture the free spirit of woodland dwellers, these hairstyles prove that curly hair and fantasy aesthetics are perfectly matched.
Each style has been thoughtfully selected to work harmoniously with the unique properties of curly hair, embracing rather than fighting against your natural texture.
Whether you’re preparing for a special event, exploring cosplay, or simply want to bring more magic into your everyday life, these elven-inspired looks provide the perfect blend of fantasy charm and practical wearability.
Remember that the most important element of any hairstyle is how it makes you feel—confident, beautiful, and connected to the magical character you’re channeling.
Experiment with different techniques, adapt styles to suit your specific curl type and personal preferences, and don’t be afraid to add your own creative touches through accessories, color, or modifications.
Your curls are already magical in their natural state, and these elven hairstyles simply provide new ways to showcase that inherent beauty.
As you explore these 27 gorgeous options, embrace the journey of discovering which styles resonate most with your personal aesthetic and practical needs, knowing that each time you create one of these looks, you’re bringing a little more fantasy enchantment into the real world.