
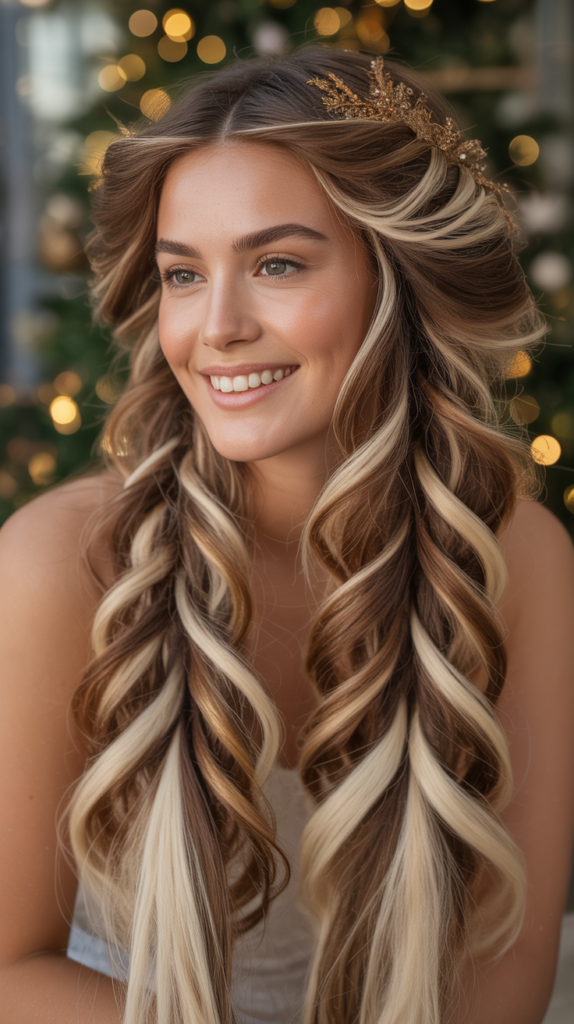
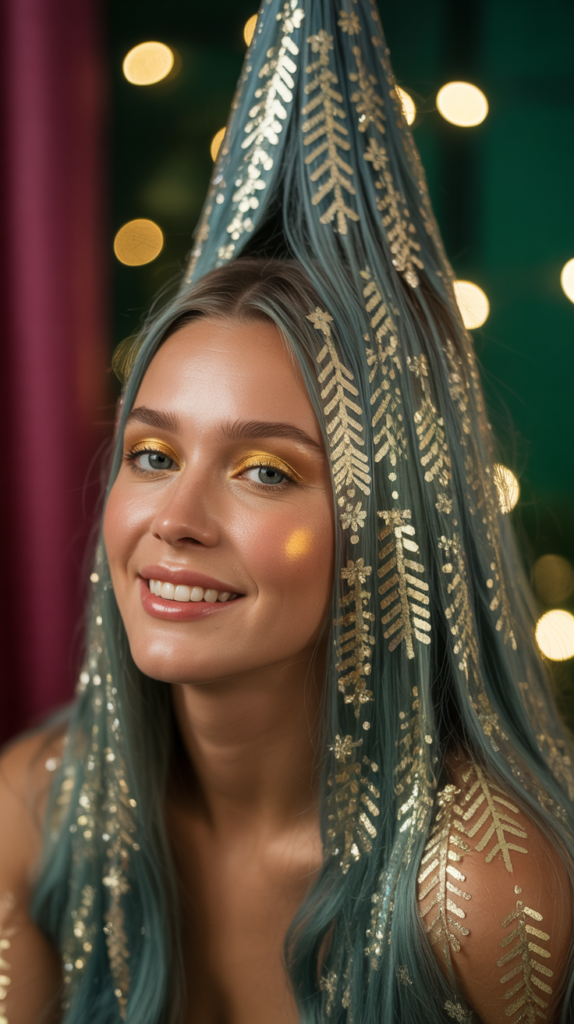
The holiday season brings magic, sparkle, and the perfect excuse to transform your hair into a festive masterpiece.
Whether you’re heading to an office party, family gathering, or New Year’s Eve celebration, your hairstyle can become the ultimate conversation starter. In this comprehensive guide to 27 Stunning Christmas Tree Hairstyles to Shine Bright at Any Party, you’ll discover creative ways to turn your locks into dazzling holiday art that captures the spirit of the season.
From elegant updos adorned with ornament-inspired accessories to playful braided designs that mimic evergreen branches, these hairstyles range from beginner-friendly to salon-worthy creations.
Each style has been carefully curated to help you shine during the most wonderful time of the year, complete with step-by-step guidance, styling tips, and accessory recommendations that will make your hair the star of any festive occasion.
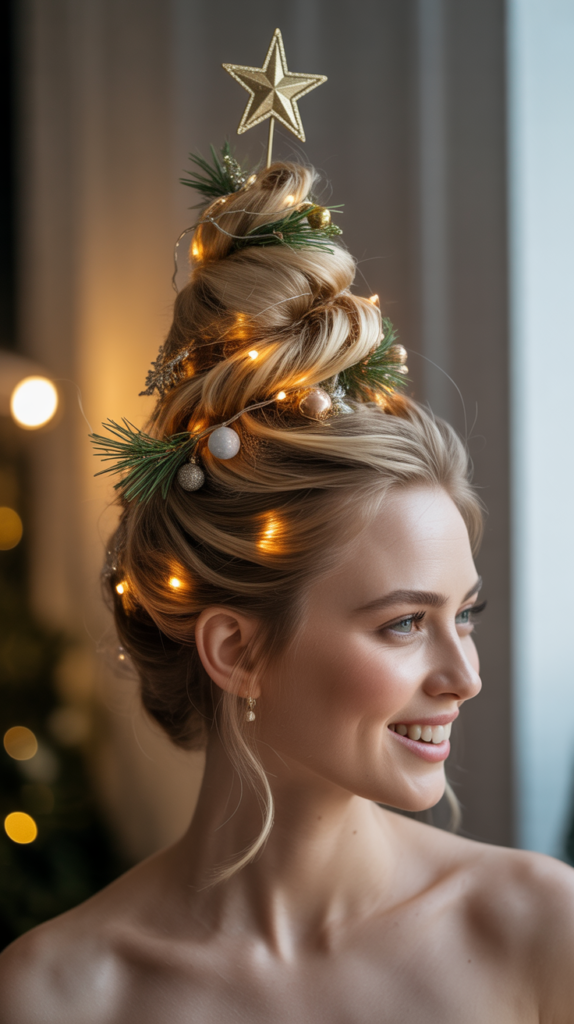
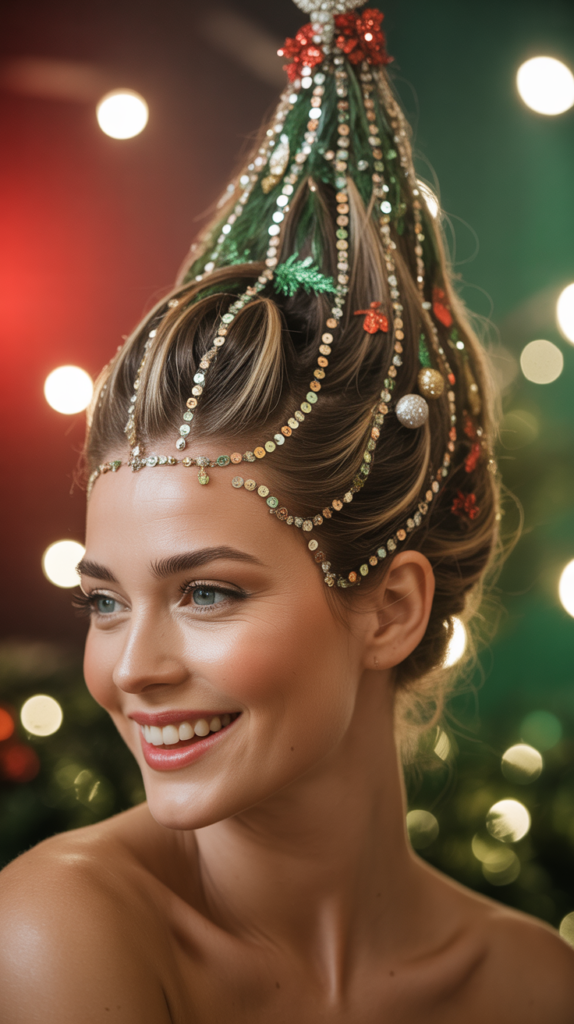
1. Classic Christmas Tree Bun
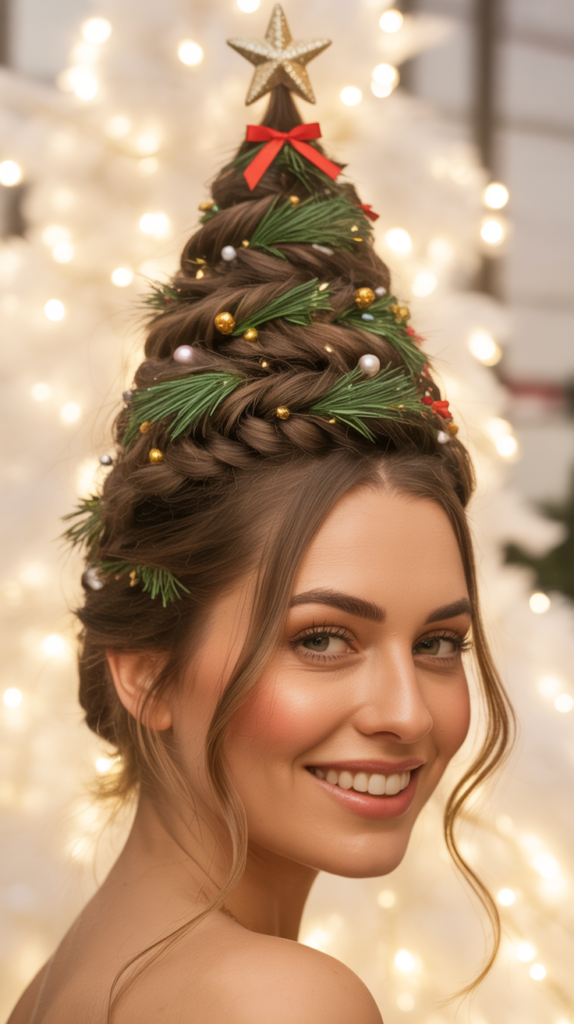
The Classic Christmas Tree Bun transforms a simple updo into a holiday spectacle by incorporating green ribbons, mini ornaments, and a star topper.
This elegant style works beautifully for formal events and can be adapted to suit any hair length with the addition of a bun maker or hair padding.
How to Create This Look
- Start by gathering your hair into a high ponytail at the crown of your head for maximum visibility
- Twist the ponytail and wrap it around the base to form a classic bun shape
- Secure the bun with bobby pins, ensuring it feels stable and won’t shift throughout the evening
- Wrap thin green ribbon around the bun in a spiral pattern, mimicking garland on a tree
- Pin small, lightweight ornament decorations strategically around the bun using decorative bobby pins
- Finish with a star-shaped hair clip or accessory positioned at the very top of the bun
- Apply strong-hold hairspray to keep everything in place during your festivities
Best Occasions for This Style
- Corporate holiday parties where elegance is expected
- Formal Christmas dinners with extended family
- Holiday wedding ceremonies as a guest or bridesmaid
- New Year’s Eve galas and black-tie events
- Christmas church services requiring sophisticated styling
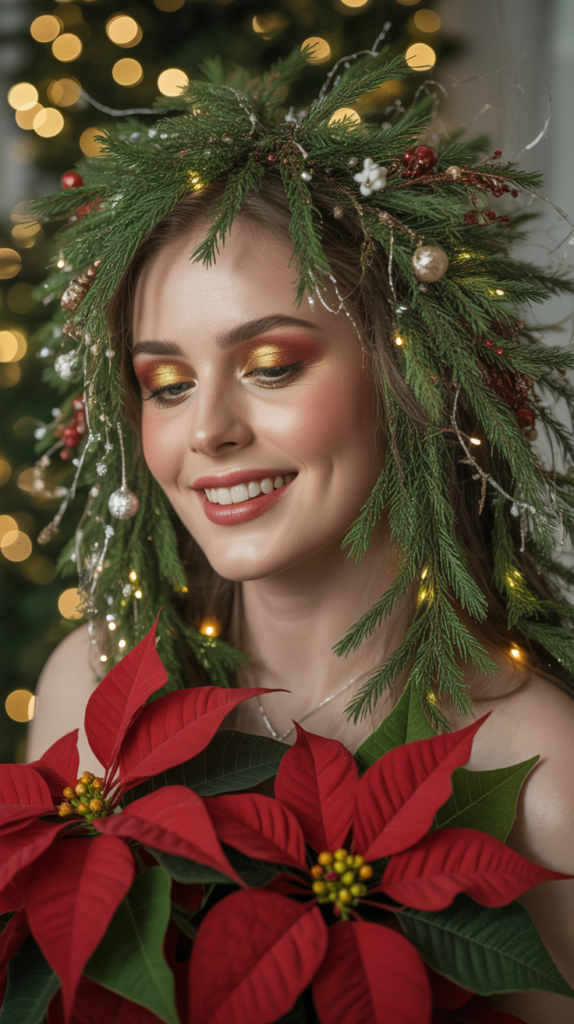
2. Braided Evergreen Crown
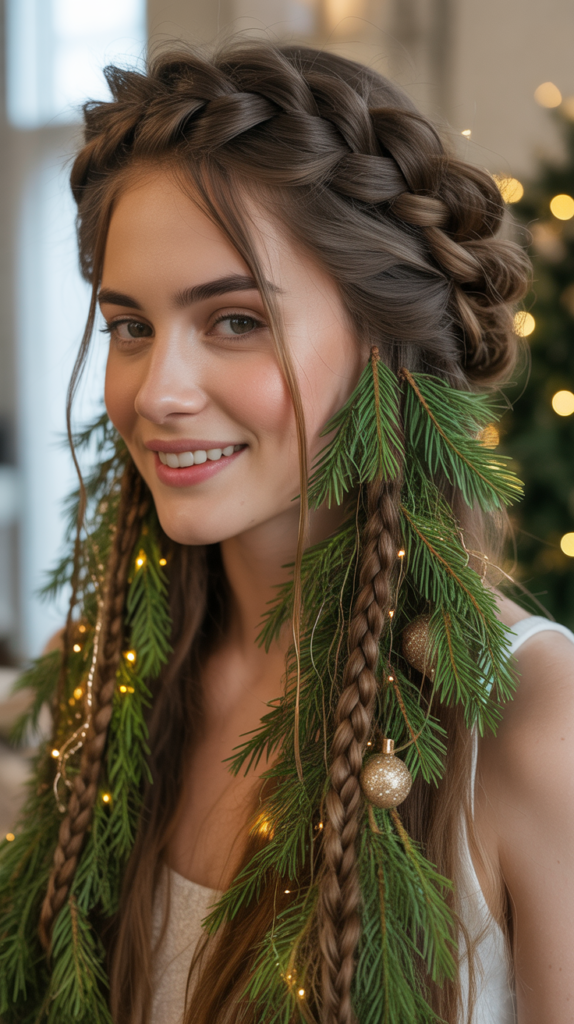
The Braided Evergreen Crown mimics the circular shape of a Christmas wreath by weaving braids around your head and adorning them with festive greenery-inspired accessories.
This bohemian-meets-holiday style offers a romantic, whimsical appearance perfect for daytime celebrations.
Creating Your Evergreen Crown
- Part your hair down the middle and divide it into two equal sections
- Begin a Dutch braid on one side, starting from the front hairline and working toward the back
- Continue braiding around the head, incorporating all hair as you go
- When you reach the starting point, tuck the end of the braid underneath and secure with pins
- Weave small evergreen sprigs (real or artificial) into the braid at regular intervals
- Add tiny red berry picks or small pinecone accessories for authentic wreath appeal
- Secure each decorative element with small hairpins to prevent slipping
Styling Variations
- Create a half-crown by braiding only from ear to ear across the top
- Add white baby’s breath flowers for a snowy, winter effect
- Incorporate small fairy lights designed for hair (battery-operated) for evening events
- Use metallic thread woven through the braid for added sparkle
- Finish with loose curls in the remaining hair for enhanced romance
3. Tinsel Waterfall Braid
The Tinsel Waterfall Braid combines the flowing beauty of a waterfall braid with shimmering tinsel strands that catch the light like icicles.
This medium-difficulty style creates movement and dimension while maintaining a polished, party-ready appearance.
Step-by-Step Waterfall Technique
- Begin at the front hairline on one side, taking a small three-strand section
- Start a regular braid for the first stitch to establish the pattern
- On the second stitch, drop the bottom strand and pick up a new section from the top
- Continue this dropping and replacing pattern as you braid toward the opposite side
- As you create each “waterfall” section, thread a piece of tinsel through the dropped strand
- Allow the tinsel to hang naturally with the hair, creating a shimmering cascade effect
- Secure the braid behind the opposite ear with a clear elastic band
- Add additional tinsel pieces throughout the loose hair for cohesive sparkle
Tinsel Selection Tips
- Choose holiday-appropriate colors like silver, gold, red, or green
- Opt for thin, hair-safe tinsel designed specifically for styling
- Cut tinsel pieces to match or slightly exceed your hair length
- Mix metallic and holographic tinsel for multidimensional shine
- Secure tinsel ends with small amounts of hair wax to prevent fraying
4. Ornament-Adorned Ponytail
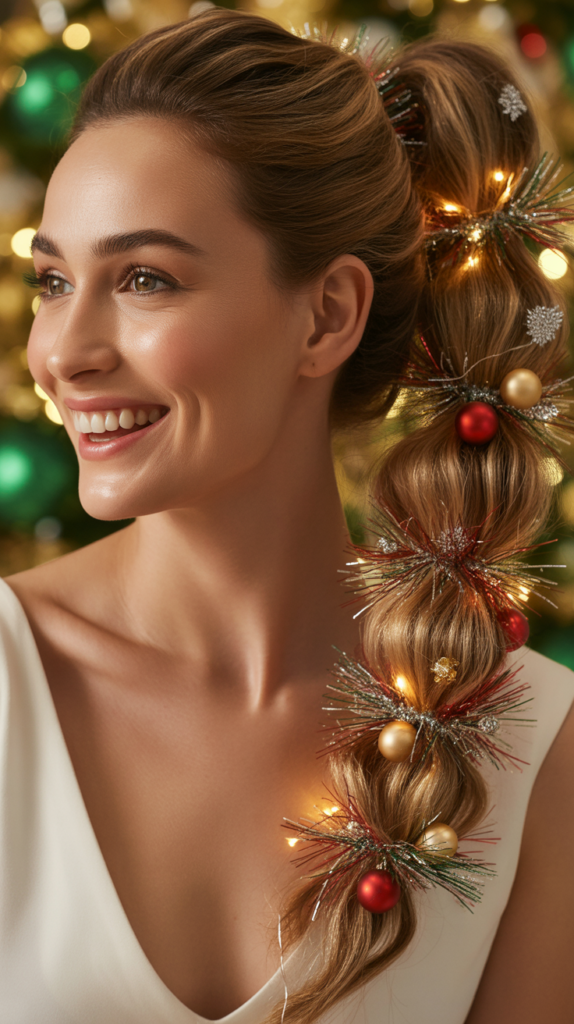
The Ornament-Adorned Ponytail takes the simple ponytail from basic to breathtaking by wrapping it with ribbon and attaching miniature Christmas ornaments throughout its length.
This accessible style works for all skill levels and can be completed in under fifteen minutes.
Building Your Ornament Ponytail
- Create a sleek, high ponytail and secure with a strong elastic band
- Wrap a coordinating ribbon around the elastic base to conceal it completely
- Select lightweight miniature ornaments with loops or clips for easy attachment
- Attach ornaments at varying intervals down the length of the ponytail
- Ensure each ornament is securely fastened to prevent dropping during the event
- Add a bow made from the same ribbon at the base for extra festivity
- Curl the ends of the ponytail for added volume and polish
5. Glitter Root Christmas Tree
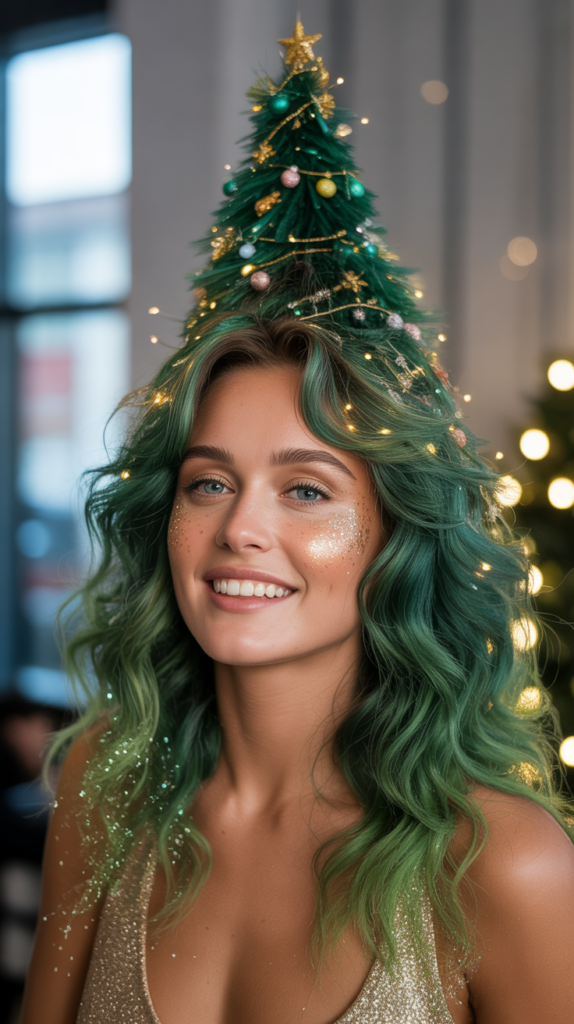
The Glitter Root Christmas Tree transforms your natural part into a festive tree shape using colored hair glitter and temporary hair paint.
This bold, Instagram-worthy style requires artistic skill but delivers maximum impact for those wanting to make a statement.
Creating the Tree Design
- Part your hair in a triangular shape starting from the forehead, widening toward the crown
- Apply hair primer or aloe vera gel to the exposed scalp for glitter adhesion
- Using a small brush, carefully fill the triangular section with green cosmetic glitter
- Create a “trunk” by extending a thin brown line down your natural center part
- Use a dotting tool to place small rhinestones as ornaments on the glitter tree
- Add a tiny star rhinestone at the top point of the triangle
- Set the design with a fine mist of hairspray, holding at least eight inches away
Product Recommendations
- Use only cosmetic-grade glitter approved for skin contact to ensure safety
- Select biodegradable glitter options for environmentally conscious styling
- Choose gel-based glitter products for easier application and longer wear
- Keep makeup remover wipes handy for quick corrections during application
- Apply a scalp-protective barrier cream around the design area to simplify removal
6. Ribbon Spiral Curls
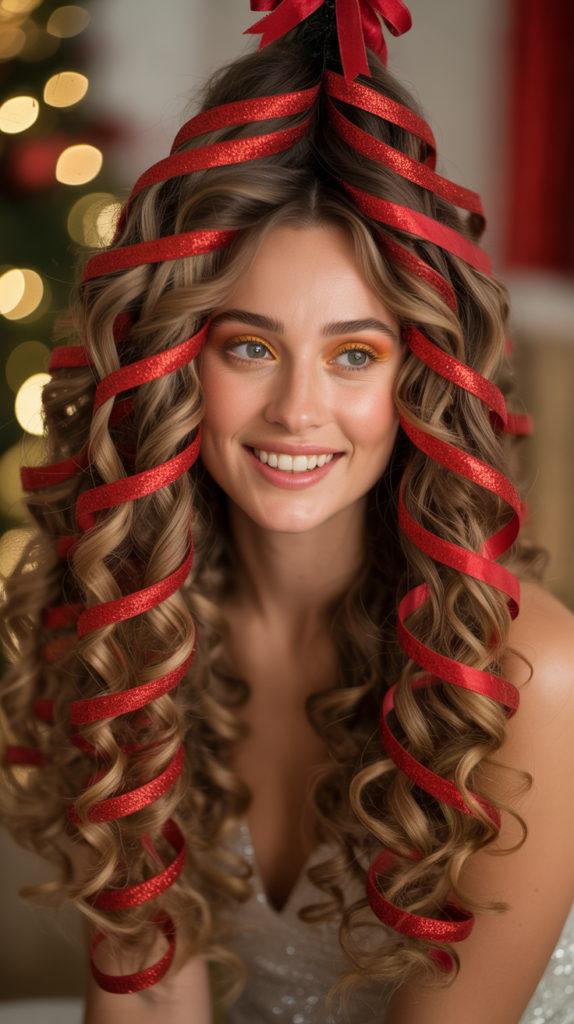
Ribbon Spiral Curls weave colorful satin ribbons through cascading curls, creating a candy-cane-inspired effect that moves beautifully.
This style celebrates volume and texture while incorporating traditional Christmas colors in an unexpected way.
Achieving Perfect Ribbon Curls
- Start with clean, dry hair and apply a heat protectant spray thoroughly
- Section hair into one-inch segments for uniform curl size
- Curl each section using a curling iron or wand, holding for eight to ten seconds
- Allow curls to cool completely before touching to ensure longevity
- Cut ribbon pieces approximately twice the length of each hair section
- Weave ribbon through the center of each curl, securing at the top with a small pin
- Alternate ribbon colors to create patterns like candy canes or peppermint swirls
- Finish with flexible-hold hairspray to maintain movement while preserving structure
Ribbon Pattern Ideas
- Classic red and white stripes for traditional Christmas appeal
- Gold and burgundy for sophisticated, elegant events
- Green and silver for a winter wonderland theme
- Multicolored ribbons for playful, fun celebrations
- Velvet ribbons for added texture and luxury feel
7. Pinecone Updo
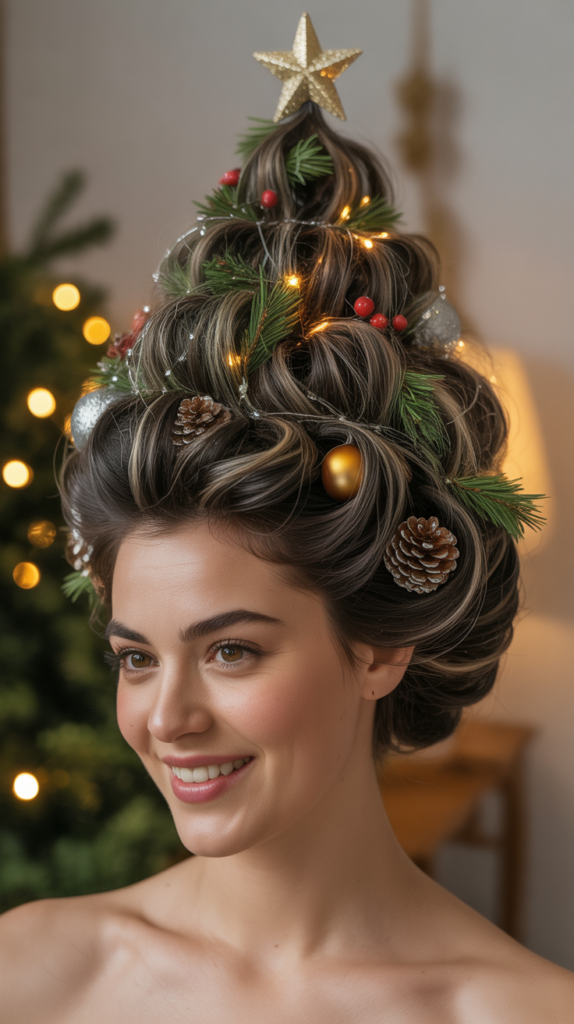
The Pinecone Updo sculpts hair into a textured, scaled pattern that resembles an actual pinecone, enhanced with bronze and brown tones.
This artistic style requires patience and skill but results in a truly unique, nature-inspired holiday look.
Creating the Pinecone Texture
- Begin by curling all hair with a medium-barrel curling iron for texture foundation
- Gather hair into a low ponytail at the nape of the neck
- Divide the ponytail into small sections, approximately one inch wide
- Twist each section and pin it back against the head in overlapping rows
- Arrange the twisted sections in a pattern that mimics pinecone scales
- Layer each row slightly over the previous one, working from bottom to top
- Spray each section with texture spray before pinning for enhanced hold
- Tuck small evergreen sprigs around the base for naturalistic decoration
Enhancing the Pinecone Effect
- Apply bronzer or brown eyeshadow to hair sections for depth and dimension
- Use bobby pins in brown or bronze shades to maintain the color scheme
- Add small pearl pins between “scales” to represent pinecone texture highlights
- Consider temporary brown hair color spray for more dramatic contrast
- Finish with a matte-finish hairspray to avoid unnatural shine
8. Christmas Light Hair Strand Weave

The Christmas Light Hair Strand Weave incorporates actual battery-operated LED lights into braids and twists, creating an illuminated hairstyle that literally glows.
This show-stopping style works best for evening events and photographs beautifully in dim lighting.
Installing Light Strands Safely
- Purchase hair-safe LED light strands specifically designed for styling purposes
- Test the lights before styling to ensure all bulbs work properly
- Create your base hairstyle first (braids, twists, or an updo structure)
- Weave the light strand through your styled hair, following the pattern of braids or twists
- Secure the battery pack discreetly at the nape of the neck or behind an ear
- Use small hairpins to anchor lights at key points, preventing sagging or drooping
- Ensure no wires are pulled tight against the scalp to avoid discomfort
- Keep the on/off switch accessible for easy control throughout the event
Safety Considerations
- Never use electrical lights intended for home decoration in your hair
- Choose lights with cool LED bulbs that won’t generate heat
- Avoid getting battery-operated lights wet or damp during wear
- Remove lights carefully to prevent tangling or hair breakage
- Store lights properly after use to maintain battery life for future styling
9. Holly Berry Hair Clips Cascade
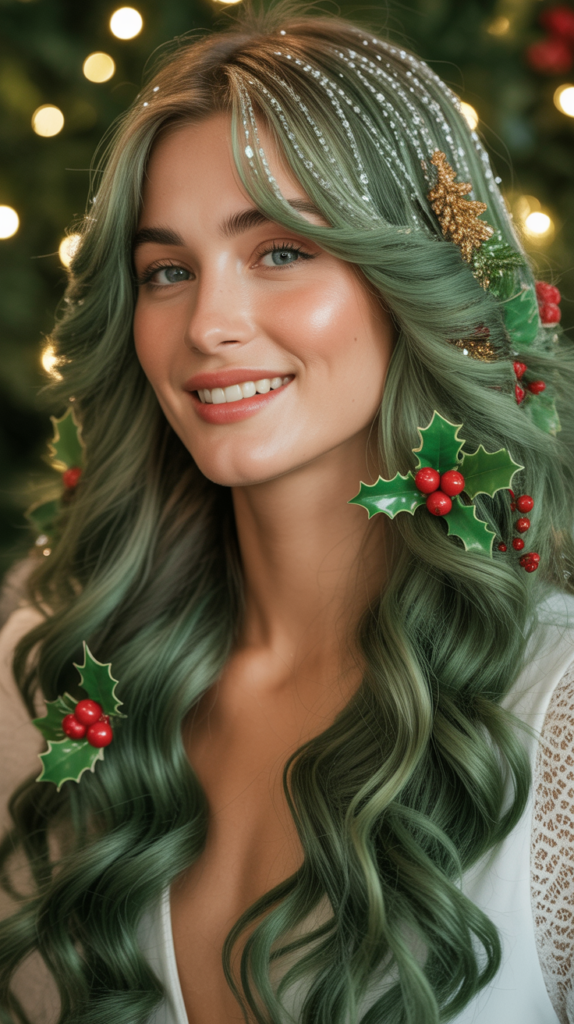
The Holly Berry Hair Clips Cascade uses strategic placement of holly-themed hair accessories throughout loose waves, creating dimension and festive flair.
This simple yet effective style requires minimal technical skill while delivering maximum holiday impact.
Arranging Your Holly Accessories
- Style hair in loose, natural waves using a large-barrel curling iron or braiding method
- Section hair visually into thirds: upper, middle, and lower zones
- Place the first holly clip at the crown area, slightly off-center for interest
- Position additional clips in a diagonal cascade pattern from crown to shoulder
- Vary the size and style of holly clips for visual texture and depth
- Ensure clips are securely fastened to hair shafts, not just resting on surface
- Leave some sections clip-free to avoid overwhelming the overall look
- Arrange face-framing pieces to soften the style and enhance facial features
Clip Selection Guidelines
- Mix traditional holly clips with modern metallic variations for contemporary appeal
- Choose clips with secure grip mechanisms that won’t slide during wear
- Select sizes proportional to your hair thickness and density
- Coordinate clip colors with your outfit for cohesive styling
- Consider adding one statement clip among smaller versions for focal interest
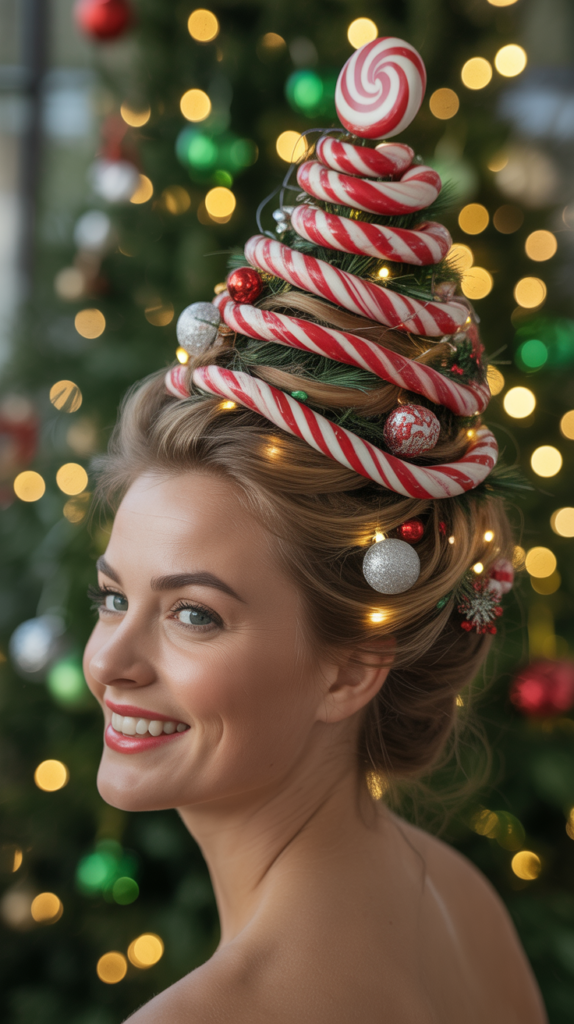
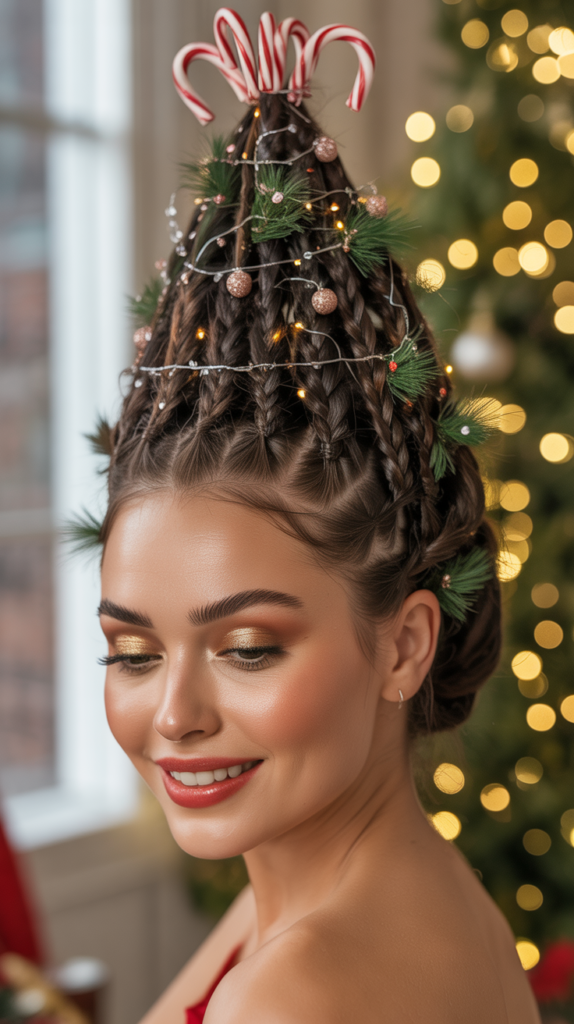
10. Candy Cane Striped Braids
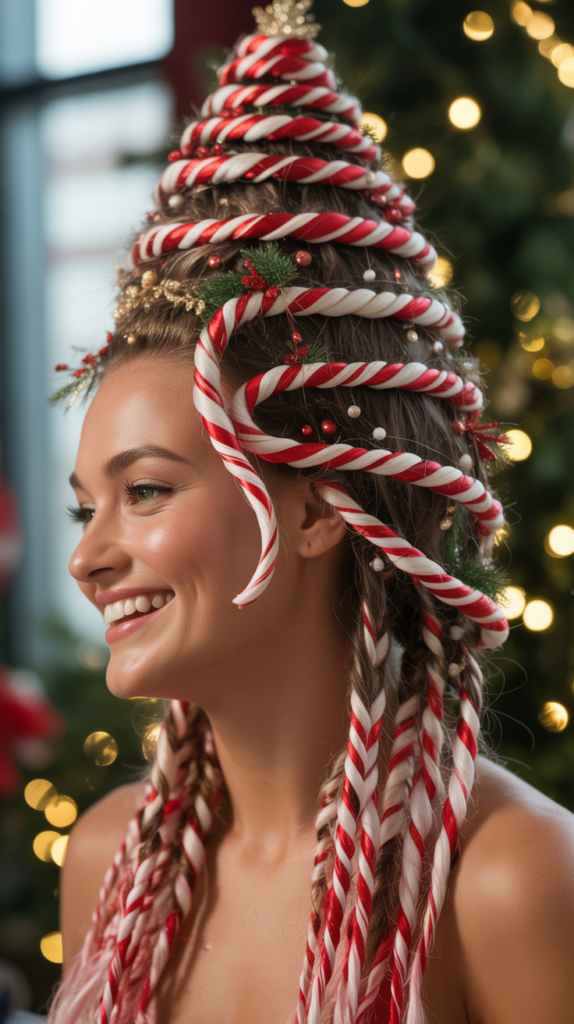
Candy Cane Striped Braids use temporary hair chalk or colored hairspray to create red and white stripes in braided sections, mimicking the iconic Christmas treat.
This playful, youthful style washes out easily, making it perfect for those wanting temporary transformation.
Creating Striped Sections
- Divide hair into two equal sections for classic braided pigtails or one section for a single braid
- Before braiding, apply white temporary hair color or chalk to the entire section if you have dark hair
- Once the white base is set and dry, section off one-inch segments along the length
- Apply red temporary color to alternating segments, leaving white sections between each red stripe
- Allow the color to dry completely before proceeding with braiding
- Create tight, neat braids to showcase the striped pattern most effectively
- Secure ends with white or red elastics that complement the candy cane theme
- Set the finished braids with hairspray to prevent color transfer
Color Application Tips
- Test temporary color on a small section first to ensure desired vibrancy
- Apply color in thin layers, building intensity gradually for best results
- Use a setting spray between color layers to prevent smudging during braiding
- Keep makeup wipes nearby for immediate cleanup of any mistakes
- Cover clothing with a cape or towel during application to prevent staining
11. Snowflake Pin Scattered Updo
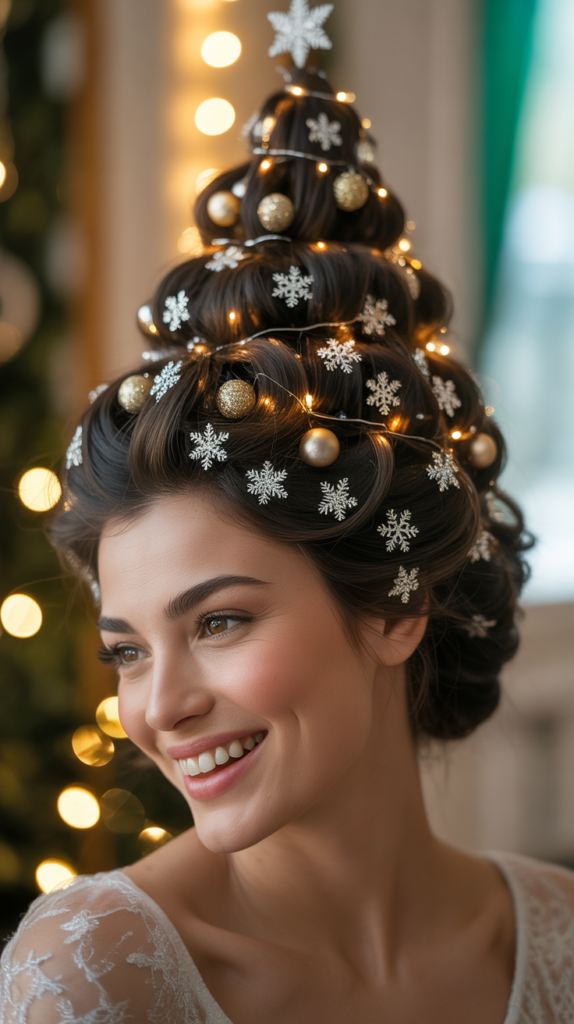
The Snowflake Pin Scattered Updo features delicate snowflake-shaped hairpins arranged throughout a loose, romantic updo, creating the illusion of softly falling snow.
This ethereal style balances elegance with whimsy, suitable for sophisticated holiday events.
Building the Foundation Updo
- Create soft curls throughout all hair before beginning the updo structure
- Gather hair loosely at the back of the head, avoiding tight, severe pulling
- Twist and pin sections randomly to create an organic, flowing updo shape
- Allow some pieces to fall naturally, embracing imperfection for romantic appeal
- Secure the structure with hairpins that blend with your hair color
- Leave a few face-framing tendrils loose for softness around your features
- Gently pull sections to add volume and create a fuller appearance
- Set the base structure before adding decorative snowflake elements
Snowflake Placement Strategy
- Start with larger snowflake pins as focal points in three to five key areas
- Fill in with smaller snowflake pins, creating a scattered, natural falling pattern
- Vary the angles of pins to catch light from different directions
- Concentrate more pins toward the top and sides, fewer near the nape
- Choose snowflake designs with rhinestones or crystals for maximum sparkle
- Consider mixing silver and clear crystal snowflakes for dimensional effect
- Step back regularly during placement to assess overall balance and distribution
12. Wrapped Gift Bow Ponytail
The Wrapped Gift Bow Ponytail transforms your ponytail into a beautifully wrapped present by incorporating ribbon wrapping techniques and a statement bow.
This charming style celebrates the gift-giving spirit of Christmas with wearable art.
Wrapping Your Ponytail
- Create a smooth, high ponytail using a brush to eliminate bumps and flyaways
- Secure with a strong elastic band that matches your hair color
- Cut a long piece of wide ribbon, at least three times the length of your ponytail
- Start wrapping the ribbon around the ponytail base, securing with a small hairpin
- Continue wrapping in a spiral pattern down the length of the ponytail, slightly overlapping each wrap
- Create a crisscross pattern by changing angles every few wraps for gift-wrap effect
- Secure the ribbon end with a small pin hidden underneath the final wrap
- Create a separate large bow and pin it prominently at the base of the ponytail
Bow-Making Techniques
- Use wired ribbon for bows that hold their shape throughout the evening
- Create loops of equal size, securing the center with floral wire
- Fluff and arrange bow loops for a full, dimensional appearance
- Attach the completed bow to hair using a comb back or large bobby pins
- Consider matching your bow to your outfit color scheme for coordinated styling
- Add small ornament decorations to the bow center for extra festivity
13. Peppermint Swirl Bun
The Peppermint Swirl Bun creates a mesmerizing spiral effect using red and white hair extensions or temporary color, twisted into a high bun that resembles a peppermint candy.
This eye-catching style requires color application but delivers sweet, festive results.
Creating the Swirl Pattern
- If using temporary color, divide hair into two equal sections before coloring
- Apply white temporary color to one section and red to the other section
- Allow colors to dry completely before proceeding with styling
- Alternatively, use red and white clip-in extensions for easier application
- Twist the two colored sections together tightly, creating a candy-cane spiral effect
- Coil the twisted hair into a high bun position at the crown of your head
- Secure the bun with bobby pins, ensuring the spiral pattern remains visible
- Use a small amount of gel on the surface to smooth flyaways without disrupting the pattern
Alternative Swirl Methods
- Braid red and white sections together instead of twisting for a different texture
- Use colored hair chalk for a more subtle, pastel peppermint effect
- Incorporate silver tinsel with the red and white for added sparkle dimension
- Create a lower bun for a more casual, accessible version of the style
- Add white pearl pins around the bun perimeter to enhance the candy appearance
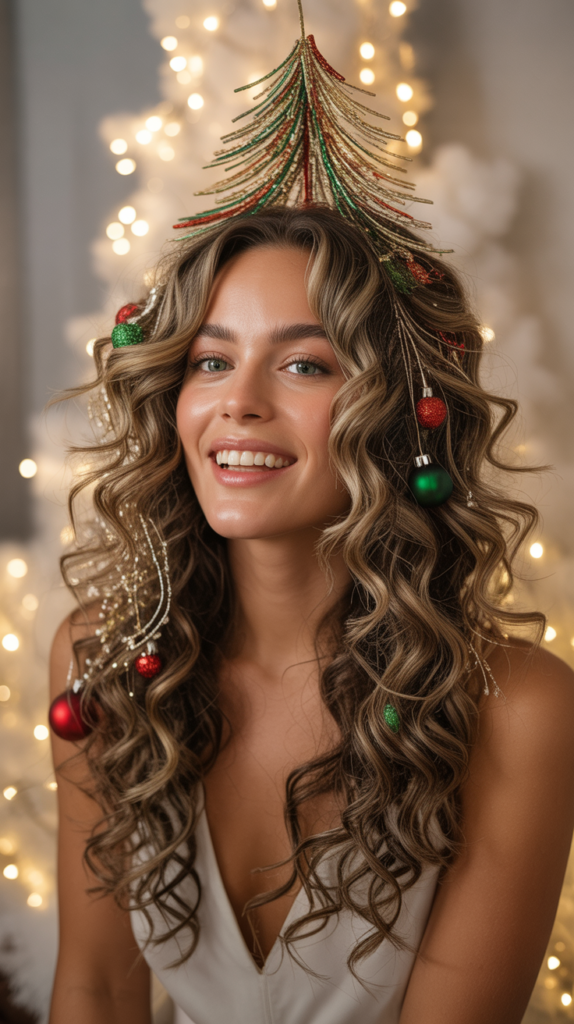
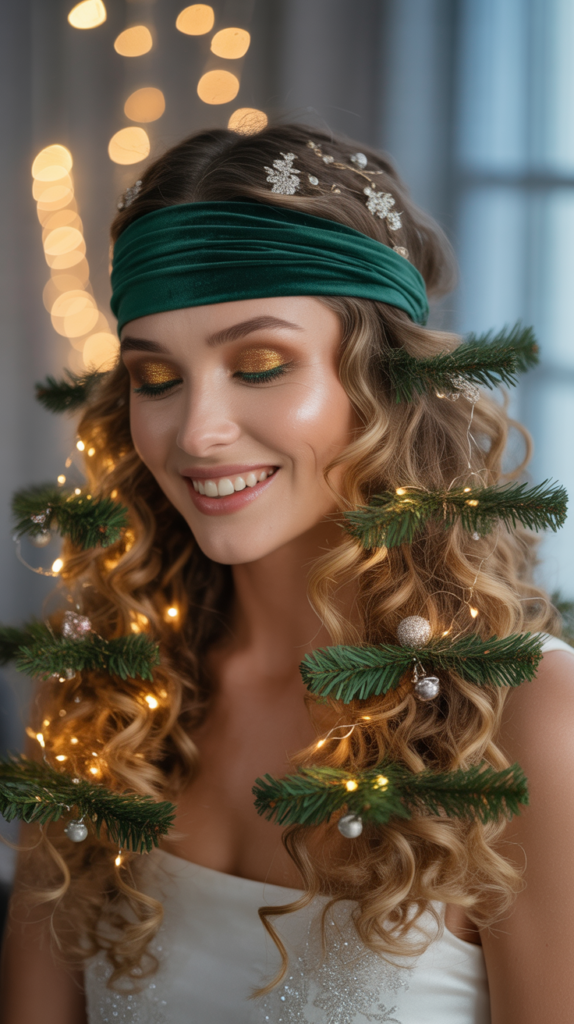
14. Garland-Wrapped Loose Curls

Garland-Wrapped Loose Curls intertwine miniature artificial garland through bouncy curls, creating the appearance of festive decoration woven throughout your hair.
This style brings Christmas tree tradition directly into your hairstyling with elegant results.
Integrating Garland Elements
- Curl hair in large sections for voluminous, loose curls throughout
- Select thin, flexible artificial garland designed for crafting rather than heavy tree garland
- Begin at the crown area, using hairpins to anchor the garland’s starting point
- Weave the garland through curls by looping it around sections and pinning periodically
- Follow the natural flow of your hair, avoiding stiff or unnatural patterns
- Secure garland every three to four inches to prevent slipping or sagging
- Allow the garland to cascade naturally with your curls for organic integration
- Trim any excess garland at the ends, tucking the cut edge under curls
Garland Selection Criteria
- Choose garland with thin, flexible wire that bends easily without breaking
- Select colors that complement your hair tone and outfit choices
- Opt for garland with small decorative elements like berries or beads rather than large ornaments
- Avoid garland with sharp edges or components that could catch or damage hair
- Test garland weight before full application to ensure comfort during extended wear
15. Star-Topped French Twist
The Star-Topped French Twist reimagines the classic updo with holiday flair by positioning a prominent star hair accessory at the twist’s peak.
This sophisticated style bridges traditional elegance with festive celebration, perfect for formal events.
Perfecting the French Twist
- Start with straight or slightly waved hair for easiest manipulation
- Gather all hair to one side, holding it with one hand at mid-head height
- Begin twisting the hair inward, moving toward the center back of your head
- As you twist, lift the hair upward to create vertical height and elegant lines
- Tuck the twisted hair ends into the pocket created by the twist
- Secure the entire structure with large hairpins inserted vertically through the twist
- Smooth the outer surface with a boar bristle brush for polished perfection
- Set with hairspray before adding decorative elements
Star Accessory Placement
- Choose a substantial star piece that serves as a clear focal point
- Position the star at the highest point of the twist for tree-topping effect
- Secure the star with multiple pins to ensure stability throughout the event
- Consider stars with rhinestones or metallic finishes for light-catching appeal
- Select star size proportional to your head size and hair volume
- Add smaller star pins scattered around the main star for constellation effect
16. Jingle Bell Hair Rings
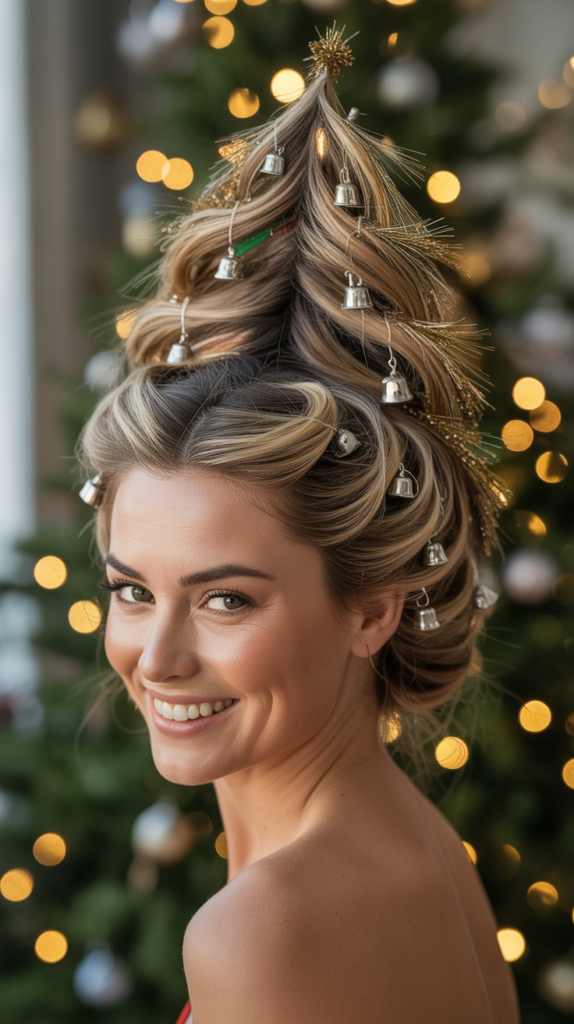
Jingle Bell Hair Rings incorporate small jingle bells attached to hair elastics throughout braided or twisted sections, creating gentle musical accompaniment to your movements.
This playful, interactive style adds auditory festivity to visual appeal.
Attaching Bells Safely
- Create multiple small braids or twist sections throughout your hair
- Secure each section with a small, clear elastic band
- Thread jingle bells onto thin ribbon or jewelry wire for easy attachment
- Tie the bell-adorned ribbon around each elastic-secured section
- Ensure bells are attached securely but not so tightly they pull on hair
- Distribute bells throughout your hairstyle for balanced sound and appearance
- Test the volume of jingling before the event; remove bells if too loud
- Use different sizes of bells for varied tonal quality when moving
17. Velvet Ribbon Headband with Cascading Curls
The Velvet Ribbon Headband with Cascading Curls combines luxurious fabric accessories with bouncy, voluminous curls for a look that’s both timeless and festive.
This accessible style suits all skill levels and can be adapted to any hair length.
Creating Luxurious Curls
- Begin with completely dry hair and apply heat protectant throughout all sections
- Section hair into manageable pieces, approximately one to two inches wide
- Use a curling iron or wand to create uniform curls, curling away from your face
- Allow each curl to cool in your hand before releasing for longer-lasting results
- Once all sections are curled, flip your head upside down and shake gently
- Run your fingers through curls to separate them into natural, flowing pieces
- Apply texture spray or light hairspray for hold without stiffness
- Position your velvet headband approximately two inches back from your hairline
Headband Selection and Styling
- Choose wide velvet headbands (2-4 inches) for maximum impact and comfort
- Select rich, jewel-toned colors like burgundy, emerald, or sapphire for elegance
- Ensure the headband has adequate grip or clips to prevent slipping during wear
- Position the headband to cover any flyaways or imperfect hairline areas
- Add a small brooch or pin to the headband for personalized embellishment
- Allow curls to fall naturally over and around the headband for seamless integration
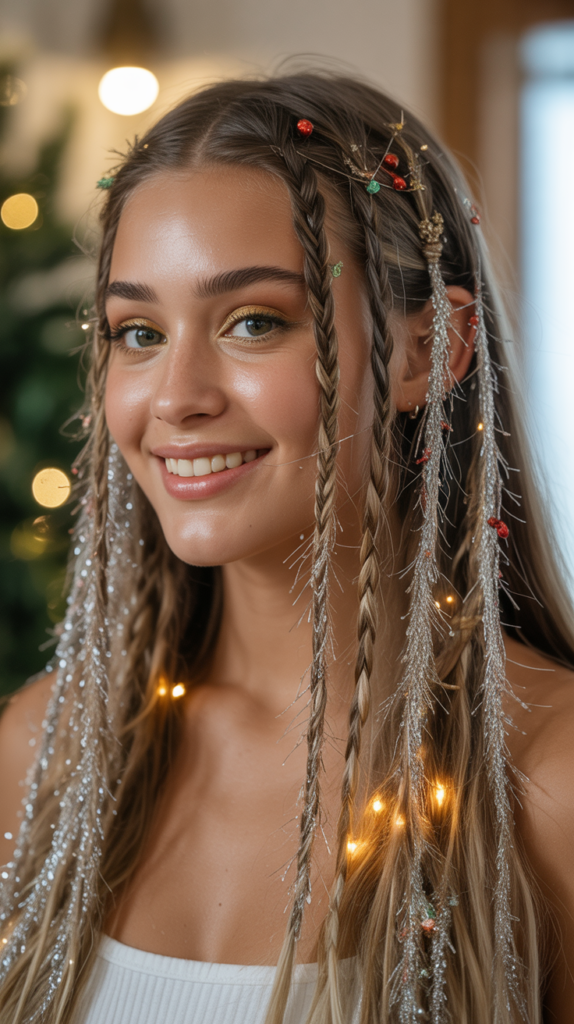
18. Icicle Hair Tinsel Extensions
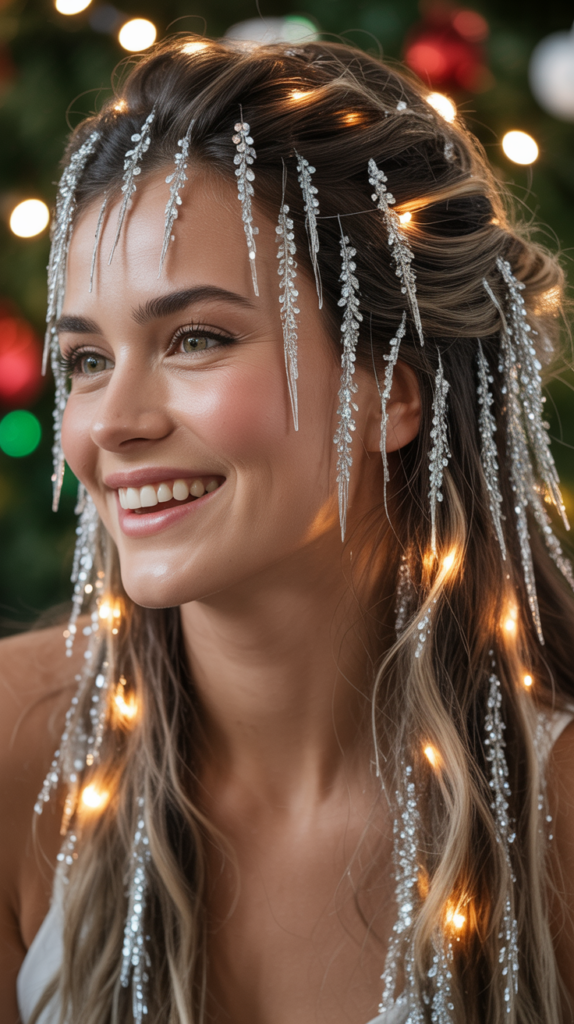
Icicle Hair Tinsel Extensions add individual strands of holographic tinsel throughout your hair, creating the appearance of glistening icicles catching winter light.
This sparkly addition works with any base hairstyle and adds festive dimension.
Installing Tinsel Strands
- Purchase hair tinsel specifically designed for styling, available in various colors and finishes
- Section hair into small subsections for targeted tinsel placement
- Use the loop method: fold tinsel in half, create a small loop around a hair strand
- Pull both tinsel ends through the loop, creating a secure slip knot around the hair
- Position tinsel strands strategically throughout all hair layers for dimensional effect
- Place more tinsel near the face and crown for maximum visibility
- Trim tinsel to match your hair length or slightly longer for deliberate sparkle
- Treat tinsel gently while styling to prevent premature removal
Tinsel Maintenance Tips
- Avoid applying heat directly to tinsel as it may melt synthetic materials
- Brush tinsel-enhanced hair gently from bottom to top to prevent pulling
- Tinsel typically lasts seven to ten days with proper care before naturally falling out
- Touch up tinsel placement between events for fresh, sparkling appearance
- Remove tinsel by gently sliding it down and off the hair strand when desired
- Choose holographic or opalescent tinsel for the most authentic icicle appearance
19. Gingerbread-Inspired Brown and White Highlights
Gingerbread-Inspired Brown and White Highlights use temporary color to create a delicious-looking color scheme reminiscent of gingerbread cookies and icing.
This sweet styling approach requires color application but offers unique, edible-inspired aesthetics.
Achieving Gingerbread Tones
- Start with medium to dark brown hair as the base “gingerbread” tone
- Select temporary white or cream hair color for the “icing” effect
- Apply white color to random sections throughout hair using a brush or comb
- Focus white highlights on the top layers and around the face for maximum impact
- Create some thicker white sections mixed with thin streaks for varied icing appearance
- Allow color to dry according to product instructions before heat styling
- Style hair in loose waves or curls to showcase the color dimension
- Add small decorative hairpins in shapes like gingerbread men or candy for themed completion
Edible-Themed Accessory Ideas
- Use gingerbread man-shaped hair clips scattered throughout the style
- Add candy-inspired hairpins in peppermint, lollipop, or gumdrop designs
- Incorporate brown and white striped ribbon woven through sections
- Position small cookie-cutter shaped accessories near the face for clear visibility
- Consider a dusting of gold shimmer spray to mimic sugar sparkle on cookies
20. Metallic Hair Stenciling
Metallic Hair Stenciling uses temporary metallic hair makeup and stencils to create precise Christmas designs directly on your hair.
This artistic approach requires steady hands but produces stunning, Instagram-worthy results with professional appearance.
Stenciling Technique
- Section off the area where you want to apply the design, securing surrounding hair away
- Choose or create a stencil featuring Christmas imagery like trees, stars, or snowflakes
- Hold the stencil firmly against the hair surface or scalp area
- Apply metallic hair makeup or temporary color using a dense makeup sponge
- Dab color through the stencil openings with a patting motion rather than rubbing
- Hold the stencil steady for ten to fifteen seconds to ensure clean lines
- Carefully lift the stencil straight up to avoid smudging the design
- Allow the metallic color to dry completely before touching or additional styling
Design Placement Options
- Side of head above the ear for maximum visibility in profile
- Crown area for overhead photograph appeal and unique perspective
- Behind one ear for subtle, peek-a-boo festive detail
- Along a side part line for integrated, flowing design
- Multiple small designs scattered throughout for comprehensive coverage
21. Poinsettia Flower Crown
The Poinsettia Flower Crown adorns your hair with the iconic Christmas flower, creating a bold, botanical statement.
This style can use fresh, silk, or paper poinsettias depending on your preference and the event duration.
Constructing Your Crown
- Purchase or create poinsettia flowers in your preferred material (fresh, silk, or paper)
- Use floral wire as your crown base, measuring to fit your head circumference comfortably
- Create a circular or half-circular crown shape depending on your desired coverage
- Attach poinsettias to the wire base using floral tape or additional wire
- Position larger poinsettias as focal points with smaller blooms filling spaces between
- Ensure all wire ends are covered or bent away from the scalp for comfort
- Add greenery like eucalyptus or holly leaves between flowers for natural appearance
- Secure the finished crown to your hair using bobby pins at strategic points
Poinsettia Color Variations
- Traditional red poinsettias with gold or yellow centers for classic Christmas appeal
- White poinsettias for elegant, winter wonderland sophistication
- Cream or champagne-colored blooms for vintage, romantic styling
- Burgundy or deep red for dramatic, moody holiday aesthetics
- Mixed colors including pink for playful, contemporary interpretation
22. Braided Gift Ribbon Updo
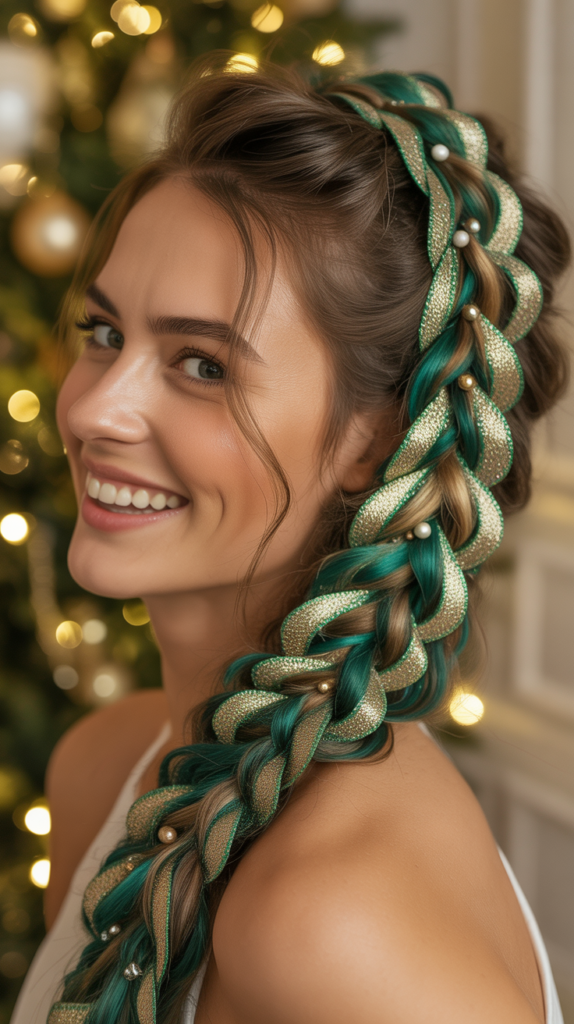
The Braided Gift Ribbon Updo incorporates actual gift ribbon into multiple braids that are then twisted into an intricate updo, creating a hairstyle that resembles elaborately wrapped presents.
This complex style showcases advanced braiding skills.
Creating Multiple Ribbon Braids
- Divide hair into six to eight sections depending on thickness and desired complexity
- Cut ribbon pieces for each section, approximately twice the hair length
- Incorporate one ribbon strand into each braid as a fourth strand in a four-strand braid
- Alternatively, use ribbons as replacement strands in traditional three-strand braids
- Braid each section tightly to showcase the ribbon integration clearly
- Secure each completed braid with a small elastic at the end
- Begin arranging braids into an updo structure, pinning as you layer
- Cross braids over and under each other to create dimensional texture
Updo Assembly Strategy
- Start with lower braids as the foundation, pinning them horizontally at the nape
- Layer middle braids over the foundation in curved or spiraled arrangements
- Position top braids as the crown layer, ensuring visibility of all ribbon colors
- Tuck braid ends underneath other braids to conceal them seamlessly
- Use hairpins that match your ribbon colors for cohesive, hidden securing
- Pull gently on braid edges to create fuller, more voluminous appearance
- Finish with strong-hold hairspray and decorative pins at key intersections
23. Sequined Hair Part Design
The Sequined Hair Part Design transforms your natural hair part into sparkling art by applying individual sequins along the part line. This subtle yet striking detail adds festive sparkle without overwhelming your overall hairstyle.
Applying Sequins Precisely
- Create a clean, straight part using a rat-tail comb for the most precise line
- Apply hair gel or eyelash glue along the part line as adhesive base
- Use tweezers to pick up individual sequins for controlled placement
- Position sequins along the part line in your chosen pattern or randomly
- Press each sequin gently into the adhesive, holding for a few seconds
- Work from front to back, checking alignment regularly in a mirror
- Allow adhesive to dry completely before touching or styling surrounding hair
- Set the design with a light mist of hairspray from at least 12 inches away
Sequin Pattern Ideas
- Alternating gold and silver sequins for classic holiday sparkle
- Graduated sizes from large at the front to small at the crown
- Color gradient transitioning from one shade to another down the part
- Clustered groups with spacing between for modern, artistic appearance
- Mixed shapes including stars, circles, and hexagons for textured interest
- Single color family in different finishes (matte, holographic, metallic) for sophistication
24. Candy Cane Twist Crown
The Candy Cane Twist Crown creates twisted sections around the head that are enhanced with red and white temporary color or ribbon to mimic candy canes.
This style combines structure with whimsy for a uniquely festive appearance.
Building the Twisted Crown
- Section hair horizontally from ear to ear across the top of the head
- Divide the top section into four to six vertical subsections
- Apply red and white temporary color in stripes to each subsection before twisting
- Twist each colored section tightly from roots to ends
- Bring the first twist across the head like a headband, pinning at the opposite side
- Layer subsequent twists parallel to the first, creating a crown band effect
- Pin each twist securely at both ends to prevent unraveling
- Style remaining loose hair in curls, waves, or a low ponytail
Enhancing the Candy Cane Effect
- Wrap thin white ribbon around red-colored twists for dimensional striping
- Use temporary hair mascara in red and white for precise color control
- Apply colors in diagonal stripes rather than horizontal for authentic candy cane spiraling
- Secure twist ends with red and white striped elastics or bobby pins
- Add small candy cane-shaped hair accessories between twists for reinforced theming
25. Snowflake-Painted Scalp Art
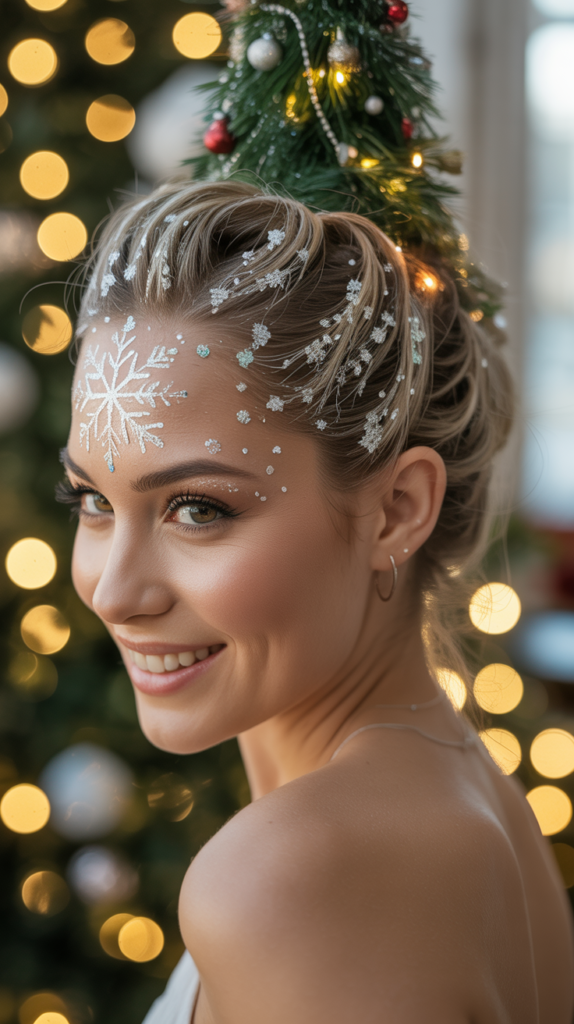
Snowflake-Painted Scalp Art features intricate snowflake designs painted directly on the scalp in visible sections like undercuts or shaved sides.
This bold style works best for those with short hair or intentional shaved areas.
Creating Scalp Snowflakes
- Ensure the target area is cleanly shaved or very short for optimal canvas
- Clean the scalp area with alcohol wipes to remove oils and improve paint adhesion
- Sketch your snowflake design lightly with a white eyeliner pencil first
- Use white body paint, face paint, or specialized hair/scalp paint for application
- Apply paint with small detail brushes, working from the center outward
- Create symmetrical snowflake patterns with six arms radiating from a center point
- Layer paint in thin coats, allowing each to dry before adding detail
- Seal the finished design with setting spray designed for body paint
Scalp Art Maintenance
- Avoid touching the painted area while it dries to prevent smudging
- Set with waterproof setting spray if you’ll be in humid environments
- Expect the design to last through one event before requiring touch-ups
- Remove with makeup remover or gentle soap and water after the event
- Moisturize the scalp after removal to prevent dryness from paint and removal process
26. Layered Ornament Clips in Pixie Cut
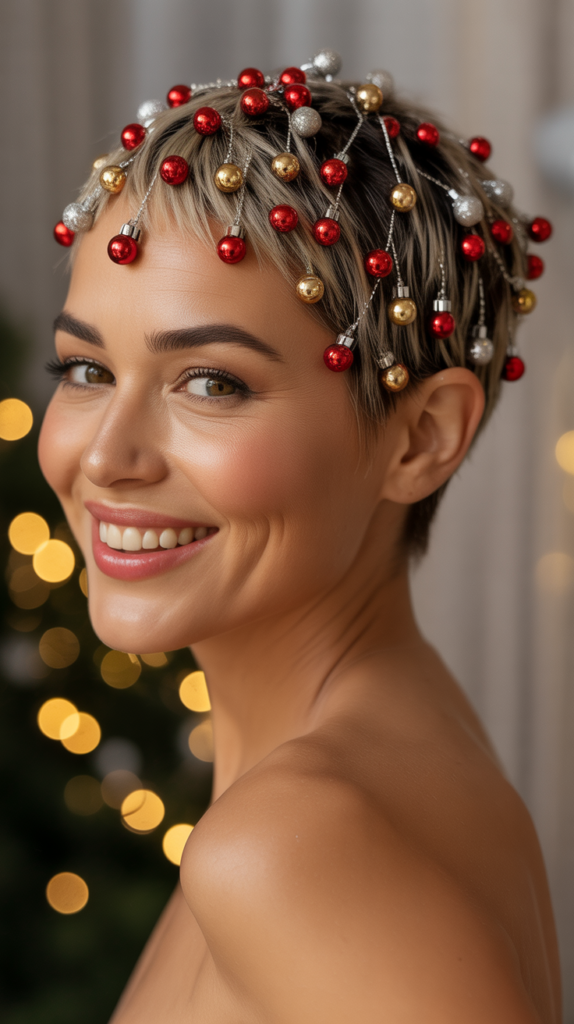
The Layered Ornament Clips in Pixie Cut demonstrates that short hair can be equally festive by strategically placing multiple ornament clips throughout textured, styled pixie cuts.
This accessible style proves holiday hair isn’t limited to long locks.
Styling Short Hair for Ornaments
- Start with freshly washed hair, applying volumizing mousse to damp strands
- Blow dry hair using your fingers to create texture and lift at the roots
- Use a small amount of styling paste or pomade to define pieces and create separation
- Create intentional direction and movement in your pixie cut rather than flat styling
- Identify key areas where clips will be most visible: temples, crown, and sides
- Select miniature ornament clips proportional to your hair length and density
- Attach clips to hair shafts at varying angles for dimensional interest
- Ensure each clip grips enough hair to stay secure throughout the event
Short Hair Clip Placement Strategy
- Position one clip at each temple area framing the face symmetrically
- Add a focal clip at the crown for overhead visual interest
- Place smaller clips along the sides for profile appeal
- Avoid overcrowding; short hair requires fewer clips than long hair for balance
- Choose clips with colors that complement your skin tone and outfit
- Mix matte and shiny ornament finishes for textured variety
27. Vintage Victory Rolls with Holly
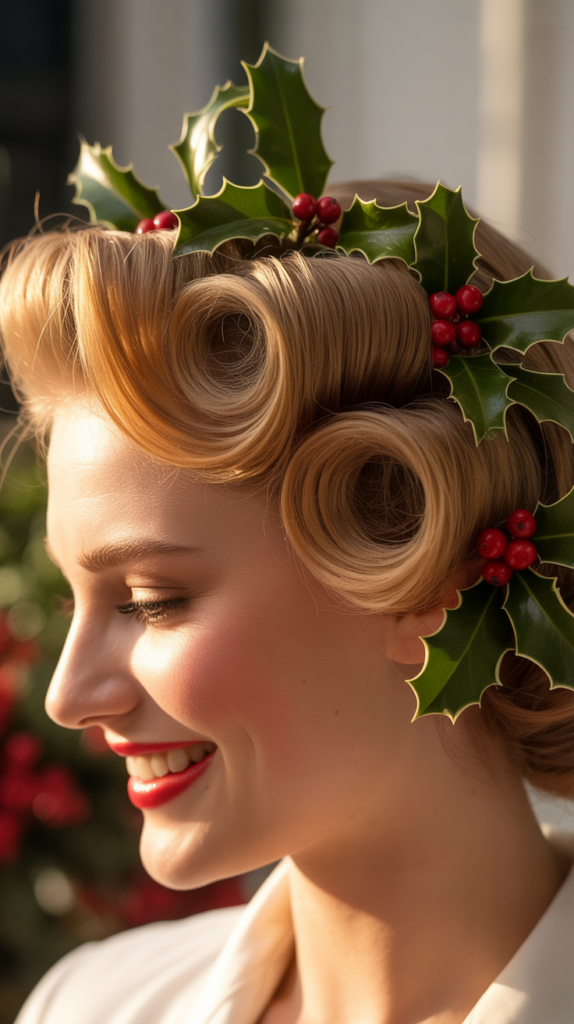
Vintage Victory Rolls with Holly combines 1940s glamour with Christmas festivity by creating classic victory rolls adorned with holly sprigs and berries.
This retro-inspired style offers timeless elegance with seasonal flair.
Creating Perfect Victory Rolls
- Section the front portion of hair from ear to ear across the top
- Divide this section into two equal parts with a center part
- Apply setting lotion or mousse to one section for hold during rolling
- Comb the section forward, then roll it backward toward the part line
- As you roll, push the hair forward slightly to create the signature bump shape
- Pin the roll securely along the base with bobby pins inserted vertically
- Repeat the process on the opposite side, ensuring symmetry between both rolls
- Smooth any flyaways with a small amount of gel on a toothbrush or fine comb
Holly Decoration Placement
- Select holly picks or small sprigs with secure stems or wire bases
- Position holly pieces at the base of each victory roll where they meet the head
- Insert holly stems between hair and scalp, securing with additional bobby pins if needed
- Angle holly to follow the curve of the rolls for natural, flowing appearance
- Add holly with red berries for authentic Christmas coloring and texture
- Consider placing a small holly cluster at the center part for additional festivity
- Balance holly placement so it enhances rather than overwhelms the vintage styling
Vintage Finishing Touches
- Set the entire style with strong-hold hairspray for all-day wear
- Add a decorative hair net in coordinating color for authentic 1940s detail
- Style the back hair in curls, waves, or a low bun depending on hair length
- Apply red lipstick and winged eyeliner to complete the vintage aesthetic
- Pair with period-appropriate accessories like pearl earrings or brooches
Conclusion
The holiday season offers endless opportunities to express your creativity and festive spirit through your hairstyle choices.
These 27 Stunning Christmas Tree Hairstyles to Shine Bright at Any Party provide options for every skill level, hair length, and personal style preference.
Whether you choose the elegant sophistication of a Classic Christmas Tree Bun, the whimsical charm of Jingle Bell Hair Rings, or the artistic boldness of Snowflake-Painted Scalp Art, each style transforms your hair into a celebration of the season.
Remember that the best hairstyle is one that makes you feel confident and joyful, so don’t be afraid to adapt these ideas to suit your unique personality and comfort level.
With the right accessories, temporary colors, and a spirit of experimentation, you can create memorable looks that capture the magic of Christmas and ensure you shine bright at every holiday gathering.
May your festive season be filled with beautiful hair days, wonderful celebrations, and the confidence that comes from looking and feeling your absolute best.