
Long, straight hair offers the perfect canvas for stunning braided hairstyles that combine elegance with versatility.
Whether you’re preparing for a special occasion or seeking everyday styles that keep your hair manageable and beautiful, straight braided hairstyles provide endless possibilities.
The smooth texture of straight hair allows braids to showcase intricate patterns with remarkable clarity, creating looks that range from casual and bohemian to sophisticated and formal.
This comprehensive guide on 27 Stylish Straight Braided Hairstyles Long Hair explores diverse braiding techniques, styling tips, and creative combinations that will transform your long locks into eye-catching masterpieces.
From classic three-strand braids to complex Dutch and fishtail variations, you’ll discover styles suitable for every skill level and occasion, ensuring your straight hair always looks polished and on-trend.
1. Classic Three-Strand Braid
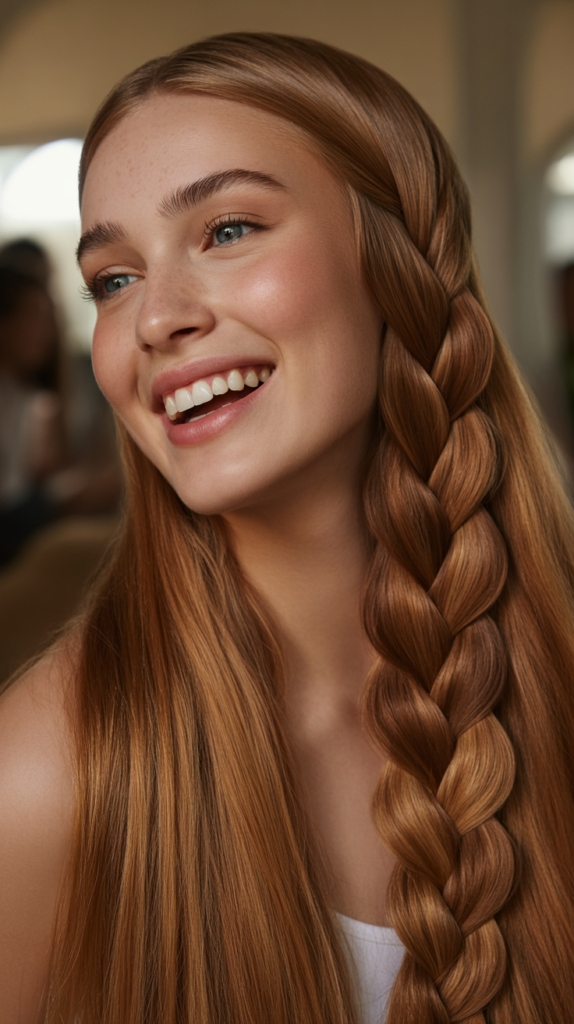
The three-strand braid remains a timeless foundation for all braiding techniques and works beautifully with straight long hair.
This fundamental style divides hair into three equal sections, crossing the outer sections alternately over the middle strand.
The sleek nature of straight hair allows this classic braid to appear clean and defined.
Styling Technique
- Brush your straight hair thoroughly to remove all tangles and create a smooth base for braiding.
- Divide your hair into three equal sections at the nape of your neck.
- Cross the right section over the middle section, then cross the left section over the new middle section.
- Continue this alternating pattern, maintaining consistent tension throughout the braid.
- Secure the end with a clear elastic band for an invisible finish.
Best Occasions
- Perfect for casual daily wear including school, work, or running errands.
- Ideal for athletic activities as it keeps hair securely away from the face.
- Works well as a foundation for more elaborate updo styles.
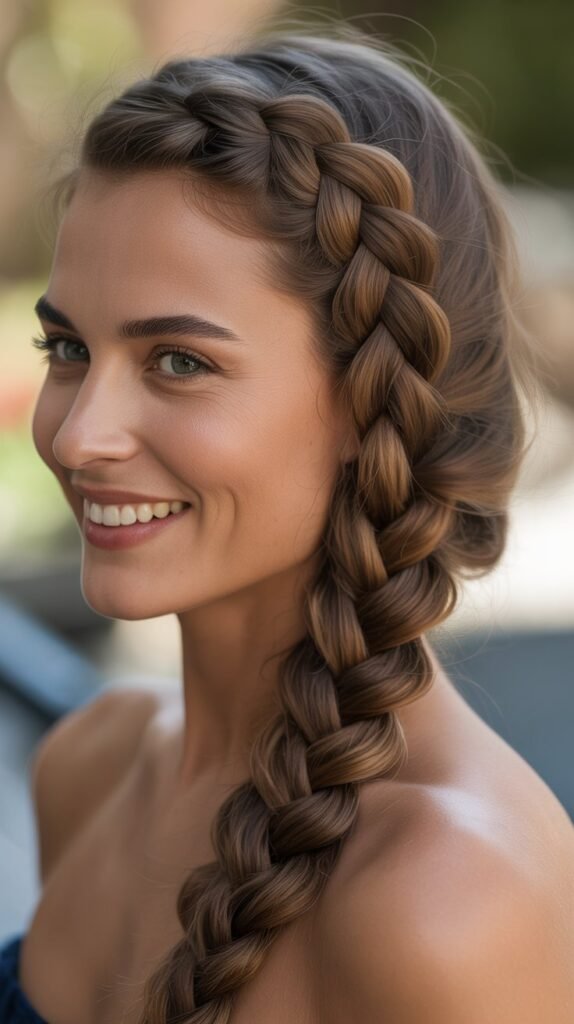
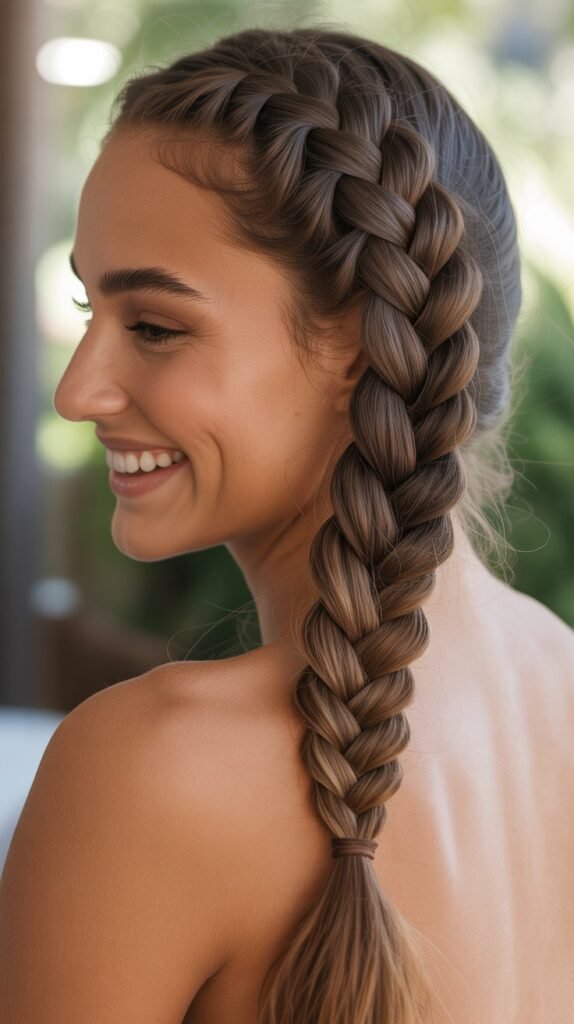
2. Dutch Braid (Reverse French Braid)

The Dutch braid creates a raised, three-dimensional effect that stands out dramatically on straight hair.
Unlike traditional braids where sections cross over each other, this technique involves crossing sections under one another, causing the braid to sit on top of the hair rather than blending into it.
The result is a bold, textured look that adds visual interest to sleek straight locks.
Step-by-Step Process
- Start with a small section of hair at the crown of your head.
- Divide this section into three equal parts.
- Cross the right strand under the middle strand, then cross the left strand under the new middle strand.
- Add small sections of hair from the sides as you continue braiding downward.
- Keep crossing strands under rather than over to maintain the raised effect.
- Complete the braid to the ends and secure with an elastic.
Maintenance Tips
- Apply a smoothing serum before braiding to enhance the sleek appearance of straight hair.
- Gently pull on the outer edges of the braid to create a fuller, more voluminous look.
- Use bobby pins to secure any loose strands near the hairline.
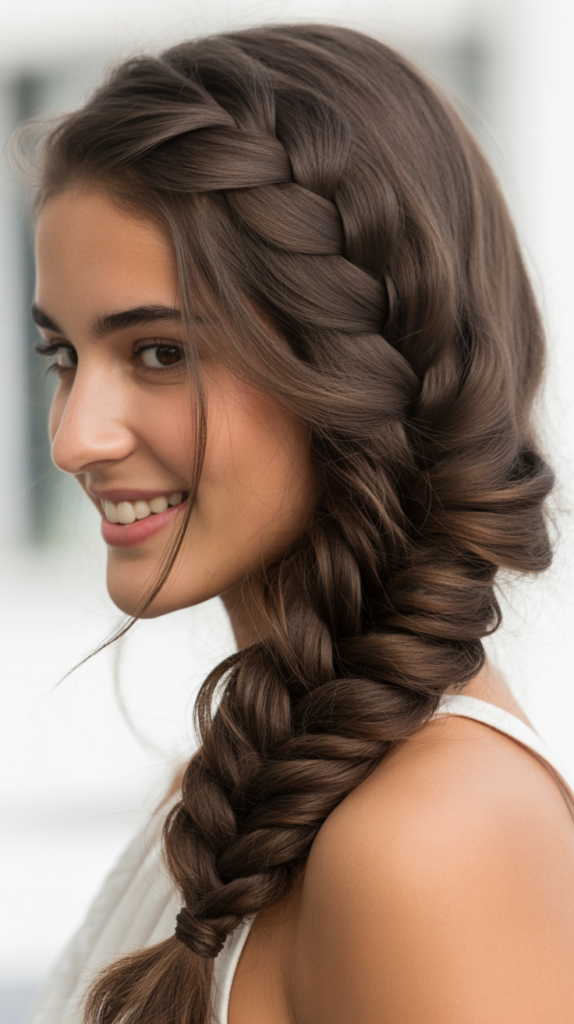
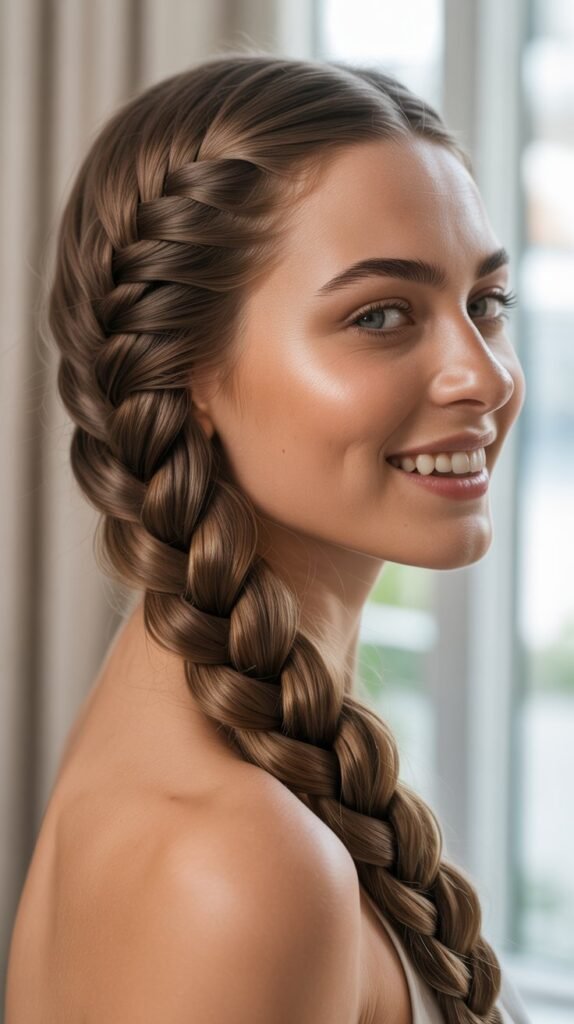
3. French Braid
The French braid offers an elegant, sophisticated style that works exceptionally well with straight long hair.
This classic technique begins at the crown and gradually incorporates sections of hair as you braid downward, creating a seamless, integrated look.
The smooth texture of straight hair allows the French braid to appear polished and refined.
Creating the Perfect French Braid
- Begin by gathering a section of hair from the top center of your head.
- Divide it into three equal strands and start with one traditional braid stitch.
- Before each subsequent stitch, gather a small section of hair from the side and add it to the outer strand before crossing over.
- Continue this pattern, alternating sides, while moving down the head.
- Maintain even tension to ensure the braid lies flat against the scalp.
Ideal Settings
- Professional environments where polished appearance matters.
- Formal events including weddings, proms, and dinner parties.
- Long workdays when you need hair to stay in place for hours.
4. Fishtail Braid
The fishtail braid creates an intricate, woven appearance that looks complex but requires only two sections of hair.
This style showcases the sleek quality of straight hair beautifully, with each small strand distinctly visible in the finished braid.
The result resembles a fish’s tail with its overlapping scale-like pattern.
Braiding Instructions
- Divide your hair into two large equal sections.
- Take a thin strand from the outer edge of the left section.
- Cross this thin strand over to join the right section.
- Take a thin strand from the outer edge of the right section.
- Cross it over to join the left section.
- Continue alternating sides, keeping the sections you transfer thin and uniform.
- The thinner the strands, the more intricate and detailed the braid appears.
Enhancement Techniques
- Pancake the braid by gently pulling on the edges to create a wider, more relaxed appearance.
- Incorporate hair accessories like small pins with pearls between the woven sections.
- Use a texturizing spray before braiding to add grip to very silky straight hair.
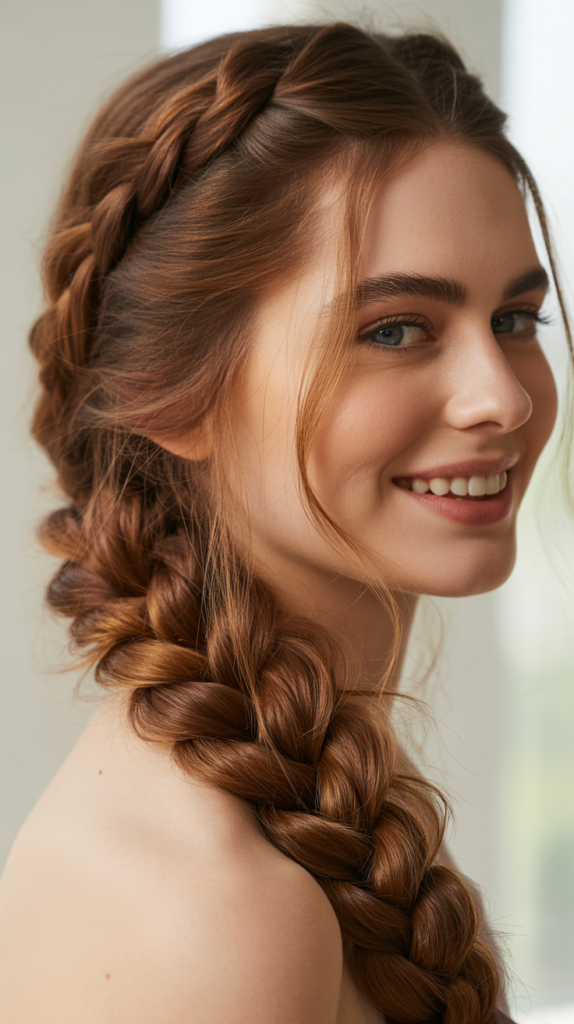
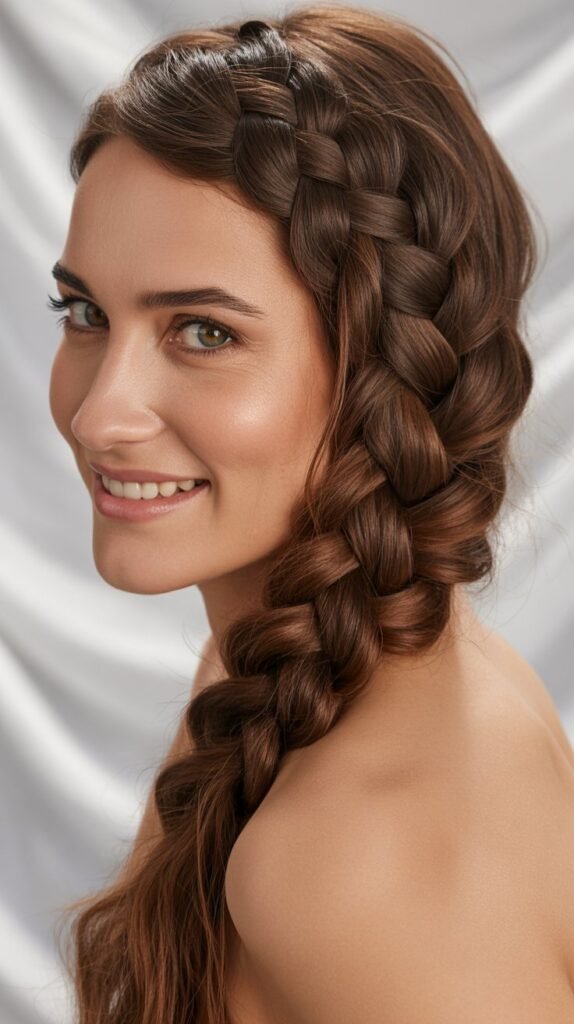
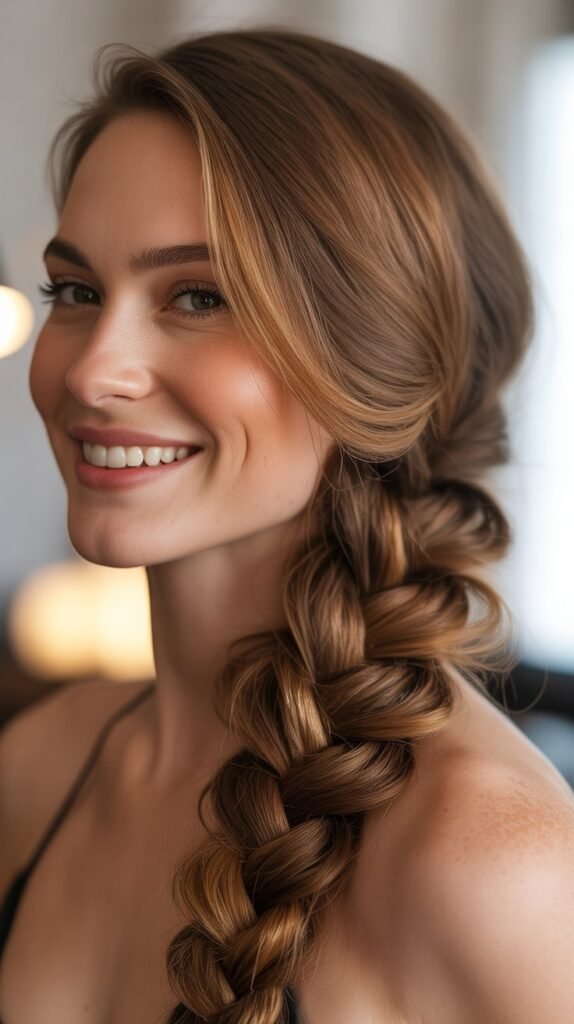
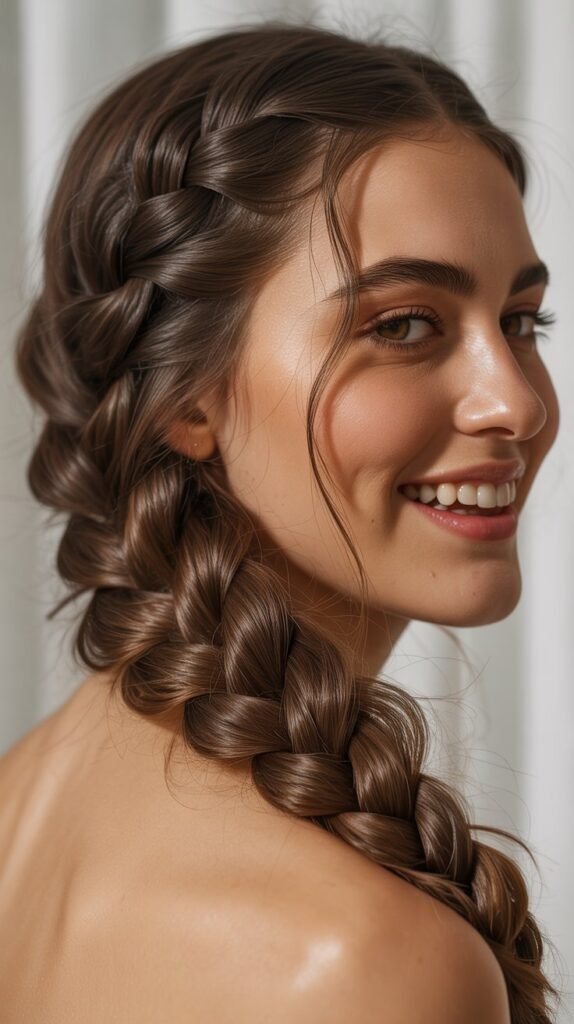
5. Side Braid with Center Part
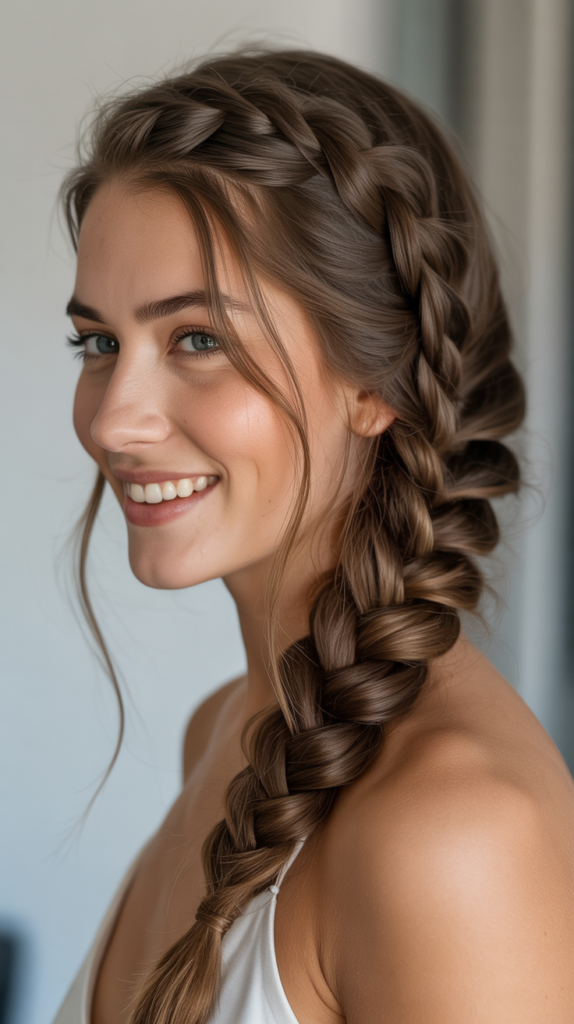
A side braid with a center part combines asymmetry with balance, creating a romantic and feminine look for straight long hair.
This style draws the braid over one shoulder, showcasing its length while keeping the top portion sleek and parted.
The contrast between the smooth parted section and the textured braid adds visual dimension.
Styling Steps
- Create a clean center part using a tail comb for precision.
- Gather all your hair to one side of your neck.
- Choose your preferred braiding technique (three-strand, fishtail, or Dutch).
- Braid loosely to maintain a soft, romantic appearance.
- Secure the end and bring the braid forward over your shoulder.
Suitable Occasions
- Date nights and romantic dinners where you want a soft, approachable look.
- Beach outings and casual summer events.
- Photography sessions where side angles will be featured.
6. Double Dutch Braids
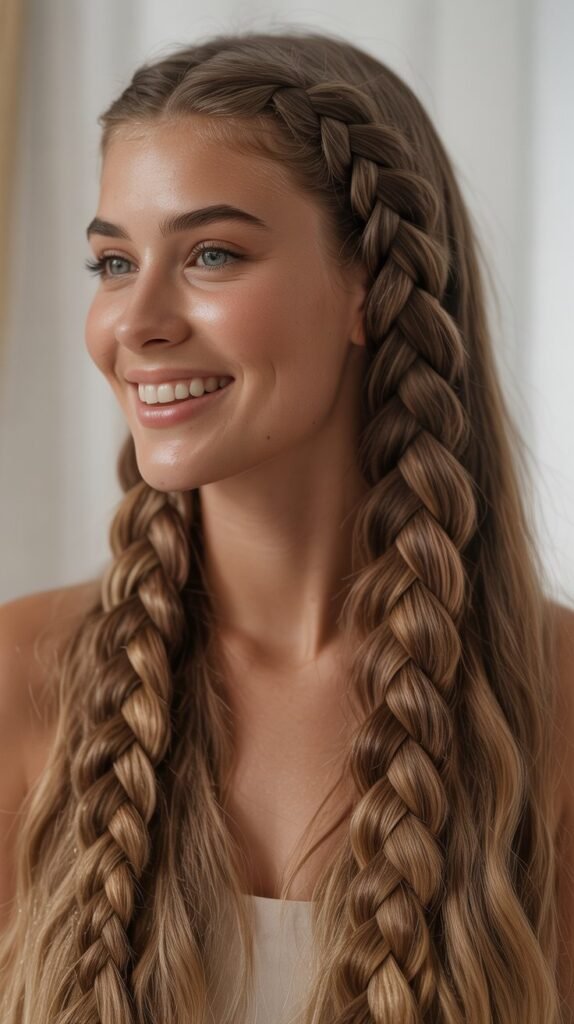
Double Dutch braids create a sporty, symmetrical look that keeps straight long hair completely secure and stylish.
This technique involves creating two parallel Dutch braids on either side of a center part.
The raised nature of Dutch braids makes them prominent and eye-catching, perfect for active lifestyles while maintaining fashion-forward appeal.
Creation Method
- Part your hair down the middle from forehead to nape, creating two equal sections.
- Clip one section away while working on the other.
- Starting at the hairline, begin a Dutch braid by crossing sections under rather than over.
- Continue adding hair and braiding down to the ends.
- Repeat the process on the opposite side, ensuring both braids are positioned symmetrically.
Activity Recommendations
- Intense workouts including running, cycling, and CrossFit sessions.
- Outdoor adventures like hiking, camping, and rock climbing.
- Sports activities where hair needs to stay completely out of the way.
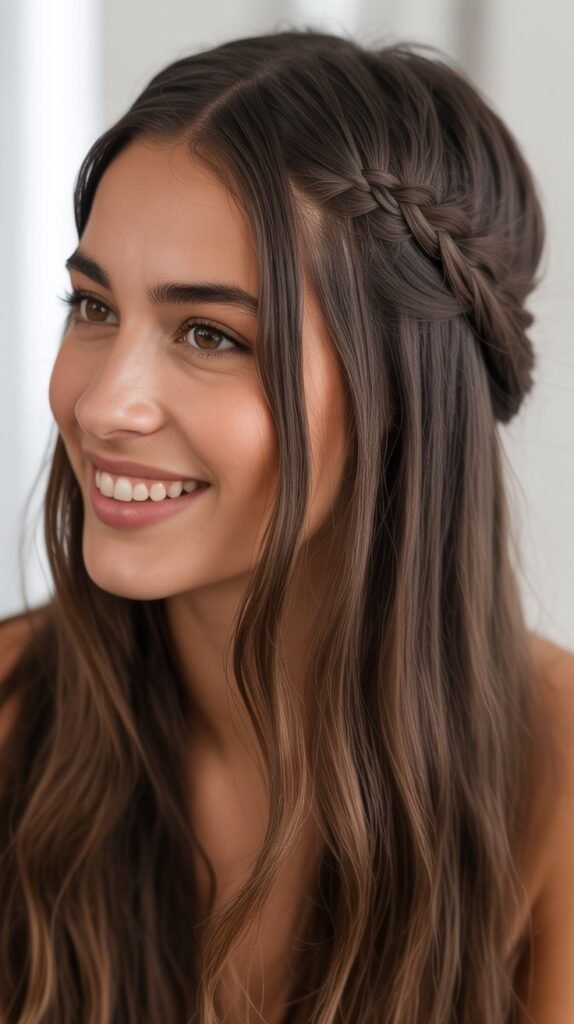
7. Waterfall Braid

The waterfall braid creates a cascading effect where sections of straight hair appear to flow through the braid like a waterfall.
This romantic style combines braiding with loose, flowing hair, creating a dreamy, ethereal look.
The sleek nature of straight hair makes each “waterfall” strand clearly defined and elegant.
Technique Breakdown
- Begin with a small section of hair near your temple.
- Start a basic three-strand braid with these sections.
- After the first stitch, drop the bottom strand and let it fall freely.
- Pick up a new section of hair from above to replace the dropped strand.
- Continue this pattern of dropping and replacing strands as you braid along the hairline.
- The dropped strands create the waterfall effect.
Perfect Pairings
- Formal events like weddings, proms, and galas.
- Spring and summer occasions with floral themes.
- Photoshoots requiring romantic, feminine styling.
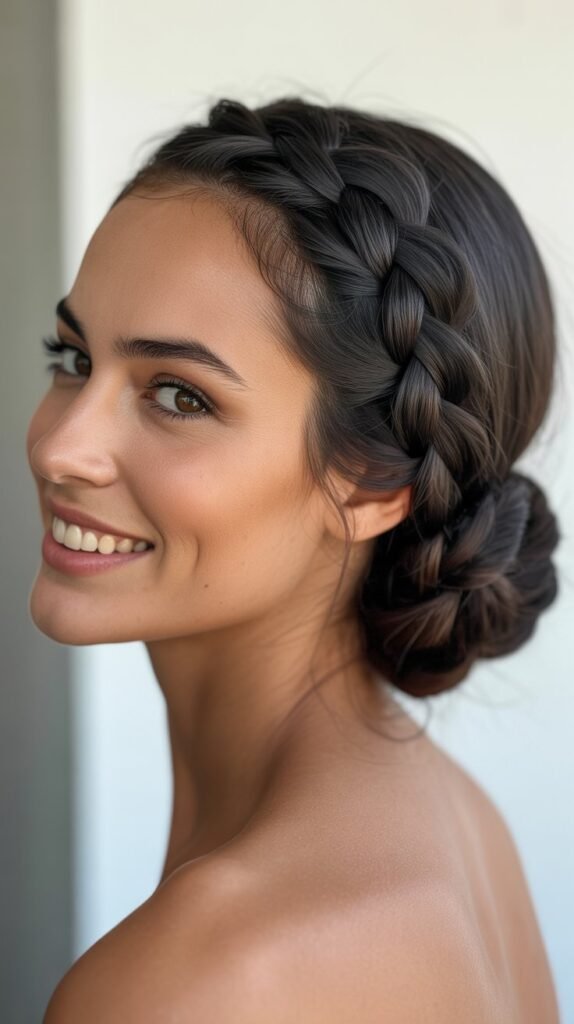
8. Crown Braid (Halo Braid)
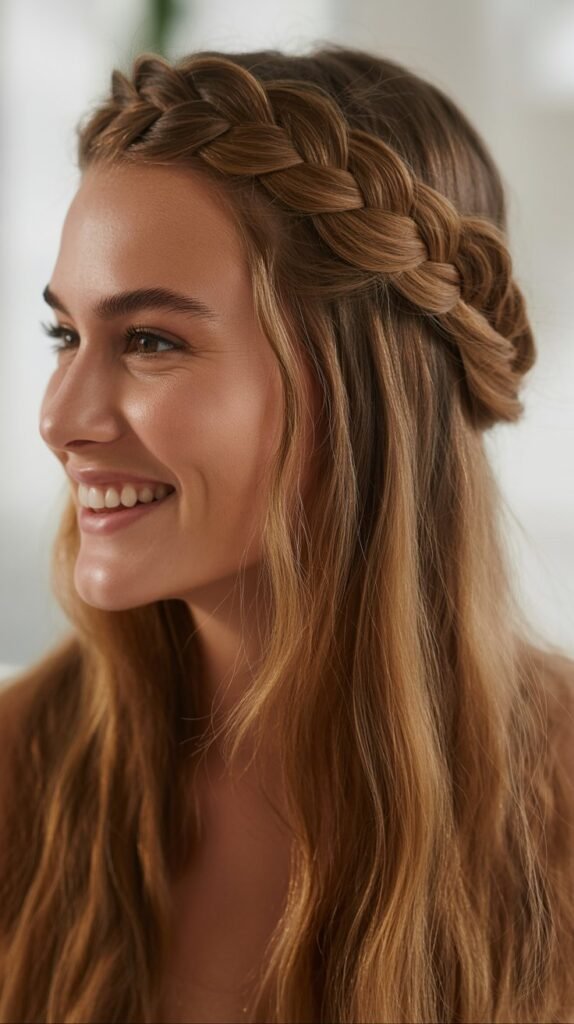
The crown braid wraps around the head like a halo, creating a regal, sophisticated appearance for straight long hair.
This style involves braiding hair around the circumference of the head, with the braid resting like a crown.
The smooth texture of straight hair allows the crown braid to lie flat and polished against the head.
Construction Process
- Part your hair on one side near your ear.
- Begin braiding (Dutch or French style) along the hairline, moving toward the back.
- Continue braiding around the entire circumference of your head.
- Incorporate all loose hair as you work your way around.
- When you reach your starting point, secure the end and tuck it underneath the braid.
- Use bobby pins to secure the braid in place around your crown.
Occasion Suitability
- Weddings as a bridal or bridesmaid hairstyle.
- Renaissance fairs and themed events.
- Professional settings requiring an elegant updo alternative.
9. Rope Braid (Twist Braid)
The rope braid, also known as a twist braid, creates a spiraled effect using only two sections of hair.
This simple yet striking technique works exceptionally well with straight hair, as the smooth strands create clean, defined twists.
The rope braid offers a quick styling option that looks polished and sophisticated.
Twisting Technique
- Divide your hair into two equal sections.
- Twist each section clockwise (or in the same direction) individually.
- Then wrap the two twisted sections around each other in the opposite direction (counterclockwise).
- The opposing twist directions create tension that holds the rope braid together.
- Continue twisting down to the ends.
- Secure with an elastic, ensuring the twist remains tight.
Styling Advantages
- Extremely quick to create, taking less than five minutes.
- Works well when you need a polished look with minimal effort.
- Less likely to give you a headache compared to tighter braiding styles.
10. Pull-Through Braid
The pull-through braid creates a voluminous, statement-making look without traditional braiding techniques.
This style uses a series of ponytails pulled through each other to create a braid-like appearance with impressive fullness.
Straight hair showcases the distinct segments beautifully, making each section clearly visible.
Step-by-Step Creation
- Create a ponytail at the crown of your head with a small section of hair.
- Below that, create a second ponytail with the hair underneath.
- Split the top ponytail in half and bring both halves around the second ponytail.
- Secure the halves with the next section of loose hair to create a third ponytail.
- Pull the sections of the top ponytail outward to create volume.
- Repeat this process down the length of your hair.
Volume Enhancement
- Gently pull on each section after securing to maximize fullness.
- Use a texturizing spray before starting for added grip.
- This technique works particularly well for special events requiring dramatic hair.
11. Braided Ponytail
A braided ponytail combines the sleekness of a ponytail with the texture of a braid, creating a versatile style for straight long hair.
This look can range from sporty to sophisticated depending on the braid type and ponytail placement.
The contrast between the smooth ponytail base and textured braid adds visual interest.
Assembly Instructions
- Gather your hair into a ponytail at your desired height (high, mid, or low).
- Secure firmly with an elastic band.
- Braid the ponytail section using your preferred braiding technique.
- Wrap a small section of hair around the elastic to conceal it for a polished finish.
- Secure the end of the braid with another elastic.
Variations to Try
- High ponytail with Dutch braid for a sporty, youthful appearance.
- Low side ponytail with loose fishtail braid for romantic elegance.
- Mid-level ponytail with classic three-strand braid for professional settings.
12. Boxer Braids
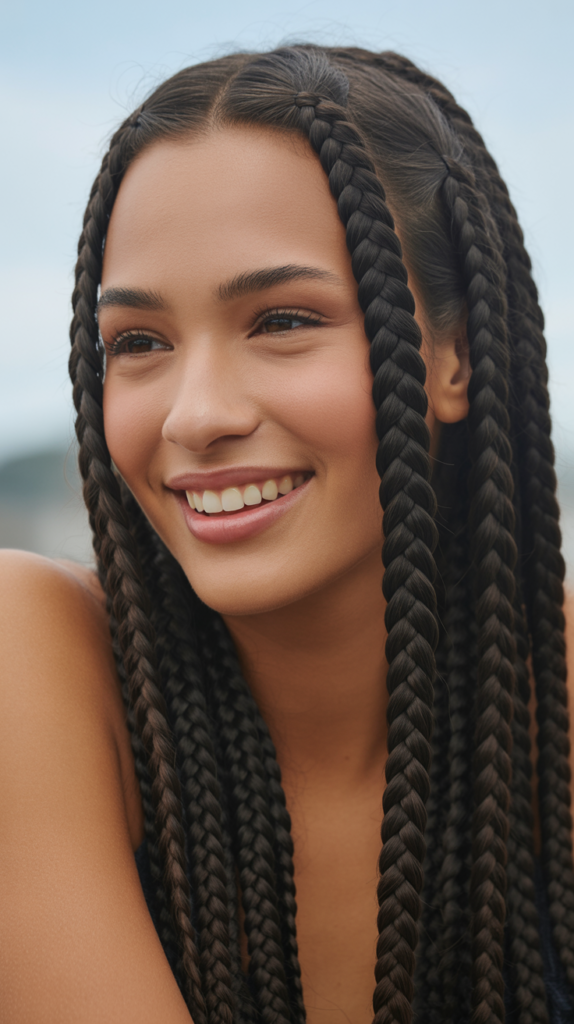
Boxer braids are tight, flat Dutch braids that run straight back from the hairline, creating a sleek, athletic style.
Originally popularized in sports, these braids have become a fashion statement for straight long hair.
The tight braiding technique keeps hair completely secure while creating bold, defined lines.
Braiding Process
- Part hair down the center from forehead to nape with precision.
- Starting at the hairline, create very tight Dutch braids straight back.
- Keep tension consistent throughout the entire braiding process.
- Braid close to the scalp for the signature flat appearance.
- Continue braiding all the way to the ends and secure tightly.
Performance Benefits
- Keeps hair completely secure during intense physical activities.
- Lasts multiple days without needing touch-ups.
- Prevents hair from interfering with athletic performance or vision.
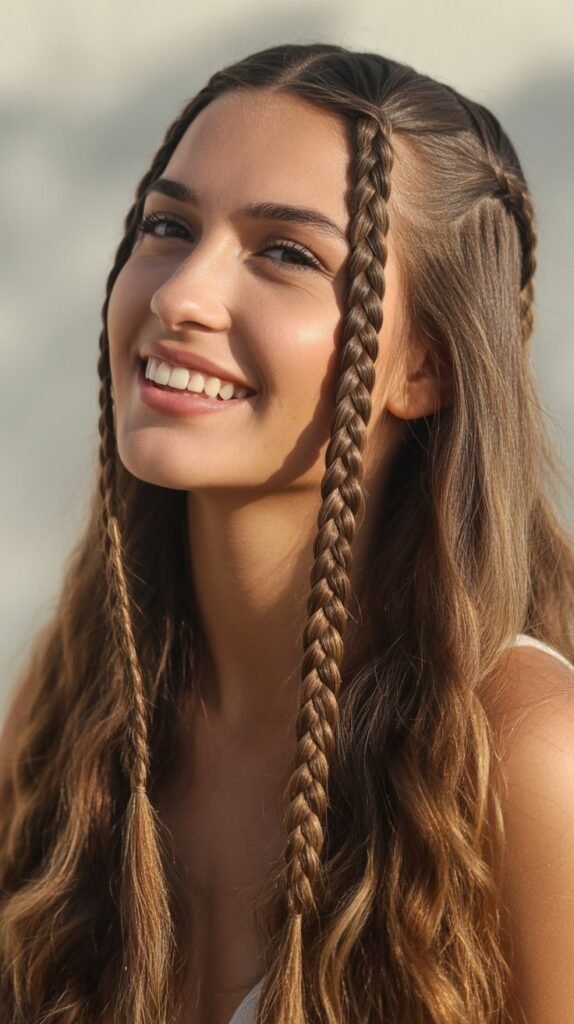
13. Braided Half-Up Half-Down
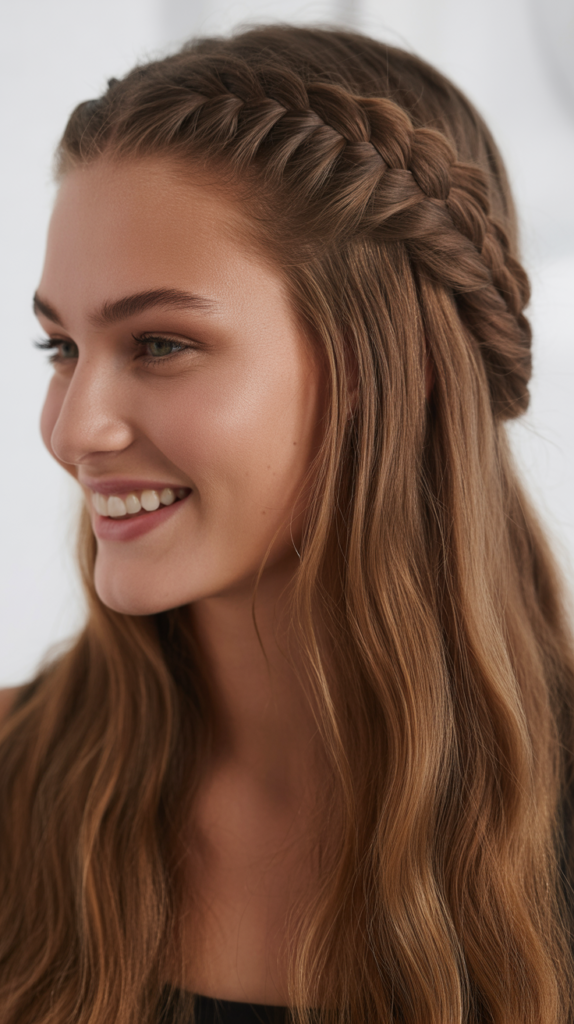
The braided half-up half-down style offers the best of both worlds, combining the elegance of an updo with the beauty of flowing hair.
This versatile look incorporates braids in the upper section while leaving the lower portion loose and straight.
It works perfectly for straight hair, creating contrast between structured and flowing elements.
Styling Approach
- Section off the top half of your hair from temple to temple.
- Create one or multiple braids within this upper section.
- Options include two small side braids, a single crown braid, or Dutch braids along the sides.
- Secure the braids at the back of your head with bobby pins or a small elastic.
- Leave the bottom section straight and flowing for contrast.
- Curl the ends slightly for added dimension if desired.
Versatility Factor
- Appropriate for both casual and formal occasions.
- Works well for school, work, dates, and celebrations.
- Easy to adjust the formality by changing braid tightness and accessories.
14. Four-Strand Braid
The four-strand braid creates a complex, woven appearance that stands out from traditional three-strand styles.
This advanced technique produces a flat, wide braid with an intricate pattern that beautifully showcases straight hair’s smooth texture.
While requiring more practice, the stunning result makes the effort worthwhile.
Braiding Instructions
- Divide your hair into four equal sections, numbered 1, 2, 3, and 4 from left to right.
- Pass section 1 under section 2.
- Pass section 4 under section 3.
- Pass section 2 over section 3 (which are now in the middle).
- Repeat this pattern: outer strand under its neighbor, then middle strands over each other.
- Maintain consistent tension to keep the pattern uniform.
Practice Recommendations
- Start with ribbons or yarn to learn the pattern before using your hair.
- Work slowly initially until the movement becomes natural.
- Watch tutorial videos to understand the three-dimensional movement.
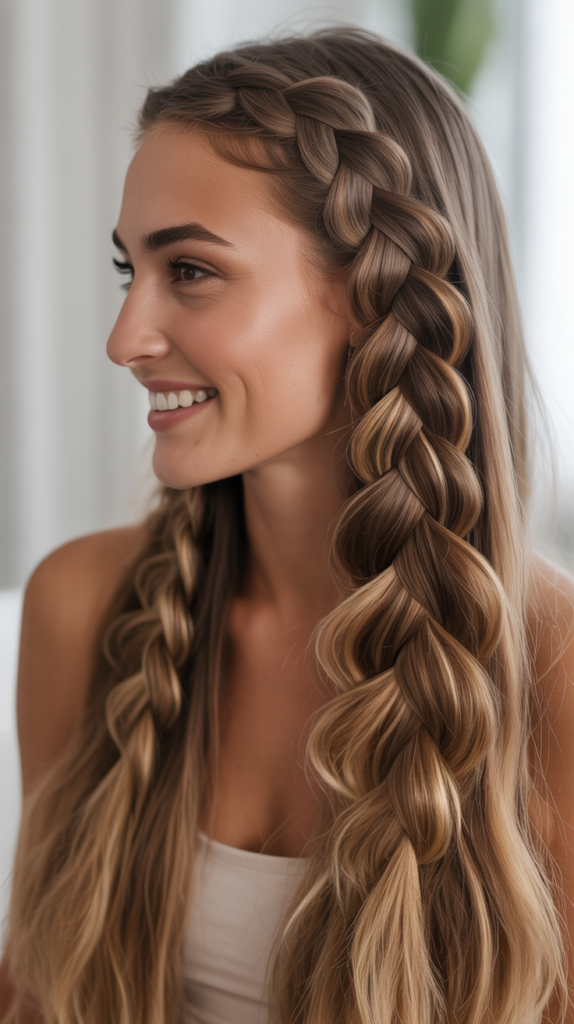
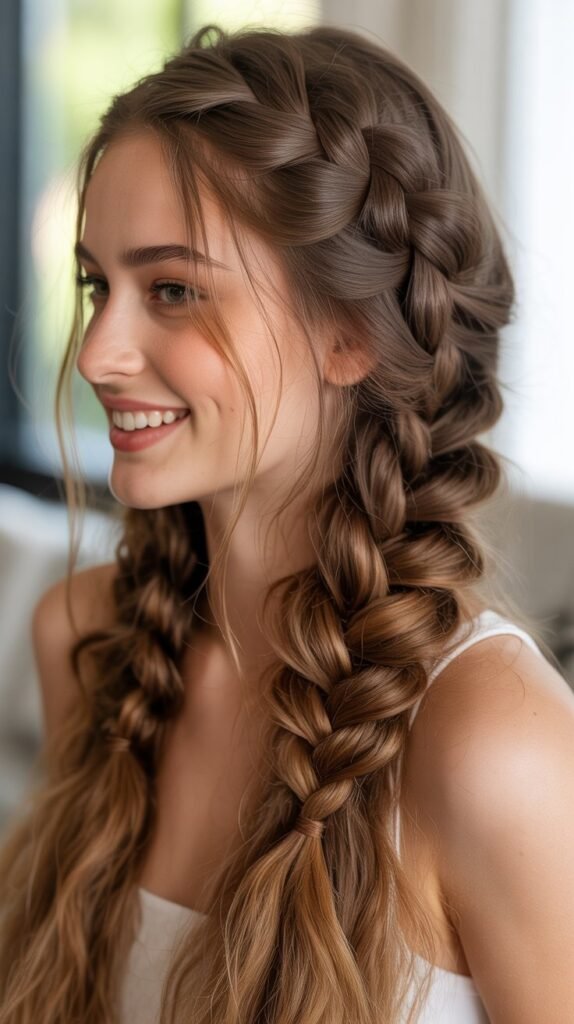
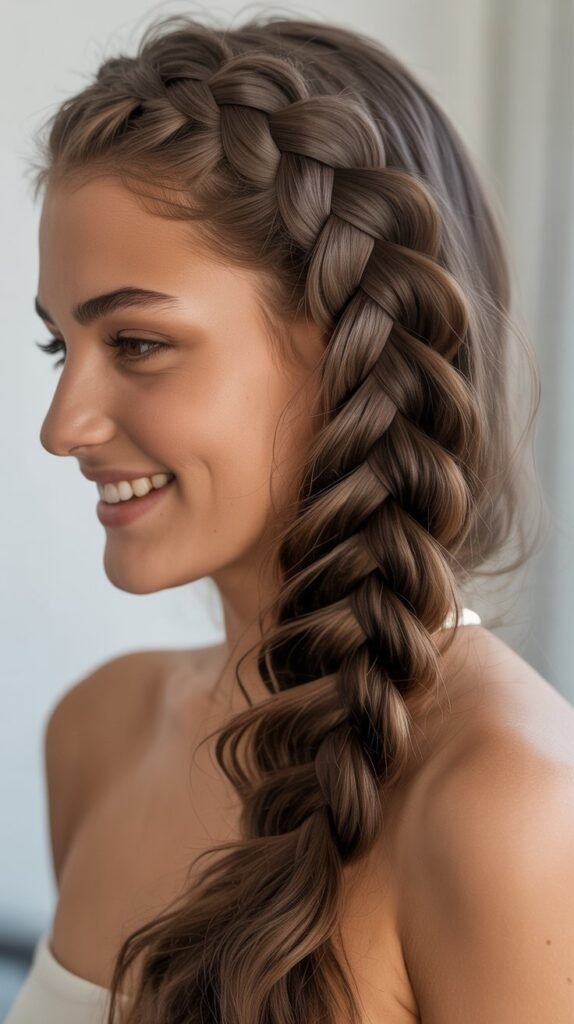
15. Side-Swept Fishtail Braid
A side-swept fishtail braid combines the romantic appeal of side styling with the intricate beauty of fishtail braiding.
This look drapes elegantly over one shoulder, perfect for showcasing the detailed weave pattern in straight long hair.
The asymmetrical placement adds a modern, fashion-forward element.
Creation Method
- Brush all your hair to one side of your neck.
- Secure loosely with your hand while beginning the fishtail braid.
- Take thin sections from the outer edges of each half and cross them over.
- Continue the fishtail pattern while keeping the braid positioned on your shoulder.
- Braid loosely for a soft, romantic appearance.
- Pancake the braid by gently pulling on the edges for extra volume.
Styling Context
- Evening events and cocktail parties.
- Romantic date nights.
- Fashion-forward casual outings.
16. Braided Bun
The braided bun elevates a classic updo by incorporating braid texture and detail.
This sophisticated style combines braiding techniques with bun construction, creating an elegant look that keeps straight long hair completely off the neck.
The smooth quality of straight hair allows the braid’s pattern to remain visible within the bun structure.
Construction Steps
- Braid your hair using your preferred technique (Dutch, French, fishtail, or three-strand).
- Complete the braid all the way to the ends.
- Wrap the braid around its base in a circular motion to form a bun shape.
- Secure with bobby pins, tucking the end underneath.
- Use hairspray to set and smooth any flyaways.
- Add decorative pins or accessories for formal occasions.
Professional Appeal
- Ideal for job interviews and professional meetings.
- Perfect for formal events requiring sophisticated updos.
- Keeps hair secure and polished for long periods.
17. Infinity Braid
The infinity braid creates a unique figure-eight pattern that appears complex and artistic on straight long hair.
This eye-catching technique involves continuously wrapping strands in a specific pattern that resembles the infinity symbol.
The smooth texture of straight hair allows the intricate loops to be clearly visible.
Weaving Process
- Divide your hair into two sections.
- Take a small strand from the left section.
- Weave it in a figure-eight motion: over the right section, under the left section, over the right, and back.
- Take a new strand from the right section and repeat the figure-eight pattern in the opposite direction.
- Continue alternating sides, creating continuous infinity loops.
- This technique requires patience but produces stunning results.
Showcase Opportunities
- Hair competitions and styling showcases.
- Fashion photography and editorial shoots.
- Special occasions where unique hairstyles are appreciated.
18. Mermaid Braid
The mermaid braid combines multiple braiding techniques to create a whimsical, fantasy-inspired look.
This style typically features a combination of traditional braids, fishtail elements, and pulled-out sections for a soft, voluminous appearance.
Straight long hair provides the perfect canvas for this enchanting style.
Layered Creation
- Begin with a Dutch braid at the crown for volume and structure.
- Transition to a fishtail braid in the middle section.
- Pancake both sections generously to create soft, billowy volume.
- Continue with a loose three-strand braid toward the ends.
- Pull out small wisps of hair around the face for a romantic, undone effect.
- The combination of techniques creates the signature mermaid appearance.
Fantasy Appeal
- Costume parties and themed events.
- Beach weddings and oceanic celebrations.
- Creative photoshoots with fantasy or bohemian themes.
19. Zig-Zag Braided Part
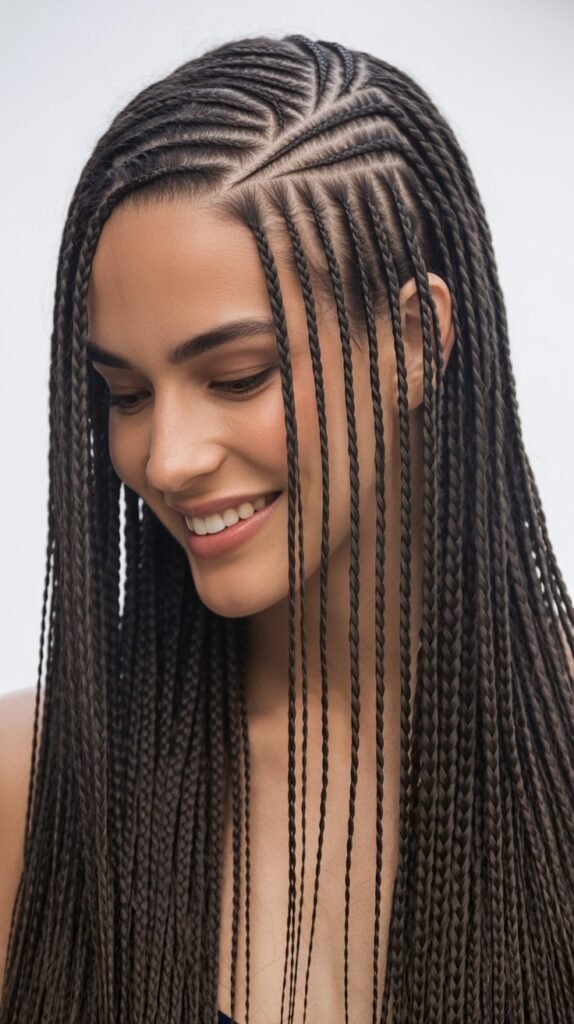
A zig-zag braided part replaces the traditional straight part with a creative, eye-catching alternative.
This style features a zig-zag parting line with small braids following the pattern, adding visual interest to straight long hair.
The geometric precision of the zig-zag contrasts beautifully with the smooth, flowing hair.
Precision Technique
- Use a tail comb to create a zig-zag part pattern from front to back.
- Make sharp, consistent angles for visual impact.
- Create small braids along each section of the zig-zag.
- These can be micro braids or slightly thicker depending on preference.
- Secure the tiny braids with clear elastics or bobby pins.
- Leave the remaining hair straight and flowing.
Artistic Expression
- Music festivals and creative gatherings.
- Fashion-forward events where unique styles are celebrated.
- Social media content creation and hair artistry showcases.
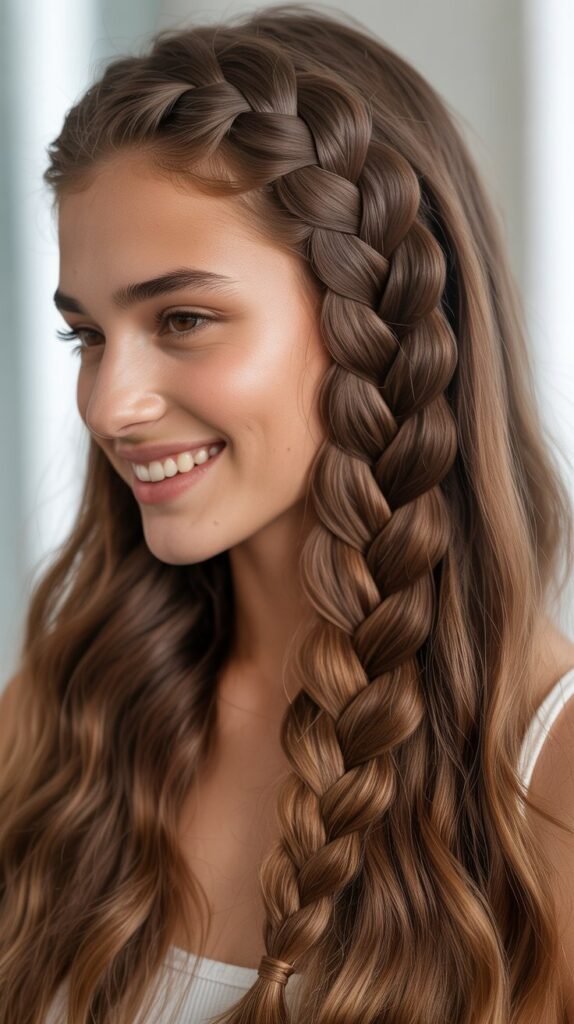
20. Braided Headband
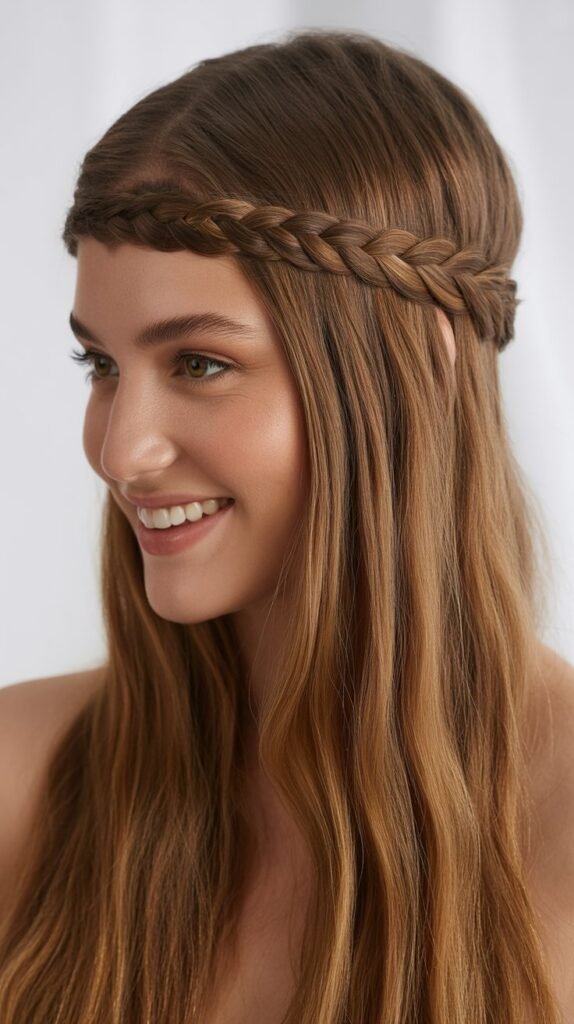
The braided headband creates a bohemian, natural accessory using your own hair.
This style involves creating a braid across the crown that resembles a headband, keeping straight long hair away from the face while adding decorative detail.
The braid acts as both functional and fashionable element.
Headband Construction
- Take a section of hair from behind one ear.
- Braid this section using a three-strand or Dutch braid technique.
- Bring the braid across the top of your head like a headband.
- Secure behind the opposite ear with bobby pins.
- Tuck the end underneath or let it blend with the flowing hair.
- Adjust the positioning for your desired look.
Bohemian Styling
- Music festivals and outdoor concerts.
- Beach vacations and casual summer outings.
- Bohemian-themed events and gatherings.
21. Triple Braid Combo
The triple braid combo creates a statement look by combining three distinct braids into one cohesive style.
This technique typically features multiple braids of different sizes or styles that come together, showcasing the versatility of straight long hair.
The combination creates visual complexity and artistic appeal.
Multi-Braid Assembly
- Section your hair into three parts: one larger center section and two smaller side sections.
- Braid each section separately using different techniques if desired.
- Options include combining Dutch, fishtail, and three-strand braids.
- Let all three braids hang separately or combine them into one large braid.
- Secure together at the bottom with a decorative elastic or ribbon.
Creative Possibilities
- Allows for mixing textures and patterns in one hairstyle.
- Perfect for those who want to showcase multiple braiding skills.
- Creates visual interest from every angle.
22. Ladder Braid
The ladder braid creates a unique woven appearance with horizontal “rungs” connecting vertical braided sections.
This intricate style works beautifully with straight long hair, as the smooth texture allows the geometric pattern to stand out clearly.
The technique requires patience but produces impressive results.
Weaving Instructions
- Create two small Dutch braids on either side of a center part.
- Leave sections of hair between the braids unbraided initially.
- Connect the two braids with horizontal strands of hair at regular intervals.
- These horizontal strands create the “ladder rungs” effect.
- Weave each connecting strand through the braids carefully.
- Continue down the length of your hair, maintaining consistent spacing.
Skill Development
- Considered an advanced braiding technique requiring practice.
- Best suited for those comfortable with multiple braiding styles.
- Produces portfolio-worthy results for aspiring hairstylists.
23. Braided Pigtails
Braided pigtails offer a youthful, playful style that keeps straight long hair organized and cute.
This look features two braids positioned symmetrically on either side of the head, creating a classic childhood style that has evolved into a fashion statement.
The simplicity makes it accessible while remaining stylish.
Pigtail Creation
- Part your hair down the center from forehead to nape.
- Secure each section into a ponytail at your desired height.
- Braid each ponytail using three-strand, Dutch, or fishtail technique.
- Position can range from low and behind the ears to high and sporty.
- Secure the ends with colorful elastics or ribbons.
- Keep braids tight for a neat appearance or loosen for casual charm.
Age-Appropriate Styling
- Children and teenagers for school and play.
- Adults embracing playful, casual fashion.
- Themed events or retro-inspired outings.
24. Hidden Braid
The hidden braid creates subtle surprise elements within seemingly straight, flowing hair.
This technique involves braiding small sections underneath the top layer of hair, revealing the braid only when hair moves or is styled differently.
It’s perfect for straight hair, adding secret detail without obvious alteration.
Concealment Technique
- Section off the top layer of your hair and clip it away.
- Create one or several small braids in the underneath sections.
- Common placements include sides, back, or scattered throughout.
- Release the top layer of hair to cover the braids completely.
- The braids become visible only when hair is styled up or moves with wind.
Subtle Sophistication
- Professional settings where subtle style is preferred.
- Daily wear for those who want low-key interesting details.
- Creates versatility for later updo styling.
25. Diagonal Braid
The diagonal braid travels across the head at an angle rather than straight down, creating dynamic visual movement.
This technique works exceptionally well with straight long hair, as the smooth texture emphasizes the diagonal line.
The angled placement adds contemporary edge to traditional braiding.
Angled Construction
- Begin at the top of your head on one side, near the temple.
- Start your chosen braid type (French or Dutch works best).
- Instead of braiding straight down, angle the braid diagonally across the back of your head.
- Continuously adjust the angle to maintain consistent diagonal direction.
- End the braid at the opposite shoulder or side.
- Secure and let the remaining hair flow naturally.
Modern Aesthetic
- Fashion-forward events and runway-inspired occasions.
- Adds asymmetry and contemporary edge to classic braiding.
- Photogenic from multiple angles.
26. Braided Top Knot

The braided top knot combines the casual coolness of a top knot with the textural interest of braiding.
This style positions a bun high on the head, but instead of smooth hair, the bun consists of braided sections.
Straight long hair creates clean braid definition within the elevated bun structure.
Elevated Assembly
- Gather your hair into a high ponytail at the crown of your head.
- Braid the ponytail completely using your preferred technique.
- Wrap the braided section around the base to create a bun shape.
- Secure with bobby pins, allowing some pieces to stick out for texture.
- Alternatively, braid the hair before pulling it up, then wrap into a knot.
- The braid can lead into the bun or be contained within it.
Contemporary Casual
- Weekend outings and relaxed social gatherings.
- Gym sessions and active lifestyle activities.
- Trendy cafes and casual creative workspaces.
27. Criss-Cross Braided Style
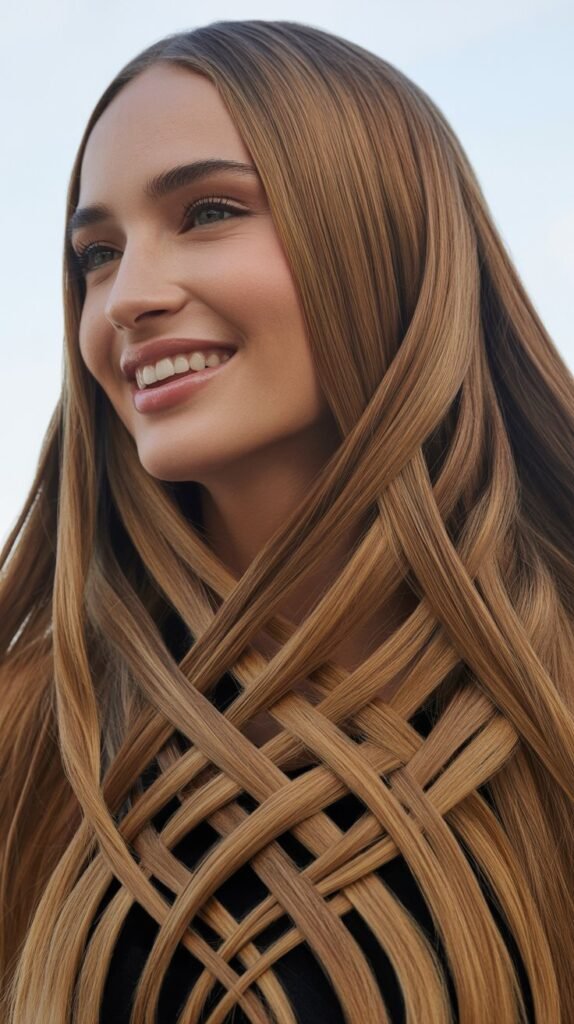
The criss-cross braided style features multiple braids that intersect and weave around each other, creating complex geometric patterns.
This artistic approach works wonderfully with straight long hair, as the smooth strands allow each crossing point to be clearly defined.
The result is a showstopping style perfect for special occasions.
Pattern Creation
- Section your hair into four or more parts.
- Begin braiding each section separately.
- As you braid, cross the sections over each other at predetermined points.
- Secure each crossing point with small bobby pins or decorative pins.
- The pattern can be symmetrical or artistically random.
- Continue weaving until all sections are incorporated into the design.
Artistic Showcase
- Formal events requiring elaborate hairstyles.
- Hair shows and competitive styling events.
- High-fashion occasions and editorial photoshoots.
Maintenance Tips for Straight Braided Hairstyles
Keeping your straight braided hairstyles looking fresh requires proper care and maintenance techniques.
Since straight hair can sometimes slip more easily than textured hair, certain practices help maintain braid integrity throughout the day.
Before Braiding
- Apply a light texturizing spray to add grip without making hair stiff or crunchy.
- Avoid using heavy conditioner or oils immediately before braiding, as this makes straight hair too slippery.
- Ensure hair is completely dry before braiding to prevent breakage and maintain hold.
- Brush thoroughly to remove all tangles, creating a smooth braiding foundation.
During Wear
- Carry small elastics and bobby pins for quick touch-ups throughout the day.
- Use a light hairspray on finished braids to set the style without creating stiffness.
- Sleep with braids wrapped in a silk scarf to prevent frizz and maintain shape overnight.
- Avoid excessive touching or manipulation, which can cause braids to loosen prematurely.
Removal and Care
- Remove braids gently by cutting elastics rather than pulling them out aggressively.
- Use your fingers to carefully unbraid sections, working from bottom to top.
- Apply a detangling spray or conditioner before brushing out braided hair.
- Deep condition hair after wearing tight braids for extended periods.
- Allow your scalp to rest between intensive braiding styles to prevent stress on hair follicles.
Essential Products for Braiding Straight Hair
Using the right products makes a significant difference in how well braids hold and how polished they appear on straight long hair.
The following products enhance braiding success and maintain hair health.
Texturizing Products
- Dry texturizing spray adds grip to slippery straight hair without visible residue.
- Sea salt spray creates slight texture while maintaining natural appearance.
- Volumizing mousse applied at roots provides lift and hold for crown braids.
- These products should be applied sparingly to avoid weighing down fine straight hair.
Finishing Products
- Light-hold hairspray sets braids without creating crunchiness or stiffness.
- Shine serum applied to finished braids enhances the glossy appearance of straight hair.
- Edge control gel smooths flyaways around the hairline for polished results.
- Anti-frizz cream in minimal amounts prevents weather-related texture changes.
Hair Health Products
- Leave-in conditioner protects hair during braiding and prevents breakage.
- Heat protectant spray is essential if blow-drying hair before braiding.
- Deep conditioning masks should be used weekly to maintain hair strength.
- Scalp oils applied to the scalp (not the hair length) keep the scalp healthy during braided styles.
Tools and Accessories for Perfect Braids
Having the proper tools makes braiding straight long hair significantly easier and produces more professional results.
Invest in quality implements that facilitate the braiding process and enhance the finished appearance.
Basic Tools
- Tail comb creates precise parts and sections with its pointed end.
- Paddle brush detangles long straight hair thoroughly before braiding begins.
- Small elastics in clear or matching hair color secure braids invisibly.
- Bobby pins in various shades match different hair colors for seamless securing.
- Hair clips section off hair during complex multi-braid styles.
Decorative Accessories
- Ribbon can be woven into braids for colorful, feminine detail.
- Hair cuffs slide onto braids to add metallic accents and bohemian flair.
- Decorative pins with pearls or crystals elevate braids for formal occasions.
- Colored elastics create playful accents for casual or youthful styles.
- Flowers (real or artificial) can be tucked into braids for romantic, garden-party aesthetics.
Braiding Techniques for Different Hair Lengths
While this guide focuses on long hair, understanding how braid positioning changes with length helps achieve optimal results with your specific hair length within the long hair category.
Very Long Hair (Below Mid-Back)
- Can accommodate multiple complex braids without running out of length.
- Heavy braids may pull on the scalp, so consider braiding slightly looser.
- Extremely long braids benefit from being secured at multiple points to prevent unraveling.
- Showcase the impressive length with single statement braids like fishtail or four-strand.
Long Hair (Shoulder to Mid-Back)
- Most versatile length for the widest variety of braiding styles.
- All 27 styles mentioned in this article work beautifully at this length.
- Provides enough length for intricate styles without becoming unmanageable.
- Ideal for practicing new braiding techniques and perfecting skills.
Long Hair with Layers
- Layers create natural texture variation within braids.
- May require more bobby pins to secure shorter layer pieces.
- Pull-through braids work particularly well with layered hair.
- Embrace the softer, more romantic appearance layers create in braids.
Common Braiding Mistakes and Solutions
Even experienced braiders encounter challenges when working with straight long hair.
Understanding common mistakes helps you troubleshoot issues and improve your braiding results.
Problem: Braids Fall Out Quickly
Causes:
- Hair is too clean and slippery.
- Sections are too loose during braiding.
- Not enough product used for grip.
Solutions:
- Braid hair that’s one day past washing for better hold.
- Maintain consistent tension throughout the entire braiding process.
- Apply texturizing spray before beginning to braid.
- Secure braids with quality elastics rather than cheap ones that slip.
Problem: Uneven or Lumpy Braids
Causes:
- Inconsistent section sizes throughout the braid.
- Varying tension at different points.
- Not incorporating hair evenly in French or Dutch braids.
Solutions:
- Practice measuring sections visually before crossing them.
- Maintain the same hand pressure throughout the entire braid.
- Add equal amounts of hair with each stitch in incorporated braids.
- Work slowly and deliberately rather than rushing through the process.
Problem: Braids Look Too Tight or Cause Discomfort
Causes:
- Excessive tension applied during braiding.
- Braiding too close to the scalp.
- Wearing tight braids for extended periods.
Solutions:
- Braid firmly but not to the point of pulling or pain.
- Position braids slightly looser if planning to wear them all day.
- Take breaks between wearing very tight braiding styles.
- If pain occurs, remove the braid immediately to prevent hair damage.
Problem: Flyaways and Frizz
Causes:
- Humidity affecting smooth straight hair.
- Static electricity in dry environments.
- Hair not properly smoothed before braiding.
Solutions:
- Use anti-frizz serum on finished braids in humid conditions.
- Apply light hairspray to tame flyaways after braiding is complete.
- Brush hair with a boar bristle brush before braiding to smooth the cuticle.
- Keep a small brush and hairspray in your bag for touch-ups throughout the day.
Braiding for Different Occasions
Selecting the appropriate braid style for specific occasions ensures your hairstyle complements the event’s formality and atmosphere.
Different settings call for varying levels of complexity and polish.
Professional and Business Settings
Recommended Styles:
- Classic French braid for conservative offices.
- Low braided bun for executive presence.
- Simple three-strand braid for approachable professionalism.
- Side braid with center part for creative industries.
Styling Notes:
- Keep braids neat and polished without excessive volume.
- Avoid decorative accessories in formal business environments.
- Choose styles that remain secure throughout long workdays.
- Opt for neutral elastics that match your hair color.
Formal Events and Celebrations
Recommended Styles:
- Crown braid for wedding guests or bridal parties.
- Waterfall braid for romantic formal occasions.
- Braided bun for black-tie events.
- Mermaid braid for evening galas with creative dress codes.
Styling Notes:
- Add decorative pins, pearls, or flowers for special occasion glamour.
- Allow time for complex styles that require patience and precision.
- Consider professional styling for once-in-a-lifetime events.
- Coordinate braid style with dress neckline and overall outfit aesthetic.
Athletic and Active Pursuits
Recommended Styles:
- Double Dutch braids for maximum security.
- Boxer braids for intense sports and workouts.
- Braided ponytail for running and cardio activities.
- Simple tight three-strand braid for yoga and pilates.
Styling Notes:
- Prioritize security and functionality over aesthetic complexity.
- Use sport-specific elastics designed to withstand sweat and movement.
- Keep braids tight to prevent loosening during activity.
- Apply extra bobby pins at the hairline if needed for complete security.
Casual and Social Occasions
Recommended Styles:
- Side-swept fishtail for relaxed gatherings.
- Braided headband for bohemian casual looks.
- Rope braid for quick, effortless style.
- Braided half-up half-down for versatile everyday wear.
Styling Notes:
- Embrace looser, more relaxed braiding for casual comfort.
- Experiment with trendy accessories like hair cuffs or colorful ribbons.
- Allow some intentional messiness for effortless, undone appeal.
- Choose styles that can transition easily from day to evening activities.
Cultural Significance and Respectful Braiding
Braiding carries deep cultural significance in many communities around the world.
While exploring various braiding techniques, it’s important to approach certain styles with cultural awareness and respect.
Understanding Braiding Heritage
- Braiding traditions span thousands of years across numerous cultures.
- Many braiding techniques originated in African, Indigenous, Viking, Celtic, and Asian communities.
- Some braid styles hold specific cultural, spiritual, or ceremonial meanings.
- Research the origins of braiding styles you’re interested in learning.
Practicing Cultural Respect
- Appreciate and acknowledge the cultural origins of specific braiding techniques.
- Avoid claiming cultural styles as generic trends without recognition of their roots.
- When learning culturally significant styles, educate yourself about their history and meaning.
- Support and credit hairstylists from the cultures where specific braiding techniques originated.
Universal Braiding Techniques
- Many basic braiding methods (three-strand, rope, fishtail) appear across multiple cultures throughout history.
- French braids, Dutch braids, and similar techniques have been practiced in various forms globally.
- Focus on learning the technical aspects while respecting cultural contexts.
- Celebrate the diversity and richness that different cultures bring to hairstyling traditions.
Learning Resources and Skill Development
Improving your braiding skills requires practice, patience, and access to quality learning resources.
Numerous platforms offer tutorials and guidance for mastering straight hair braiding techniques.
Online Learning Platforms
- YouTube tutorials provide visual step-by-step instructions for all skill levels.
- Instagram hairstylists share quick tips and inspiration through posts and reels.
- Pinterest boards collect diverse braiding ideas organized by style or occasion.
- Online courses offer structured learning paths from beginner to advanced techniques.
Practice Strategies
- Begin with simple three-strand braids to develop muscle memory and coordination.
- Practice on a friend or mannequin head before attempting complex styles on yourself.
- Break down complicated braids into smaller, manageable steps.
- Set aside dedicated practice time rather than attempting new styles when rushed.
- Take progress photos to track improvement and identify areas needing work.
Skill Progression Path
Beginner (Weeks 1-4):
- Master the classic three-strand braid on someone else.
- Learn to braid your own hair in a simple braid.
- Practice French braid technique on a mannequin or friend.
Intermediate (Months 2-3):
- Perfect French and Dutch braids on yourself.
- Learn fishtail braiding technique.
- Experiment with combination styles like braided ponytails.
Advanced (Months 4-6):
- Tackle four-strand and rope braids.
- Create crown braids and waterfall braids independently.
- Develop signature styles combining multiple techniques.
Expert (6+ Months):
- Master intricate styles like infinity braids and ladder braids.
- Create original braid combinations and patterns.
- Help others learn braiding techniques.
Adapting Braids for Hair Type Variations
While this guide focuses on straight hair, understanding how to adapt techniques for slight texture variations ensures success with your specific straight hair type.
Fine Straight Hair
Characteristics:
- Individual strands are thin in diameter.
- May lack volume and appear flat.
- Can slip out of braids more easily.
Adaptation Strategies:
- Use texturizing products generously for grip.
- Consider slightly messier, pulled-out braid styles for the illusion of thickness.
- Try pull-through braids which create volume without requiring thick hair.
- Tease roots gently before braiding for added fullness.
Medium Straight Hair
Characteristics:
- Balanced texture with moderate strand thickness.
- Holds styles well with minimal product.
- Most versatile for all braiding techniques.
Adaptation Strategies:
- This hair type works beautifully with all 27 styles listed.
- Experiment freely with different techniques and complexity levels.
- Minimal product needed, focus on technique rather than enhancement.
- Ideal for practicing new braiding skills.
Thick Straight Hair
Characteristics:
- Individual strands are coarse and thick.
- Creates voluminous, substantial braids.
- May feel heavy when braided.
Adaptation Strategies:
- Divide hair into more sections for manageability.
- Consider multiple smaller braids rather than one large heavy braid.
- Use strong elastics designed for thick hair.
- Be mindful of scalp comfort with heavy braids.
- Allow extra time as thick hair takes longer to braid completely.
Seasonal Braiding Considerations
Different seasons present unique challenges and opportunities for braided hairstyles. Adapting your braiding approach to weather conditions ensures your styles remain beautiful and functional year-round.
Summer Braiding
Benefits:
- Keeps long straight hair off neck during hot weather.
- Reduces heat styling damage when braiding replaces blow-drying.
- Works perfectly for beach, pool, and outdoor activities.
- Protects hair from sun damage when hair is secured in braids.
Recommendations:
- Choose styles that expose the neck for cooling relief.
- Apply UV protection products before braiding in sunny conditions.
- Opt for braids that withstand water exposure like Dutch and boxer braids.
- Incorporate beachy accessories like shells or colorful threads.
Winter Braiding
Benefits:
- Prevents static electricity common with winter air.
- Protects hair from harsh cold wind and indoor heating damage.
- Keeps hair neat under hats and winter accessories.
- Reduces tangles from scarves and coat collars.
Recommendations:
- Use anti-static products before braiding to combat dry air.
- Choose styles that fit comfortably under winter hats.
- Apply extra moisturizing products since winter air is drying.
- Consider styles that incorporate hat hair gracefully like low braids.
Spring and Fall Transitional Seasons
Benefits:
- Moderate weather allows for versatile styling options.
- Fewer weather-related styling challenges.
- Perfect for trying new techniques in comfortable conditions.
Recommendations:
- Experiment with elaborate styles without weather interference.
- Embrace romantic, flowing braids perfect for transitional season aesthetics.
- Layer braiding with seasonal accessories like flowers or autumn leaves.
- Focus on learning new techniques during these forgiving weather periods.
Conclusion
The world of 27 Stylish Straight Braided Hairstyles Long Hair offers endless possibilities for transforming your long locks into stunning, functional works of art.
From the simplicity of a classic three-strand braid to the complexity of infinity and ladder braids, straight hair provides the perfect canvas for mastering diverse braiding techniques.
Each style serves different purposes, whether you need a practical solution for athletic activities, a romantic look for special occasions, or a professional appearance for work settings.
The key to braiding success lies in understanding your hair’s unique characteristics, practicing fundamental techniques, and gradually progressing to more advanced styles.
With the proper tools, products, and patience, anyone can learn to create these beautiful braided hairstyles.
Remember that braiding is both an art and a skill that improves with dedicated practice, so embrace the learning journey and celebrate each milestone achieved.
Whether you’re preparing for a formal event, seeking a new everyday style, or simply exploring creative expression through hair, these straight braided hairstyles offer versatility, elegance, and endless inspiration for keeping your long hair beautifully styled and manageable throughout every season and occasion.