The holiday season brings magical moments of transformation, and what better way to celebrate than adorning your child’s hair with festive beads that capture the spirit of Christmas?
28 Fun Christmas Hairstyles for Kids with Beads Full of Holiday Spirit offers a comprehensive collection of creative, easy-to-achieve hairstyles that will make your little ones shine at every holiday gathering.
From classic braids embellished with red and green beads to intricate updos featuring snowflake-themed accessories, this guide covers everything you need to create memorable Christmas looks.
Whether you’re preparing for a family photo, a school holiday party, or Christmas morning festivities, these beaded hairstyles combine practicality with festive charm.
Each style is designed with children’s comfort in mind while delivering that extra sparkle that makes the season unforgettable.
This article will walk you through diverse options suitable for various hair types, lengths, and textures, ensuring every child can participate in the holiday hair fun.
You’ll discover styling tips, bead color combinations, and techniques that even beginner parents can master, along with advanced options for those seeking show-stopping results.
1. Classic Christmas Braids with Red and Green Beads
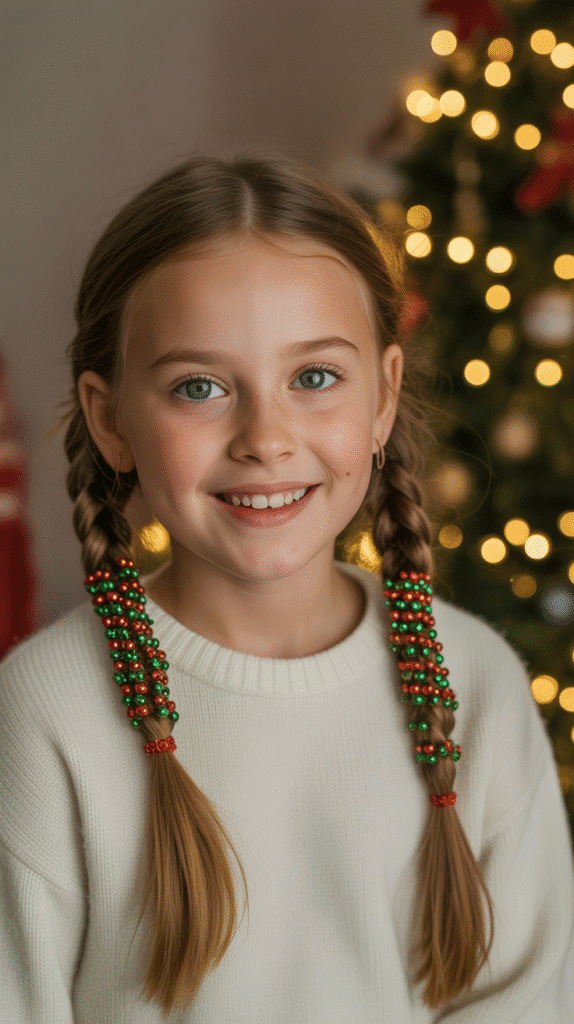
The foundation of holiday hair styling begins with traditional braids enhanced by festive colors.
This timeless approach combines simplicity with seasonal flair, making it perfect for parents who want impressive results without complex techniques.
- Start with freshly washed and detangled hair to ensure smooth braiding and easy bead application.
- Section the hair into two equal parts down the middle for traditional side braids or multiple sections for more intricate patterns.
- Apply a light leave-in conditioner or styling cream to prevent frizz and make the hair more manageable throughout the braiding process.
- Create tight, even braids starting from the hairline and working down to the ends, maintaining consistent tension for a polished appearance.
- Thread red beads onto the right braid and green beads onto the left, or alternate colors within each braid for a candy cane effect.
- Secure each braid with a small elastic band that matches the hair color or use festive red and green bands for extra holiday spirit.
- Space the beads evenly throughout the length of the braids, approximately one inch apart, to create a balanced and visually appealing pattern.
- For children with thicker hair, consider using larger beads that won’t get lost in the volume and will make a bolder statement.
2. Snowflake-Themed Beaded Pigtails
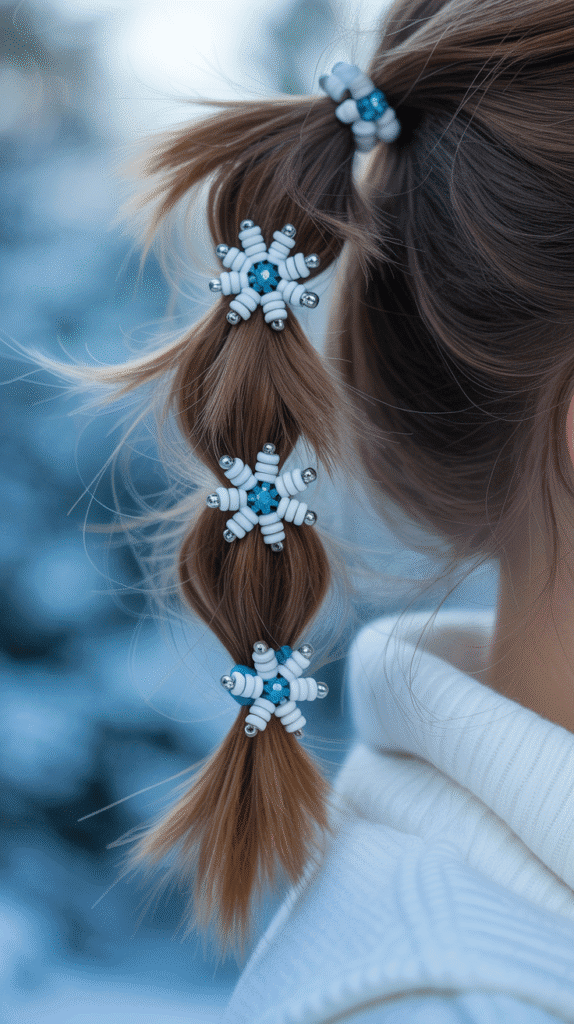
Pigtails take on a winter wonderland transformation when adorned with white and silver beads that mimic glistening snowflakes.
This style works beautifully for younger children and offers a playful yet elegant holiday look.
- Part the hair straight down the center from forehead to nape, creating two equal sections for symmetrical pigtails.
- Gather each section into a high ponytail at temple level, securing with elastic bands that won’t damage delicate children’s hair.
- Choose a combination of round silver beads, white pearl beads, and actual snowflake-shaped beads available at craft stores.
- Thread the beads onto the pigtails in a pattern that mimics falling snow, with clusters near the top and scattered beads toward the ends.
- Add small clear or iridescent beads between the larger decorative pieces to create a shimmering, icy effect.
- Wrap thin silver tinsel or ribbon around the base of each pigtail to enhance the winter theme and hide the elastic bands.
- Apply a light-hold hairspray specifically formulated for children to keep flyaways in place without stiffness.
- This style stays secure throughout active play, making it ideal for holiday parties where kids will be running and dancing.
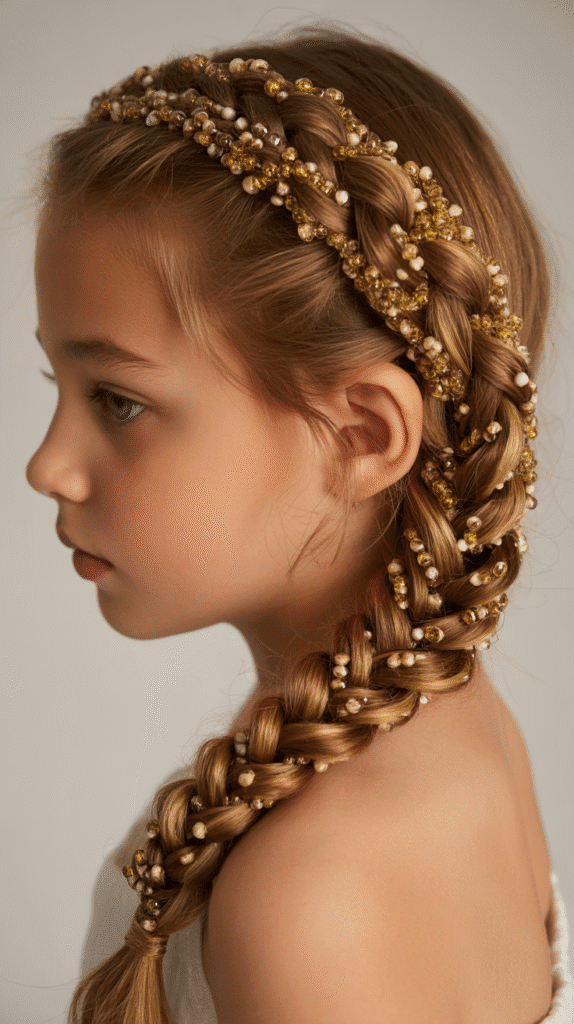
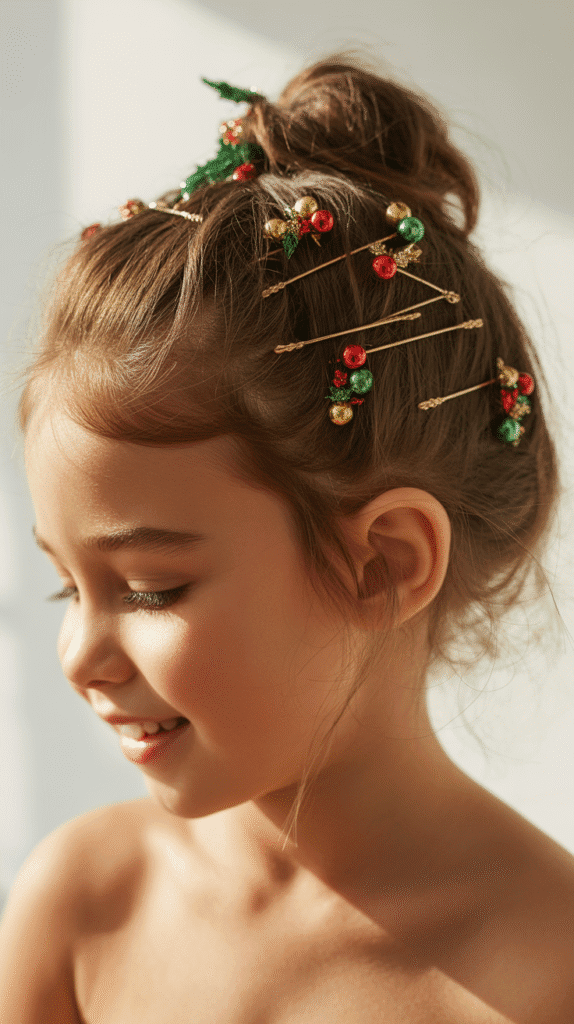
3. Twisted Crown with Gold Bead Accents
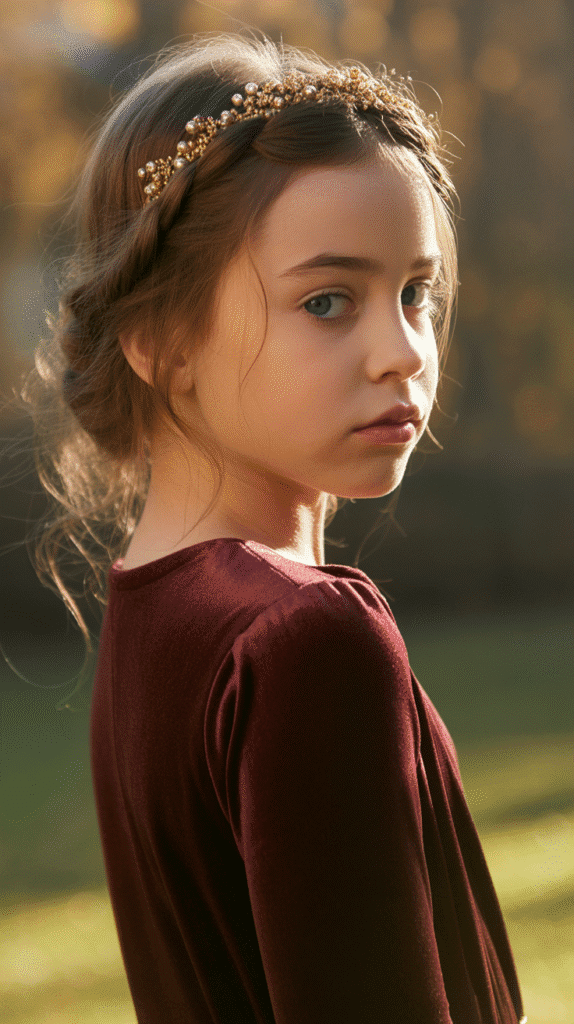
A twisted crown hairstyle creates a regal appearance perfect for Christmas pageants and special family dinners.
Gold beads add a touch of elegance that photographs beautifully.
- Begin by sectioning off the front portion of hair from ear to ear, leaving the back section free.
- Divide the front section into two parts and twist each section away from the face, moving toward the back of the head.
- As you twist, periodically thread small gold beads onto thin strands within the twist to integrate them seamlessly.
- Secure both twisted sections at the back of the head with bobby pins, crossing them over each other to form a crown effect.
- The remaining hair can be left down in natural curls, straightened, or gathered into a low ponytail depending on preference.
- Add larger gold statement beads at the points where the twists meet and are pinned for a focal point.
- This style works exceptionally well for children with medium to long hair and creates a sophisticated holiday look.
- Consider adding small gold ribbon woven through the twists for extra dimension and a truly royal appearance.
4. Bubble Ponytail with Multicolored Christmas Beads
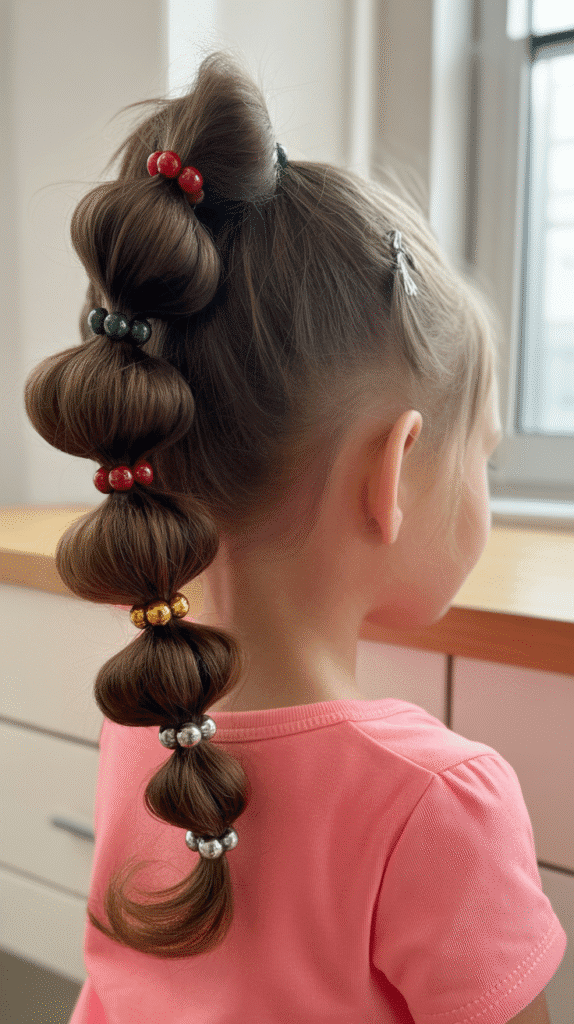
The bubble ponytail trend meets Christmas spirit in this fun, youthful style that children absolutely love.
Multiple sections create visual interest while providing plenty of opportunities for bead placement.
- Create a high or mid-level ponytail and secure it tightly with a durable elastic band as the foundation.
- Measure approximately two to three inches down from the base elastic and add another clear elastic band to create the first bubble.
- Gently pull and loosen the hair between the elastics to create a rounded, puffy bubble effect.
- Continue this process down the length of the ponytail, creating four to six bubbles depending on hair length.
- Thread Christmas-colored beads onto the hair within each bubble section, distributing them evenly for balanced color.
- Alternate bead colors in each bubble—red in the first, green in the second, gold in the third—for a rainbow effect.
- Add small jingle bells alongside beads in the bottom bubble for a playful sound element kids will enjoy.
- This style is particularly forgiving for fine hair as the bubbling technique creates the illusion of fuller, thicker hair.
5. Dutch Braids with Candy Cane Striped Beading
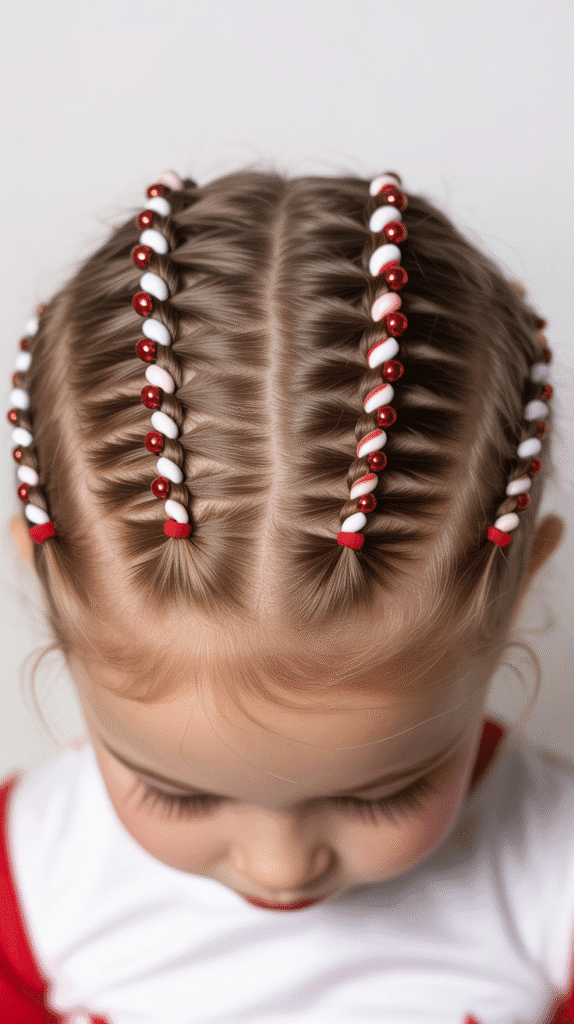
Dutch braids provide a raised, textured look that showcases beads prominently along the top of the head.
The candy cane color pattern makes this style unmistakably festive.
- Section hair down the middle and work on one side at a time to create symmetrical Dutch braids.
- Begin the Dutch braid technique by crossing strands under rather than over, creating a braid that sits on top of the hair.
- After completing two or three crossovers, thread a red bead onto a thin section before incorporating it into the braid.
- Continue braiding and alternate between red and white beads at regular intervals to create the striped candy cane appearance.
- The Dutch braid technique naturally highlights the beads since they sit prominently along the raised braid structure.
- Secure the ends with elastic bands and add a final cluster of red and white beads at the tips.
- For extra security during active play, apply small amounts of edge control gel at the hairline to keep baby hairs smooth.
- This style typically lasts two to three days with proper nighttime care using a silk or satin bonnet.
6. Half-Up Christmas Tree Style with Green Beads
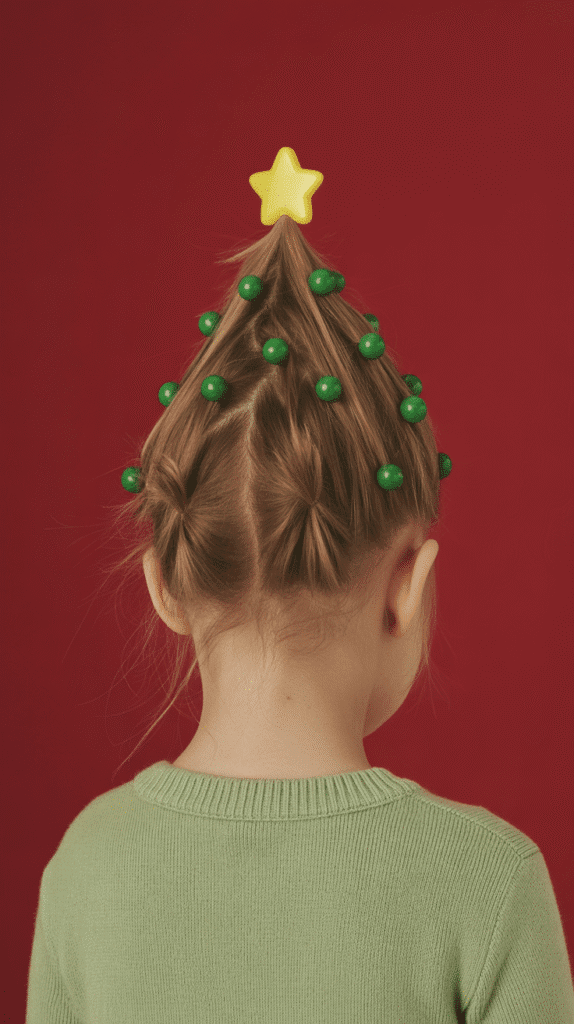
Transform the top section of hair into a triangular Christmas tree shape, complete with green beads as ornaments.
This creative style is perfect for holiday parties and school celebrations.
- Section the top half of the hair into a triangular shape, with the point starting at the crown and widening toward the temples.
- Create a series of small ponytails within the triangle, starting with one at the top and increasing the number in each row below.
- Connect these ponytails using the ladder braid or topsy-tail technique to form the tree structure.
- Thread various shades of green beads—from emerald to lime—onto the sections to represent ornaments.
- Add a special yellow or gold star-shaped bead at the very top point to crown the tree.
- Include a few red beads scattered throughout to represent traditional Christmas tree decorations.
- The bottom half of the hair can remain loose with gentle curls or waves for a balanced overall look.
- Finish with a light mist of shine spray to make the “tree” glisten under lights.
7. Side-Swept Braid with Ombre Holiday Beads
A romantic side-swept braid becomes festive when adorned with beads that transition from one Christmas color to another.
This style suits older children and pre-teens beautifully.
- Brush all hair to one side, choosing whichever side the child prefers or that complements their natural part.
- Begin a loose French or regular braid starting from behind the ear and continuing down over the shoulder.
- Thread dark red beads into the top third of the braid for a rich, deep color foundation.
- Transition to lighter red and rose gold beads in the middle section for a gradual color shift.
- Finish with bright gold beads in the bottom third, creating a complete ombre effect from red to gold.
- Keep the braid slightly loose rather than tight for a softer, more romantic holiday appearance.
- Pull gently on the outer edges of the braid after completion to create a fuller, more dimensional look.
- Add a decorative hair clip or bow at the base where the braid begins for an extra special touch.
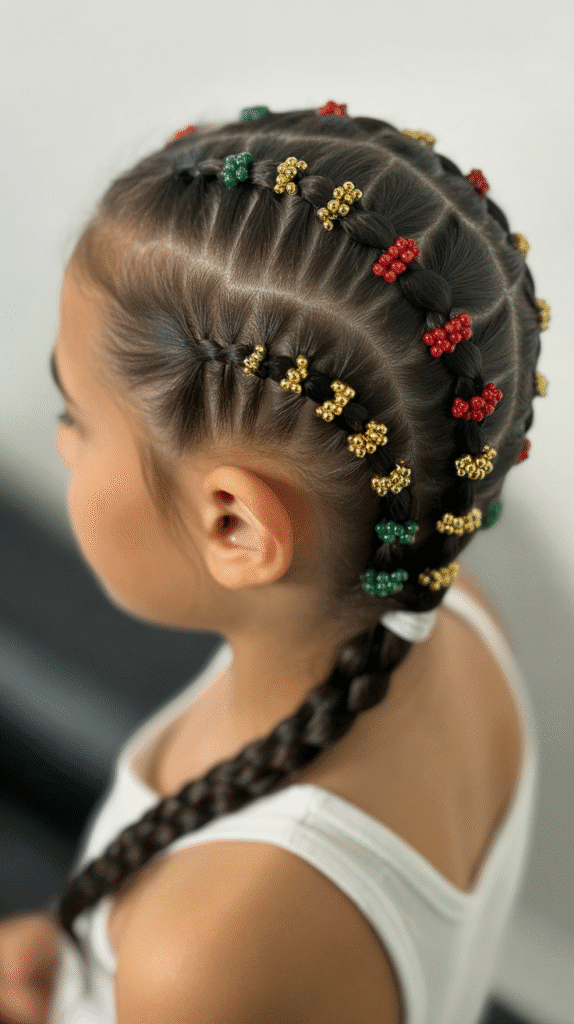
8. Beaded Cornrows in Festive Patterns
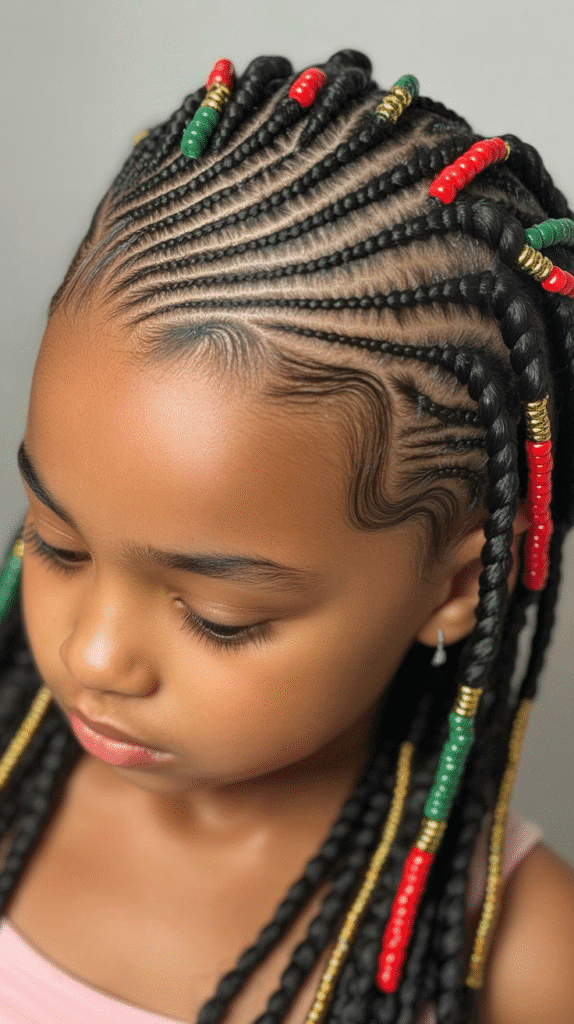
Cornrows provide a long-lasting protective style that becomes festive with the addition of holiday-colored beads.
This option works wonderfully for textured hair types.
- Plan your cornrow pattern in advance—straight back, curved, zigzag, or geometric designs all work beautifully.
- Apply a moisturizing hair product to ensure the scalp and hair remain hydrated throughout the styling process.
- Create clean, tight cornrows using the appropriate sectioning and braiding technique for the child’s hair texture.
- Thread beads onto the ends of each cornrow, choosing colors that complement or contrast with each other.
- For special occasions, consider patterns like Christmas trees, candy canes, or snowflakes formed by the cornrow placement itself.
- Use a rattail comb to create precise parts that enhance the overall geometric design of the style.
- This protective style can last one to two weeks with proper maintenance and scalp care.
- Add bead charms or decorative beads with Christmas motifs along the length of the cornrows for extra holiday spirit.
9. Twisted Bun with Beaded Hairpins
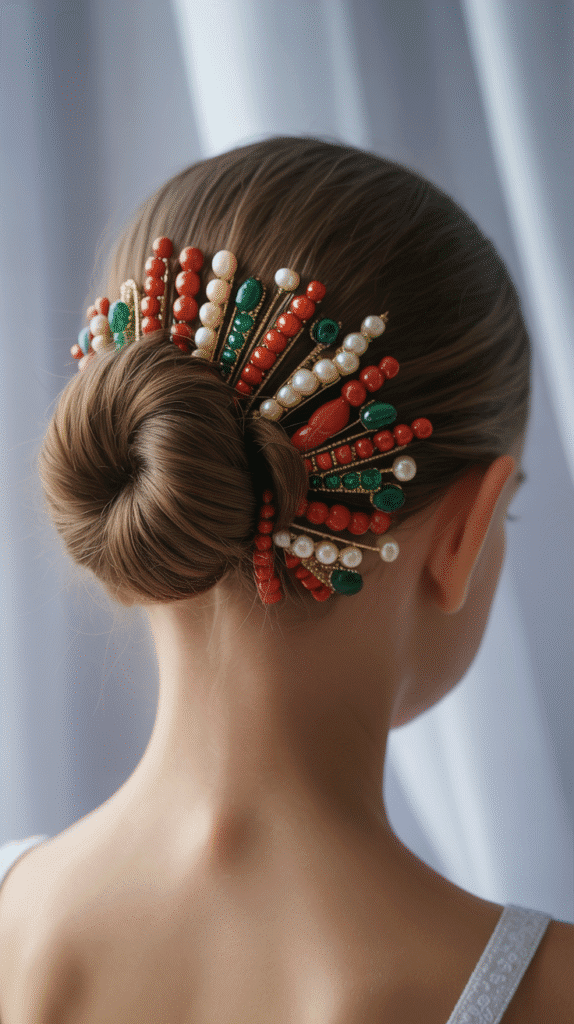
An elegant twisted bun serves as the perfect canvas for decorative beaded hairpins scattered throughout.
This sophisticated style works well for formal holiday events.
- Gather all hair into a low ponytail at the nape of the neck and secure with a strong elastic band.
- Divide the ponytail into two or three sections and twist each section tightly in the same direction.
- Wrap the twisted sections around the base of the ponytail to form a bun, securing with bobby pins as you go.
- Insert decorative hairpins adorned with beads in red, green, gold, and pearl finishes throughout the bun.
- Position the beaded pins at various angles to create visual interest and catch light from different directions.
- For extra security, cross bobby pins in an X-pattern underneath the decorative pins.
- A few face-framing tendrils can be left out and curled for a softer overall appearance.
- Finish with a flexible-hold hairspray to keep the style intact through holiday dinners and photographs.
10. Zigzag Part with Beaded Mini Braids
A creative zigzag part adds instant visual interest, while mini braids decorated with beads provide festive detail without overwhelming the style.
- Use a rattail comb to create a zigzag pattern down the center of the head from forehead to crown.
- On each side of the zigzag part, section off small pieces of hair for mini braids.
- Create three to five small braids on each side, keeping them thin enough to be delicate but thick enough to hold beads.
- Thread two to three beads onto each mini braid in coordinating Christmas colors.
- Leave the remaining hair loose, in ponytails, or in a half-up style depending on personal preference.
- The zigzag part itself becomes a design element that makes even simple styling look intentional and creative.
- This style works beautifully for children with all hair types and lengths from medium to long.
- Change up the bead colors to match specific outfits or holiday party themes throughout the season.
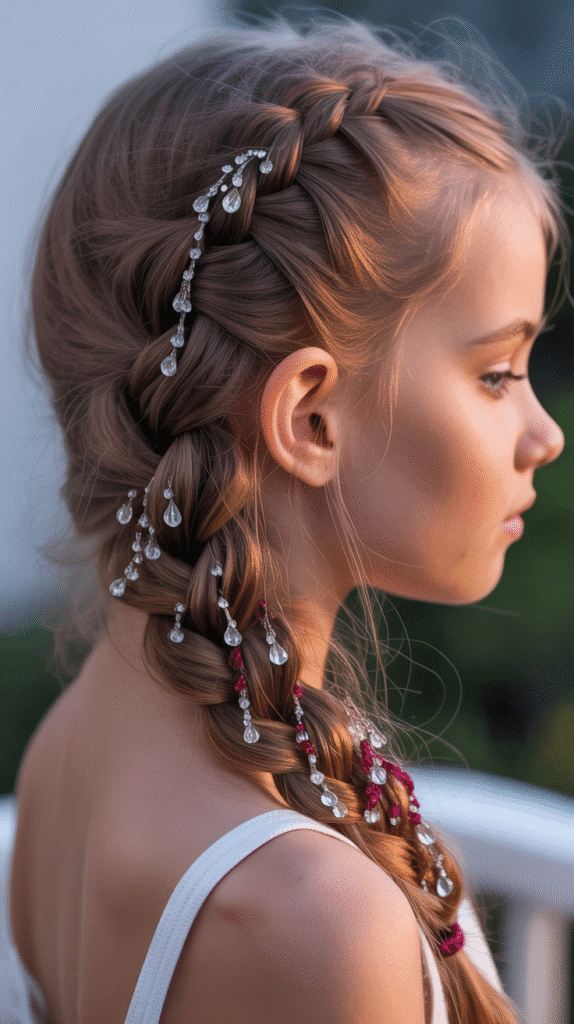
11. Waterfall Braid with Crystal and Red Beads
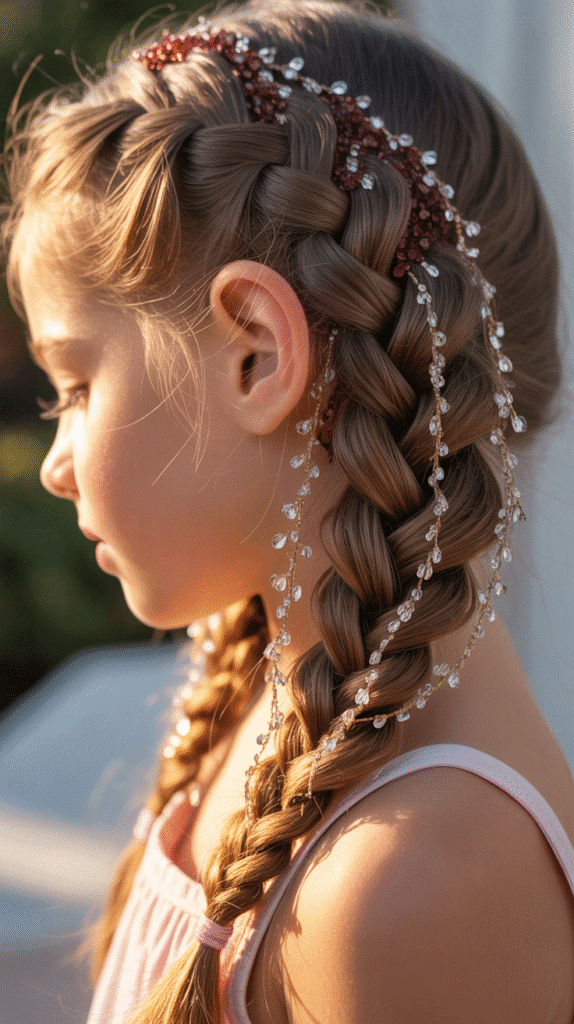
The romantic waterfall braid technique creates a cascading effect that becomes even more magical with the addition of crystal and red beads.
- Begin at one side of the head near the temple and start a regular three-strand braid moving horizontally.
- After each crossover, drop the bottom strand and pick up a new section of hair to replace it, creating the waterfall effect.
- Thread small crystal beads onto the dropped strands so they catch light as they cascade down.
- Add red beads periodically throughout the working braid to provide color contrast against the crystal beads.
- Continue the waterfall braid around to the opposite side of the head or stop at the center back.
- The combination of clear and red beads creates an elegant ruby-and-diamond appearance perfect for Christmas.
- Curl the loose hair beneath the waterfall braid for added volume and a complete, polished look.
- This intermediate-level style may require practice but delivers stunning results for special holiday occasions.
12. Double Bun Style with Beaded Wraps
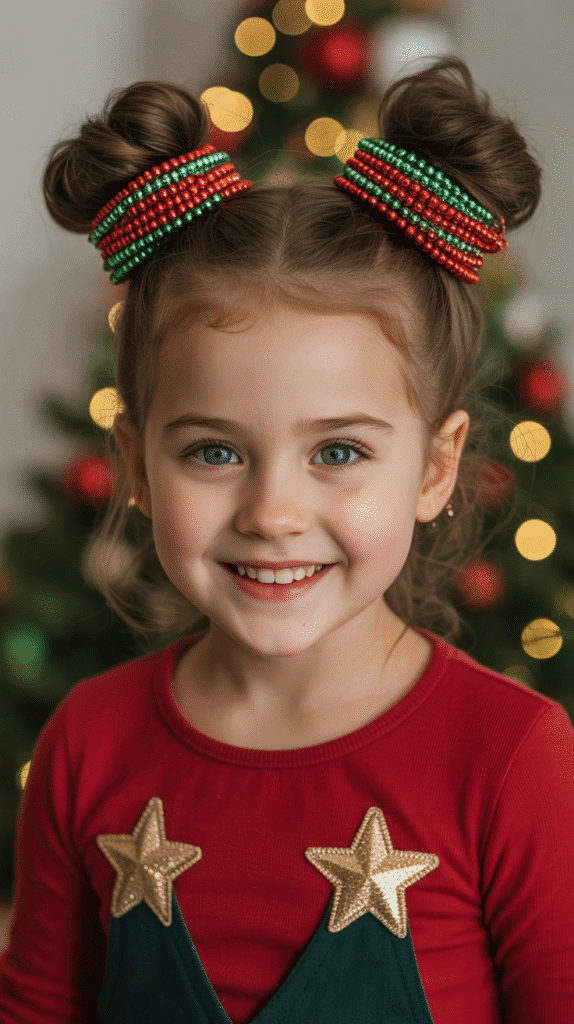
Two buns positioned on either side of the head get a festive upgrade with beaded wire or ribbon wrapped around their bases.
- Part the hair down the middle and create two high ponytails positioned above and slightly behind each ear.
- Twist each ponytail and wrap it around its base to form neat, round buns.
- Secure the buns with bobby pins and elastic bands for maximum hold during active play.
- Take beaded wire or ribbon strung with Christmas beads and wrap it around the base of each bun multiple times.
- Tuck the ends of the wire or ribbon securely into the bun so they don’t poke or come loose.
- Add a few individual statement beads secured with bobby pins on top of each bun for extra decoration.
- This playful style evokes a festive, youthful energy perfect for younger children.
- The buns keep hair completely out of the face, making this an excellent choice for active holiday activities.
13. Rope Braid Ponytail with Graduated Bead Sizes
A rope braid offers a unique twisted texture that displays beads beautifully, especially when using graduated sizes from small to large.
- Create a ponytail at the desired height and secure it with a clear elastic band.
- Divide the ponytail into two equal sections and twist each section tightly in the same direction.
- Wrap the two twisted sections around each other in the opposite direction to create the rope braid effect.
- Secure the end with another elastic band and begin adding beads from top to bottom.
- Start with small beads near the base of the ponytail and gradually increase bead size as you move toward the ends.
- The graduated effect creates visual interest and draws the eye down the length of the braid.
- Gold and bronze beads work particularly well for this style, creating a sophisticated holiday look.
- The rope braid technique is easier than traditional braiding and creates a unique texture that stands out.
14. Crown Braid with Alternating Bead Colors
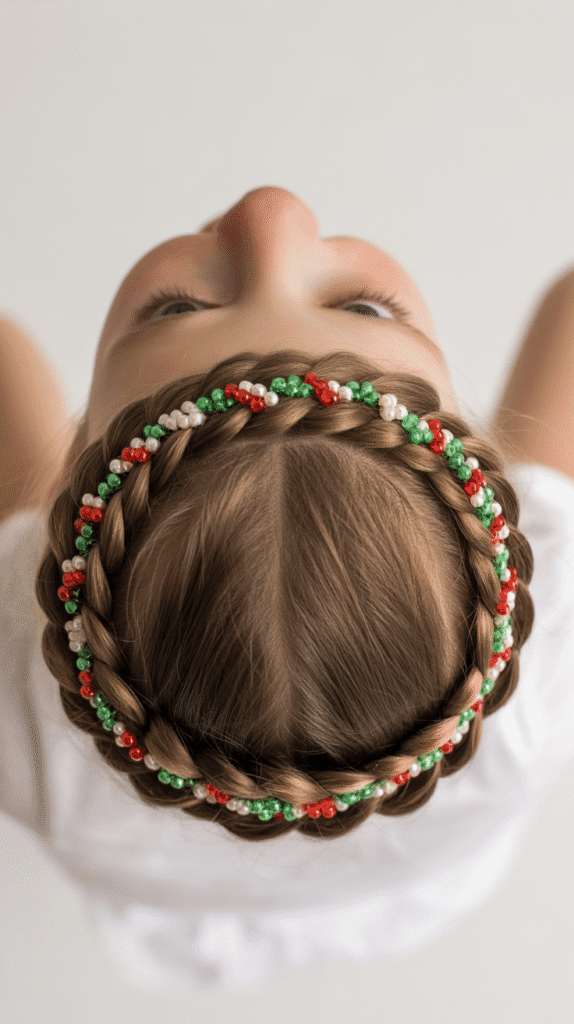
A crown braid that circles the entire head becomes a festive masterpiece when beads in alternating Christmas colors are woven throughout.
- Part the hair to one side and begin a Dutch or French braid starting from the part.
- Continue braiding around the entire circumference of the head, following the hairline.
- As you braid, thread beads onto sections before incorporating them into the braid structure.
- Alternate bead colors in a repeating pattern—red, green, white, red, green, white—for consistency.
- When you return to the starting point, tuck the remaining tail of the braid under the crown and secure with pins.
- The circular crown creates a halo effect that’s both angelic and festive for the holiday season.
- This style works best on medium to long hair and may require assistance from an adult for younger children.
- Add a decorative bow or flower clip at the point where the braid ends for a finished appearance.
15. Space Buns with Glitter and Bead Mix
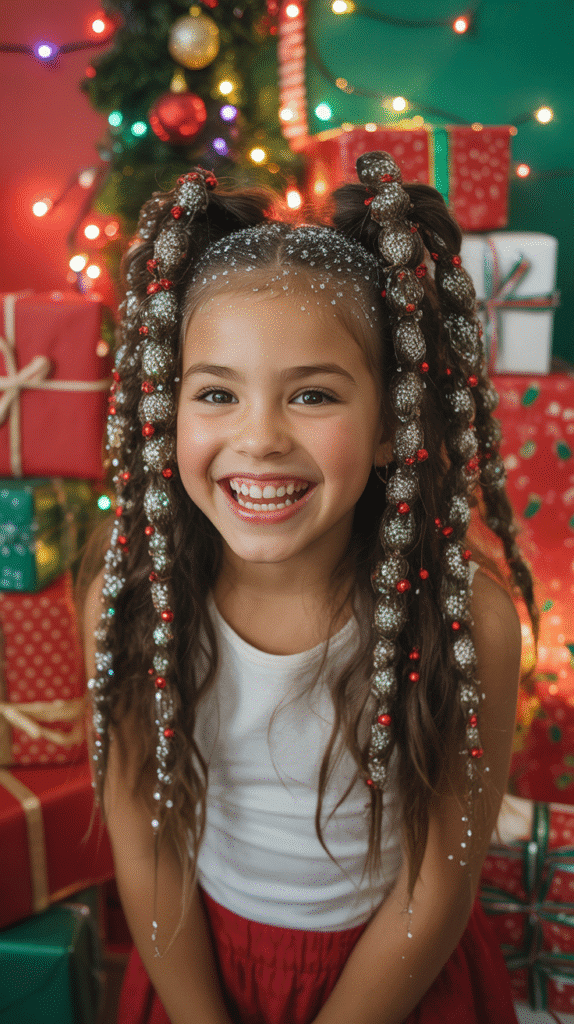
Space buns positioned high on the head become Christmas-ready with a combination of glitter spray and strategically placed beads.
- Section the hair horizontally across the top of the head from ear to ear, creating two sections.
- Create two high ponytails positioned toward the top front of the head for the classic space bun placement.
- Twist and wrap each ponytail around its base to form round buns, securing them firmly.
- Apply child-safe glitter spray over the buns, holding the can at least six inches away from the hair.
- Insert bobby pins adorned with beads randomly throughout the buns for a starry, festive effect.
- Combine red and silver beads to create a candy cane-inspired color palette.
- The glitter adds sparkle under lights while the beads provide three-dimensional texture and interest.
- This fun, youthful style is perfect for holiday parties where kids want to express their playful side.
16. Fishtail Braid with Pearl and Emerald Beads
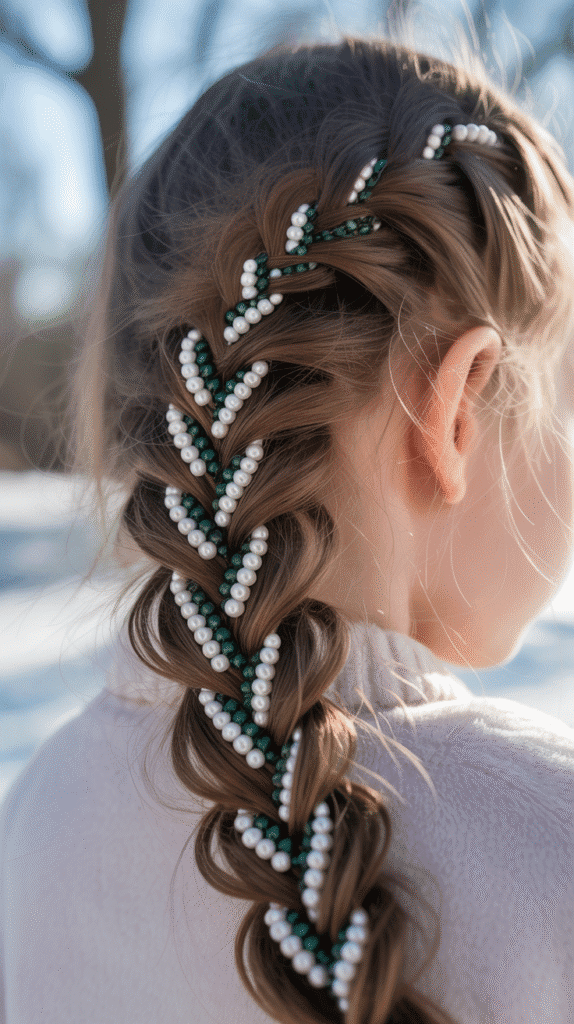
The intricate texture of a fishtail braid provides the perfect showcase for elegant pearl and emerald-colored beads.
- Gather hair into a ponytail or begin the fishtail braid directly from the nape or side of the head.
- Divide the hair into two sections and take a small piece from the outside of one section, crossing it over to the other side.
- Repeat this process alternating sides, creating the distinctive fishtail pattern that’s tighter and more detailed than regular braids.
- Thread pearl beads onto thin strands every few crossovers to distribute them evenly throughout the braid.
- Add emerald-colored beads between the pearls to create an elegant Christmas color combination.
- The fishtail technique naturally creates a flatter, wider braid that displays beads prominently.
- For extra elegance, slightly pancake the braid by gently pulling on the edges after completion.
- This sophisticated style works wonderfully for older children and pre-teens attending formal holiday events.
17. Mohawk Braid with Festive Bead Clusters
A center mohawk braid creates an edgy yet festive look when adorned with clusters of Christmas beads along its length.
- Section hair in a strip down the center of the head from forehead to nape, approximately two to three inches wide.
- Leave the sides loose, in small braids, or slicked down depending on the desired overall effect.
- Create a Dutch braid along the center section, which will raise the braid up for the mohawk appearance.
- At each elastic band used to create the puffy sections, add a cluster of three to five beads in various Christmas colors.
- The raised structure of the Dutch braid naturally highlights the bead clusters.
- For added dimension, slightly loosen each section between elastics to create volume.
- This modern take on holiday hairstyling appeals to children who want something different and contemporary.
- The style stays secure throughout the day while making a bold festive statement.
18. Beaded Headband Braid with Loose Curls
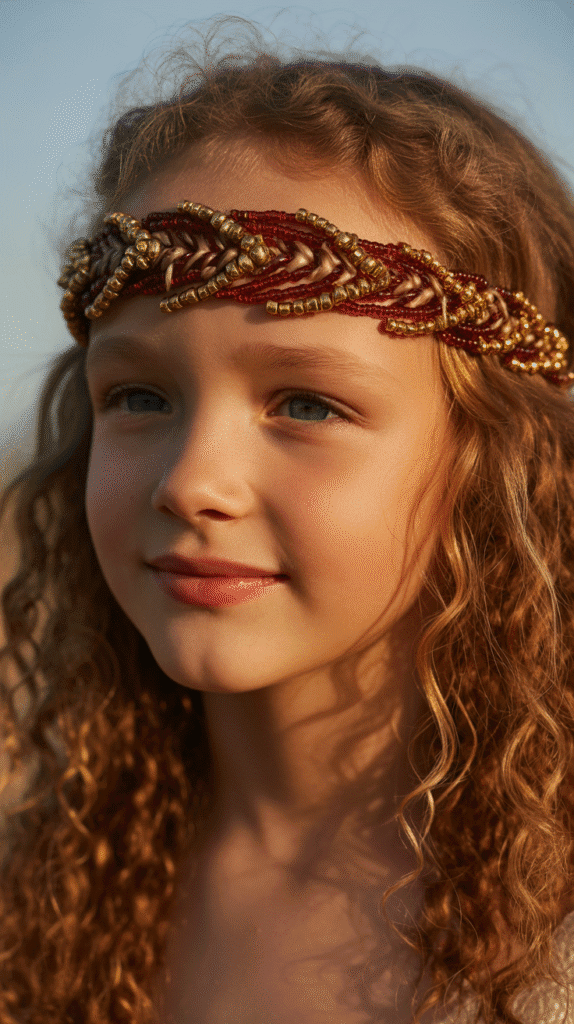
A braid that acts as a headband across the front of the head, decorated with beads, frames loose curls beautifully for a romantic holiday look.
- Section off a strip of hair approximately one to two inches wide across the front from temple to temple.
- Create a regular or French braid with this section, keeping it relatively tight so it holds its headband shape.
- Thread beads onto the braid at regular intervals, choosing colors that complement the overall holiday outfit.
- Secure the end of the braid behind the ear with bobby pins, tucking it discreetly into the loose hair.
- Curl the remaining loose hair using age-appropriate heat tools with proper heat protection.
- The contrast between the structured, beaded braid and soft curls creates elegant visual interest.
- This style works beautifully for Christmas Eve services, holiday photos, or family gatherings.
- Add a small decorative clip where the braid tucks behind the ear for extra embellishment.
19. Triple Braids with Rainbow Christmas Beads
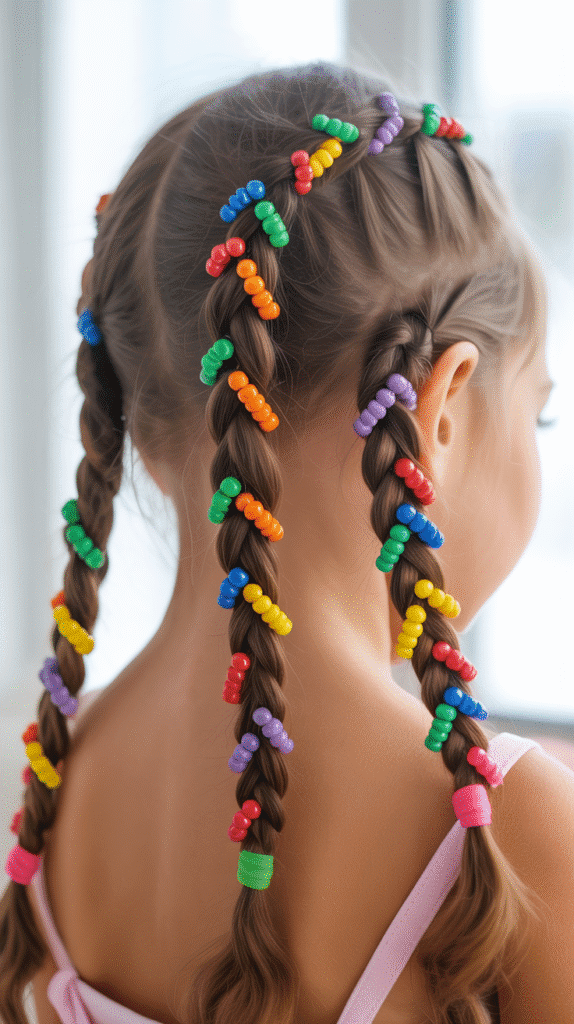
Three parallel braids running down the back of the head become a canvas for rainbow-colored Christmas beads that appeal to children’s love of color.
- Part the hair into three equal vertical sections from the crown to the nape of the neck.
- Create a braid in each section, keeping the tension consistent so all three braids are the same tightness.
- Thread beads onto each braid in rainbow order, or distribute the colors randomly for a more playful appearance.
- While traditional Christmas colors work beautifully, adding the full rainbow appeals to younger children’s preferences.
- Secure each braid with a clear elastic band and add a final bead cluster at each end.
- The three-braid design is simple enough for busy parents but delivers impressive visual results.
- This style can last multiple days with proper care, making it practical for the busy holiday season.
- Encourage children to choose their favorite color combinations to give them ownership of their holiday look.
20. Low Ponytail with Beaded Ribbon Wrap
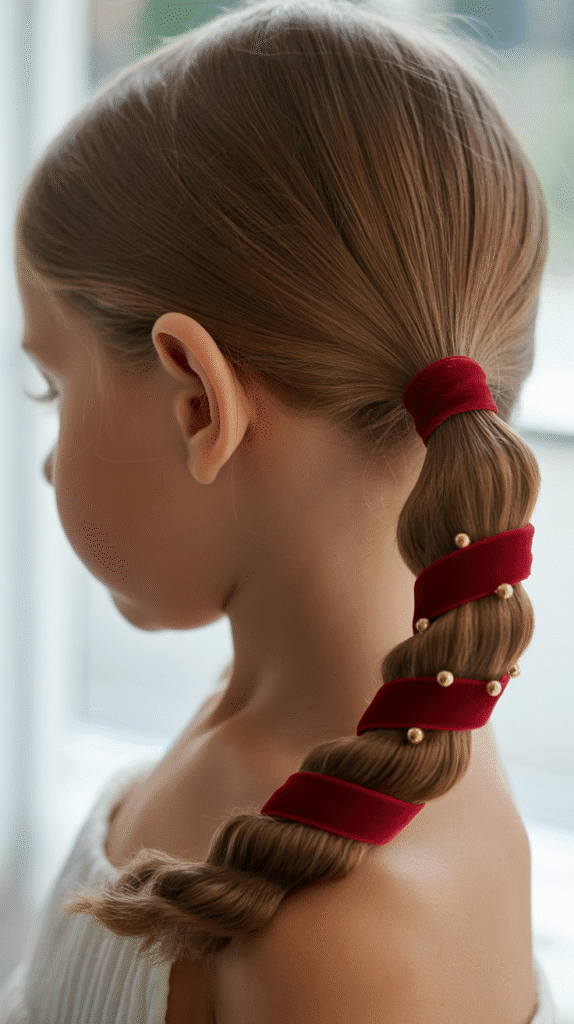
A simple low ponytail transforms into holiday elegance when wrapped with ribbon that has beads threaded onto it.
- Smooth all hair back into a low ponytail at the nape of the neck using a brush and styling gel for sleekness.
- Secure the ponytail with an elastic band that matches the hair color for a seamless appearance.
- Take a length of festive ribbon—velvet works beautifully—and thread beads onto it before styling.
- Wrap the beaded ribbon around the ponytail in a spiral pattern from base to tip.
- Secure the ribbon by tying it in a bow at the end of the ponytail.
- This elegant, simple style requires minimal time but delivers sophisticated results.
- Perfect for last-minute holiday events or for children who prefer understated styles.
- The ribbon can be removed easily without disturbing the base hairstyle, offering versatility throughout the day.
21. Heart-Shaped Braid with Red Bead Accents
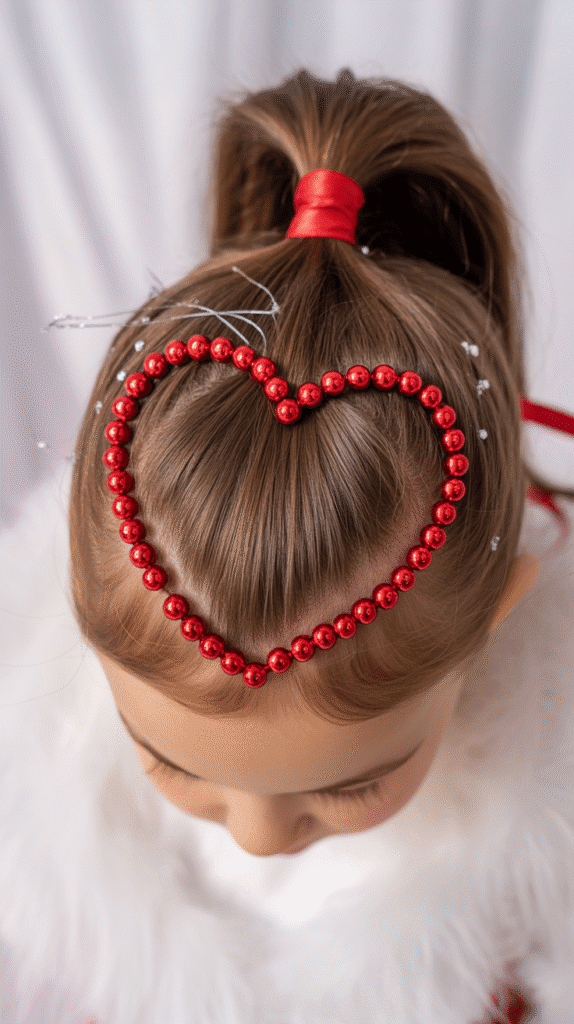
Create a heart shape at the crown using braiding techniques, then accent it with red beads for a sweet, love-filled Christmas style.
- Section off hair at the crown in a heart shape, using clips to hold the remaining hair out of the way.
- Create two curved braids that start at the top center of the heart and sweep outward and down to form the heart’s upper curves.
- Bring both braids down to meet at the point of the heart at the center back.
- Thread red beads throughout both braids, concentrating them along the outer edges to define the heart shape clearly.
- The remaining hair can be left down, gathered into a ponytail, or incorporated into the design.
- This creative style takes practice but creates a memorable, photo-worthy holiday look.
- Red beads emphasize the love and joy associated with both Christmas and heart imagery.
- Add a small gold or crystal bead at the point where the two braids meet for a special focal point.
22. Infinity Braid with Bicolor Bead Pattern
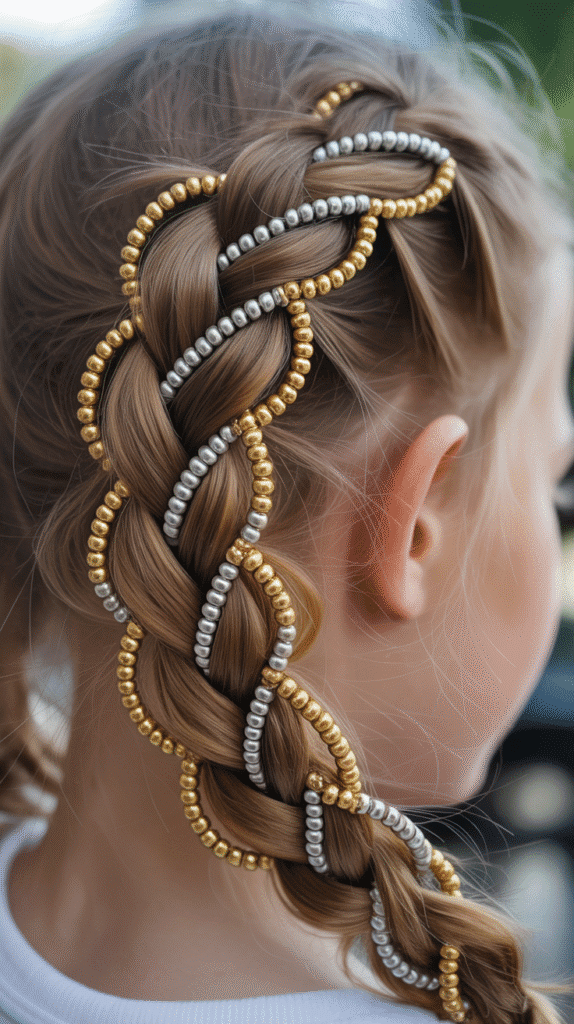
The infinity or figure-eight braid creates mesmerizing texture that’s enhanced by a two-color bead pattern alternating throughout.
- This advanced braiding technique involves weaving sections in a figure-eight pattern as you work down the hair.
- Begin with a ponytail or start the infinity braid directly from the crown for an all-over look.
- The infinity braid creates a woven appearance that naturally has spaces perfect for bead placement.
- Thread gold beads into the sections that weave over and silver beads into sections that weave under for clear pattern definition.
- The alternating bead colors highlight the unique structure of this special braid type.
- This style requires practice or tutorial assistance but creates stunning results for special occasions.
- Secure the end with an elastic and add a cluster of mixed gold and silver beads for a finished appearance.
- The complexity of the braid makes it a conversation starter at holiday gatherings.
23. Side Ponytail with Spiral Bead Arrangement
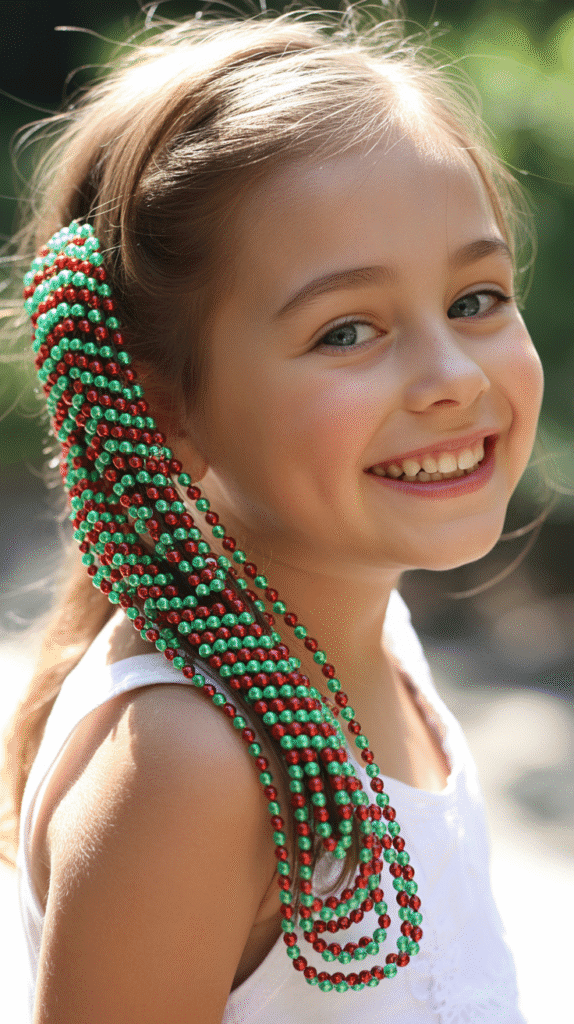
A playful side ponytail becomes festive when beads are arranged in a spiral pattern down its length, creating movement and visual flow.
- Gather all hair to one side and secure it with a strong elastic band at ear level or slightly lower.
- Divide the ponytail into four to six small sections from top to bottom using clear elastic bands.
- Beginning at the top section, thread beads in red, then rotate the ponytail slightly and add green beads to the next section.
- Continue rotating and alternating colors to create a spiral candy cane effect down the length of the ponytail.
- The spiral arrangement requires planning but creates dynamic visual movement.
- This style photographs beautifully from all angles as the spiral naturally catches light differently.
- For extra hold and shine, apply a small amount of lightweight styling serum to the ponytail.
- The playful side placement keeps the style youthful and fun for active children.
24. Lattice Braid with Jeweled Beads
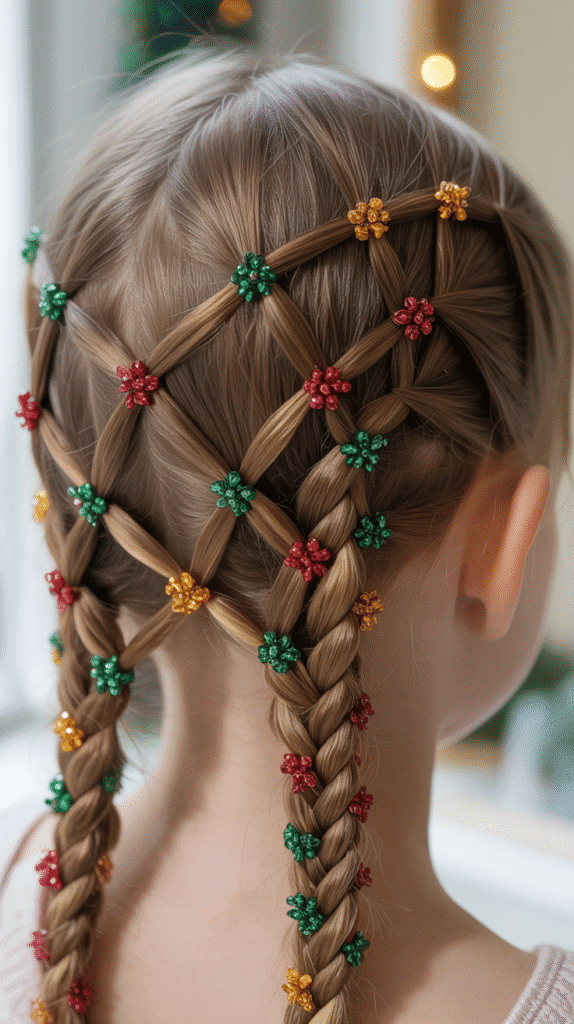
Create an intricate lattice pattern using multiple small braids and secure them with beads at each intersection point for a show-stopping style.
- Section the hair into a grid pattern across the back of the head with horizontal and vertical parts.
- Create small braids in each vertical section, leaving them loose initially.
- Weave the vertical braids over and under each other horizontally to create the lattice appearance.
- At each intersection where braids cross, secure with a bobby pin and add a decorative jeweled bead.
- Choose jeweled beads in deep reds, emerald greens, and royal blues for a rich, luxurious appearance.
- This advanced style requires time and patience but creates an absolutely stunning result.
- The lattice pattern works best on longer hair and may need adult assistance to complete.
- Finish by gathering any remaining loose ends into a low bun or ponytail at the nape.
25. Messy Bun with Scattered Holiday Beads
An intentionally messy bun gets holiday charm from beads scattered throughout using hairpins, creating an effortlessly festive look.
- Gather hair into a high or mid-level ponytail without worrying about perfect smoothness.
- Twist the ponytail loosely and wrap it around the base, allowing pieces to fall naturally for the messy texture.
- Secure the bun with bobby pins, intentionally leaving some ends and pieces loose and textured.
- Take bobby pins with beads attached and insert them throughout the bun at various angles and depths.
- The random, scattered placement creates an organic, relaxed holiday appearance.
- This style is perfect for children who want something festive but comfortable and not too structured.
- Mix bead sizes and colors for an eclectic, playful approach to holiday styling.
- The messy texture means this style is forgiving and easy to create, even on busy mornings.
26. Four-Strand Braid with Gradient Bead Coloring
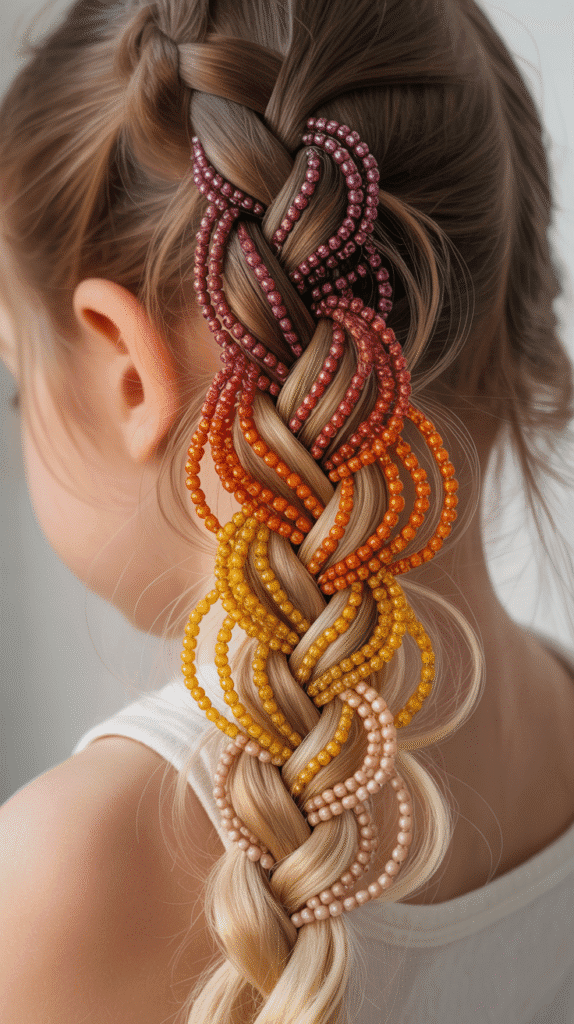
The four-strand braid creates a complex, dimensional texture that showcases a gradient bead color scheme beautifully from dark to light.
- The four-strand braid requires practice but creates a wider, more intricate braid than traditional three-strand versions.
- Start with hair in a ponytail and divide it into four equal sections to begin the specialized braiding pattern.
- Weave the outside sections over and under the inside sections in the specific four-strand technique.
- Begin threading dark red beads into the top portion of the braid for the start of the gradient.
- Gradually transition through orange-red and gold beads in the middle section.
- Finish with light champagne or pearl beads at the bottom for a complete dark-to-light gradient.
- The four-strand technique creates dimension that makes the gradient effect even more pronounced.
- This advanced style is perfect for older children and creates an impressive, sophisticated holiday look.
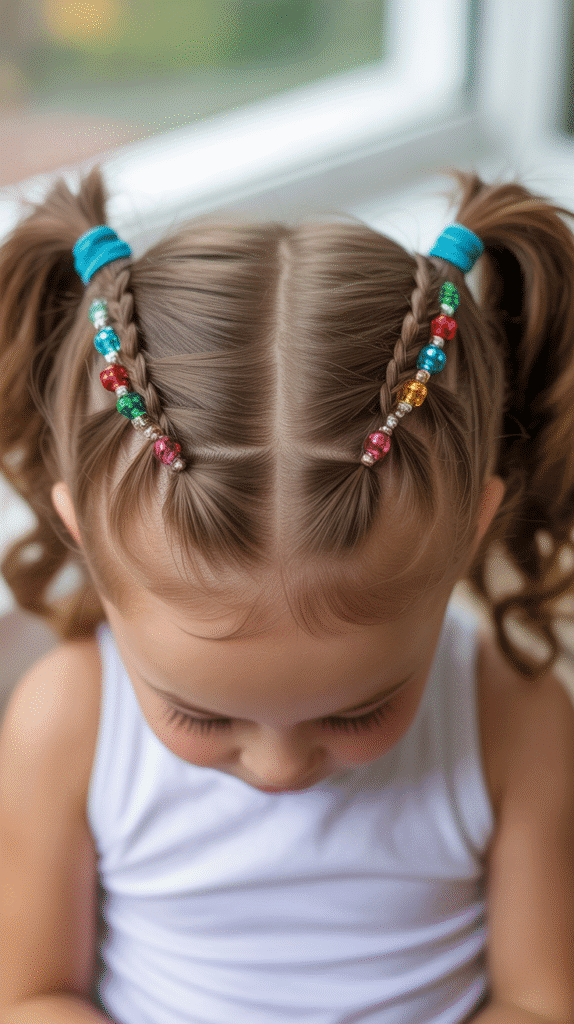
27. Criss-Cross Style with Beaded Elastics
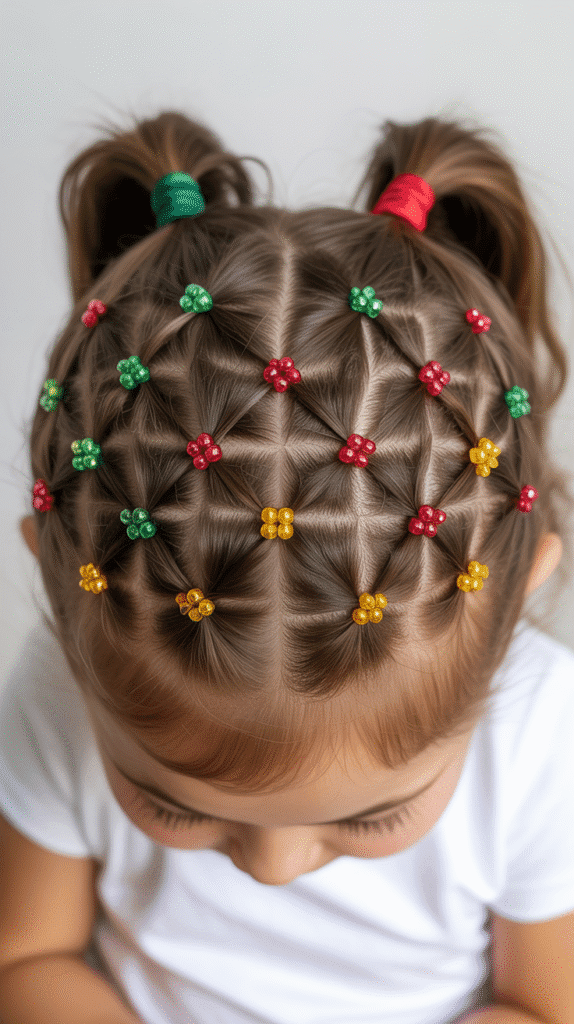
Multiple small ponytails connected in a criss-cross pattern across the head use beaded elastics as both functional and decorative elements.
- Section hair across the top of the head into a grid of small squares, approximately six to nine sections total.
- Create a small ponytail in each section using beaded elastics in various Christmas colors.
- Take strands from adjacent ponytails and combine them together in a new ponytail below, creating the criss-cross effect.
- Continue this pattern working from the crown toward the nape, with each row combining sections from the row above.
- The beaded elastics serve both to secure the sections and add festive color throughout the style.
- This geometric pattern creates visual interest and works well with medium-length hair.
- The style keeps hair secure and out of the face while delivering fun, contemporary holiday appeal.
- Different colored beaded elastics can be used to create patterns or gradients within the overall design.
28. Victory Rolls with Beaded Bobby Pins
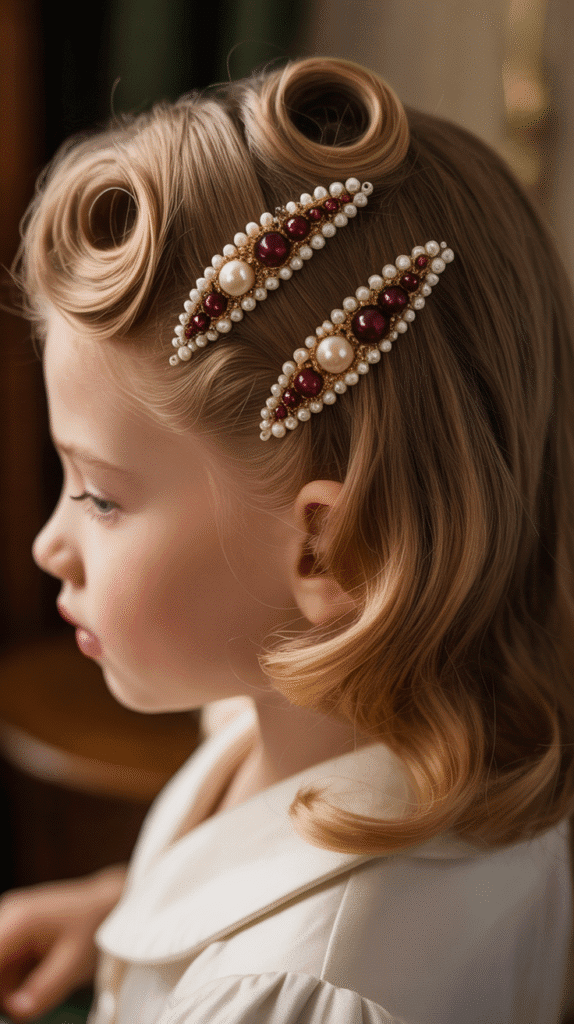
Vintage-inspired victory rolls get a Christmas update with beaded bobby pins securing the rolls and adding sparkle.
- Section off the front portions of hair on each side, leaving the back down or in a complementary style.
- Roll each front section backward toward the crown, creating the characteristic cylindrical shape of victory rolls.
- Secure each roll with multiple bobby pins, then add decorative beaded pins on top of the structural pins.
- Pearl and red beads create a classic, vintage Christmas appearance that photographs beautifully.
- This retro style works wonderfully for themed holiday
parties or vintage-inspired family photo sessions.
- Victory rolls work best on medium to long hair and may require styling product for hold and smoothness.
- The remaining hair at the back can be curled, left straight, or pulled into a low bun depending on the overall desired effect.
- This sophisticated style suits older children and pre-teens who want something unique and elegant for special holiday occasions.
Conclusion
The journey through 28 Fun Christmas Hairstyles for Kids with Beads Full of Holiday Spirit reveals endless possibilities for creating memorable, festive looks that children will love wearing throughout the holiday season.
From simple beaded braids that take just minutes to intricate lattice patterns that become works of art, these styles offer options for every skill level, hair type, and occasion.
The magic of combining traditional hairstyling techniques with colorful Christmas beads transforms ordinary looks into extraordinary holiday statements that capture the joy and wonder of the season.
Whether you’re preparing for casual family gatherings, formal holiday events, school parties, or Christmas morning celebrations, these beaded hairstyles provide the perfect finishing touch to any festive outfit.
The beauty of these styles lies not only in their visual appeal but also in the special bonding moments created between parents and children during the styling process.
As you experiment with different bead colors, patterns, and techniques throughout the season, you’ll discover which styles best suit your child’s personality, hair texture, and comfort preferences.
Remember that the most important element of any holiday hairstyle is the confidence and happiness it brings to the child wearing it, making them feel special and celebrated during this magical time of year.
These beaded Christmas hairstyles create lasting memories captured in photographs and treasured for years to come, reminding families of the creativity, love, and festive spirit that make the holidays truly unforgettable.