The holiday season brings magical moments of celebration, and every young girl deserves to feel like a princess at Christmas parties and family gatherings.
When it comes to creating memorable holiday looks, the right hairstyle can transform an ordinary outfit into something truly spectacular.
This comprehensive guide to 30 Cute Christmas Hairstyles for Girls Perfect for Holiday Parties will walk you through an exciting collection of festive hair designs that range from simple and sweet to elegantly sophisticated.
Whether you’re preparing for a school Christmas concert, a family dinner, or a festive photo session, you’ll discover step-by-step ideas for braids adorned with ribbons, sparkling updos decorated with holiday accessories, cascading curls with festive embellishments, and playful ponytails that capture the spirit of the season.
Each hairstyle has been carefully selected to suit different hair lengths, textures, and skill levels, ensuring that every parent or stylist can create stunning looks that will make young girls shine throughout the holiday celebrations.
1. Classic Christmas Bow Ponytail
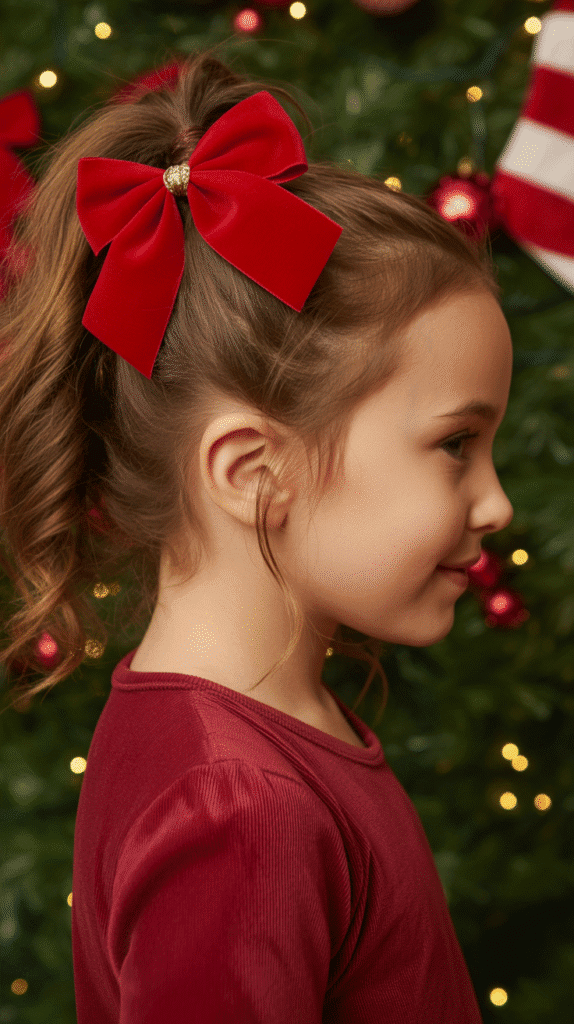
This timeless style combines elegance with festive cheer, making it perfect for girls who want a polished yet playful look.
The Classic Christmas Bow Ponytail features a high or mid-level ponytail adorned with a large velvet or satin bow in traditional Christmas colors.
How to Create:
- Start by brushing the hair thoroughly to remove all tangles and create a smooth base for styling.
- Gather the hair at your desired height (high ponytails work best for formal events, while mid-level suits casual parties).
- Secure with a strong elastic band that matches the hair color to keep it invisible under the bow.
- Take a large Christmas bow in red, green, gold, or plaid pattern and attach it securely to the elastic.
- Use a light-hold hairspray to tame any flyaways and ensure the style stays intact throughout the party.
- For added volume, gently tease the ponytail before adding the bow to create a fuller appearance.
Best For: All hair types and lengths (shoulder-length or longer)
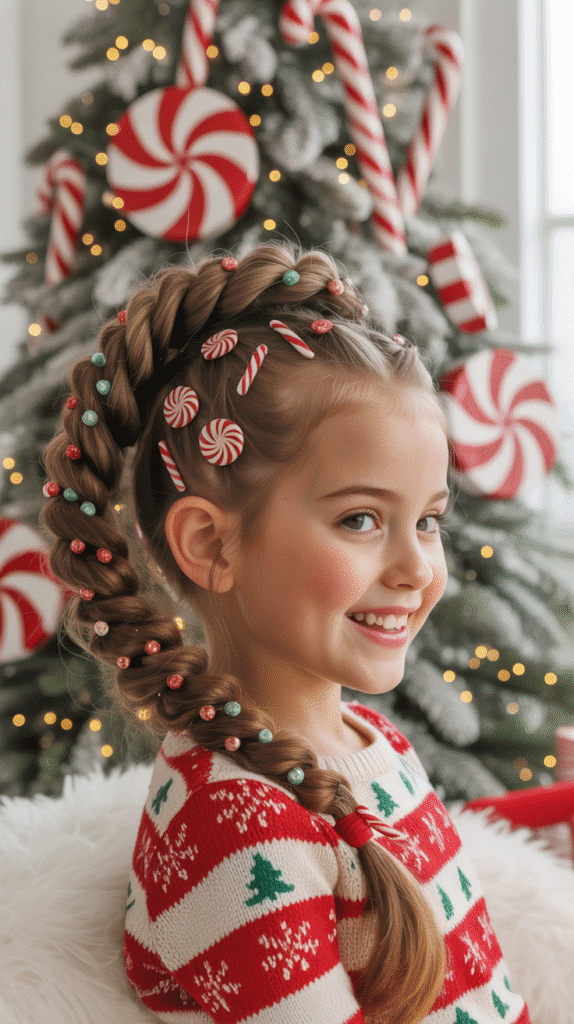
2. Braided Christmas Tree Hairstyle
Transform your little one’s hair into an actual Christmas tree with this creative and eye-catching design.
The Braided Christmas Tree Hairstyle uses strategic braiding techniques to create a triangular tree shape on the back of the head.
Styling Steps:
- Begin with clean, detangled hair and create a center part from forehead to nape.
- Start at the crown with a small Dutch braid, incorporating small sections as you work downward.
- Gradually widen the braid as you move down to create the triangular Christmas tree shape.
- Secure the end with a small elastic and decorate with mini hair clips shaped like ornaments, stars, or snowflakes.
- Use colorful bobby pins in green, red, and gold placed along the braid to mimic Christmas lights.
- Finish with small rhinestone pins at strategic points to represent ornaments on the tree.
- Apply a flexible-hold hairspray to maintain the shape without making the hair stiff.
Skill Level: Intermediate
3. Festive Half-Up Twisted Crown
This elegant style offers sophistication while keeping hair manageable for active children during holiday festivities.
The Festive Half-Up Twisted Crown creates a beautiful framing effect around the face while allowing the remaining hair to flow freely.
Creation Process:
- Part the hair horizontally from ear to ear, separating the top section from the bottom.
- Divide the top section into two equal parts on either side of a center part.
- Take the right section and twist it tightly while moving backward toward the crown.
- Secure with bobby pins, creating a twisted rope effect along the side of the head.
- Repeat the same process on the left side, ensuring both twists are symmetrical.
- Cross the two twisted sections at the back and pin them securely to create a crown effect.
- Add small pearl or rhinestone pins along the twists for extra holiday glamour.
- Curl the loose bottom section with a curling iron for added elegance.
Perfect For: Medium to long hair, all textures
4. Cascading Ringlet Curls with Holly Clips
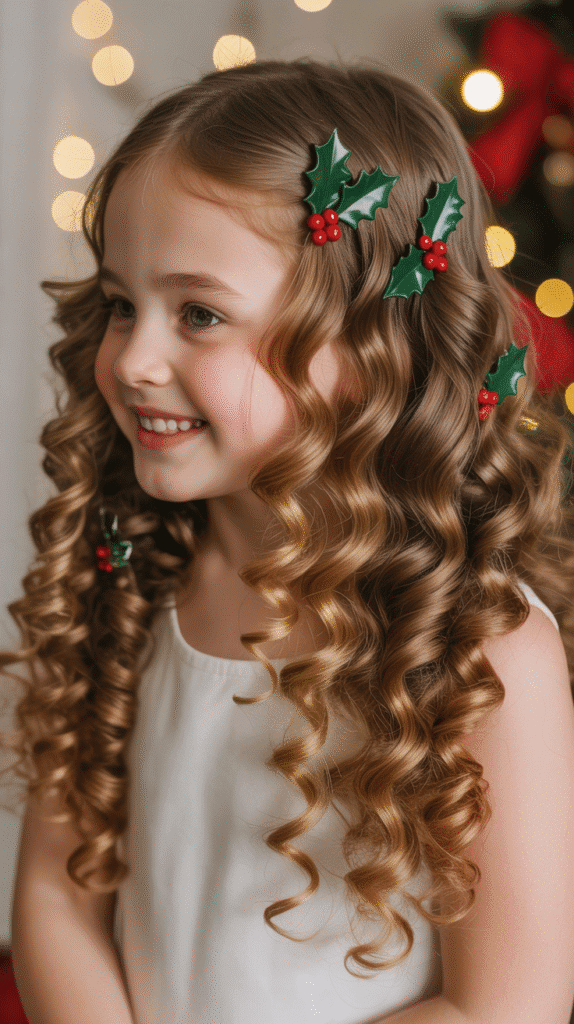
Nothing says classic holiday beauty like bouncy, cascading curls adorned with festive accessories.
The Cascading Ringlet Curls with Holly Clips style brings timeless glamour to any Christmas celebration.
Styling Instructions:
- Begin with freshly washed and dried hair, applying a heat protectant spray throughout.
- Section the hair into manageable portions, working from the bottom layer upward.
- Use a small-barrel curling iron or wand to create tight ringlets, holding each section for 8-10 seconds.
- Allow the curls to cool completely in your hand before releasing them to ensure they hold their shape.
- Once all hair is curled, gently separate the ringlets with your fingers for a fuller, more voluminous look.
- Apply a light-hold hairspray to maintain the curls throughout the event.
- Strategically place holly-shaped clips or clips with red berries throughout the curls.
- Consider adding a festive headband for an extra touch of holiday magic.
Duration: Lasts 4-6 hours with proper products
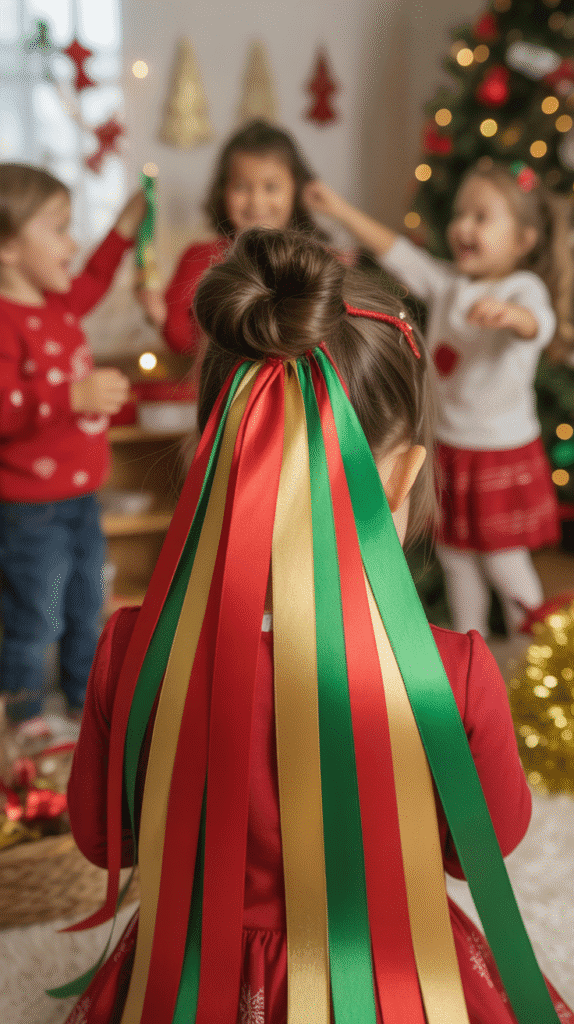
5. Dutch Braid with Ribbon Weave
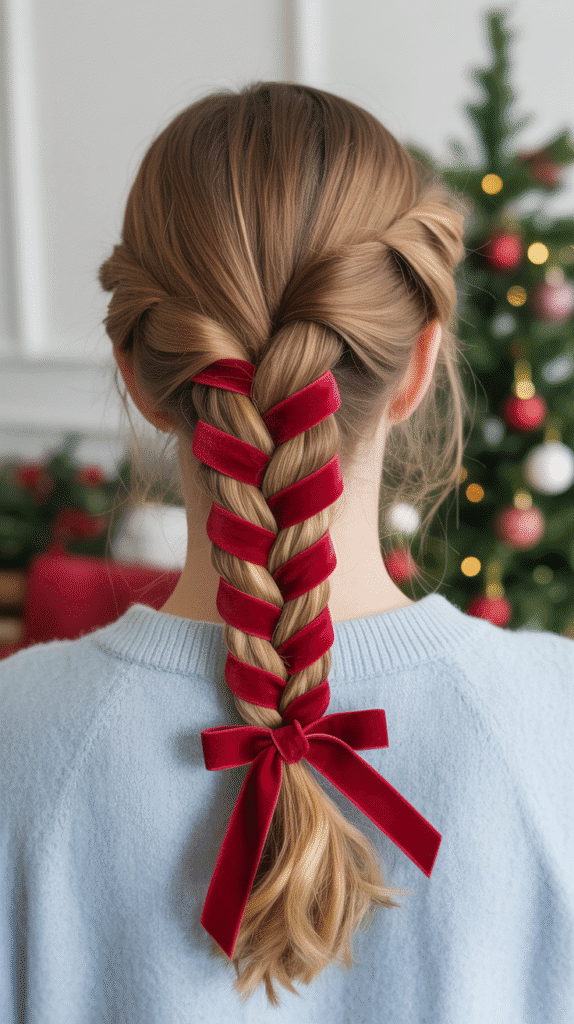
This intricate yet stunning style incorporates festive ribbons directly into a classic Dutch braid.
The Dutch Braid with Ribbon Weave creates dimension and adds a pop of holiday color to any outfit.
Step-by-Step Guide:
- Choose a festive ribbon (red, green, gold, or silver) that is approximately 1/4 inch wide and three times the length of the hair.
- Secure the ribbon at the crown of the head with a small bobby pin, leaving equal lengths on both sides.
- Begin a Dutch braid (reverse French braid) at the crown, incorporating the ribbon as a fourth strand.
- Weave the ribbon through the braid by alternating it with the hair sections as you work downward.
- Continue braiding all the way to the ends, maintaining even tension throughout.
- Secure the end with a small elastic, then wrap the remaining ribbon around it and tie in a bow.
- Gently pancake the braid by pulling on the outer edges to create a fuller, more romantic appearance.
- Finish with hairspray to prevent flyaways and maintain the structure.
Ribbon Suggestions: Velvet, satin, or metallic ribbons in traditional Christmas colors
6. Messy Bun with Tinsel Accessories
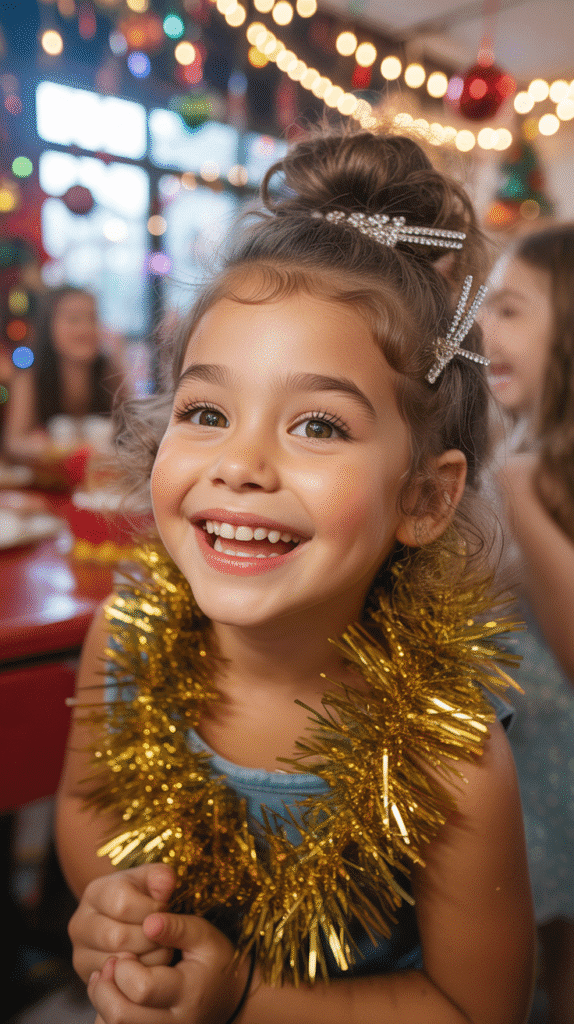
For a fun and trendy holiday look that’s both stylish and practical, the Messy Bun with Tinsel Accessories offers effortless charm.
This style works perfectly for active girls who need their hair secured but still want to look festive.
Creating the Look:
- Gather all hair into a high ponytail, intentionally leaving a few face-framing pieces loose for a relaxed effect.
- Twist the ponytail and wrap it around the base to form a bun shape.
- Secure with bobby pins, allowing some pieces to fall naturally for the “messy” aesthetic.
- Don’t worry about perfection—the charm is in the undone appearance.
- Wrap tinsel or metallic wire garland around the bun, securing with bobby pins.
- Add sparkly hair pins or clips throughout the bun for extra festive shimmer.
- Spray with flexible-hold hairspray to maintain the structure while keeping the natural movement.
- Consider adding a festive scrunchie at the base for additional color and texture.
Time Required: 5-7 minutes
7. Side-Swept Curls with Snowflake Pins

This glamorous style creates old Hollywood elegance adapted for young girls.
The Side-Swept Curls with Snowflake Pins offer sophistication and winter wonderland charm simultaneously.
Styling Method:
- Create a deep side part, positioning it approximately two inches from the center.
- Apply a volumizing mousse to damp hair before blow-drying to create body and lift.
- Section the hair and curl using a medium-barrel curling iron, creating loose, romantic waves.
- Brush through the curls gently with a wide-tooth comb to soften them into waves.
- Sweep all hair to one side and secure behind the ear with bobby pins that match the hair color.
- Place decorative snowflake pins along the secured side, creating a cascading pattern.
- The opposite side should showcase the volume and wave of the curls falling over the shoulder.
- Finish with a medium-hold hairspray to ensure the style stays in place during dancing and activities.
Ideal Occasion: Formal Christmas parties, holiday photos, special dinners
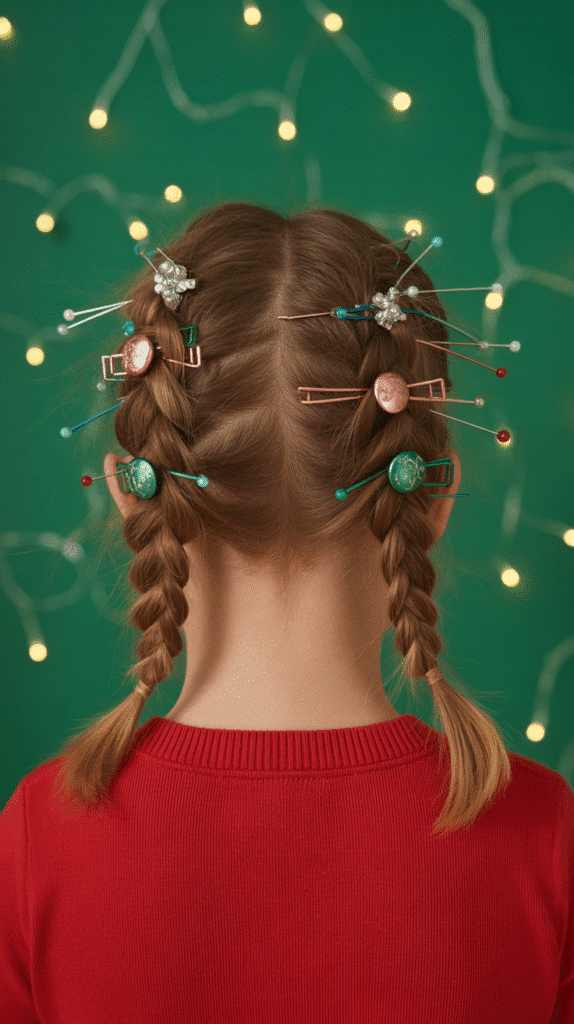
8. Double Dutch Braids with Ornament Clips
This sporty yet festive style keeps hair completely secured while maintaining holiday spirit.
The Double Dutch Braids with Ornament Clips work wonderfully for active celebrations where hair needs to stay put.
Braiding Process:
- Part the hair straight down the middle from forehead to nape, creating two equal sections.
- Clip one section away while working on the first braid.
- Begin a Dutch braid at the hairline, crossing sections under rather than over for the raised effect.
- Continue braiding tightly all the way to the ends, incorporating all hair from that section.
- Secure with a small elastic and repeat the process on the opposite side.
- Ensure both braids are symmetrical in size and positioning for a polished appearance.
- Attach small ornament-shaped clips or bells along the length of both braids.
- Spray with strong-hold hairspray to prevent frizziness and maintain neatness throughout the day.
Benefits: Stays secure for extended periods, works for sports or active play
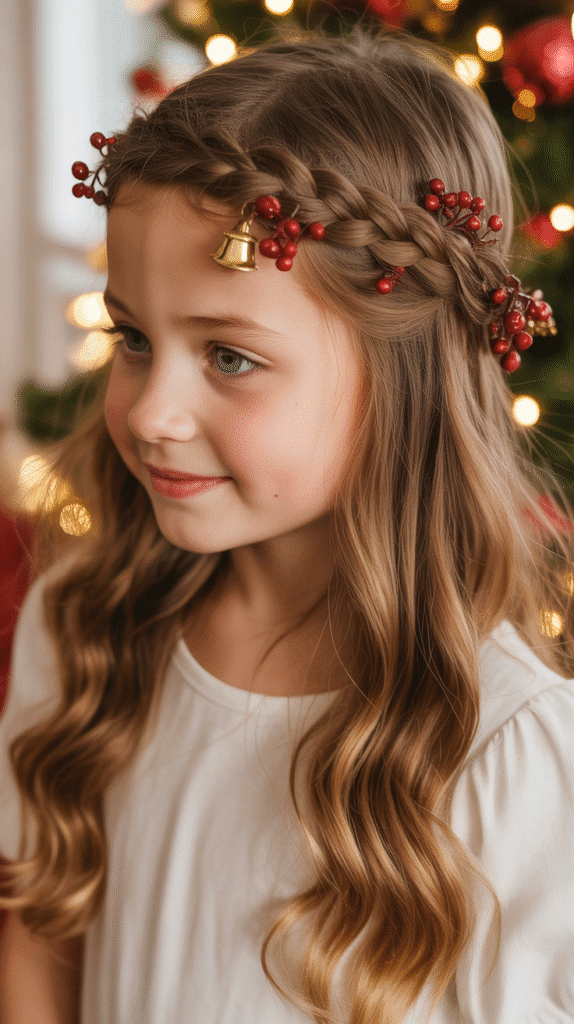
9. Christmas Crown Braid
This regal style wraps around the entire head like a crown, creating a princess-worthy look.
The Christmas Crown Braid serves as both a hairstyle and an accessory, requiring no additional headpiece.
Construction Steps:
- Part the hair horizontally behind one ear, leaving a small section at the front.
- Begin a Dutch or French braid just behind the ear, working along the hairline.
- Continue braiding around the entire head, following the natural hairline from ear to forehead to opposite ear.
- Incorporate small sections consistently to maintain an even braid thickness throughout.
- When you reach the starting point, continue braiding the remaining length and tuck it under the crown braid.
- Secure with bobby pins that match the hair color for an invisible finish.
- Weave small flowers, berries, or festive clips throughout the crown braid.
- Gently pull on the outer edges of the braid to create a fuller, more prominent crown effect.
Hair Length Needed: Medium to long
10. High Ponytail with Spiral Wrap
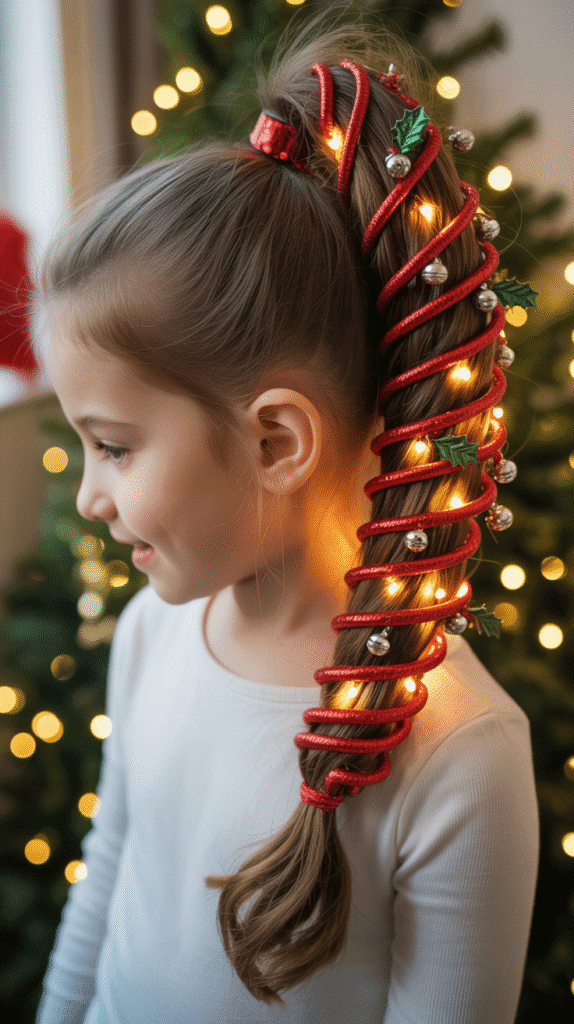
This sleek and modern style adds interest to a simple ponytail with a decorative spiral wrap technique.
The High Ponytail with Spiral Wrap brings contemporary flair to traditional holiday hairstyling.
Creating This Style:
- Smooth all hair back into a high ponytail, using a boar bristle brush for a sleek finish.
- Secure tightly with a strong elastic band at the crown area.
- Take a small section of hair from the underside of the ponytail to wrap around the elastic.
- Wind this section around the base multiple times to completely conceal the elastic.
- Secure the wrapped section with a bobby pin tucked underneath the ponytail.
- Take a festive ribbon, tinsel, or decorative cord and begin wrapping it spirally down the length of the ponytail.
- Space the wraps evenly, approximately one inch apart, securing the beginning and end with small pins.
- Curl the ends of the ponytail with a curling iron for a polished finish.
Pro Tip: Use gel or pomade at the hairline for ultra-sleek results
11. Braided Headband with Loose Waves
This romantic style combines the elegance of a braided headband with the softness of loose waves.
The Braided Headband with Loose Waves creates a bohemian-meets-formal holiday aesthetic.
Styling Instructions:
- Section off a two-inch wide portion of hair from behind one ear to behind the other ear.
- Clip the remaining hair away while working on the headband section.
- Create a simple three-strand braid with the sectioned hair, braiding from ear to ear across the top of the head.
- Secure the end with a small elastic and tuck it behind the opposite ear with bobby pins.
- Release the remaining hair and create loose waves using a large-barrel curling iron or flat iron technique.
- The waves should be relaxed and flowing, not tight curls.
- Weave small festive accessories like mini poinsettias or pearl pins through the braided headband.
- Apply a light-hold hairspray to maintain the waves without weighing them down.
Versatility: Works for both casual and formal Christmas events
12. Twisted Low Bun with Berry Accents
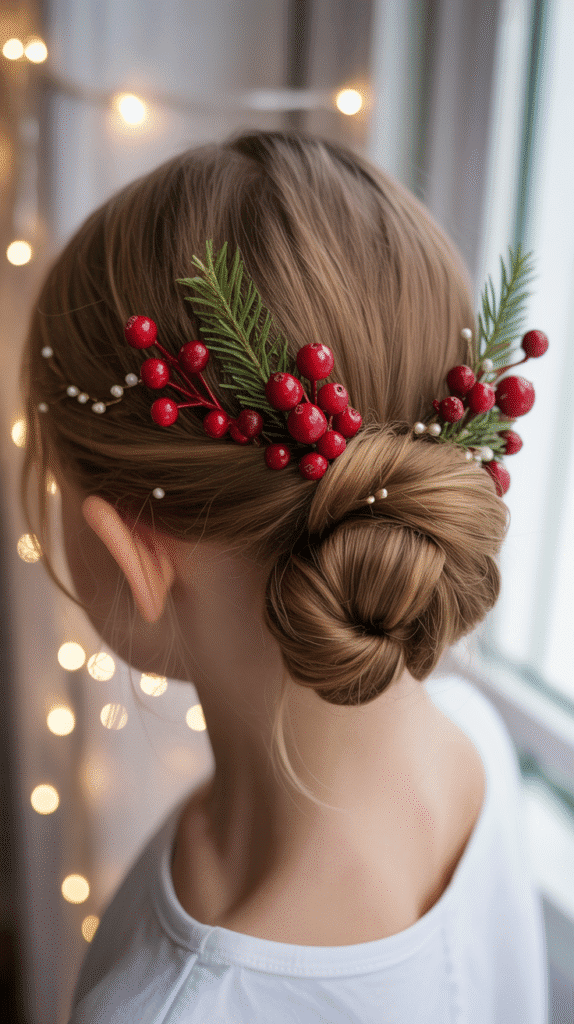
This sophisticated updo exudes elegance and works beautifully for formal holiday occasions.
The Twisted Low Bun with Berry Accents creates a refined, mature look appropriate for special Christmas celebrations.
Assembly Process:
- Brush all hair smooth and gather it at the nape of the neck into a low ponytail.
- Divide the ponytail into two equal sections.
- Twist each section individually in the same direction until they begin to coil naturally.
- Then twist the two sections around each other in the opposite direction, creating a rope braid effect.
- Wrap this twisted rope around the base of the ponytail to form a bun shape.
- Secure with bobby pins, ensuring the bun feels stable and won’t slip.
- Tuck any loose ends underneath the bun for a clean finish.
- Add decorative picks with red berries or small Christmas flowers around the bun for festive elegance.
Formal Factor: Perfect for church services, holiday concerts, or fancy dinners
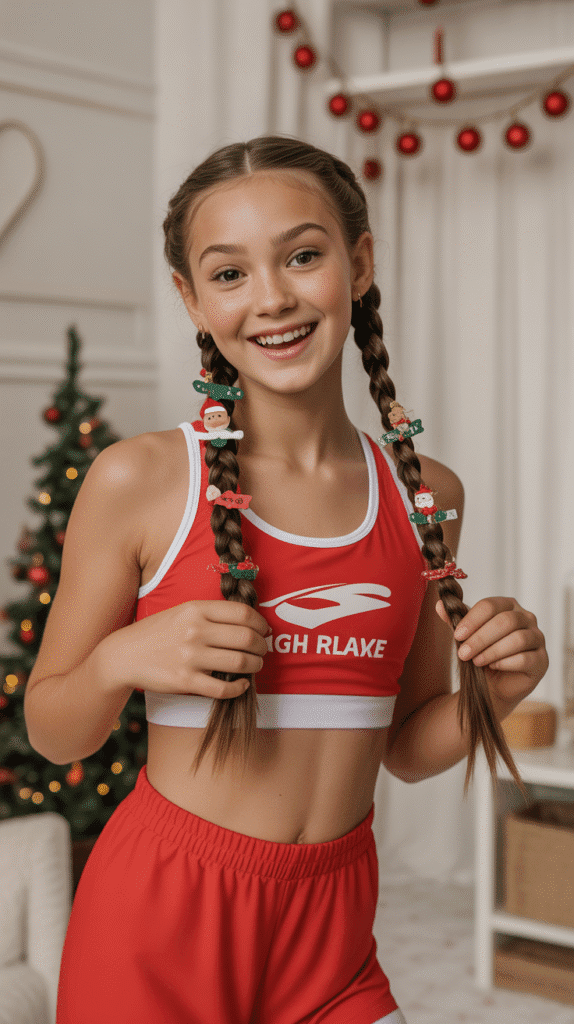
13. Pigtail Braids with Candy Cane Ribbons
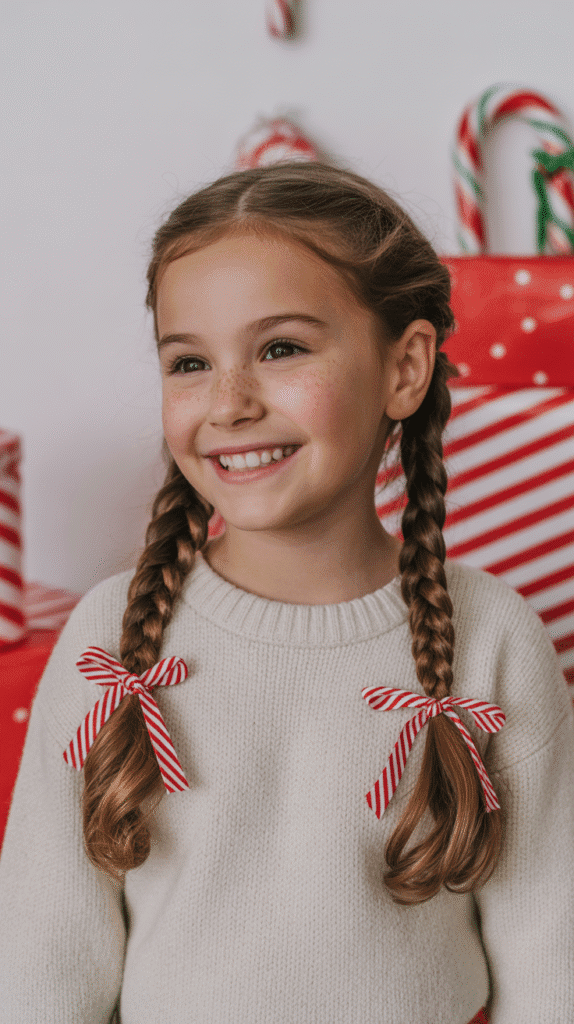
Playful and age-appropriate, this style captures childhood innocence with festive flair.
The Pigtail Braids with Candy Cane Ribbons bring whimsy and Christmas spirit to a classic young girl’s hairstyle.
Braiding Steps:
- Create a center part from forehead to nape, dividing hair into two equal sections.
- Secure one side with a clip while working on the first braid.
- Begin a three-strand braid on one side, starting at ear level.
- Braid all the way to the ends and secure with a small elastic.
- Repeat the exact process on the opposite side, ensuring both braids hang at the same length.
- Take red and white striped ribbons (candy cane style) and tie them in bows at the end of each braid.
- Alternatively, wrap the ribbons around the braids in a candy cane stripe pattern.
- Add matching ribbons or scrunchies at the base of each braid for extra color.
Age Group: Best for younger girls (ages 3-10)
14. Waterfall Braid with Glitter Spray
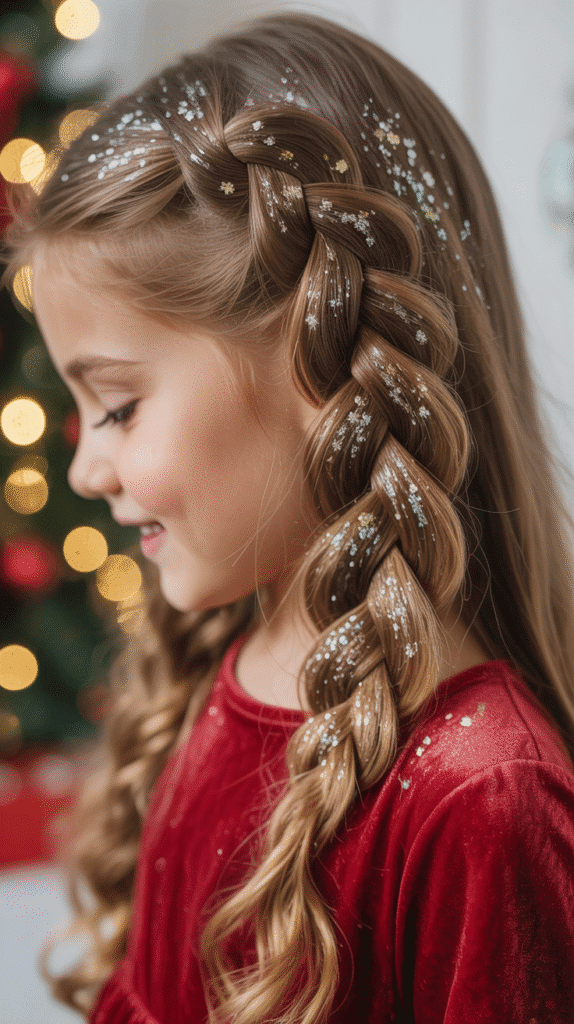
This ethereal style creates a cascading effect that looks intricate but is surprisingly achievable.
The Waterfall Braid with Glitter Spray adds magical sparkle perfect for holiday celebrations.
Creation Technique:
- Begin at the front hairline on one side, taking a three-inch section.
- Start a regular three-strand braid for the first stitch.
- For the waterfall effect, drop the bottom strand and pick up a new section from the top to replace it.
- Continue this pattern across the head, allowing strands to cascade down like a waterfall.
- The dropped strands should hang freely, creating the signature waterfall appearance.
- Secure the braid behind the opposite ear with bobby pins.
- Apply colored glitter spray (gold, silver, or red) lightly over the entire hairstyle.
- Use a light-hold hairspray before the glitter spray to help it adhere better.
Difficulty: Intermediate to advanced
15. Space Buns with Holiday Tinsel
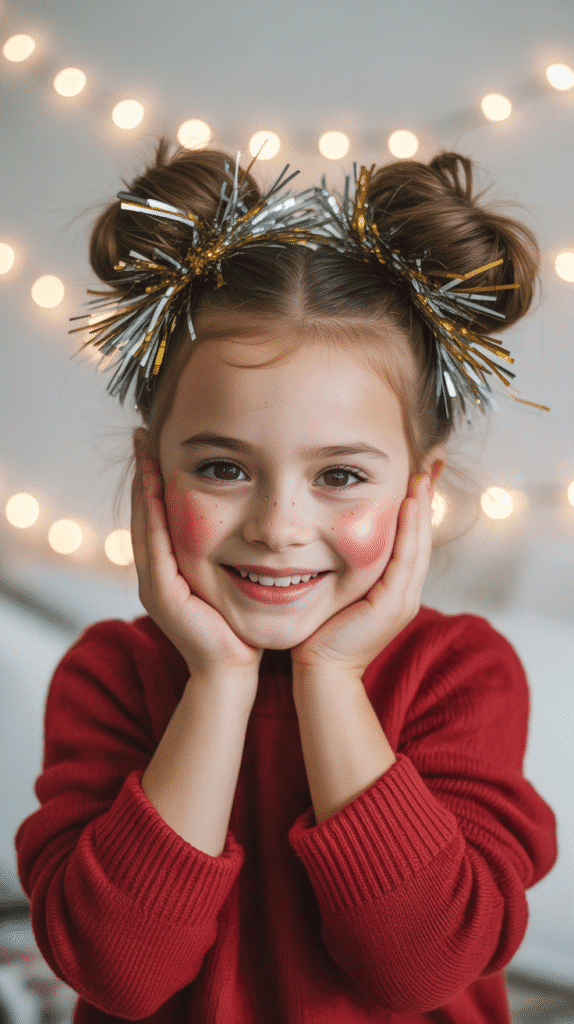
This trendy, youthful style has gained popularity and adapts perfectly for Christmas festivities.
The Space Buns with Holiday Tinsel offer a fun, contemporary look that young girls love.
Styling Method:
- Part the hair straight down the middle from forehead to nape.
- Gather one section into a high ponytail positioned above the ear on that side.
- Twist the ponytail and wrap it around its base to create a bun, securing with bobby pins.
- Repeat the process on the opposite side, ensuring both buns are positioned symmetrically.
- The buns should sit high on the head, creating the signature “space bun” placement.
- Wrap Christmas-colored tinsel around each bun, securing with bobby pins.
- Add sparkly scrunchies at the base of each bun for extra festive flair.
- Use strong-hold hairspray to keep the buns secure throughout active play.
Fashion Factor: Very trendy, appeals to fashion-forward kids
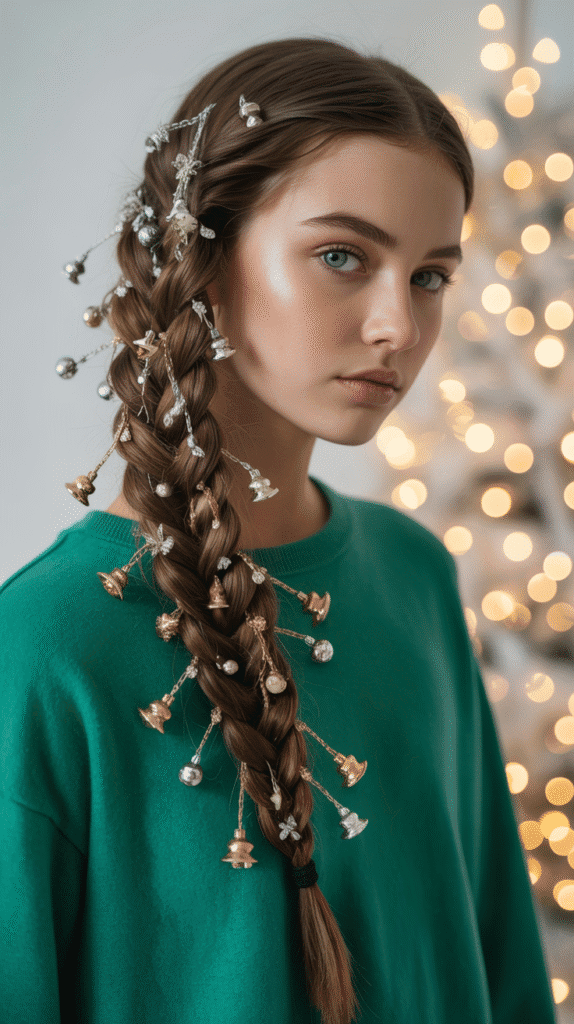
16. French Braid Ponytail with Jingle Bells
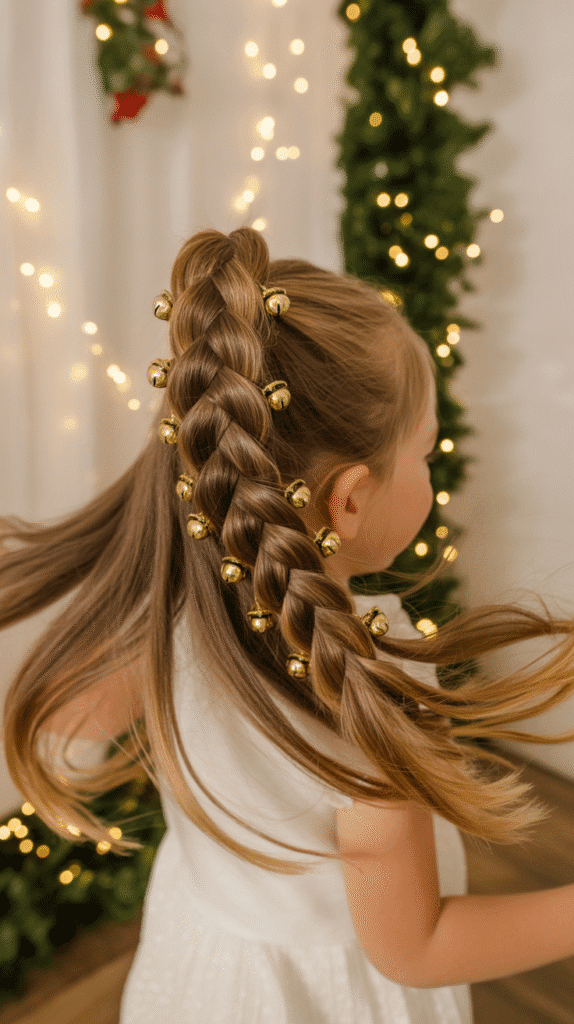
This hybrid style combines the security of a braid with the movement of a ponytail.
The French Braid Ponytail with Jingle Bells creates both visual and auditory festive appeal.
Assembly Instructions:
- Begin at the crown with a French braid, incorporating sections from both sides as you work backward.
- Continue braiding only halfway down the head, approximately to the crown area.
- Secure the braid with an elastic, leaving the remaining hair loose as a ponytail.
- The ponytail portion can be left straight, curled, or crimped depending on preference.
- Thread small jingle bells onto thin ribbons or elastic cords.
- Attach these bell decorations to the braid section using bobby pins.
- Ensure the bells are secure so they won’t fall out during movement but will still jingle when the child moves.
- Wrap a festive ribbon around the elastic where the braid transitions to the ponytail.
Interactive Element: The jingle bells add sound to the festive look
17. Side Fishtail Braid with Poinsettia Clip
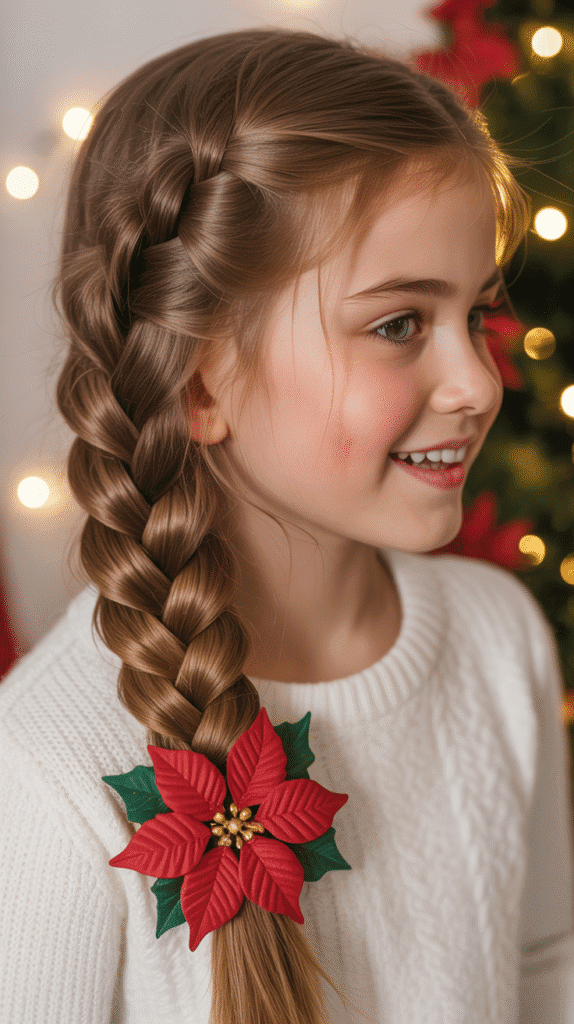
This elegant braid style offers sophistication with a botanical holiday accent.
The Side Fishtail Braid with Poinsettia Clip provides texture and interest while keeping hair neatly contained.
Braiding Process:
- Sweep all hair over one shoulder, deciding which side will showcase the braid.
- Divide the hair into two equal sections rather than three.
- Take a thin strand from the outer edge of the right section and cross it over to join the left section.
- Take a thin strand from the outer edge of the left section and cross it over to join the right section.
- Continue this alternating pattern all the way down to the ends.
- The thinner the strands you cross over, the more intricate and detailed the fishtail will appear.
- Secure the end with a clear elastic for an invisible finish.
- Gently pull on the outer edges of the braid to pancake it and create a fuller, more romantic appearance.
- Attach a large poinsettia clip near the top of the braid for a classic Christmas touch.
Best Suited For: Long hair, special occasions
18. Top Knot with Ribbon Streamers
This modern updo keeps hair completely off the face and neck while maintaining festive charm.
The Top Knot with Ribbon Streamers works excellently for active children who need secure styling.
Construction Steps:
- Flip your head upside down and brush all hair toward the crown area.
- Gather all hair into a very high ponytail at the top of the head.
- Secure tightly with a strong elastic band.
- Twist the entire ponytail and wrap it around the base to create a knot.
- Secure the knot with bobby pins, ensuring it feels stable and won’t unravel.
- Tuck any loose ends underneath and pin them securely.
- Take several long ribbons in Christmas colors and attach them to the base of the top knot.
- The ribbons should be long enough to cascade down past the shoulders for a streamer effect.
Activity Level: Perfect for active play, stays secure
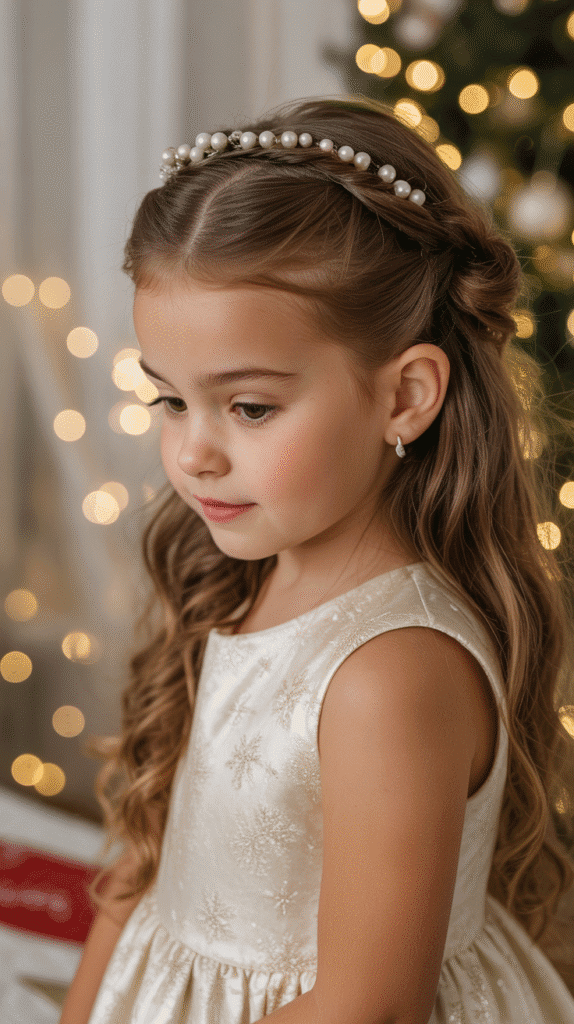
19. Halo Braid with Pearl Accents
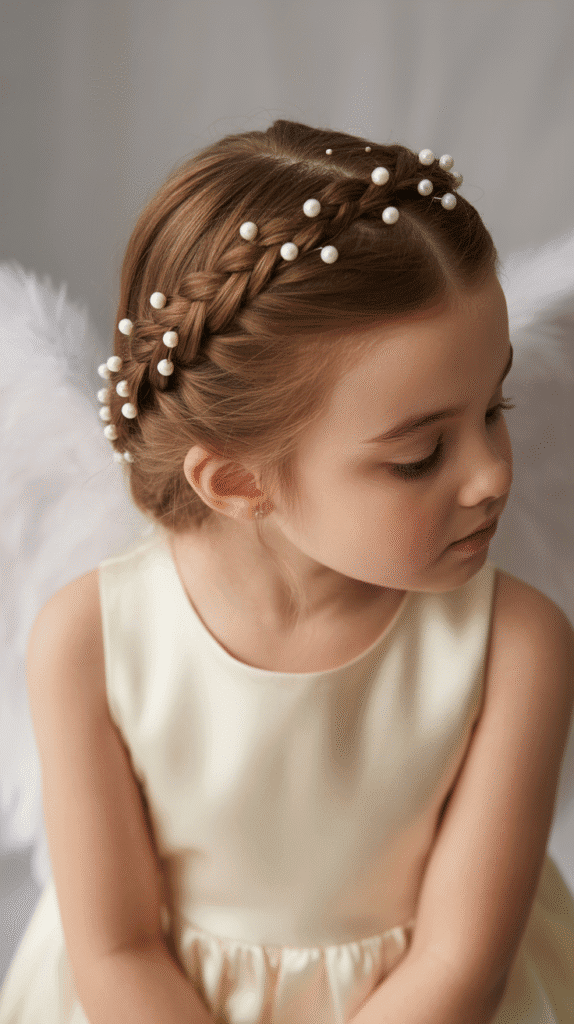
This angelic style creates a braid that circles the entire head like a halo.
The Halo Braid with Pearl Accents offers a heavenly look perfect for Christmas pageants or religious celebrations.
Styling Instructions:
- Part the hair down the center from forehead to nape.
- Begin a Dutch braid on one side at the nape, working upward along the hairline.
- Continue braiding across the front hairline from one side to the other.
- The braid should follow the natural hairline, creating a complete circle around the head.
- When you reach the starting point, continue braiding any remaining length.
- Tuck the end of the braid underneath the halo and secure with bobby pins for an invisible finish.
- Weave pearl-headed pins throughout the entire halo braid, spacing them evenly.
- The pearls add elegance and a subtle shimmer that catches light beautifully.
Symbolism: The halo shape is particularly appropriate for Christmas angel costumes
20. Asymmetrical Side Braid with Ornament Dangles
This contemporary style plays with asymmetry and unexpected placement.
The Asymmetrical Side Braid with Ornament Dangles creates an artistic, fashion-forward holiday look.
Braiding Technique:
- Create a deep side part, positioning it far to one side of the head.
- On the side with more hair, begin a Dutch or French braid starting at the part.
- Braid along the side of the head, incorporating hair as you work toward the ear.
- Continue the braid past the ear and down the length of the hair to the ends.
- Secure with a small elastic band.
- The opposite side should be smooth and tucked behind the ear.
- Attach small ornament-shaped dangly earrings or clips to the braid using jump rings or small bobby pins.
- These ornament accents should move and catch light when the child turns her head.
Fashion Forward: Appeals to older girls who want sophisticated styling
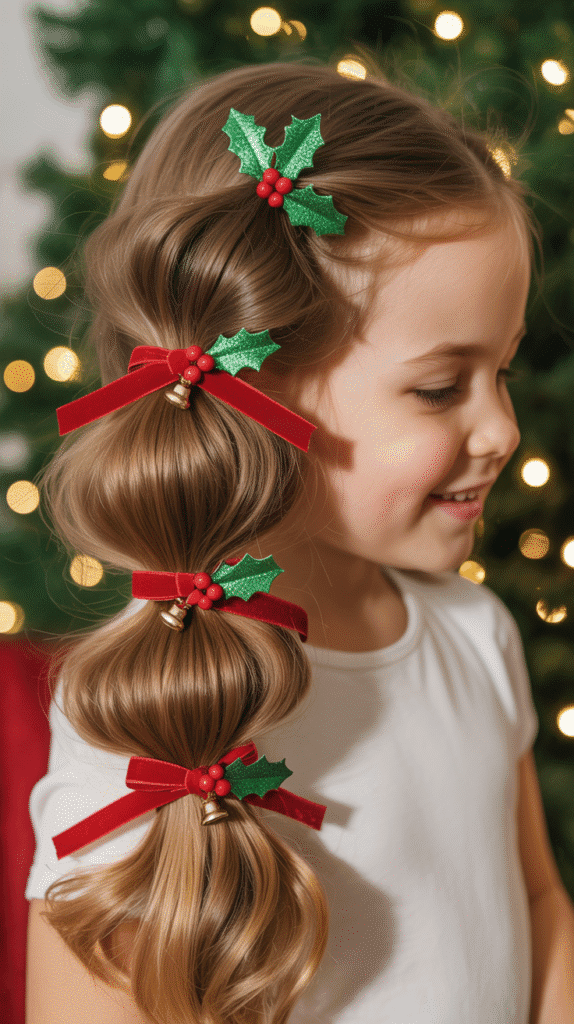
21. Bubble Ponytail with Christmas Colors
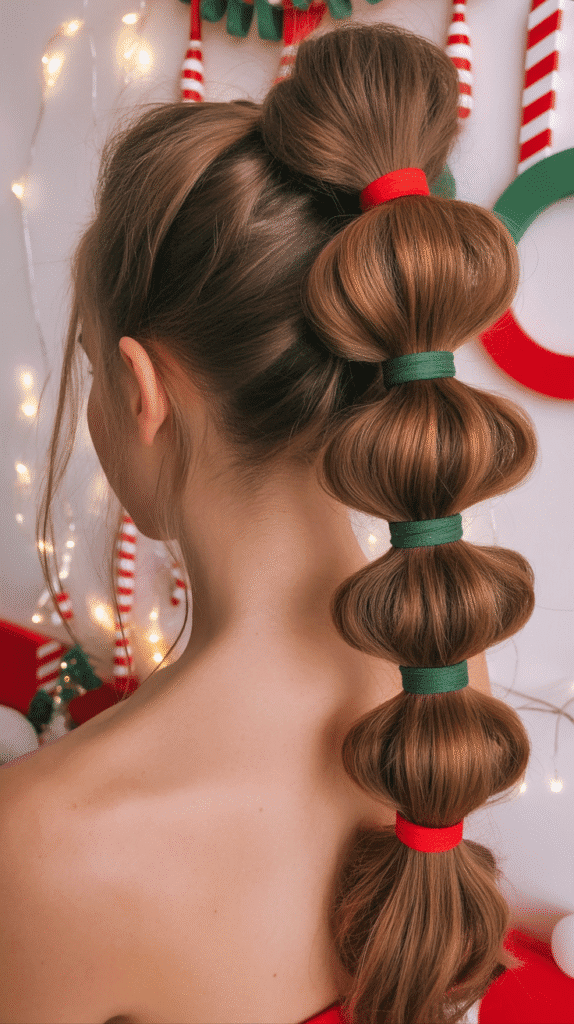
This fun and volumized ponytail style creates “bubbles” down the length of the hair.
The Bubble Ponytail with Christmas Colors adds dimension and playful texture to a simple ponytail.
Creation Method:
- Gather all hair into a ponytail at the desired height (high or mid-level works best).
- Secure with an elastic in a festive color like red or green.
- Measure approximately 2-3 inches down from the first elastic and add another elastic in a different Christmas color.
- Gently pull on the hair between the two elastics to create a bubble effect.
- Continue adding elastics every 2-3 inches down the length of the ponytail, alternating colors.
- Each section should be gently pulled and puffed to create the bubble shape.
- The result is a segmented ponytail with volumized sections in festive colors.
- Spray with hairspray to maintain the bubble shapes throughout the event.
Color Suggestions: Alternate red, green, gold, and white elastics
22. Victory Rolls with Festive Pins
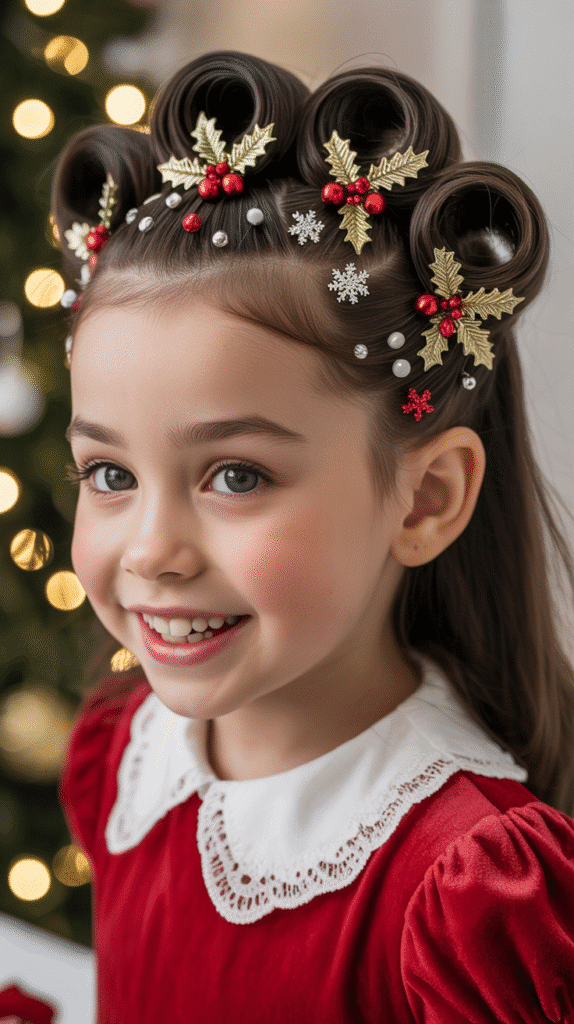
This vintage-inspired style brings 1940s glamour to modern holiday celebrations.
The Victory Rolls with Festive Pins create a retro look that’s surprisingly unique for Christmas parties.
Rolling Technique:
- Section off the front portions of hair on both sides, leaving the back loose.
- Take one front section and spray it with strong-hold hairspray.
- Roll the section backward and inward, creating a tight roll toward the scalp.
- Secure the roll against the head using several bobby pins inserted from different angles.
- Repeat the process on the opposite side, ensuring both rolls are symmetrical in size and height.
- The rolls should sit prominently on top of the head, creating volume and vintage appeal.
- Decorate each roll with festive pins featuring stars, snowflakes, or Christmas trees.
- The back hair can be left straight, curled, or styled into a bun depending on preference.
Era Inspired: 1940s vintage, unique for holiday events
23. Rope Braid Ponytail with Garland Wrap
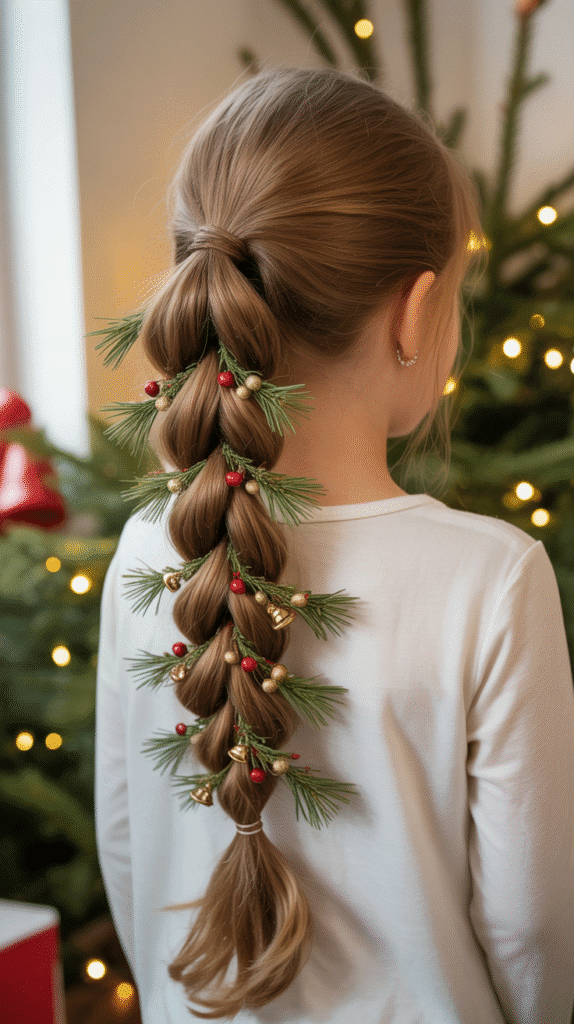
This textured ponytail style uses a rope braiding technique for visual interest.
The Rope Braid Ponytail with Garland Wrap combines technique with festive decoration seamlessly.
Braiding Steps:
- Pull all hair into a secure ponytail at the desired height.
- Divide the ponytail into two equal sections.
- Twist the right section clockwise multiple times until it begins to coil.
- Twist the left section clockwise the same number of times.
- Now wrap both twisted sections around each other in a counterclockwise direction.
- This opposing twist creates the rope braid effect that holds itself together.
- Secure the end with an elastic band.
- Take thin Christmas garland or tinsel and wrap it around the rope braid from top to bottom.
- Secure the garland at the top and bottom with bobby pins to prevent slipping.
Texture Created: More defined than a regular braid, with a twisted rope appearance
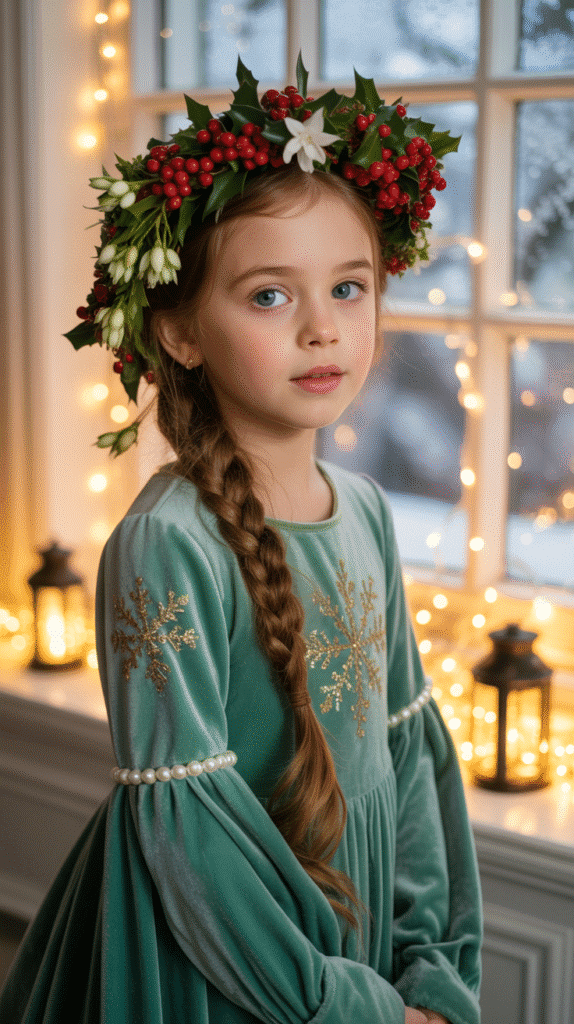
24. Flower Crown Updo with Winter Florals
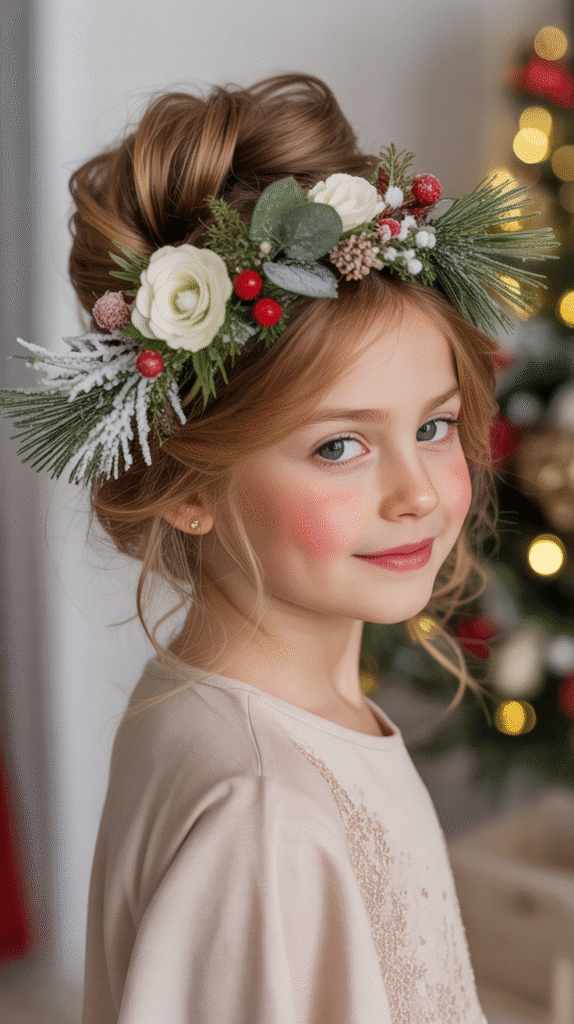
This romantic updo incorporates fresh or artificial winter flowers for a botanical holiday theme.
The Flower Crown Updo with Winter Florals creates a garden-inspired festive look.
Updo Construction:
- Begin by curling all hair in large sections for texture and grip.
- Gather the hair loosely at the crown and twist it into a soft, messy bun.
- Secure with bobby pins, allowing some pieces to fall naturally for a romantic effect.
- Don’t make the bun too tight or perfect—the charm is in the softness.
- Create a flower crown using white roses, pine sprigs, red berries, or baby’s breath.
- Position the flower crown around the bun, securing each element with bobby pins or floral wire.
- Small flowers can also be pinned throughout the bun itself for additional botanical detail.
- Finish with light-hold hairspray to maintain the style without deflating the volume.
Seasonal Florals: White roses, holly, pine, eucalyptus, winter berries
25. Zigzag Part with Dual Ponytails
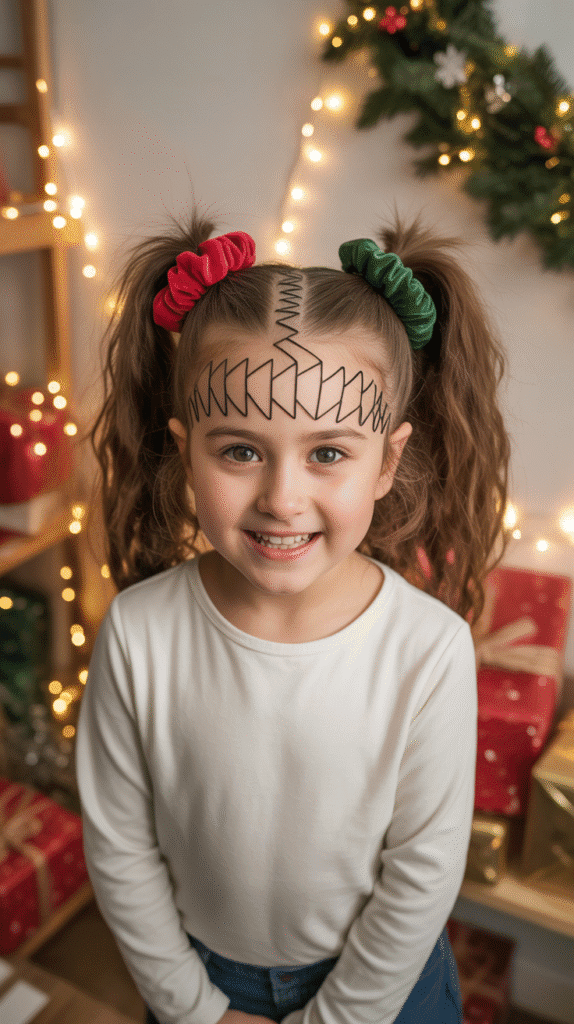
This playful style adds interest with an unexpected zigzag parting technique.
The Zigzag Part with Dual Ponytails brings geometry and fun to traditional pigtails.
Parting and Styling:
- Use the pointed end of a rat-tail comb to create a zigzag part from forehead to nape.
- Move the comb in sharp angles rather than a straight line to create the zigzag effect.
- The zigzag should be bold and visible, not subtle.
- Gather one side into a ponytail at the desired height, securing with a festive elastic.
- Repeat on the opposite side, ensuring both ponytails are positioned symmetrically.
- The zigzag part adds visual interest to an otherwise simple style.
- Add Christmas-colored scrunchies or bows to each ponytail for festive flair.
- Curl the ends of the ponytails if desired for extra polish.
Modern Twist: The zigzag part updates a classic style
26. Braided Bun with Candy Decorations
This sweet style incorporates actual candy or candy-themed accessories into an elegant bun.
The Braided Bun with Candy Decorations perfectly captures the treats and sweets of the holiday season.
Bun Assembly:
- Gather all hair into a ponytail at the desired location (crown or nape).
- Braid the entire ponytail using a three-strand or fishtail technique.
- Wrap the braid around the base of the ponytail to form a circular bun shape.
- Secure with bobby pins, tucking the end underneath the bun.
- Use wrapped candy decorations (ensure they’re securely sealed) and pin them around the bun.
- Alternatively, use candy-shaped hair clips or resin decorations that look like peppermints, lollipops, or candy canes.
- Ensure all decorations are securely attached so they won’t fall out during movement.
- Add a matching ribbon bow for an extra sweet finishing touch.
Theme: Perfect for gingerbread house parties or candy-themed events
27. Elsa-Inspired Side Braid with Snowflakes
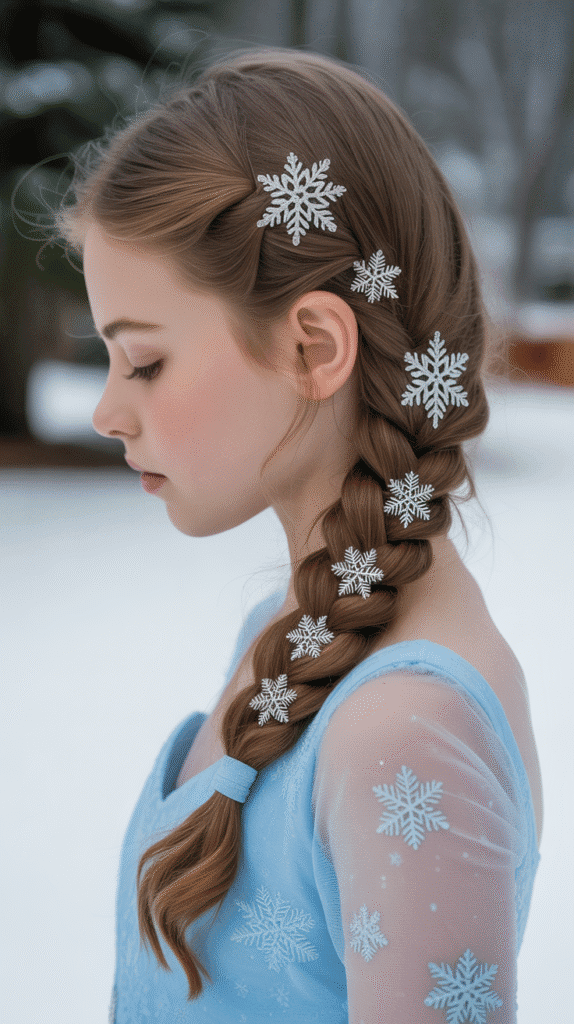
Drawing inspiration from the beloved character, this elegant braid works beautifully for winter-themed celebrations.
The Elsa-Inspired Side Braid with Snowflakes captures ice princess magic for Christmas.
Braiding Instructions:
- Sweep all hair over one shoulder for the signature side placement.
- Begin a French braid at the crown on the same side where the hair will fall.
- As you braid, incorporate sections loosely for a softer, more romantic appearance.
- Continue the braid all the way down to the ends of the hair.
- Secure with a clear elastic for an invisible finish.
- Gently pull on the outer edges of the braid to pancake it and create width.
- Attach snowflake clips, pins, or even temporary snowflake tattoos throughout the braid.
- Apply a shimmer spray or hair glitter for an icy, frozen effect.
Character Connection: Perfect for Frozen fans
28. Triple Twisted Ponytail
This dimensional style creates three twisted sections in a single ponytail for added interest.
The Triple Twisted Ponytail offers texture and complexity while remaining surprisingly simple to achieve.
Twisting Method:
- Gather all hair into a ponytail at the desired height and secure with an elastic.
- Divide the ponytail into three equal sections.
- Take the first section and twist it tightly from base to ends, securing the end with a small clear elastic.
- Complete the third section using the same twisting technique and secure the end.
- The result is three distinct twisted ropes hanging from a single ponytail base.
- Wrap a festive ribbon around each twist, spiraling from top to bottom.
- Alternatively, clip small ornaments or bells to each twisted section for Christmas flair.
- Apply hairspray to each twist to prevent them from unraveling throughout the event.
Visual Impact: Creates texture and dimension in a simple ponytail
29. Low Twisted Half-Up with Star Accessories
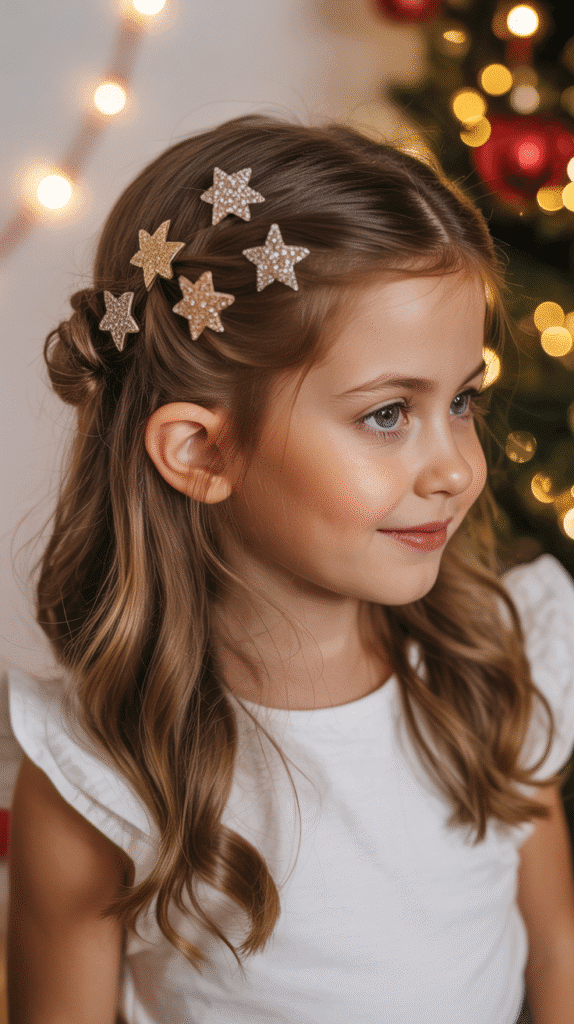
This sophisticated yet simple style keeps the top half secured while allowing bottom hair to flow freely.
The Low Twisted Half-Up with Star Accessories balances elegance with ease of creation.
Styling Process:
- Section the hair horizontally from the top of one ear to the other.
- Divide the top section into two parts at the center.
- Twist each section individually toward the back of the head.
- Cross the two twisted sections at the back and secure with bobby pins where they meet.
- The remaining hair should hang loose beneath the twisted sections.
- Position star-shaped clips or pins where the two twists intersect.
- Add additional star accessories scattered throughout the twisted portions.
- Curl or wave the loose bottom section for added glamour and movement.
Time Efficiency: Quick to create, looks more complex than it is
30. Braided Ponytail with Christmas Light Clips
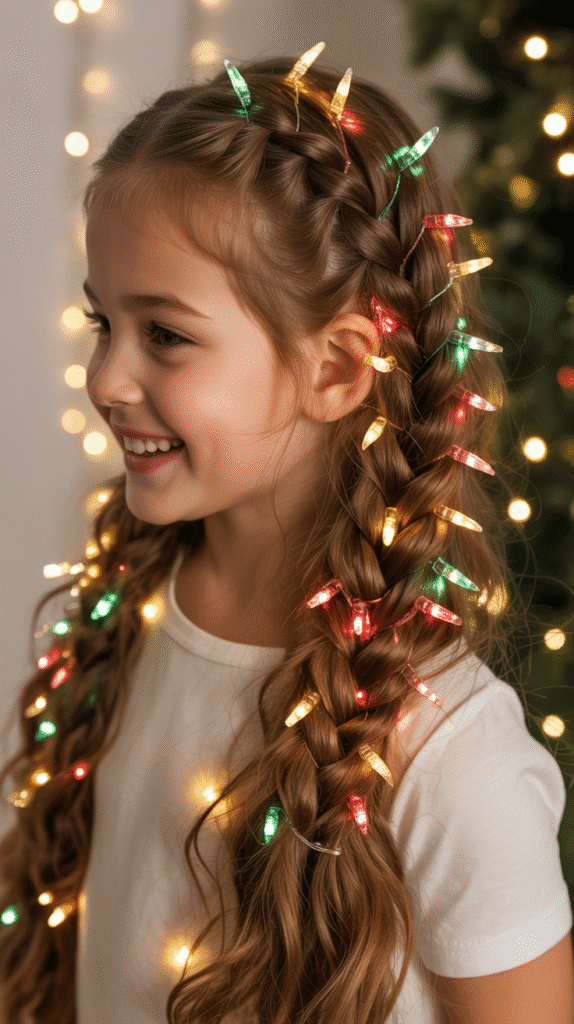
This final style celebrates the iconic imagery of Christmas lights wrapped around a textured braid.
The Braided Ponytail with Christmas Light Clips brings literal holiday illumination to hairstyling.
Final Style Creation:
- Pull all hair into a ponytail at mid or high level, securing with a strong elastic.
- Braid the entire length of the ponytail using your preferred braiding technique (three-strand, Dutch, or fishtail).
- Secure the end of the braid with an elastic band.
- Take small light bulb-shaped clips in multiple colors (red, green, blue, yellow, orange).
- Attach these clips along the entire length of the braid, spacing them evenly.
- The clips should resemble a string of Christmas lights wrapped around the braid.
- Alternatively, use actual battery-operated fairy lights carefully woven through the braid for evening events.
- Ensure any electronic elements are safely secured and won’t pull on the hair.
Festive Factor: Literally lights up the holiday spirit
Helpful Styling Tips and Hair Care
To ensure these Christmas hairstyles look their best and last throughout holiday celebrations, consider these professional tips and care recommendations.
Essential Styling Tools
- Quality hair elastics in various colors matching Christmas themes prevent breakage and hold styles securely throughout long events.
- Bobby pins and hair pins in colors matching the hair create invisible support while decorative pins add festive flair.
- Rat-tail comb enables precise parting and sectioning, essential for symmetrical styles and clean lines.
- Paddle brush and round brush smooth hair during preparation and create different finishing effects.
- Curling iron or wand (with adult supervision) adds texture, volume, and polish to many holiday hairstyles.
- Hair accessories including ribbons, bows, clips, flowers, and themed decorations transform simple styles into festive creations.
Making Styles Last Longer
- Start with clean, completely dry hair as damp hair won’t hold styles as effectively.
- Use styling products appropriate for the hair type to provide hold without stiffness or greasiness.
- Secure all bobby pins by crossing two pins in an X formation for maximum grip and stability.
- Apply hairspray from 10-12 inches away in light layers rather than one heavy coating.
- Teach children to avoid touching or playing with their styled hair during events.
- Bring backup accessories and bobby pins to holiday parties for quick touch-ups if needed.
- Consider the activity level of the event when choosing styles—active parties require more secure styling.
Safety Considerations
- Always use heat protectant spray before applying any hot styling tools to prevent hair damage.
- Test all hair accessories for sharp edges or points that could scratch delicate scalp skin.
- Avoid styles that pull too tightly, which can cause discomfort and damage hair follicles.
- Ensure decorative elements are securely attached and won’t pose choking hazards for younger children.
- Supervise all heat styling tools and never leave them unattended when working with children.
- Choose age-appropriate styles—very young children should have simpler, more comfortable styles.
- Remove all accessories, elastics, and pins before bedtime to prevent tangling and discomfort.
External Resources for Holiday Hairstyling
For additional inspiration and detailed video tutorials, visit reputable hairstyling websites such as AllThingsHair.com, which offers comprehensive guides for various hair types and skill levels. The American Academy of Dermatology provides excellent information on healthy hair care practices for children. For festive hair accessory ideas and products, explore retailers specializing in children’s hair accessories, which often feature seasonal collections perfect for holiday celebrations.
Conclusion
Creating memorable holiday looks for young girls doesn’t require professional training or expensive salon visits—with patience, practice, and the right inspiration, parents and caregivers can craft stunning festive hairstyles at home.
This comprehensive guide to 30 Cute Christmas Hairstyles for Girls Perfect for Holiday Parties has provided you with a diverse collection ranging from simple ribbon-adorned ponytails to intricate braided updos, ensuring there’s a perfect option for every skill level, hair type, and celebration style.
Whether your little one is attending a formal Christmas concert, a casual family gathering, or a playful holiday party with friends, these hairstyles will help her feel confident, beautiful, and fully immersed in the magic of the season.
Remember that the most important element of any hairstyle is the joy and confidence it brings to the child wearing it—the sparkle in her eyes will outshine even the most elaborate hair accessories.
With these techniques, tips, and creative ideas at your fingertips, you’re now equipped to make every holiday celebration extra special with hairstyles that capture the wonder, elegance, and festive spirit of Christmas.
May your holiday season be filled with beautiful moments, stunning hairstyles, and memories that will last long after the decorations come down.