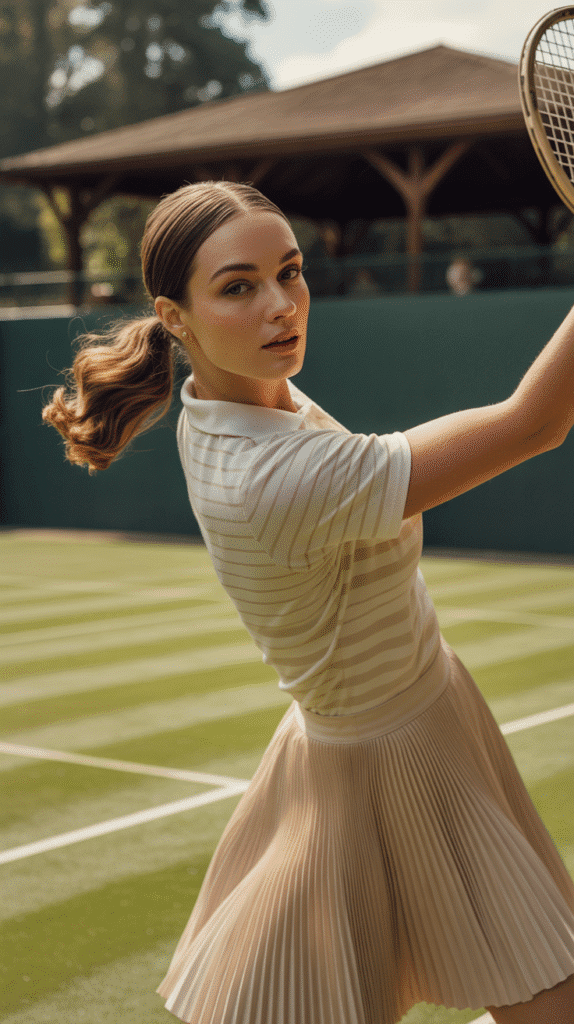
The 1930s marked a transformative era in beauty and fashion, where hairstyles became an art form that defined elegance and sophistication.
This comprehensive guide to 30 Effortless 1930s Hairstyle Ideas for Inspiration will transport you back to the golden age of Hollywood glamour, where finger waves, marcel curls, and sleek bobs reigned supreme.
Whether you’re preparing for a vintage-themed event, seeking inspiration for your wedding day, or simply fascinated by the timeless beauty of this iconic decade, you’ll discover a treasure trove of styling techniques and creative ideas.
From the soft romanticism of pin curls to the bold statement of a deep side part, each hairstyle tells a story of an era that celebrated femininity, grace, and meticulous attention to detail.
Get ready to explore authentic vintage styles that remain surprisingly wearable and relevant in today’s fashion landscape, complete with practical tips and modern adaptations that make these classic looks accessible for everyone.
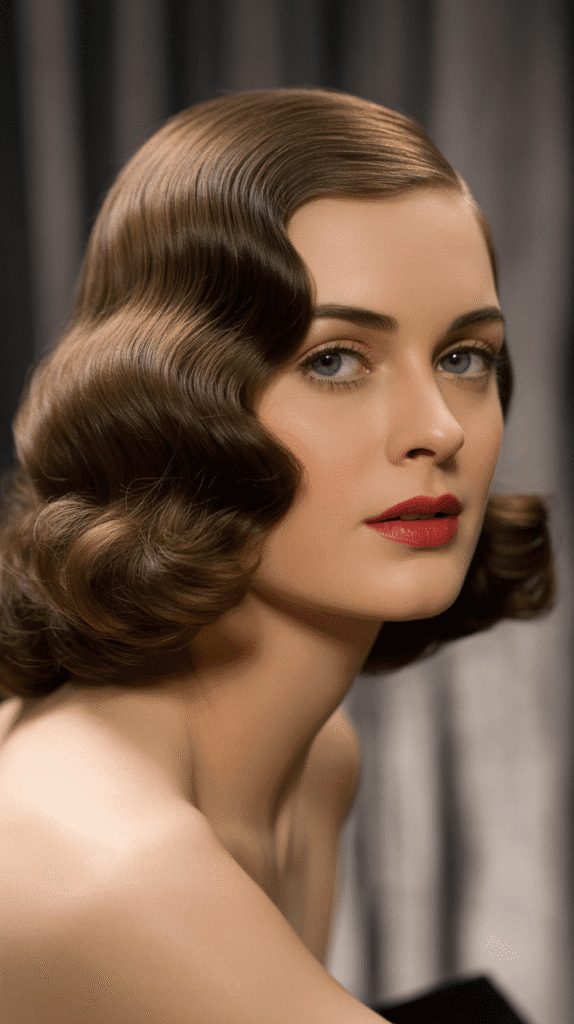
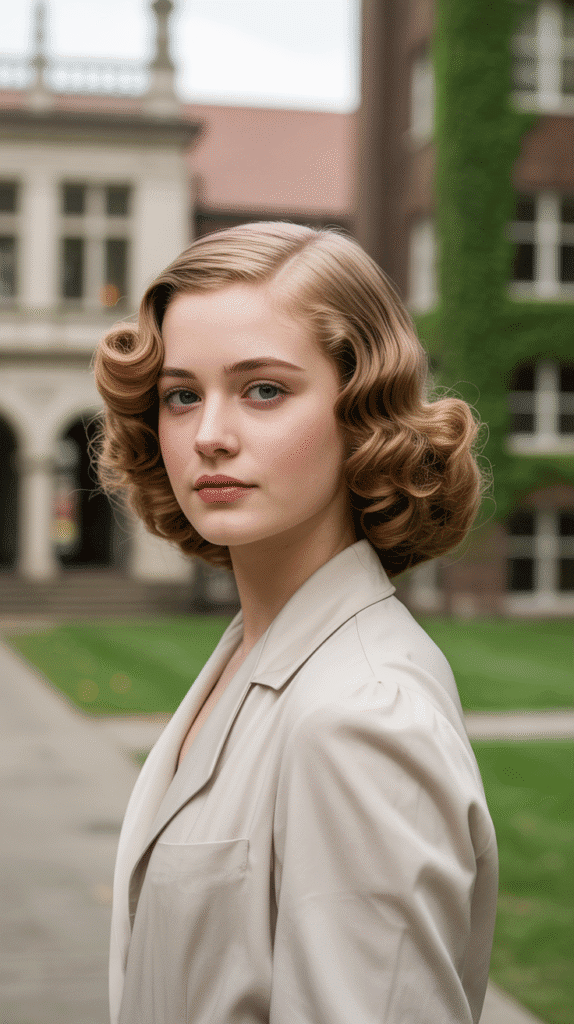
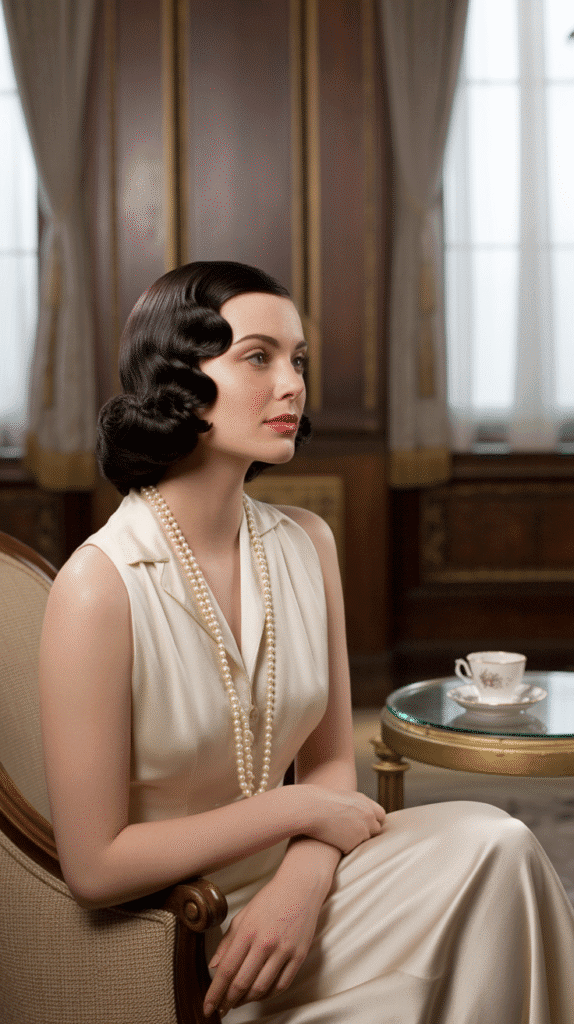
1. Classic Finger Waves

Finger waves represent the quintessential 1930s hairstyle that became synonymous with Hollywood glamour and sophisticated elegance.
This sculptural styling technique creates S-shaped curves that flow seamlessly across the head, offering a polished look that works beautifully for formal occasions and vintage enthusiasts alike.
- The finger wave technique originated in the 1920s but reached its peak popularity during the 1930s when movie stars like Jean Harlow and Josephine Baker made it iconic.
- To create authentic finger waves, you’ll need setting lotion, a fine-tooth comb, and metal wave clips to hold the pattern while hair dries.
- Start with damp hair and apply generous amounts of setting lotion to ensure the waves hold their distinctive shape throughout the day.
- Use your index finger to create a ridge in the hair while combing the section in the opposite direction to form the characteristic S-pattern.
- Secure each wave with clips placed parallel to the ridge, maintaining even spacing for a symmetrical appearance.
- Allow hair to dry completely before removing clips, then gently brush through with a soft-bristle brush to soften the waves while maintaining their structure.
- Modern adaptations include using flat irons to recreate the wave pattern on dry hair for a quicker styling option.
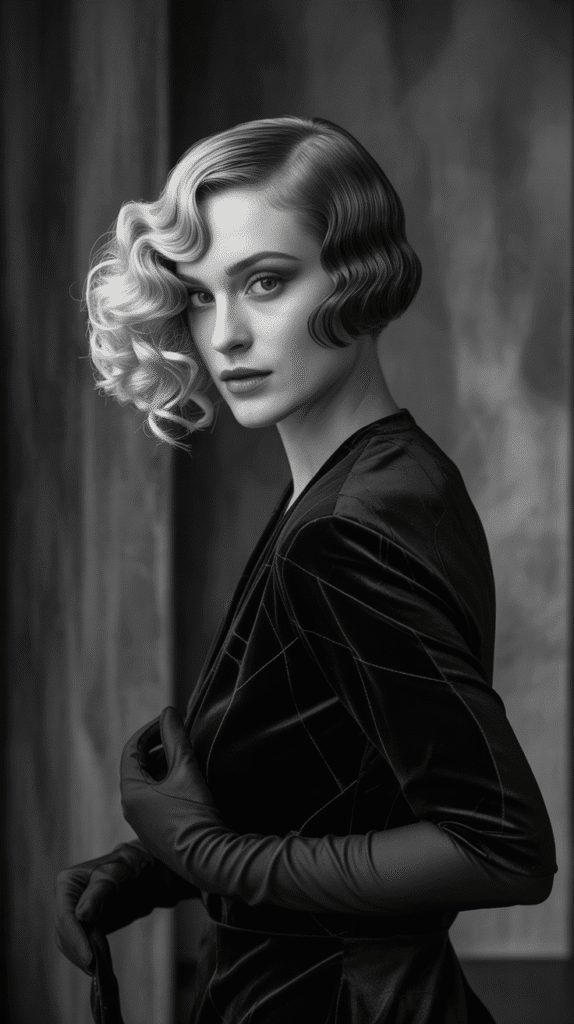
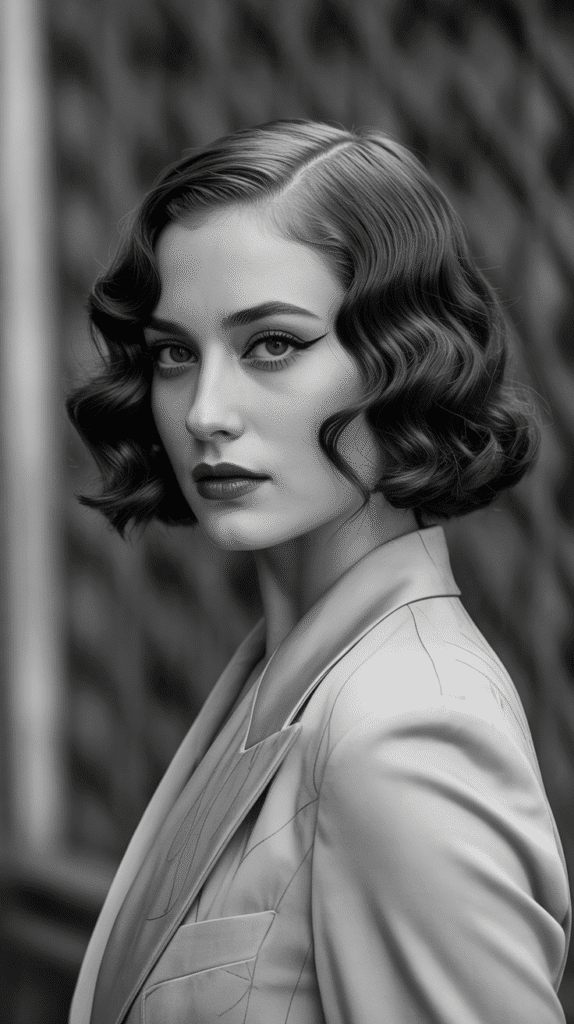
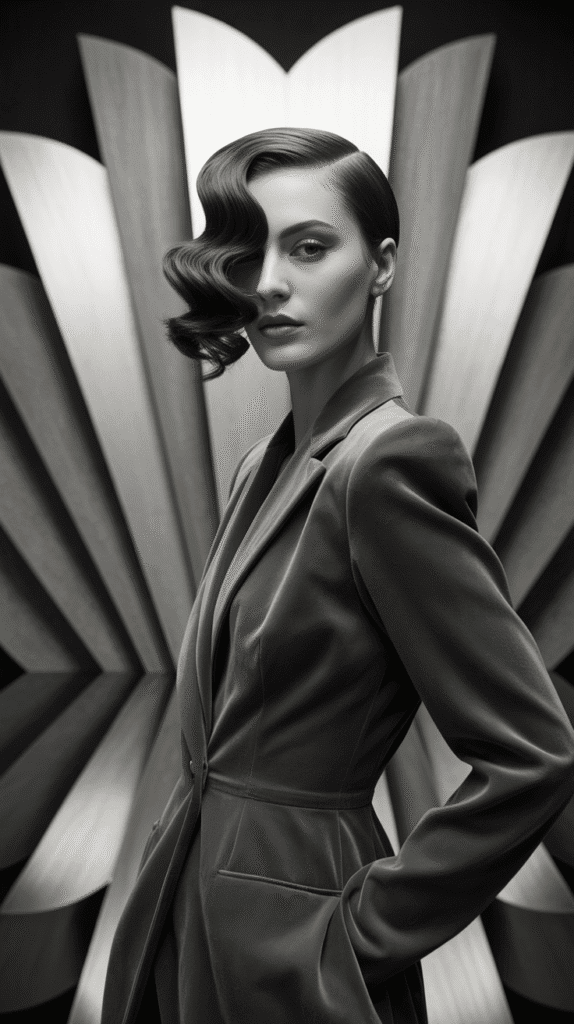
2. Marcel Waves with Deep Side Part
Marcel waves offered a softer, more natural alternative to finger waves while still maintaining the era’s signature wavy aesthetic.
Named after French hairdresser Marcel Grateau who invented the technique, this style uses heat to create uniform, flowing waves.
- Marcel waves differ from finger waves in their rounder, more tubular shape created with heated curling irons rather than combs and fingers.
- The deep side part, typically placed above one eyebrow, became a defining characteristic of 1930s hairstyles and added dramatic flair to the look.
- Professional Marcel irons were specifically designed for this technique, featuring a round barrel and clamp mechanism.
- Begin by sectioning hair with a dramatic side part, usually positioned 2-3 inches from the center of the head.
- Work in small sections, clamping the iron at the root and rotating it to create uniform waves down the length of each section.
- The waves should flow in alternating directions, creating a continuous ripple effect across the entire head.
- Finish with a light hairspray to maintain the wave pattern without creating stiffness or reducing natural movement.
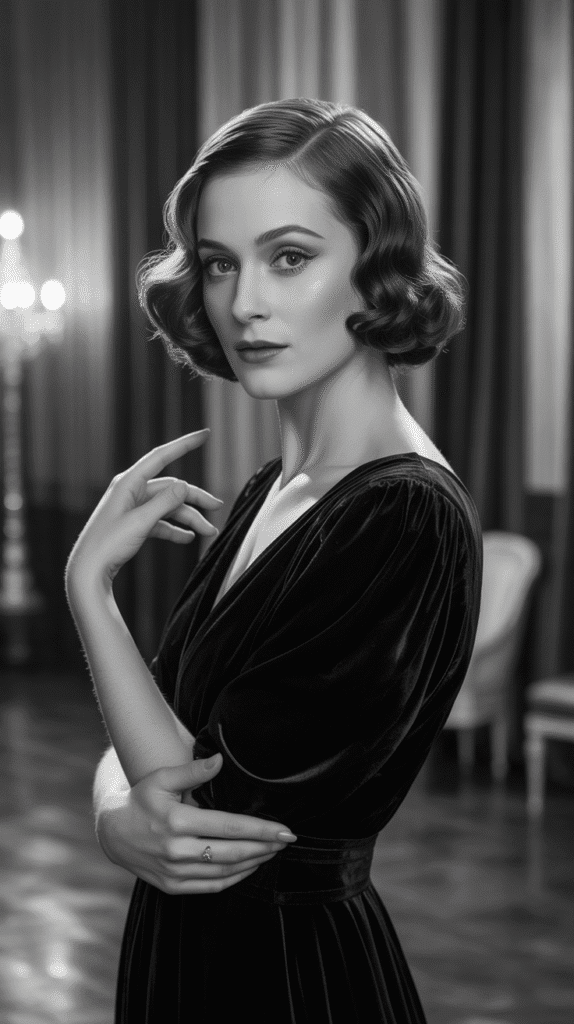
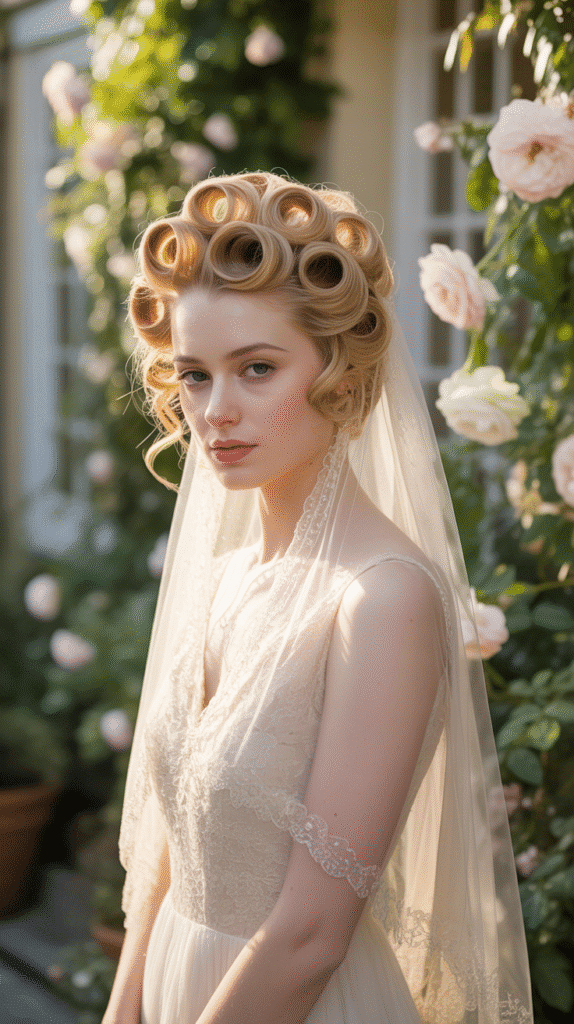
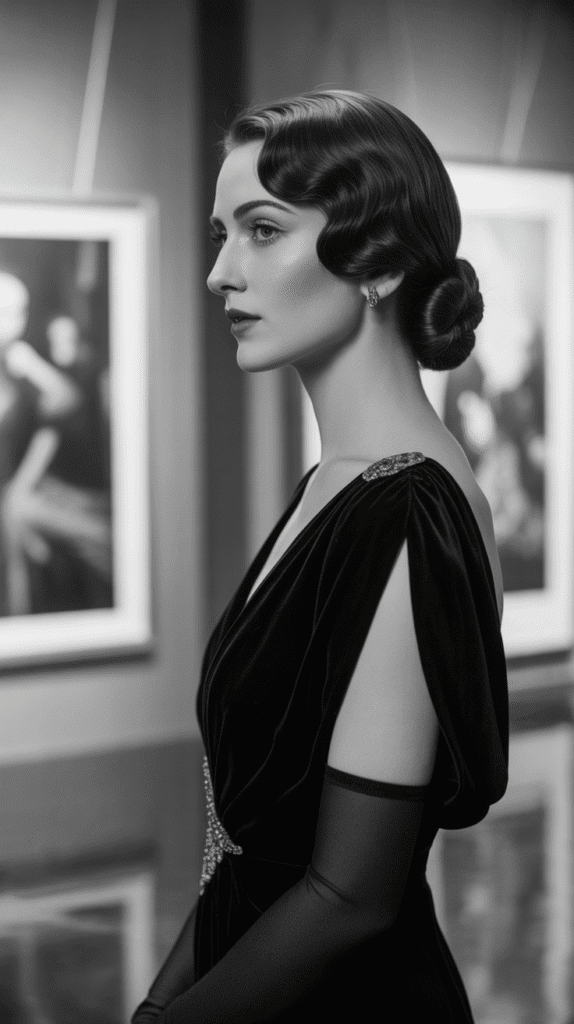
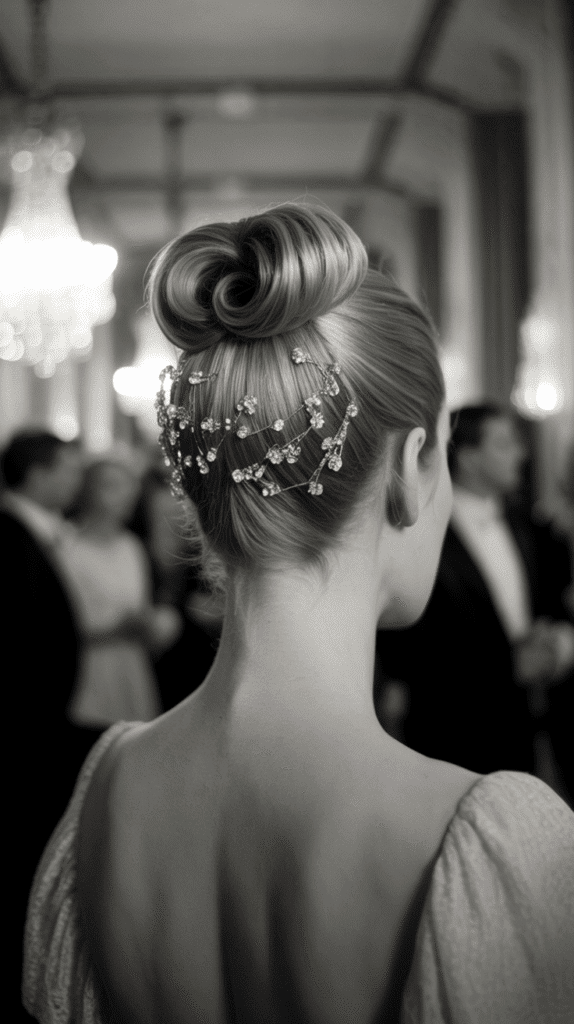
3. Low Chignon with Pin Curls

The low chignon represented refined elegance in the 1930s, often paired with decorative elements and soft pin curls framing the face.
This versatile updo worked equally well for daytime sophistication and evening glamour.
- Pin curls served as the foundation for most 1930s hairstyles, creating smooth waves and curls that could be arranged in countless configurations.
- The low chignon sits at the nape of the neck, providing a graceful silhouette that complemented the bias-cut dresses popular during this era.
- Create pin curls by wrapping small sections of damp hair around your finger, sliding the curl off, and pinning it flat against the scalp.
- Allow pin curls to set completely before unpinning, then gently brush through to create soft, controllable waves.
- Gather the back sections into a low ponytail at the nape, then twist and wrap the hair into a classic chignon shape.
- Secure with bobby pins, ensuring the chignon feels stable and sits smoothly against the head.
- Leave the front sections styled in soft pin curls or waves that frame the face, creating a romantic and feminine appearance.
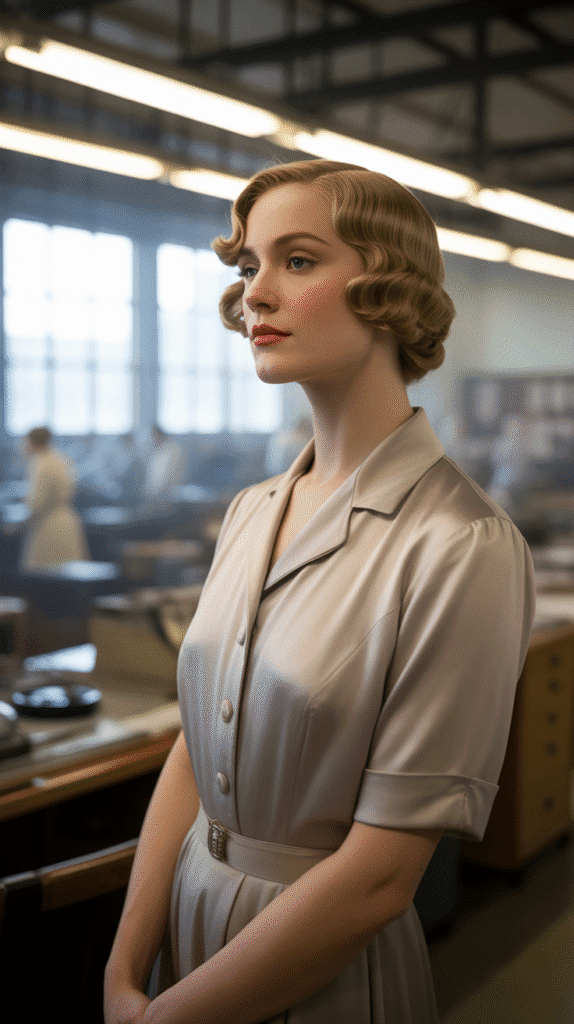
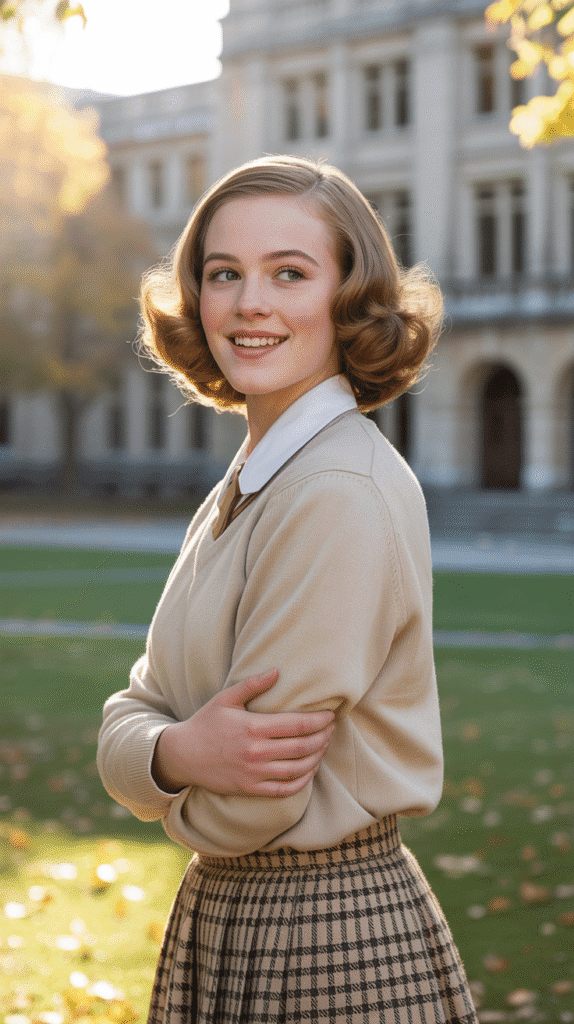
4. The Pageboy Bob
The pageboy bob emerged as a practical yet stylish option during the 1930s, featuring hair cut to chin-length with ends curled under in a smooth roll.
This polished style balanced modernity with femininity.
- The pageboy differs from other bobs with its distinctive inward curl at the ends, creating a rounded, helmet-like shape.
- Hair length typically fell between the jawline and shoulders, making it more conservative than the shorter bobs of the 1920s.
- To achieve an authentic pageboy, hair should be cut in a blunt, even line around the perimeter with minimal layering.
- Set damp hair in large rollers or pin curls, directing the ends inward to create the characteristic under-curl.
- Once dry, brush through smoothly, using a paddle brush to maintain sleekness on top while preserving the curled ends.
- The crown area should remain smooth and close to the head, with volume concentrated at the rolled ends.
- A side part or slight wave at the front added visual interest while maintaining the style’s signature clean lines.
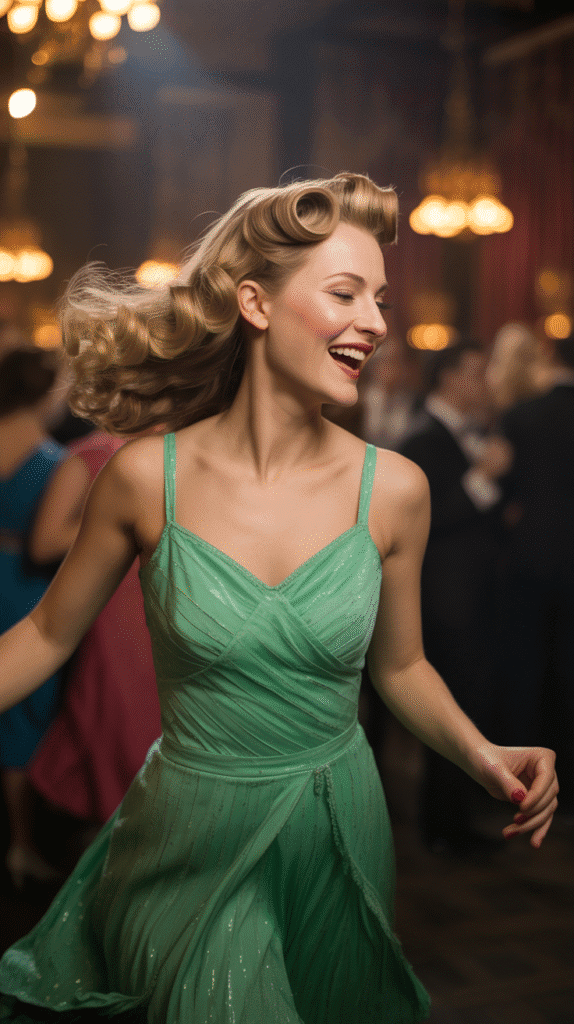
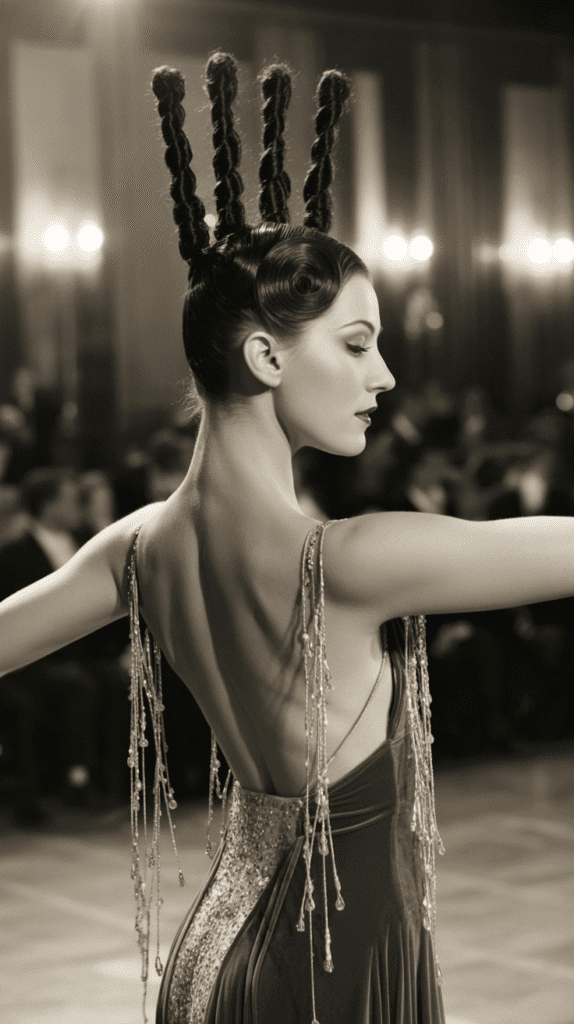
5. Victory Rolls
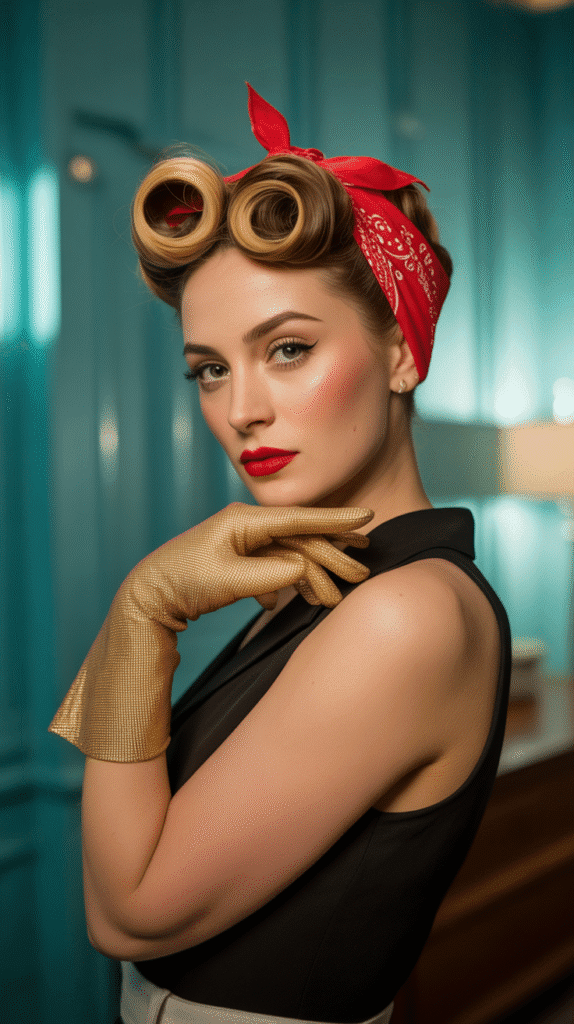
Victory rolls became an iconic hairstyle that, while peaking in the early 1940s, had its roots in late 1930s styling techniques.
These distinctive rolled sections of hair created height and drama at the front of the hairstyle.
- Victory rolls were named for their resemblance to the aerobatic maneuver performed by fighter pilots during wartime.
- The style typically features two symmetrical rolls positioned at the front hairline, though single rolls or asymmetrical versions also existed.
- Begin by sectioning the front portions of hair, typically starting from a side or center part and extending back about 2-3 inches.
- Backcomb each section at the roots to create volume and texture that will help the roll maintain its shape.
- Roll the hair upward and backward, creating a smooth cylindrical shape that sits above the forehead.
- Secure with bobby pins inserted vertically into the base of the roll, ensuring the pins remain hidden within the style.
- The remaining hair can be styled in waves, curls, or gathered into an updo to complete the look.
6. Soft Waves with Hair Combs
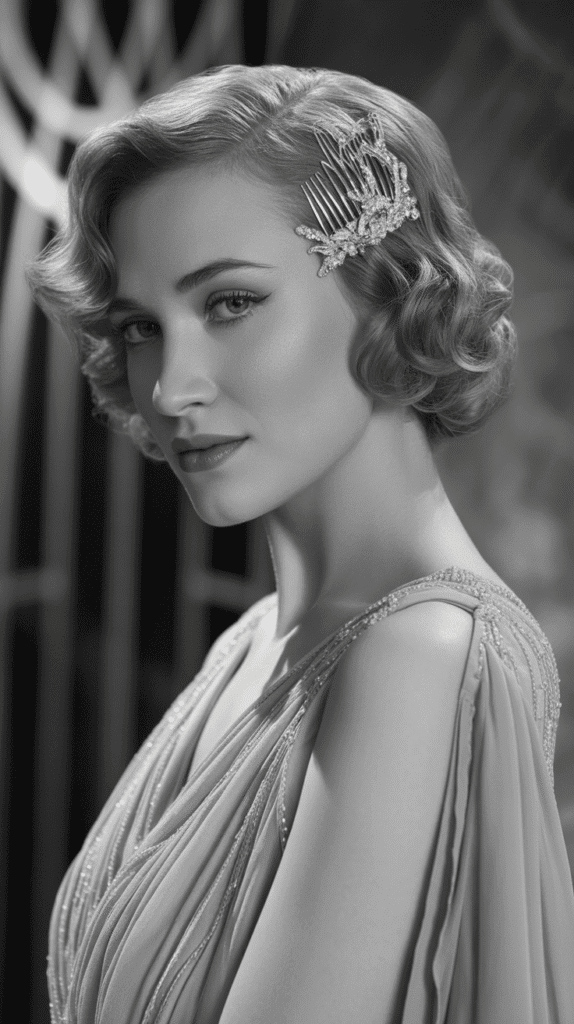
Decorative hair combs became essential accessories in 1930s hairstyling, adding elegance while serving the practical purpose of securing waves and updos.
These ornamental pieces ranged from simple to elaborate designs featuring rhinestones, pearls, or Art Deco motifs.
- Hair combs were strategically placed to accentuate finger waves or secure sections of hair in updos.
- Art Deco-inspired combs featuring geometric designs perfectly complemented the architectural styling of 1930s waves.
- Create soft waves using any preferred method such as finger waves, Marcel waves, or set curls brushed out.
- Position decorative combs at the temples, just above and behind the ears, to secure waves while adding sparkle.
- Multiple smaller combs could be used throughout the hairstyle for added embellishment and security.
- The combs should slide into the hair at an angle, with teeth gripping the hair firmly without causing discomfort.
- Evening styles often featured more elaborate combs adorned with crystals or precious metals, while daytime versions remained more understated.
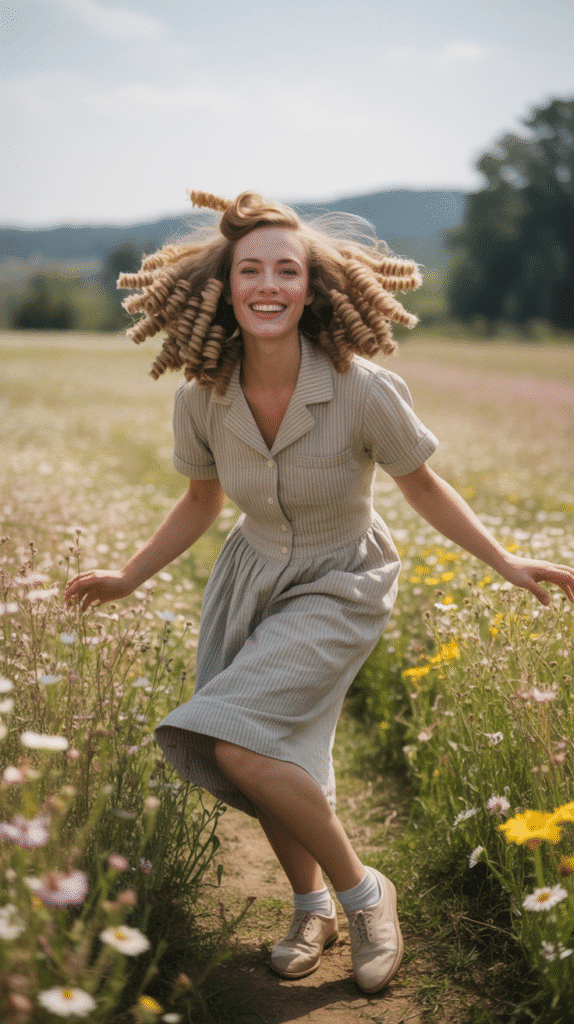
7. Center Part with Barrel Curls
The center part enjoyed renewed popularity in the 1930s, especially when paired with bouncy barrel curls that created a balanced, symmetrical appearance.
This style offered youthful freshness while maintaining period-appropriate sophistication.
- Barrel curls are cylindrical curls that maintain their round shape rather than being brushed out into waves.
- The center part creates symmetry and works particularly well for oval and heart-shaped faces.
- Section hair down the exact center of the head from forehead to nape, ensuring the part remains straight and precise.
- Create barrel curls by wrapping sections of hair around rollers or a curling iron, holding each section until completely cool.
- The curls should be uniform in size, typically ranging from 1 to 2 inches in diameter for an authentic 1930s appearance.
- Once all curls are set and cooled, gently separate with fingers rather than brushing to maintain the defined curl structure.
- Finish with a light-hold hairspray that allows the curls to bounce and move naturally without becoming stiff.
8. The Asymmetrical Bob
Asymmetrical styling became increasingly popular in the 1930s, with bobs cut shorter on one side to create visual interest and modern edge.
This bold choice demonstrated confidence and fashion-forward thinking.
- The asymmetrical bob featured a dramatic difference in length between sides, sometimes varying by several inches.
- Typically, one side was cut to expose the ear while the other side fell to chin-length or beyond.
- The exposed side was often styled with flat finger waves or slicked close to the head for maximum contrast.
- The longer side received more elaborate styling with waves, curls, or rolled sections to emphasize the asymmetry.
- This style required precise cutting technique to ensure the asymmetry appeared intentional rather than uneven.
- Regular trims were essential to maintain the dramatic difference in length and keep edges sharp and defined.
- The asymmetrical bob particularly suited women with strong facial features and confident personal style.
9. Faux Bob with Finger Waves
Women with longer hair could achieve the fashionable bob silhouette without committing to a haircut by creating a faux bob.
This clever styling technique combined finger waves with strategic pinning to create the illusion of shorter hair.
- The faux bob allowed women to follow trends while maintaining the versatility of long hair.
- Begin by creating finger waves through the front and side sections as desired for your chosen style.
- Once waves are set and dry, gather the remaining length at the nape of the neck into a low ponytail.
- Twist the ponytail and fold it upward, tucking the ends under to create a rolled effect at the nape.
- Pin the tucked section securely with bobby pins, ensuring all long hair is concealed and the fold sits smoothly.
- The finished result should appear as though hair ends at the nape, creating a bob-length appearance.
- This technique worked especially well for formal events when a woman wanted the elegant look of a bob without permanent commitment.
10. Pompadour with Rolled Back
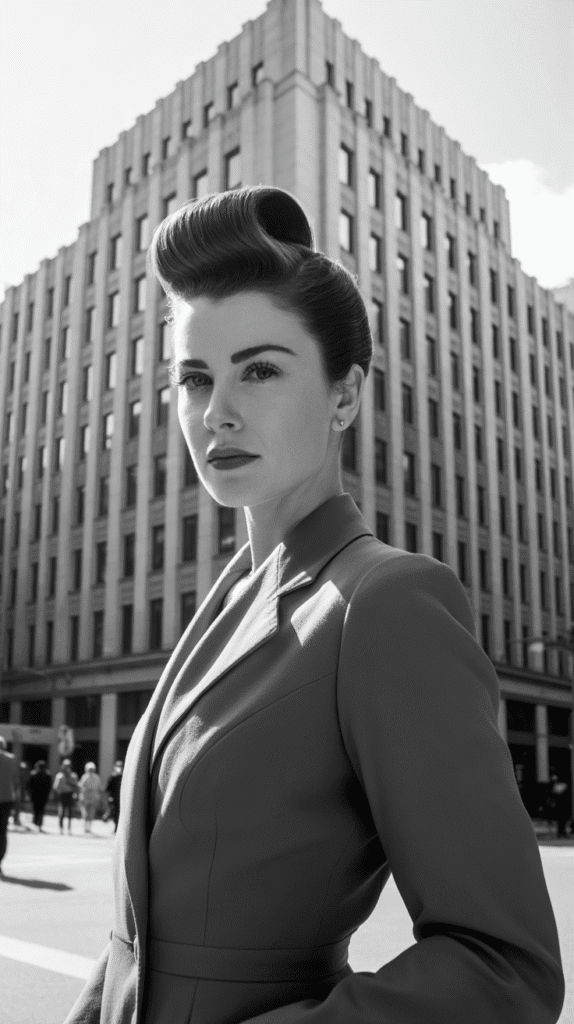
The pompadour style, featuring dramatically swept-back hair with height at the crown, represented boldness and glamour in 1930s hairstyling.
This architectural approach to hair created a striking silhouette.
- The 1930s pompadour differed from later versions by maintaining smoothness and incorporating waves rather than extreme volume.
- Height at the front was created through backcombing and rolling techniques rather than the teasing methods of later decades.
- Section the front hair from ear to ear, separating it from the rest of the hair.
- Backcomb the sectioned hair at the roots to create a foundation for height and volume.
- Smooth the top layer of hair over the backcombed section, rolling it backward and slightly upward.
- Secure the rolled section with bobby pins placed horizontally at the back of the roll.
- The sides and back could be styled in waves, curls, or sleek updos depending on the desired overall effect.
11. Pin Curl Updo
Pin curls served as the foundation for countless 1930s hairstyles, and when arranged into an updo, they created intricate patterns and sophisticated elevation.
This technique required patience but delivered stunning results.
- Pin curls could be arranged in rows, spirals, or random patterns depending on the desired final effect.
- Setting the curls in different directions created natural-looking volume and movement once unpinned.
- Create pin curls throughout the head on damp hair, paying attention to curl direction and placement.
- Allow curls to dry completely, using a hooded dryer or air drying for several hours.
- Once dry, carefully remove pins and gently separate curls with fingers to create soft, voluminous waves.
- Arrange the curled sections into an updo by pinning sections up and back, creating height and shape.
- Leave some curls loose around the face or nape to soften the overall appearance and add romantic detail.
12. Waves with Snood
Snoods became popular hair accessories in the late 1930s, serving as both practical hairnets and decorative elements that complemented waved hairstyles.
These fabric or crocheted nets contained hair while adding vintage charm.
- Snoods were originally practical items to keep hair contained during work but evolved into fashionable accessories.
- They came in various materials including silk, rayon, crochet, and even metallic threads for evening wear.
- Style the front and sides of hair in your preferred wave pattern, whether finger waves or Marcel waves.
- Create the waves only through the visible portions of hair, as the back will be contained in the snood.
- Gather the back sections of hair into a low ponytail or simply let them hang loosely at the nape.
- Slide the snood over the gathered hair, positioning it to sit at the desired height on the back of the head.
- Secure the snood with bobby pins if needed, ensuring it sits smoothly and contains all back sections of hair.
13. Side-Swept Waves
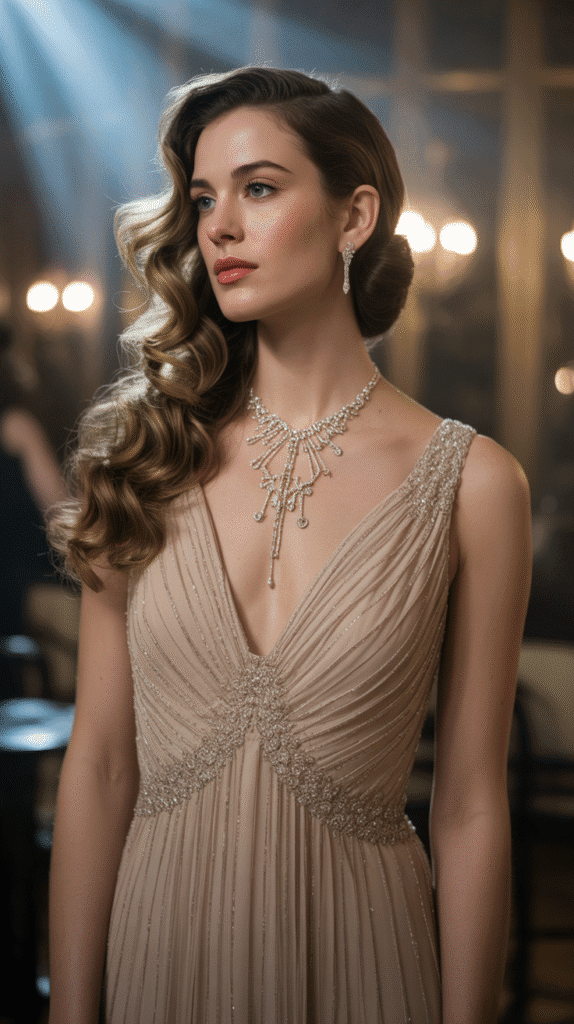
Side-swept styling created asymmetrical elegance in 1930s hairstyles, with all hair dramatically directed to one side of the head.
This technique showcased beautiful waves while creating a romantic, windswept appearance.
- Side-swept styles worked particularly well for evening events and formal occasions.
- The dramatic sweep revealed one side of the neck and face while creating fullness on the opposite side.
- Begin by creating a deep side part, positioning it several inches from the center of the head.
- Style hair in waves using your preferred method, working from the part downward on both sides.
- Direct all waves to flow toward the heavier side, using pins and setting techniques to train hair in this direction.
- The lighter side should lie flat and smooth against the head, often styled with neat finger waves close to the scalp.
- Secure the heavy side with decorative clips or pins to maintain the swept position throughout the evening.
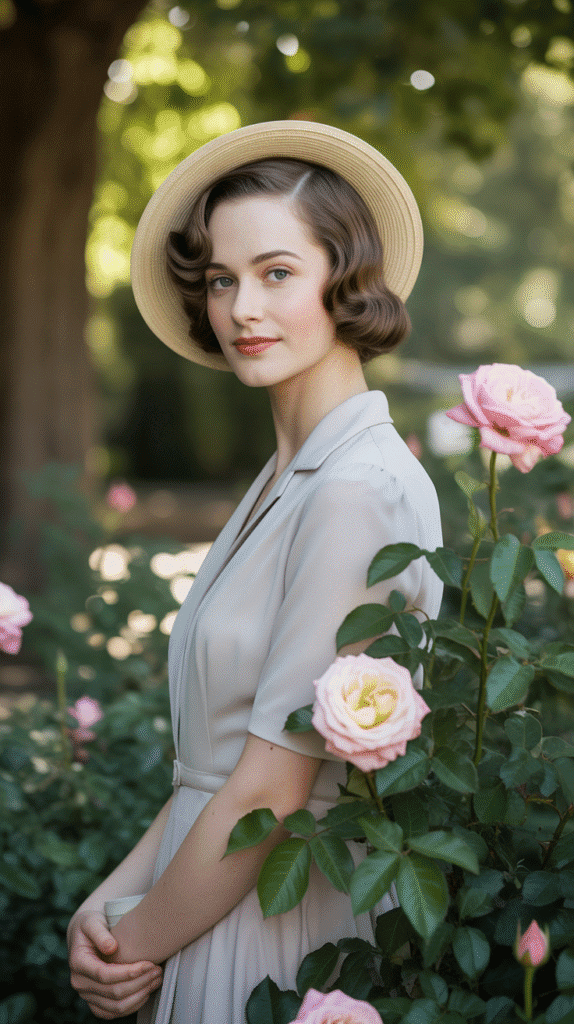
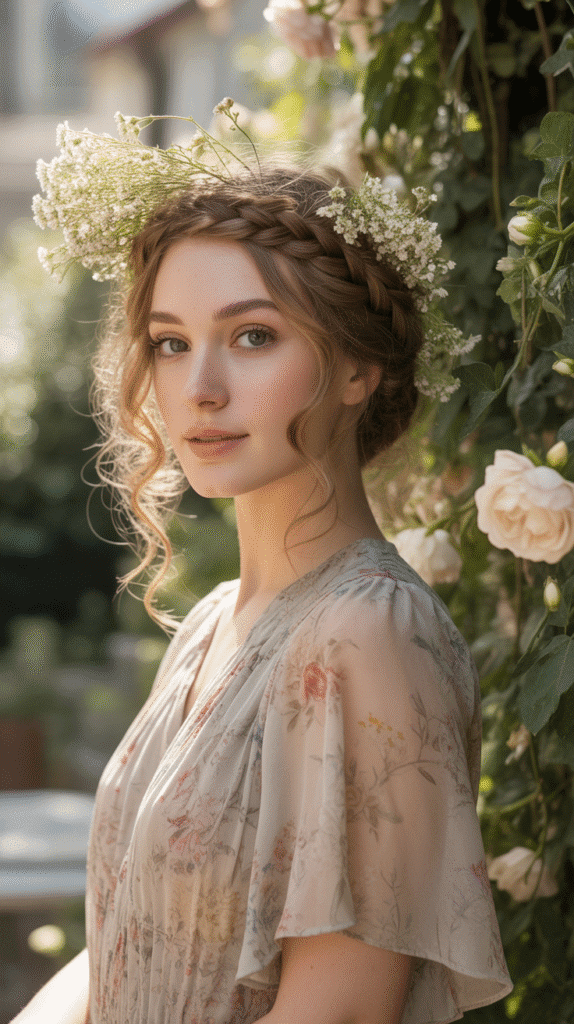
14. Rolled Updo with Flowers
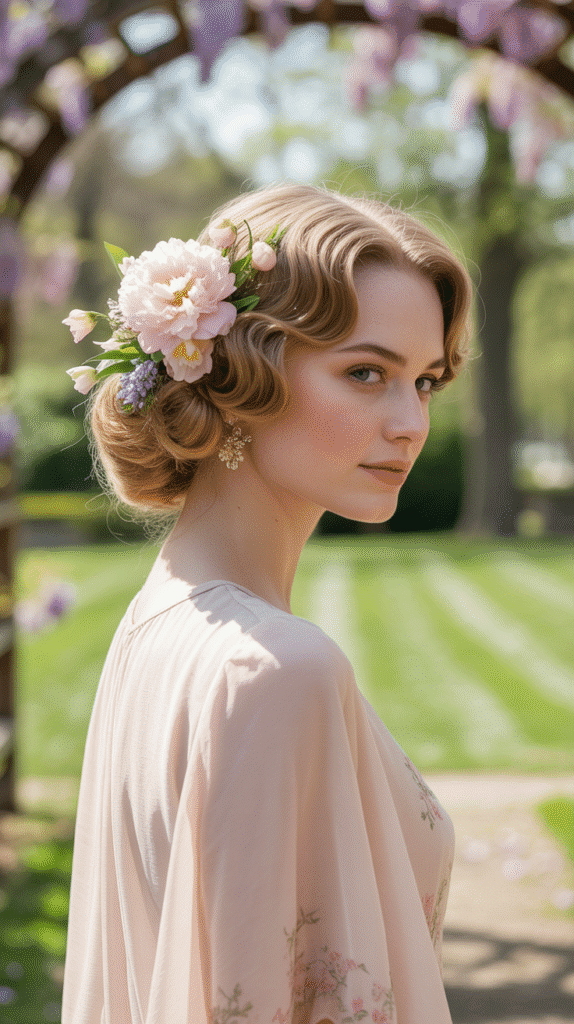
Floral embellishments added romantic femininity to 1930s updos, with fresh or silk flowers tucked into rolled and pinned styles.
This combination created perfect hairstyles for spring and summer occasions.
- Flowers were positioned strategically to enhance the updo’s structure while adding color and softness.
- Popular flower choices included roses, gardenias, orchids, and camellias, often matching dress colors or event themes.
- Create a foundation by setting hair in pin curls or waves, then brush through to create smooth, manageable texture.
- Roll sections of hair upward from the nape and sides, pinning them securely to create a structured updo base.
- Continue adding rolled sections, building height and shape according to your desired silhouette.
- Tuck fresh flowers or silk flowers into the rolls, securing them with bobby pins pushed through the flower stems.
- Ensure flowers are positioned to look naturally integrated into the hairstyle rather than simply placed on top.
15. The Deep Wave Bob
The deep wave bob featured more pronounced, dramatic waves throughout a bob-length cut, creating texture and movement while maintaining the sleek sophistication of the era.
This style offered more visual impact than subtler wave patterns.
- Deep waves were wider and more defined than standard finger waves, creating bold S-curves throughout the hair.
- The bob length, falling between chin and shoulders, provided the perfect canvas for showcasing dramatic wave patterns.
- Start with a blunt bob cut that provides even length and maximum surface area for wave creation.
- Create waves using either finger wave technique with exaggerated ridge depths or Marcel irons held longer for more pronounced curves.
- The waves should be uniform in depth and spacing, creating a consistent pattern throughout the entire hairstyle.
- Use setting lotion and clips to maintain wave structure while drying, ensuring crisp, defined ridges.
- Once dry and styled, the waves should move as a cohesive unit, maintaining their pattern through normal head movement.
16. Halo Braid with Waves
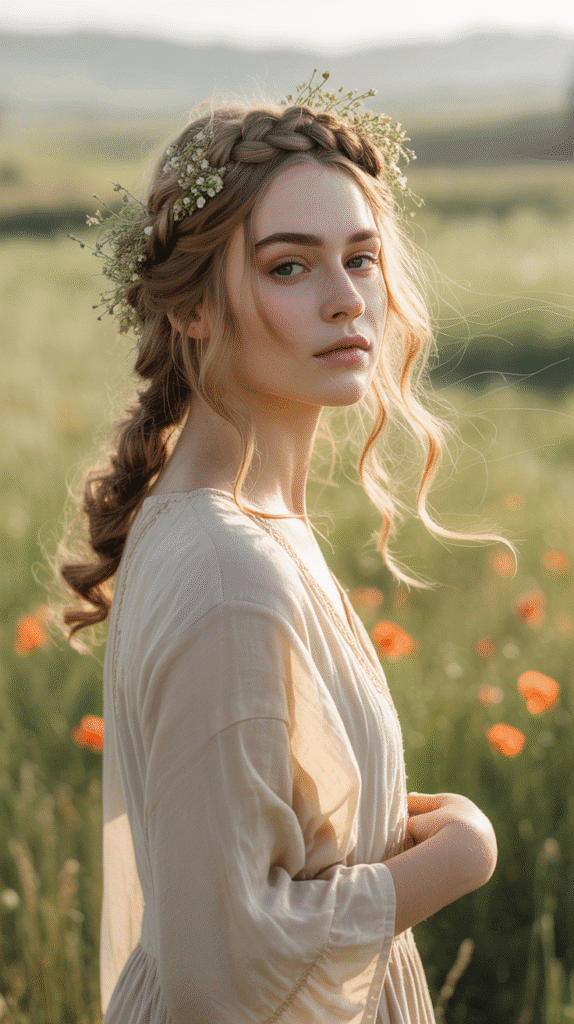
The halo braid, also called a crown braid, created an ethereal, romantic look when combined with soft waves throughout the remaining hair.
This style worked beautifully for daytime events and outdoor occasions.
- The halo braid circles the head like a crown, incorporating hair from around the perimeter.
- Combining the structured braid with soft waves created interesting textural contrast and dimensional beauty.
- Create waves through the bulk of the hair using your preferred setting method before beginning the braid.
- Section a band of hair around the head, approximately 2-3 inches wide, starting at one temple.
- Begin a Dutch braid (inverted French braid) that sits on top of the head rather than sinking into it.
- Continue braiding around the entire head, incorporating new sections as you progress until you return to the starting point.
- Secure the end by tucking it under the beginning of the braid and pinning invisibly.
17. Slicked Back with Low Roll
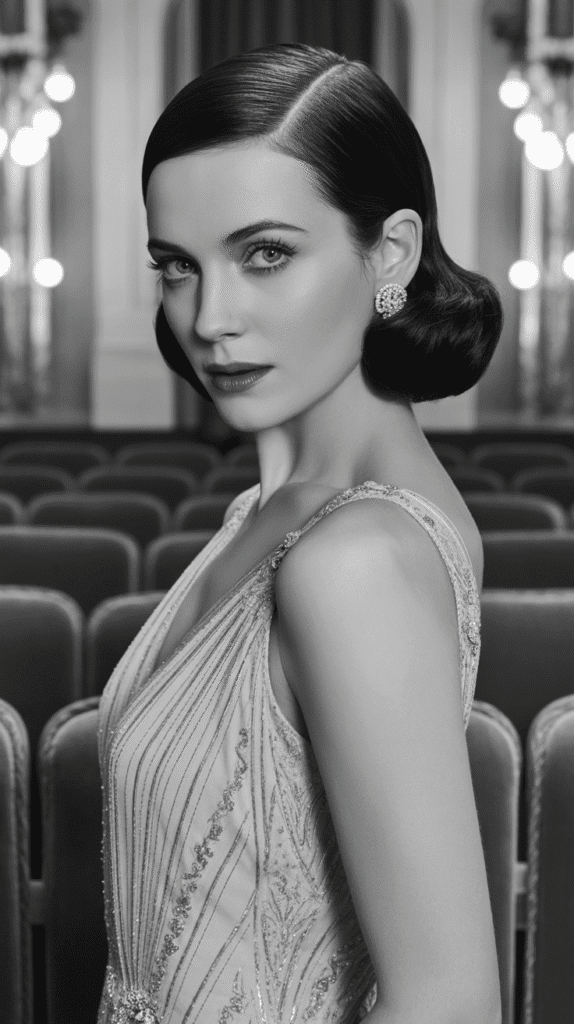
The slicked back style represented sleek sophistication, with hair smoothed close to the head and ending in a low rolled section at the nape.
This minimal approach to styling created clean lines and emphasized facial features.
- This style worked particularly well for formal evening events and highlighted elegant evening wear and jewelry.
- The contrast between the sleek top and the rolled end created subtle visual interest without excessive decoration.
- Apply generous amounts of setting gel or pomade to damp hair, distributing it evenly from roots to ends.
- Use a fine-tooth comb to smooth hair straight back from the hairline, eliminating any texture or wave.
- Continue smoothing all hair toward the nape, ensuring the surface remains completely sleek and shiny.
- At the nape, roll the ends under, creating a neat horizontal roll that sits against the neck.
- Secure the roll with bobby pins inserted horizontally, hiding them within the rolled section for a clean finish.
18. Crimped Waves
Crimped waves offered a unique textural alternative to smooth finger waves, creating a zigzag pattern throughout the hair.
This technique, achieved with crimping irons or braiding methods, added volume and visual interest.
- Crimping created a more casual, textured appearance compared to the formal smoothness of finger waves.
- The technique worked especially well for thicker hair types that held texture easily.
- For heat crimping, section hair and use crimping irons to create uniform zigzag patterns from roots to ends.
- Alternatively, braid damp hair in multiple small braids and allow to dry completely before unbraiding for a natural crimped effect.
- The crimped sections could then be styled into updos, left loose, or partially pinned for various looks.
- This textured foundation provided excellent grip for pins and allowed styles to hold longer without additional products.
- Crimped hair offered significantly more volume than smooth styles, creating a fuller silhouette.
19. The Gibson Tuck
The Gibson Tuck, a style carried over from earlier decades, remained popular in the 1930s for its timeless elegance.
This updo involved tucking the hair under and rolling it at the nape, creating a sophisticated silhouette.
- The Gibson Tuck was named after the Gibson Girls illustrated by Charles Dana Gibson in the early 1900s.
- This style particularly suited longer hair and could be combined with waved or straight texture at the crown.
- Style the front and crown sections with your preferred wave pattern or smooth them back sleekly.
- Gather the back sections of hair at the nape, maintaining the styled crown sections separately.
- Roll the gathered hair inward and upward, tucking the ends under and into the roll to hide them.
- Pin the rolled section securely against the head, creating a neat horizontal roll that sits at the nape.
- The finished style should appear smooth and continuous, with no visible pins or loose ends.
20. Curled Ends with Straight Top
This style created interesting contrast by maintaining smooth, straight hair through the crown and sides while curling only the ends.
The result was a youthful, modern appearance that balanced structure with softness.
- The straight-to-curled transition typically occurred at ear level or just below, creating a clear demarcation between textures.
- This style worked beautifully for medium-length hair that fell to shoulder length or slightly beyond.
- Begin by smoothing the upper sections of hair, either with a flat iron for modern interpretation or by setting it sleek when damp.
- Section the hair horizontally at the desired transition point, typically at ear level.
- Set the lower sections in pin curls or rollers, creating bounce and curl only in the ends.
- The curls should be uniform in size and direction, creating a cohesive curled section that contrasts with the smooth top.
- This style required minimal maintenance as the two sections remained distinct without blending techniques.
21. Bandeau with Finger Waves
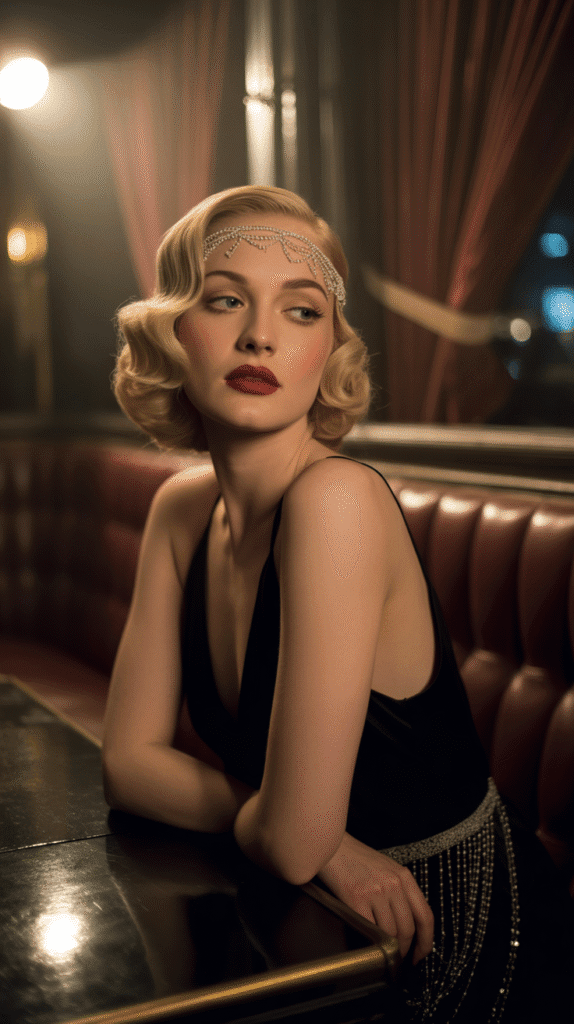
The bandeau, a decorative headband worn across the forehead, became an iconic 1930s accessory that perfectly complemented finger waved hairstyles.
These embellished bands added sparkle and reinforced the era’s geometric aesthetic.
- Bandeaux ranged from simple ribbons to elaborate designs featuring beads, sequins, feathers, or Art Deco metalwork.
- The placement across the forehead drew attention to the eyes and created a frame for facial features.
- Create finger waves throughout the hair, paying particular attention to the waves that will be visible around the bandeau.
- Allow waves to set completely and remove clips, gently brushing through to soften while maintaining wave structure.
- Position the bandeau across the forehead, typically sitting just above the eyebrows or at the hairline.
- Secure the bandeau with bobby pins at the temples, hiding the pins within the wave patterns.
- The bandeau should sit comfortably without sliding, becoming an integrated part of the hairstyle rather than an afterthought.
22. The Wrapped Chignon
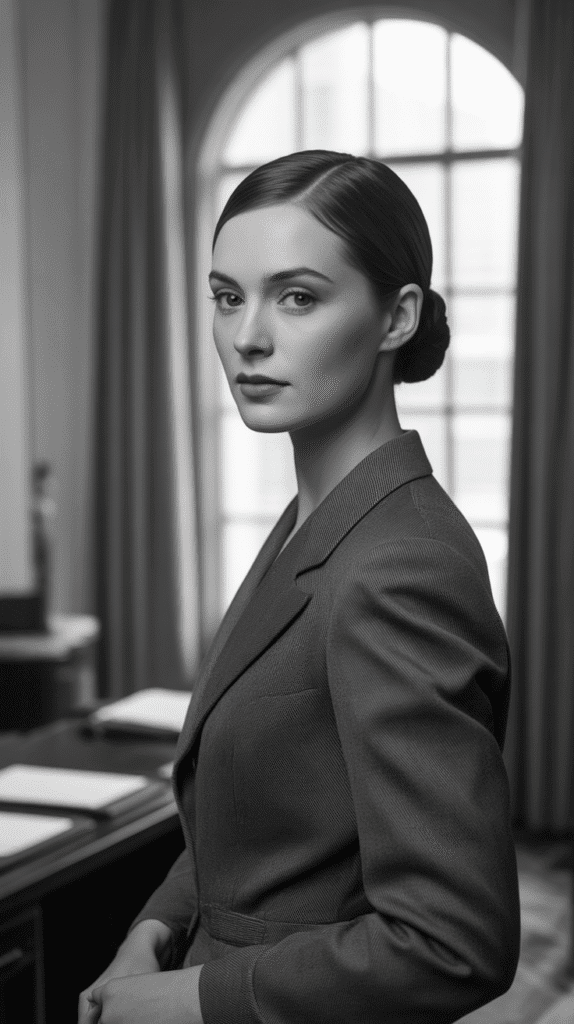
The wrapped chignon featured hair wound around a central core, creating a neat, compact bun that sat low on the head.
This sophisticated style offered practicality without sacrificing elegance.
- The wrapped chignon could be positioned at the nape, slightly off-center, or at the side of the head for variation.
- This style worked particularly well for professional settings and daytime activities where hair needed to stay controlled.
- Gather all hair into a ponytail at the desired location, securing it with a hair elastic.
- Twist the ponytail tightly to create a rope-like texture that will wrap more smoothly.
- Wrap the twisted ponytail around its base, spiraling outward to create a flat, disc-like bun.
- Tuck the ends under the wrapped sections and secure the entire chignon with bobby pins inserted around the perimeter.
- The front sections could be left smooth and slicked back or styled with subtle waves for added interest.
23. Half-Up Victory Style
This variation on the full victory rolls incorporated the dramatic rolled sections at the front while leaving the back hair down and styled in waves or curls.
The combination offered versatility and visual interest.
- The half-up style maintained the iconic front element while providing the movement and femininity of loose hair.
- This approach worked especially well for medium to long hair lengths that had sufficient length to showcase when worn down.
- Create victory rolls at the front of the hair on one or both sides, depending on your preferred symmetry.
- Secure the rolls firmly with bobby pins, ensuring they will hold even without the support of hair pinned around them.
- Style the remaining loose hair in waves or curls using your preferred method, whether vintage techniques or modern tools.
- The loose sections should begin where the victory rolls end, creating a smooth transition between secured and free hair.
- This style offered the best of both worlds: structured vintage styling with the romance of flowing hair.
24. Side Bun with Finger Waves
Positioning a bun at the side of the head rather than the back created an asymmetrical, fashion-forward look that was enhanced by finger waves through the remaining sections.
This style made a bold statement.
- Side buns were particularly popular for evening events and formal occasions where dramatic styling was appropriate.
- The placement typically occurred just behind and slightly above the ear on the chosen side.
- Create finger waves through the front, crown, and opposite side of the hair, setting them to flow toward the bun placement.
- Gather the hair at the chosen side point, twisting or wrapping it into a bun shape.
- Secure the bun with bobby pins inserted from multiple angles to ensure stability despite the asymmetrical weight distribution.
- The finger waves should appear to flow naturally into and around the bun, creating visual continuity.
- Decorative elements like flowers, clips, or combs could be added at the bun to enhance the dramatic effect.
25. The Waterfall Wave
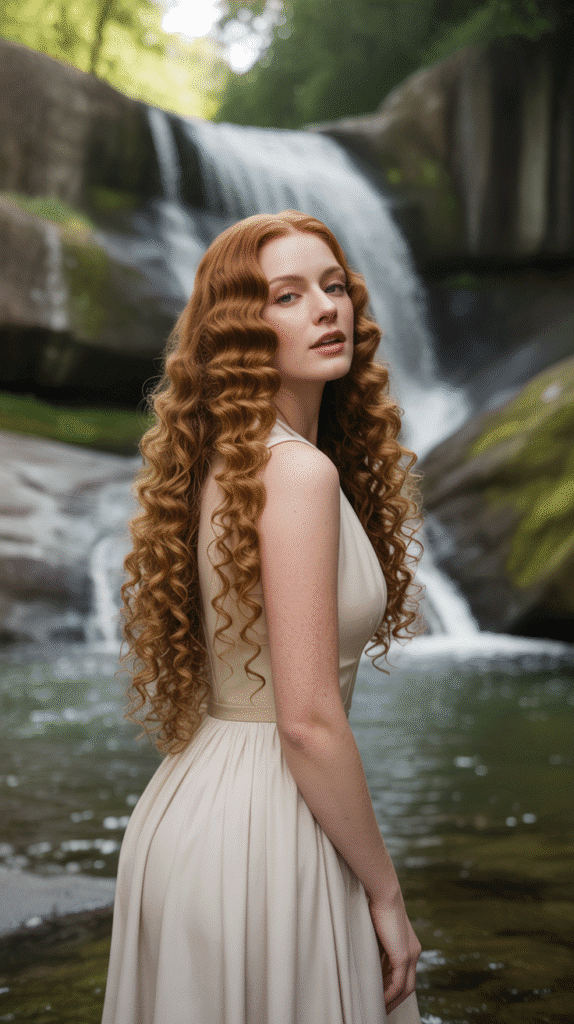
Waterfall waves created a cascading effect where waves appeared to flow downward like falling water, typically styled on longer hair.
This romantic technique showcased beautiful wave patterns throughout extended length.
- The waterfall effect required waves to be set in a specific directional pattern that emphasized downward movement.
- This style worked best on hair that reached past the shoulders, providing adequate length for the cascading effect.
- Part hair as desired, then section it into horizontal layers from crown to nape.
- Set each layer in waves that flow in the same downward direction, ensuring uniform wave placement across each horizontal section.
- The waves should align vertically so that ridges line up from one layer to the next, enhancing the waterfall appearance.
- Once set and dry, gently brush through to soften the waves while maintaining their directional flow.
- The result should be continuous wave patterns that appear to cascade smoothly from crown to ends.
26. Braided Crown with Loose Curls
Combining a braided crown with loose curls throughout the remaining hair created a style that balanced structure with softness.
This approach suited both formal events and casual occasions depending on execution.
- The braided crown could be created from the natural hairline or positioned slightly back from it for variation.
- Loose curls provided volume and movement that contrasted beautifully with the controlled braid.
- Create curls throughout the bulk of the hair using pin curls, rollers, or heated styling tools.
- Once curls are set, section hair around the crown area, separating it from the curled sections below.
- Braid the crown section, incorporating hair as you work around the head in crown formation.
- Secure the braid end by tucking it under the starting point and pinning invisibly.
- Allow the loose curls to fall naturally, adding volume and romantic texture to the overall style.
27. Sleek Ponytail with Waved Ends
While ponytails weren’t as common in 1930s styling, when executed with period-appropriate elements like sleek smoothness and waved ends, they offered a practical yet elegant option.
- The ponytail typically sat low at the nape rather than high on the head, maintaining the era’s preference for lower styling.
- The contrast between sleek roots and waved ends created visual interest and honored 1930s aesthetic principles.
- Apply smoothing product to hair and comb it straight back from the hairline, eliminating any texture or volume.
- Gather hair into a low ponytail at the nape, securing it with a covered elastic that matches the hair color.
- Create waves through the ponytail length using pin curls set in the gathered hair or by using heated tools.
- The waves should begin where the elastic ends, creating a clear transition from sleek to textured.
- A decorative ribbon or barrette could be added at the elastic to enhance the vintage aesthetic.
28. Double Roll Updo
The double roll featured two horizontal rolls stacked one above the other at the back of the head, creating dimensional structure and elegant height.
This architectural approach to styling suited formal occasions perfectly.
- The double roll created more height and visual interest than a single roll while maintaining the era’s preference for smooth, controlled styling.
- This technique worked well for medium to long hair that provided adequate length for creating substantial rolls.
- Section hair horizontally across the back of the head at approximately ear level, creating upper and lower sections.
- Roll the lower section upward, tucking the ends under and pinning the roll securely against the head.
- Roll the upper section in the same manner, positioning it directly above the first roll.
- Both rolls should be uniform in size and align perfectly, creating a stacked appearance.
- The front and sides could be styled sleekly back or with finger waves depending on the desired overall effect.
29. Asymmetrical Finger Waves
Rather than styling finger waves uniformly across the entire head, asymmetrical placement created modern edge and visual intrigue.
This approach featured waves concentrated on one side or styled in varying sizes.
- Asymmetry in 1930s styling demonstrated fashion awareness and willingness to embrace avant-garde trends.
- The asymmetrical approach could involve different wave depths, varying directions, or concentration on specific sections.
- Create a deep side part to establish the asymmetrical foundation of the style.
- Style one side with pronounced, dramatic finger waves that showcase the technique’s architectural beauty.
- Alternatively, create waves of varying widths on both sides, with larger waves on one side and tighter waves on the other.
- The asymmetry should appear intentional and artistic rather than accidental or poorly executed.
- This style required confidence to wear and made a strong fashion statement at any event.
- Secure the waves with clips during setting, ensuring the asymmetrical pattern remains distinct and doesn’t blend together.
30. The Twisted Back Updo
The twisted back updo featured sections of hair twisted and pinned upward, creating texture and dimension while keeping hair completely off the neck.
This versatile style transitioned seamlessly from day to evening.
- Twisting created rope-like sections that added visual interest and held securely without excessive pinning.
- This technique worked beautifully for all hair lengths from chin-length bobs to longer styles.
- Divide hair into multiple vertical sections from front to back, creating approximately 4-6 sections depending on hair thickness.
- Twist each section tightly from roots to ends, maintaining consistent tension throughout the twist.
- Pin each twisted section upward and back, securing it against the head with bobby pins inserted through the twist.
- The twisted sections could be arranged in parallel rows, crisscrossed patterns, or gathered at the crown for variation.
- Leave the front sections smooth and waved, or incorporate them into the twisted pattern depending on desired coverage.
- This style offered excellent staying power and worked well for active occasions where hair needed to remain controlled.
Essential Products for 1930s-Inspired Styling
Understanding the products used historically and their modern equivalents helps achieve authentic results while benefiting from contemporary hair care advances.
- Setting lotion was essential for 1930s styling, providing hold without the stiffness of modern hairsprays.
- Modern alternatives include mousse, setting spray, or diluted gel applied to damp hair before styling.
- Pomade and brilliantine created the sleek, glossy finish characteristic of the era’s aesthetic preferences.
- Contemporary shine serums and smoothing creams replicate this effect without the heavy, oil-based formulas of vintage products.
- Wave clips remain virtually unchanged and are still the best tool for securing finger waves during the setting process.
- Bobby pins in the 1930s were often larger and sturdier than modern versions; look for professional-grade pins for better hold.
- Hair nets and snoods are now available from vintage reproduction companies and specialty retailers for authentic accessories.
- Heat protectant is a modern essential that should always be applied before using any heated styling tools on hair.
For detailed tutorials on achieving vintage hairstyles, the Victoria and Albert Museum offers extensive archives on 1930s fashion and beauty history.
Hair Care Considerations for Vintage Styling
Maintaining healthy hair while creating elaborate vintage styles requires attention to proper preparation and aftercare practices.
- Deep conditioning treatments should be used weekly to counteract the stress of repeated setting and manipulation.
- The constant use of pins, clips, and tight styling can cause breakage if hair isn’t properly moisturized and strengthened.
- Protein treatments help reinforce hair structure, making it more resilient to the tension created by rolled and pinned styles.
- Allow hair to rest between elaborate styles, wearing simple updos or loose styles on non-event days.
- Silk or satin pillowcases reduce friction during sleep, helping preserve set styles overnight and preventing unnecessary damage.
- When removing pins and clips, work gently and patiently to avoid pulling or breaking hair strands.
- Clarifying shampoo should be used periodically to remove product buildup from the various gels, pomades, and setting lotions used in vintage styling.
- Trim hair regularly to eliminate split ends that can travel up the hair shaft and compromise overall style quality.
The American Academy of Dermatology provides evidence-based guidance on maintaining healthy hair while styling.
Adapting 1930s Styles for Different Hair Textures
The original 1930s hairstyles were primarily designed for straight to wavy Caucasian hair textures, but modern interpretations can and should be adapted for all hair types.
- Naturally curly hair can embrace finger wave patterns by using twist-outs or braid-outs that create similar S-shaped patterns.
- The Marcel wave technique adapts beautifully to textured hair, creating uniform waves while respecting natural curl patterns.
- Coily hair textures can achieve victory rolls and pompadours using braiding or twisting techniques combined with strategic pinning.
- Stretched natural hair provides an excellent foundation for rolled updos and chignons inspired by 1930s styling.
- Fine, straight hair benefits from texturizing products that provide grip and hold for styles that might otherwise slip.
- Teasing at the roots creates necessary foundation for styles requiring volume and height on finer hair types.
- Thick, heavy hair may require sectioning styles differently and using more pins to support the weight of elaborate updos.
- All adaptations should honor the aesthetic principles of the 1930s while working with rather than against natural hair texture.
Consulting with stylists experienced in diverse hair textures ensures successful adaptation of vintage styles for any hair type.
Accessories That Complete the 1930s Look
Authentic 1930s hairstyles were rarely complete without carefully chosen accessories that enhanced and complemented the styling.
- Decorative hair combs featuring Art Deco designs, rhinestones, or pearls were positioned to secure and embellish waves.
- Combs came in matched sets or individual statement pieces, often coordinating with jewelry and clothing details.
- Headbands and bandeaux wrapped around the forehead or crown, adding sparkle and defining the face shape.
- Evening versions featured elaborate beadwork, feathers, or metallic threading for maximum glamour and light reflection.
- Hat pins and brooches secured the fashionable hats of the era while adding another layer of ornamentation.
- Cloche hats, berets, and wide-brimmed styles were designed to complement rather than crush the elaborate hairstyles beneath them.
- Flowers both fresh and silk were tucked into updos and pinned at strategic points for romantic, feminine appeal.
- Gardenias, roses, and orchids were particular favorites, often matching corsages or bouquet arrangements.
- Ribbons and bows provided simpler decorative options for daytime styling and younger women’s hairstyles.
Vintage reproduction companies and online marketplaces offer authentic-style accessories for completing your 1930s-inspired look.
Timeline: Setting and Styling Duration
Understanding the time commitment required for various 1930s hairstyles helps with planning and realistic expectations for achieving these looks.
- Basic finger waves on short hair: 2-3 hours including setting time, or 30-45 minutes using modern heated styling tools.
- Marcel waves with updo: 3-4 hours for traditional method, 1-2 hours using contemporary curling irons and techniques.
- Pin curl set and style: 4-6 hours minimum including complete drying time, though overnight setting was common practice.
- Quick vintage-inspired style: 30 minutes achievable for modern interpretations using heated tools and holding products.
- Full formal updo with accessories: 2-3 hours for elaborate arrangements with multiple components and embellishments.
- Daily 1930s-inspired maintenance: 15-30 minutes for refreshing existing sets, smoothing flyaways, and adjusting accessories.
- Professional stylists specializing in vintage techniques can often complete styles more quickly through experience and skill.
- Practice significantly reduces styling time as finger memory develops and technique improves with repetition.
Planning ahead and potentially setting styles the evening before events ensures adequate time for proper execution.
Common Mistakes to Avoid
Learning from typical errors helps achieve more authentic and successful 1930s-inspired hairstyles from the beginning.
- Over-brushing finger waves destroys the crisp ridges that define the style; use fingers to separate instead.
- The architectural quality of waves depends on maintaining their structure rather than softening them too much.
- Insufficient setting time results in styles that fall quickly; hair must be completely dry before removing clips and pins.
- Rushing the process compromises the longevity and appearance of the finished style significantly.
- Using too little product on naturally smooth hair causes styles to lack staying power and fall flat within hours.
- Conversely, excessive product creates stiff, unnatural results that look dated rather than vintage-inspired.
- Improper pin placement makes pins visible or creates lumps and bumps rather than smooth, continuous surfaces.
- Pins should be inserted parallel to the scalp and hidden within folds, rolls, or waves whenever possible.
- Ignoring face shape when choosing styles can create unflattering results even when technical execution is perfect.
- Research which 1930s styles best complement your specific features before committing to elaborate styling sessions.
- Attempting complex styles without practice before important events risks disappointing results and unnecessary stress.
Always practice new techniques multiple times before wearing them to significant occasions or events.
Face Shape Recommendations
Different 1930s hairstyles flatter various face shapes, and choosing appropriately ensures the most becoming results.
- Oval faces are considered ideal and can wear virtually any 1930s style successfully without concerns.
- The balanced proportions of oval faces work equally well with side parts, center parts, and asymmetrical styling.
- Round faces benefit from styles with height at the crown and volume at the temples to create length illusion.
- Victory rolls, pompadours, and styles with dramatic side parts add angles that complement rounder features.
- Square faces are softened by styles featuring curves around the jawline, such as pageboy bobs with inward-curled ends.
- Finger waves positioned to flow toward the face create movement that softens angular jaw lines beautifully.
- Heart-shaped faces look best with styles that add width at the jawline while keeping the forehead area sleek.
- Low chignons and styles with volume at the nape balance the wider forehead characteristic of heart shapes.
- Long faces benefit from styles with horizontal emphasis, such as side-swept waves or wide, shallow rolls.
- Avoiding excessive height at the crown prevents further elongation of already long facial proportions.
Understanding your face shape helps narrow down the many 1930s options to those that will be most flattering.
Color and Highlight Considerations
Hair color significantly influenced styling choices and overall aesthetic during the 1930s era, with certain shades being particularly fashionable.
- Platinum blonde reached peak popularity thanks to Jean Harlow, creating an ultra-glamorous, high-maintenance aesthetic.
- The dramatic contrast of platinum hair with dark brows and lashes became an iconic look of the era.
- Rich brunette shades were equally fashionable and often paired with deep red lipstick for classic Hollywood glamour.
- Brunettes could achieve dramatic styling without the constant upkeep required by bleached blonde hair.
- Auburn and red tones added warmth and vibrancy, particularly popular among women seeking to stand out.
- These colors showcased wave patterns beautifully through their dimensional depth and light reflection.
- Natural gray hair was typically covered during this era, as youth and vitality were prized aesthetic qualities.
- Modern interpretations can embrace silver and gray tones for sophisticated vintage-inspired styling with contemporary sensibility.
- Highlights and lowlights weren’t common in the 1930s but can enhance modern versions by adding dimension to waves.
- Subtle dimensional color makes wave patterns more visible and creates depth in updos and rolled styles.
Consider consulting color specialists to achieve shades that both flatter your complexion and showcase your chosen vintage styling.
Makeup to Complement 1930s Hairstyles
Hairstyling and makeup worked together as a cohesive aesthetic package in the 1930s, creating complete vintage looks.
- Thin, defined eyebrows were achieved through tweezing and penciling, creating high, rounded arches that opened the eye area.
- Brow shape significantly impacts the overall vintage appearance and should complement the era’s aesthetic principles.
- Matte foundation created smooth, porcelain-like complexion that served as a canvas for other makeup elements.
- The emphasis was on even, flawless skin tone rather than the dewy, highlighted looks of later decades.
- Subtle contouring under cheekbones and along the nose bridge added dimension without obvious shadowing or sculpting.
- Rouge was applied in circular motions on the apples of the cheeks for a youthful, healthy flush.
- Bold, defined lips featuring cupid’s bow emphasis and slightly overdrawn upper lip created the era’s characteristic mouth shape.
- Deep reds, berries, and plums were favorite shades, applied with precision using lip brushes for crisp edges.
- Soft, romantic eye makeup featured matte shadows in neutral tones with defined lashes created through careful mascara application.
- Eyeliner when used was subtle, unlike the dramatic wings of later decades, focusing on defining the lash line.
Coordinating hair and makeup creates authentically styled vintage looks that honor the complete aesthetic of the 1930s.
Historical Context and Cultural Significance
Understanding the social and cultural factors that influenced 1930s hairstyles adds depth and meaning to recreating these looks.
- The Great Depression impacted beauty standards, with women seeking glamour as escapism from economic hardship.
- Hollywood films provided fantasy and aspiration, with movie stars becoming the primary influence on hairstyle trends.
- Technological advances in permanent waving and styling tools made elaborate hairstyles more accessible to average women.
- Home permanent kits appeared during this decade, democratizing curly and waved styles previously requiring salon visits.
- Women’s increasing independence influenced styling choices, with practical considerations balanced against aesthetic preferences.
- Working women needed hairstyles that could transition from office to evening without requiring complete restyling.
- Art Deco influence extended from architecture and design into beauty, with geometric precision characterizing finger waves.
- The clean lines and sculptural quality of Art Deco aesthetics perfectly aligned with the architectural approach to hair.
- Cinema technology improved, with better film quality capturing fine details of hairstyles and increasing their influence.
- Actresses’ hairstyles could be seen clearly in close-ups, making them easier to copy and more aspirational for audiences.
This historical awareness enriches the experience of wearing and appreciating 1930s-inspired hairstyles today.
Professional vs. DIY Execution
Deciding whether to attempt 1930s hairstyles yourself or seek professional assistance depends on multiple factors including skill level and occasion importance.
- Professional stylists specializing in vintage hair can achieve authentic results efficiently with proper training and experience.
- For significant events like weddings or professional photoshoots, investing in expert execution ensures consistent, beautiful results.
- DIY attempts work well for practice, casual occasions, and developing skills that improve with repetition and patience.
- Numerous online tutorials and vintage hairstyling books provide step-by-step guidance for self-teaching these techniques.
- Learning curves vary with some styles like basic pin curls being quite accessible while complex finger waves require more practice.
- Start with simpler styles and gradually progress to more complicated techniques as confidence and skill develop.
- Cost considerations favor DIY approaches for regular wear while professional styling makes sense for special occasions.
- Initial investment in proper tools and products pays off through multiple uses for those committed to vintage styling.
- Time availability affects feasibility, as DIY vintage styling requires significant time especially during the learning phase.
- Professional appointments can be scheduled to fit busy schedules without requiring personal time investment in execution.
Consider your priorities, budget, timeline, and skill level when deciding how to achieve your desired 1930s-inspired look.
Preservation and Longevity Tips
Making elaborate 1930s hairstyles last multiple days maximizes the significant time investment required for their creation.
- Sleeping in pin curls allows the original set to be refreshed, maintaining wave patterns for several days without complete restyling.
- Cover set curls with a silk or satin scarf to protect them during sleep while allowing scalp comfort.
- Minimal brushing between wearings preserves the style’s structure; instead, use fingers to gently reshape sections as needed.
- Over-manipulation breaks down the set and causes styles to lose definition and fall flat prematurely.
- Strategic pinning at night secures vulnerable areas like rolls and waves, preventing them from coming loose during sleep.
- Pin sections back in their styled positions using bobby pins that can be easily removed in the morning.
- Dry shampoo refreshes the scalp and adds texture that helps maintain volume and hold without requiring full washing.
- Apply sparingly to roots, focusing on areas that appear flat or oily between complete style sessions.
- Light hairspray refreshing in the morning revives hold without building up excessive product that weighs hair down.
- Hold spray 10-12 inches from hair and apply in light, even mists rather than concentrated application.
- Storing accessories properly ensures decorative elements remain in good condition and ready for repeated use.
With proper maintenance techniques, elaborate 1930s styles can look beautiful for 3-5 days before requiring complete restyling.
Conclusion
The timeless elegance captured in these 30 Effortless 1930s Hairstyle Ideas for Inspiration demonstrates why this era continues to influence modern beauty standards and captivate vintage enthusiasts worldwide.
From the architectural precision of finger waves to the romantic softness of pin curl updos, each style reflects an era when hairstyling was elevated to an art form worthy of time, patience, and dedication.
These techniques, born from a unique combination of technological innovation, Hollywood glamour, and cultural aspiration, offer contemporary audiences the opportunity to connect with history while creating stunning looks for modern occasions.
Whether you choose to recreate these styles with authentic period techniques or adapt them using today’s tools and products, the fundamental principles of balance, symmetry, and polished elegance remain unchanged.
As you embark on your own vintage styling journey, remember that mastery comes through practice, patience, and appreciation for the artistry that defined the golden age of Hollywood beauty.
These hairstyles aren’t merely historical artifacts but living traditions that continue to inspire creativity, elegance, and the enduring pursuit of beauty across generations.