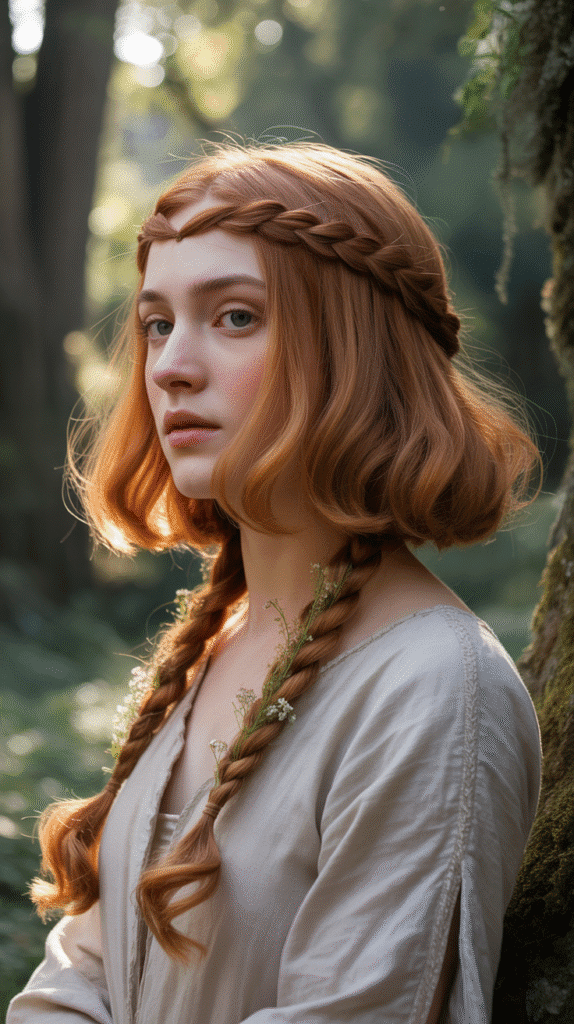
When you think of medieval hairstyles, cascading locks and waist-length braids might come to mind, but the truth is that short-haired royalty had their own arsenal of stunning styles that exuded elegance and power.
Whether you’re preparing for a Renaissance faire, a themed wedding, a costume party, or simply want to channel your inner medieval princess in everyday life, short hair doesn’t limit your options—it expands them.
This comprehensive guide to 33 Chic Medieval Hairstyles for Short-Haired Princesses will walk you through historically-inspired looks that work beautifully with bobs, pixies, and shoulder-length cuts, complete with modern adaptations that honor the past while embracing contemporary styling techniques.
From delicate braided crowns and jeweled headpieces to romantic waves and intricate pinning methods, you’ll discover that medieval glamour is absolutely within reach, regardless of your hair length.
These styles prove that short-haired princesses can command the throne room with just as much grace and sophistication as their long-haired counterparts.
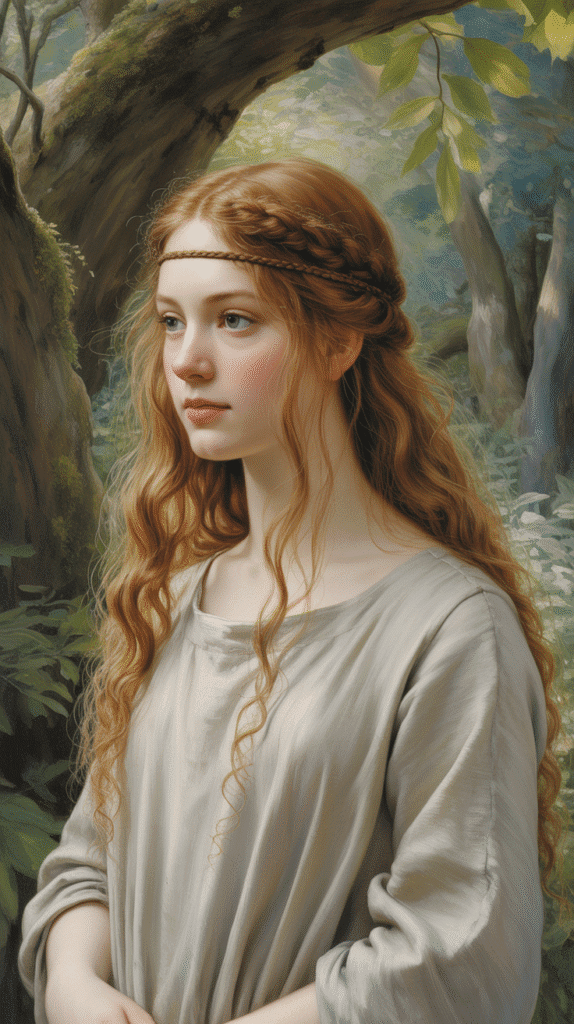
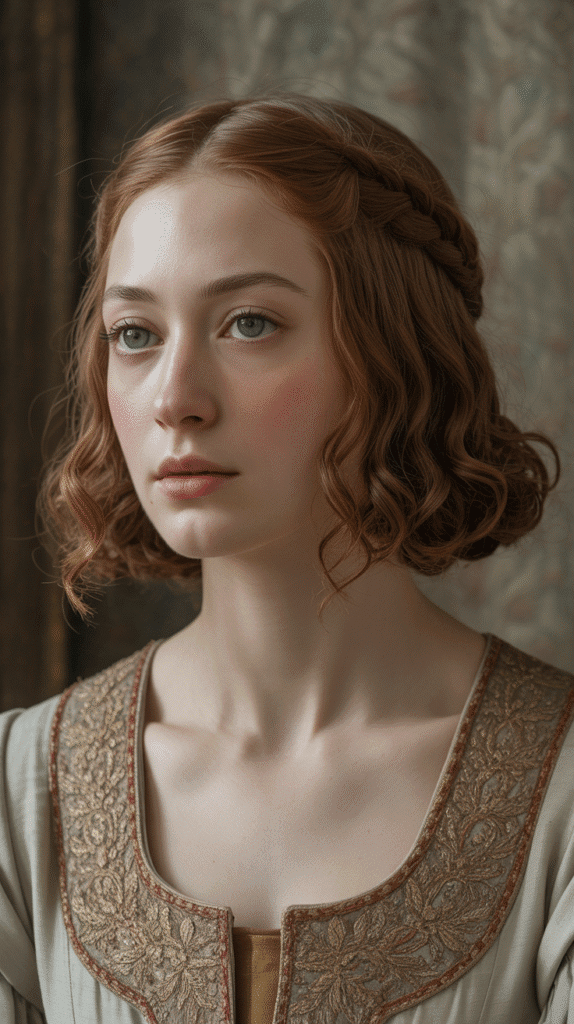
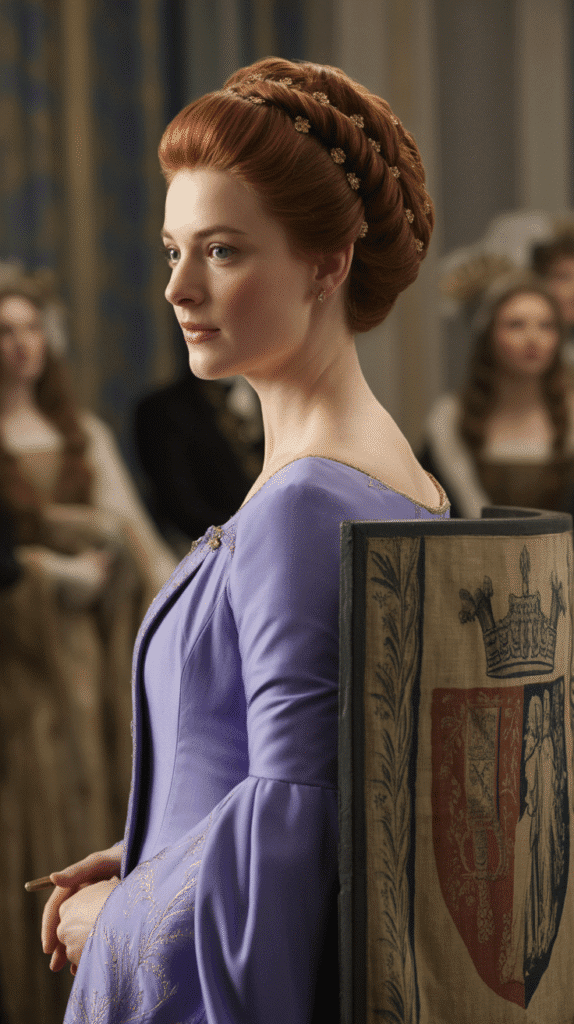
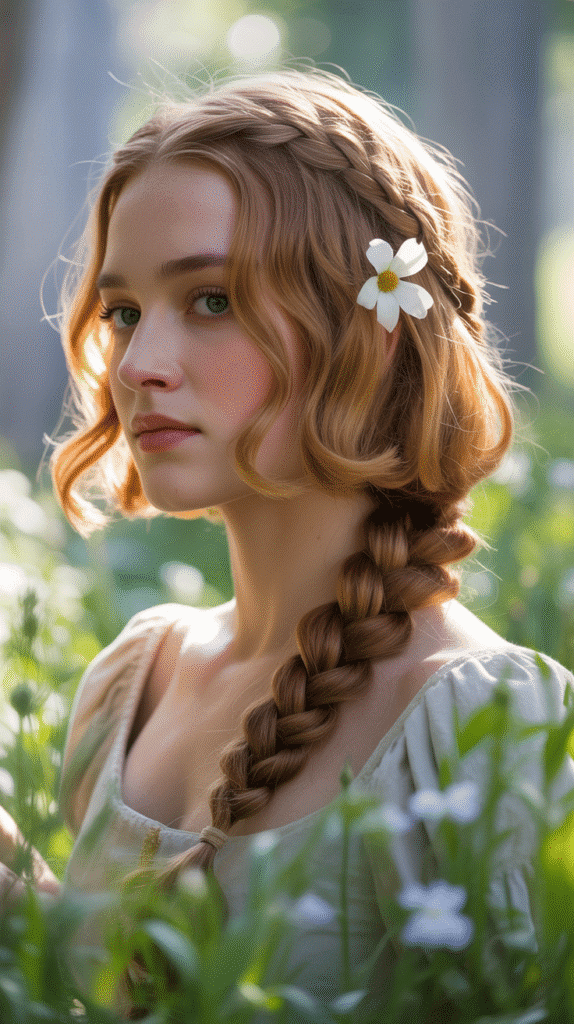
1. The Crowned Braid Halo

The crowned braid halo transforms even the shortest hair into a regal statement piece by creating the illusion of a continuous braid encircling the head.
This style works exceptionally well for bob-length hair and can be adapted for pixie cuts with the addition of small braided extensions or creative pinning techniques.
Key Styling Techniques:
- Begin by creating a deep side part to maximize the hair available for braiding around the crown area
- Dutch braid or French braid small sections starting from one temple and working around the head following the hairline
- For shorter lengths, create multiple mini braids that connect rather than one continuous braid
- Secure each braid segment with small bobby pins that match your hair color for invisible hold
- Finish with a light misting of flexible-hold hairspray to keep flyaways tamed without creating stiffness
Historical Context:
- Braided crowns were popular among nobility from the 12th through 15th centuries as symbols of virtue and femininity
- Shorter braided styles often indicated youth or unmarried status in medieval society
- These styles were frequently adorned with fresh flowers, ribbons, or metallic circlets depending on the occasion
Modern Adaptations:
- Add small pearl pins or crystal hair jewelry along the braid path for contemporary sparkle
- Combine with loose waves in any remaining hair for a romantic, textured finish
- Use colored hair chalk or temporary dye on the braided section for festival-appropriate color pops
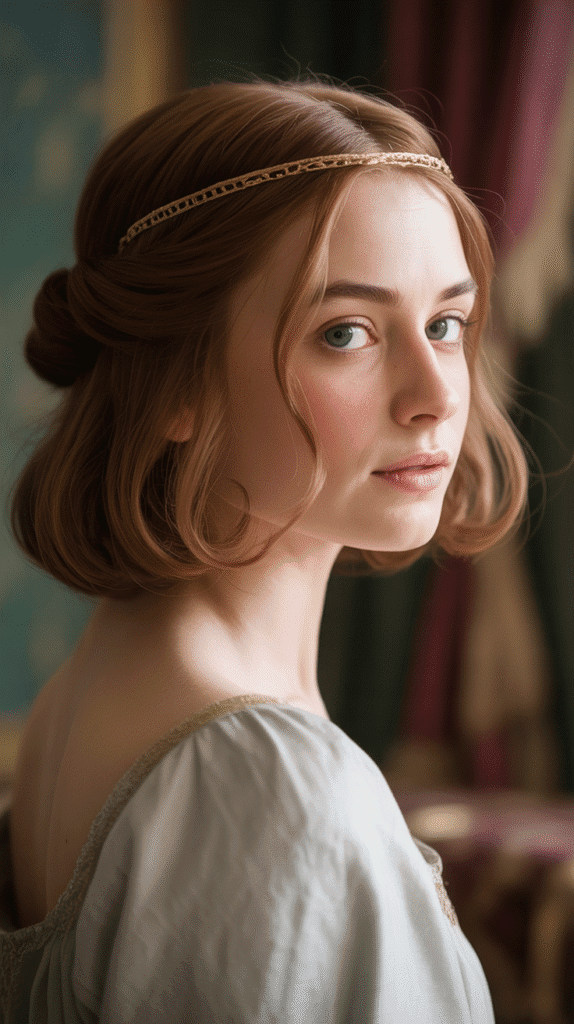
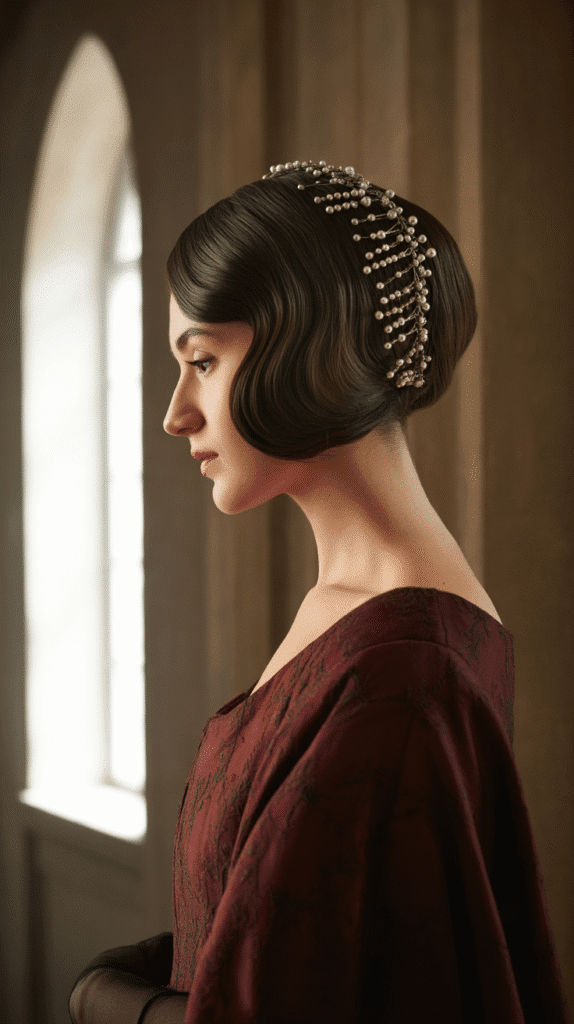
2. Jeweled Forehead Band with Finger Waves
This sophisticated style combines the glamour of 1920s finger waves with authentic medieval headpiece placement, creating a timeless look that flatters short hair beautifully.
The jeweled forehead band, historically known as a fillet or circlet, sits across the forehead rather than on top of the head, drawing attention to the face and styled hair.
Styling Process:
- Start with slightly damp hair and apply a strong-hold setting lotion throughout
- Use a fine-toothed comb to create S-shaped waves by pinching and molding the hair in alternating directions
- Secure each wave with flat clips while the hair dries completely (approximately 2-3 hours or use a hooded dryer)
- Once dry, gently remove clips and softly brush through with a boar bristle brush for smooth, connected waves
- Position your jeweled band approximately one inch above the eyebrows for authentic medieval placement
Finishing Touches:
- Apply a small amount of shine serum to the waves for a lustrous, healthy appearance
- Tuck any awkward lengths behind the ears and secure with decorative bobby pins
- Consider adding matching jeweled earrings to create a cohesive medieval aesthetic
3. The Side-Swept Braided Accent
Perfect for asymmetrical bobs and longer pixie cuts, the side-swept braided accent creates medieval romance through strategic placement of one or two small braids that draw the eye across the face.
This minimalist approach to medieval styling proves that sometimes less truly is more.
Step-by-Step Instructions:
- Create a dramatic side part, allocating approximately 70% of hair to the heavier side
- Select a small triangular section from the heavier side near the hairline for braiding
- Execute a tight three-strand or four-strand braid, incorporating small amounts of hair as you work backward
- Secure the braid end behind the ear with a small elastic that matches your hair color
- Allow the remaining hair on the heavy side to sweep naturally across the forehead and cheek
Enhancement Options:
- Weave ultra-thin ribbons in complementary colors through the braid for added medieval authenticity
- Insert tiny fresh flowers like baby’s breath or small roses between braid sections
- Add small metal hair rings or cuffs at intervals along the braid for a warrior princess aesthetic
- Create a second, parallel braid for more dramatic impact and visual interest
4. The Veiled Mystery Look
Medieval veils weren’t exclusively for long-haired maidens—short-haired nobility often wore elaborate veils that created mystery and elegance while framing the face beautifully.
This style works exceptionally well for very short hair where styling options might otherwise seem limited.
Veil Styling Fundamentals:
- Choose lightweight, semi-transparent fabrics like silk chiffon, organza, or fine tulle for authentic drape
- Position the veil attachment (circlet, comb, or band) approximately two inches behind the hairline
- Allow the veil to flow naturally over short hair rather than attempting to tuck hair underneath
- For very short cuts, the contrast between cropped hair and flowing veil creates striking visual drama
- Secure the veil base with multiple bobby pins in an X-pattern for stability during movement
Veil Length and Style Variations:
- Chin-length veil: Creates a mysterious, face-framing effect ideal for formal portraits or ceremonies
- Shoulder-length veil: The most versatile option, providing coverage while allowing hair to remain visible
- Chapel-length veil: Extends to mid-back, creating maximum drama for special occasions like medieval weddings
- Double-layer veil: Combines a short face veil with longer back veil for dimensional sophistication
Historical Accuracy Notes:
- In the 13th-15th centuries, veils often indicated marital status, with married women covering more hair
- Colors held significance: white for purity, blue for loyalty, and red for passion or nobility
- Veils were frequently paired with wimples (neck coverings) for formal court appearances
5. Twisted Temple Pinning
This elegant technique creates the illusion of length and complexity by twisting sections of short hair and pinning them strategically at the temples.
It’s an excellent choice for those with chin-length bobs or growing-out pixie cuts seeking medieval sophistication.
Detailed Technique:
- Section hair into three zones: left temple, right temple, and back section
- Take a two-inch section from the left temple area and twist it tightly away from the face
- Pin the twisted section horizontally across the head using two crossing bobby pins for security
- Repeat the process on the right temple, creating symmetrical twists that meet or overlap at the back
- Leave the remaining back hair loose, curled, or styled in complementary waves
Pin Selection Matters:
- Decorative medieval-style pins: Choose designs with fleur-de-lis, Celtic knots, or small jeweled ends
- Hair sticks: Wooden or metal sticks with ornate tops add authentic medieval charm
- Bobby pin clusters: Group plain pins together and top with a single statement piece
- Fresh flower accent: Tuck small blooms into the pinned sections for natural ornamentation
Troubleshooting Short Hair:
- For very short hair, twist smaller sections and create multiple twisted rows instead of single twists
- Use texturizing spray before twisting to add grip and prevent sections from slipping
- Consider temporary hair extensions in matching colors for the temple sections if desired length isn’t available
- Accept and embrace visible pins as decorative elements rather than trying to hide them completely
6. The Braided Headband with Loose Ends
Creating a braided headband from your own hair while leaving the remaining length loose combines structure with softness—a hallmark of medieval aesthetic sensibility.
This style particularly suits those with layered bobs or shoulder-grazing cuts.
Construction Method:
- Part hair horizontally from ear to ear across the crown, separating the front section from the back
- Divide the front section into three equal parts for a standard braid or more for complex patterns
- Braid the front section from one side to the other, keeping the braid relatively tight for definition
- Secure the braid end behind the opposite ear with pins that match your hair color
- Style the remaining back hair in gentle waves, curls, or leave naturally textured for contrast
Braid Pattern Variations:
- Classic three-strand: Simple, elegant, and easiest to execute on shorter lengths
- Four-strand braid: Adds width and complexity, creating a more substantial headband effect
- Fishtail braid: Creates an intricate, scale-like pattern that reads as more ornate
- Rope braid: Two sections twisted together create a clean, sculptural look
Enhancing the Style:
- Gently pull apart braid sections (pancaking) to create a wider, more romantic headband appearance
- Wrap the braid with ultra-thin leather cord or embroidery thread in complementary colors
- Add small decorative elements like pearls or metal beads woven between braid sections
- Mist the loose hair with sea salt spray for enhanced texture and medieval-appropriate natural appearance
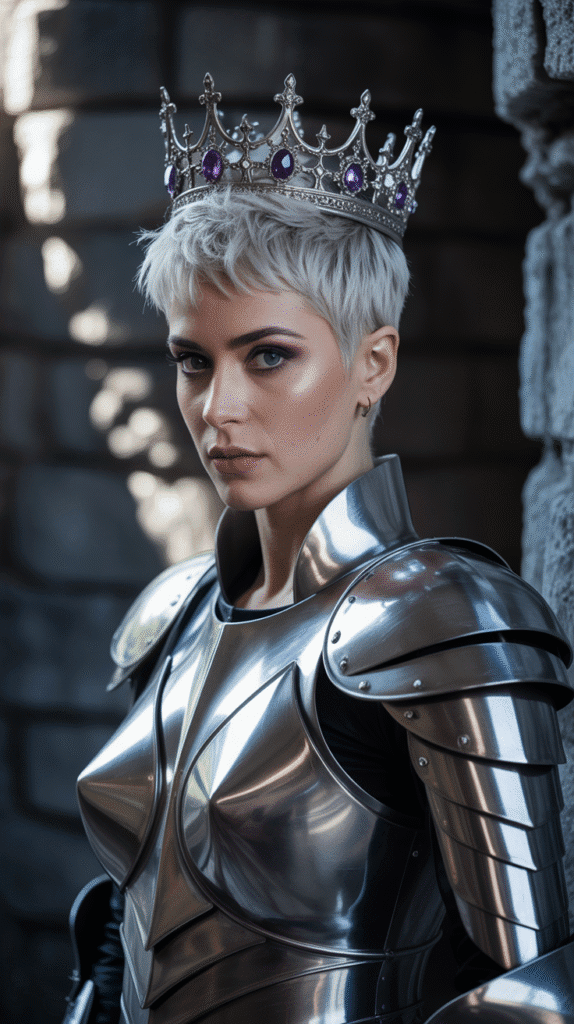
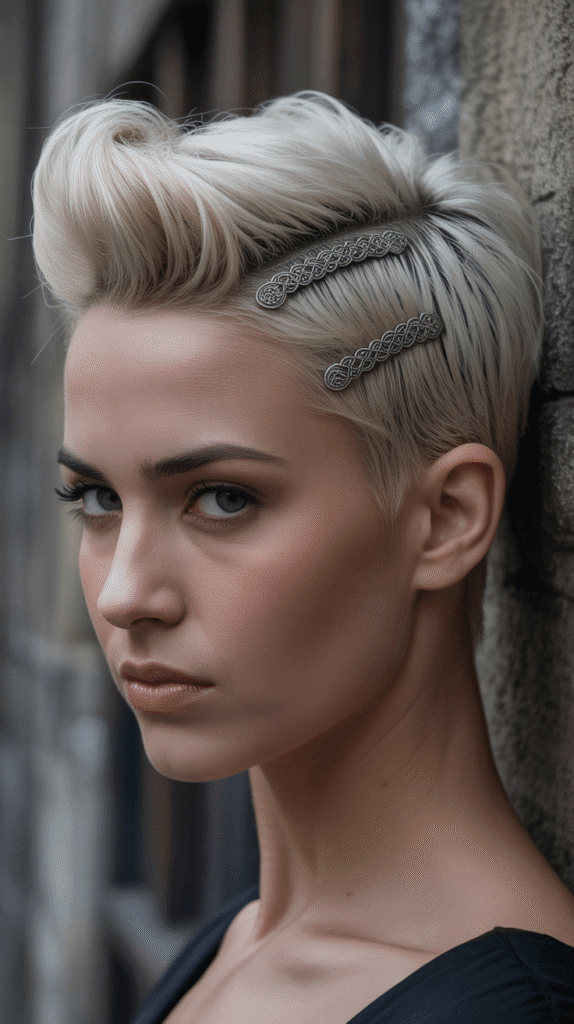
7. The Pixie Crown with Metallic Accessories
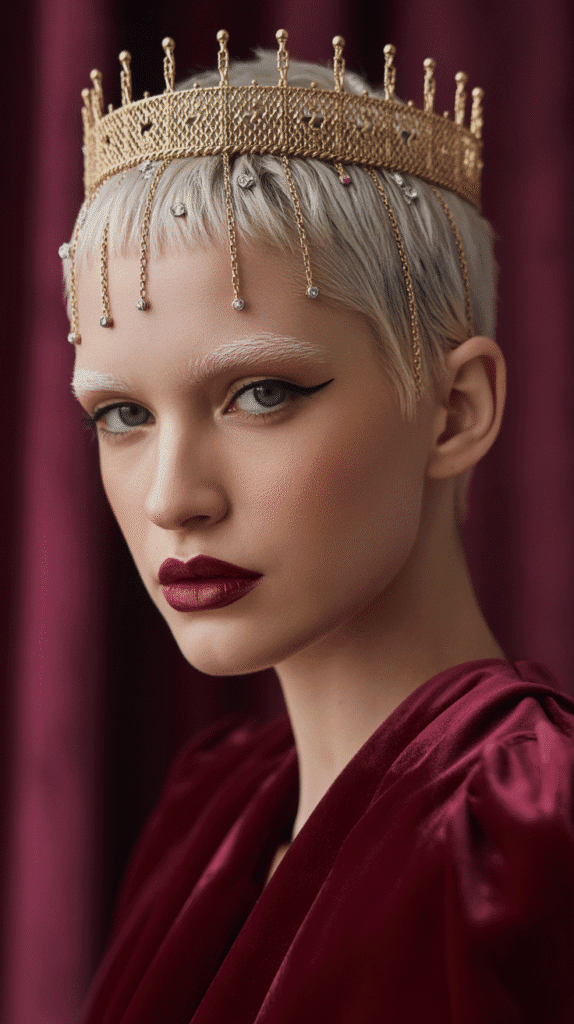
Very short pixie cuts can achieve stunning medieval elegance through strategic use of metallic hair accessories that create the impression of a crown or elaborate headpiece.
This approach celebrates short hair rather than attempting to disguise it.
Accessory Placement Strategy:
- Begin with a foundation piece: a delicate chain crown, thin metal circlet, or jeweled headband positioned across the crown
- Add secondary elements: place decorative bobby pins, small hair jewels, or metal cuffs at strategic points around the head
- Create asymmetry: concentrate more embellishment on one side for modern, editorial appeal
- Layer textures: combine matte metal finishes with shiny gems for dimensional interest
- Secure everything: use clear elastic bands or thin bobby pins to anchor decorative pieces to actual hair
Styling the Hair Itself:
- Apply strong-hold styling product to create piecey, defined texture that showcases accessories
- Consider a sleek, gel-smoothed look for maximum contrast with ornate metallic pieces
- Add subtle finger waves at the front for vintage-inspired softness
- Use hair color spray in metallic tones (gold, silver, bronze) to coordinate with accessories
8. The Medieval Bob with Center Part
The simple center part, when executed with medieval-appropriate styling, becomes a canvas for showcasing the symmetry and balance prized in historical beauty standards.
This foundational style works beautifully for straight, wavy, and even gently curled short hair.
Achieving the Perfect Part:
- Wash hair and apply smoothing products while wet for maximum control
- Use a fine-toothed comb or the pointed end of a rat-tail comb to create a precise center part from forehead to crown
- For asymmetrical face shapes, adjust the “center” part slightly to create the optical illusion of balance
- Blow-dry hair using a paddle brush, pulling each side forward to emphasize the part line
- Flat iron in small sections if additional smoothness is desired for a polished medieval court appearance
Styling Both Sides:
- Tuck hair behind ears to reveal face shape and any decorative earrings (a medieval status symbol)
- Create gentle inward curls at the ends for a classic medieval bob silhouette
- Add volume at the crown with teasing or volumizing products to prevent flatness
- Keep one side tucked and leave the other partially covering the ear for asymmetric variation
- Apply shine serum to the exterior layers only, avoiding the roots to prevent greasiness
Embellishment Options:
- Place a small jeweled comb at the crown where the part begins for subtle sparkle
- Add fresh flowers tucked behind one or both ears for pastoral medieval charm
- Incorporate narrow ribbons braided into small sections on each side of the part
- Wear a delicate circlet that sits along the part line, emphasizing the center division
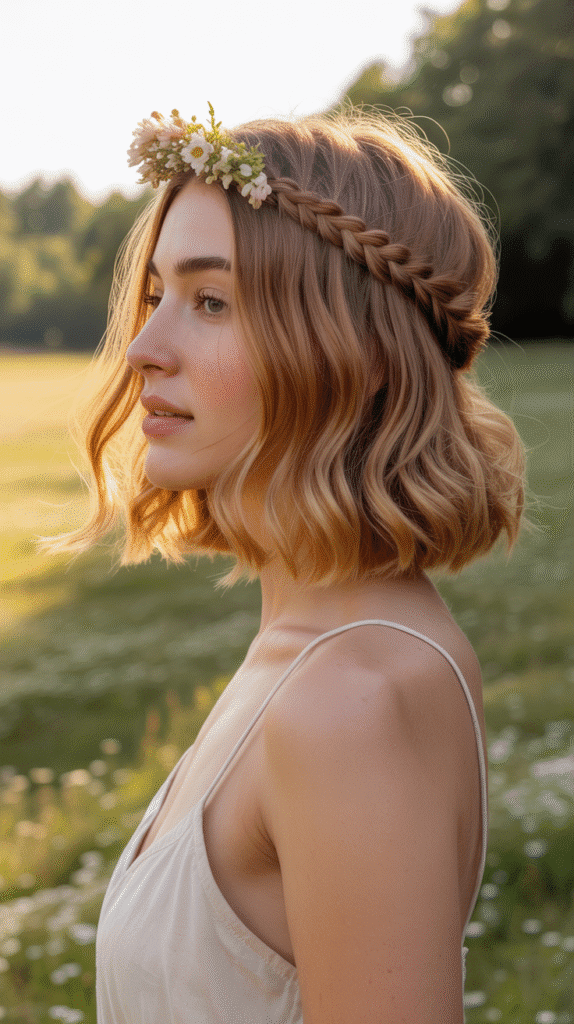
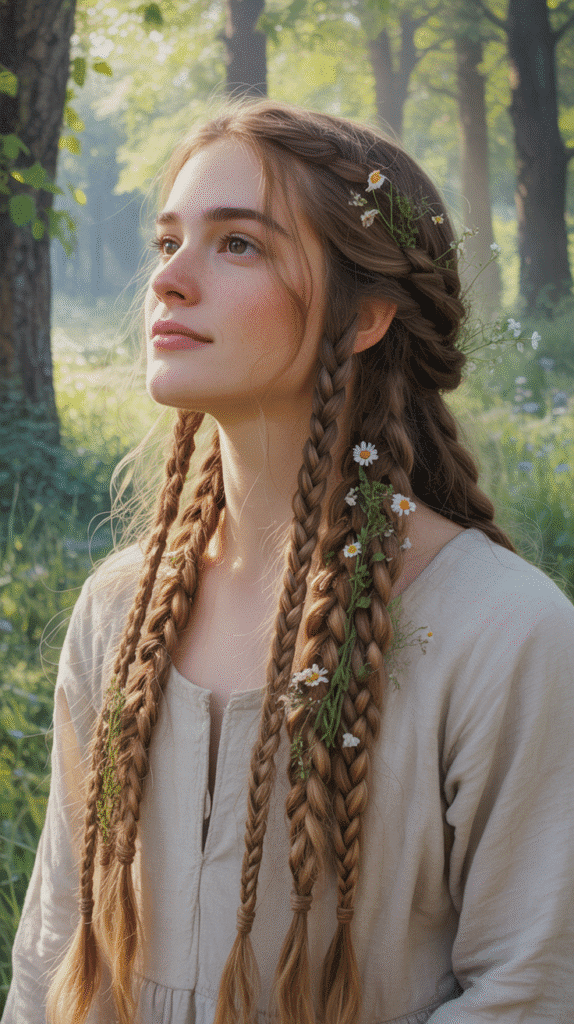
9. The Crimped Texture with Floral Crown
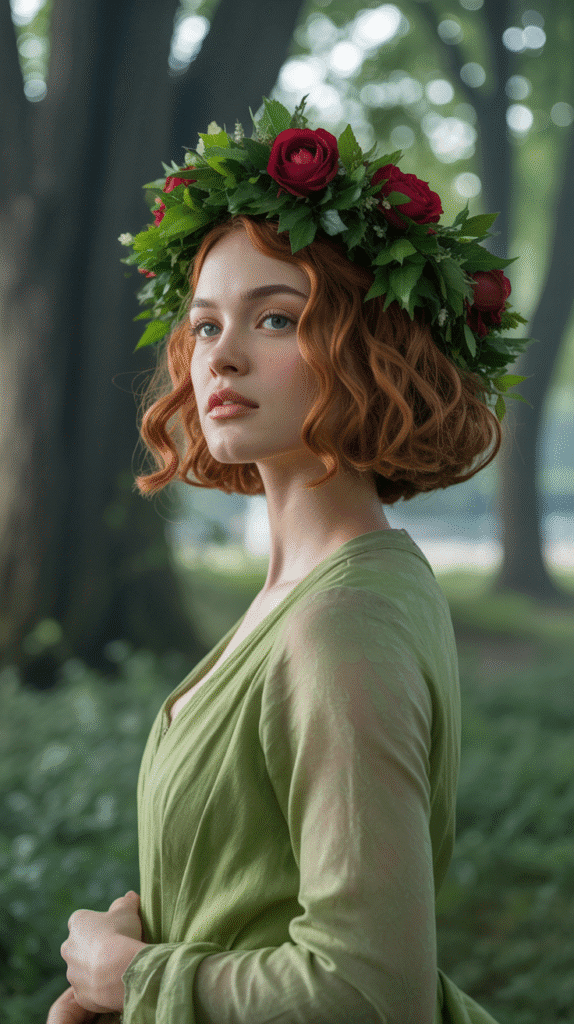
Crimped or waved texture creates the volume and visual interest necessary for short hair to hold elaborate floral crowns, a staple of medieval spring and summer celebrations.
This style perfectly balances structured flowers with free-spirited texture.
Creating Authentic Texture:
- For modern crimping: use a three-barrel crimping iron on small sections throughout the hair
- For historically accurate texture: braid damp hair in multiple small braids overnight, then release
- For heatless waves: use foam or fabric rollers in alternating directions for dimensional texture
- Apply texturizing spray to dry hair before creating texture for better hold and definition
- Work from bottom layers to top, ensuring even texture distribution throughout the entire head
Floral Crown Construction:
- Choose flowers with sturdy stems and long-lasting blooms like roses, chamomile, lavender, or wildflowers
- Create the crown base with flexible floral wire formed into a circle matching your head circumference
- Attach flowers to the base using floral tape, overlapping blooms for full, lush coverage
- Include greenery like ivy, fern fronds, or eucalyptus for authentic medieval aesthetic
- Size the crown to rest on crimped hair rather than sliding down to the hairline
Combining Elements:
- Position the crown slightly back from the hairline, allowing textured hair to peek out in front
- Pull out small face-framing pieces to soften the overall look and prevent severity
- Secure the crown with bobby pins that penetrate through flowers into the textured hair beneath
- Consider a half-crown or asymmetric floral piece for shorter pixie lengths where full crowns overwhelm
Preservation Tips:
- Mist fresh flowers lightly with water throughout the day to maintain appearance
- Store floral crowns in the refrigerator overnight if creating in advance for multi-day events
- Substitute silk or paper flowers for longer-lasting, reusable crowns for frequent medieval events
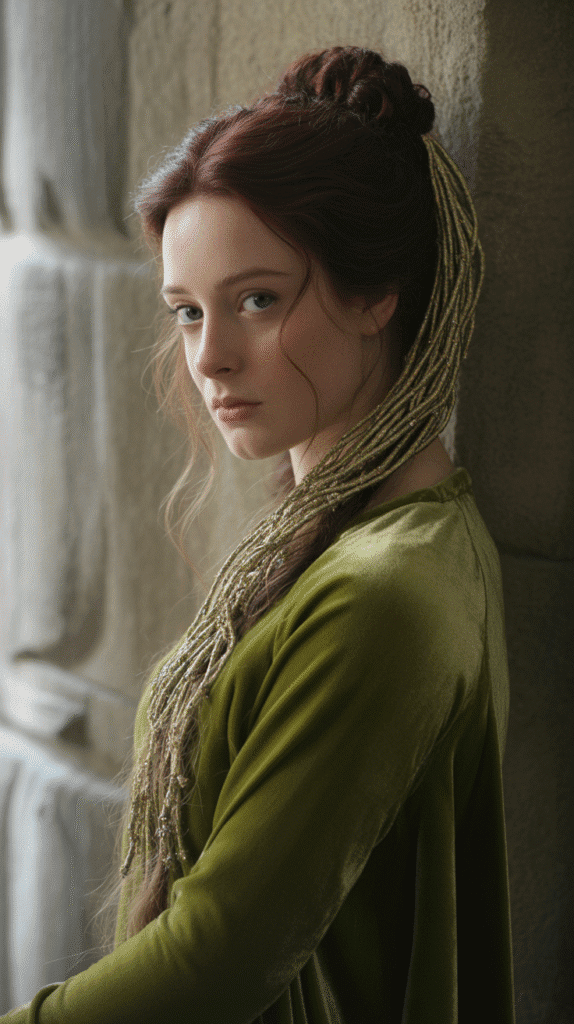
10. The Temple Braid Connection
When hair is too short for traditional long braids, connecting small braids from each temple across the back of the head creates architectural interest and medieval sophistication.
This style works wonderfully for bobs and longer pixie cuts with some length variation.
Braiding Technique:
- Section out a narrow strip of hair from the left temple area, approximately one inch wide
- Create a tight Dutch braid (reverse French braid) working backward along the hairline toward the back
- Repeat the process on the right temple, creating a mirror-image braid
- Cross the two braids at the back center of the head, securing where they meet with small elastics
- Pin the crossed section firmly to the head, then tuck or pin the braid ends underneath for a finished appearance
Styling Variations:
- Parallel braids: Instead of crossing, pin both braids side-by-side horizontally across the back
- Braided crown illusion: Continue braiding around the entire head if length permits, even if very small
- Ribbon integration: Weave narrow ribbons through both braids before crossing them for color contrast
- Asymmetric version: Create one prominent temple braid and pin across to the opposite side only
Hair Length Requirements:
- Minimum 2-3 inches needed at temples for grippable braiding
- If one side is shorter, focus braid on the longer side and pin across to create balance
- Use clear elastic bands on very short braids to minimize visible hardware
- Apply strong-hold gel or pomade to shorter sections before braiding to control flyaways
11. The Rolled Edge Bob
This sophisticated technique involves rolling the perimeter of short hair under or over to create a polished, sculptural silhouette reminiscent of medieval coifs and head coverings.
It’s especially effective for blunt bobs and chin-length cuts.
Rolling Method:
- Begin with freshly washed, slightly damp hair for optimal moldability
- Apply setting lotion or mousse evenly throughout for long-lasting hold
- Section hair horizontally into three layers: bottom, middle, and top
- Using a round brush during blow-drying, roll each section under (or over for variation) at the ends
- For tighter rolls, use Velcro rollers or pin curls and allow to cool completely before release
Securing the Roll:
- Place decorative bobby pins or hair sticks along the rolled edge at intervals for both security and embellishment
- Use a strong-hold hairspray, concentrating on the rolled portions while avoiding the roots
- For extra-short hair, gel the perimeter and use small clips to hold the roll shape until dry
- Consider a light coating of hair powder at the roots for volume contrast against smooth rolled edges
Medieval Authenticity:
- In the 12th-14th centuries, rolled edges often concealed the hair’s transition into head coverings
- This style was particularly popular among merchant class and minor nobility
- The smooth, controlled appearance symbolized dignity and restraint in medieval social contexts
- Pair with period-appropriate jewelry like long pendant earrings to draw the eye to the facial frame created by rolls
12. The Asymmetric Pin Cluster
Strategic placement of decorative pins in clusters creates visual weight on one side of short hair, achieving the asymmetric elegance seen in medieval artwork and illuminated manuscripts.
This approach works with any short hair length and texture.
Cluster Design Principles:
- Select 5-9 pins in complementary designs, sizes, and finishes for cohesive variety
- Choose one statement pin as the focal point, surrounding it with smaller supporting pieces
- Position the cluster above the ear on one side for maximum visibility and profile impact
- Arrange pins in an organic, flowing pattern rather than rigid geometric placement
- Vary pin angles slightly to catch light from multiple directions and create dimension
Pin Types to Combine:
- Jeweled pins: Provide sparkle and color as primary focal points
- Metalwork pins: Add texture and historical authenticity with Celtic knots or filigree
- Pearl pins: Contribute classic elegance and subtle luminosity
- Flower pins: Introduce natural elements and soften metallic components
- Chain pins: Connect multiple pieces for cohesive, intentional design
Balancing the Asymmetry:
- Keep the opposite side sleek and simple to let the pin cluster shine
- Consider tucking unpinned side behind the ear for additional asymmetry
- Add a single delicate pin on the opposite side if complete asymmetry feels too stark
- Style hair texture differently on each side: smooth on one, textured on the clustered side
13. The Low Braided Knot
For short hair with just enough length to gather at the nape, a low braided knot provides medieval elegance without requiring long tresses.
This style works particularly well for active medieval reenactments where hair needs to stay controlled.
Construction Steps:
- Apply strong-hold styling product to slightly damp hair for maximum control
- Create 2-3 small braids from the front or temple areas, leaving most hair loose initially
- Gather all hair including braid ends at the nape of the neck
- Twist or loosely braid the gathered section, then coil it into a small knot shape
- Secure with multiple bobby pins crossing through the knot center and edges for stability
Length Adaptations:
- Very short bobs: Create the knot from just the bottom layer, leaving top layers loose
- Chin-length cuts: Pull as much as possible into the knot, accepting shorter pieces that escape
- Shoulder-length: Achieve a fuller knot with more elaborate braiding incorporated throughout
- Pixie lengths: Create a faux knot using a small hairpiece secured at the nape and cover with your own hair
Activity Considerations:
- This style remains secure during physical activity like dancing, archery, or horseback riding
- Mist with strong-hold hairspray before and after construction for all-day wear
- Place the knot low enough that it doesn’t interfere with helmets or head coverings if wearing armor
- Use a hairnet in matching color over the knot for Renaissance faire authenticity and extra security
14. The Textured Pixie with Crown
Very short pixie cuts become medieval masterpieces when topped with elaborate crown pieces that celebrate rather than compensate for the short length.
This bold style makes a powerful statement about confidence and royalty.
Pixie Texturing Methods:
- Use texturizing paste or clay on dry hair for piecey, defined separation
- Create spiky elements at the crown for height that supports the crown piece physically
- Smooth sides completely for contrast with textured top sections
- Add subtle finger waves at the front for vintage medieval softness despite overall texture
- Consider temporary color highlights in complementary tones to the crown metalwork
Crown Selection and Fit:
- Choose crowns with adjustable sizing or flexible bases for secure fit on short hair
- Wider crown bases distribute weight better and prevent slipping on pixie cuts
- Position crowns further back on the head rather than at the hairline for better balance
- Select styles with combs or clips built into the base for attachment to short hair
- Consider custom-made pieces specifically designed for pixie-length hair if attending frequent events
Creating Grip for Crowns:
- Backcomb or tease the crown area gently to create texture for the crown base to grip
- Apply dry shampoo or texturizing powder to the crown area for added friction
- Place a silicone wig grip headband underneath the crown for slip-prevention
- Use small clear elastics to create tiny ponytails at strategic points for crown attachment
- Bobby pin the crown to the hair in multiple locations using pins that match the crown color
15. The Side Chignon with Face-Framing Pieces
Moving the traditional chignon from the back to the side creates instant medieval drama while accommodating shorter lengths that might not reach for a centered back placement.
This asymmetric approach feels fresh and historically grounded.
Chignon Construction:
- Create a deep side part, dividing hair approximately 70/30
- Leave 2-3 face-framing pieces out on the heavy side before gathering remaining hair
- Pull all gathered hair to one side at the lower portion of the head behind the ear
- Twist the gathered hair and coil it into a circular chignon shape
- Secure with bobby pins inserted horizontally through the chignon into the scalp beneath
Face-Framing Elements:
- Curl the left-out pieces with a small-barrel curling iron away from the face
- Varying the pieces’ lengths creates more natural, romantic framing
- Apply light-hold hairspray to maintain curl while keeping pieces touchably soft
- Consider braiding one face-framing piece for added medieval detail and texture
- Tuck a small flower or jeweled pin where the face-framing pieces separate from the chignon
Short Hair Solutions:
- For very short hair, create a mini chignon from bottom layers only while styling top layers differently
- Use a small hairpiece in matching color to bulk up the chignon if natural hair lacks volume
- Accept a smaller, more delicate chignon as equally elegant and perhaps more appropriate for short hair
- Wrap the chignon with ribbon or thin leather cord to create the illusion of more substantial size
16. The Braided Front with Loose Back
Concentrating all braiding detail at the front hairline while leaving the back completely loose creates beautiful contrast and solves the common short-hair challenge of having insufficient length for all-over braiding.
Front Braiding Pattern:
- Part hair horizontally from ear to ear approximately two inches back from the hairline
- Divide the front section into 5-7 smaller subsections depending on hair thickness
- Create tight braids in each subsection, working from hairline backward to the part line
- Secure each braid temporarily with a small clip while working on adjacent sections
- Once all front braids are complete, remove clips and allow braids to rest naturally
Integrating Braids with Loose Hair:
- Use bobby pins to secure the braids where they transition into loose back hair
- Gently blend braid ends into loose hair by backcombing slightly and smoothing over
- Wrap tiny elastics matching your hair color around braid ends before pinning for extra security
- Leave the back section in natural texture, gentle waves, or add curls for enhanced contrast
Styling the Back Section:
- Apply lightweight oil or serum to the loose back hair for smooth, healthy shine
- Create beachy waves using a flat iron twisting technique or sea salt spray
- Keep back hair very straight and sleek for maximum contrast with detailed braided front
- Add subtle highlights or lowlights to the back section to ensure it doesn’t appear plain by comparison
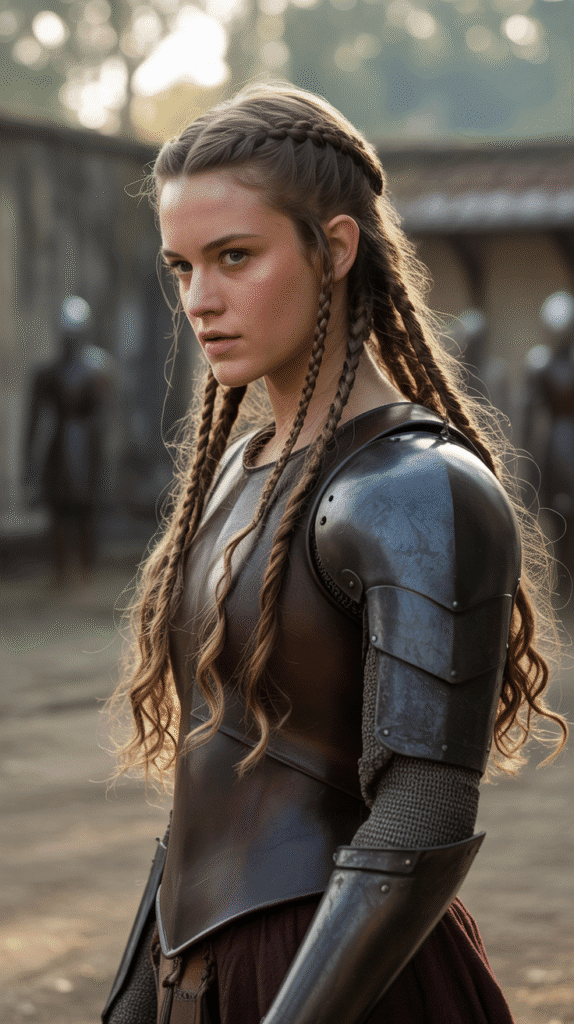
17. The Medieval Mohawk

This bold interpretation combines Viking and medieval aesthetics, creating a raised center section through braiding, teasing, or gel sculpting while keeping sides controlled.
Perfect for those seeking edgier medieval princess energy.
Creating the Center Ridge:
- Section hair into a mohawk pattern: a strip down the center from forehead to nape approximately 2-3 inches wide
- Decide on your preferred technique: braided ridge, teased volume, or gel-sculpted spikes
- For braided version: create one central Dutch braid or multiple parallel braids standing upright
- For volume version: backcomb the center section extensively and smooth the outer layer while maintaining height
- For sculpted version: apply strong-hold gel and use a comb to create defined, upward-pointing shapes
Side Section Treatment:
- Slick sides completely flat with gel or pomade for maximum contrast with the center
- Create small braids on the sides running horizontally from front to back
- Leave sides at natural length but smooth and controlled, or embrace actual undercut sides if present
- Add decorative elements like metal cuffs or leather wraps to secured side sections
Historical Context:
- While not strictly medieval, Viking and Celtic influences on medieval culture embraced similar aesthetic
- This style suits medieval-fantasy contexts, warrior princesses, or creative medieval interpretations
- Represents strength, fierceness, and rejection of conventional feminine beauty standards even in medieval contexts
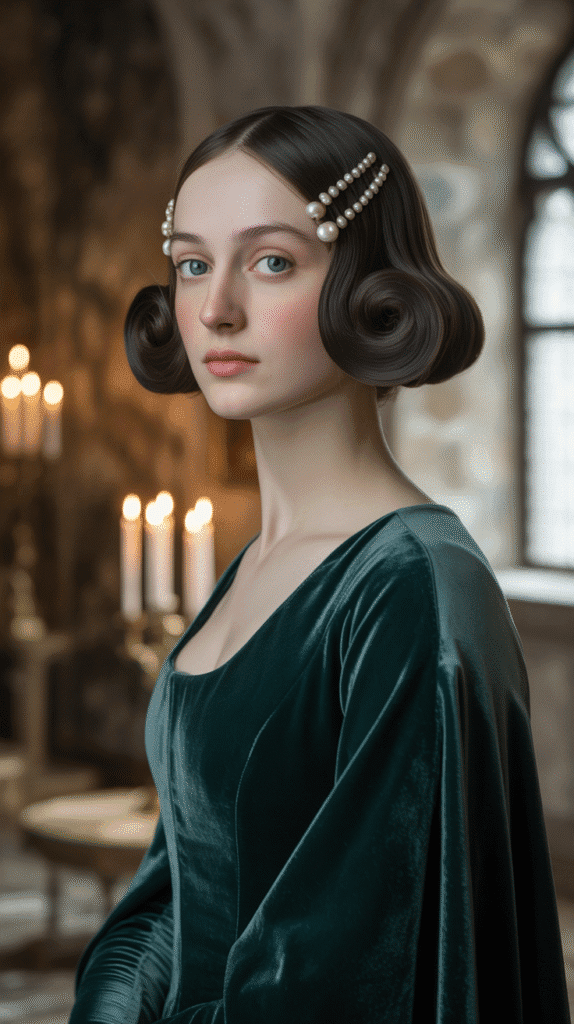
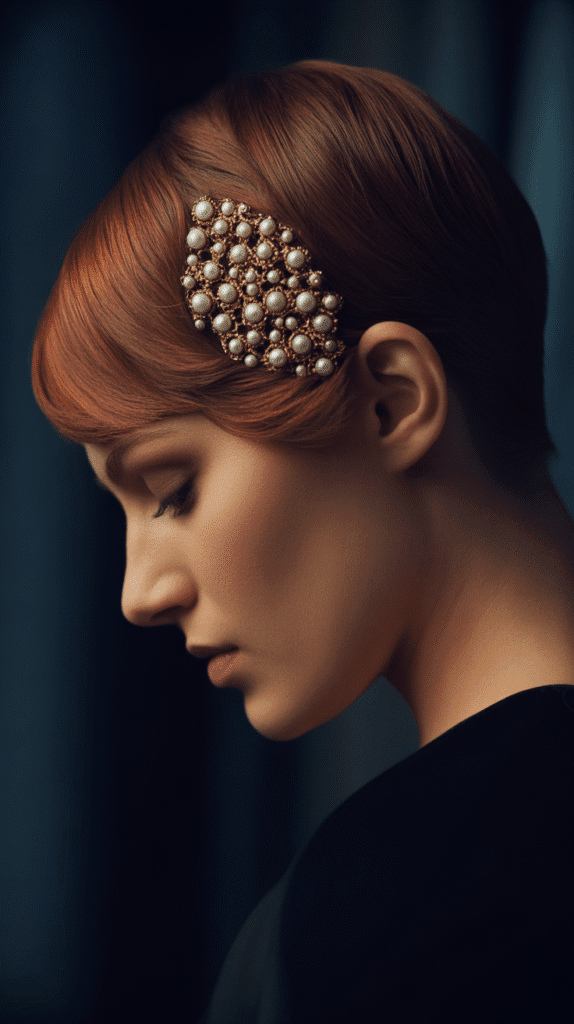
18. The Pearl-Studded Simplicity
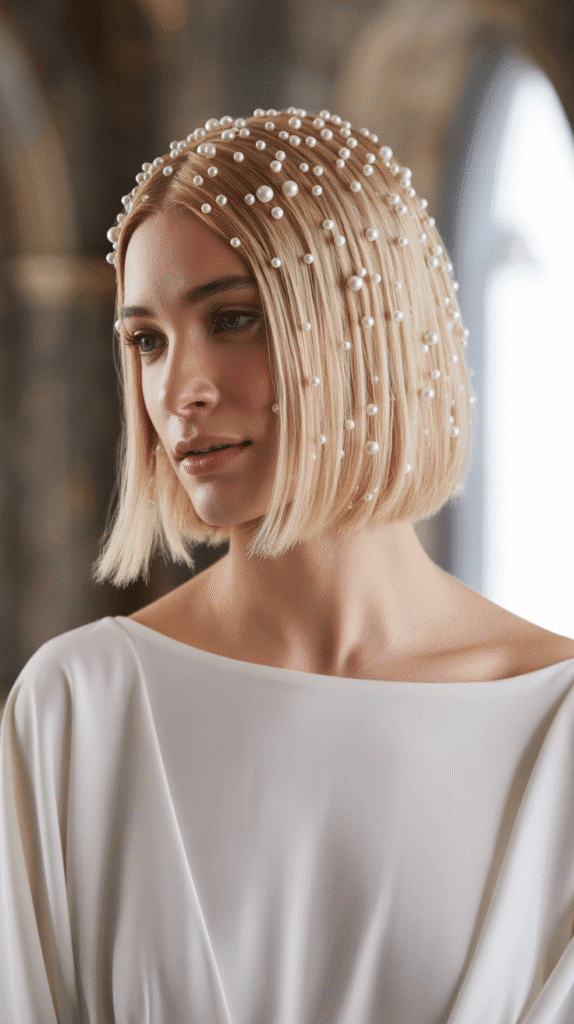
Sometimes the most stunning medieval styles come from simplicity elevated by luxurious details.
A smooth, classic short hairstyle becomes extraordinary when adorned with pearl pins scattered throughout like dewdrops.
Pearl Placement Strategy:
- Begin with hair styled smoothly—either straight, gently waved, or curled under at the edges
- Start pearl placement at the crown and work outward in an organic, random-appearing pattern
- Vary pearl sizes: use larger pearls (6-8mm) as focal points and smaller pearls (3-4mm) as filler
- Insert pearl pins at different angles so they catch light from multiple directions
- Aim for asymmetric distribution rather than uniform coverage for natural, scattered appearance
Pearl Selection Guide:
- Genuine pearls: For authentic luxury and special occasions like medieval-themed weddings
- Glass pearls: High-quality alternative providing excellent luster at accessible price points
- Plastic pearls: Budget-friendly option for practice runs or casual medieval events
- Mixed finishes: Combine matte and glossy pearls for dimensional interest
- Colored pearls: While white is most traditional, consider blush, champagne, or gray for variation
Application Tips:
- Use pins specifically designed for pearls with a loop-top or push-pin style for easy insertion
- Apply hairspray before pearl placement to create texture that helps pins grip
- Insert pins at hair’s base rather than sliding them through for better hold
- Remove pearls carefully by supporting the hair while withdrawing the pin to avoid tangling
19. The Wrapped Braid Bundle
When hair is just long enough to gather into a small ponytail at the crown or nape, wrapping the bundle with decorative cord, ribbon, or metallic wire creates instant medieval elegance while adding perceived length and substance.
Bundle Creation
- Secure the base with a small elastic that matches your hair color to create the foundation
- If hair is very short, backcomb the gathered section before securing to create more volume
- For added fullness, gently pull apart the bundle slightly at the base to create a rounded, voluminous shape
- Leave strategic face-framing pieces loose before gathering the bundle for softness
Wrapping Techniques:
- Begin wrapping material at the elastic base, overlapping each layer by approximately half
- Maintain consistent tension throughout the wrapping process for neat, even coverage
- For leather cord: soak briefly in water before wrapping for increased flexibility and easier manipulation
- For metallic wire: use paper-wrapped floral wire which is gentler on hair and easier to shape
- Secure the wrapping end by tucking it under previous layers or using a small decorative pin
Material Selection:
- Silk ribbon: Provides luxurious sheen and softness, available in rich medieval colors like burgundy, emerald, and gold
- Leather cord: Offers rustic, warrior-princess aesthetic perfect for Viking-influenced medieval looks
- Metallic thread: Creates shimmer and catches light beautifully, ideal for evening or formal medieval events
- Embroidered trim: Adds intricate pattern and texture, making even small bundles appear substantial
- Chain or beaded strands: Wrap loosely around the bundle for dimensional, jewelry-like embellishment
Finishing Details:
- Attach a decorative charm or pendant to the wrapped bundle’s end for additional medieval character
- Tuck fresh or silk flowers into the wrapping at intervals for romantic garden party appeal
- Leave the very tips of hair peeking out from the wrapping for natural, organic appearance
- Mist the entire style with flexible-hold hairspray to prevent the wrapping from slipping throughout the day
20. The Half-Up Twisted Crown
This versatile style pulls the top half of short hair back while leaving the bottom section loose, creating dimension and medieval elegance that works beautifully for active occasions where complete updos might be uncomfortable.
Top Section Styling:
- Part hair horizontally from the top of one ear across the crown to the top of the other ear
- Gather the top section and divide it into two equal parts at the center back
- Twist each part tightly in opposite directions to create rope-like texture
- Cross the twisted sections over each other and pin securely at the crown intersection point
- Coil any remaining length from the twists into a small knot and secure with additional bobby pins
Bottom Section Options:
- Leave completely straight for sleek, modern contrast with the twisted top
- Add loose, romantic waves using a curling wand or flat iron for soft medieval femininity
- Create subtle crimped texture for volume and period-appropriate visual interest
- Keep natural texture but apply smoothing serum for polished, healthy appearance
- Add a few small braids within the loose bottom section for cohesive braided detail
Crown Placement:
- Position decorative crowns, circlets, or headbands directly over the twisted crown area to emphasize the style’s focal point
- Choose pieces thin enough to nestle into the twisted section without disrupting the structure
- Secure crown pieces with bobby pins inserted through the crown into the twisted hair beneath
- Consider floral crowns that can be pinned directly into the twisted section for organic integration
Adaptation for Very Short Hair:
- If top section is too short to twist fully, create multiple small twists pinned in a crown pattern
- Use decorative pins to secure the twisted section, making the hardware part of the aesthetic
- Accept smaller, more delicate twisted sections as equally elegant for pixie cuts
- Focus embellishment on the twisted area to draw attention to the style’s constructed portion
21. The Ribbon-Laced Style
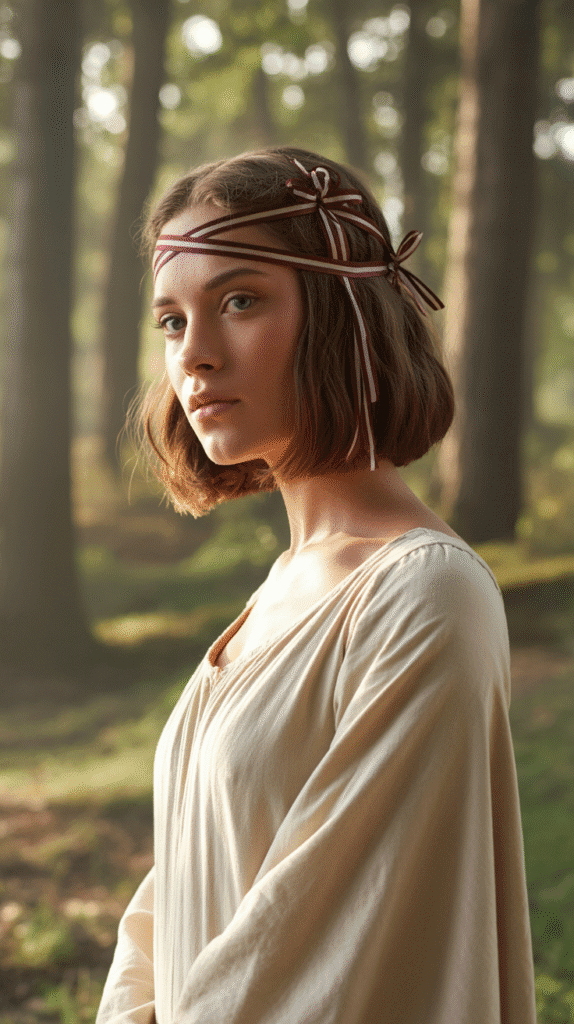
Threading ribbons through short hair using various techniques creates color, texture, and medieval authenticity while working with even very limited hair length.
This approach offers endless customization through ribbon color and placement choices.
Lacing Methods:
- Horizontal lacing: Thread ribbon through small sections of hair in parallel lines across the head from one side to the other
- Crisscross pattern: Create X-shapes by threading ribbon diagonally in alternating directions across the crown area
- Spiral lacing: Wrap ribbon around the head in a continuous spiral from crown to nape for maximum coverage
- Random weaving: Thread ribbon through scattered sections without formal pattern for organic, natural appearance
- Braid integration: Incorporate ribbon directly into small braids throughout the hair for cohesive texture
Ribbon Selection:
- Choose widths between 1/8 inch and 1/2 inch depending on hair thickness and desired visual impact
- Select medieval-appropriate colors: rich jewel tones, metallics, or natural earth tones
- Consider double-faced satin ribbon for color on both sides and elegant draping
- Opt for grosgrain ribbon for texture and better grip in slippery fine hair
- Use velvet ribbon for luxury and special occasions requiring elevated medieval authenticity
Threading Technique:
- Use a large-eye embroidery needle or bobby pin to pull ribbon through small hair sections
- Keep ribbon flat rather than twisted as you thread for smooth, polished appearance
- Secure ribbon ends with small knots, bows, or decorative pins to prevent slipping
- Thread gently to avoid pulling or stressing hair at the roots
- For very short hair, attach ribbon to bobby pins and insert pins strategically rather than threading through hair directly
22. The Faux Hawk with Ornamental Pins
Creating height at the center of the head while keeping sides controlled produces a faux hawk silhouette that combines medieval structure with contemporary edge—perfect for short-haired individuals seeking unique medieval styling.
Faux Hawk Construction:
- Section hair into three vertical zones: center strip (approximately 2 inches wide) and two side sections
- Apply volumizing mousse or powder to the center section while hair is slightly damp
- Blow-dry the center section upward using a round brush or fingers to create maximum height
- Use strong-hold pomade or gel on side sections to slick them flat against the head
- Set the style with firm-hold hairspray, concentrating on the raised center section
Creating Height in Short Hair:
- Backcomb or tease the center section at the roots before smoothing the outer layer
- Use small hair clips to hold the center section up while it dries completely
- For pixie cuts, focus height at the crown area where hair is typically longest
- Consider using hair extensions or clip-in pieces at the center for dramatic height if natural length is limited
- Apply dry shampoo or texturizing powder to roots for grip and lift
Pin Placement Along the Ridge:
- Select 3-5 statement pins with medieval motifs like Celtic knots, fleur-de-lis, or dragon designs
- Space pins evenly along the faux hawk ridge from front to back
- Insert pins perpendicular to the ridge line so they’re visible from both front and side views
- Choose pins with flat backs that lie flush against the raised hair rather than protruding awkwardly
- Coordinate pin finishes: all silver, all gold, or all bronze for cohesive aesthetic impact
Style Variations:
- Soft faux hawk: Create gentle height with softer products and rounded shape for approachable medieval princess
- Sharp faux hawk: Use strong gel and define individual spikes for warrior princess or shield maiden aesthetic
- Braided faux hawk: Instead of teasing, create multiple small braids in the center section that stand upright
- Textured faux hawk: Add crimping or waves to the center section for dimensional, romantic interpretation
23. The Side-Pinned Cascade
When hair is just long enough to sweep to one side, securing it with decorative pins creates the illusion of a side-swept cascade that flatters the face while maintaining medieval elegance and control.
Side-Sweep Technique:
- Create a deep side part positioned approximately 2-3 inches from the center toward your preferred side
- Apply smoothing serum or cream to the heavy side for sleek, controlled sweep
- Use a paddle brush and blow dryer to direct all hair on the heavy side forward and down
- Secure the top layer of hair along the part line with a horizontal row of decorative pins
- Allow the swept hair to cascade over one shoulder, curling or waving the ends if desired
Pin Arrangement Strategies:
- Single file line: Place 5-7 pins in a straight line from crown to behind the ear along the part
- Scattered cluster: Concentrate pins in one area (temple or crown) for asymmetric focal point
- Graduated size: Start with larger pins at the crown, transitioning to smaller pins toward the nape
- Alternating styles: Mix different pin types (pearls, jewels, metalwork) in deliberate pattern
- Double row: Create two parallel rows of pins for more dramatic, structured appearance
Controlling the Light Side:
- Tuck the light side behind the ear completely to emphasize asymmetry and showcase facial features
- Create small braids on the light side running backward from temple to behind ear
- Slick the light side flat with gel or pomade for maximum contrast with the voluminous swept side
- Secure the light side with a single statement pin or comb at the ear for subtle embellishment
- Leave the light side slightly loose for softer, less dramatic asymmetric styling
Enhancing the Cascade:
- Add body to the swept side by teasing underneath layers before smoothing the outer layer
- Curl just the ends of the cascade for polished, finished appearance
- Thread a ribbon through the swept section for added color and medieval detail
- Mist the cascade with shine spray to enhance the hair’s healthy, luminous quality
24. The Grecian-Medieval Hybrid
While Grecian styles predate the medieval period, their influence on medieval nobility created hybrid styles that incorporated Grecian elements like twisted sections and metallic accessories into medieval contexts.
Creating Grecian Twists:
- Part hair into multiple horizontal sections from front hairline to crown
- Take small sections from each layer and twist them back toward the crown
- Secure each twist with bobby pins that match your hair color for invisible hold
- Overlap twists slightly as you work backward to create layered, dimensional effect
- Focus on creating smooth, rope-like twists rather than loose, casual twists for Grecian precision
Metallic Accessory Integration:
- Position thin metal headbands, laurel crowns, or chain pieces across the crown where twists converge
- Weave metallic thread or thin chains through the twisted sections for integrated shimmer
- Add metal leaf-shaped pins or laurel pins along the twist lines to reinforce the Grecian theme
- Choose gold tones for warm hair colors (blonde, auburn, warm brown) and silver tones for cool hair colors (ash blonde, black, cool brown)
- Layer multiple thin metallic pieces rather than one substantial piece for delicate, refined appearance
Medieval Elements to Include:
- Add a sheer veil attached at the crown and flowing down the back for medieval modesty
- Incorporate small jewels or colored stones into the metallic accessories for medieval opulence
- Include fresh flowers tucked into the twisted sections for medieval pastoral charm
- Choose rich fabric colors in your gown: deep burgundy, royal purple, or forest green rather than pure white
- Add embroidered or beaded details to the metallic accessories for medieval craft tradition
Short Hair Adaptations:
- For very short hair, create fewer, larger twists rather than many small ones
- Twist only the front section of hair if back sections are too short to participate
- Use the twisted front as a headband alternative, leaving the back smooth and simple
- Accept that twists may be smaller and more delicate—this creates elegant restraint rather than appearing insufficient
25. The Bohemian Braid Mix
Combining different braid types throughout short hair creates a bohemian, free-spirited interpretation of medieval styling that works beautifully for festival settings and outdoor medieval-themed events.
Braid Variety Selection:
- Three-strand braids: Use for foundational structure and classic medieval appearance
- Fishtail braids: Add at temples or random sections for intricate, scale-like texture
- Rope braids: Incorporate along sides for sculptural, twisted dimension
- Four-strand braids: Place strategically as statement braids that draw the eye
- Dutch braids: Create raised, prominent braids that add dimension and stand out from the head
Random Placement Strategy:
- Avoid symmetry by placing braids at different locations on each side of the head
- Vary braid sizes from very small accent braids to medium featured braids
- Create some braids that start at the hairline and others that begin mid-length
- Allow some braids to connect with others while leaving others independent
- Maintain approximately 40-60% braided hair with the remainder loose for balanced bohemian appearance
Embellishment Integration:
- Weave thin leather cords in natural brown tones through random braids
- Tuck small wildflowers like daisies, clover, or chamomile into braid sections
- Add tiny beads to select braid ends for subtle sound and movement
- Wrap metallic thread around certain braids while leaving others plain for contrast
- Incorporate feathers for boho-medieval festival aesthetic (though less historically accurate)
Maintaining Bohemian Aesthetic:
- Deliberately leave some braids slightly messy or pulled apart for lived-in, natural appearance
- Allow flyaways and wispy pieces rather than controlling every hair
- Mix tight braids with very loose braids for organic, unstructured appearance
- Pancake some braids by gently pulling sections apart while leaving others tight
- Embrace braids that loosen throughout the day rather than constantly reapplying products
26. The Structured Medieval Updo
Even short hair can achieve sophisticated updos by strategically pinning, twisting, and tucking sections to create the illusion of elaborate construction—perfect for formal medieval banquets and wedding celebrations.
Foundation Building:
- Begin with texturized hair (backcombed, crimped, or waved) to create grip for pinning
- Section hair into workable zones: front, crown, sides, and nape
- Work from the bottom up, securing lower sections first to create base structure
- Use abundant bobby pins (15-25 pins is not excessive for structured updos)
- Consider using small hair donuts or padding pieces in matching color to create volume if natural hair lacks fullness
Construction Technique:
- Take small sections from the nape and twist or roll them upward, pinning at the crown
- Overlap each pinned section slightly to create seamless, cohesive structure
- Crisscross bobby pins in X-patterns for maximum security and all-day hold
- Leave no section unsecured—every piece should be deliberately placed and pinned
- Work in a circular pattern around the head until all hair is incorporated into the updo
Creating the Illusion of Length:
- Fold shorter pieces back on themselves before pinning to create doubled bulk
- Use strategic teasing underneath visible outer layers to add perceived fullness
- Position the updo’s focal point at the crown or upper back where hair is typically longest
- Incorporate hairpieces in matching color if completely authentic medieval updo requires more hair than available
- Embrace smaller, more compact updos as period-appropriate for short-haired medieval nobility
Decorative Finishing:
- Place ornamental pins, combs, or hair jewelry at the updo’s center as focal point
- Weave thin chains or metallic cords through the structured sections
- Add a decorative hair net (caul) over the updo in gold or silver metalwork
- Position a small crown or coronet on top of the updo for maximum regal impact
- Tuck preserved flowers or silk blooms into crevices of the structured updo
27. The Waterfall Braid Adaptation
The waterfall braid technique, where sections are dropped and replaced as you braid, creates beautiful cascading effects even in short hair by emphasizing the front and side sections while leaving the back touchable and flowing.
Waterfall Braid Basics:
- Begin at the temple on your preferred side with a three-strand braid close to the hairline
- After the first stitch of the braid, drop the back section and pick up a new section from above to replace it
- Continue braiding while dropping and replacing sections to create the waterfall effect
- Work along the hairline from temple toward the back, following the natural curve of the head
- Secure the braid end behind the ear or at the back center with small elastic matching hair color
Short Hair Modifications:
- Accept that fewer sections will be dropped in short hair—even 4-6 dropped sections create beautiful effect
- Make the braid more prominent by braiding tighter and using larger sections
- If hair is too short to drop sections successfully, create a standard braid along the same path and call it a frame braid
- Focus the waterfall braid on the longest sections of layered short hair for best results
- Use strong-hold styling products before braiding to help control shorter sections
Styling Dropped Sections:
- Curl each dropped section lightly with a small-barrel curling iron for enhanced definition
- Allow dropped sections to remain natural for effortless, organic appearance
- Add tiny beads or flowers to select dropped sections for embellishment
- Ensure dropped sections are visible by positioning hair behind the shoulder on the braided side
- Apply light-hold hairspray to dropped sections to maintain definition without stiffness
Enhancing the Overall Look:
- Create mirror-image waterfall braids on both sides meeting at the back center for symmetrical elegance
- Pair the waterfall braid with a sheer veil attached at the braid end for romantic medieval effect
- Style the non-braided side completely differently (slicked, twisted, or pinned) for asymmetric drama
- Add a thin circlet or headband positioned above the waterfall braid to frame and emphasize the style
28. The Medieval Bandana Style
While bandanas are typically associated with later periods, the medieval head wrap or coif created similar covered aesthetics that modern bandanas can replicate with appropriate fabric choices and styling approaches.
Fabric Selection:
- Choose natural fabrics like linen, cotton muslin, or silk for period-appropriate texture and drape
- Select solid colors in medieval dye tones: madder red, woad blue, saffron yellow, or natural cream
- Consider embroidered or block-printed fabrics with medieval motifs like flowers, vines, or geometric patterns
- Avoid synthetic fabrics and modern prints which break medieval illusion
- Size should be approximately 22-24 inches square for adequate coverage and tying
Tying Methods:
- Nape tie: Fold bandana into triangle, position at forehead, bring ends to nape and tie once or twice
- Top knot: Position bandana further back, bring ends to crown and tie decoratively on top
- Side tie: Place bandana asymmetrically, tie ends at one side behind the ear for casual appearance
- Front tie: Position bandana at nape with point forward, bring ends to forehead and tie with ends tucked
- Twist tie: Twist bandana into rope before positioning, creating texture and dimension
Hair Arrangement Beneath:
- Allow front pieces to escape the bandana framing the face for softness
- Tuck all hair completely for modest, working-class medieval appearance
- Position short hair so it peeks out at the nape for casual, approachable styling
- Create small braids in visible sections for detail that complements the bandana
- Use bobby pins inside the bandana to secure it to hair for all-day stability
Social Context Styling:
- Lower-class medieval women covered hair more completely—tie securely with minimal hair showing
- Higher-class ladies used sheerer fabrics and showed more hair as status symbol
- Working women needed secure head coverings that stayed in place during labor
- Unmarried women could show more hair than married women in many medieval cultures
- Adjust your styling to reflect the medieval character or class you’re portraying
29. The Crossed Headband Effect
Creating the appearance of crossed headbands using your own hair through strategic sectioning and pinning adds architectural interest and medieval symmetry to short hairstyles.
Section Division:
- Part hair into four quadrants: left front, right front, left back, right back
- Take a horizontal section approximately one inch wide from the left front near the hairline
- Take a matching section from the right front in the same position
- Leave back sections unstyled initially to focus on creating the crossed effect
- Ensure sections are equal in thickness for balanced, symmetrical appearance
Creating the Cross:
- Smooth the left section across the forehead and over to the right side, pinning behind the right ear
- Take the right section across the forehead in the opposite direction, crossing over the left section
- Pin the right section behind the left ear, creating an X-pattern across the forehead
- Secure the intersection point where sections cross with a decorative pin as focal point
- Ensure sections lie flat and smooth without bumps or buckles
Styling Remaining Hair:
- Allow back and side hair to remain loose in natural texture or add waves
- Create small braids in the loose sections for cohesive braided detail throughout
- Gather remaining hair into a low ponytail or bun at the nape if desired
- Add texture to loose sections with sea salt spray or texturizing products
- Keep loose sections simple to let the crossed headband effect remain the focal point
Embellishment Ideas:
- Place a jeweled pin or brooch where the sections intersect for medieval luxury
- Weave thin ribbons through the crossed sections before pinning for added color
- Use decorative bobby pins along the crossed sections for functional beauty
- Position a thin circlet over the crossed sections to emphasize the headband illusion
- Add small flowers tucked into the intersection point for romantic medieval garden parties
30. The Layered Pin Technique
Strategically layering decorative pins at varying heights creates depth and dimension while showcasing a collection of medieval-inspired hair jewelry on short hair that might not accommodate elaborate braiding.
Layering Principles:
- Identify three depth levels: base layer (flush against scalp), middle layer (elevated slightly), top layer (most prominent)
- Place 2-3 pins at base layer using flat-backed designs that sit close to the head
- Add 3-4 pins at middle layer using moderate-length pins that hover above base pins
- Finish with 1-2 statement pins at top layer using longest pins or tallest designs
- Vary angles so pins point in slightly different directions for organic, natural appearance
Creating Visual Flow:
- Arrange pins to create directional movement leading the eye across the head
- Start denser clustering at focal point (temple, crown, or side) and disperse outward
- Use larger, heavier pins as anchors with smaller pins surrounding and supporting
- Create asymmetry by concentrating pins primarily on one side or in one area
- Maintain some bare space so hair itself remains visible and pins don’t overwhelm
Securing Layered Pins:
- Insert base layer pins first directly into hair at scalp level
- Position middle layer pins slightly elevated by pinning through a small teased section
- Place top layer pins through twisted or rolled sections that lift them away from the head
- Use additional invisible bobby pins to support statement pieces that might be heavy
- Test security by gently shaking head—pins should remain stable without shifting
31. The Side-Swept Elegance with Jeweled Comb

A dramatic side sweep secured with an ornate jeweled comb combines simplicity of technique with luxury of adornment—ideal for short-haired individuals seeking elegant medieval styling for formal occasions.
Creating the Sweep:
- Wash and blow-dry hair directing all airflow toward your chosen sweep side
- Apply smoothing cream or serum to control frizz and create sleek, polished appearance
- Use a flat iron on small sections if additional smoothness is desired for formal occasions
- Gather all hair from the opposite side and sweep it across and down toward the heavy side
- Leave the light side completely clear and exposed to showcase the dramatic asymmetry
Comb Selection and Placement:
- Choose combs with 3-5 teeth for adequate grip in short hair (more teeth can be difficult to insert)
- Select statement pieces with significant visual presence: large jewels, intricate metalwork, or substantial size
- Position the comb at the temple area on the light side where the sweep begins its journey
- Insert comb teeth horizontally into the hair, angling slightly downward for secure grip
- Ensure decorative portion of comb is fully visible and positioned at its most flattering angle
Hair Length Considerations:
- Pixie cuts: Create a mini sweep using available length; comb may appear larger by proportion which creates drama
- Short bobs: Ideal length for this style; hair naturally wants to sweep and cooperates readily
- Shoulder-length: Maximum impact as hair creates substantial swept volume to balance the exposed side
- Layered cuts: Focus on sweeping the longest layers while shorter layers add textured interest
Styling the Swept Side:
- Curl or wave the ends of the swept hair for romantic, finished appearance
- Leave swept hair perfectly straight for modern, minimalist interpretation of medieval elegance
- Add volume at the roots of the swept side by backcombing underneath layers
- Mist with strong-hold hairspray to maintain the sweep’s position throughout extended wear
- Consider adding a second, smaller decorative comb lower on the swept side for additional security and ornamentation
32. The Crown Braid Illusion
When hair is too short for a complete crown braid, creating the illusion through partial braiding and strategic pinning achieves similar visual impact while accommodating length limitations.
Illusion Construction:
- Create 2-3 small braids on each side of the head starting at the temples
- Braid each section backward toward the crown, keeping braids relatively tight
- Bring all braided sections together at the back crown area
- Cross braids over each other or twist together to create the appearance of a continuous crown
- Pin securely at the back, then arrange loose back hair over pin points to conceal mechanics
Filling in Gaps:
- If space exists between braids where scalp shows through, place decorative pins or flowers to fill visual gaps
- Create additional mini braids to fill any bare areas and complete the crown illusion
- Use small hair flowers or jeweled pins spaced along the braid path to create continuity
- Style hair between braid sections with gentle waves or texture to blend with braided areas
- Apply dry shampoo or volumizing powder at roots between braids to create fullness
Front Hairline Treatment:
- Leave a soft wispy section at the front hairline unbraided for face-framing softness
- Incorporate the very front hair into the first braid if you prefer all hair controlled
- Create a small braided section directly at the front center like a tiara for fairy-tale princess effect
- Smooth front hair back into the crown braid sections for sleek, formal appearance
- Add a thin metallic headband at the hairline below the braid crown for defined separation
Short Hair Solutions:
- Accept that the “crown” may be more of a crown accent than complete circle
- Focus crown placement at the sides and front where hair is most visible
- Allow the back to remain simple since it’s less visible than front and side sections
- Use the illusion principle: create the impression of encircling braids even if not geometrically complete
- Combine with other elements like veils or circlets that extend the crown concept
33. The Romantic Undone Braid
Rather than pursuing perfect, polished braiding, intentionally creating loose, partially undone braids throughout short hair produces romantic, ethereal medieval styling perfect for fantasy-inspired looks and artistic interpretations.
Creating Undone Texture:
- Start with 4-6 small braids positioned randomly throughout short hair
- Braid each section loosely from the start, avoiding tight tension at any point
- Once braided and secured, gently pull apart each braid segment significantly
- Vary the amount of pulling—some braids very loose, others moderately separated
- Embrace imperfection and asymmetry as essential elements of the romantic undone aesthetic
Strategic Deconstruction:
- Pull apart certain areas of each braid more than others for organic, natural appearance
- Allow some braid sections to nearly fall apart while others maintain more structure
- Create some braids that begin tight and loosen progressively toward the ends
- Leave some pieces completely out of braids to frame the face and add wispy softness
- Don’t worry about braids matching or achieving symmetry—variety creates the romantic effect
Embellishment with Natural Elements:
- Tuck fresh or realistic silk flowers throughout the undone braids in random placement
- Weave greenery like ivy tendrils, fern tips, or eucalyptus stems through loosened sections
- Add decorative elements only to some braids while leaving others plain for natural variation
- Choose delicate, small-scale flowers rather than large blooms to maintain ethereal quality
- Consider baby’s breath, small roses, chamomile, lavender, or wildflowers for authentic medieval garden feeling
Finishing for Maximum Romance:
- Mist hair lightly with sea salt spray for enhanced texture and matte finish
- Avoid heavy products that create shine or definition—aim for natural, untouched appearance
- Rough up the braid texture by running fingers through sections repeatedly
- Add face-framing pieces by pulling small wisps out around the hairline
- Allow braids to loosen further throughout the day rather than attempting to maintain them
- Embrace the impermanent nature of the style as part of its romantic, fleeting beauty
Conclusion
The journey through these 33 Chic Medieval Hairstyles for Short-Haired Princesses reveals that hair length has never been a barrier to achieving breathtaking medieval elegance, only an invitation to creativity and innovation.
From the structured sophistication of jeweled combs and ornate updos to the romantic freedom of undone braids and bohemian mixes, short-haired royalty possess countless options for channeling medieval beauty.
Whether you’re drawn to the warrior fierceness of a medieval mohawk, the delicate femininity of pearl-studded simplicity, or the timeless grace of veiled mystery, these styles prove that authentic medieval glamour lives in the details, the accessories, and the confidence with which you wear them rather than in hair length alone.
As you experiment with these techniques, remember that medieval beauty standards were far more diverse than popular imagination suggests, and your short-haired interpretation of medieval style is just as valid and stunning as anyRetry
This response paused because Claude reached its max length for a message. Hit continue to nudge Claude along.