
Long, straight hair offers a stunning canvas for countless styling possibilities that can transform your everyday look.
Whether you’re rushing to work, preparing for a casual outing, or simply want to switch up your daily appearance, having a repertoire of quick and beautiful hairstyles makes all the difference.
In this comprehensive guide on 33 Easy Straight Hairstyles for Long Hair Daily, you’ll discover versatile styling options ranging from sleek and polished looks to playful and textured styles.
Each hairstyle is designed to be achievable within minutes, using minimal tools and products, making them perfect for busy mornings or last-minute plans.
From classic ponytails with modern twists to elegant braided styles and chic half-up arrangements, these hairstyles cater to various occasions and personal preferences.
You’ll learn step-by-step techniques, styling tips, and product recommendations that will help you master each look effortlessly.
Whether you’re a hairstyling novice or looking to expand your styling skills, this collection provides practical solutions that celebrate the natural beauty of straight, long hair while keeping you looking fresh and fashionable every single day.
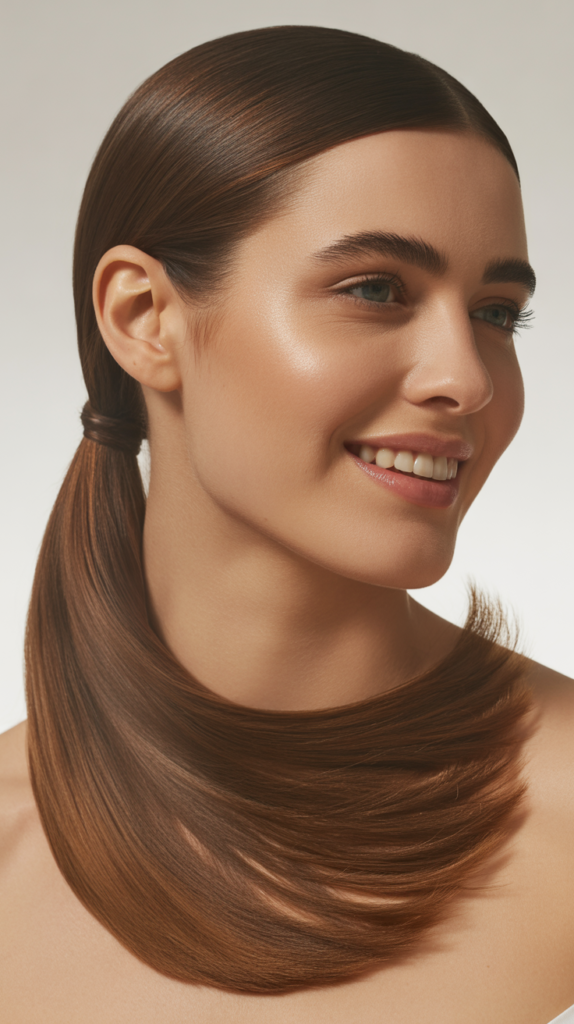
1. Sleek Low Ponytail
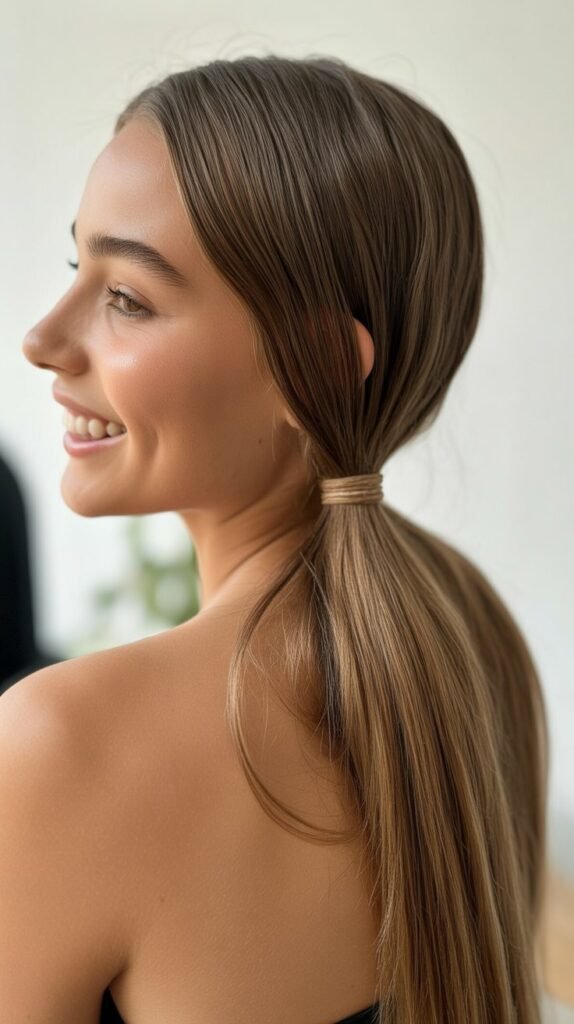
The sleek low ponytail is a timeless and sophisticated hairstyle that works beautifully for both professional and casual settings.
This elegant style emphasizes the smooth, glossy nature of straight hair while creating a polished, put-together appearance that never goes out of fashion.
- Start by brushing your hair thoroughly to remove any tangles and create a smooth base for styling.
- Apply a smoothing serum or hair oil from mid-lengths to ends to add shine and control flyaways.
- Use a fine-tooth comb to gather all your hair at the nape of your neck, ensuring there are no bumps or uneven sections.
- Secure with a hair elastic that matches your hair color for a seamless look.
- Take a small section of hair from the ponytail and wrap it around the elastic to conceal it, securing with a bobby pin underneath.
- Finish with a light mist of hairspray to maintain the sleek appearance throughout the day.
- For extra shine, run a boar bristle brush over the surface of your hair before securing the ponytail.
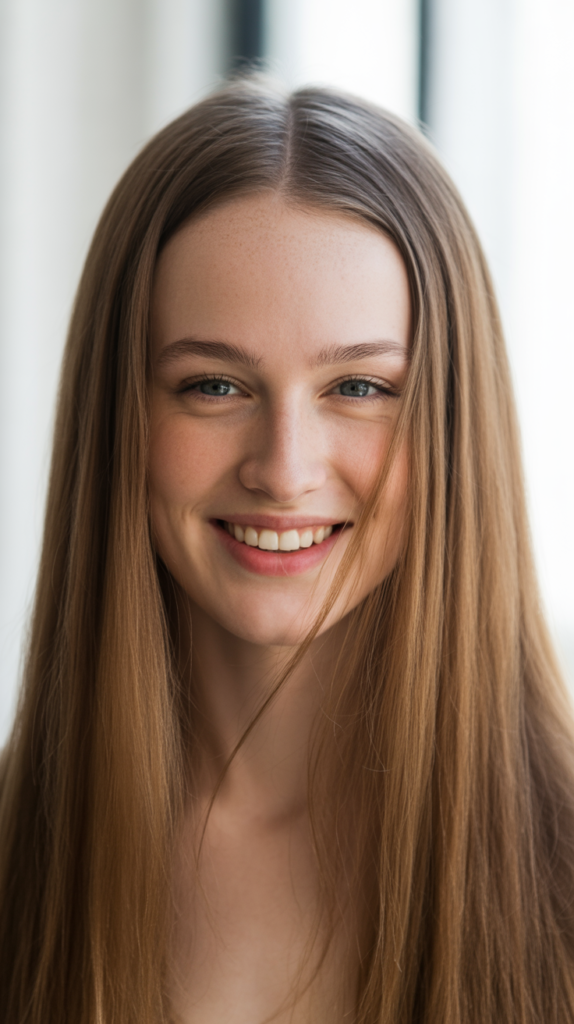
2. Middle Part Straight Down
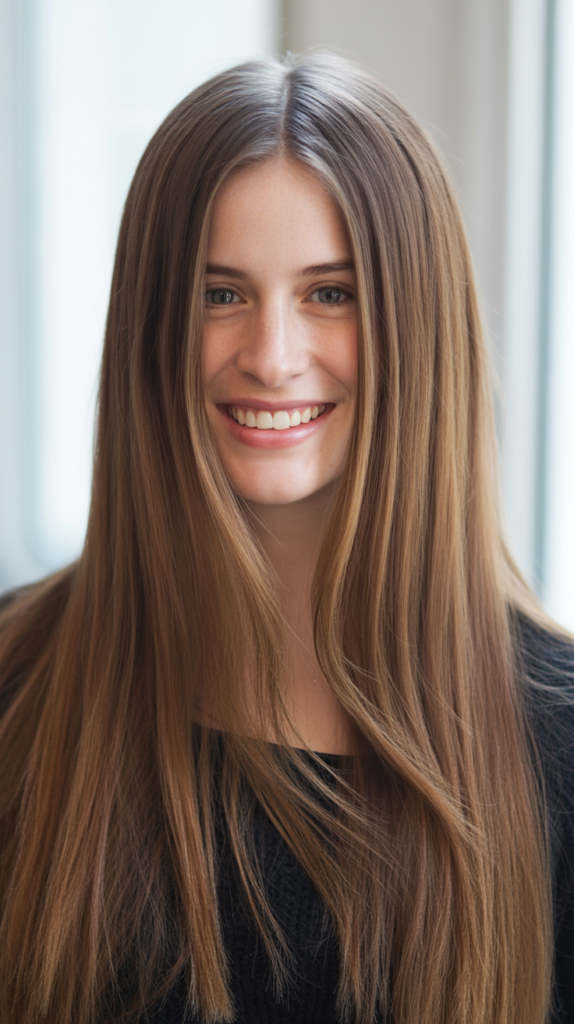
The middle part with hair worn straight down is the quintessential effortless look that showcases the natural beauty of long, straight hair.
This simple yet striking style has been a favorite among celebrities and fashion influencers for its ability to frame the face symmetrically and highlight healthy, shiny hair.
- Wash and condition your hair with products designed for straight hair to enhance smoothness.
- Apply a heat protectant spray evenly throughout damp hair before blow-drying.
- Use a paddle brush while blow-drying to stretch the hair and create a sleek finish.
- Once completely dry, create a precise middle part using a rat-tail comb for accuracy.
- Run a flat iron through small sections of hair from roots to ends to achieve ultra-smooth results.
- Apply a small amount of shine serum to the palms of your hands and gently run through the lengths of your hair.
- For a more relaxed look, slightly tousle the ends with your fingers rather than keeping them perfectly straight.
- This style works exceptionally well for showcasing hair color and natural shine.
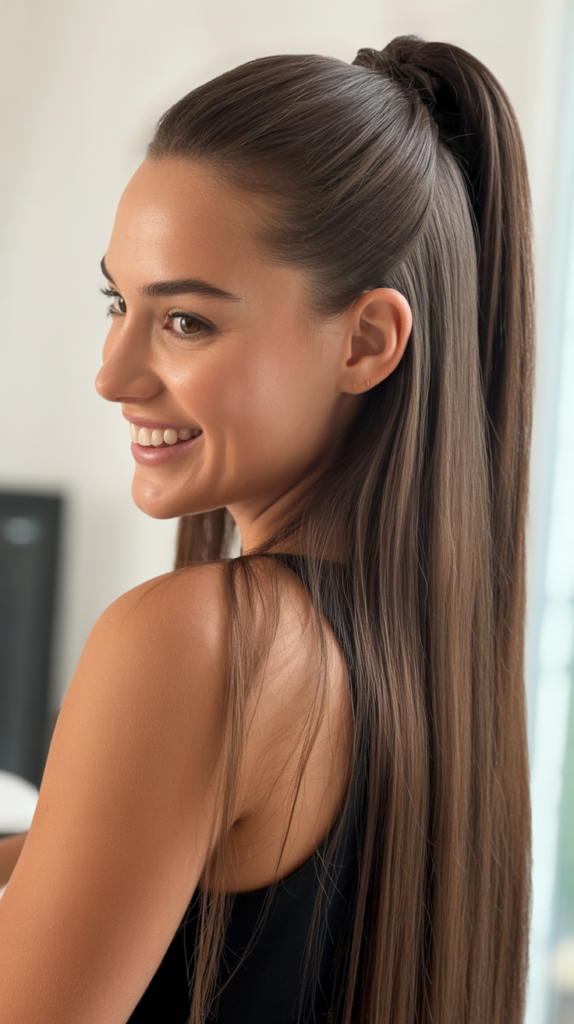
3. High Sleek Ponytail
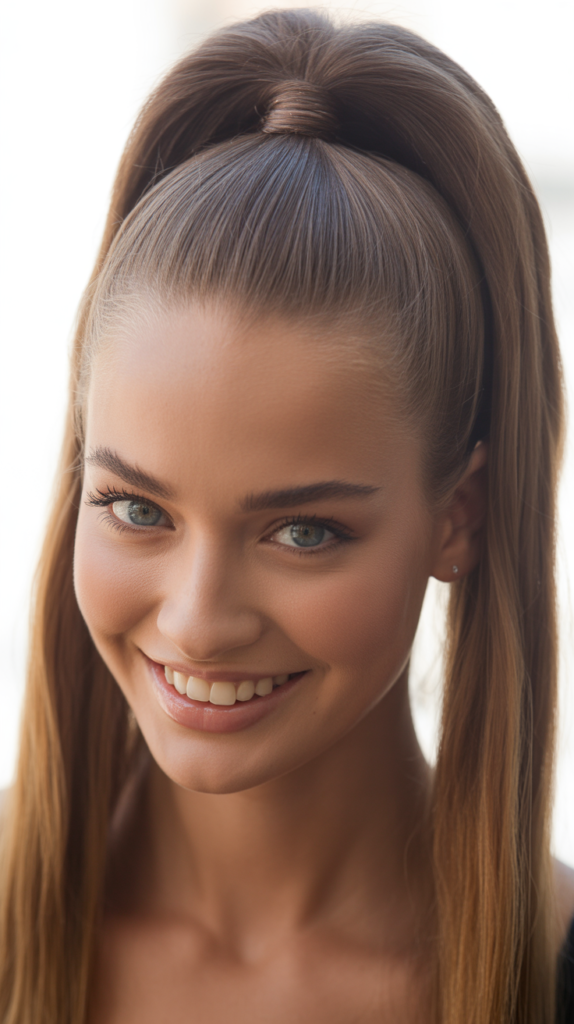
The high sleek ponytail is a dynamic and youthful hairstyle that combines elegance with practicality.
This versatile look is perfect for active days, workout sessions, or when you want to create a more dramatic, face-lifting effect while keeping hair completely off your face and neck.
- Begin with freshly washed or second-day hair that has been brushed smooth.
- Apply a volumizing mousse at the roots if you want extra lift at the crown.
- Flip your head upside down and gather all hair at the crown of your head where you want the ponytail positioned.
- Use a brush to smooth any bumps while holding the ponytail in place.
- Secure tightly with a strong elastic band to prevent slipping throughout the day.
- For a lifted look, gently tease the hair at the crown before securing the ponytail.
- Wrap a section of hair from the ponytail around the elastic and pin it underneath.
- Use a fine-tooth comb and hairspray to smooth down any flyaways along the hairline.
- Consider adding a slight bend to the ponytail ends with a curling iron for added movement.
4. Side-Swept Straight Hair
Side-swept straight hair offers a romantic and glamorous alternative to center-parted styles.
This asymmetrical look creates visual interest and works particularly well for special occasions, date nights, or when you want to add a touch of Hollywood elegance to your everyday appearance.
- Create a deep side part using a comb, positioning it about two inches from your natural part line.
- Apply a light styling cream to help hair stay in place on the swept side.
- Use a flat iron to ensure hair is perfectly straight with a glossy finish.
- Sweep the larger section of hair over one shoulder, allowing it to cascade down gracefully.
- Secure the hair behind your ear on the opposite side with bobby pins that match your hair color.
- Apply a flexible hold hairspray to keep the style in place without stiffness.
- For added security during evening events, use decorative pins or clips on the secured side.
- This style beautifully showcases statement earrings and necklaces.
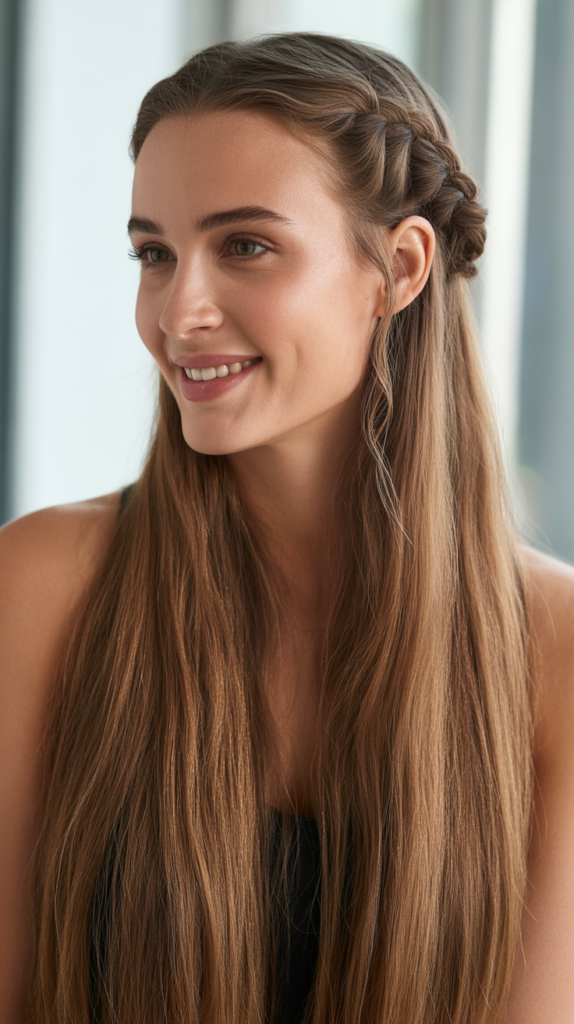
5. Half-Up Half-Down with Twist
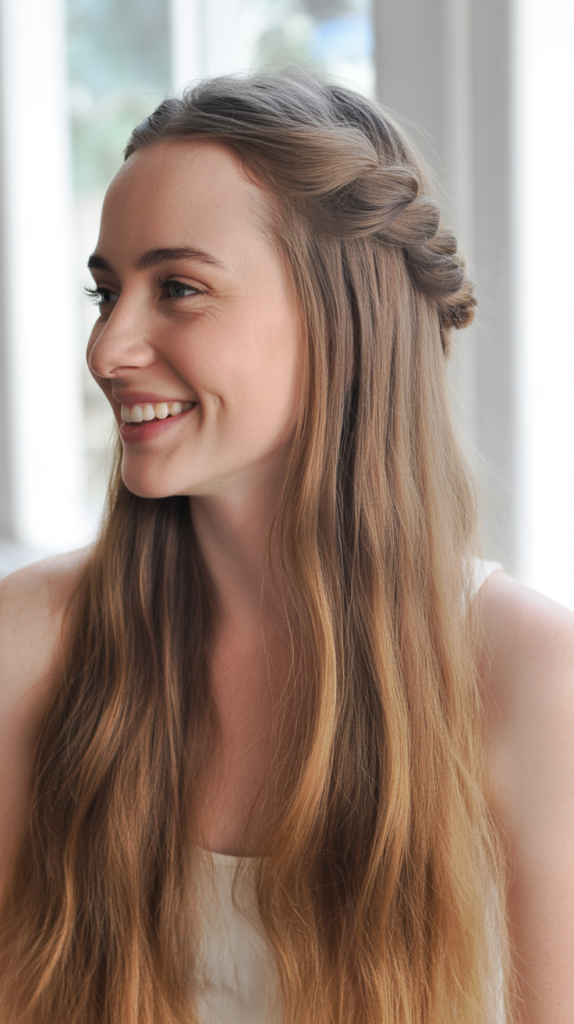
The half-up half-down style with twist details combines the best of both worlds, keeping hair out of your face while showcasing length.
This versatile hairstyle works for various occasions and adds a feminine touch with the twisted sections that create visual interest and texture.
- Start by straightening your hair completely for a sleek foundation.
- Take a section of hair from each side of your head, starting above your ears.
- Twist each section backwards towards the center of your head.
- Secure both twisted sections together at the back with bobby pins or a clear elastic.
- Leave the remaining hair flowing down straight for a balanced look.
- For added dimension, gently pull on the twisted sections to create a looser, more romantic appearance.
- Finish with a light hairspray to hold the twists in place.
- This style can be dressed up with decorative pins or kept simple for everyday wear.
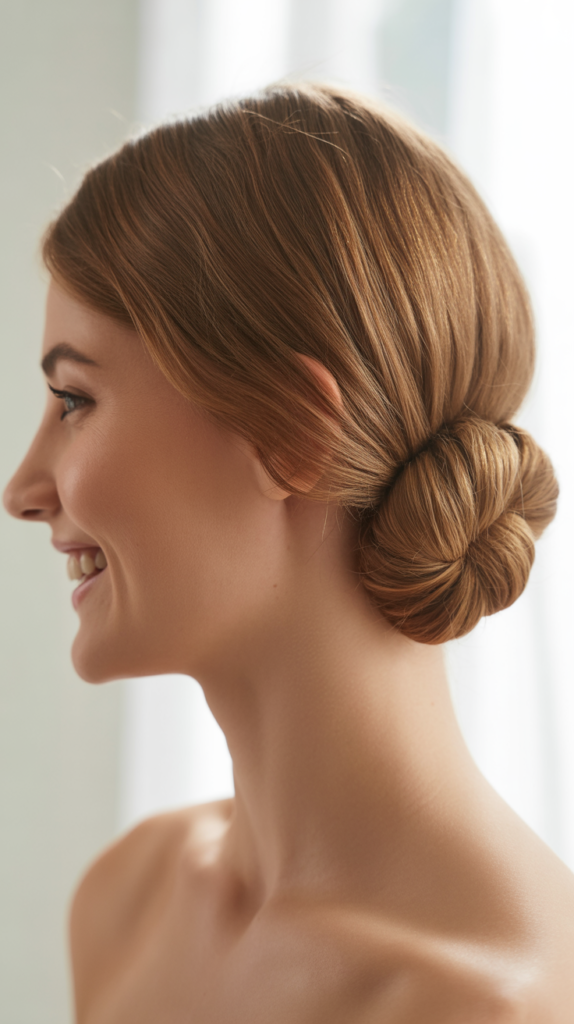
6. Low Bun with Straight Texture
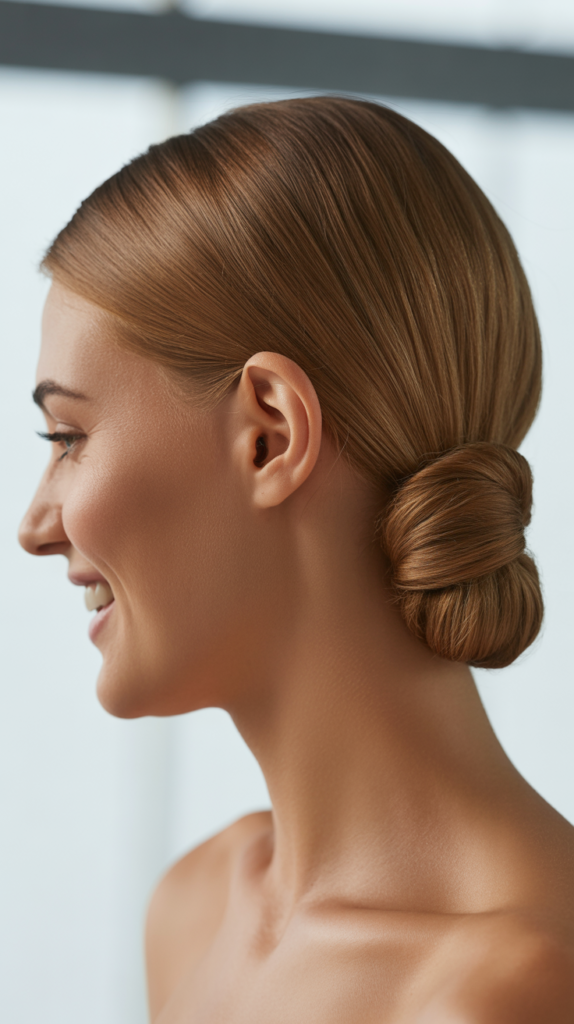
The low bun with straight texture is a sophisticated and professional hairstyle that’s perfect for office environments, formal events, or minimalist fashion aesthetics.
This polished look emphasizes sleekness while creating an elegant silhouette that complements professional attire and formal wear.
- Brush your straight hair into a low ponytail at the nape of your neck.
- Apply a smoothing balm to control any flyaways and create a polished finish.
- Twist the ponytail loosely and wrap it around the base to form a bun.
- Secure with bobby pins, ensuring the bun feels stable and secure.
- Use a toothbrush sprayed with hairspray to smooth down any baby hairs or flyaways along the hairline.
- For a sleeker look, avoid pulling pieces out and keep the bun tight and controlled.
- Add a decorative hair pin or barrette for special occasions.
- This style works beautifully with both business suits and elegant evening gowns.
7. Straight Hair with Headband
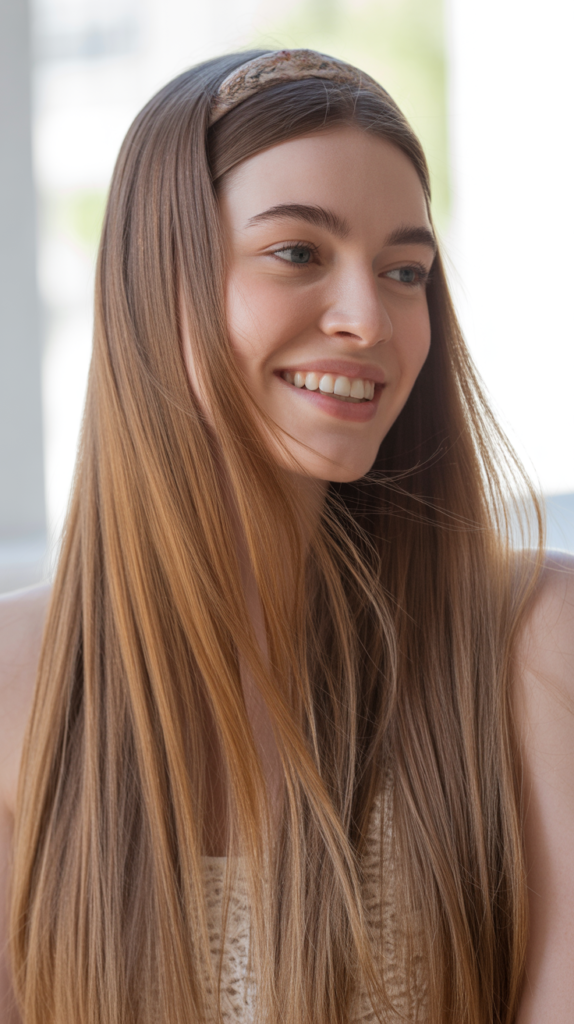
Straight hair paired with a headband creates an effortlessly chic look that’s both practical and stylish.
This accessorized hairstyle is perfect for keeping hair off your face during busy days while adding a fashionable element that can transform a simple straight style into something more polished and intentional.
- Begin with freshly straightened hair for the smoothest appearance.
- Choose a headband that complements your outfit and personal style – options include padded, metal, fabric, or embellished designs.
- Place the headband over your head, positioning it where you want it to sit – typically one to two inches from the hairline.
- Adjust the headband so it sits comfortably and securely without causing pressure.
- Allow your straight hair to flow naturally behind the headband.
- For added volume, gently tease the crown area before placing the headband.
- Tuck any shorter layers or bangs behind the headband or allow them to frame your face.
- This style works particularly well for casual outings, brunch dates, or artistic environments.
8. Straight Hair Tucked Behind Ears
The simple act of tucking straight hair behind your ears creates a clean, fresh-faced look that’s perfect for showing off your facial features and jewelry.
This minimalist styling approach is ideal for professional settings, video calls, or any situation where you want to appear open and approachable.
- Straighten your hair completely using a flat iron for a sleek finish.
- Apply a light serum to add shine without weighing hair down.
- Create your preferred part – middle, side, or slightly off-center.
- Gently tuck the hair behind both ears, smoothing it as you go.
- Use small, discreet bobby pins behind your ears if you need extra security.
- Apply a light mist of hairspray to help the hair stay in place.
- This style beautifully showcases earrings, so consider wearing statement pieces.
- Touch up throughout the day as needed by re-tucking any pieces that fall forward.
9. Sleek Side Ponytail
The sleek side ponytail offers a playful yet sophisticated alternative to traditional center ponytails.
This asymmetrical style adds visual interest and works wonderfully for both casual and dressy occasions, providing a fresh take on the classic ponytail that feels modern and fashion-forward.
- Brush all your hair to one side, deciding whether you prefer left or right placement.
- Apply smoothing cream to eliminate any frizz or flyaways.
- Gather all hair at the side of your head, positioning it just behind and below your ear.
- Secure with a strong elastic that can hold the weight of your long hair.
- Wrap a section of hair from the ponytail around the elastic to conceal it.
- Use bobby pins to secure any shorter layers that might stick out on the opposite side.
- Apply shine spray for a glossy, polished finish.
- For evening events, consider adding a decorative hair tie or ribbon.
10. Straight Hair with Middle Braid
Incorporating a middle braid into otherwise straight hair creates a bohemian-inspired look that combines structure with free-flowing beauty.
This style is perfect for festivals, casual weekends, or when you want to add textural interest to your straight hair without committing to an entirely braided look.
- Start with completely straightened hair as your base.
- Take a small section of hair from the very top center of your head.
- Create a simple three-strand braid down the center, continuing as far as you’d like.
- Secure the end of the braid with a small, clear elastic.
- Allow the rest of your straight hair to flow freely on both sides of the braid.
- Gently pull on the braid sections to create a fuller, more relaxed appearance.
- This style can be enhanced by taking braids from the sides and incorporating them into the center braid.
- Finish with a texturizing spray for a lived-in, effortless look.
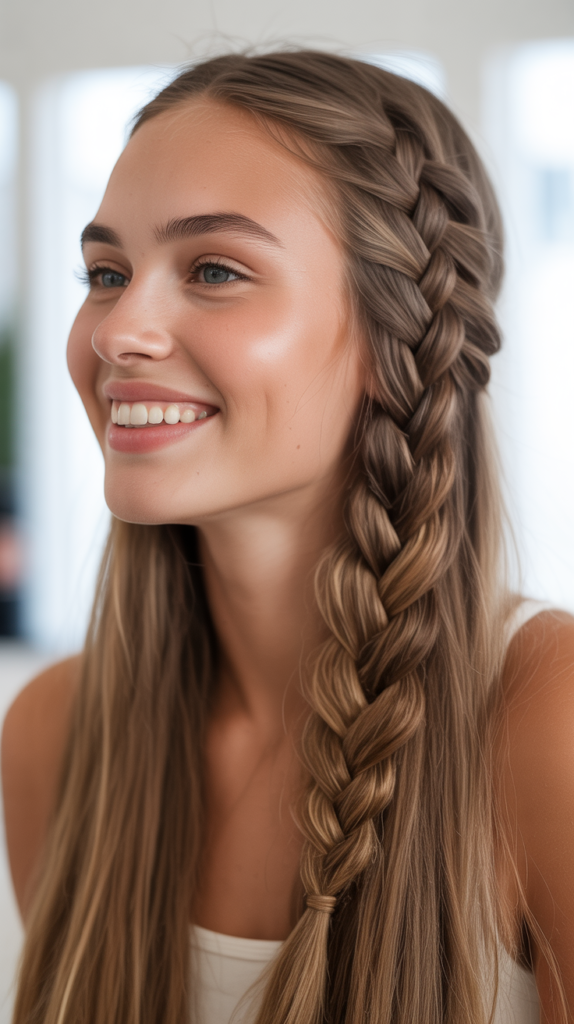
11. Low Side Braid
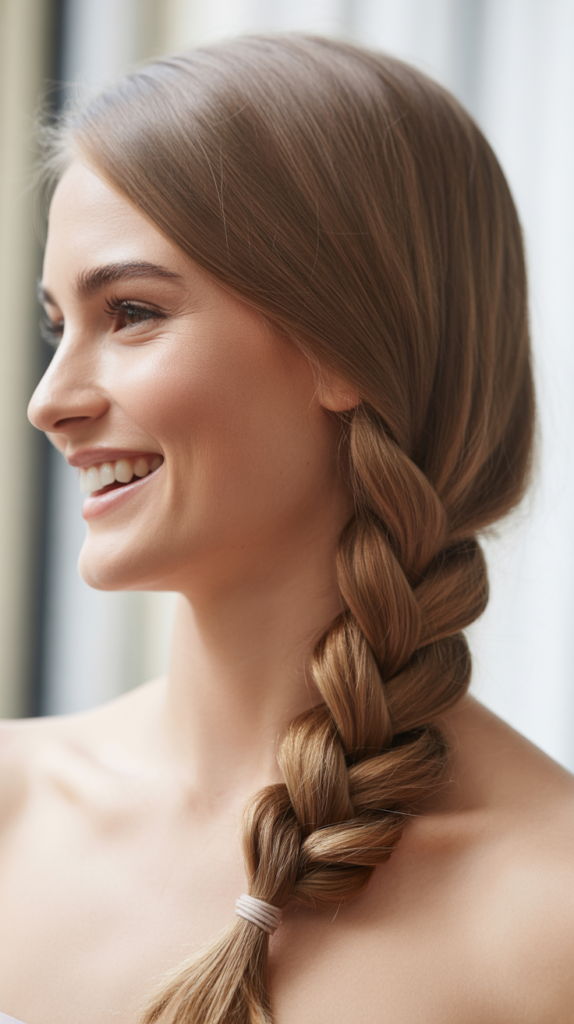
The low side braid is a romantic and versatile hairstyle that works beautifully for straight hair, offering a relaxed elegance that’s appropriate for various occasions.
This style keeps hair controlled while maintaining a soft, feminine appearance that’s perfect for dates, casual gatherings, or everyday wear.
- Brush your straight hair to one side of your head.
- Apply a light texturizing spray if your hair is very slippery to help the braid hold better.
- Gather all hair over one shoulder and divide it into three equal sections.
- Create a loose three-strand braid, keeping the tension relaxed for a softer look.
- Secure the end with a hair elastic, leaving a few inches of straight ends showing.
- Gently pull on the braid sections to create width and a more voluminous appearance.
- Pull out a few face-framing pieces around your hairline for a softer, more romantic effect.
- This style pairs beautifully with off-the-shoulder tops and casual dresses.
12. Straight Hair with Hair Clips
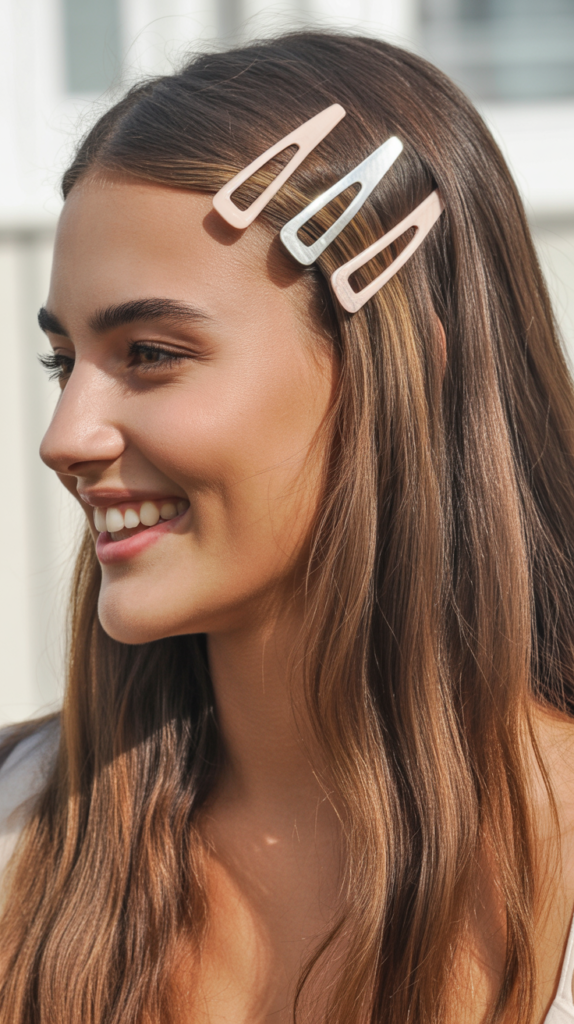
Decorative hair clips have made a major comeback in fashion, and styling straight hair with strategic clip placement creates an instantly trendy look.
This accessorized approach transforms simple straight hair into a fashion statement while serving the practical purpose of keeping hair off your face.
- Begin with beautifully straightened, glossy hair.
- Choose your hair clips – options include pearl clips, metallic barrettes, colorful plastic clips, or minimalist designs.
- Decide on your clip placement strategy – clustered on one side, symmetrically placed, or scattered throughout.
- Take small sections of hair and secure them with clips, positioning them where desired.
- Popular placements include just above the ear, along a side part, or at the crown area.
- Mix and match different clip styles for an eclectic, personalized look.
- Ensure clips are secured properly to avoid slipping throughout the day.
- This style works particularly well with the 90s fashion aesthetic and modern minimalist looks.
13. Bubble Ponytail Straight
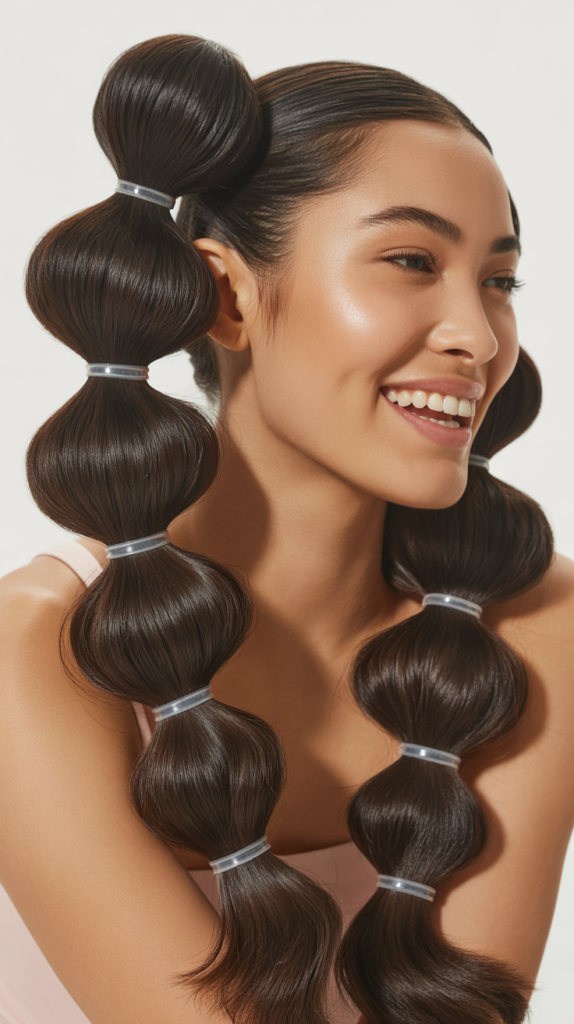
The bubble ponytail adds a playful, dimensional twist to traditional ponytails by creating segmented “bubbles” down the length of your hair.
This Instagram-worthy style works wonderfully with straight hair, as the smooth texture allows the bubble shapes to stand out clearly and create maximum visual impact.
- Start by creating a high or mid-height ponytail with your straightened hair.
- Secure the base ponytail with a strong elastic band.
- Measure down approximately three to four inches and add another elastic around the ponytail.
- Continue adding elastics at regular intervals down the length of your ponytail.
- Gently pull on each section between the elastics to create the “bubble” effect.
- For fuller bubbles, tease each section slightly before securing the next elastic.
- Finish with hairspray to maintain the bubble shapes throughout the day.
- This style is perfect for festivals, parties, or whenever you want a fun, youthful look.
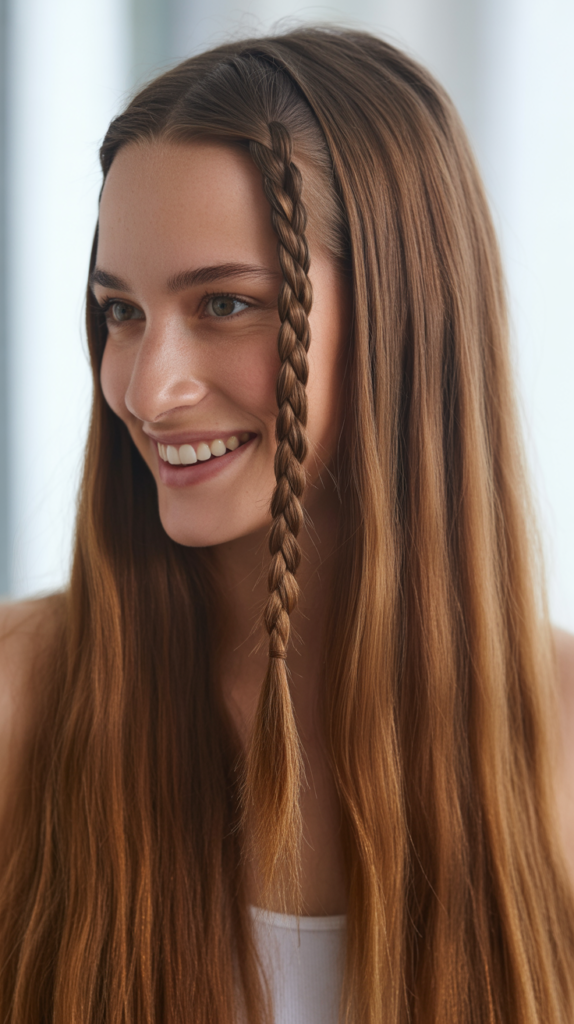
14. Straight Hair with Side Braid Detail
Adding a side braid detail to otherwise loose straight hair creates a subtle yet effective styling element that adds interest without overwhelming the natural beauty of your hair.
This delicate touch is perfect for those who want something more than just straight hair down but don’t want a fully styled look.
- Straighten your hair thoroughly for a sleek base.
- Take a small section of hair from one side of your head, near the temple area.
- Create a thin, tight braid with this section, keeping it close to the hairline.
- Continue the braid down past your ear and secure it with a small clear elastic.
- Let the rest of your straight hair flow naturally.
- The thin braid can be incorporated into the rest of your hair or kept visible as an accent.
- This style adds a bohemian touch without requiring extensive styling time.
- Consider creating matching braids on both sides for a symmetrical look.
15. Slicked-Back Straight Ponytail
The slicked-back straight ponytail is a bold, confident hairstyle that exudes sophistication and power.
This ultra-sleek look is favored by models, executives, and fashion-forward individuals who appreciate a minimalist aesthetic that emphasizes facial features and creates a strong, polished impression.
- Apply a generous amount of strong-hold gel to damp or dry hair.
- Use a fine-tooth comb to slick all hair straight back from the hairline.
- Ensure there are no bumps or texture – the goal is complete smoothness.
- Gather all hair at your desired ponytail height – high, mid, or low positioning all work.
- Secure tightly with a strong elastic band.
- Use additional gel on a toothbrush to smooth any flyaways or baby hairs.
- Wrap a section of hair around the elastic for a polished finish.
- Apply a strong-hold hairspray to maintain the sleek appearance all day.
- This style pairs excellently with bold makeup looks and statement jewelry.
16. Straight Hair with Center Clip
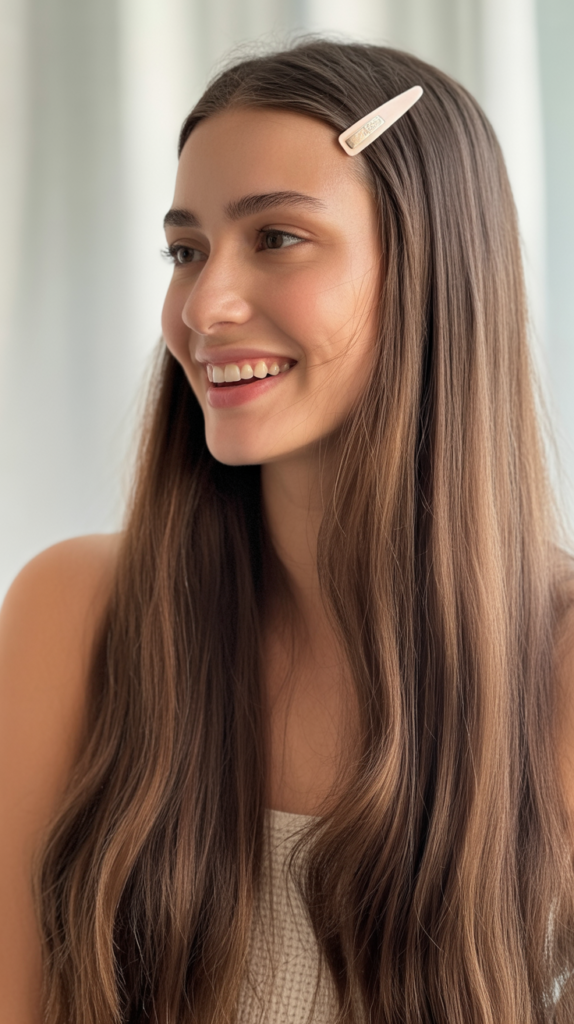
A single statement clip positioned at the center back of straight hair creates a simple yet effective styling solution that’s both practical and decorative.
This minimalist approach works beautifully for various occasions and allows you to showcase a beautiful hair accessory while keeping hair controlled.
- Straighten your hair completely for a polished foundation.
- Create a middle part for symmetry or your preferred part style.
- Take a section of hair from the crown area, approximately three to four inches wide.
- Pull this section back to the center of your head, just above where the crown meets the back.
- Secure with a decorative hair clip – options include barrettes, jeweled clips, or vintage-style accessories.
- Allow the rest of your hair to flow naturally down your back.
- Adjust the clip to ensure it’s secure and positioned at the desired angle.
- This style creates a half-up effect while highlighting your chosen accessory.
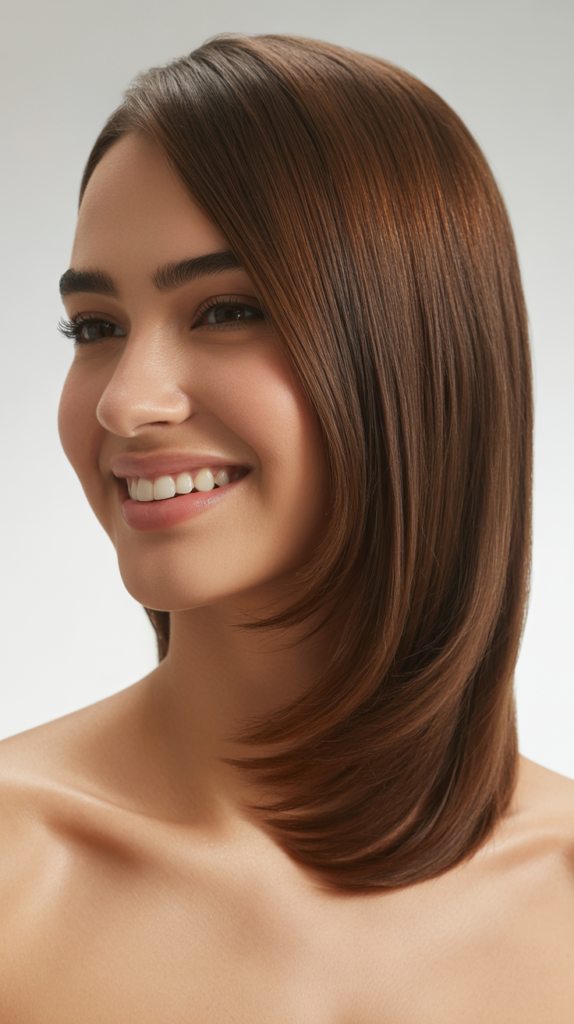
17. Straight Layered Look
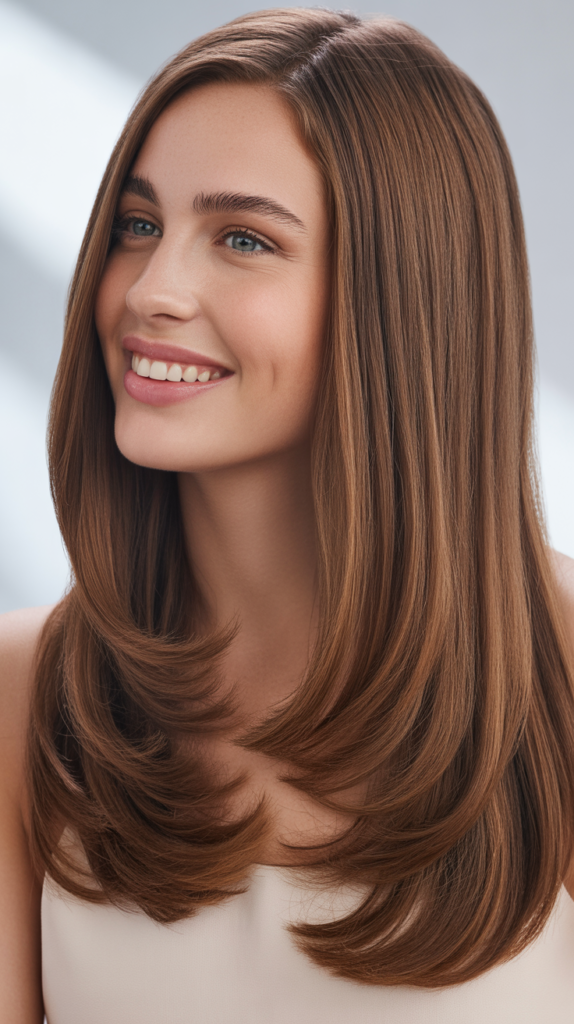
Emphasizing the layers in straight long hair creates movement and dimension that prevents the style from appearing flat or one-dimensional.
This styling approach celebrates the architecture of a good haircut while maintaining the sleek, straight texture that showcases each distinct layer.
- Begin with freshly washed and dried straight hair.
- Apply a volumizing spray at the roots of each layer to create lift.
- Use a flat iron on each layer individually, ensuring the ends are perfectly straight and defined.
- Apply a light texturizing spray to enhance the separation between layers.
- Use your fingers to gently separate and position each layer for maximum visual effect.
- The goal is to create visible distinction between layers rather than blending them together.
- Apply shine serum specifically to the ends of each layer for a polished finish.
- This style works particularly well for showing off a fresh haircut or highlighting hair color.
18. Straight Half-Up Bun
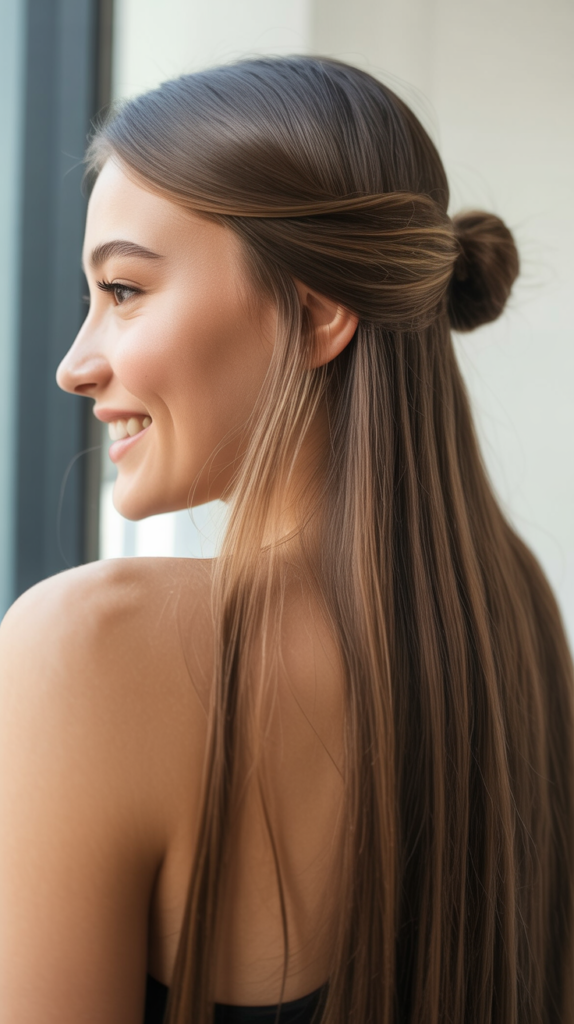
The half-up bun combines the convenience of keeping hair off your face with the beauty of showing off your hair length.
This balanced style works wonderfully for straight hair, creating a modern, youthful look that’s appropriate for various settings from casual to semi-formal.
- Straighten all of your hair thoroughly before beginning.
- Section off the top half of your hair, from ear to ear across the crown.
- Gather this top section into a ponytail at the desired height.
- Twist the ponytail and wrap it around the base to create a bun.
- Secure with bobby pins, ensuring the bun is tight and won’t unravel.
- Leave the bottom half of your hair hanging straight and loose.
- Pull out a few face-framing pieces if desired for a softer look.
- This style can be made messy for a casual vibe or kept sleek for more formal occasions.
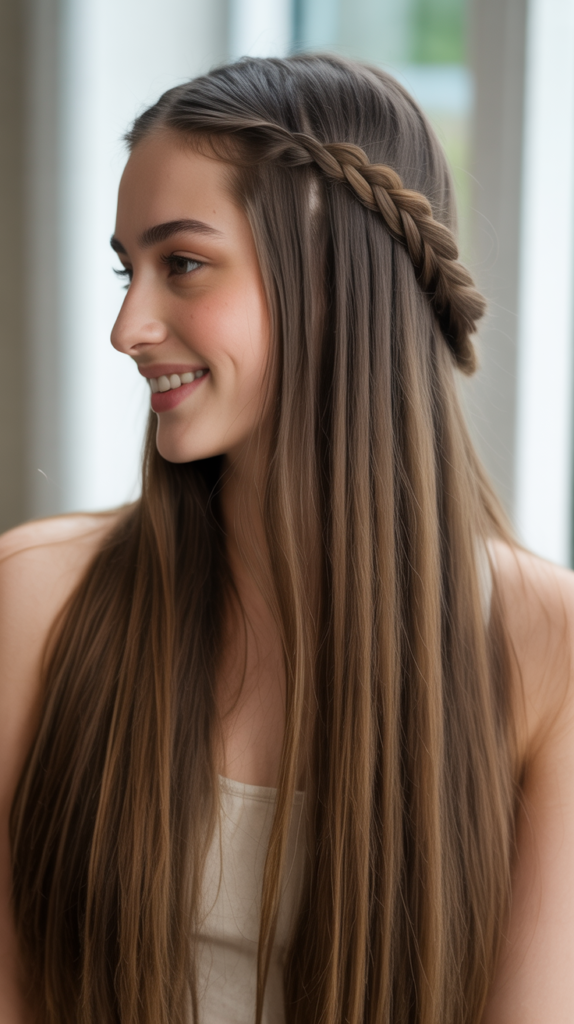
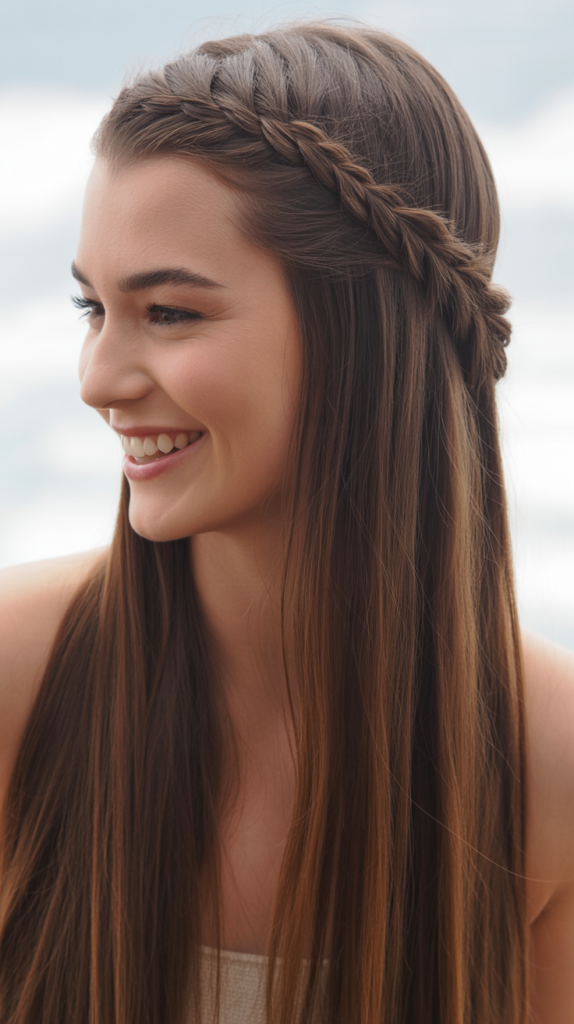
19. Straight Hair with Crown Braid
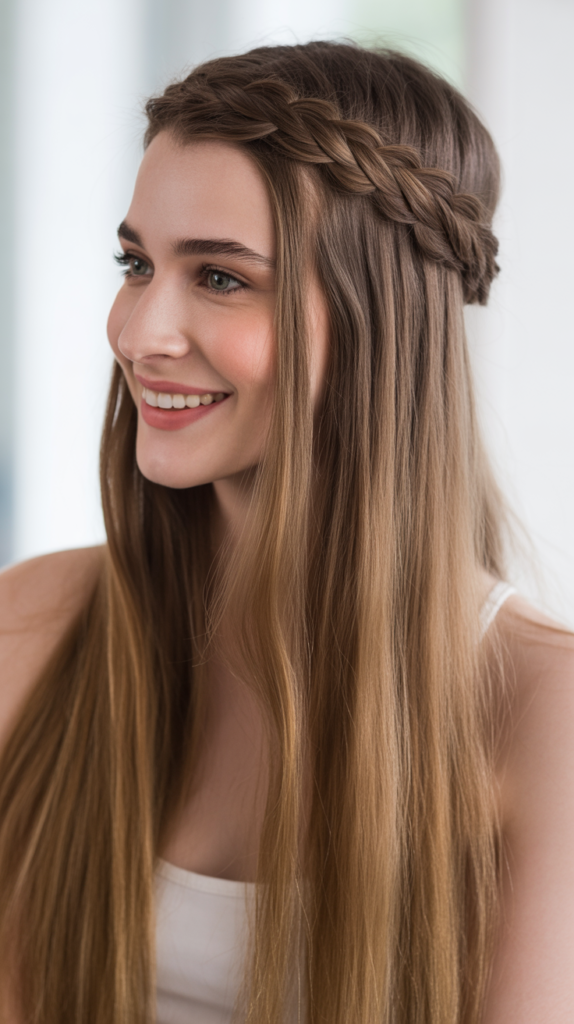
A crown braid incorporated into straight hair creates a romantic, ethereal look that’s perfect for special occasions, weddings, or when you want to feel particularly feminine.
This style frames the face beautifully while allowing the length and beauty of straight hair to shine.
- Start with straightened hair as your base.
- Part your hair deeply on one side.
- Take a section from the heavier side near the hairline and divide into three strands.
- Create a Dutch or French braid along the hairline, moving toward the opposite ear.
- Continue the braid across like a headband or crown.
- Secure the end of the braid behind the opposite ear with bobby pins.
- Allow the rest of your straight hair to flow freely.
- Gently pull on the braid to create a softer, more romantic appearance.
- Finish with hairspray to keep the crown braid secure throughout the day.
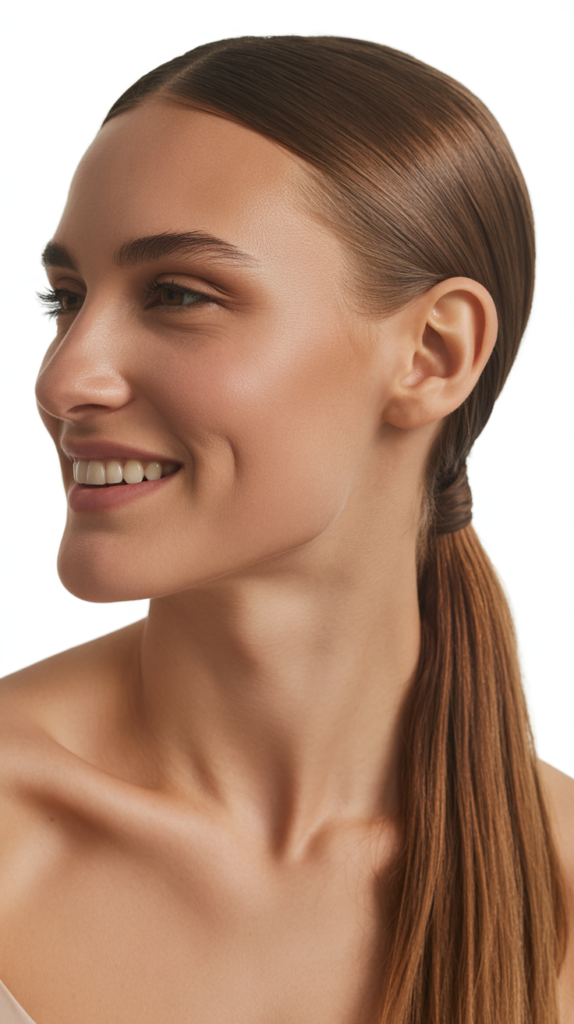
20. Sleek Middle Part Low Ponytail
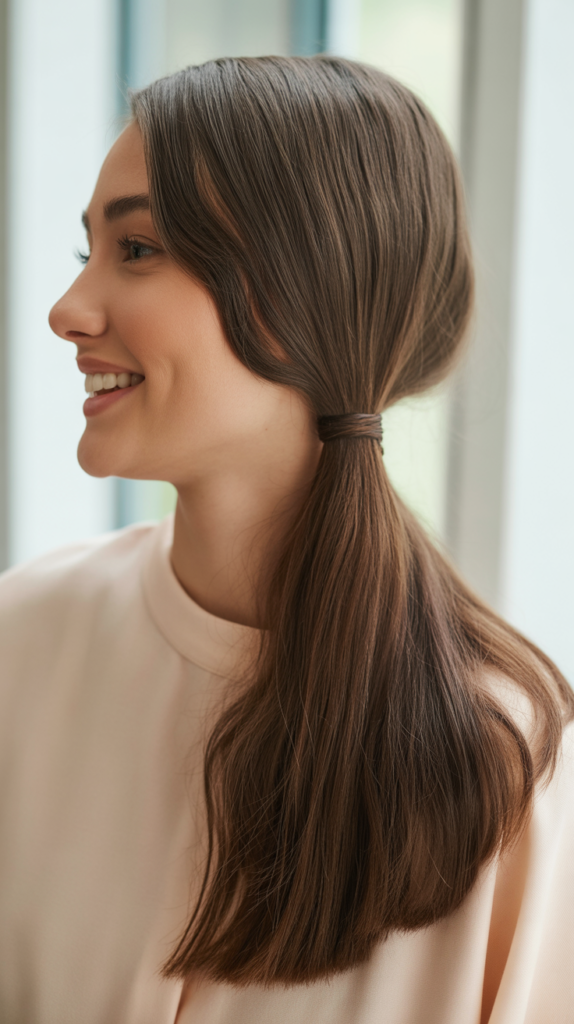
The combination of a precise middle part with a sleek low ponytail creates a sophisticated, symmetrical look that emphasizes facial features and projects confidence.
This polished style is perfect for professional environments, minimalist fashion aesthetics, or anyone who appreciates clean, intentional styling.
- Create a precise middle part using a rat-tail comb for accuracy.
- Apply smoothing serum throughout your hair for enhanced sleekness.
- Brush hair straight back on both sides, ensuring perfect symmetry.
- Gather all hair at the nape of your neck in a low ponytail.
- Secure with an elastic that matches your hair color.
- Use gel on a fine-tooth comb to smooth any imperfections along the part.
- Wrap a section of hair around the elastic to conceal it.
- Apply shine spray for a glossy, polished finish.
- This style pairs beautifully with structured clothing and minimalist jewelry.
21. Straight Hair with Twisted Side Sections
Creating twisted side sections that pull back portions of straight hair offers a romantic styling option that combines structure with flowing beauty.
This elegant look works wonderfully for dates, dinners, or any occasion where you want to appear polished yet approachable.
- Begin with completely straightened hair for a smooth foundation.
- Take a section of hair from one side, starting near the temple.
- Twist this section backwards toward the center back of your head.
- Repeat on the opposite side, creating a matching twist.
- Bring both twisted sections together at the center back.
- Secure where they meet with bobby pins or a small elastic.
- Allow the twists to overlap or cross for added visual interest.
- Leave the remaining hair flowing straight down.
- Pull gently on the twists to create a softer, more voluminous appearance.
22. Straight Hair in Low Twisted Bun
A low twisted bun offers a refined alternative to standard bun styles, incorporating twisting techniques that add texture and visual interest.
This sophisticated updo works beautifully for formal events, professional settings, or when you want an elevated everyday look that showcases your styling skills.
- Start with straightened hair brushed smooth.
- Gather all hair into a low ponytail at the nape of your neck.
- Divide the ponytail into two equal sections.
- Twist each section individually in the same direction.
- Then twist both sections around each other in the opposite direction, creating a rope effect.
- Wrap this twisted rope around the base of the ponytail to form a bun.
- Secure with bobby pins, ensuring the bun feels stable.
- Tuck any loose ends into the bun for a clean finish.
- Apply hairspray to control flyaways and maintain the polished appearance.
23. Straight Hair with Side-Swept Bangs
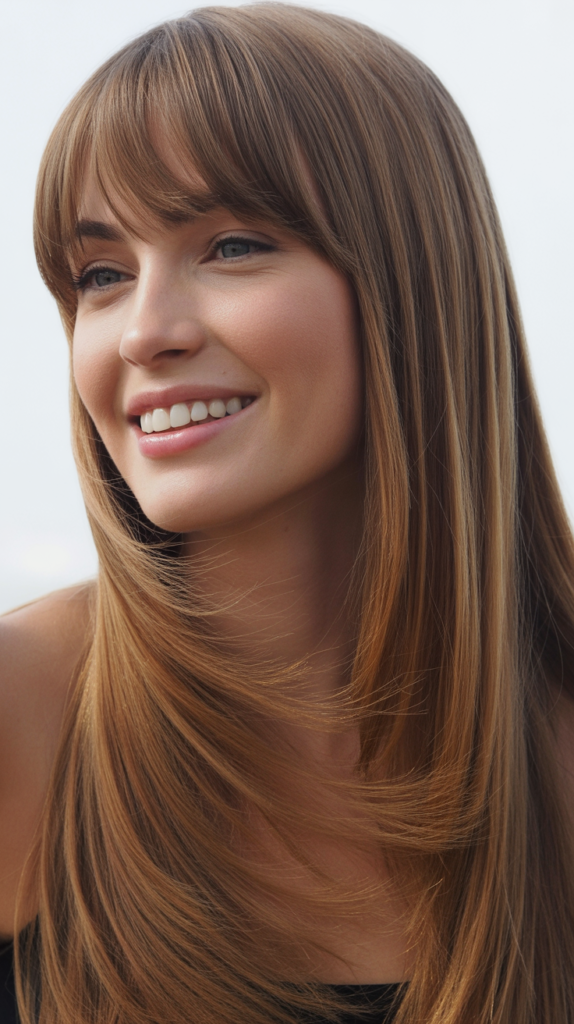
Side-swept bangs paired with long straight hair creates a face-framing effect that’s universally flattering and effortlessly chic.
This styling approach works whether you have actual bangs or are simply styling your existing hair to create a bang-like effect across your forehead.
- Straighten all of your hair, paying special attention to the front sections.
- Create a deep side part, positioning it where you want your bangs to sweep from.
- Take the front section that will become your side-swept bangs.
- Apply a small amount of smoothing cream to this section.
- Use a round brush while blow-drying to create a gentle curve in the bangs.
- Sweep the bangs across your forehead toward the opposite side.
- Use a light-hold hairspray to keep the swept bangs in place without stiffness.
- Bobby pins can be used behind the ear on the swept side for extra security.
- This style beautifully frames the face and can minimize forehead width.
24. Straight Hair Double Ponytails
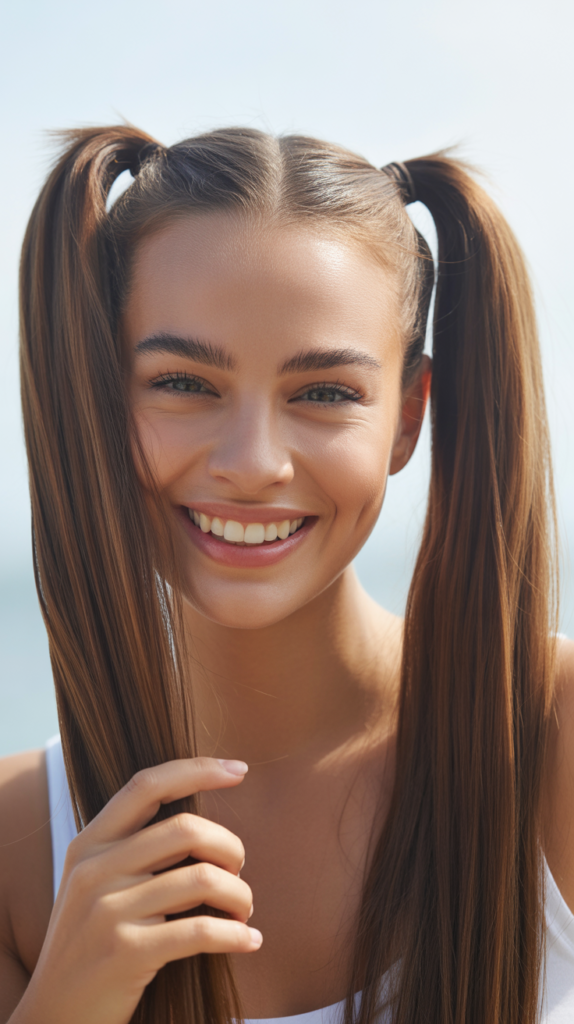
Double ponytails, also known as pigtails when positioned lower, offer a playful and youthful styling option that’s both cute and practical.
This fun style works wonderfully for casual days, exercise, or when you want to channel a more lighthearted, energetic aesthetic.
- Part your hair down the middle to create two equal sections.
- Brush each section smooth to eliminate any bumps or tangles.
- Gather one section and secure it with an elastic at your desired height.
- Repeat on the opposite side, ensuring both ponytails are at matching heights.
- Wrap a small section of hair from each ponytail around its elastic to conceal it.
- Apply shine serum to each ponytail for a polished, glossy finish.
- The ponytails can be positioned high for a more playful look or low for something more subtle.
- This style works particularly well for active pursuits as it keeps hair completely secured.
25. Straight Hair with Back Criss-Cross
Creating a criss-cross pattern at the back of your head with sections of straight hair offers an intricate-looking style that’s actually quite simple to achieve.
This detailed styling approach adds visual interest to the back view while maintaining the sleek appearance of straight hair.
- Begin with completely straightened hair.
- Take two sections from each side of your head, just above the ears.
- Cross the right section over to the left side and secure with a bobby pin.
- Cross the left section over to the right side, crossing over the first section.
- Secure with bobby pins where the sections cross.
- Continue this criss-cross pattern down as far as desired.
- The remaining hair can be left flowing loose or gathered into a ponytail.
- This technique creates a corset-lacing effect that’s particularly striking.
- Apply hairspray to keep the crossed sections in place throughout the day.
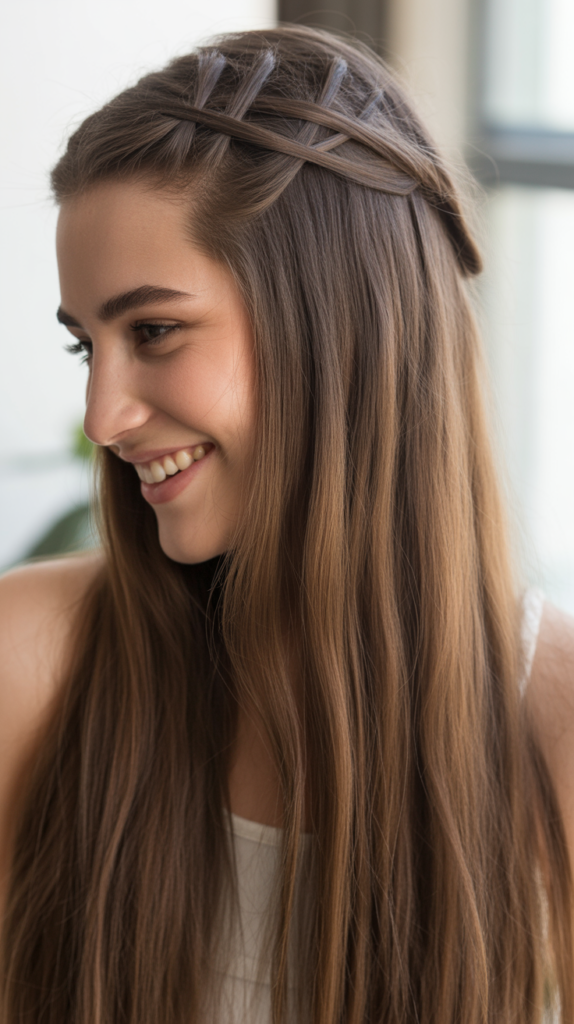
26. Straight Hair Waterfall Braid
The waterfall braid creates a cascading effect that beautifully complements straight hair, allowing sections to “fall” through the braid like a waterfall.
This romantic and intricate-looking style is perfect for special occasions, though it’s more achievable than it appears.
- Start with straightened hair as your canvas.
- Part your hair as desired and begin near the temple on one side.
- Take a small section and divide it into three strands.
- Begin a French braid, but instead of continuing with all three strands, drop the bottom strand and pick up a new section from above.
- Continue this pattern, allowing sections to fall through while the braid moves horizontally across your head.
- The “waterfall” sections should hang straight down, showcasing your hair’s smooth texture.
- Secure the braid behind the opposite ear or continue it around the back of your head.
- Finish with hairspray to maintain the braid structure.
27. Straight Hair with Top Knot
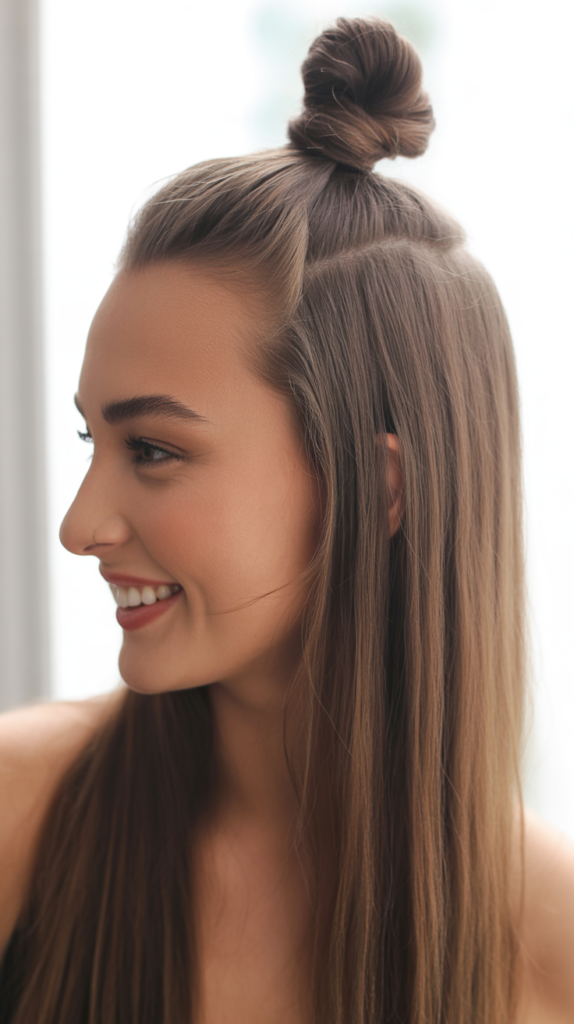
A top knot positioned at the crown of your head offers a casual yet stylish option that keeps all hair up and away while creating a trendy, fashion-forward silhouette.
This versatile updo works for everything from yoga class to brunch with friends, offering both comfort and style.
- Gather all of your straightened hair into a high ponytail at the crown of your head.
- Hold the ponytail upright and begin twisting it.
- Wrap the twisted ponytail around its base, creating a bun or knot shape.
- Secure with bobby pins, pushing them through the bun and into your hair at the base.
- Use additional pins as needed to ensure the knot feels secure and stable.
- Pull out a few face-framing pieces if you want a softer, more casual appearance.
- The knot can be tight and controlled or loose and messy depending on your preference.
- Finish with hairspray if you need extra hold throughout a long day.
28. Straight Hair Fishtail Braid
A fishtail braid offers a more intricate alternative to traditional three-strand braids, creating a detailed, woven appearance that looks stunning in straight hair.
This eye-catching style works beautifully for various occasions and showcases the sleek texture of straight hair within the braid pattern.
- Start with straightened hair gathered to one side or in a low ponytail.
- Divide the hair into two equal sections.
- Take a small piece from the outer edge of the left section and cross it over to join the right section.
- Repeat on the right side, taking a small outer piece and crossing it to the left section.
- Continue alternating sides, keeping the crossed pieces small for a more defined fishtail pattern.
- Secure the end with a clear elastic when you reach the desired length.
- Gently pull on the braid sections to create width and a fuller appearance.
- This technique creates a herringbone pattern that’s particularly striking in straight, shiny hair.
29. Straight Hair with Ribbon
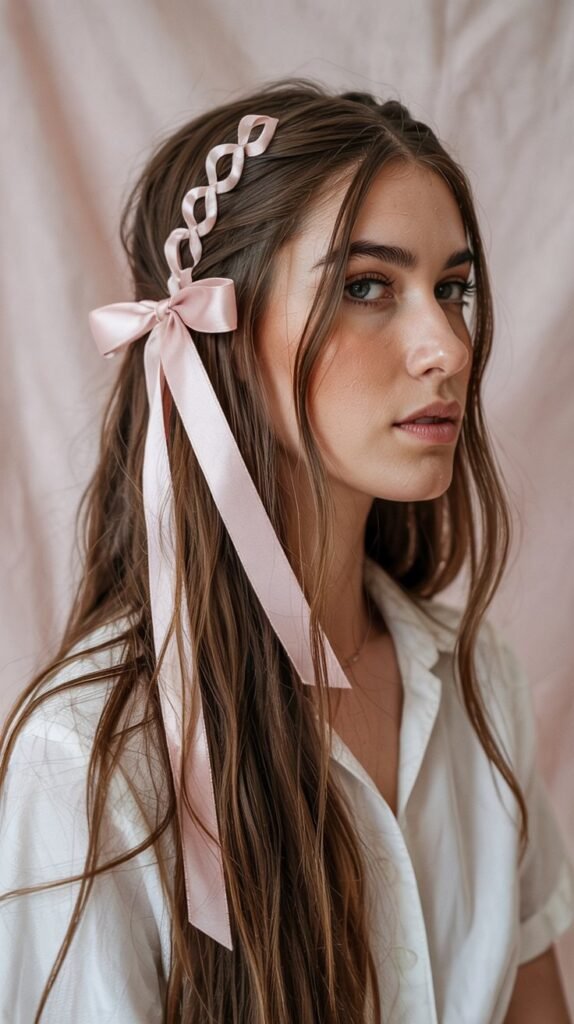
Incorporating a ribbon into straight hair styling adds a vintage-inspired, feminine touch that transforms a simple look into something special
This accessorized approach works for various occasions and allows you to coordinate your hairstyle with your outfit through ribbon color and material selection.
- Begin with beautifully straightened, glossy hair.
- Choose a ribbon that complements your outfit – satin, velvet, or grosgrain all work wonderfully.
- The ribbon can be incorporated several ways: woven through a braid, tied around a ponytail, or used as a headband.
- For a ponytail, wrap the ribbon around the elastic and tie it in a bow, allowing the ends to hang down with your hair.
- For a braid, weave the ribbon through the sections as you braid, incorporating it like an additional strand.
- As a headband, tie the ribbon under your hair at the nape of your neck for a classic look.
- Ensure the ribbon is secure and won’t slip throughout the day.
- This styling approach adds a romantic, feminine element perfect for special occasions or adding charm to everyday looks.
30. Straight Hair Asymmetrical Style
An asymmetrical styling approach creates deliberate imbalance that’s visually striking and fashion-forward.
This modern look plays with proportions and positioning, offering a creative alternative to symmetrical styles while showcasing the sleek nature of straight hair.
- Straighten your hair thoroughly for a polished foundation.
- Create an extreme side part, positioning it far to one side of your head.
- Allow the larger section to flow freely over one shoulder.
- The smaller section can be tucked behind the ear, pinned back, or styled differently from the larger section.
- Consider adding a small braid or twist to the smaller section for contrast.
- Use bobby pins to secure the smaller section if needed.
- This style creates an editorial, high-fashion aesthetic.
- Apply shine serum to emphasize the glossy, straight texture.
- The asymmetry draws attention and creates a dynamic, interesting silhouette.
31. Straight Hair with Face-Framing Layers Emphasized
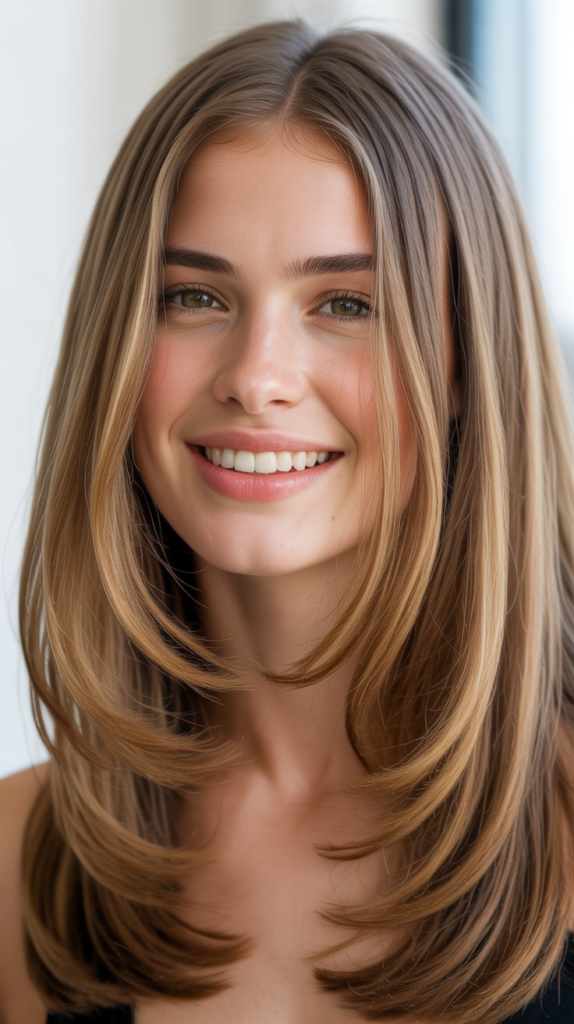
Emphasizing face-framing layers in straight hair creates a flattering, dimensional look that highlights your facial features while maintaining overall length.
This styling technique celebrates the structure of a well-cut layered haircut and creates movement around the face.
- Straighten your hair with particular attention to the front layers.
- Apply a volumizing spray specifically to the face-framing sections.
- Use a round brush to add slight bend or curve to these front pieces.
- Position the layers to frame your face, tucking them slightly behind your ears or letting them fall forward.
- The goal is to create separation and definition in these front sections.
- Apply a small amount of texturizing spray to the layers for added definition.
- The contrast between the defined front layers and the straighter back sections creates visual interest.
- This style beautifully showcases a fresh haircut and adds dimension to straight hair.
32. Straight Hair Low Twisted Side Ponytail
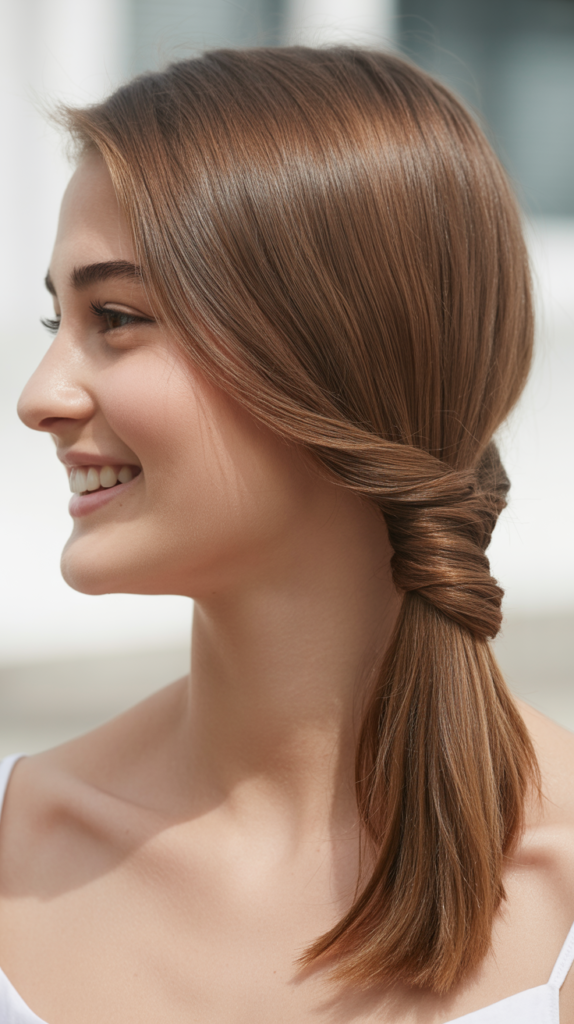
Combining a low side ponytail with twisting techniques creates an elegant, textured look that’s perfect for romantic occasions or elevated everyday styling.
This refined approach adds visual interest to a simple side ponytail while maintaining a polished appearance.
- Gather your straightened hair to one side at a low position near the nape of your neck.
- Before securing, divide the gathered hair into two sections.
- Twist each section individually in the same direction.
- Twist both sections around each other to create a rope effect.
- Secure at the desired length with a hair elastic.
- The twist creates texture and dimension in otherwise straight hair.
- Pull gently on the twisted sections to create fuller, softer appearance.
- Finish with shine spray for a glossy, polished result.
- This style pairs beautifully with elegant evening wear and special occasion outfits.
33. Straight Hair with Multiple Small Braids
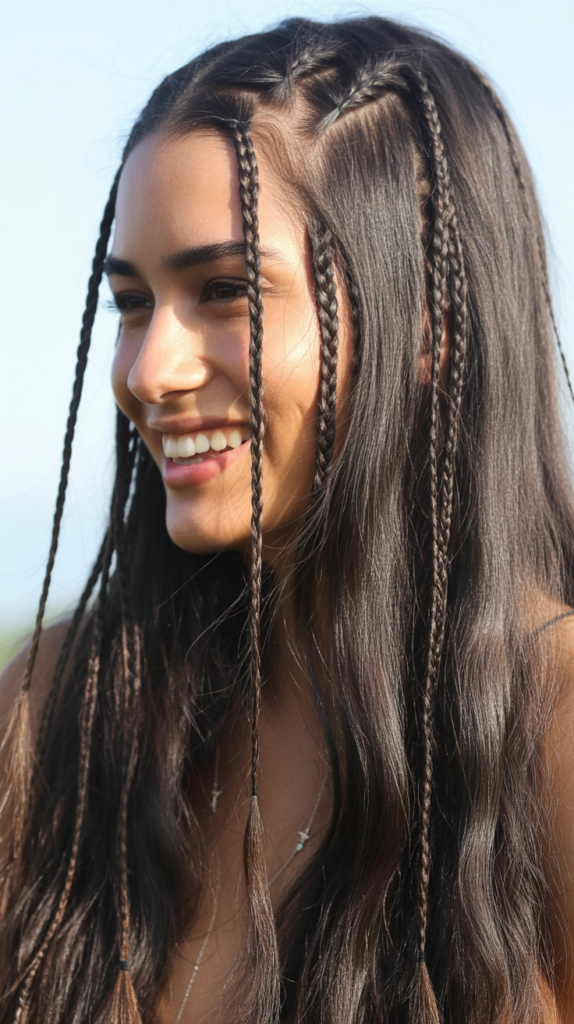
Incorporating multiple small, thin braids throughout otherwise straight, loose hair creates a bohemian-inspired look with interesting textural contrast.
This free-spirited style works wonderfully for festivals, beach days, or when you want to add subtle detail without committing to a fully styled look.
- Start with completely straightened hair as your base.
- Section off small, random pieces throughout your hair – aim for 4-8 thin sections.
- Create tight, small three-strand braids with each selected section.
- Secure each braid with a small, clear elastic at the end.
- Allow the braids to blend with your loose, straight hair flowing naturally.
- The braids should be thin enough that they appear as delicate accents rather than dominant features.
- Position braids randomly throughout for an organic, unplanned appearance.
- This style can be worn for multiple days, making it perfect for travel or low-maintenance periods.
- Add small beads or thread to the braids for additional bohemian flair if desired.
Essential Products for Straight Hairstyles
To achieve and maintain these beautiful straight hairstyles, certain products are essential for optimal results:
- Heat Protectant Spray: Shields hair from damage when using flat irons and blow dryers, maintaining hair health while styling.
- Smoothing Serum: Eliminates frizz and adds glossy shine to straight hair, creating that coveted sleek appearance.
- Flexible Hold Hairspray: Keeps styles in place without stiffness or crunchiness, allowing natural movement.
- Texturizing Spray: Adds grip and dimension to very straight, slippery hair, making braids and twists easier to achieve.
- Shine Spray: Enhances the natural luster of straight hair, creating a healthy, glossy finish for any style.
- Strong Hold Gel: Essential for slicked-back styles and controlling flyaways along the hairline.
- Quality Flat Iron: Invest in a ceramic or titanium flat iron with adjustable temperature settings for safe, effective straightening.
Tips for Maintaining Healthy Straight Hair
Maintaining the health of your straight hair ensures that all these beautiful hairstyles look their best:
- Minimize Heat Damage: Always use heat protectant products before styling with hot tools, and use the lowest effective temperature setting.
- Regular Trims: Schedule haircuts every 8-12 weeks to remove split ends and maintain healthy-looking hair.
- Deep Conditioning: Use intensive conditioning treatments weekly to maintain moisture and prevent dryness.
- Gentle Brushing: Use a wide-tooth comb on wet hair and a boar bristle brush on dry hair to minimize breakage.
- Silk Pillowcases: Sleeping on silk reduces friction that can cause breakage and helps maintain straightened styles longer.
- Proper Washing: Avoid over-washing straight hair, as this can strip natural oils; 2-3 times per week is typically sufficient.
- Quality Products: Invest in sulfate-free shampoos and nourishing conditioners specifically formulated for straight hair types.
For more information on maintaining healthy hair, visit the American Academy of Dermatology for expert guidance on hair care practices.
Conclusion
Mastering the art of styling straight long hair opens up a world of possibilities for expressing your personal style and adapting to different occasions throughout your day.
The 33 Easy Straight Hairstyles for Long Hair Daily presented in this guide offer versatile solutions ranging from quick five-minute styles to more elaborate looks that make a statement.
Whether you prefer the polished professionalism of a sleek low ponytail, the romantic charm of a crown braid, or the playful energy of bubble ponytails, there’s a perfect style waiting for you in this collection.
The beauty of straight hair lies in its versatility—it serves as an ideal canvas for both minimalist aesthetics and more detailed, intricate designs.
By incorporating these hairstyles into your routine, you’ll never struggle with hair styling monotony again. Remember that practice makes perfect, and what might seem challenging at first will become second nature with repetition.
Keep your hair healthy through proper care and maintenance, experiment with different accessories to personalize each look, and don’t be afraid to adapt these styles to suit your unique preferences and face shape.
With these 33 options at your fingertips, you’re equipped to face any day with confidence, knowing your hair looks absolutely beautiful. Embrace the natural elegance of your straight long hair and enjoy the endless styling possibilities it offers for every occasion in your daily life.