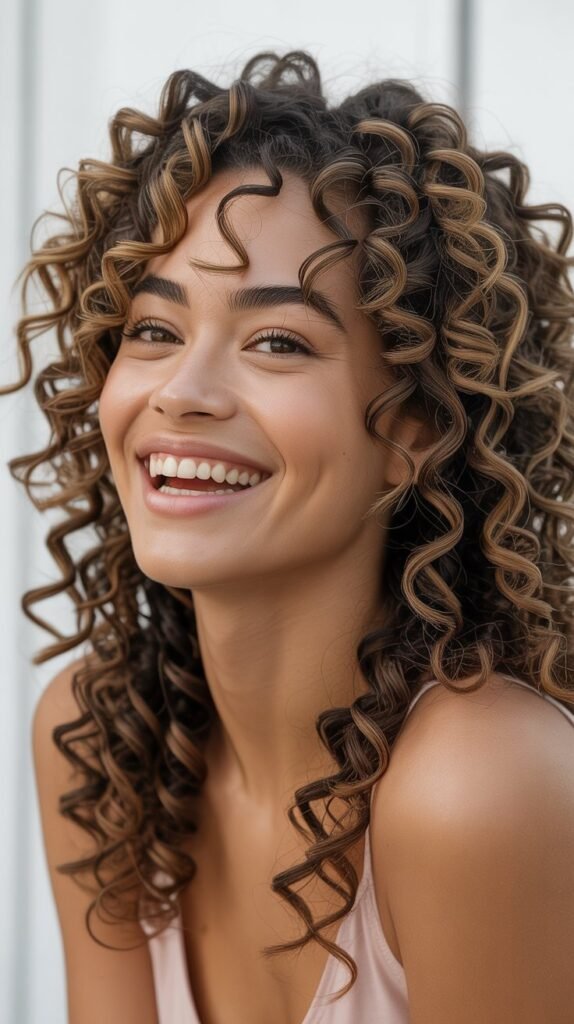
We’ve all been there—waking up to curly hair that’s greasier than we’d like, with no time or energy for a full wash day.
But here’s a secret that experienced stylists know: greasy curly hair isn’t a disaster waiting to happen; it’s actually an opportunity to create stunning hairstyles that work with your hair’s natural texture and oils.
This comprehensive guide to 33 Gorgeous Greasy Hair Hairstyles for Curly Hair will transform the way you view second, third, or even fourth-day curls.
Whether you’re dealing with slightly oily roots or full-on greasy locks, you’ll discover elegant updos, casual half-up styles, protective braids, textured ponytails, and creative twisted looks that actually look better with a little extra oil.
From professional office-ready styles to relaxed weekend vibes, these hairstyles will help you embrace your natural oils while looking absolutely fabulous.
Get ready to say goodbye to emergency wash days and hello to effortlessly chic curly hairstyles that celebrate your hair exactly as it is.
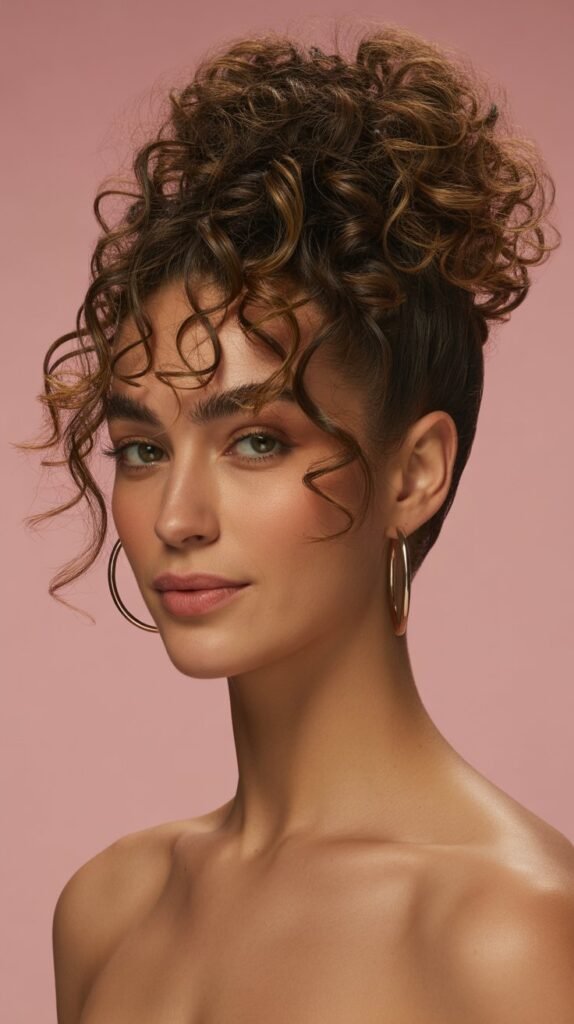
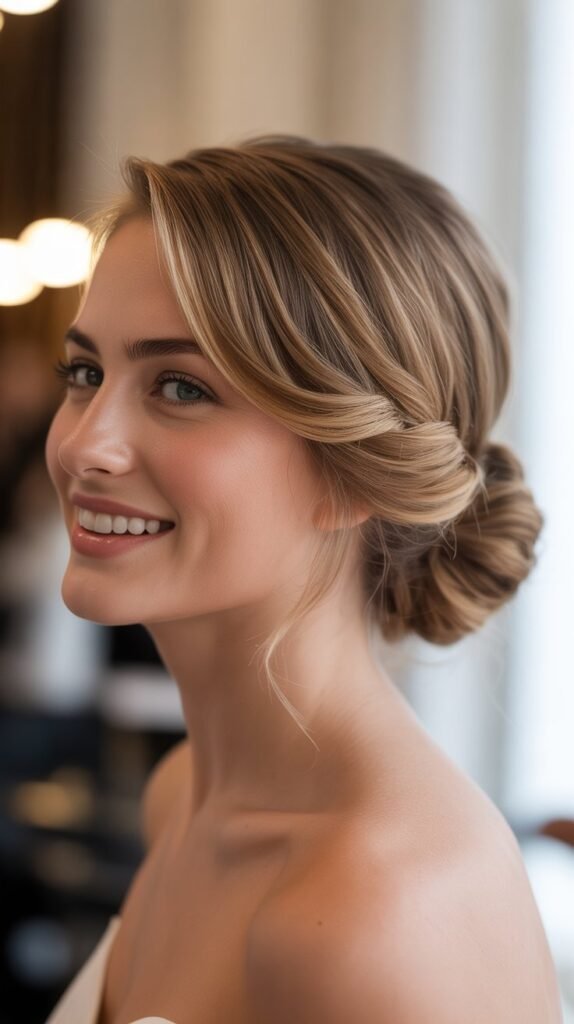
1. The Classic Slicked-Back Curly Bun
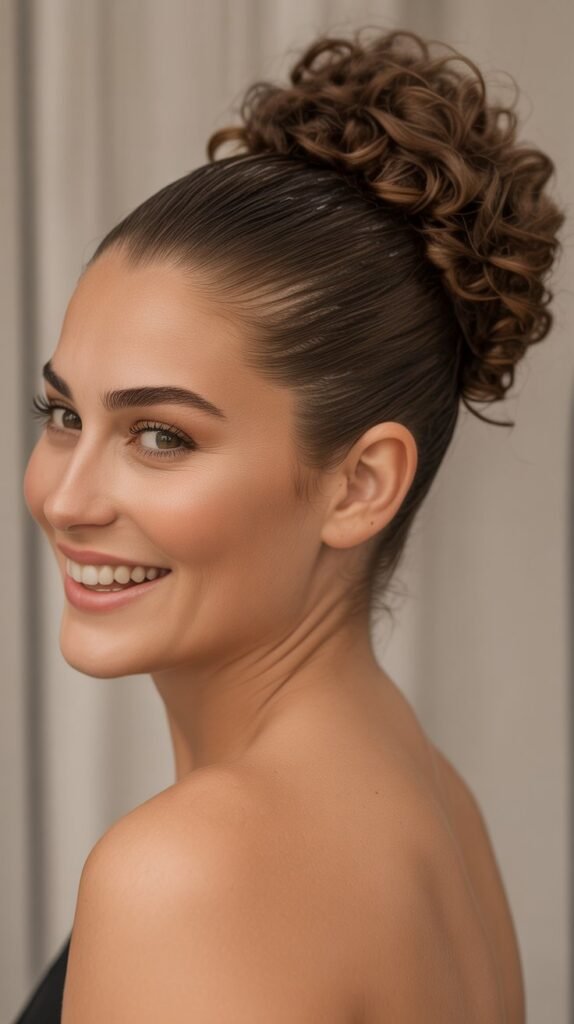
Greasy hair provides the perfect foundation for achieving that coveted sleek, polished look that’s been dominating runways and red carpets.
The natural oils in your hair act as a built-in styling product, helping you create a sophisticated slicked-back bun that stays in place all day without the need for heavy gels or pomades.
How to Create This Style:
- Start by applying a small amount of water to your hairline and roots to reactivate the natural oils
- Use a boar bristle brush or fine-tooth comb to smooth your curls straight back from your forehead
- Gather all your hair at the crown or nape of your neck, depending on your preferred bun placement
- Twist the length of your hair into a rope-like coil to maintain some curl definition
- Wrap the twisted hair around itself to form a bun shape
- Secure with bobby pins, inserting them in a criss-cross pattern for maximum hold
- Use your fingers to gently pull and arrange any loose curls around the bun for a softer, more romantic finish
- Finish with a light mist of hairspray to tame any flyaways
Why It Works for Greasy Curly Hair:
- The natural oils eliminate frizz and create a glossy, intentional-looking finish
- Your hair is more pliable and easier to manipulate when it has some oil buildup
- The sleek style disguises oily roots while showcasing your curls in the bun itself
- This look transitions seamlessly from day to night, making it perfect for busy schedules
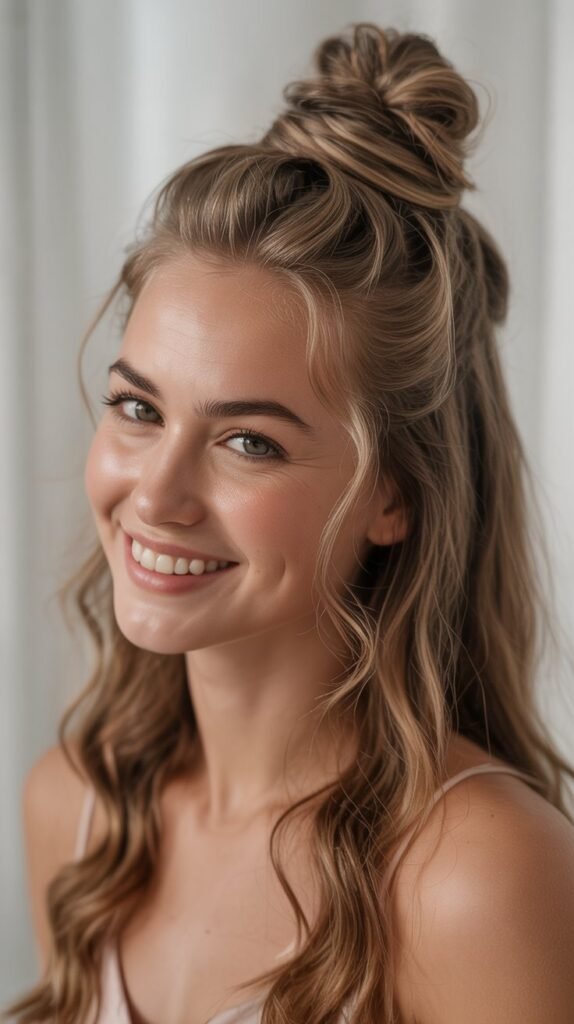
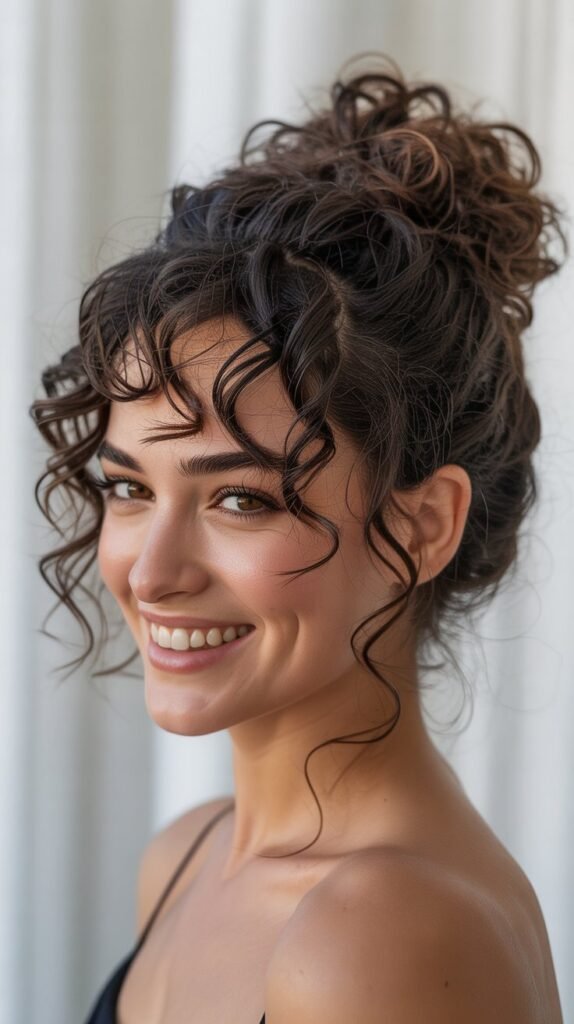
2. Messy Curly Top Knot
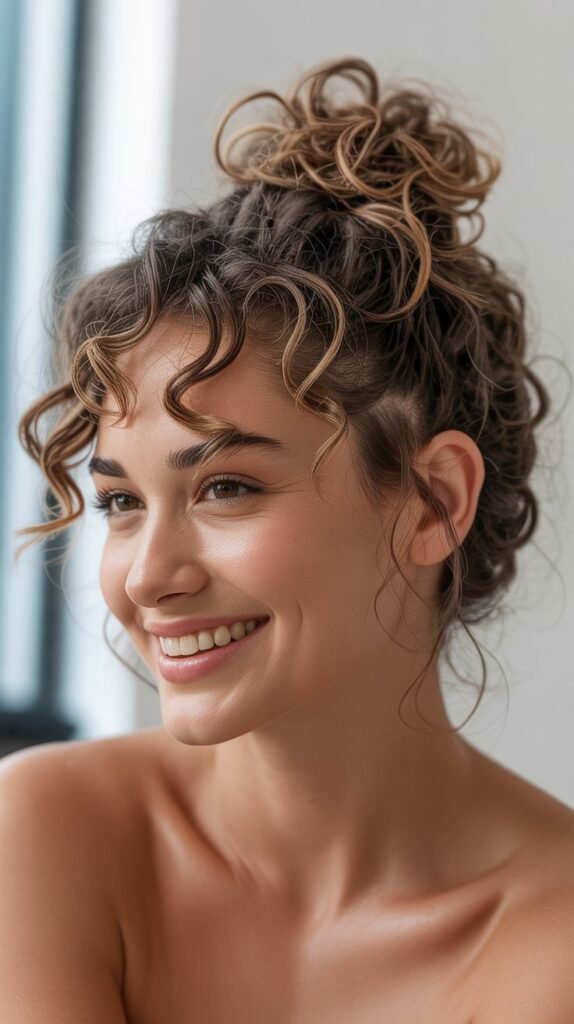
The messy top knot is your ultimate ally when dealing with greasy curls because it embraces the undone, effortless aesthetic that’s both trendy and practical.
This style works particularly well when your curls have lost some volume at the roots but still have beautiful texture through the lengths.
Step-by-Step Instructions:
- Flip your head upside down and gather all your hair at the very top of your head
- Don’t worry about smoothness—the messier, the better for this casual style
- Twist your hair loosely around itself, allowing curls to naturally fall and loop
- Secure with a hair elastic, pulling the hair only halfway through on the last loop to create a loop-like bun
- Let the ends of your curls fan out and cascade around the bun
- Pull out a few face-framing tendrils around your hairline for a softer look
- Gently tug on different sections of the bun to create more volume and texture
- For extra security, add a few bobby pins around the base of the knot
Styling Benefits:
- The height of the top knot draws attention away from oily roots at the scalp
- Natural oils add definition and piece-y texture to the messy aesthetic
- This style takes less than three minutes to complete
- Works beautifully for workouts, running errands, or casual social events
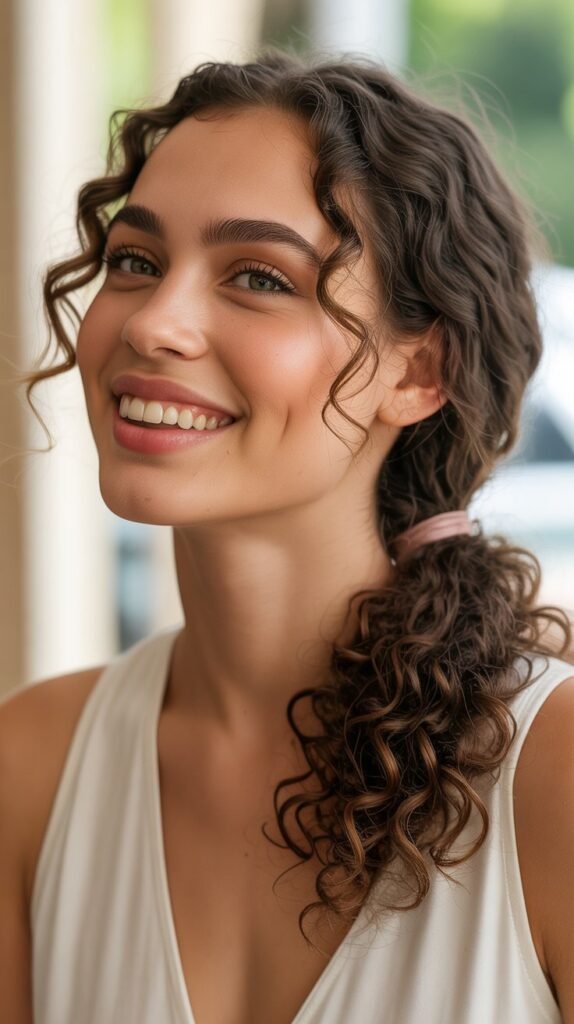
3. Side-Swept Curly Ponytail
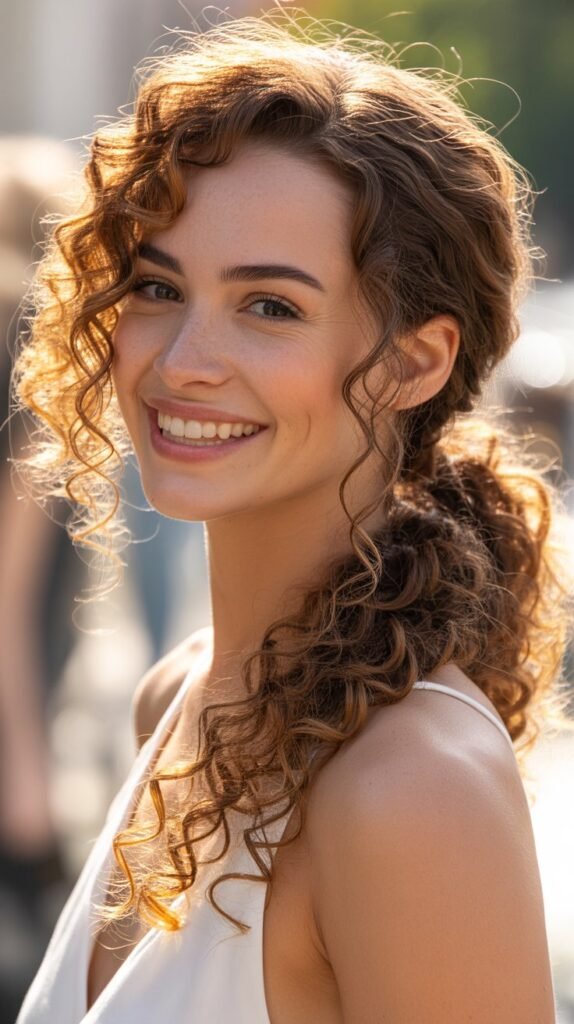
A side-swept ponytail offers an asymmetrical elegance that cleverly camouflages greasy roots while creating a dynamic, face-framing silhouette.
This style works exceptionally well for curly hair because the natural oils help your curls clump together beautifully, creating defined spirals that cascade over one shoulder.
Creating the Perfect Side-Swept Look:
- Part your hair deeply on one side, using the natural oils to help hold the part in place
- Smooth the hair on the heavier side back toward the opposite side of your head
- Gather all your hair at the nape of your neck, positioning the ponytail behind your ear on one side
- Secure with a hair elastic that matches your hair color for a seamless look
- Take a small section of curls from the ponytail and wrap it around the elastic to hide it
- Pin the wrapped section underneath the ponytail with a bobby pin
- Gently separate and fluff individual curls in the ponytail for more volume
- Allow your oily roots to create a smooth, polished appearance on top while your curls hang freely
When to Wear This Style:
- Date nights when you want to look put-together but effortless
- Formal events that call for sophistication without stiffness
- Days when you want your curls to be the focal point of your look
- Anytime you need to keep hair off your face while maintaining style
4. Pineapple Updo for Curly Hair
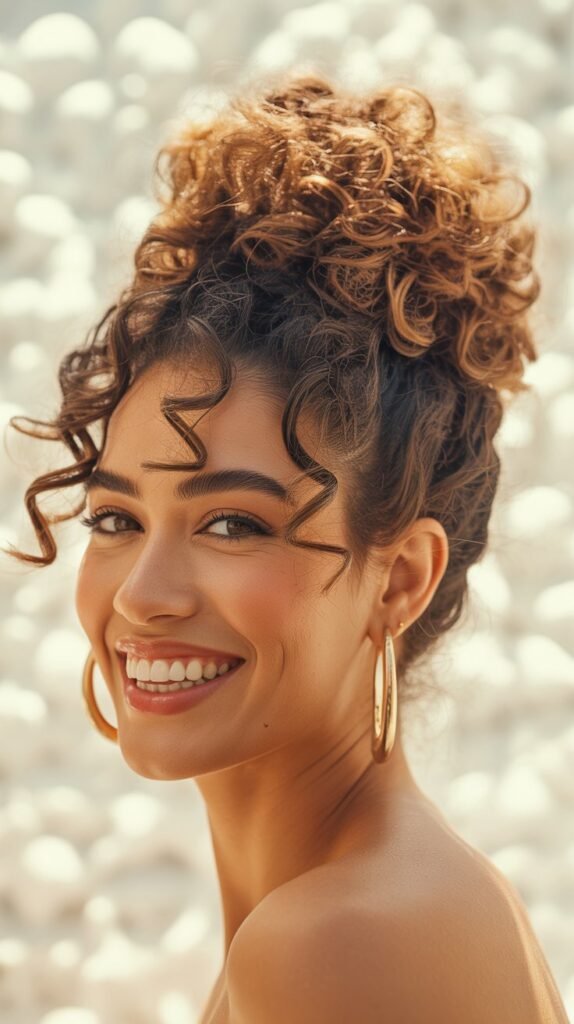
The pineapple updo is a protective styling technique that curly-haired individuals swear by, and it’s even more effective when your hair has natural oils working in your favor.
This high, loose ponytail maintains curl integrity while strategically hiding greasy roots.
Pineapple Perfection Steps:
- Gather all your curls at the very top center of your head as if creating a fountain
- Use a satin scrunchie or spiral hair tie to loosely secure the hair—never pull tight
- Allow your curls to cascade down in all directions from this high point
- Position the gathered hair so that it fans out evenly around your crown
- Leave some curls at the nape of your neck loose for a more relaxed appearance
- The natural oils will help your curls maintain their shape without becoming frizzy
- For extra volume, gently lift sections at the roots around your hairline
- This style also works perfectly as an overnight protective style to preserve your curls
Advantages for Greasy Curly Hair:
- Keeps oily roots concealed at the top of your head
- Natural sebum helps curls maintain definition throughout the day
- Reduces friction and prevents further oil transfer to pillows or clothing
- Takes only seconds to create but looks intentionally styled
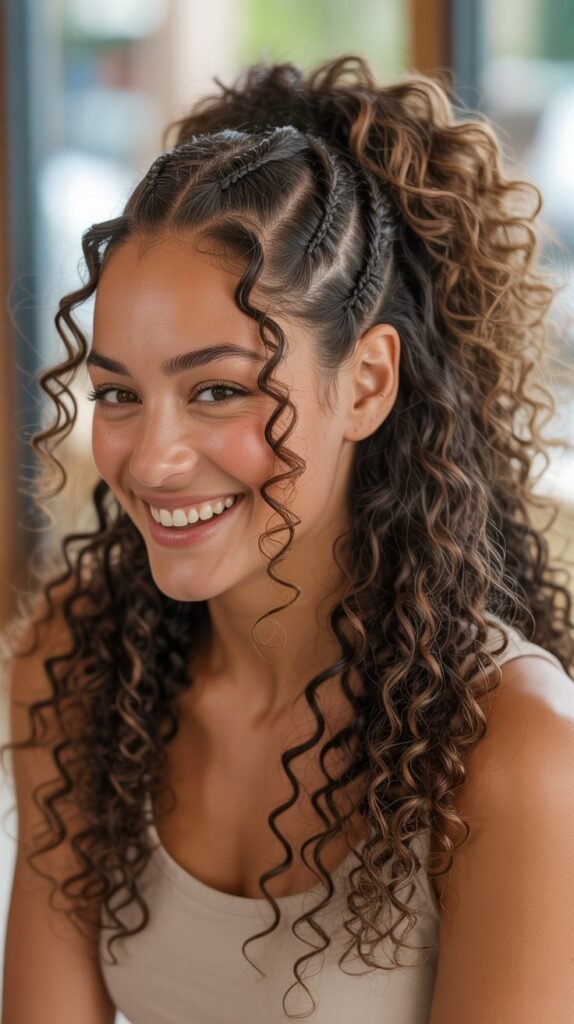
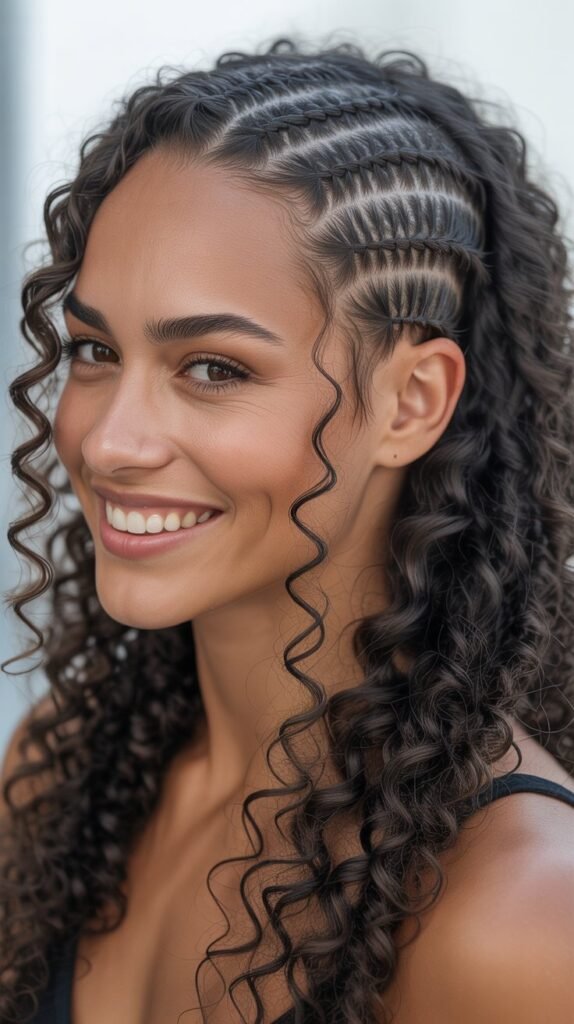
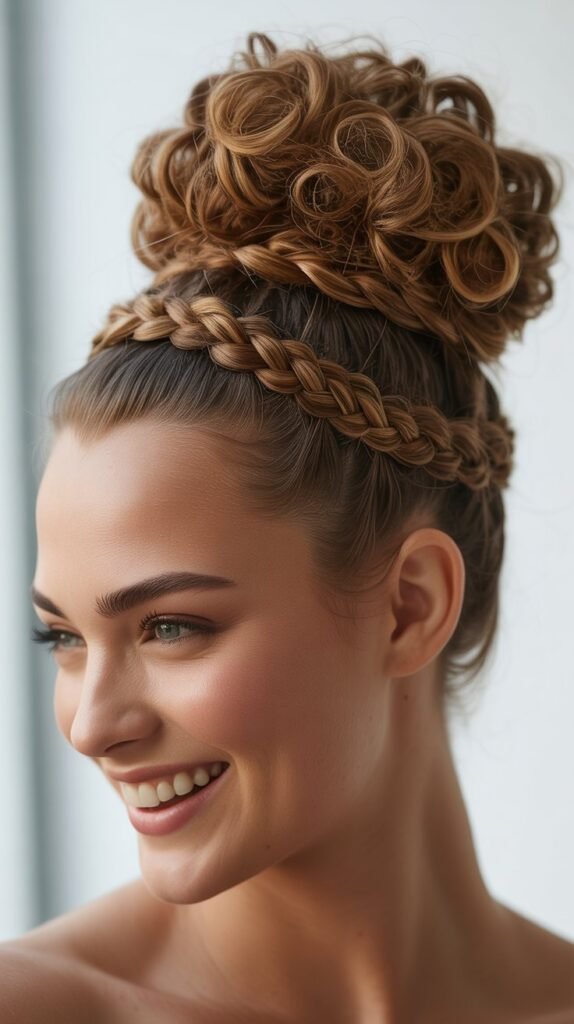
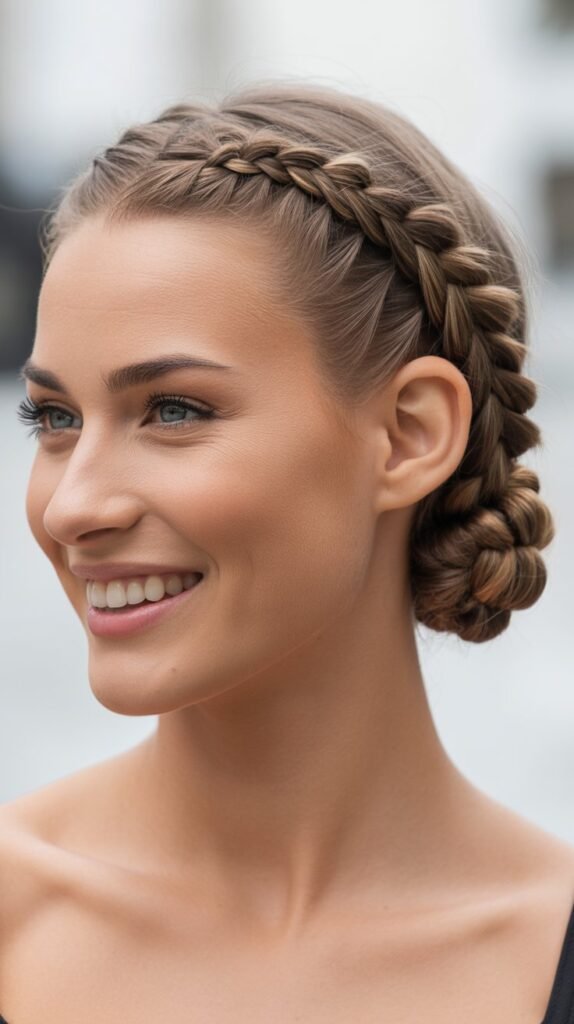
5. Dutch Braid Crown for Curls
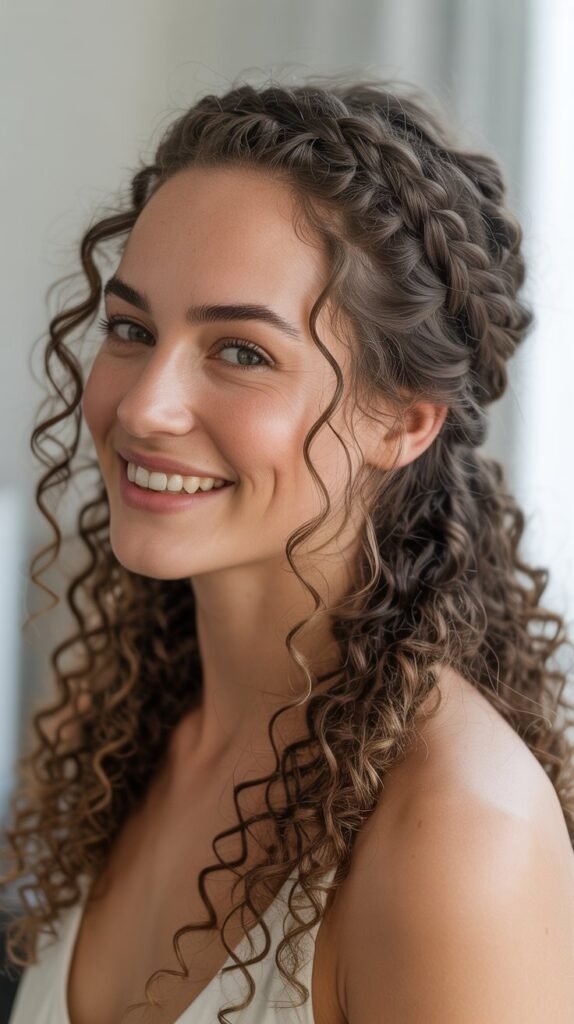
A Dutch braid crown transforms greasy curly hair into a regal, bohemian masterpiece that looks intricate but is surprisingly manageable.
The raised braid style works with your hair’s natural oils to create hold and definition while giving your scalp a break from the weight of loose curls.
Braiding Instructions:
- Part your hair down the center from forehead to nape
- Starting at the hairline on one side, begin a Dutch braid by crossing sections under rather than over
- As you braid, pick up new sections of curly hair and incorporate them into the braid
- The natural oils will help your curls cooperate and reduce frizz during braiding
- Continue the Dutch braid along your hairline, following the curve of your head like a crown
- When you reach the starting point on the opposite side, secure the end with a small elastic
- Tuck the tail of the braid underneath the crown and pin it in place
- Gently pull on the edges of the braid to create a fuller, more voluminous appearance
- Allow some curls at the nape of your neck to remain loose for textural contrast
Perfect Occasions:
- Music festivals and outdoor concerts where bohemian vibes reign
- Weddings and formal events requiring an elegant updo
- Hot summer days when you need hair completely off your face
- Professional settings where you want to showcase creativity within polish
6. Half-Up Curly Space Buns
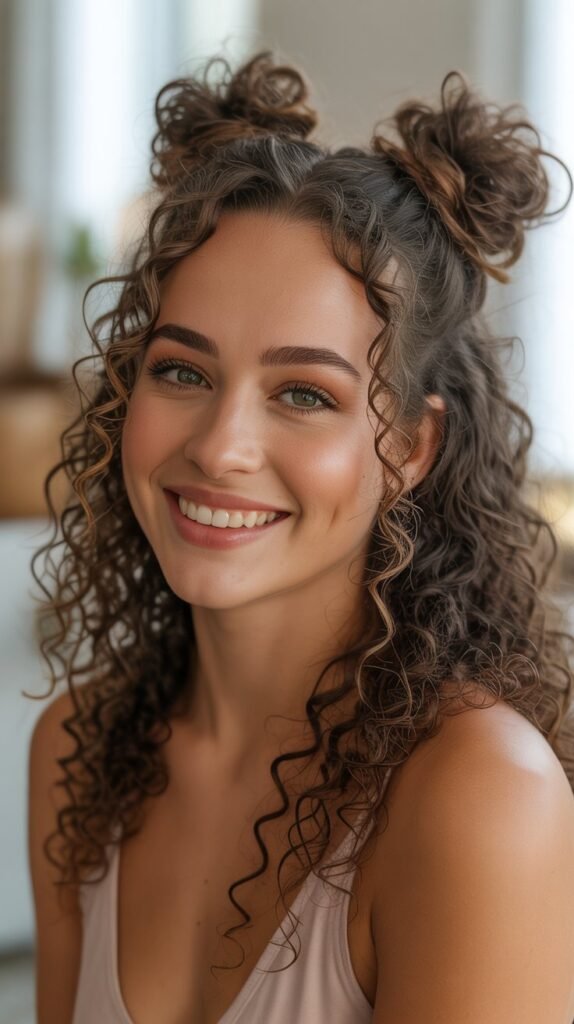
Space buns bring a playful, youthful energy to greasy curly hair while providing excellent coverage for oily roots.
This trendy style has remained popular because it perfectly balances fun and functionality, making it ideal for everything from casual outings to creative work environments.
Creating Adorable Space Buns:
- Section your hair horizontally from ear to ear across the top of your head
- Divide the top section into two equal parts down the middle
- Leave the bottom section of curls loose and flowing
- Twist each top section tightly, coiling it around itself to form a bun on each side
- Position the buns symmetrically on either side of your head, slightly back from your hairline
- Secure each bun with bobby pins inserted in multiple directions for stability
- The natural oils will help the twisted sections hold their shape without products
- Adjust the bottom curls so they cascade naturally over your shoulders
- For a more polished look, smooth the hair between the buns with your palms
Style Variations:
- Position buns higher for a more dramatic, editorial look
- Make larger buns for a bold, statement-making style
- Create smaller, tighter buns for a subtle, understated version
- Add colorful scrunchies or decorative pins for personalized flair
7. Low Twisted Curly Bun
The low twisted bun exudes sophistication and timeless elegance, making it the perfect choice when you need to look polished despite having greasy curls.
This style sits gracefully at the nape of the neck, creating a swan-like silhouette that works for both professional and social settings.
Twisting Technique:
- Gather all your hair at the nape of your neck, keeping it low and centered
- Divide the gathered hair into two equal sections
- Twist each section tightly in the same direction (clockwise or counterclockwise)
- Once both sections are twisted, wrap them around each other in the opposite direction
- The natural oils in your hair will make this twisting process smoother and more controlled
- Coil the twisted rope around itself at the base to form a low bun
- Tuck the ends under the bun and secure with multiple bobby pins
- For a softer romantic look, gently pull out a few curls around your face
- Spray with a light-hold hairspray if you need the style to last all day
Why This Style Stands Out:
- Creates an elongated neck appearance that’s universally flattering
- The low placement keeps attention on your facial features rather than oily roots
- Greasy hair actually makes the twisting easier and gives a lustrous finish
- Appropriate for weddings, job interviews, formal dinners, or any upscale event
8. Curly Faux Hawk with Slicked Sides
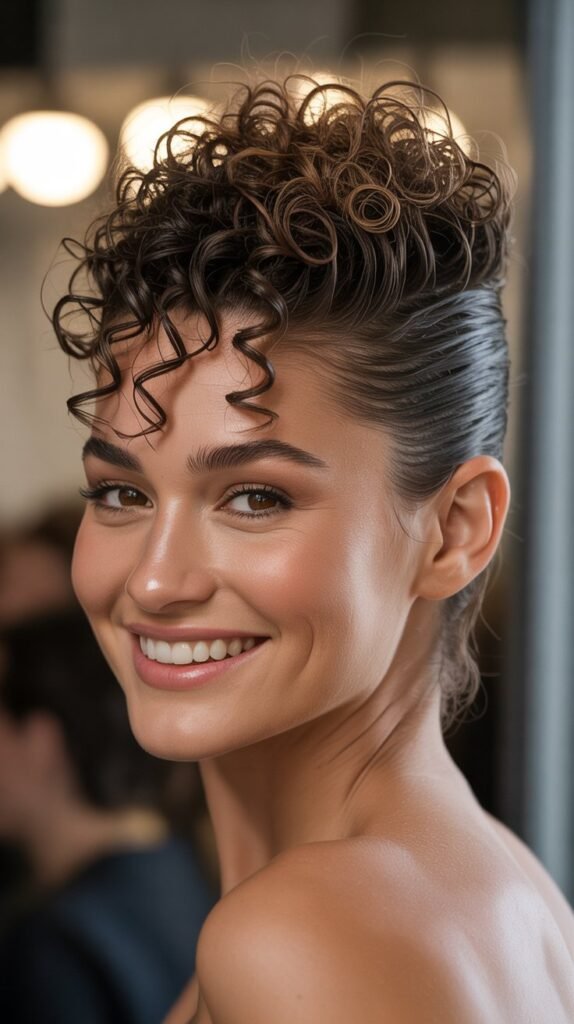
The curly faux hawk brings edgy drama to greasy hair by transforming what might feel like a hair emergency into a bold fashion statement.
This style cleverly uses natural oils to create the sleek sides essential to a faux hawk while celebrating your curls’ volume at the crown.
Achieving the Faux Hawk Look:
- Part your hair into three sections: a wide center strip from forehead to nape, and two side sections
- Apply water or a small amount of styling cream to the side sections
- Use a fine-tooth comb or brush to slick both side sections flat against your head
- Secure the slicked sides with bobby pins placed vertically along the hairline
- Gather the center section of curls and tease them gently at the roots for extra height
- Use your fingers to arrange the center curls upward and slightly back
- Pin the base of the center section to create lift and maintain the “hawk” shape
- Allow your natural oils to create shine on the slicked portions
- Spritz with strong-hold hairspray to maintain the dramatic height
Styling Considerations:
- This look works best on second or third-day curls with moderate oil buildup
- Perfect for concerts, parties, or any event where you want to stand out
- Can be made more subtle by creating less height in the center section
- Demonstrates that greasy hair can be fashionable and intentional
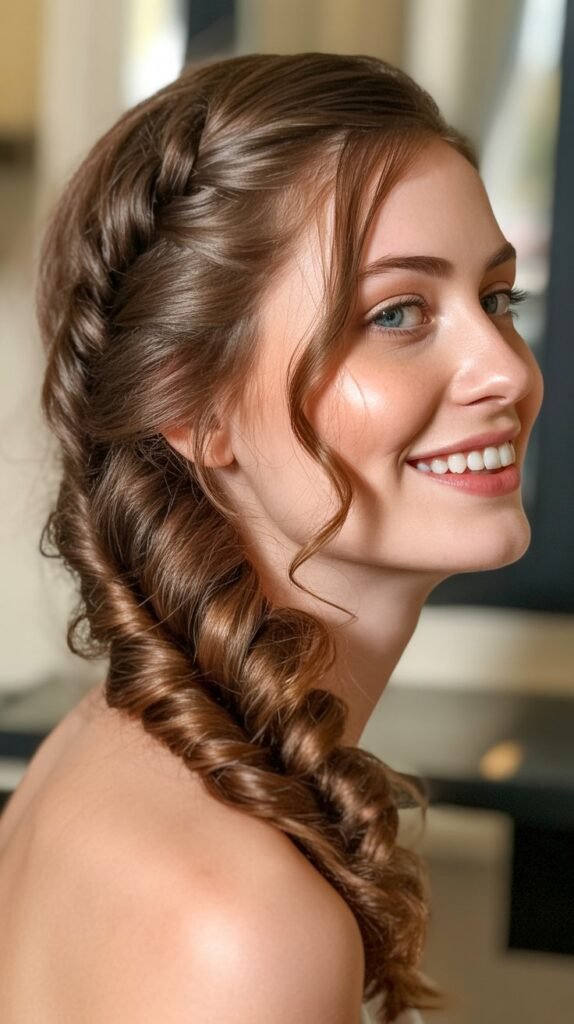
9. Braided Curly Ponytail
A braided curly ponytail adds textural interest and visual complexity to the classic ponytail style, while the braiding technique helps control and disguise greasy roots.
This versatile look transitions seamlessly from gym sessions to brunch dates.
Braiding Process:
- Begin by creating a standard ponytail at your desired height (high, mid, or low)
- Secure the ponytail with a hair elastic that won’t slip on oily hair
- Divide the ponytail into three equal sections
- Create a traditional three-strand braid down the length of the ponytail
- The natural oils will help the braid stay neat and defined without flyaways
- Secure the end of the braid with a small elastic
- Gently pull on the edges of the braid to make it wider and more voluminous
- This technique, called “pancaking,” creates a fuller, more textured appearance
- Wrap a small section of hair around both elastics to hide them and create polish
Alternative Braiding Options:
- Try a fishtail braid for a more intricate, bohemian aesthetic
- Create a rope braid by twisting two sections around each other
- Add small braids within the ponytail before securing it for extra dimension
- Incorporate colorful threads or ribbons through the braid for personalization
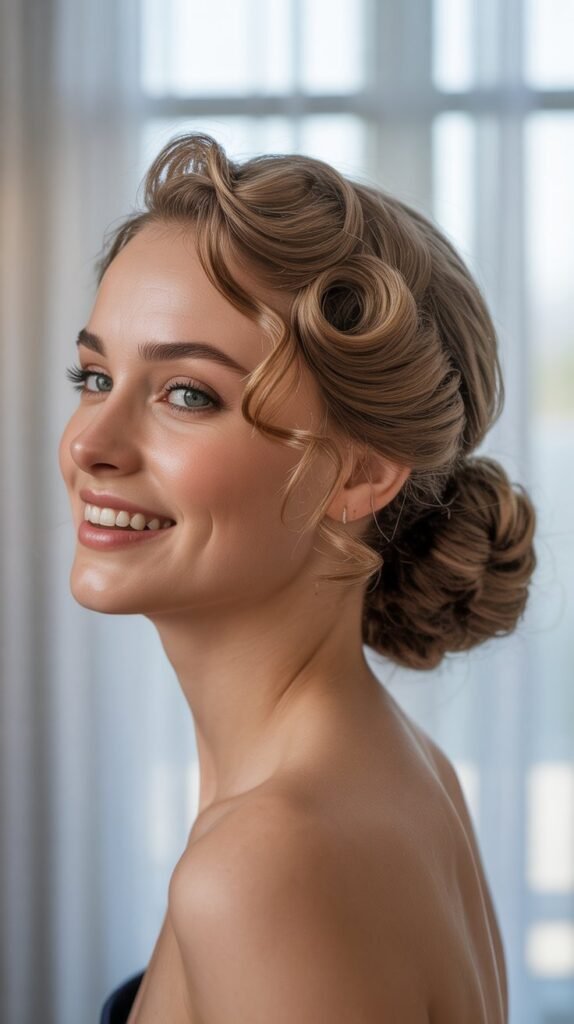
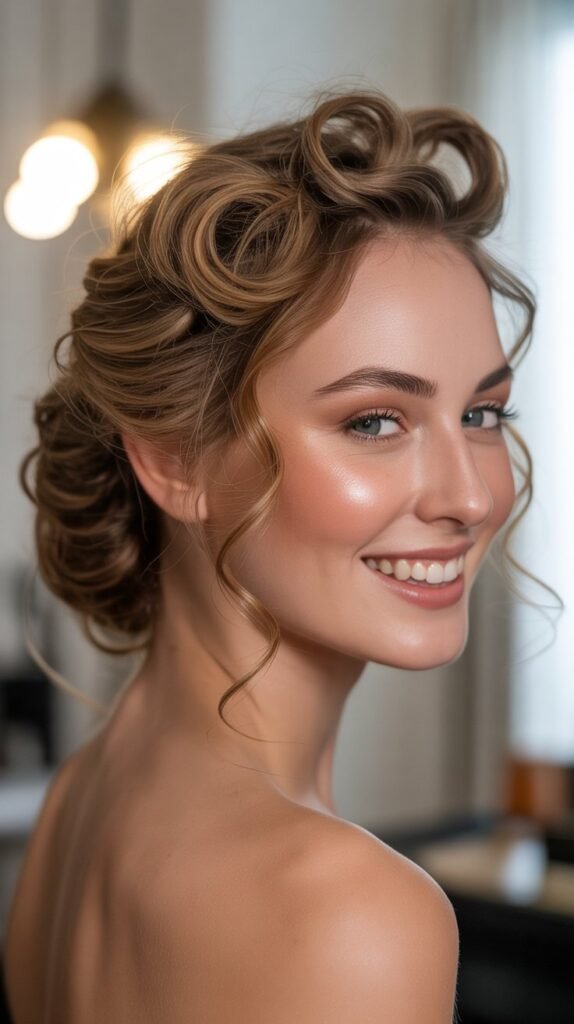
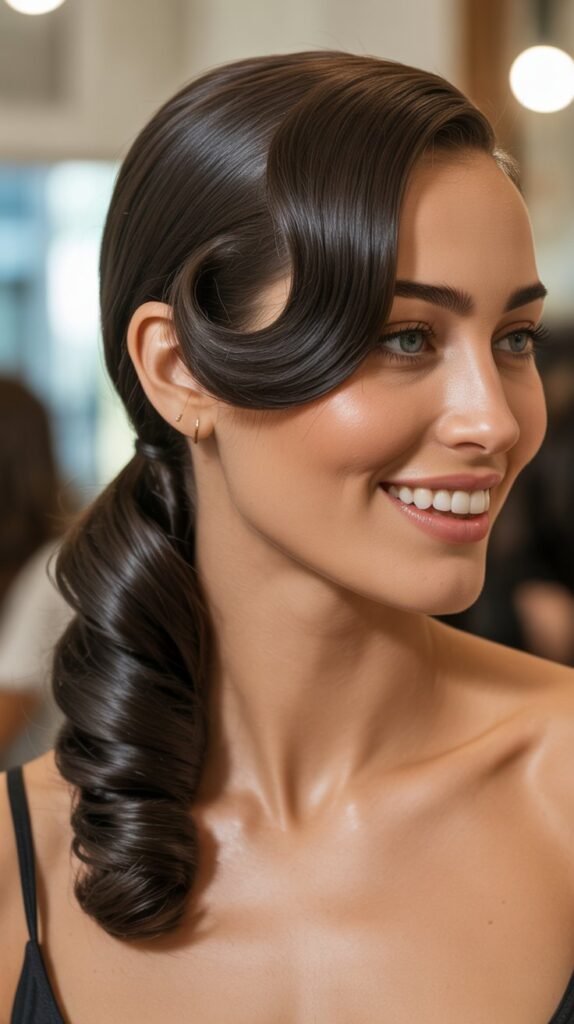
10. Vintage Pin Curl Updo
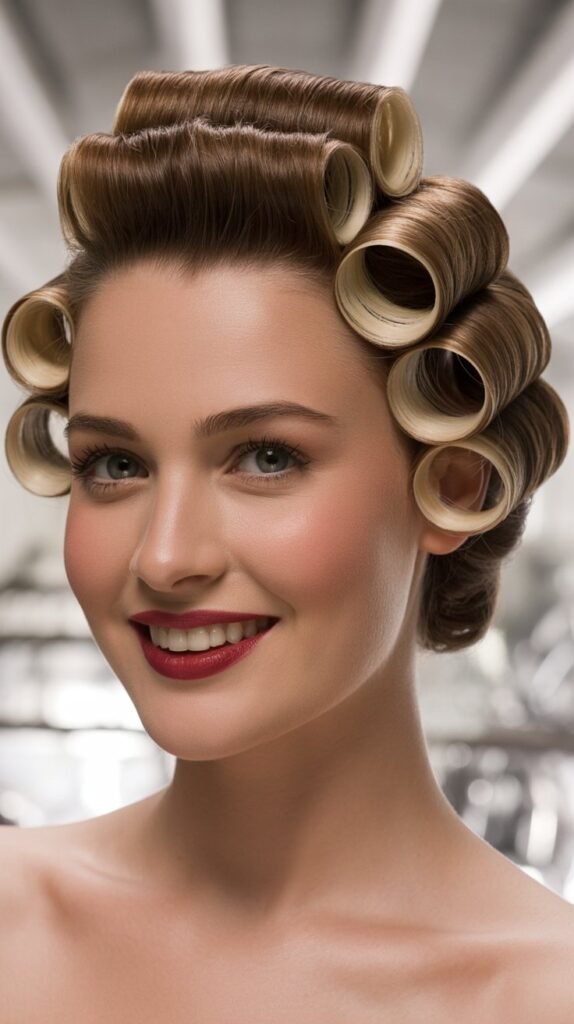
Vintage pin curls offer a nostalgic glamour that actually benefits from the natural oils in greasy curly hair, as they help set and hold the defined curl shapes.
This retro-inspired style channels old Hollywood elegance while solving your second-day hair dilemma.
Creating Pin Curls:
- Start with slightly damp hair by misting with water to reactivate your natural oils
- Section your hair into small, workable portions around your head
- Take each section and wrap it around your finger to form a flat spiral curl
- Slide the curl off your finger and pin it flat against your head with two crossed bobby pins
- Continue this process, working in rows from your hairline back toward your crown
- The natural oils will help the pin curls set and hold their shape
- Allow the pin curls to dry completely (or use a diffuser on low heat)
- Once dry, carefully remove all bobby pins
- Gently separate and arrange the curls with your fingers
- Leave them as tight ringlets or brush through for softer vintage waves
Vintage Styling Tips:
- Pin curls work best on shorter to medium-length curly hair
- Use this technique on the top and sides, leaving the back in a low bun for a partial updo
- Add a vintage headband or decorative pins for authentic retro flair
- This style works beautifully for themed parties, weddings, or when you want to feel glamorous
11. Curly Waterfall Braid
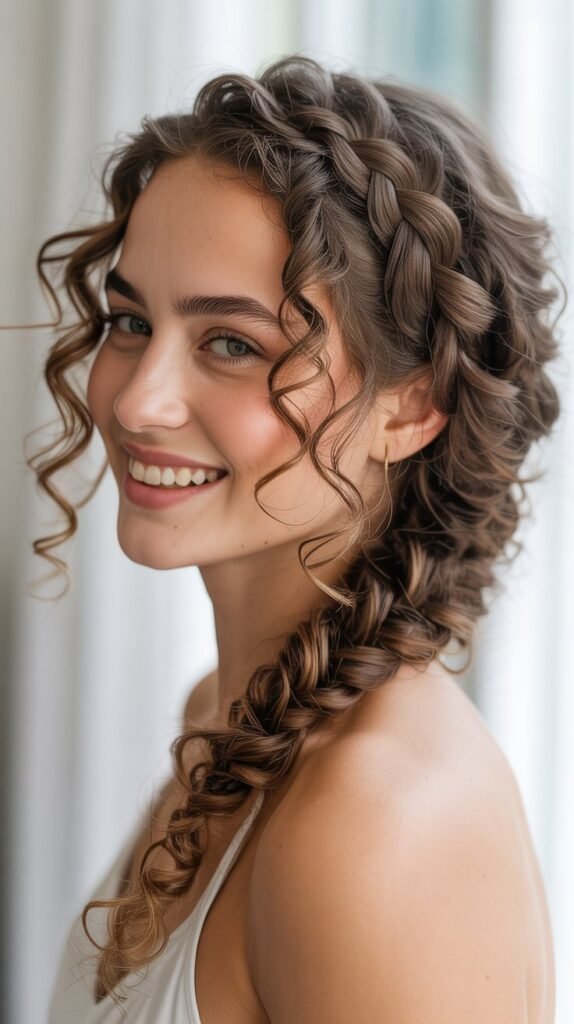
The waterfall braid is a stunning, romantic style that creates the illusion of curls cascading through a braid like water flowing over rocks.
When working with greasy curly hair, the natural oils help the woven sections stay defined and separated, enhancing the waterfall effect.
Waterfall Braid Technique:
- Begin at your temple on one side of your head with a small three-strand section
- Start braiding by crossing the back section over the middle, then the front section over the new middle
- Here’s where the waterfall begins: instead of bringing the bottom section back into the braid, drop it and let it fall
- Pick up a new section of hair from the top to replace the dropped section
- Continue this pattern—braiding, dropping the bottom strand, picking up a new top strand
- The natural oils will help the dropped strands maintain their curl definition as they cascade
- Work the braid along your hairline from one side to the other, or stop at the back for a half-up style
- Secure the end of the braid with a small clear elastic
- Gently pull on the braid edges to create fullness and texture
Romantic Styling Ideas:
- Add small flowers or decorative pins along the braid for wedding or festival looks
- Create a double waterfall braid for extra intricacy and visual impact
- Pair this style with loose, voluminous curls below for maximum romantic effect
- The cascading curls beautifully disguise any oily roots near the crown
12. Twisted Crown with Loose Curls
A twisted crown combines the elegance of an updo with the casual beauty of wearing your curls down, making it perfect for those days when your roots are greasy but your lengths still have life.
This half-up style frames your face beautifully while keeping hair out of your eyes.
Crown Twisting Method:
- Section out the front portions of your hair from temple to temple
- Divide this front section into two parts at your center part
- Take the section on one side and begin twisting it back toward the crown of your head
- As you twist, pick up small sections of hair along the way, similar to a French twist
- The natural oils will help the twist stay tight and smooth without product
- Continue twisting until you reach the center back of your head
- Secure the twisted section with bobby pins
- Repeat the same process on the opposite side
- Meet both twists at the center back and pin them together
- Allow all remaining curls to fall naturally over your shoulders
- Gently pull on the twists to create more volume and texture
Versatility of This Style:
- Works for virtually any occasion from casual to formal
- Takes only five minutes once you master the technique
- Keeps oily roots hidden while showcasing your best curls
- Can be made more elaborate by adding braids within the twists
13. High Curly Ponytail with Volume
A high curly ponytail is both practical and glamorous, especially when you add intentional volume at the crown to distract from greasy roots.
This style has been popularized by celebrities and influencers because it’s universally flattering and surprisingly easy to achieve.
Creating Maximum Volume:
- Flip your head upside down and gather all hair at the crown of your head
- This position naturally creates lift at the roots
- Secure with a strong elastic, making sure it’s tight enough to hold but not painful
- Once secured, flip your head back upright
- Use your fingers to gently pull and lift hair at the crown, creating a “bump” of volume
- Take a small section of curls from the ponytail and wrap it around the elastic to hide it
- Pin the wrapped section underneath with a bobby pin
- Fluff and separate the curls in your ponytail for maximum fullness
- Apply a small amount of dry shampoo or texture powder at the roots for extra lift
- The height of the ponytail draws all attention upward, away from any oil at the scalp
Pro Styling Tips:
- Use a spiral hair tie or scrunchie to prevent breakage and creasing
- For extra drama, clip in a curly ponytail extension for additional length and volume
- Tease the roots before gathering into a ponytail for even more height
- This style works beautifully for workouts, nights out, or anytime you want to feel polished
14. Curly Bantu Knot-Out Style
While traditional Bantu knots require clean hair for initial creation, styling a Bantu knot-out on greasy curly hair can actually enhance the defined, separated curl pattern.
This protective style celebrates natural texture while managing oil buildup beautifully.
Styling a Knot-Out on Greasy Hair:
- If you already have Bantu knots in, carefully unravel each knot one at a time
- The natural oils will have set the curl pattern, making it more defined and lasting
- Gently separate each unraveled curl with your fingers for fullness
- Do not brush or comb through, as this will create frizz and destroy the pattern
- Apply a small amount of lightweight oil to your fingertips and scrunch through curls for added definition
- The combination of natural sebum and the set curl pattern creates stunning results
- For greasy roots, part your hair in zigzag sections rather than straight parts to camouflage oiliness
- Pin back the front sections if needed to keep hair off your face
- This style typically lasts for several days with minimal maintenance
Benefits of This Technique:
- Transforms second or third-day hair into a fresh, intentional style
- The defined curls distract from any scalp oiliness
- Works as a protective style that reduces manipulation and breakage
- Creates uniform, bouncy curls throughout your entire head
15. Side Braid with Curly Ends
A side braid offers an asymmetrical, bohemian vibe that’s perfect for greasy curly hair because it strategically places the braid where oil tends to accumulate while letting your less-oily lengths remain loose and curly.
This style is ideal for casual days when you want to look put-together without much effort.
Side Braiding Instructions:
- Sweep all your hair over one shoulder
- Decide whether you want the braid to start at the top near your ear or lower at shoulder level
- Begin with a standard three-strand braid, incorporating your curls as you go
- The natural oils will help the braid stay neat and prevent curls from escaping
- Braid down to about mid-length, leaving several inches of curly ends loose
- Secure with a clear or matching elastic
- Gently pull on the braid edges to create width and a more relaxed appearance
- Allow the loose curly ends to cascade freely for a romantic, undone finish
- Bring a few face-framing tendrils forward on the opposite side for balance
Styling Variations:
- Create a fishtail braid instead of a standard three-strand for more texture
- Add a Dutch or French braid at the top before transitioning to a regular side braid
- Incorporate ribbons, threads, or small flowers throughout the braid
- This style works beautifully for festivals, beach days, or casual weekend activities
16. Curly French Twist
The French twist is a classic updo that takes on new dimension when created with curly hair, and the natural oils actually make achieving this elegant style easier by adding grip and smoothness.
This sophisticated look is perfect for formal events or professional settings.
French Twist Tutorial:
- Gather all your hair to one side of your head (usually the left)
- Hold the hair firmly at the nape with one hand
- Begin twisting the hair upward along the center back of your head
- As you twist, the hair will naturally want to fold inward
- Continue twisting until you reach the crown area
- Tuck the ends of your hair into the twist, creating a smooth roll
- The natural oils will help the twist hold its shape and provide a polished finish
- Secure the twist by inserting bobby pins vertically along the seam where the hair folds
- Add additional pins horizontally through the twist for extra security
- Smooth any flyaways with your palms or a small amount of oil on your fingertips
- For a softer look, pull out a few curls at the crown or around your face
Perfecting the French Twist:
- Practice makes perfect—this style takes a few attempts to master
- Use more bobby pins than you think you need for maximum security
- For curlier or thicker hair, create a looser, more textured version rather than trying to force it smooth
- This updo looks stunning with statement earrings and an open neckline
17. Half-Up Twisted Topknot
The half-up twisted topknot combines the best of both worlds—an updo that controls greasy roots while allowing your beautiful curls to remain visible and touchable.
This modern style has become increasingly popular because it’s both functional and incredibly chic.
Creating the Twisted Topknot:
- Section your hair horizontally from ear to ear across the crown
- Gather the top section and hold it at the crown of your head
- Twist this top section tightly into a rope-like coil
- The natural oils will help the twist stay compact and smooth
- Wrap the twisted hair around itself at the base to form a small topknot
- Secure the knot with bobby pins inserted in different directions
- Leave the bottom section of your curls completely loose and natural
- Gently tug on the twisted knot to create more volume and texture
- Pull out a few wispy curls around your hairline for a softer, more romantic frame
- The positioning of the knot at your crown cleverly hides the oiliest part of your hair
When to Wear This Style:
- Casual coffee dates or brunches with friends
- Work-from-home video calls when you need to look presentable
- Running errands while still feeling stylish
- Transition seamlessly from day to evening by adding statement accessories
18. Curly Mohawk Braid
The curly mohawk braid is a bold, statement-making style that embraces your natural texture while creating a unique silhouette.
This edgy look works exceptionally well with greasy hair because the oils help maintain the sleek sides and add definition to the central braid.
Mohawk Braid Construction:
- Create a deep side part on both sides of your head, leaving a wide center strip of hair from forehead to nape
- Slick down the side sections with your natural oils, combing them flat against your head
- Secure the slicked sides with small clips or bobby pins along the hairline
- Begin a Dutch braid (crossing under) at your hairline using the center strip of hair
- Add hair to the braid as you work down the center of your head
- The natural oils will help the braid stay neat and the sides remain flat
- Continue braiding all the way down to your ends
- Secure with an elastic at the bottom
- Gently pull on the braid edges to make it wider and more dramatic
- The contrast between the sleek sides and textured braid creates stunning visual impact
Mohawk Braid Variations:
- Create multiple smaller braids down the center instead of one large braid
- Add colorful thread or yarn woven through the braid for extra flair
- Try a cornrow pattern on the slicked sides for additional detail
- This style works beautifully for athletic activities, concerts, or artistic events
19. Low Curly Ponytail with Wrapped Base
A low ponytail wrapped at the base exudes understated elegance and sophistication, making it perfect for those days when you want to look polished despite having greasy curls.
The wrapped base adds a designer touch that elevates this simple style.
Wrapped Ponytail Technique:
- Gather all your hair at the nape of your neck, positioning it slightly off-center for added interest
- Secure with a hair elastic that closely matches your hair color
- Before wrapping, apply a tiny amount of oil or smoothing cream to the section you’ll use for wrapping
- Take a one-inch section of hair from underneath the ponytail
- Wrap this section tightly around the elastic, covering it completely
- Continue wrapping until you reach the ends of the section
- Tuck the ends under the wrapped base and secure with a bobby pin pushed upward into the ponytail
- The natural oils in your hair will help the wrapped section stay smooth and sleek
- Adjust the ponytail curls by gently separating them for more volume
- This clean, wrapped base disguises the elastic and creates a polished, salon-quality finish
Professional Styling Applications:
- Perfect for job interviews or important business meetings
- Elegant enough for wedding guest attire or formal dinners
- Creates a sophisticated look for professional headshots or photos
- The low placement is both modest and timelessly chic
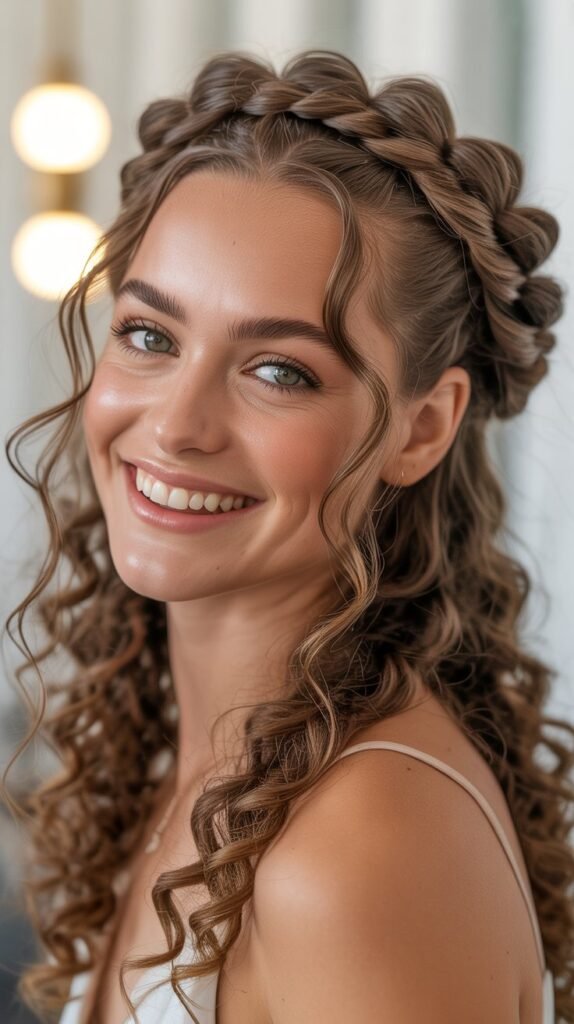
20. Curly Halo Braid
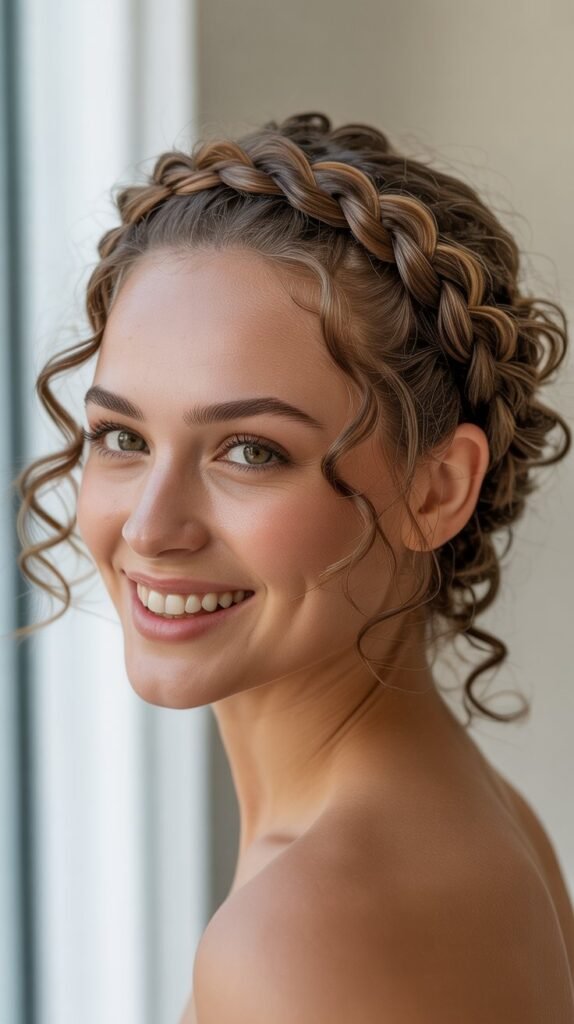
The halo braid, also known as a crown braid, creates an angelic, ethereal look that’s perfect for special occasions.
When working with greasy curly hair, the natural oils help the braid maintain its shape and create a beautiful shine that enhances the crown effect.
Halo Braid Instructions:
- Part your hair down the center from forehead to nape
- Starting behind one ear, begin a Dutch braid working with curls from one side of the part
- Braid along your hairline, following the curve of your head like a halo
- The natural oils will help your curls cooperate and create a smooth, defined braid
- Continue braiding around the entire circumference of your head
- When you return to the starting point, continue braiding the remaining hair without adding new sections
- Wrap this tail braid around your head, tucking it under the halo where you began
- Secure the end by tucking it into the braid and pinning it in place
- Gently pull on the braid edges to create a fuller, more voluminous halo effect
- Leave a few loose curls at the nape of your neck or pull some tendrils forward for softness
Halo Braid Occasions:
- Weddings, whether you’re the bride, bridesmaid, or guest
- Graduation ceremonies or other milestone celebrations
- Garden parties or outdoor spring and summer events
- Anytime you want to feel like royalty
21. Textured Curly Ponytail with Bubble Sections

The bubble ponytail adds a playful, contemporary twist to the traditional ponytail by creating spherical sections down the length.
This trendy style works wonderfully with greasy curly hair because the natural oils help define each bubble section while adding shine.
Creating Bubble Sections:
- Start with a high, medium, or low ponytail secured with a strong elastic
- Measure down about three to four inches from the base elastic
- Add another elastic around the ponytail at this point
- Gently pull and tease the hair between the two elastics to create a rounded bubble shape
- The natural oils will help the curls maintain their volume and definition within each bubble
- Continue adding elastics down the length of your ponytail at regular intervals
- Create as many bubble sections as your hair length allows (typically three to five)
- Pull on each bubble section to make them fuller and more spherical
- For extra drama, wrap small sections of hair around each elastic to hide them
- This style creates the illusion of longer, fuller hair while keeping greasy roots concealed
Bubble Ponytail Styling Tips:
- Use clear elastics for a subtle look or colorful ones for a bold statement
- Make bubbles uniform in size for a polished look, or vary sizes for an artistic approach
- This style photographs beautifully and is perfect for social media content
- Works for all ages and translates well from playground to party
22. Twisted Low Side Bun
The twisted low side bun offers romantic elegance with a touch of asymmetry, making it an excellent choice for those wanting to look sophisticated while managing greasy curls.
This style sits gracefully at the side of the neck, creating a feminine silhouette.
Side Bun Creation Process:
- Sweep all your hair to one side, gathering it just behind and below your ear
- Divide the gathered hair into two equal sections
- Twist each section individually in the same direction
- Once both sections are twisted, wrap them around each other in the opposite direction
- The natural oils will help these twists stay tight and defined
- Coil the twisted rope around itself at the base to form a low side bun
- Position the bun so it sits elegantly at the side of your neck
- Secure with bobby pins inserted at various angles for maximum hold
- Tuck any loose ends into the bun and pin them in place
- Pull out a few face-framing curls on the opposite side for balance
- Finish with a decorative hair pin or flower for added elegance
Ideal Settings for This Style:
- Evening weddings or cocktail parties
- Romantic dinner dates or anniversary celebrations
- Theater performances or ballet when you want to look refined
- Formal photoshoots where you want a soft, feminine aesthetic
23. Curly Hair with Headband Tuck

The headband tuck is a vintage-inspired technique that transforms greasy curly hair into a polished, retro look reminiscent of 1960s glamour.
This style uses a headband as both an accessory and a functional tool to manage oily roots.
Headband Tuck Method:
- Place a stretchy or elastic headband over your head like a crown, positioning it about an inch back from your hairline
- Ensure the headband sits securely around your entire head
- Starting at one side, take small sections of hair and tuck them up and over the headband
- Continue tucking sections of hair around the entire headband, working toward the opposite side
- The natural oils will help the tucked sections stay in place without slipping
- Once all hair is tucked, adjust the sections to create even coverage around the headband
- Gently pull on the tucked hair to create more volume and texture
- Some curls may naturally escape, which adds to the romantic, undone appeal
- For extra security, insert bobby pins through the tucked sections into the headband
Headband Selection Tips:
- Choose fabric-covered headbands that grip better than plastic ones
- Metallic or jeweled headbands add glamour for evening events
- Braided or twisted headbands create texture and visual interest
- Wider headbands provide more coverage for particularly oily roots
24. High Curly Bun with Braided Wrap
A high curly bun becomes even more special when adorned with a braided wrap around the base.
This style elegantly disguises greasy roots while creating a statement updo that’s perfect for formal occasions or when you simply want to feel extra polished.
Creating the Braided Wrap:
- Gather all your hair into a high ponytail at the crown of your head
- Before securing, separate out a small section of hair from underneath the ponytail
- Secure the main ponytail with an elastic, leaving that small section separate
- Twist or coil the main ponytail into a bun shape and secure with bobby pins
- Take the separated section and create a three-strand braid
- The natural oils will help the braid stay neat and defined
- Wrap this braid around the base of the bun like a decorative band
- Secure the braid by tucking the end into the bun and pinning it in place
- Adjust the bun to ensure it’s secure and symmetrical
- This braided wrap adds an elegant detail that elevates the entire style
Enhancement Options:
- Create multiple thin braids to wrap around the bun for more texture
- Add small flowers or decorative pins along the braided wrap
- Try a fishtail braid instead of a regular braid for more intricacy
- Position the bun slightly off-center for a modern, asymmetrical look
25. Curly Half-Updo with Criss-Cross Pins
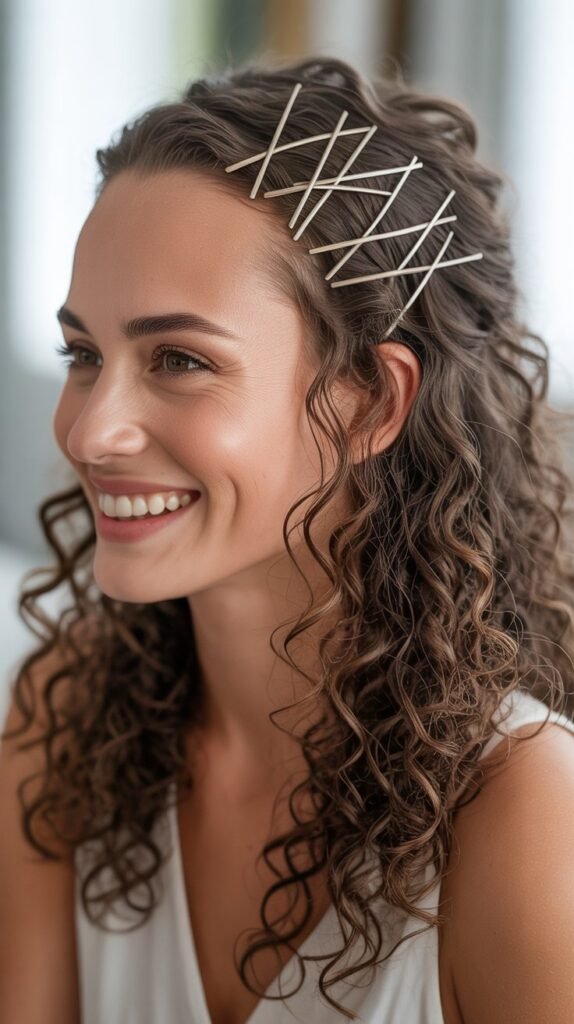
The criss-cross pin half-updo is a simple yet stunning style that uses decorative bobby pins as both functional tools and fashion accessories.
This look works beautifully with greasy curly hair because it strategically pulls oily roots back while showcasing your curls.
Criss-Cross Pinning Technique:
- Section out the hair from your temples back toward the crown
- Gather this top section and twist it loosely at the back of your head
- Instead of using a hair tie, secure this section with decorative bobby pins
- Cross two pins in an X pattern to hold the hair in place
- The natural oils will help the pins grip better and stay secure
- Add additional criss-crossed pins for both security and aesthetic appeal
- Create a pattern with your pins—symmetrical X’s, scattered placement, or a linear row
- Leave all remaining curls loose and flowing naturally
- Gently tug on the pinned section to create volume and prevent it from looking too tight
Pin Selection and Styling:
- Gold or rose gold pins add warmth and elegance
- Silver pins create a modern, sleek aesthetic
- Pearl-topped pins offer vintage romance
- Colorful enamel pins make a bold, playful statement
- Position pins visibly as part of the design rather than trying to hide them
26. Sleek Curly Low Ponytail with Side Part
A sleek low ponytail with a dramatic side part transforms greasy curly hair into a sophisticated, editorial-worthy style.
The deep side part adds dimension while the low positioning keeps the focus on your face rather than oily roots.
Achieving Sleek Perfection:
- Create a deep side part, placing it far over on one side of your head
- Use the natural oils to help hold the part in place sharply and cleanly
- Apply water or a small amount of smoothing cream to the heavier side
- Use a boar bristle brush or fine-tooth comb to smooth this section back
- The natural oils will help eliminate frizz and create a glossy, polished finish
- Gather all hair at the nape of your neck into a low ponytail
- Secure with a hair elastic that matches your hair color
- Take a small section from the ponytail and wrap it around the elastic to hide it
- Pin the wrapped section underneath the ponytail
- Allow your curls to hang freely in the ponytail while the top remains sleek and smooth
Professional Application:
- Perfect for corporate environments or conservative professional settings
- Creates a polished look for speaking engagements or presentations
- Sophisticated enough for formal events without being overly elaborate
- The contrast between sleek top and curly ponytail is visually striking
27. Messy Curly Bun with Face-Framing Pieces
The messy curly bun embraces the “undone” aesthetic that’s become synonymous with effortless chic.
This style actually benefits from greasy hair because the natural oils add texture and piece-y definition to the intentionally messy look.
Messy Bun Construction:
- Flip your head upside down and gather hair loosely at your desired bun height
- Don’t worry about smoothness—visible bumps and texture add to the messy appeal
- Twist the hair very loosely around itself, allowing curls to escape and loop naturally
- Secure with a hair elastic, intentionally leaving the bun loose and imperfect
- Pull out several chunky sections around the bun to create more volume and messiness
- Allow face-framing pieces to fall naturally around your hairline on both sides
- The natural oils will help these face-framing pieces maintain definition without frizz
- Pin any sections that feel too loose, but embrace the overall imperfect aesthetic
- Gently tug on different parts of the bun to create asymmetry and interest
Styling Philosophy:
- The goal is “perfectly imperfect”—overthinking will make it look too controlled
- This style should take less than two minutes to create
- Works for literally any casual occasion from coffee runs to movie nights
- The messy aesthetic makes greasy roots look intentional and stylish
28. Double Dutch Braids into Low Buns
Double Dutch braids that transition into low buns create a sporty yet feminine style perfect for active days when you’re dealing with greasy curls.
This protective style keeps all hair secured while looking polished and intentional.
Double Dutch Technique:
- Part your hair down the center from forehead to nape, creating two equal sections
- Starting at the hairline on one side, begin a Dutch braid by crossing sections under
- Continue the Dutch braid down the length of that side, adding hair as you go
- The natural oils will help the braid stay neat and prevent curls from frizzing out
- Once you reach the nape area, continue braiding without adding new sections
- Secure the end of the braid with a small elastic
- Coil the remaining braid into a small bun at the nape and pin in place
- Repeat the entire process on the opposite side
- The two low buns should sit symmetrically on either side of your neck
- Gently pull on the braid edges to create fuller, more textured braids
Activity-Friendly Benefits:
- Perfect for workouts, yoga, or any physical activity
- Keeps hair completely off your neck and face in hot weather
- Stays secure throughout the day without needing adjustments
- Transitions easily from gym to casual social settings
29. Asymmetrical Curly Updo
An asymmetrical updo brings modern artistry to formal styling, using the natural oils in greasy curly hair to create sculptural shapes and interesting angles.
This avant-garde style makes a bold statement at fashion-forward events.
Creating Asymmetry:
- Divide your hair into unequal sections—one side significantly larger than the other
- Start with the smaller section, twisting or braiding it and pinning it low on one side
- Take the larger section and create volume by teasing gently at the roots
- The natural oils will help the teased section hold its volume and shape
- Twist or coil the larger section upward, creating height and dimension
- Pin this section at an angle, creating an asymmetrical silhouette
- Allow some curls to escape and frame your face on the side with less hair
- Pin strategically to create intentional negative space and interesting angles
- The contrast between the two sides creates visual drama and interest
- Add decorative pins or accessories on the larger side for additional flair
When to Wear Asymmetrical Styles:
- Fashion-forward weddings or black-tie events
- Art gallery openings or cultural events
- Editorial photoshoots or creative professional settings
- Anytime you want to make a memorable style statement
30. Curly Ponytail with Braided Sides
A curly ponytail enhanced with braided sides combines multiple techniques into one cohesive, intricate-looking style.
The braids help control greasy roots along the sides while adding visual interest and texture to a classic ponytail.
Braided Sides Method:
- Part your hair down the center or create a side part, depending on preference
- Section out a strip of hair along each side of your head from temple to ear
- Create small Dutch or French braids with these side sections
- The natural oils will help these braids stay tight and defined
- Continue each braid back toward where you’ll position your ponytail
- Gather all remaining hair (including the ends of the side braids) into a ponytail
- Secure with a strong elastic at your desired height
- The side braids should frame your face beautifully and merge into the ponytail
- Wrap a section of hair from the ponytail around the elastic to hide it
- Fluff and separate the curls in your ponytail for maximum volume
Braiding Variations:
- Create multiple thin braids on each side instead of one thicker braid
- Try cornrows along the sides for a more intricate, protective style
- Add beads or cuffs to the braids for personalized decoration
- This style works at any ponytail height—high, mid, or low
31. Twisted Curly Half-Up with Accessory
A twisted half-up style becomes extra special when paired with a statement hair accessory, transforming greasy curly hair into an occasion-worthy look.
The accessory becomes the focal point while the twists disguise oily roots.
Accessorized Twist Tutorial:
- Section hair from temple to temple across the crown of your head
- Divide this top section into two parts at your center
- Twist each side back toward the center back of your head
- The natural oils help the twists maintain their rope-like definition
- Secure both twists together at the back with a few bobby pins
- This is where you add your statement accessory—a decorative clip, barrette, or comb
- Position the accessory over the point where the twists meet
- This hides the pins and bobby pins while adding glamorous flair
- Allow all remaining curls to cascade naturally over your shoulders
- Adjust the twists to ensure they’re symmetrical and secure
Accessory Selection Guide:
- Pearl barrettes create classic, timeless elegance
- Metallic geometric clips offer modern, minimalist appeal
- Floral or jeweled accessories bring romantic femininity
- Vintage-inspired combs add retro glamour
- Choose accessories that complement your outfit and the occasion
32. Curly Top Knot with Twisted Sides
The curly top knot with twisted sides elevates the basic top knot by adding sculptural twists along the sides of the head.
This style uses greasy hair’s natural oils to create sleek twists while maintaining curly volume at the crown.
Twisted Top Knot Steps:
- Section out strips of hair along both sides of your head from temple to crown
- Leave the center section (from forehead to crown) and all hair below unsectioned
- Begin twisting the right side section tightly from temple back toward the crown
- The natural oils create grip and shine in the twisted sections
- Pin the twisted section temporarily at the crown
- Repeat the twisting process on the left side, meeting the right twist at the crown
- Gather all hair at the crown, including the twisted sections
- Create a top knot by twisting the gathered hair and coiling it around itself
- Secure with bobby pins inserted at various angles
- The twisted sides create a sleek contrast to the textured top knot
Styling Versatility:
- Works for both formal and casual occasions depending on how you style it
- The sleek sides help camouflage particularly oily areas
- Creates the illusion of an intricate, time-consuming style in just minutes
- Keeps all hair secure and off your neck for comfort and practicality
33. Loose Curly Chignon with Pulled-Out Pieces
The loose curly chignon offers romantic sophistication with an effortlessly undone quality that works beautifully with greasy curly hair.
This soft, low bun style celebrates your natural texture while keeping oily roots concealed and managed.
Chignon Creation:
- Gather all your hair at the nape of your neck, keeping it low and loose
- Instead of securing with an elastic first, twist the hair very loosely
- The natural oils will help the hair stay together without requiring tight manipulation
- Tuck the twisted hair under itself at the nape, creating a horizontal roll
- Secure with bobby pins inserted vertically along the roll
- Don’t worry about perfection—this style should look soft and romantic
- Pull out small sections of curls throughout the chignon to create texture and dimension
- Leave several face-framing tendrils loose around your hairline
- Gently pull on the chignon to make it fuller and less structured
- The combination of pinned and loose curls creates beautiful movement
Perfect Chignon Occasions:
- Garden weddings or outdoor romantic ceremonies
- Formal spring and summer events with flowing dresses
- Date nights when you want to look effortlessly beautiful
- Professional events that require polish without stiffness
- Any occasion calling for soft, feminine elegance
Why This Style Loves Greasy Hair:
- Natural oils provide the grip needed to hold the loose structure
- Oily roots are completely hidden at the nape
- The soft, pulled-apart aesthetic looks intentional rather than unkempt
- Greasy hair actually makes achieving the “undone” look easier and more authentic
Additional Styling Tips for Greasy Curly Hair
Product Recommendations:
- Dry shampoo specifically formulated for curly hair can extend styles between washes
- Lightweight hair oils on lengths (avoiding roots) add definition without greasiness
- Satin or silk scrunchies prevent additional oil transfer and reduce breakage
- Texturizing powders applied at roots can absorb excess oil while adding volume
Hair Care Between Styles:
- Sleep on satin or silk pillowcases to reduce oil transfer and frizz
- Avoid touching your hair throughout the day as hands transfer additional oils
- Use a microfiber towel or t-shirt for drying instead of regular towels
- Consider clarifying shampoos once a month to remove buildup
When to Embrace the Oil:
- Natural sebum is actually beneficial for curl definition and moisture
- Many of these styles look better with some oil than on freshly washed hair
- Second and third-day hair often has better hold and manageability
- Learning to work with your hair’s natural oil cycle reduces washing frequency and damage
Conclusion
Throughout this comprehensive guide to 33 Gorgeous Greasy Hair Hairstyles for Curly Hair, we’ve discovered that oily curls aren’t something to hide or feel embarrassed about—they’re actually an opportunity to create stunning, long-lasting hairstyles with enhanced definition and hold.
From elegant updos like the French twist and loose chignon to playful styles like space buns and bubble ponytails, there’s a perfect greasy hair solution for every occasion, hair length, and personal style.
The natural oils in your hair provide grip, shine, and manageability that freshly washed hair simply can’t match, making many of these styles easier to achieve and longer-lasting on second, third, or even fourth-day curls.
By embracing your hair’s natural oil cycle and learning these versatile styling techniques, you’ll not only save time and reduce heat damage but also discover that your curls look their absolute best when you work with their natural texture rather than against it.
Remember that beautiful hair isn’t about perfection—it’s about confidence, creativity, and finding styles that make you feel amazing exactly as you are.
So the next time you wake up to greasy curls, smile and reach for this guide, because you now have 33 gorgeous options that will transform your hair day from disaster to fabulous in just minutes.