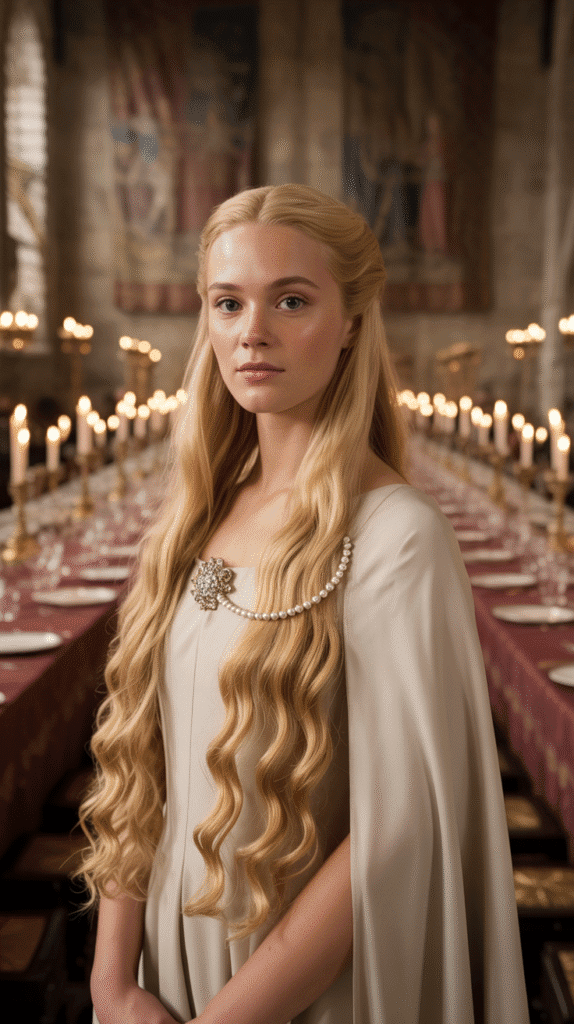
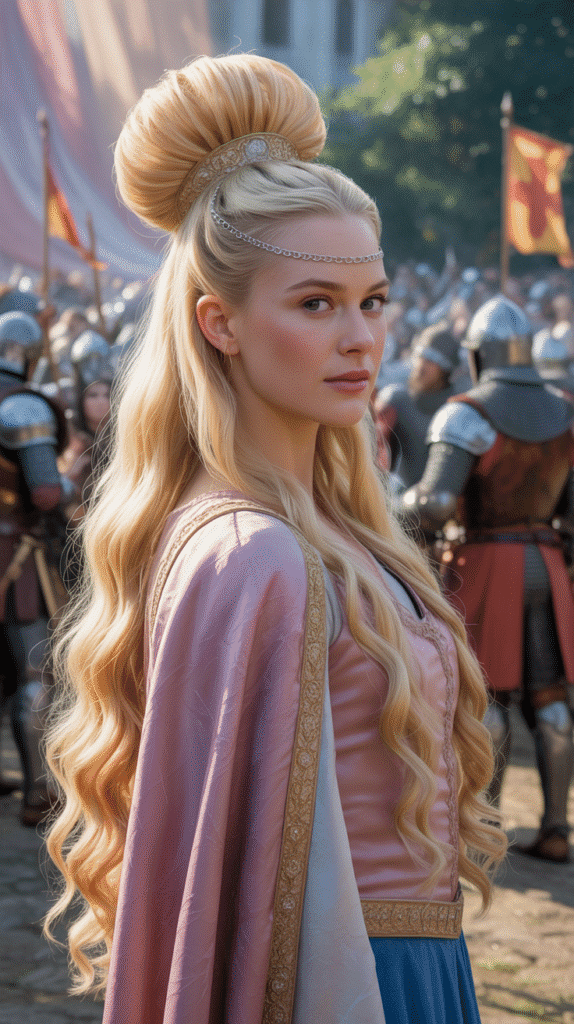
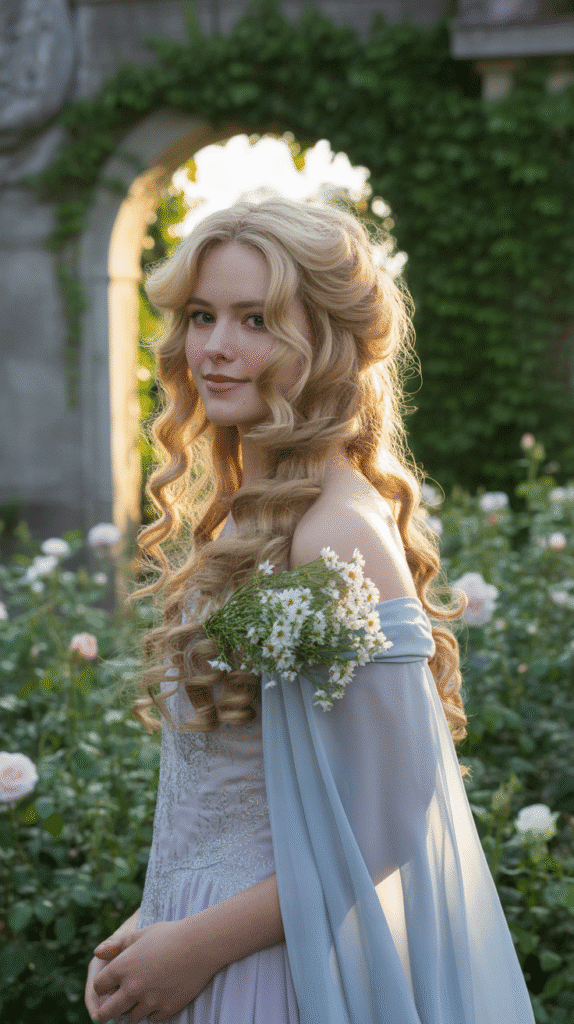
Imagine stepping into a world where golden locks cascade like spun silk, adorned with jeweled circlets and delicate braids that whisper tales of ancient courts and royal grandeur.
Medieval hairstyles for blonde princesses represent more than just fashion—they embody an era of romance, elegance, and timeless beauty that continues to captivate modern hearts.
Whether you’re preparing for a Renaissance fair, a themed wedding, a costume party, or simply seeking inspiration to channel your inner royalty, the art of medieval hair styling offers endless possibilities for transforming blonde tresses into crowning glories worthy of any princess.
This comprehensive guide to 33 Gorgeous Medieval Hairstyles for Blonde Princesses will take you through centuries of hair artistry, from simple maiden braids to elaborate courtly arrangements, each designed to showcase the luminous beauty of blonde hair while staying true to historical authenticity.
You’ll discover techniques that range from beginner-friendly styles to intricate masterpieces, complete with modern adaptations that make these ancient looks accessible for today’s enthusiasts.
The enchanting combination of blonde hair with medieval styling creates an ethereal aesthetic that has inspired countless fairy tales, historical dramas, and fantasy epics, proving that these classic looks possess a magic that transcends time itself.
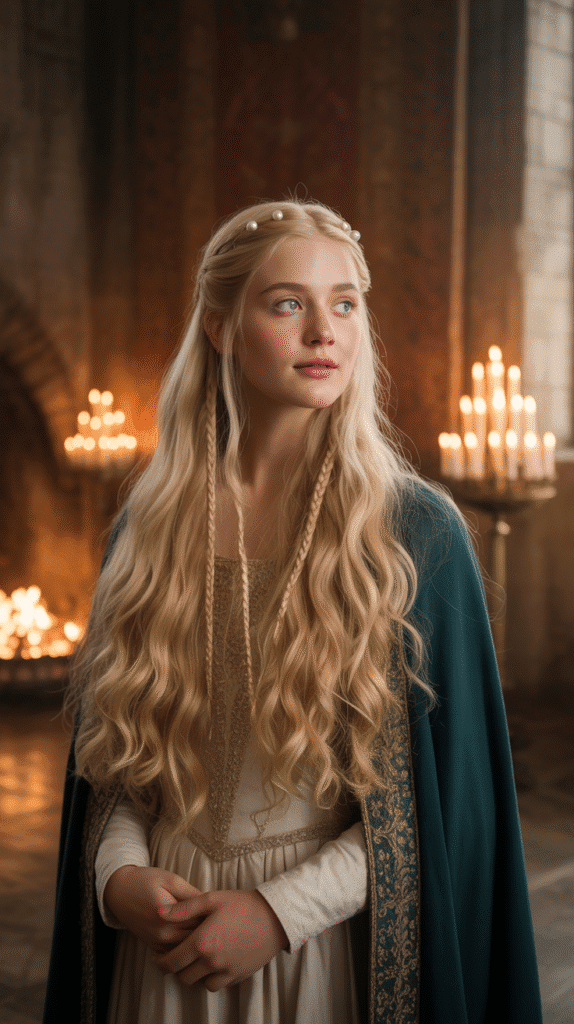
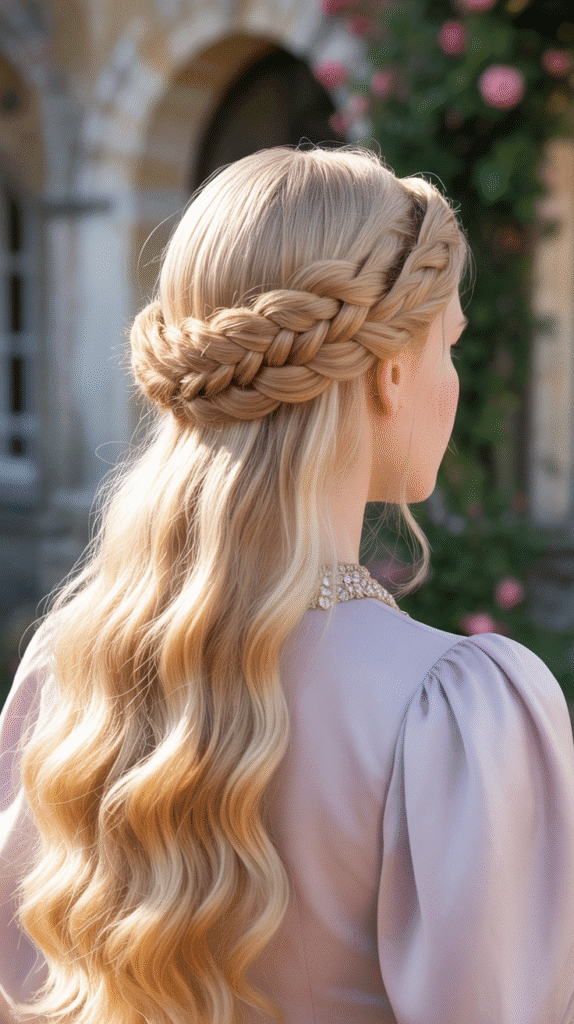
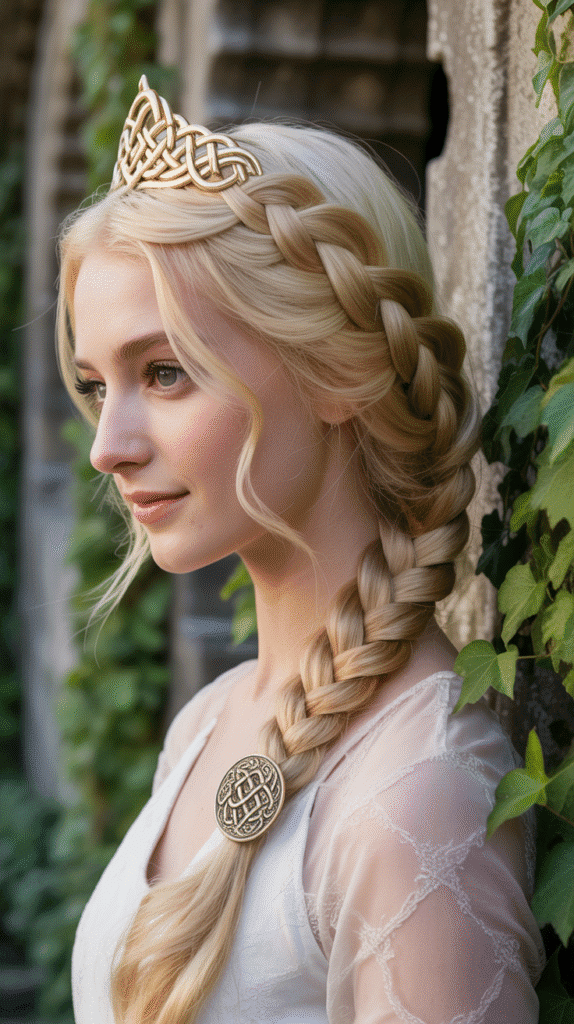
1. The Classic Crown Braid
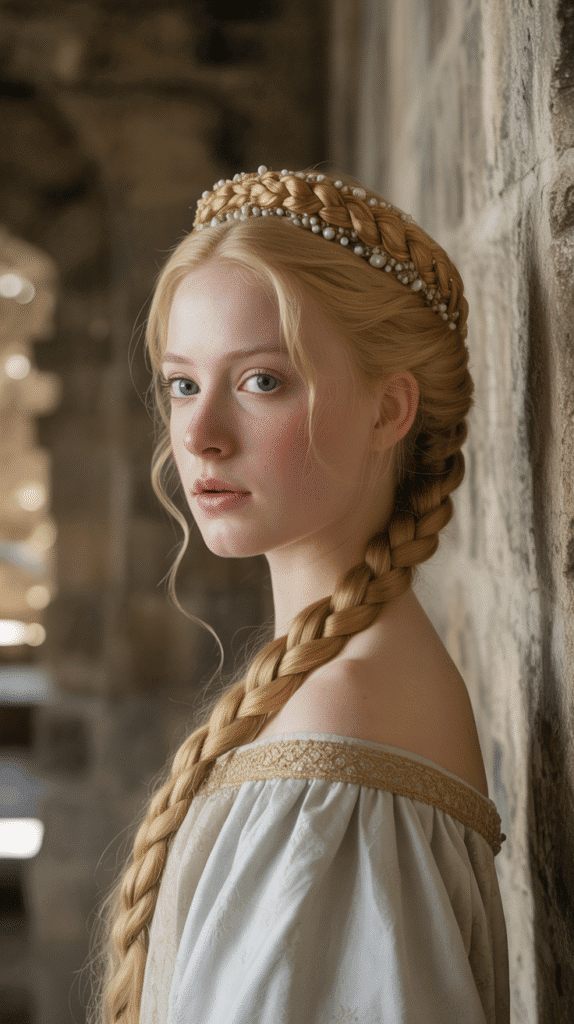
The crown braid stands as one of the most iconic medieval hairstyles, creating a regal halo effect that perfectly frames the face and showcases blonde hair’s natural luminosity.
This timeless style was favored by noble ladies across medieval Europe for both its beauty and practicality, keeping hair secure during daily activities while maintaining an air of sophistication.
How to Create:
- Begin with brushed, tangle-free blonde hair that has been lightly textured with sea salt spray for better grip.
- Part your hair down the center from forehead to nape, creating two equal sections.
- Start a Dutch braid (reverse French braid) on one side at the temple, incorporating small sections as you braid around the head.
- Continue braiding around the circumference of your head, keeping the braid tight against the scalp.
- When you reach the starting point, tuck the remaining tail under the crown and secure with bobby pins.
- Gently pull at the braid edges to create volume and a fuller appearance.
- Set with light-hold hairspray and add small pearl pins along the braid for authentic medieval decoration.
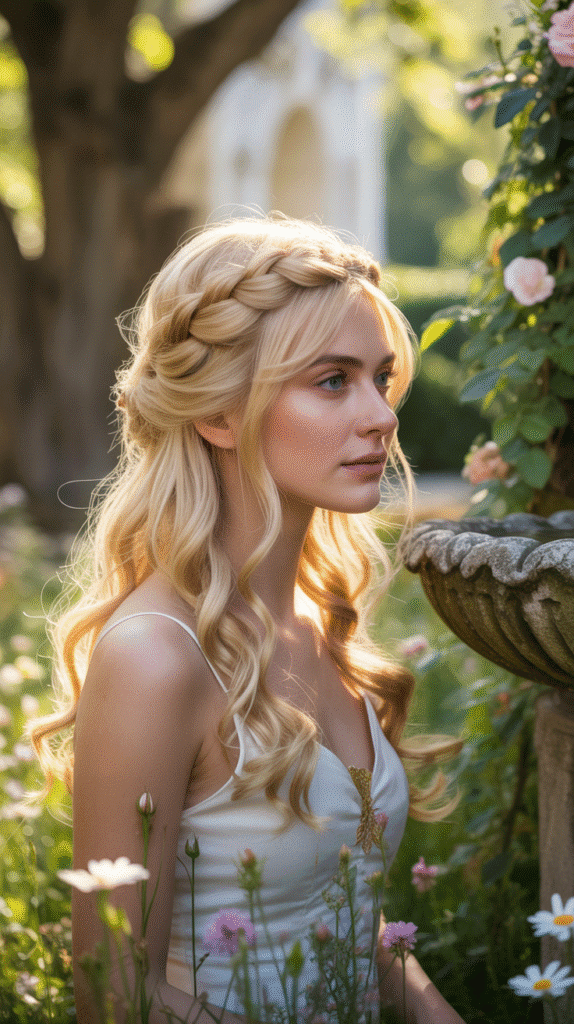
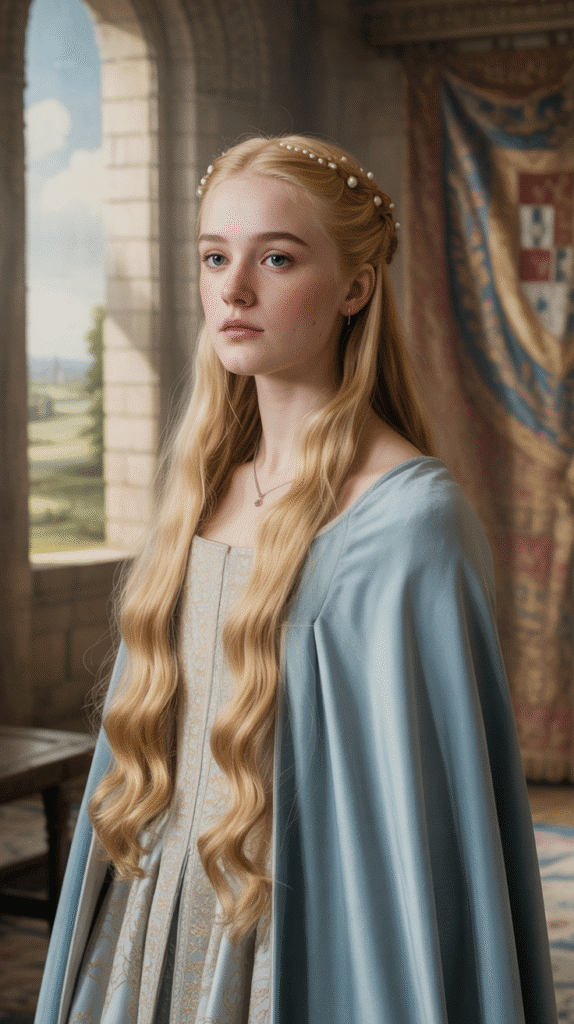
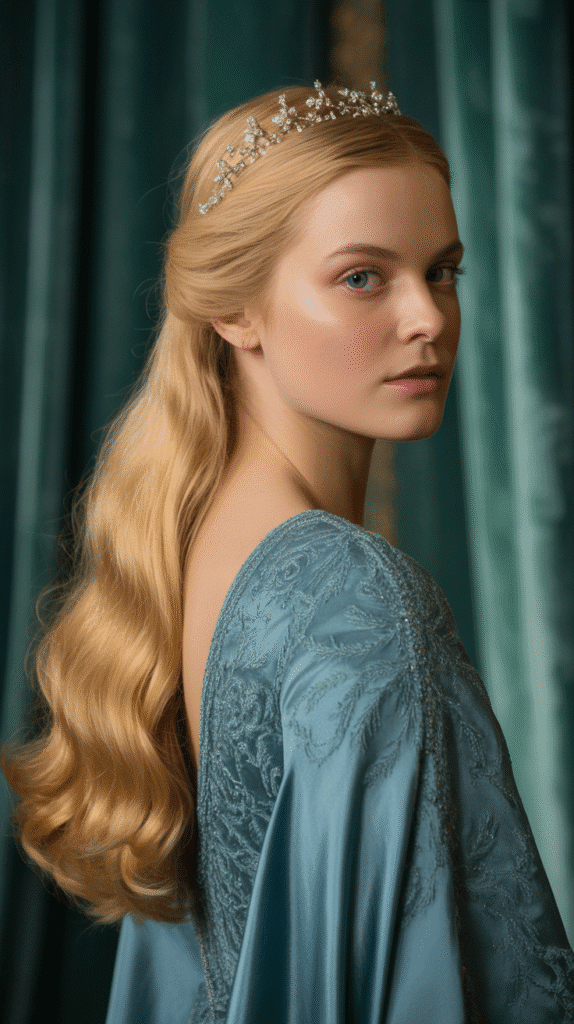
2. Flowing Maiden Waves
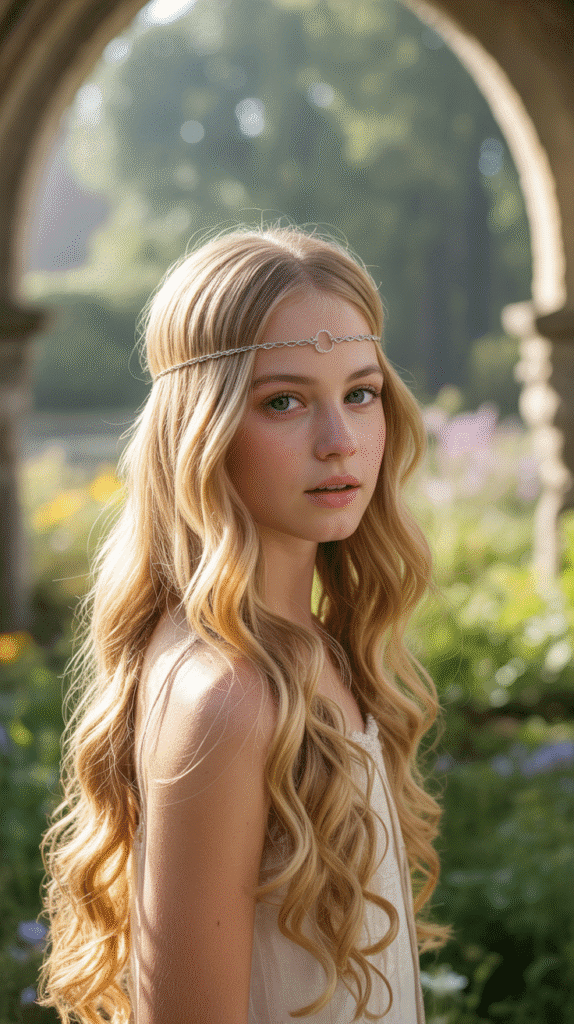
The flowing maiden waves represent youthful innocence and natural beauty, a style commonly worn by unmarried young women in medieval times.
This effortless look allows blonde hair to cascade freely while maintaining a polished, romantic appearance that embodies the medieval ideal of feminine grace.
Styling Steps:
- Wash hair and apply a volumizing mousse from roots to ends for body and texture.
- Blow-dry hair using a round brush, lifting at the roots to create natural volume.
- Section hair into 2-inch portions and wrap each around a large-barrel curling iron held vertically.
- Hold for 8-10 seconds, then release and allow the curl to cool in your palm before dropping.
- Once all sections are curled, flip your head upside down and gently shake to separate the waves.
- Run fingers through hair to blend the waves into soft, flowing curves rather than defined curls.
- Apply a shine serum to blonde sections to enhance the golden luminosity.
- Place a simple metal circlet or floral crown at the hairline to complete the maiden aesthetic.
3. The Wrapped Chignon
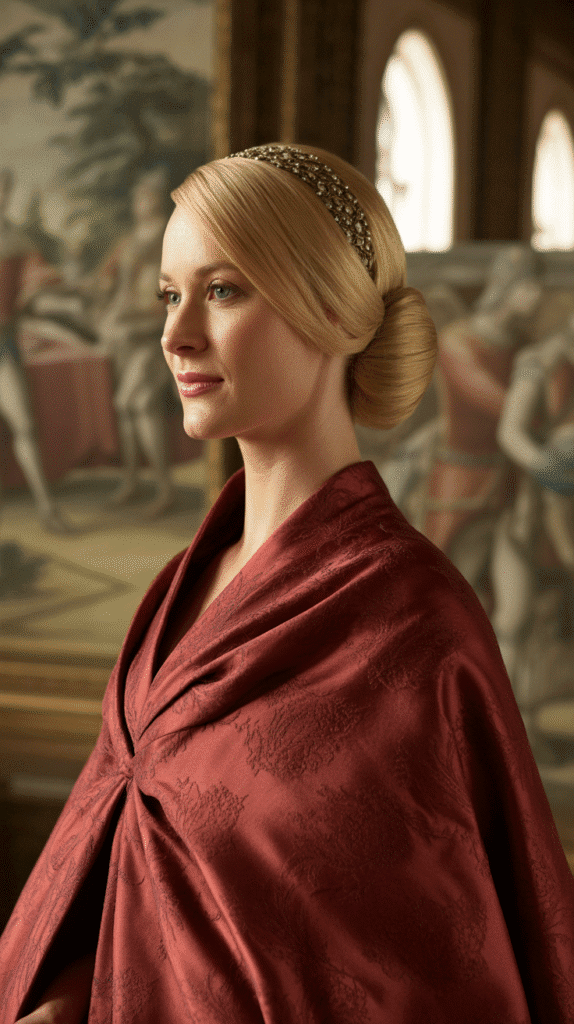
The wrapped chignon was a sophisticated style worn by married noblewomen and queens throughout the medieval period.
This elegant updo demonstrates status and maturity while showcasing the intricate hair manipulation techniques that defined medieval court fashion.
Construction Method:
- Gather all hair at the nape of the neck and secure with a hair elastic in a low ponytail.
- Divide the ponytail into two equal sections and twist each section tightly in the same direction.
- Wrap the twisted sections around the base of the ponytail in opposite directions, creating a rope-like effect.
- Secure the ends underneath the chignon with bobby pins placed in an X-pattern for maximum hold.
- Wrap a decorative ribbon or brocade fabric around the base of the chignon several times.
- Secure the ribbon with small stitches or ornamental pins to keep it in place throughout the day.
- Leave two small blonde tendrils loose at the temples to soften the face and add a romantic touch.
- Finish by inserting jeweled hairpins at strategic points around the chignon for royal embellishment.
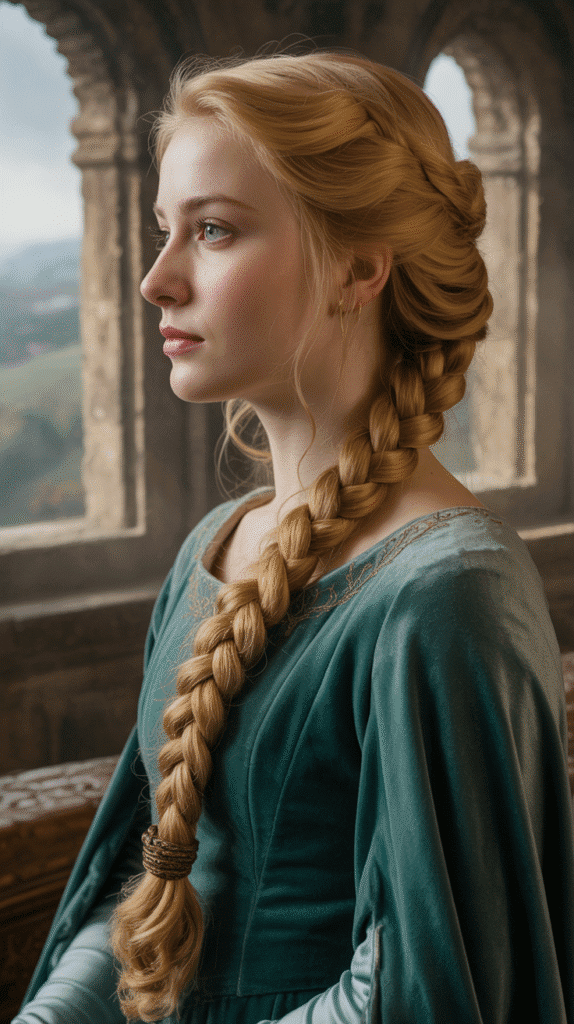
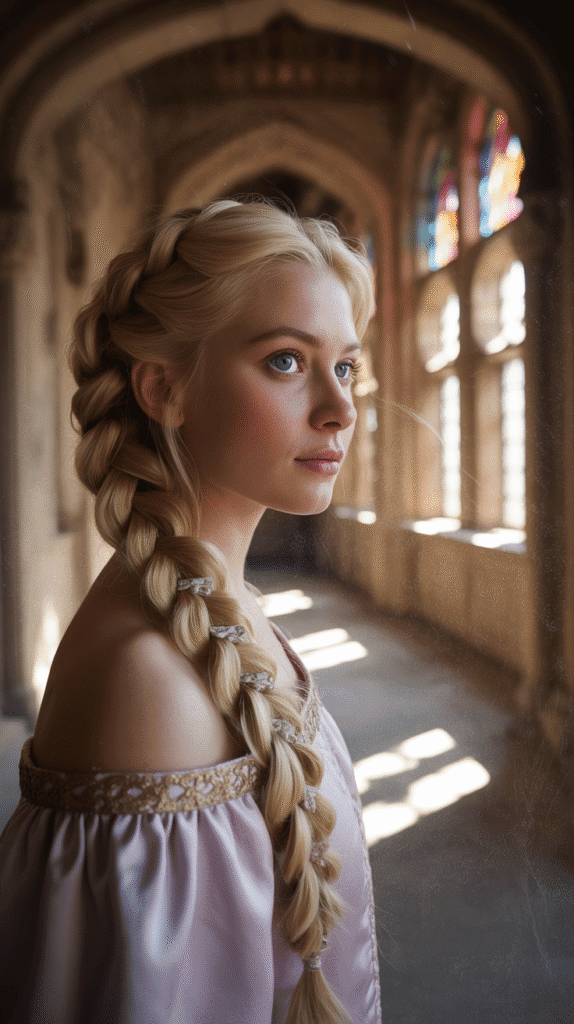
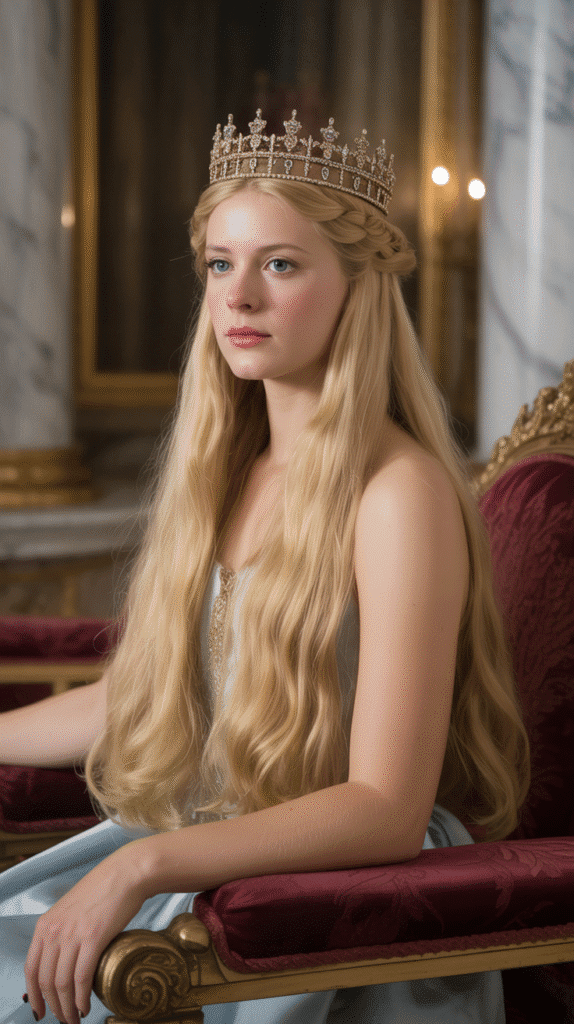
4. Double Braided Crown
The double braided crown elevates the classic single crown braid into a more elaborate statement of royal status.
This style creates impressive dimension and texture that particularly enhances the multi-tonal qualities of blonde hair, from platinum to golden hues.
Creation Process:
- Part hair horizontally from ear to ear, creating distinct upper and lower sections.
- Clip the upper section away temporarily while working on the lower portion.
- Create a Dutch braid following the hairline from one ear, across the nape, to the other ear.
- Secure this braid temporarily, then release the upper section of hair.
- Create a second Dutch braid following the same path but positioned 2-3 inches above the first.
- When both braids are complete, wrap their tails around each other at the back and tuck under.
- Secure both braids with bobby pins that match your blonde shade for invisible hold.
- Gently pancake both braids by pulling on the outer edges to create fuller, more dramatic appearance.
- Add small fresh flowers or silk blooms between the two braids for authentic medieval ornamentation.
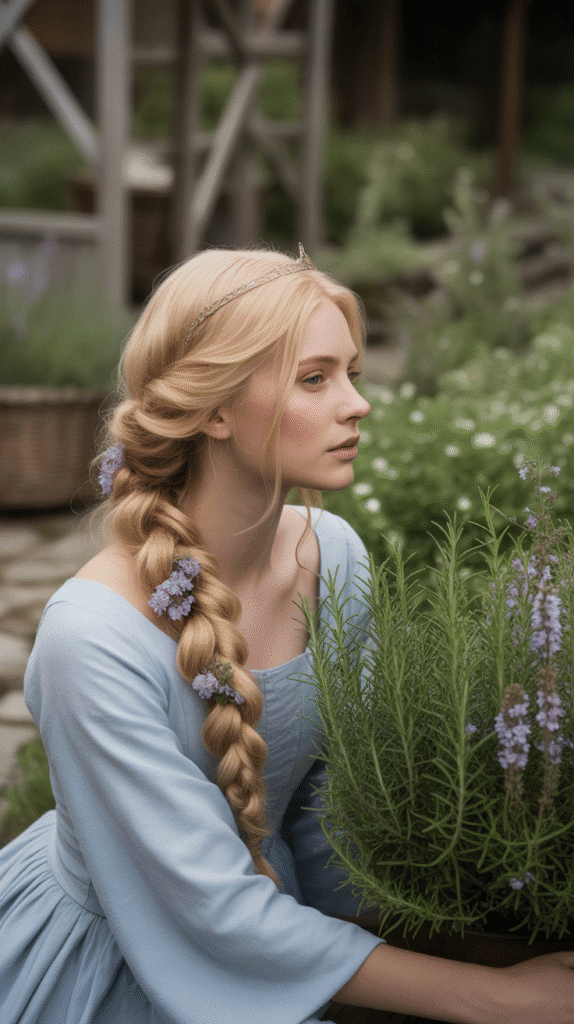
5. The Side-Swept Rope Braid
This romantic medieval style draws all hair to one side, creating an asymmetrical focal point that was particularly popular during the late medieval period.
The rope braid technique offers a unique texture that catches light beautifully on blonde hair while maintaining structural integrity throughout active wear.
Braiding Technique:
- Brush all hair over one shoulder, choosing the side that best complements your facial features.
- Divide the hair into two equal sections at the shoulder line.
- Twist the right section clockwise several times until it begins to coil upon itself.
- Twist the left section clockwise with the same number of rotations.
- Now wrap the right twisted section over and around the left in a counterclockwise direction.
- Continue this wrapping motion, keeping tension consistent to prevent the rope from unraveling.
- As you wrap, the two sections will naturally spiral around each other creating a rope appearance.
- Secure the end with a ribbon tied in a decorative bow or a period-appropriate leather cord.
- Place decorative beads or small metal rings at intervals along the rope braid for authentic medieval detail.
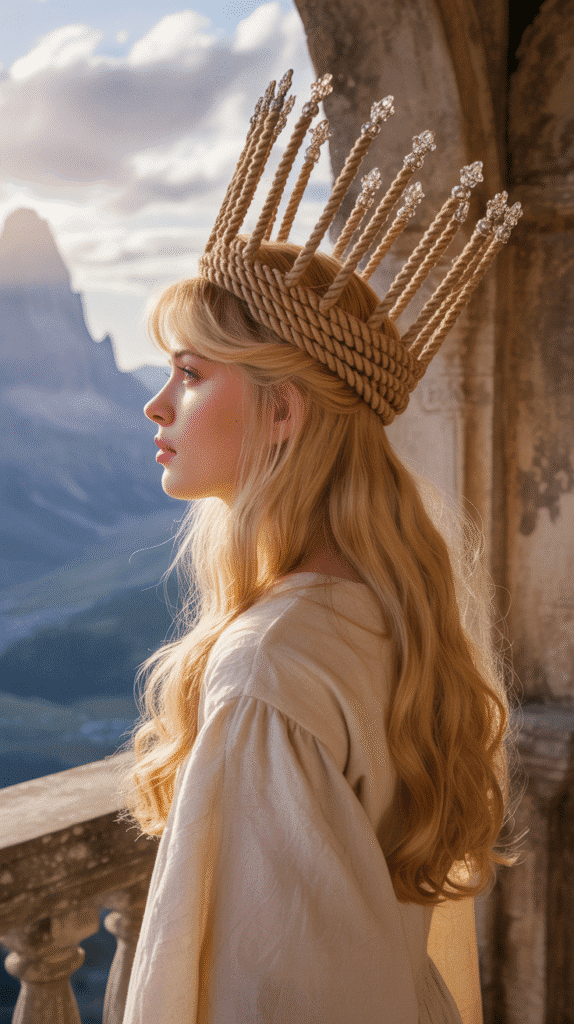
6. The Horned Headdress Style
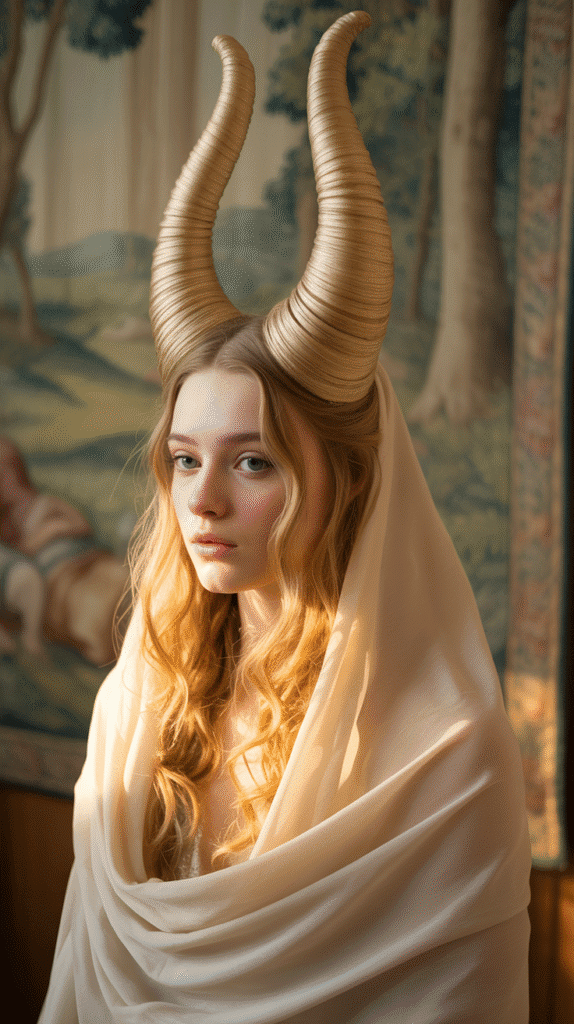
The horned headdress, or “hennin horns,” represents one of the most dramatic medieval fashion statements, particularly popular in 15th-century Burgundian courts.
While controversial in its time, this style created an unforgettable silhouette that showcased elaborate hair arrangements beneath structured supports.
Assembly Instructions:
- Create a center part and divide hair into two equal sections on either side of the head.
- Braid each section into tight three-strand braids starting at the temple and working downward.
- Coil each braid into a tight spiral pin curl at ear level on each side of the head.
- Secure each coil with multiple crossed bobby pins to create a stable foundation.
- Place a wire or padded horn-shaped support over each coiled braid.
- Wrap sheer fabric or silk gauze around each horn, allowing it to flow down dramatically.
- Pin the fabric securely at the base of each horn using ornamental pins.
- Add a jeweled band connecting the two horns across the crown for structural support and decoration.
- Allow any remaining blonde tendrils to curl gently at the nape for softening effect.
7. Waterfall Braid with Loose Curls
The waterfall braid creates a cascading effect where strands of blonde hair appear to flow through the braid like water over stones.
This romantic style combines structure with freedom, perfectly embodying the medieval aesthetic of controlled natural beauty.
Detailed Steps:
- Start with slightly wavy or curled blonde hair for texture and volume.
- Take a three-strand section near the temple on one side of your head.
- Begin a standard French braid for the first few stitches to establish the pattern.
- On the third stitch, drop the bottom strand and let it fall, replacing it with a new section from above.
- Continue this pattern across the crown, consistently dropping strands to create the waterfall effect.
- Each dropped strand should fall naturally into the loose hair below.
- Continue the braid to the opposite side and secure behind the ear with clear elastic.
- Curl the loose flowing hair with a curling wand in 1.5-inch sections for voluminous waves.
- Mist with texturizing spray to enhance the ethereal, flowing appearance.
- Add small flowers or jeweled pins where the braid crosses the crown.
8. The Wrapped Ponytail with Circlet
This elegant yet practical style combines the security of a ponytail with medieval ornamentation, creating a look suitable for both active pursuits and courtly appearances.
The wrapped detail conceals the hair elastic while adding textural interest that highlights blonde hair’s depth.
Construction Details:
- Gather all hair at mid-head level, approximately at the crown area.
- Secure with a strong elastic that matches your blonde hair color.
- Separate a 1-inch section from underneath the ponytail base.
- Wrap this section tightly around the elastic, covering it completely in a spiral pattern.
- Secure the wrapped section’s end with a bobby pin tucked invisibly under the wrap.
- Place a metal circlet or jeweled headband approximately 2 inches back from the hairline.
- Curl or wave the ponytail length using heated tools for added medieval romance.
- Weave a thin ribbon through the ponytail in a spiral pattern from base to ends.
- Allow a few face-framing blonde pieces to escape at the temples for softness.
9. Braided Half-Up Medieval Style
The braided half-up style strikes a perfect balance between maiden innocence and sophisticated elegance, allowing blonde hair to showcase its beauty both secured and flowing.
This versatile look was popular across social classes in medieval times with variations in ornamentation denoting status.
Styling Process:
- Section the top half of hair from temple to temple, leaving bottom half loose.
- Divide the upper section into three equal portions for braiding.
- Create a standard three-strand braid with the center section, keeping it flat against the head.
- Take the two side sections and create thinner braids on each side, framing the face.
- Bring all three braids together at the crown and secure with a decorative hair clasp or ribbon.
- Allow the braids to flow into the loose lower section, blending seamlessly.
- Curl or wave the loose bottom section for added texture and medieval romantic appeal.
- Add pearl pins at the crown junction where the three braids meet.
- Mist the entire style with shine spray to enhance blonde hair’s natural luminosity.
10. The Coiled Temple Braids
Coiled temple braids represent a quintessentially medieval detail that frames the face with sculptural beauty while keeping hair controlled.
This style particularly enhances oval and heart-shaped faces, drawing attention to the eyes and cheekbones while showcasing intricate braiding skills.
Technique Breakdown:
- Create a center part from forehead to crown, leaving the back section loose.
- On each side of the part, section a 2-inch wide portion from hairline to temple.
- Braid each temple section tightly in a three-strand braid down to the ends.
- Coil each braid into a flat spiral shape against the temple area.
- Secure each coil with bobby pins placed around the perimeter like a spiral.
- The pins should be invisible from the front, hidden under the coiled edges.
- Leave the remaining blonde hair loose and flowing, or gather into a loose ponytail.
- Add small jeweled pins to the center of each temple coil for royal embellishment.
- Mist face-framing areas with light-hold spray to prevent flyaways while maintaining softness.
11. The Netted Caul Hairstyle
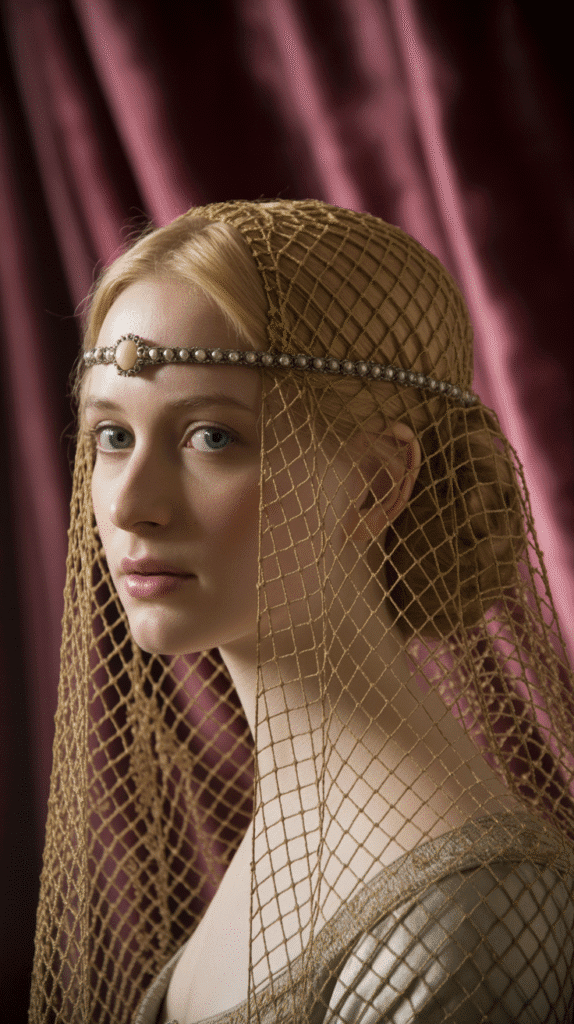
The caul or hair net represents medieval practicality meeting ornamental beauty, often crafted from silk, gold thread, or precious metals.
This style completely encases the hair while allowing blonde tones to shimmer through the netting, creating an ethereal appearance favored by high-ranking noblewomen.
Application Method:
- Brush all hair thoroughly and gather at the nape into a low bun or twisted coil.
- Secure the bun flat against the head using numerous bobby pins for stability.
- Place a decorative hair net (caul) over the entire gathered section.
- The net should be taut enough to hold hair but not so tight it creates discomfort.
- Secure the net’s edges with small ornamental pins at strategic points around the perimeter.
- Position a circlet or jeweled band across the forehead to anchor the front edge.
- For authentic detail, choose nets with gold or silver threading that complements blonde hair.
- Allow a small section at the crown to peek through slightly for dimensional interest.
- Add dangling pearls or jeweled ornaments to the net for additional medieval luxury.
12. Twisted Crown with Flowing Back
This style combines the structured elegance of a crown with the romantic appeal of loose, flowing hair.
The twisted crown creates a natural-looking halo effect that’s less formal than braiding while still maintaining the controlled beauty characteristic of medieval styling.
Creation Steps:
- Part hair horizontally from ear to ear, separating the front crown section from back section.
- Clip the back section away temporarily to keep it out of your working area.
- Divide the front section into two equal portions, one on each side of a center part.
- Take the right section and twist it tightly away from the face, moving toward the back.
- Secure the twisted section temporarily at the center back with a clip.
- Repeat the twisting process with the left section, twisting away from face toward center back.
- Cross the two twisted sections at the center back and secure together with bobby pins.
- Release the back section and allow it to flow freely, or add loose waves with a curling iron.
- Tuck the twisted ends under the loose hair section to hide them completely.
- Adorn the crown area with fresh flowers, silk blooms, or jeweled pins for medieval authenticity.
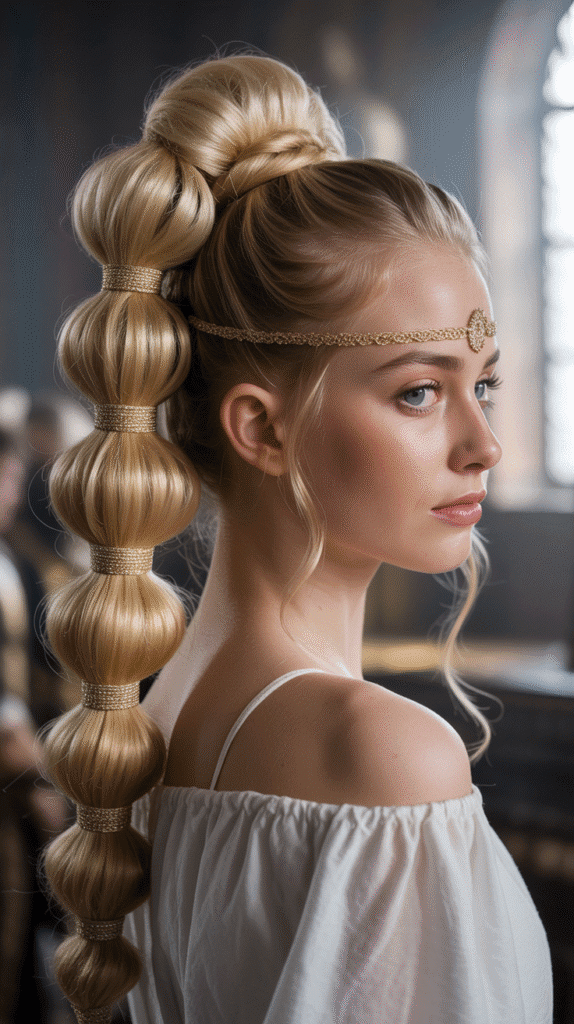
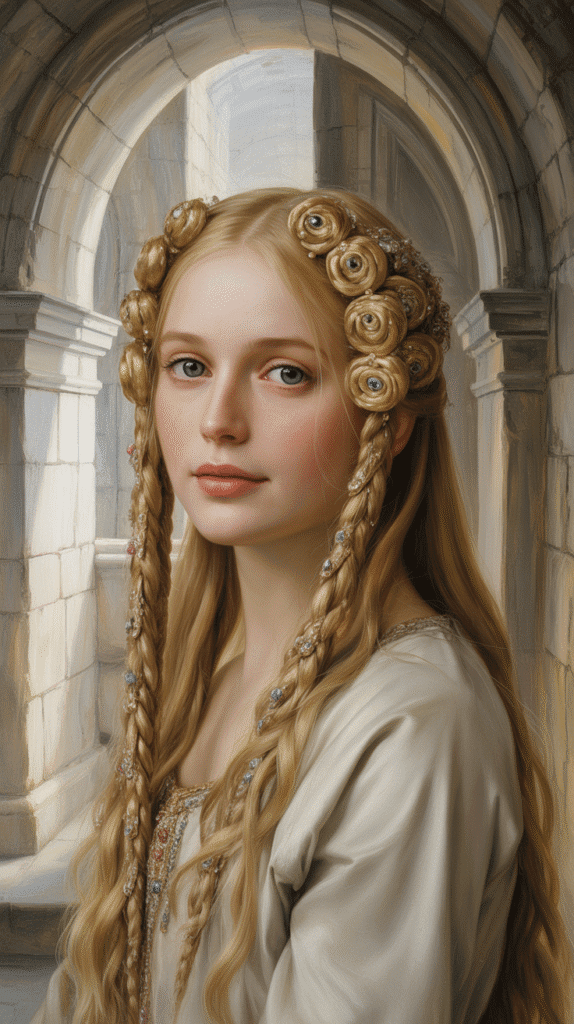
13. The Elaborate Five-Strand Braid
The five-strand braid showcases advanced medieval braiding techniques, creating a wide, intricate pattern that displays remarkable complexity.
This sophisticated style was reserved for special occasions and demonstrated both the wearer’s status and their lady’s maid’s exceptional skill.
Braiding Instructions:
- Gather all hair into a low ponytail at the nape and secure with elastic.
- Divide the ponytail into five equal sections, holding three in your right hand and two in your left.
- Number the sections 1-5 from left to right in your mind for tracking purposes.
- Take section 1 (far left) and weave it over section 2, under section 3, and over section 4.
- Take section 5 (far right) and weave it over the new section 4, under section 3, and over section 2.
- Continue this pattern alternating from left and right sides, maintaining even tension throughout.
- The resulting braid will be wide and flat with an intricate woven pattern.
- Secure the end with a ribbon tied in an elaborate bow or decorative hair jewelry.
- Gently pancake the braid by pulling on the outer edges to create impressive width.
- Weave thin ribbons through the pattern or add small flowers between the woven sections.
14. Simple Center Braid with Loose Sides
This understated medieval style balances simplicity with elegance, featuring a single braid down the center while leaving side sections free to frame the face.
The style was particularly popular among young noblewomen and working-class medieval women alike, transcending social boundaries with its practical beauty.
Styling Approach:
- Create a section from forehead to crown approximately 3 inches wide down the center.
- Leave side sections loose on both sides of the face from temple to behind the ears.
- Begin a French braid with the center section, starting at the hairline and working backward.
- Incorporate small sections from the center parting as you braid toward the crown.
- Continue as a regular three-strand braid once you’ve passed the crown area.
- Secure at the nape with a ribbon or leather cord tied decoratively.
- Wave or curl the loose side sections gently using a curling iron for softness.
- The blonde side pieces should flow naturally, softening the structured center braid.
- Add small flowers or pearl pins along the braided section for enhanced medieval charm.
15. The Crimped Medieval Volume
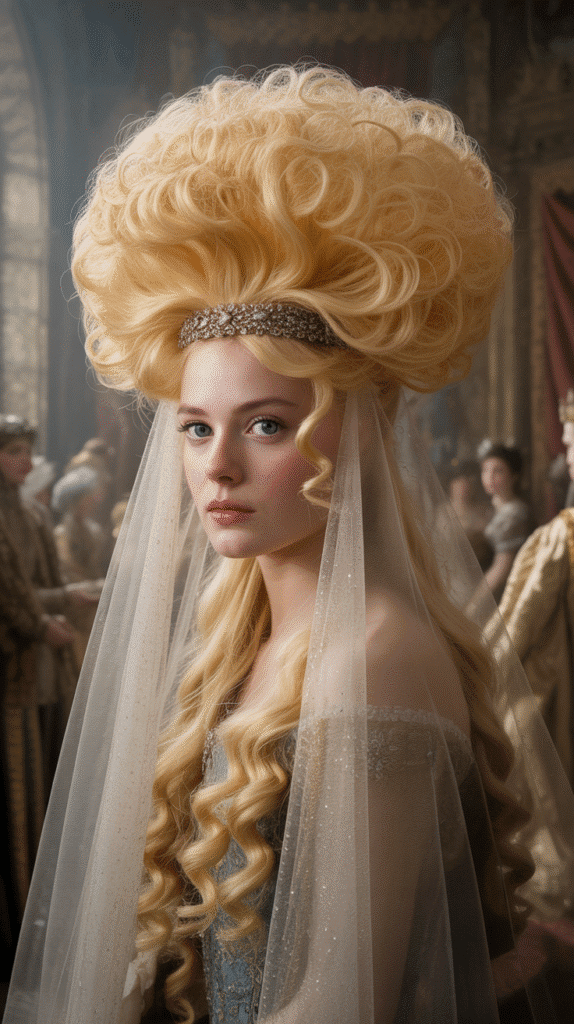
Medieval women achieved dramatic volume through various techniques including crimping and texturizing methods.
This style recreates that impressive fullness, giving blonde hair enormous presence that commands attention in any medieval-themed setting.
Volume Creation:
- Work with clean, dry hair that has been treated with volumizing products at the roots.
- Section hair into manageable portions starting from the bottom layer.
- Use a crimping iron or create small braids throughout damp hair, allowing them to dry completely.
- Once crimped texture is achieved throughout all sections, remove any braids gently.
- Brush through the crimped hair with a wide-tooth comb to blend the texture into massive volume.
- Use your fingers to direct hair backward away from the face for maximum height at the crown.
- Place a circlet or jeweled headband 3-4 inches back to control and showcase the volume.
- Allow the voluminous blonde hair to cascade down the back in a cloud of textured waves.
- Set with strong-hold hairspray, focusing on the root area to maintain lift throughout wear.
- Add a veil attached to the circlet for authentic high medieval styling and additional drama.
16. Braided Bun with Crown Accent
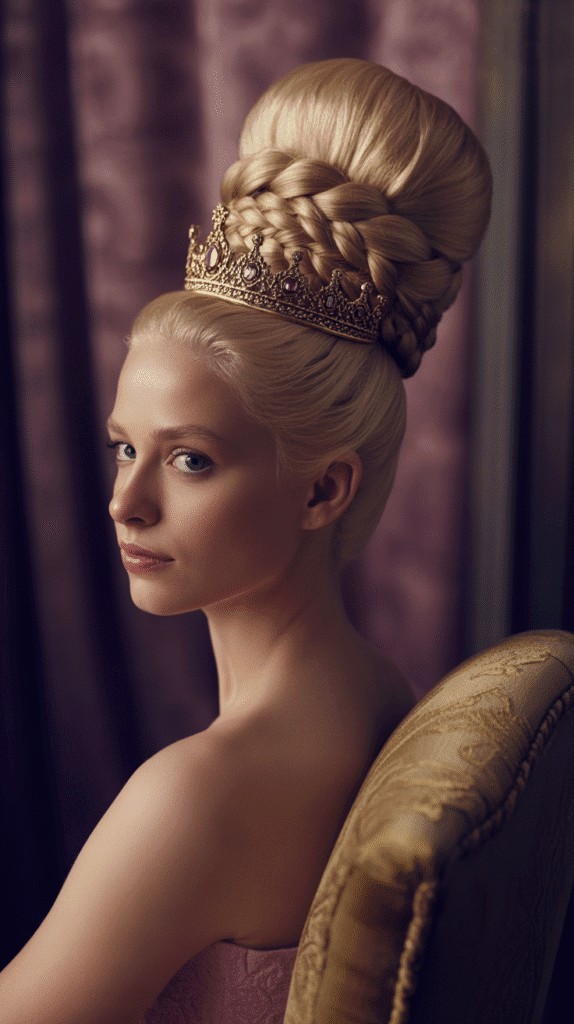
This refined style combines the security and sophistication of a braided bun with the regal statement of a crown or circlet.
The technique keeps all hair elegantly contained while creating textural interest through the braiding pattern visible within the bun structure.
Construction Technique:
- Gather all hair into a high ponytail at the crown, securing with a strong elastic.
- Divide the ponytail into three equal sections for braiding purposes.
- Create a tight three-strand braid with all the ponytail hair down to the ends.
- Wrap the completed braid around the base of the ponytail in a coiling motion.
- As you wrap, pin each layer of the coil to the head and to previous layers for stability.
- Tuck the end of the braid under the bun and secure with multiple bobby pins.
- The braided pattern should be visible on the surface of the bun, creating texture.
- Position a jeweled crown or ornate circlet around the base of the bun for royal emphasis.
- Add hairpins with pearl or jewel details throughout the bun for additional medieval sparkle.
17. The Asymmetrical Medieval Drape
This sophisticated style features hair draped asymmetrically over one shoulder, secured with elaborate pinning and ornamentation.
The asymmetry creates dynamic visual interest while the controlled draping demonstrates the refinement expected in medieval courtly circles.
Styling Method:
- Create a deep side part, positioning it approximately above the arch of one eyebrow.
- On the heavier side, take all hair and bring it forward over the shoulder.
- On the lighter side, twist the hair tightly back toward the nape and pin securely.
- The front draped section should create a graceful curve from part to shoulder.
- Secure the draped hair at the shoulder with an ornamental brooch or jeweled pin.
- Create loose waves or curls in the draped section to add dimension and volume.
- The twisted back section can be coiled at the nape or incorporated into the draped side.
- Weave a decorative chain or string of pearls through the draped hair for luxury.
- Position a jeweled hair clip at the deep part line for additional medieval authenticity.
18. Double Rope Twists into Low Bun
This elegant style features two rope twists that converge into a low bun, combining textural interest with sophisticated simplicity.
The rope twist technique creates beautiful dimension in blonde hair while the low bun positioning evokes medieval modesty and grace.
Assembly Process:
- Part hair down the center from forehead to nape, creating two equal halves.
- Take the right section and divide it into two portions.
- Twist both portions individually in the same direction (clockwise), then wrap them around each other counter-clockwise.
- This creates a rope twist effect that travels from the temple to the nape.
- Repeat the identical process on the left side, maintaining symmetry.
- At the nape, combine both rope twists together into one unified section.
- Coil the combined twisted hair into a low bun at the nape base.
- Secure the bun with bobby pins placed in an X-pattern for maximum stability.
- Wrap a decorative ribbon or fabric band around the bun base for medieval detail.
- Add jeweled pins at intervals along the rope twists for sparkle and authenticity.
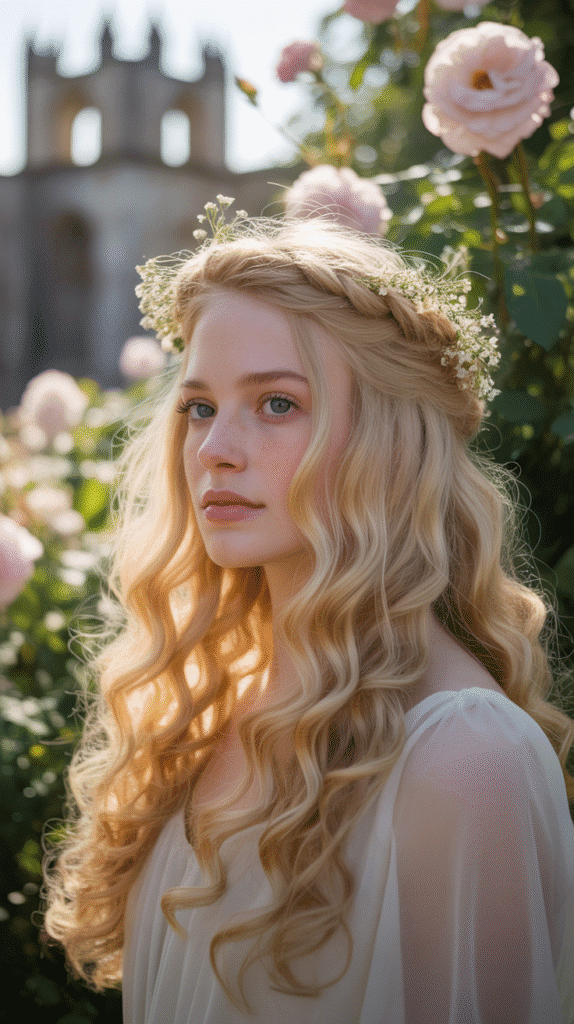
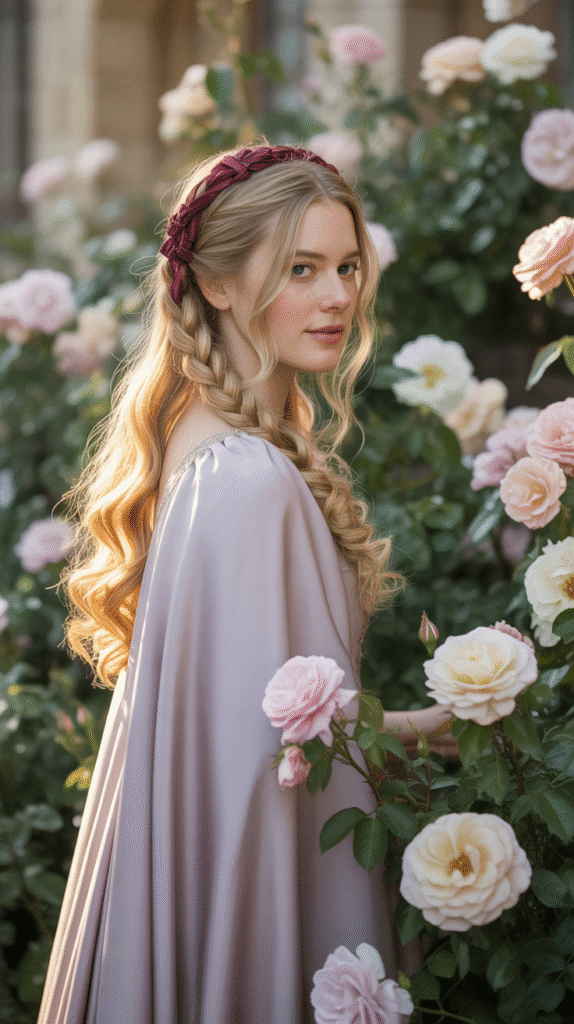
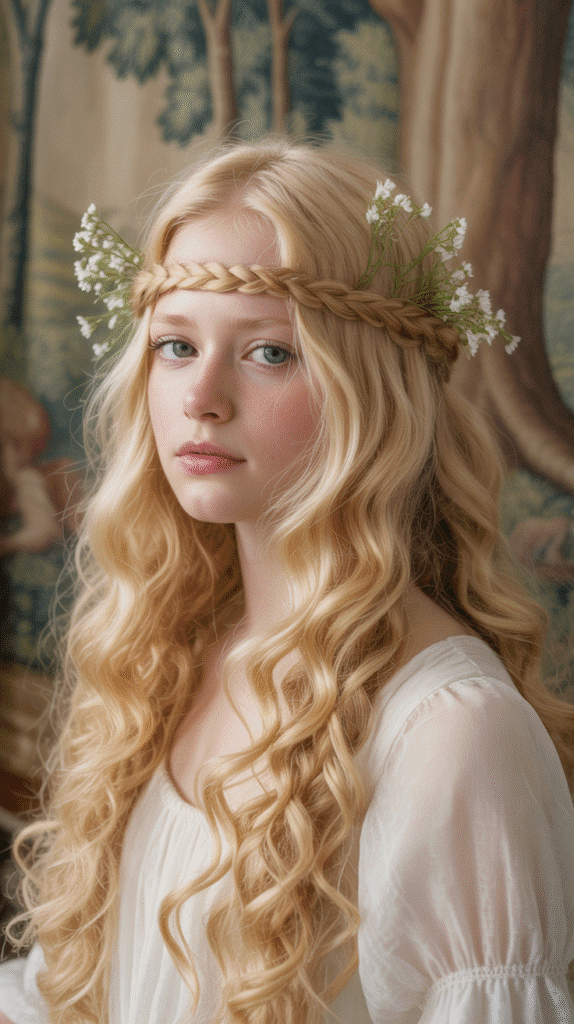
19. The Flower Crown with Braided Base
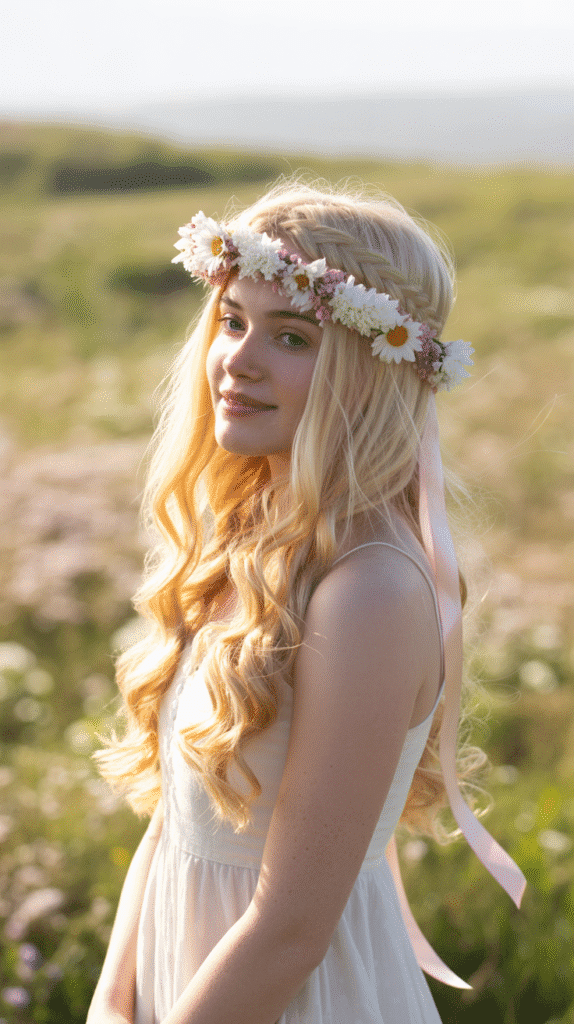
Flower crowns represent one of the most romantic medieval accessories, traditionally worn by maidens during festivals and celebrations.
Creating a braided base ensures the flower crown stays secure while integrating naturally with the blonde hair itself.
Creation and Application:
- Create a crown braid following the hairline from ear to ear across the forehead and crown.
- Keep this braid relatively flat against the head to serve as an anchor.
- Continue the braid around the entire circumference of the head until returning to start.
- Secure the braid end by tucking it under the beginning and pinning invisibly.
- Take a flexible floral wire crown pre-made with fresh or silk flowers in medieval colors.
- Position the flower crown directly over the braided base, nestling it into the braid.
- Secure the flower crown to the braid underneath using hairpins pushed through both elements.
- Allow the remaining loose blonde hair to flow freely, or add gentle waves for romance.
- Choose flowers in whites, pinks, and purples which complement blonde hair beautifully.
- Add trailing ribbons from the back of the flower crown for enhanced medieval pageantry.
20. Sleek Side Part with Temple Tucks
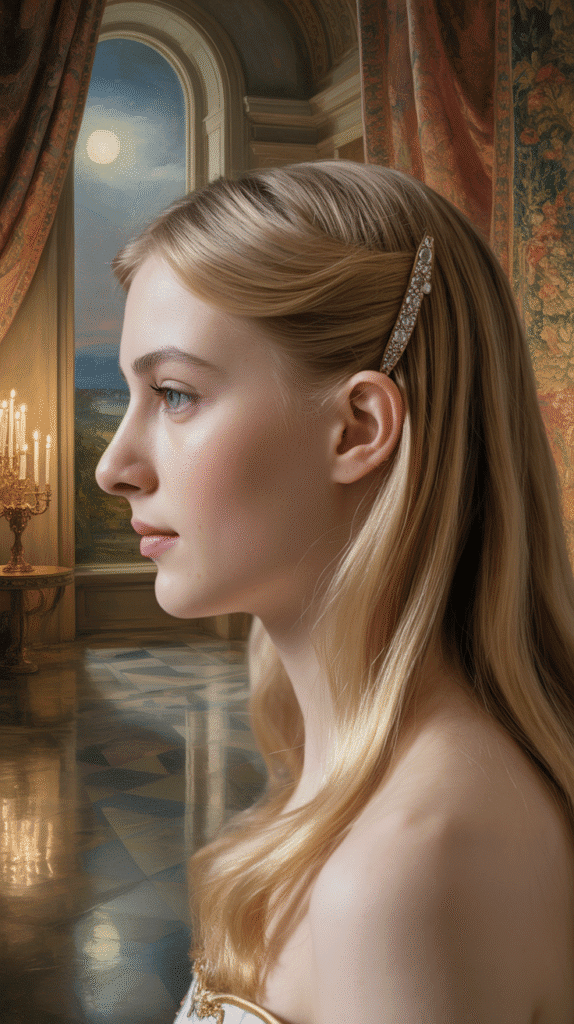
This minimalist medieval style relies on precise parting and strategic tucking rather than elaborate braiding, creating clean lines that showcase the natural beauty of blonde hair.
The temple tucks add subtle detail while keeping hair controlled and elegant.
Styling Technique:
- Create a dramatic side part positioned above one eyebrow using a fine-tooth comb.
- Apply smoothing serum to hair on the heavier side of the part for sleek finish.
- Take a 1-inch section at the temple on the heavy side and smooth it back.
- Tuck this section behind the ear and secure with bobby pins that match your blonde shade.
- Repeat with a second temple section, slightly overlapping the first for layered effect.
- On the lighter side of the part, smooth hair tightly against the head and pin behind the ear.
- Allow the remaining hair to flow smoothly down the back or over one shoulder.
- Add a jeweled hair clip or ornamental pin at the temple tuck point for medieval detail.
- Finish with shine spray to enhance the sleek appearance and blonde hair’s natural luster.
21. The Wrapped Medieval Ponytail Crown
This innovative style elevates the ponytail from simple to spectacular by incorporating wrapped sections that create a crown-like effect.
The technique showcases blonde hair’s dimension while maintaining the practicality medieval women valued for active lifestyles.
Construction Details:
- Create a high ponytail at the crown, securing with a strong elastic band.
- Separate a 2-inch section from the underside of the ponytail base.
- Wrap this section around the elastic multiple times, concealing it completely.
- Instead of securing immediately, take another 2-inch section and wrap it beside the first.
- Continue taking sections and wrapping them around the base in a circular pattern.
- Each wrapped section should slightly overlap the previous one, creating petal-like layers.
- Once the base is completely covered in wrapped sections, secure with bobby pins underneath.
- The ponytail tail should flow freely, enhanced with waves or curls for medieval romance.
- Position a delicate chain circlet at the hairline to complement the wrapped crown effect.
22. Loose Half-Up with Ribbon Weaving
This romantic style combines the innocence of loose flowing hair with the decorative detail of ribbon weaving, a technique that adds color and texture while remaining authentically medieval.
The ribbon weaving transforms simple half-up styling into a work of art.
Weaving Process:
- Section the top third of hair from temple to temple, leaving the rest loose.
- Divide the upper section into three equal parts for a standard braid.
- Take a length of silk ribbon (medieval colors like burgundy or forest green work beautifully).
- Fold the ribbon in half and loop it around the left strand at the beginning.
- Braid normally, but treat the ribbon as part of the strands it’s attached to.
- As you braid, the ribbon will weave in and out, creating a decorative pattern.
- Secure the braid at the crown with the ribbon itself, tying a decorative bow.
- Allow the ribbon ends to trail down with the loose flowing hair beneath.
- Curl or wave the loose bottom section for added medieval romantic appeal.
- The blonde hair contrasts beautifully with colored ribbons, creating eye-catching dimension.
23. The Medieval Pompadour
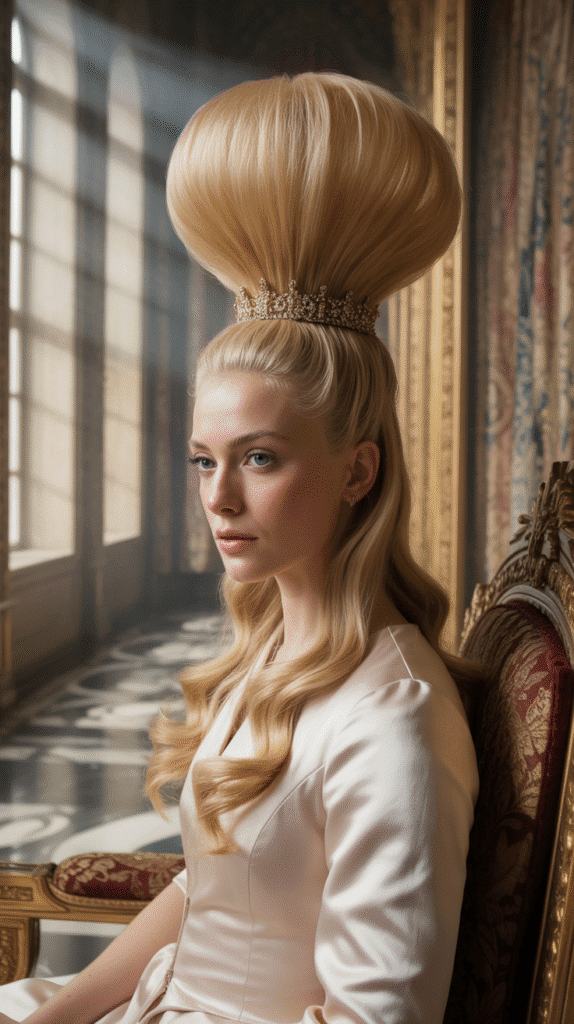
This dramatic style features significant height at the crown, achieved through backcombing and strategic pinning.
While pompadours are often associated with later periods, medieval women also created impressive height at the crown as a sign of status and fashion awareness.
Height Creation:
- Section off the front third of hair from temple to temple, approximately 4 inches deep.
- Clip the remaining hair away to keep your working area clear.
- Take the crown section and backcomb it thoroughly at the roots for volume.
- Smooth the outer layer gently with a natural bristle brush while maintaining interior volume.
- Roll the section backward toward the crown, creating a rounded, elevated shape.
- Pin the rolled section at the crown with bobby pins pushed vertically into the roll.
- The pompadour should stand 3-4 inches above the natural hairline for dramatic effect.
- Release the back sections and allow them to flow freely or gather into a low style.
- Position a jeweled circlet or small crown at the base of the pompadour for royal emphasis.
- Blonde hair’s light-catching properties make this high-volume style especially striking.
24. Braided Headband with Curls
This charming style uses the wearer’s own hair to create a headband effect, combining practicality with beauty in a quintessentially medieval fashion.
The braided headband keeps hair away from the face while the flowing curls maintain romantic appeal.
Creation Technique:
- Part hair straight back from the forehead rather than using a side or center part.
- Section a 2-inch wide strip from temple to temple across the front hairline.
- Leave the remaining hair loose for now, clipping it out of the way.
- Braid the front section in a tight three-strand braid from one temple to the other.
- Position this braid across the hairline like a headband, approximately 1 inch back from edge.
- Secure each end of the braid behind the ears with bobby pins.
- Release the remaining hair and curl it in large sections for voluminous medieval waves.
- The curled blonde hair should cascade from beneath the braided headband naturally.
- Add small flowers or pearl pins along the braided headband for decorative detail.
25. The Twisted Rope Crown
This elegant variation on the crown style uses twisted ropes rather than braids, creating a different texture that’s equally beautiful.
The rope twist technique is slightly easier than braiding while still achieving an impressively polished medieval appearance.
Twisting Method:
- Part hair down the center from forehead to nape.
- Take the right section and divide it into two equal parts.
- Twist each part individually in a clockwise direction until tight.
- Then twist the two twisted sections around each other counter-clockwise (rope twist).
- Continue this rope twist from the temple around the back of the head.
- Repeat the identical process on the left side, creating a matching rope twist.
- Bring both rope twists to meet at the back center of the head.
- Cross them over each other and pin securely at the crossing point.
- Wrap the ends around each other and tuck under, hiding any elastic or pins.
- The completed style creates a crown of twisted rope texture around the entire head.
- Add jeweled pins at intervals along the twisted crown for medieval sparkle.
26. Layered Braids with Flowing Ends
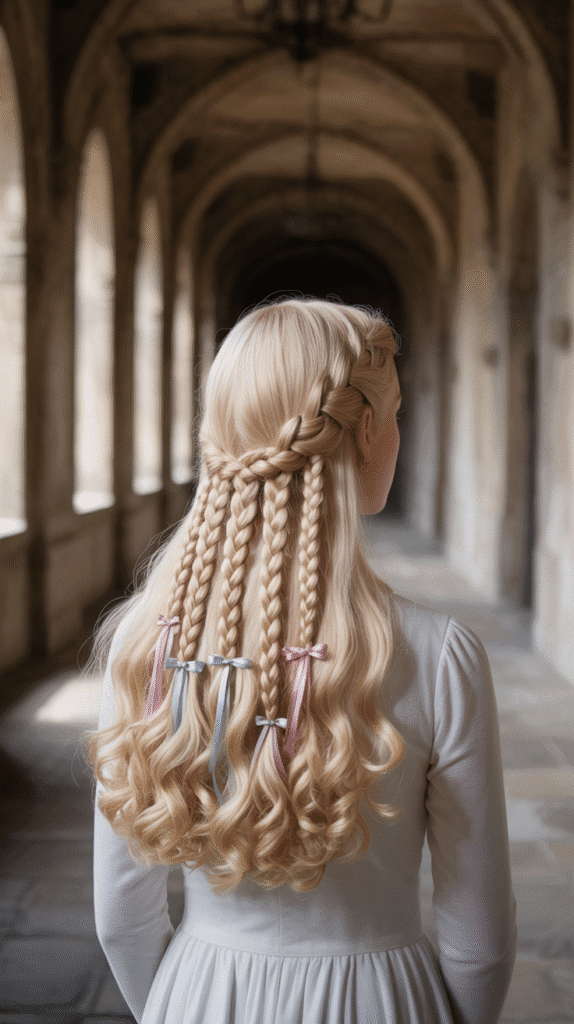
This style showcases multiple braids of different sizes layered together, creating impressive texture and dimension.
The technique was popular among medieval noblewomen who had time and assistance to create elaborate multi-braid arrangements.
Braiding Strategy:
- Section hair into five distinct zones: center crown, left side, right side, left nape, right nape.
- Begin with the center crown section, creating a French braid running straight back.
- Create smaller three-strand braids on each side section, starting at temple level.
- The nape sections remain loose initially to provide hair for the side braids to incorporate.
- All braids should stop at approximately ear level, leaving the lower lengths unbraided.
- Once all braids are complete, remove the temporary elastics and allow the braid ends to flow together.
- The blonde hair will cascade in a unified fall of different textured sections from the braids.
- Gently separate and loosen the braids slightly for a fuller, more romantic appearance.
- Add small ribbons tied at the point where each braid ends and loose hair begins.
- Curl the flowing ends with a large-barrel curling iron for enhanced medieval beauty.
27. The Veiled Crown Braid
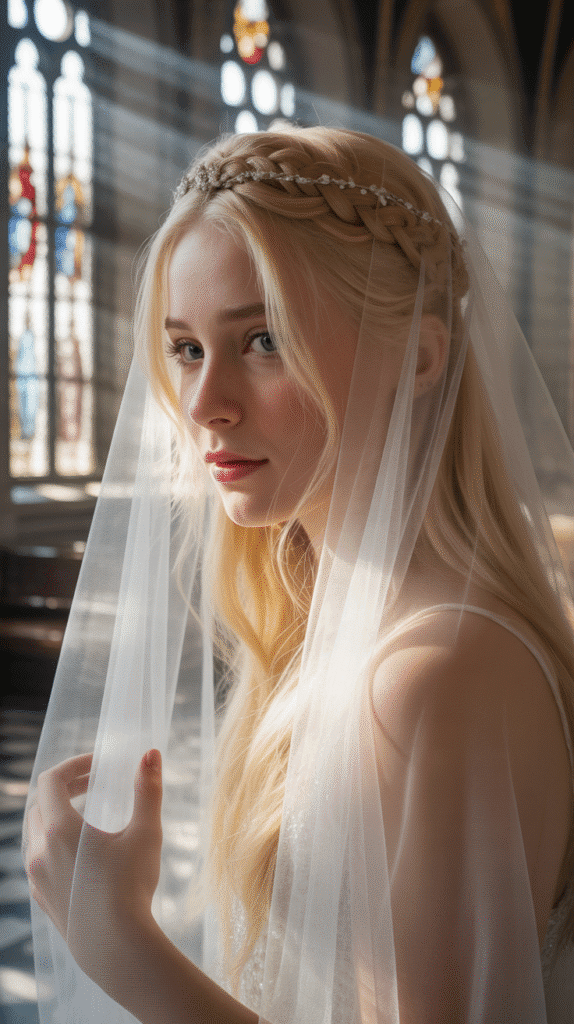
This style combines a crown braid with a sheer veil, creating an ethereal appearance perfect for medieval ceremonies or formal occasions.
The veil adds mystery while allowing blonde hair to shimmer through the delicate fabric.
Assembly Instructions:
- Create a Dutch crown braid following the earlier crown braid technique around the head.
- Ensure the braid sits flat and secure against the head for proper veil support.
- Take a circular or rectangular sheer veil in white, ivory, or pale gold tones.
- Position the veil over the crown braid, centering it properly on the head.
- Secure the veil to the braid underneath using small pins pushed through both layers.
- The veil can drape down the back or be arranged to frame the face and shoulders.
- Allow some blonde tendrils to escape at the hairline for a softer, romantic effect.
- Position a jeweled circlet or metal band over the veil at the hairline for security.
- The combination of blonde hair, braided crown, and flowing veil creates quintessential medieval bridal beauty.
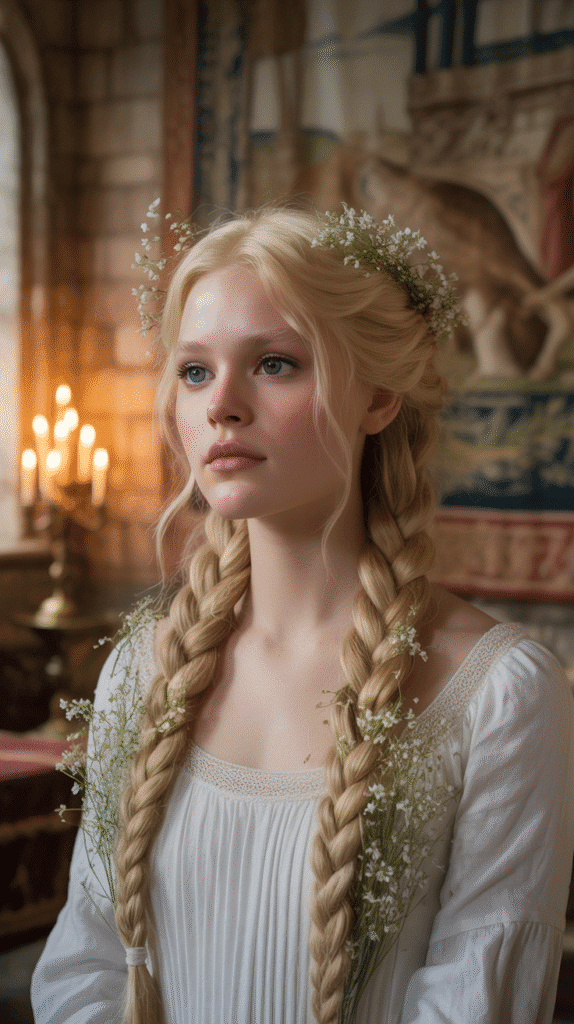
28. Simple Low Braid with Flowers
This understated style proves that medieval beauty doesn’t always require complexity.
A single low braid adorned with fresh or silk flowers creates romantic simplicity that allows blonde hair’s natural beauty to take center stage.
Styling Approach:
- Brush all hair back smoothly from the face without creating a part.
- Gather hair at the nape into a low ponytail position but don’t secure with elastic yet.
- Begin a three-strand braid starting at the nape and working down the length.
- Keep the braid loose rather than tight for a softer, more romantic appearance.
- Secure the end with a ribbon tied in a bow rather than a modern elastic.
- Starting at the top of the braid, insert fresh flower stems or silk flowers with wire stems.
- Space flowers evenly down the length of the braid, approximately every 3-4 inches.
- Choose flowers in colors that complement blonde hair—white, lavender, and soft pink work beautifully.
- Gently pull at the braid edges to create a fuller, more textured appearance.
- Allow a few blonde face-framing pieces to remain loose at the temples.
29. The Celtic Knot Braid
This intricate style incorporates Celtic knot designs into the braiding pattern, creating a complex visual that showcases advanced medieval hair artistry.
The style requires patience but creates a stunning focal point that celebrates blonde hair’s ability to display intricate patterns.
Knotting Technique:
- Section the top third of hair from temple to temple, leaving the rest loose.
- Divide this section into four equal strands instead of the typical three.
- Cross the far right strand under its neighbor, then over the next one.
- Cross the far left strand under its neighbor, then over the next one.
- Continue this under-over pattern, which creates an interwoven Celtic knot appearance.
- The pattern is complex: strand 1 under 2, over 3; strand 4 under 3, over 2; repeat.
- Work slowly to maintain the pattern’s integrity and even tension throughout.
- After 6-8 inches of Celtic knot braiding, transition to a standard three-strand braid.
- Secure with a decorative Celtic-inspired hair clasp or brooch.
- Allow the remaining loose hair to flow naturally or add waves for texture.
- The blonde hair makes the intricate over-under pattern especially visible and impressive.
30. Swept-Back Simplicity with Jeweled Pins
This minimalist approach focuses on sleek lines and strategic ornamentation rather than complex braiding.
The style emphasizes blonde hair’s natural shine and color while jeweled pins provide the medieval decorative element.
Styling Method:
- Apply smoothing serum throughout hair from roots to ends for maximum sleekness.
- Brush all hair straight back from the face, eliminating any part.
- Smooth the hair tightly against the head, especially at the crown and temples.
- Secure at the nape with bobby pins arranged horizontally for invisible hold.
- The hair can then flow freely, be gathered into a ponytail, or coiled into a bun.
- Place jeweled hairpins in a decorative pattern across the crown area.
- Arrange pins in a line, cluster, or scattered pattern depending on your preference.
- Choose pins with medieval-appropriate designs: crosses, fleur-de-lis, or simple jeweled settings.
- The blonde hair’s smoothness creates a perfect canvas for the ornamental pins to shine.
- Finish with strong-hold hairspray to maintain the sleek appearance throughout wear.
31. The Medieval Updo with Escaping Tendrils
This sophisticated updo keeps most hair controlled while allowing strategic blonde tendrils to escape, creating a balance between formal structure and romantic softness.
The style was perfect for medieval noblewomen attending court functions.
Construction Process:
- Curl all hair with a medium-barrel curling iron before beginning the updo construction.
- Pull small sections at the temples and nape to hang free as tendrils before styling.
- Gather the remaining hair into a high ponytail at the crown area.
- Twist the ponytail loosely and wrap it around the base, pinning as you go.
- Don’t make the updo too tight—allow some texture and volume to remain.
- Create a slightly messy, romantic updo rather than a severe, slicked-back bun.
- The escaping blonde tendrils should frame the face naturally on both sides.
- Curl the tendrils tightly so they spiral elegantly along the cheeks and neck.
- Pin decorative elements like small flowers or jeweled pins throughout the updo.
- A few pieces escaping at the nape add to the romantic, slightly undone medieval aesthetic.
32. Double-Wrapped Crown with Center Part
This regal style features two sections of hair wrapped around the head like a double crown, meeting at the back.
The center part and symmetrical wrapping create a formal, balanced appearance befitting medieval royalty.
Wrapping Technique:
- Create a precise center part from forehead to crown, dividing hair into equal halves.
- Take the right section and smooth it tightly back toward the crown area.
- Instead of braiding, wrap this section around the back of the head at crown level.
- Secure with bobby pins as you wrap, keeping the wrapped section flat and smooth.
- Repeat with the left section, wrapping it at the same level to meet the right section.
- Where the two wrapped sections meet at the back, cross them and continue wrapping.
- Each wrapped section should complete a full circle around the head like a crown.
- Tuck the ends under the wrapped sections and pin securely for invisible finish.
- Position a jeweled circlet or crown over the wrapped sections for additional royal emphasis.
- Any remaining length can hang down the back or be coiled at the nape.
33. The Maiden’s Side Cascade
This final style celebrates youthful beauty with hair swept to one side in a cascading waterfall of blonde waves.
The asymmetrical arrangement was popular among young medieval maidens and creates a romantic, approachable appearance.
Cascading Method:
- Create a deep side part, positioning it far to one side for dramatic effect.
- On the smaller side, take all hair and twist it back smoothly toward the ear.
- Secure this twisted section behind the ear with bobby pins, keeping it flat.
- On the larger side, gather all hair and bring it forward over the shoulder.
- Create large, loose waves throughout the forward-swept hair using a curling wand.
- The waves should cascade down the front of the shoulder in a golden waterfall.
- Add small braids within the cascading section for textural interest if desired.
- Pin fresh flowers or silk blooms at the point where hair sweeps forward over the shoulder.
- Allow the cascading blonde hair to catch light naturally, enhancing its golden tones.
- This style works beautifully with highlights or dimensional blonde coloring that adds depth.
Modern Adaptation Tips:
- Medieval styles work best on second-day hair that has natural texture and grip.
- Invest in quality bobby pins that match your blonde shade for invisible securing.
- Practice historical styles before important events as many require patience and skill.
- Combine modern products like texturizing spray with historical techniques for best results.
- Don’t worry about perfect precision—many medieval styles had an organic, handcrafted quality.
Hair Health Considerations:
- Avoid creating styles too tight, which can cause tension headaches and hair damage.
- Remove all pins and accessories before sleeping to prevent tangling and breakage.
- Deep condition blonde hair regularly as these elaborate styles can cause stress to strands.
- Use heat protectant when curling or waving before creating medieval updos.
- Give your hair breaks between elaborate styling to maintain its health and strength.
Conclusion
The timeless beauty of 33 Gorgeous Medieval Hairstyles for Blonde Princesses offers endless inspiration for anyone seeking to channel the romance, elegance, and majesty of medieval court life.
From simple maiden braids that take mere minutes to elaborate updos requiring advanced skills and patience, these styles prove that the medieval period was a golden age of hair artistry that continues to captivate modern imaginations.
Whether you’re preparing for a Renaissance faire, themed wedding, costume party, historical reenactment, or simply exploring creative styling options, these authentic medieval hairstyles transform blonde hair into crowning glories worthy of royalty.
The beauty of these styles lies not only in their visual impact but also in their connection to centuries of tradition, when hair represented status, identity, and artistry in ways both practical and deeply symbolic.
By mastering the techniques shared in this guide—from basic braiding to complex rope twists, from structured updos to flowing romantic waves—you’ll discover that the principles of medieval hair styling remain remarkably relevant and accessible today.
Each style in this collection of 33 Gorgeous Medieval Hairstyles for Blonde Princesses celebrates the unique luminosity of blonde hair while honoring the craftsmanship and creativity of medieval hair artisans whose legacy continues to inspire beauty and wonder in our modern world.