
Prom night stands as one of the most memorable evenings in a young woman’s life, where every detail matters from the dress to the shoes, and especially the hairstyle.
When it comes to long, straight hair, the styling possibilities are endless, offering elegance, sophistication, and timeless beauty that photographs beautifully under prom lights.
33 Gorgeous Straight Hairstyles for Long Hair Prom presents a comprehensive collection of stunning looks that celebrate the natural beauty of sleek, flowing locks while adding that extra touch of glamour for your special night.
Whether you prefer minimalist chic, romantic embellishments, or bold statement styles, straight hair provides the perfect canvas for creating a show-stopping prom look.
This guide walks you through diverse styling options ranging from classic center parts to intricate half-up designs, side-swept elegance to accessorized masterpieces, ensuring you’ll find the perfect hairstyle that complements your dress, matches your personality, and makes you feel absolutely radiant as you dance the night away.
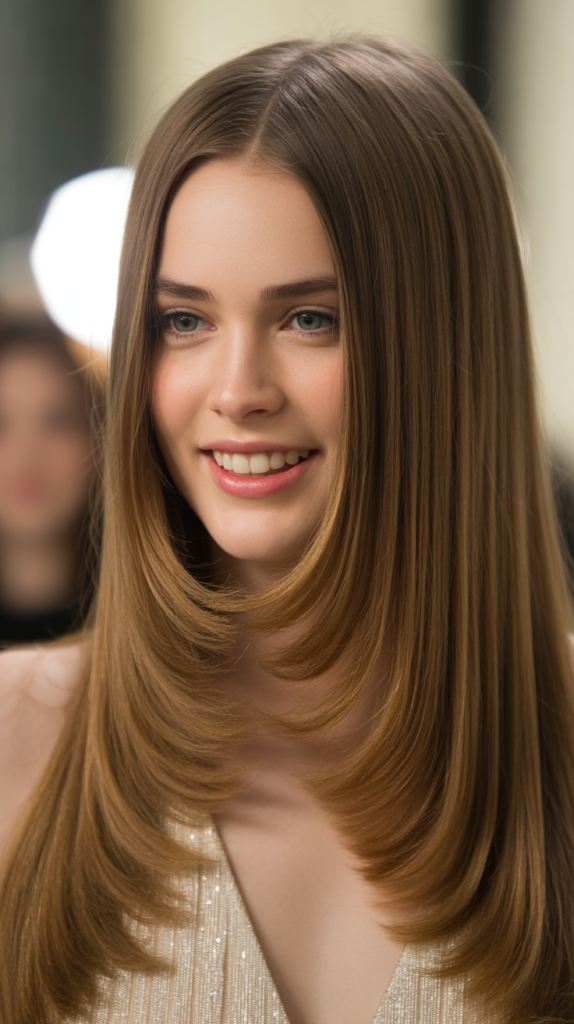
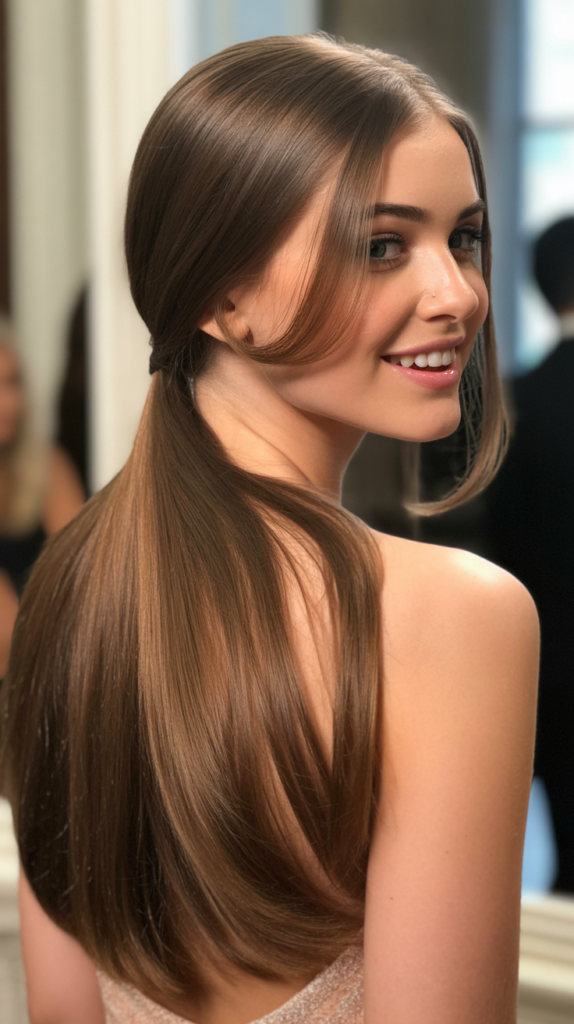
1. Sleek Center Part with Straightened Lengths
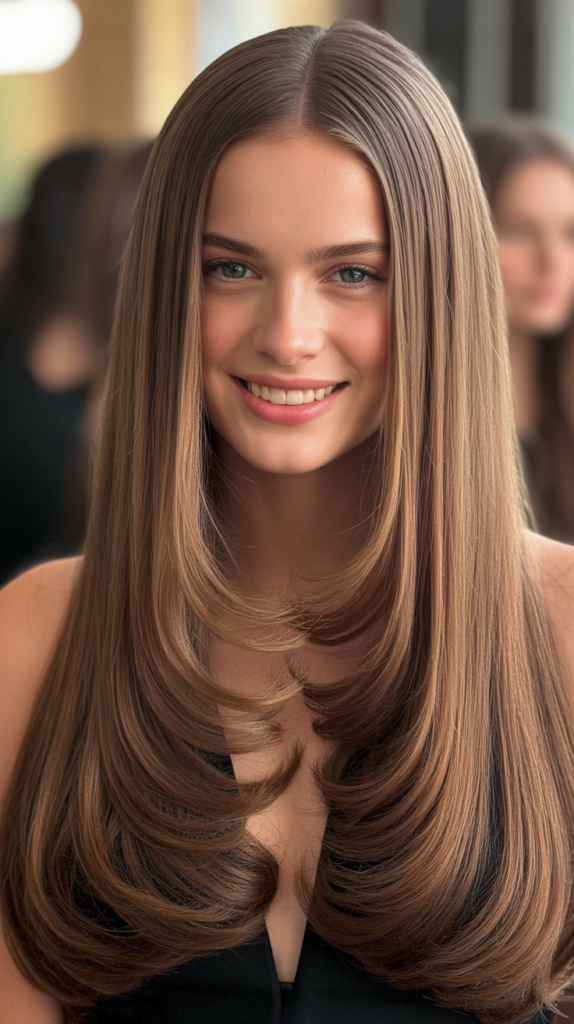
The sleek center part represents the epitome of modern sophistication and minimalist beauty.
This timeless style works exceptionally well for prom because it highlights facial symmetry while allowing your dress and accessories to take center stage.
Styling technique:
- Begin with freshly washed hair and apply a heat protectant spray throughout all sections
- Blow-dry hair completely straight using a paddle brush and directing airflow downward to seal the cuticle
- Create a precise center part using a rat-tail comb for mathematical accuracy
- Section hair into two-inch portions and run a flat iron through each piece at 350-400°F depending on hair texture
- Apply a lightweight shine serum or oil to the mid-lengths and ends for mirror-like reflection
Why it works for prom:
- Creates an elegant, red-carpet worthy appearance that photographs beautifully from all angles
- Draws attention to statement earrings, necklaces, and the neckline of your prom dress
- Provides a clean backdrop for bold makeup looks without competing for attention
- Remains secure throughout the evening with minimal touch-ups required
Best face shapes:
- Oval faces benefit most as the center part enhances natural symmetry
- Heart-shaped faces gain balance through the vertical line created by the part
- Square faces can soften angular features when combined with face-framing layers
2. Deep Side Part with Swept Bangs
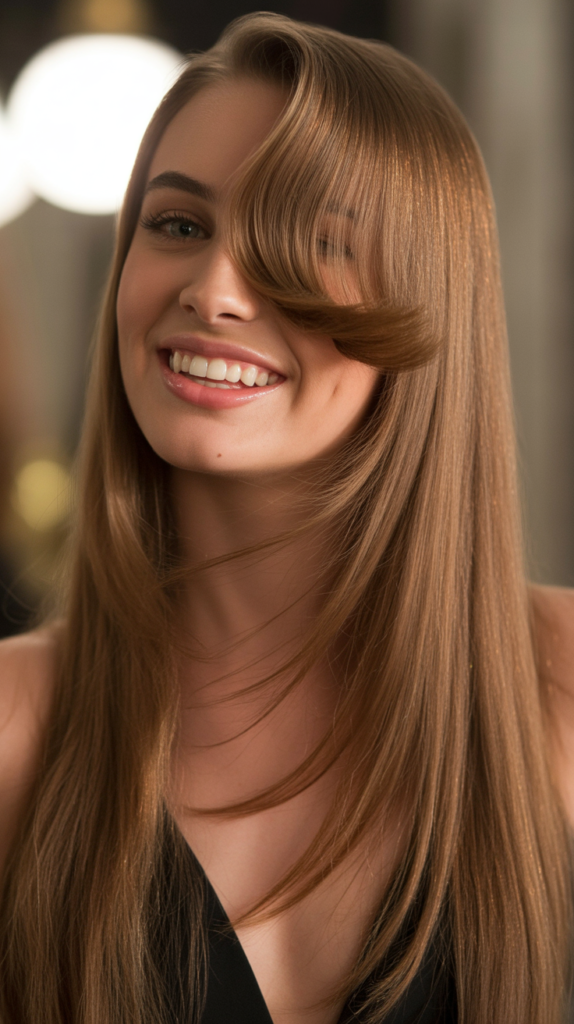
The deep side part delivers instant drama and old Hollywood glamour that transforms straight hair into a sophisticated prom statement.
This asymmetrical approach adds visual interest while maintaining the sleek elegance of straight styling.
Creating the perfect side part:
- Locate your natural part by pushing hair back from the forehead and seeing where it naturally separates
- Create your deep part approximately one to two inches from the center, aligning with the arch of one eyebrow
- Use a fine-tooth comb to establish a clean, defined parting line
- Apply volumizing mousse to the roots on the heavier side for added lift
Styling the swept section:
- Straighten the hair on the smaller side and tuck it behind the ear
- Consider using decorative bobby pins or a jeweled hair clip for added security and sparkle
- Allow the larger section to cascade over the opposite shoulder for maximum impact
- Finish with flexible-hold hairspray to maintain the style while dancing
Complementary elements:
- Pair with a statement earring on the exposed ear side
- Works beautifully with one-shoulder or asymmetrical dress designs
- Consider adding a few face-framing highlights to emphasize the dramatic sweep
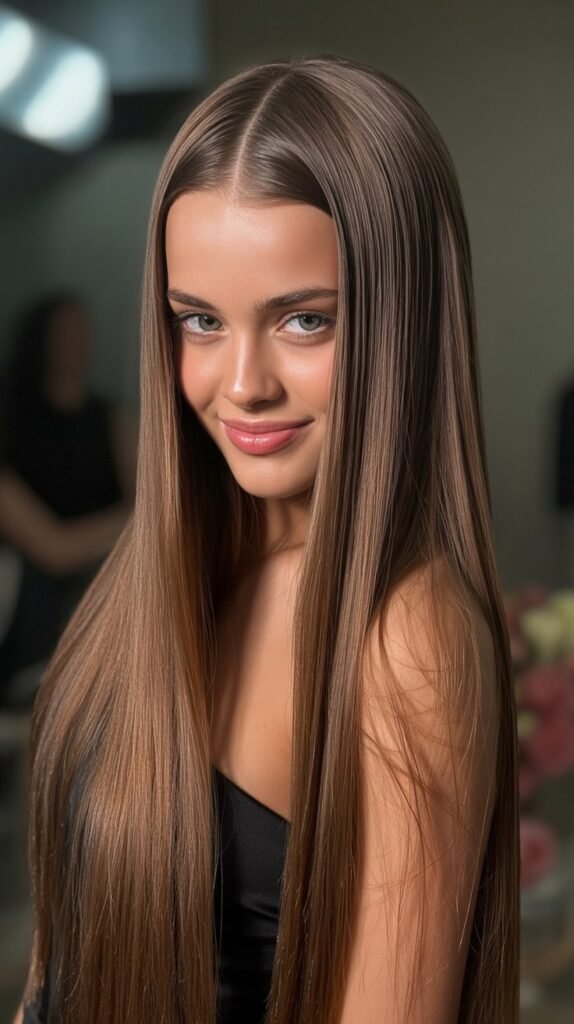
3. Ultra-Smooth Glass Hair
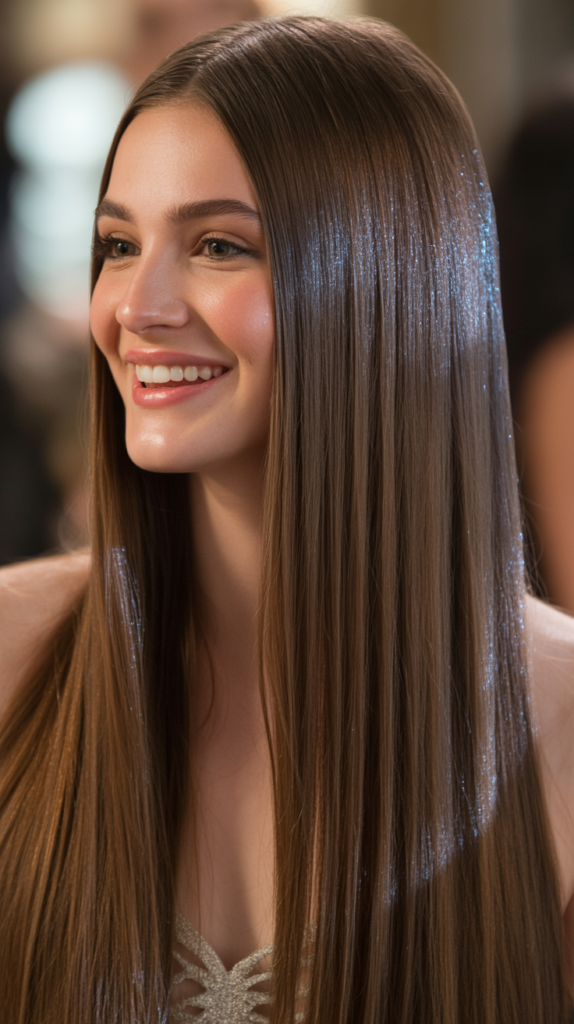
Glass hair represents the pinnacle of straight hair perfection, featuring an ultra-glossy, reflective finish that resembles polished glass.
This Korean beauty trend has taken the prom world by storm with its incredibly sleek appearance.
Achieving glass hair texture:
- Start with a clarifying shampoo to remove any product buildup that could dull shine
- Apply a deep conditioning mask and leave on for 15-20 minutes before rinsing with cool water
- Use a shine-enhancing serum on damp hair before blow-drying
- Straighten hair in small sections with a high-quality ceramic flat iron at the appropriate temperature
- Seal with a glossing treatment or light oil specifically formulated for shine enhancement
Maintenance tips for prom night:
- Bring along a small bottle of shine serum for mid-event touch-ups
- Avoid touching your hair excessively as natural oils from hands can reduce the glossy effect
- Use blotting papers on your scalp if oil production increases throughout the evening
- Keep hair away from humid environments when possible to maintain the ultra-smooth texture
Product recommendations:
- Look for serums containing silicones like dimethicone for maximum light reflection
- Consider a final mist of shine spray rather than traditional hairspray for enhanced gloss
- Invest in a professional-grade flat iron with adjustable temperature settings
4. Straight Hair with Face-Framing Layers
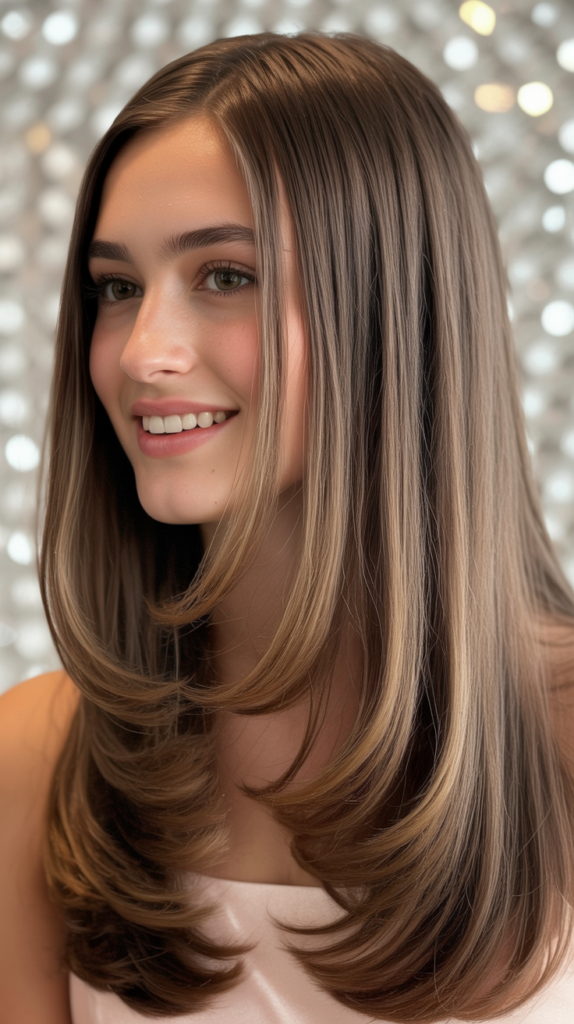
Face-framing layers add dimension and movement to long straight hair while maintaining the overall sleek aesthetic.
This style offers the perfect balance between structured elegance and soft, romantic appeal.
Layer placement strategy:
- Shortest layers should begin around chin or collarbone length to properly frame the face
- Gradually increase length as layers move toward the back for seamless blending
- Request subtle, blended layers rather than choppy cuts for a more sophisticated prom look
- Ensure layers are long enough to tuck behind ears without awkward lengths sticking out
Styling techniques:
- Use a round brush while blow-drying the front layers to create gentle movement
- Straighten layers with slight inward bending at the ends for a polished finish
- Apply a light-hold styling cream to prevent layers from becoming too piece-y or separated
- Consider adding subtle highlights to the layered sections for added dimension
Face shape considerations:
- Round faces benefit from longer, more angular layers that create length
- Long faces pair well with shorter, more horizontal layers that add width
- Square faces soften with wispy, textured layers that curve around the jawline
5. Blunt Cut with Precision Ends
The blunt cut straight hairstyle makes a powerful statement with its razor-sharp edges and uniform length.
This bold choice demonstrates confidence and works exceptionally well for those wanting a modern, editorial prom look.
Preparing for a blunt cut:
- Schedule your haircut two to three weeks before prom for optimal freshness without being too new
- Ensure your stylist uses professional shears designed for blunt cutting
- Request a completely horizontal cut line for maximum impact
- Consider slight internal layering for thickness management while maintaining blunt appearance
Styling for perfection:
- Straighten hair thoroughly as any wave or curl will disrupt the clean line
- Use a flat iron to ensure the ends are perfectly straight and aligned
- Apply an anti-frizz serum to the bottom three inches to maintain crisp edges
- Trim any split ends yourself the morning of prom if necessary using professional hair scissors
Maintenance throughout the evening:
- The blunt cut requires minimal adjustment once styled properly
- Avoid sitting directly on your hair as this can create creases in the ends
- Run fingers through hair vertically rather than horizontally to prevent disrupting the blunt line
- Touch up with a flat iron if bathroom facilities allow for it mid-event
6. Middle Part with Tucked Behind Ears
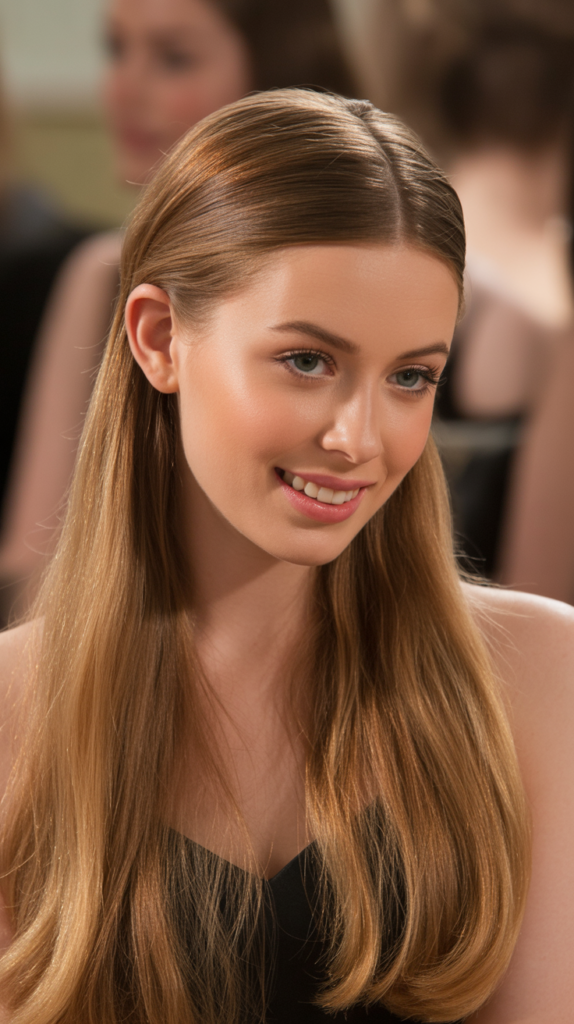
This effortlessly chic style combines the classic center part with the refined elegance of tucking hair behind both ears.
The look showcases facial features while maintaining long, flowing hair down the back.
Creating the tucked look:
- Start with the sleek center part technique described earlier
- Apply a small amount of styling gel or pomade behind the ears for hold
- Tuck hair smoothly behind each ear, ensuring no bumps or lumps along the sides
- Secure with small, clear elastic bobby pins placed vertically behind the ears if needed
Accessorizing opportunities:
- This style provides the perfect showcase for statement earrings or ear cuffs
- Consider adding decorative bobby pins in metallic finishes that complement your dress
- Small jeweled clips can secure the tucked sections while adding sparkle
- Hair jewelry or chains can be draped along the part line for additional glamour
Best for:
- Those wanting to showcase their facial features and makeup artistry
- Highlighting beautiful earrings or ear accessories
- Cooler prom venues where keeping hair off the neck provides comfort
- Creating a balanced look with ornate or embellished prom dresses
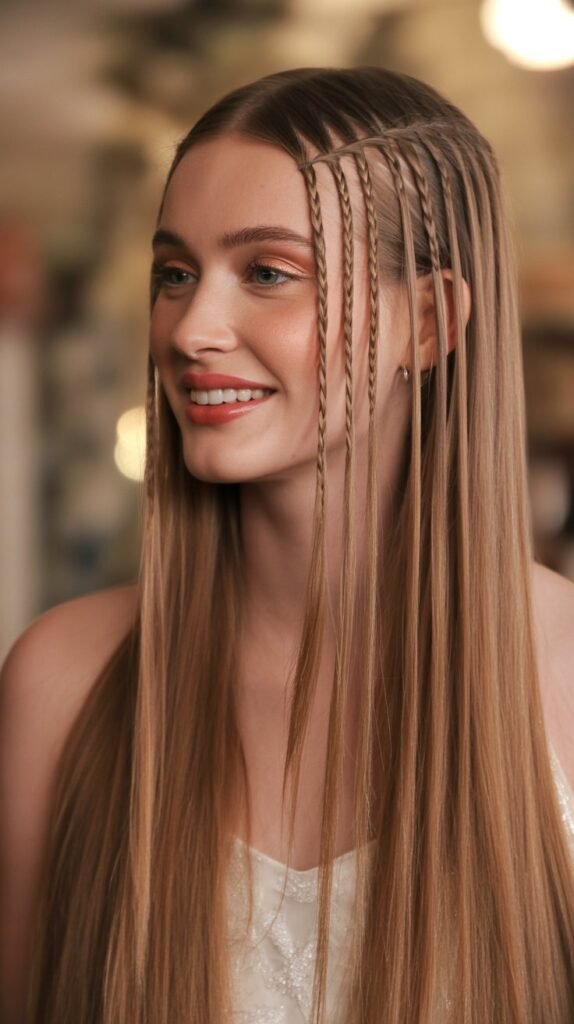
7. Straight Hair with Middle Braid Accent
Adding a single braided accent down the center creates visual interest while maintaining the overall straight aesthetic.
This style offers a unique twist on traditional straight hair that photographs beautifully.
Braid creation process:
- Part hair down the center and section out a one-inch width strip from the hairline
- Create a three-strand or Dutch braid down the center, keeping it tight and uniform
- Secure the braid end with a clear elastic band
- Straighten the remaining loose hair on both sides for contrast
- Optional: pancake the braid slightly for added texture and dimension
Variation options:
- Extend the braid all the way to the ends or stop at mid-back for different effects
- Incorporate small flowers or pearls into the braid for romantic embellishment
- Create a fishtail braid instead of a traditional three-strand for more intricate detail
- Add subtle highlights to the braided section to make it more visible
Styling considerations:
- This works best with hair long enough to create a substantial braid (past shoulder length minimum)
- The contrast between braided and straight textures creates compelling visual dimension
- Requires good lighting to be fully appreciated in photos
- Can be combined with half-up styling by securing the braid into a higher position
8. Side-Swept Straight Glamour
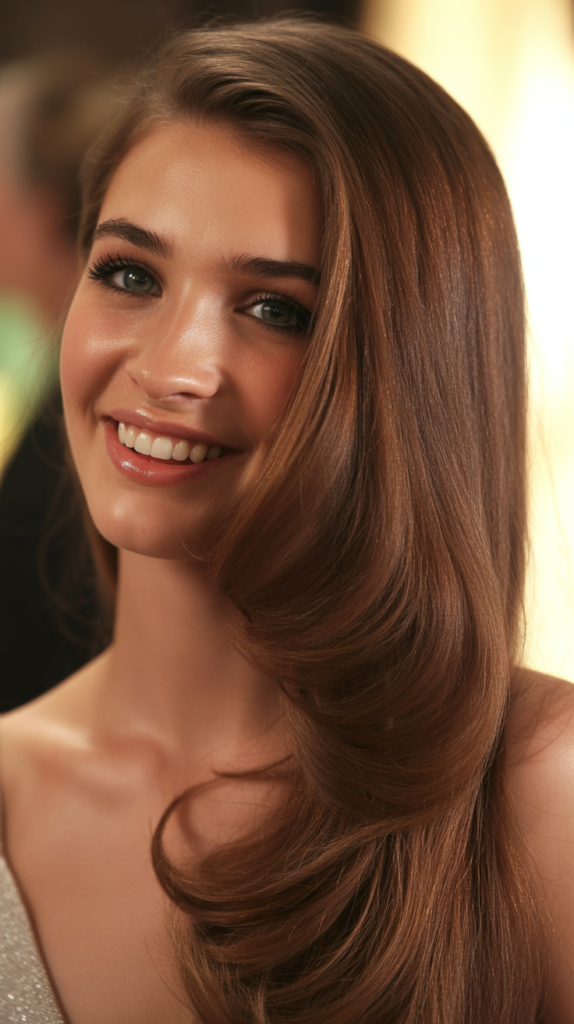
The side-swept style channels vintage Hollywood elegance by directing all hair to cascade over one shoulder.
This asymmetrical approach adds drama while remaining beautifully sleek and straight.
Creating lasting side-sweep:
- Determine which side complements your dress neckline and natural part
- Apply volumizing spray at the roots on the opposite side for lift and body
- Straighten all hair thoroughly before sweeping to the chosen side
- Use bobby pins in an X-formation at the nape of neck on the opposite side to anchor hair securely
Securing techniques:
- Place decorative clips or pins along the tucked side for both function and beauty
- Consider a low side ponytail as a base if hair is very heavy or slippery
- Apply strong-hold hairspray to the tucked side to prevent slipping throughout the evening
- Test the hold by dancing and moving around before leaving for prom
Complementary accessories:
- Statement shoulder jewelry on the exposed shoulder
- Dramatic earring on the visible ear
- Hair jewelry or decorative combs placed at the sweep point
- Consider temporary hair extensions for added volume on the swept side
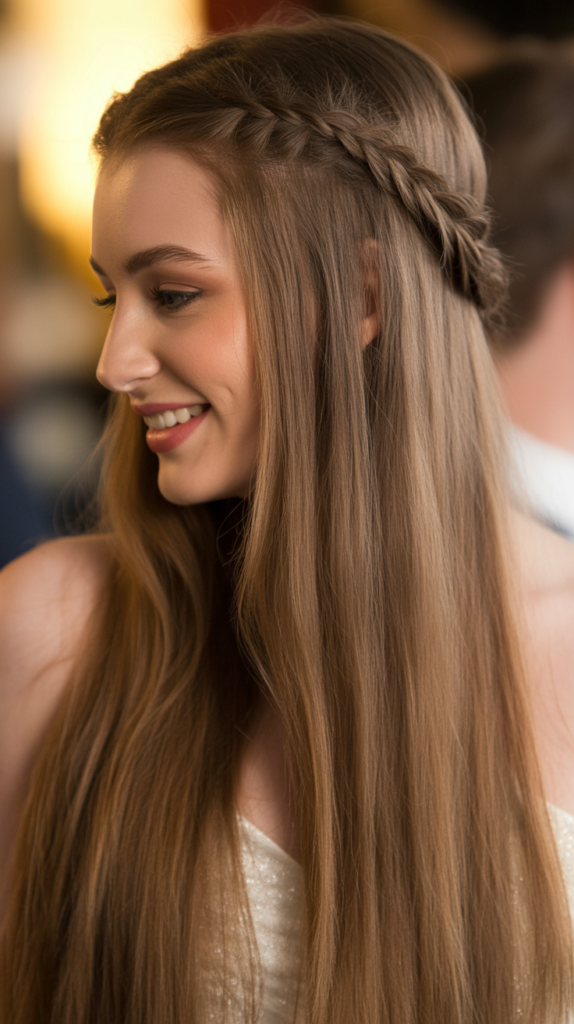
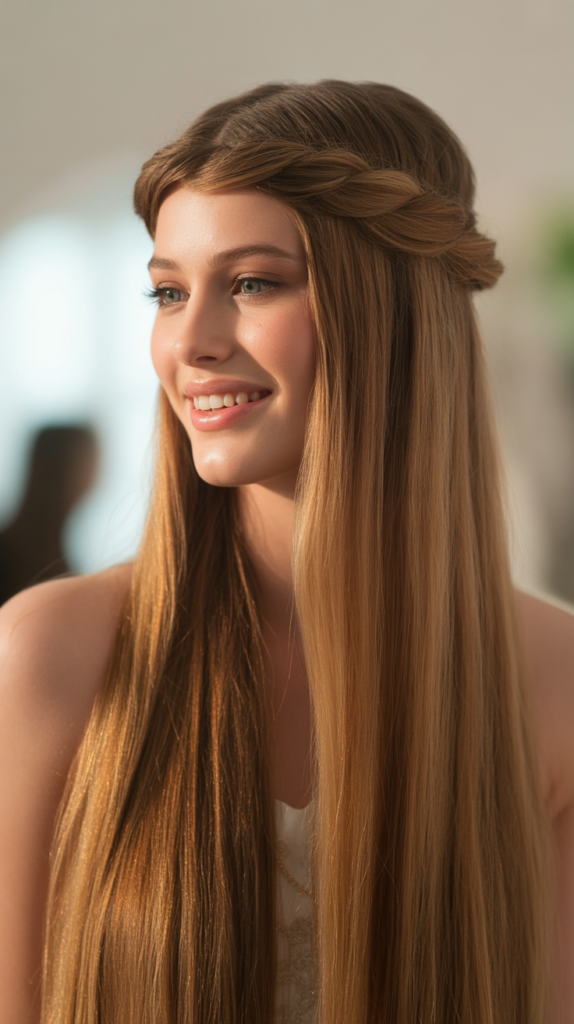
9. Straight Hair with Crown Braid

A crown braid creates a regal, princess-like appearance while keeping the length of straight hair flowing freely.
This style combines intricate braiding with the elegance of straight styling for a multidimensional prom look.
Crown braid construction:
- Section out hair from ear to ear across the top of the head in a two-inch wide strip
- Create a Dutch or French braid along this section, working from one ear to the other
- Keep the braid close to the hairline for a crown effect
- Secure the end behind the opposite ear with bobby pins
- Straighten the remaining loose hair for beautiful contrast
Enhancing the crown:
- Weave small flowers, baby’s breath, or pearl pins throughout the braid
- Gently pull on the outer edges of the braid for a fuller, more voluminous crown
- Use a toothbrush sprayed with hairspray to smooth any flyaways along the braid
- Consider metallic thread or ribbon woven through the braid for added sparkle
Styling benefits:
- Keeps hair away from the face while dancing and eating
- Creates a focal point that draws the eye upward, elongating the silhouette
- Provides structure to very straight hair that might otherwise appear flat
- Works beautifully for outdoor or garden-themed proms
10. Straight Hair with Low Ponytail
The low ponytail offers sophisticated simplicity, combining the sleekness of straight hair with the practical elegance of having it secured.
This style works particularly well for those wanting a polished, fuss-free prom look.
Creating the perfect low ponytail:
- Straighten all hair completely before gathering to ensure a smooth, polished finish
- Brush hair back from the face using a boar bristle brush to eliminate bumps
- Secure at the nape of the neck with a hair elastic that matches your hair color
- Take a small section from the ponytail and wrap it around the elastic, securing with a bobby pin underneath
Elevation techniques:
- Add a small volumizing insert or bump-it at the crown before creating the ponytail for added height
- Tease the roots gently at the crown area before smoothing the surface layer
- Position the ponytail slightly off-center for a more modern, editorial appearance
- Straighten the ponytail length again after securing to ensure perfect alignment
Embellishment options:
- Wrap the base with metallic cord, ribbon, or decorative hair wrap
- Add a jeweled hair tie or decorative elastic that complements your prom dress
- Attach a hair extension ponytail for added length and volume
- Consider a velvet scrunchie for a trendy, textured accent
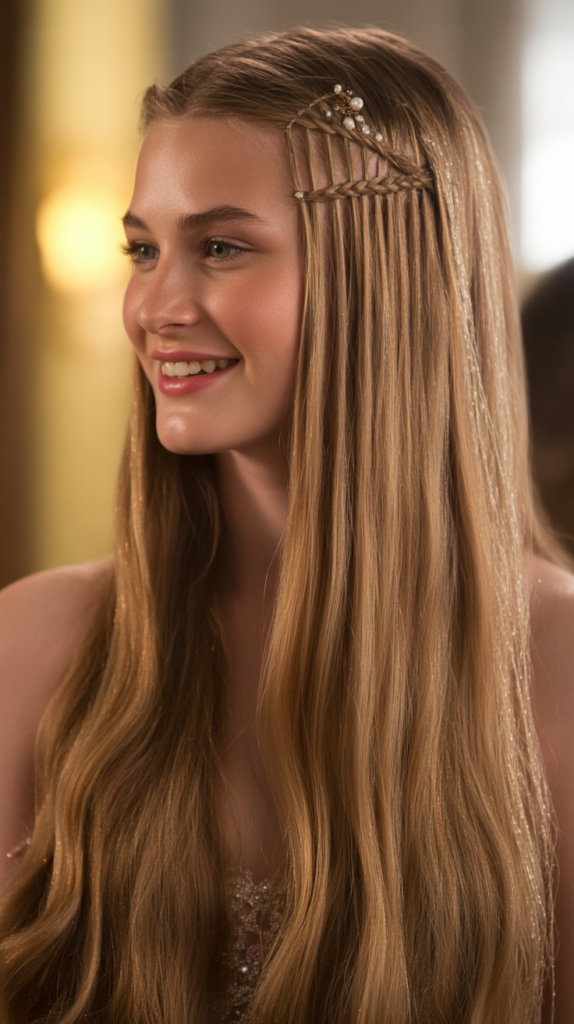
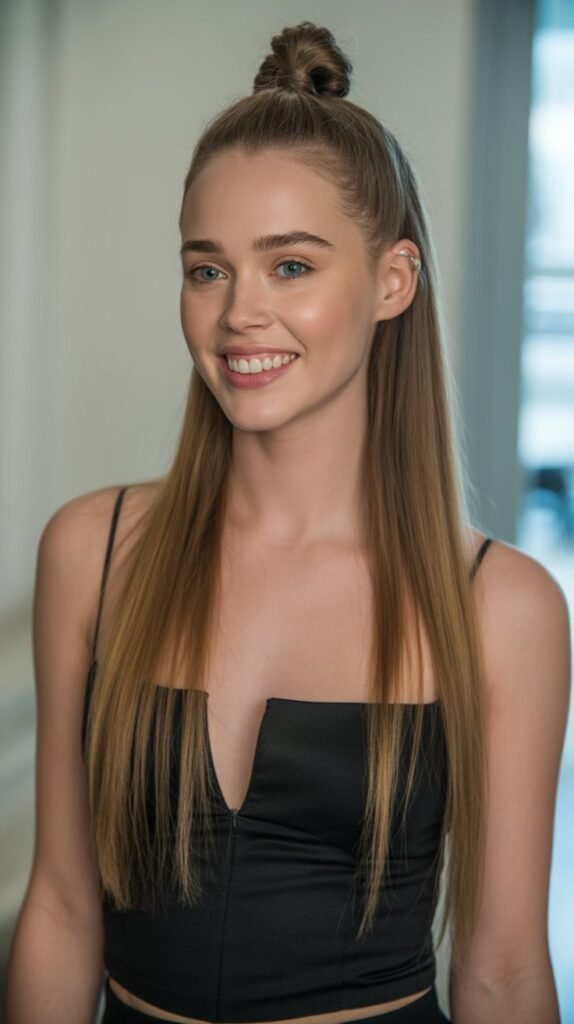
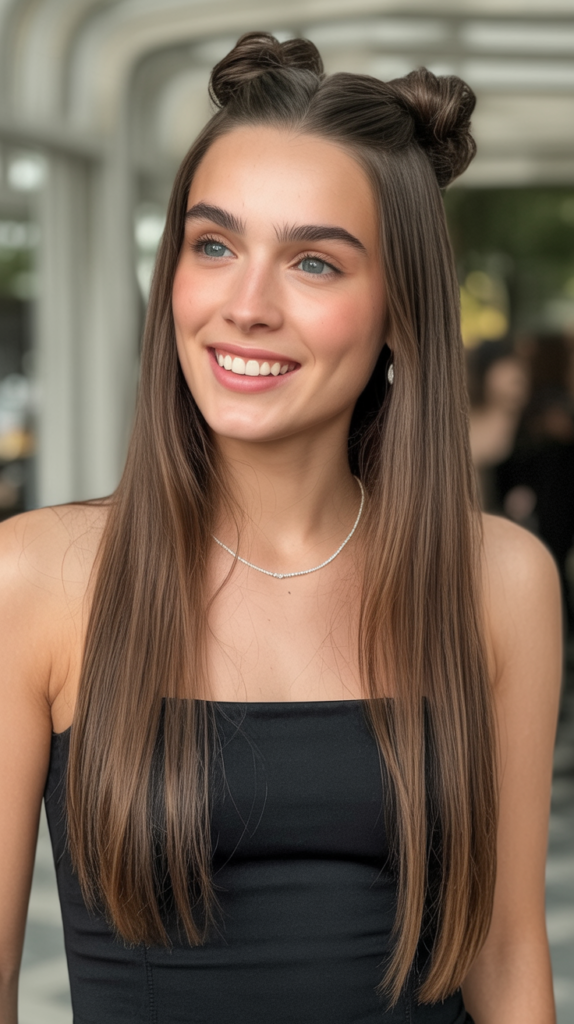
11. Half-Up, Half-Down Straight Style
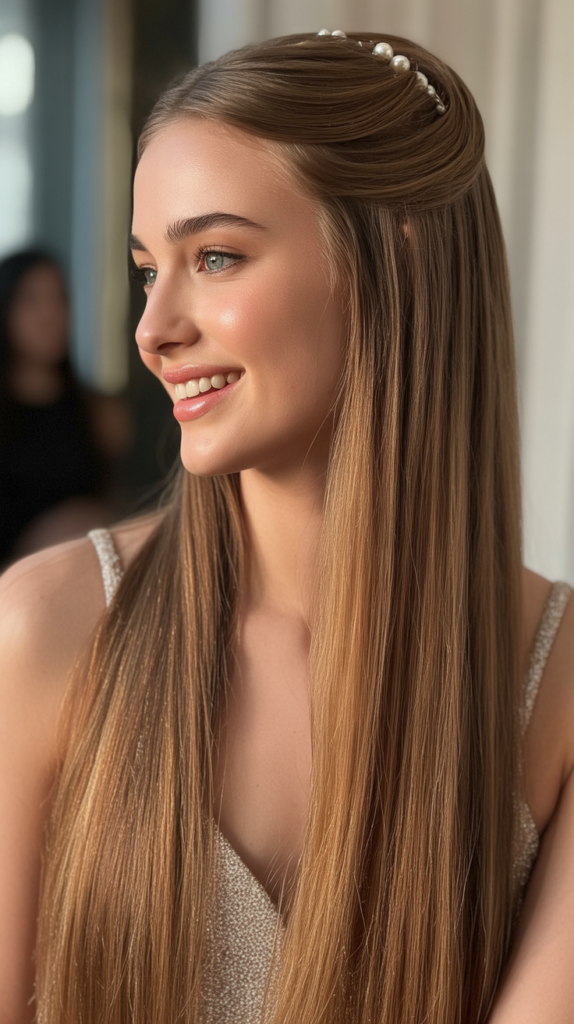
The half-up, half-down hairstyle provides the best of both worlds: the romance of flowing hair with the practicality of keeping hair away from the face.
This versatile option works beautifully with straight hair texture.
Sectioning and styling:
- Create a horizontal part from the top of one ear to the other, approximately at temple level
- Straighten the bottom section thoroughly for a sleek foundation
- Gather the top section and secure at the crown or slightly lower depending on preference
- Use a decorative clip, elastic, or create a small bun with the top section
Top section variations:
- Create a small twisted bun for added elegance and texture
- Form a braided section before securing for visual interest
- Make a small ponytail and wrap with your own hair for a polished finish
- Add volume by teasing the crown section before pulling back
Lower section finishing:
- Ensure the bottom half is perfectly straight for maximum impact
- Apply shine serum to the flowing portion for added gloss
- Consider subtle layering in the bottom section for movement
- Keep the straight ends freshly trimmed for a healthy appearance
12. Straight Hair with Headband Accent
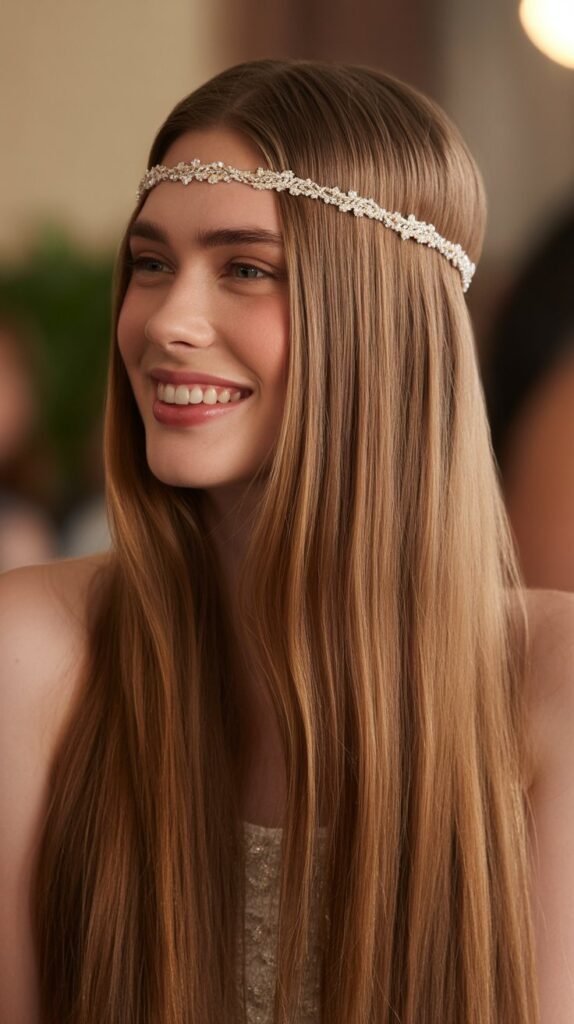
Incorporating a headband into your straight prom hairstyle adds instant polish and sophistication.
This accessory-forward approach works with various headband styles from delicate chains to embellished bands.
Headband selection:
- Choose a headband that complements your dress color and embellishments
- Consider width: thin headbands for delicate looks, wider bands for bold statements
- Ensure the headband is secure and won’t slide during dancing and movement
- Match metal tones (gold, silver, rose gold) with your jewelry and dress details
Placement and styling:
- Position the headband one to two inches behind the hairline for classic placement
- Push slightly forward over the hairline for a bohemian, relaxed appearance
- Ensure straight hair is perfectly smooth before adding the headband
- Apply smoothing serum to prevent flyaways from disrupting the clean lines
Headband types for prom:
- Jeweled or crystal-embellished bands for maximum glamour and sparkle
- Metallic chains or delicate gold bands for minimalist elegance
- Velvet-covered headbands for rich, luxurious texture
- Pearl-adorned bands for classic, timeless sophistication
- Floral crowns or wreaths for romantic, garden-party themes
13. Straight Hair with Side Braid Detail

A single side braid adds asymmetrical interest to otherwise straight hair, creating a focal point that draws the eye. This style balances structure with flowing elegance.
Braid placement and creation:
- Section out a three-inch wide portion of hair starting at the temple on one side
- Create a Dutch or French braid down along the hairline toward the ear
- Continue the braid down past the shoulder or stop at ear level and blend into loose hair
- Secure with a small elastic that matches your hair color
Integration with straight hair:
- Straighten all remaining hair to create contrast with the braided texture
- Allow the braid to fall naturally alongside the straight sections
- Consider pulling gently on the braid edges for a fuller, more romantic appearance
- Coordinate the side with your dress details or natural part for balance
Advanced variations:
- Create multiple small braids along one side for bohemian texture
- Incorporate ribbons or metallic thread through the braid
- Add small decorative pins or pearls along the braid length
- Combine with a side-swept style for maximum drama
14. Sleek High Ponytail with Straight Length
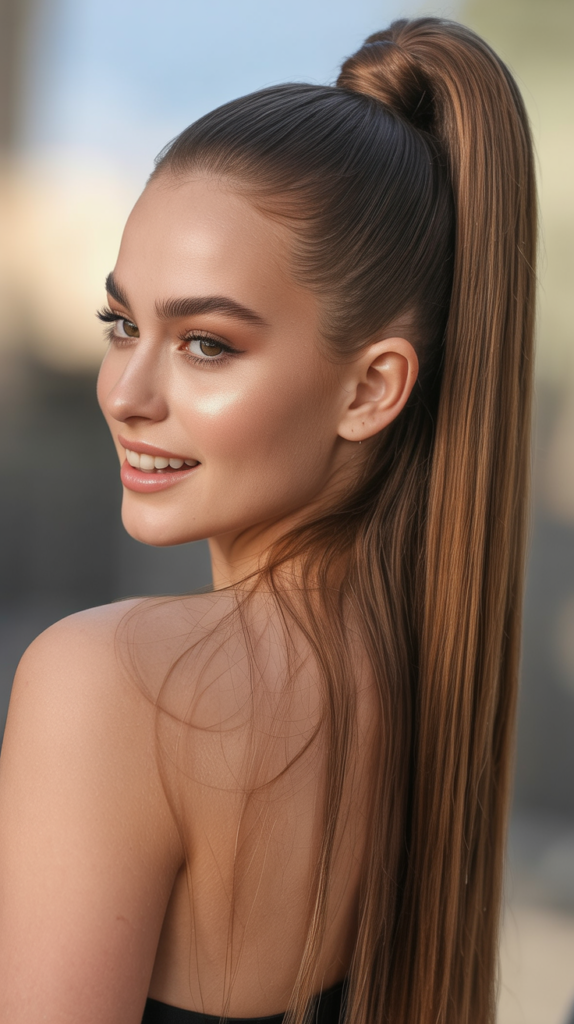
The high ponytail elevates straight hair literally and figuratively, creating a youthful, energetic look that’s perfect for dancing the night away.
This style showcases the length and sleekness of straight hair while keeping it completely off the neck and shoulders.
Achieving the perfect high ponytail:
- Flip head upside down while gathering hair to help achieve maximum height
- Position the ponytail at the crown of the head for the highest placement
- Smooth any bumps using a fine-tooth comb and strong-hold gel on the sides
- Secure with multiple elastics stacked on top of each other for extra security and height
Maintaining height and volume:
- Insert a small volumizing insert at the base of the ponytail for added lift
- Take a small section from underneath the ponytail and pin it back toward the scalp
- Use bobby pins in an X-pattern underneath the elastic for added support
- Straighten the ponytail length after securing to ensure it hangs properly
Styling the ponytail length:
- Apply smoothing serum to the length for extra shine and sleekness
- Consider wrapping a section of hair around the elastic base for a polished finish
- Add clip-in extensions to the ponytail for extra length and volume
- Finish with flexible-hold hairspray to prevent flyaways while maintaining movement
15. Straight Hair with Jeweled Bobby Pins
Decorative bobby pins transform simple straight hair into a sparkling masterpiece.
This accessory-forward approach allows you to customize your look while keeping styling relatively simple.
Pin placement strategies:
- Create a scattered, constellation-like pattern along one side for organic elegance
- Arrange pins in geometric patterns for modern, editorial styling
- Line pins along a side part for structured glamour
- Create a cascading effect down one side from temple to behind the ear
Selecting the right pins:
- Choose pins that complement your dress color and jewelry metals
- Mix pearl and crystal pins for dimensional sparkle
- Consider matching sets for cohesive, intentional appearance
- Ensure pins are secure and won’t slip out of straight, silky hair
Application techniques:
- Twist the bobby pin slightly as you insert it for better grip on straight hair
- Cross two pins over each other for extra security
- Apply a small amount of hairspray directly where pins will be placed for better hold
- Test all pins by shaking your head gently before leaving for prom
16. Center Part with Extreme Sleekness
Taking the center part to the extreme with ultra-sleek styling creates a high-fashion, runway-ready prom look. This style requires perfect technique but delivers maximum impact.
Achieving extreme sleekness:
- Use a clarifying treatment the day before prom to remove all product buildup
- Apply a heat protectant and smoothing primer to damp hair
- Blow-dry using the tension method: pulling hair taut while directing heat downward
- Straighten in very small sections with a professional-grade flat iron at appropriate temperature
Eliminating flyaways:
- Apply a small amount of smoothing pomade or gel to a clean toothbrush
- Brush over the surface of hair and along the part line
- Use a fine mist of strong-hold hairspray from 12 inches away
- Smooth down any remaining flyaways with clean hands coated in a tiny amount of serum
Maintaining the look:
- Avoid humid environments when possible
- Bring touch-up products including shine serum and hairspray
- Don’t touch hair unnecessarily as oils from hands can disrupt sleekness
- Consider using a silk pillowcase in the days leading up to prom to minimize frizz
17. Straight Hair with Hair Chains
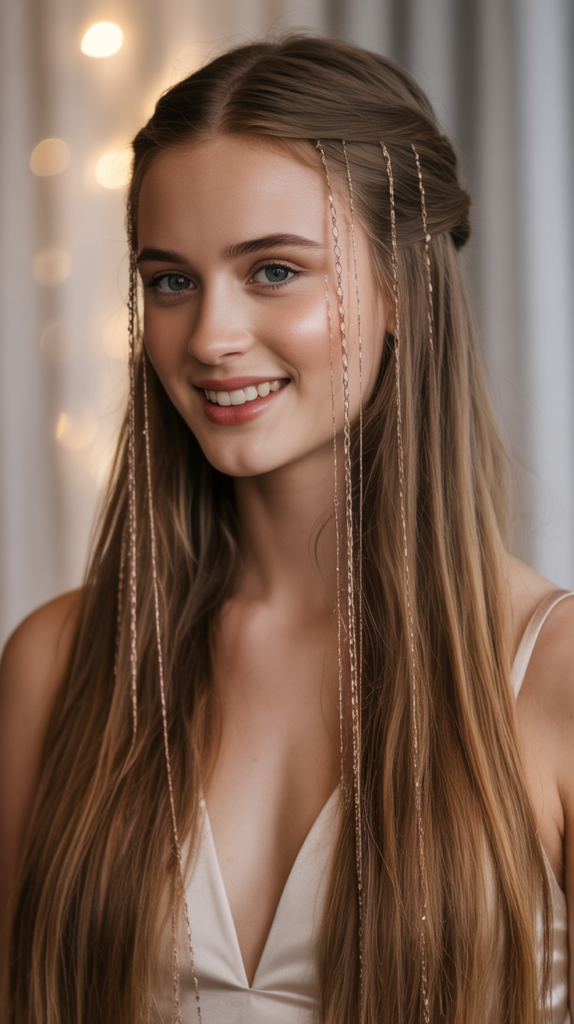
Hair chains or hair jewelry add a bohemian, festival-inspired element to straight prom hair. These decorative accessories drape beautifully through sleek, straight lengths.
Types of hair chains:
- Crown-to-temple chains that drape across the forehead
- Parting chains that follow the center or side part down the crown
- Cascading chains that hang from a hair clip or comb
- Ear-to-ear chains that create a crown effect
Installation and securing:
- Attach chains to small bobby pins or hair combs for security
- Ensure chains lay flat against sleek, straight hair for proper showcase
- Position chains before final hairspray application
- Test movement by tilting head in all directions
Coordinating with your look:
- Match chain metal (gold, silver, rose gold) to dress and jewelry
- Consider chains with crystals or pearls for added sparkle
- Keep other accessories minimal to let the chain be the focal point
- Ensure chains are appropriate length for your hair and won’t tangle
18. Straight Hair with Fresh Flowers
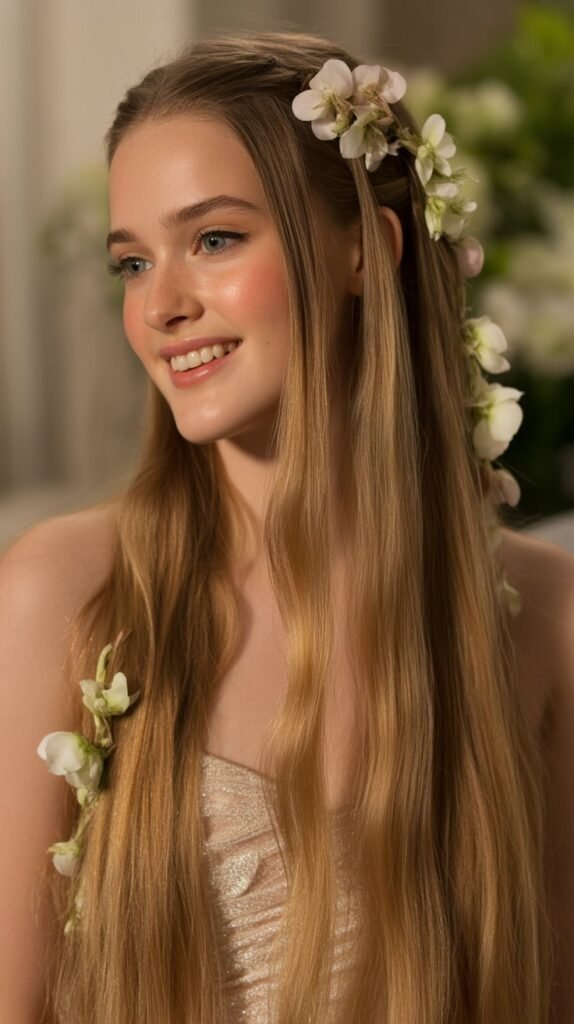
Incorporating fresh flowers into straight hair creates a romantic, ethereal prom aesthetic. The contrast between structured straight hair and organic flowers is visually striking.
Flower selection:
- Choose flowers that complement your dress color palette
- Select hardy varieties that won’t wilt quickly (roses, orchids, carnations, baby’s breath)
- Consider size: smaller flowers for delicate looks, larger blooms for drama
- Coordinate with your corsage or bouquet for cohesive styling
Securing flowers:
- Use floral wire to create small hair pins from flower stems
- Apply flowers to bobby pins using floral tape for easier attachment
- Position flowers strategically to cover the securing mechanisms
- Mist flowers lightly with water before attaching to keep them fresh
Placement options:
- Create a side cluster of flowers behind one ear for asymmetrical beauty
- Scatter individual blooms throughout half-up styling
- Form a flower crown or half-crown along the hairline
- Attach a single statement flower at a low side ponytail
19. Asymmetrical Straight Style

An asymmetrical approach to straight hair styling creates modern edge and visual intrigue. This involves different lengths, angles, or styling techniques on each side of the head.
Creating asymmetry:
- Part hair deeply to one side (as far as the center of the head)
- Tuck the smaller section completely behind the ear and secure
- Allow the larger section to flow forward over the opposite shoulder
- Straighten both sections with different techniques: ultra-sleek on one side, slightly textured on the other
Variations:
- Create different textures: one side perfectly straight, other with subtle bend
- Use accessories on only one side for visual imbalance
- Incorporate a braid or twist on the smaller side only
- Add volume to one side while keeping the other flat and sleek
Balancing the look:
- Ensure asymmetry appears intentional rather than accidental through precise execution
- Coordinate the styled side with your dress details (match embellished side with decorated side)
- Wear a statement earring on the exposed ear
- Practice the asymmetrical style before prom to perfect the technique
20. Straight Hair with Zigzag Part

A zigzag part adds playful, unexpected detail to otherwise simple straight hair. This fun alternative to traditional straight parts creates visual interest without complex styling.
Creating the zigzag:
- Use the pointed end of a rat-tail comb to create the zigzag pattern
- Start at the hairline and move backward in sharp, angular motions
- Keep the zigzags uniform in size (approximately half-inch segments)
- Make the pattern prominent enough to be visible but not cartoonish
Styling considerations:
- Zigzag parts work best with perfectly straight, smooth hair for maximum visibility
- Apply a small amount of gel along the part line to keep the pattern sharp
- Avoid covering the zigzag with accessories as it serves as the focal point
- Consider a subtle color contrast (highlighted pieces) along the part for added dimension
Best for:
- Those wanting a fun, youthful prom look without extreme styling
- Adding interest to very fine, straight hair that might appear flat otherwise
- Playful, modern dress styles rather than ultra-formal gowns
- Photos from above or at crown level where the zigzag is most visible
21. Straight Hair with Ribbon Weave
Weaving ribbon through straight hair creates a preppy, polished look with customizable color options. This technique adds texture and visual interest while maintaining the overall straight aesthetic.
Ribbon selection:
- Choose ribbon width between 1/4 inch to 1/2 inch for best weaving
- Select satin, velvet, or grosgrain ribbon for luxury appearance
- Coordinate ribbon color with dress, shoes, or accessories
- Ensure ribbon is long enough (at least double your hair length)
Weaving techniques:
- Create a three-strand braid and incorporate ribbon as the fourth strand
- Weave ribbon through a Dutch braid for more visible ribbon presence
- Lace ribbon through straight hair in a serpentine pattern
- Attach ribbon at crown and wrap it around small sections as you move down
Securing and finishing:
- Tie ribbon ends in a small bow at the bottom for feminine touch
- Trim excess ribbon with sharp scissors for clean edges
- Use small dots of fabric glue on ribbon ends to prevent fraying
- Secure ribbon at the top attachment point with bobby pins underneath
22. Straight Hair with Side Twist
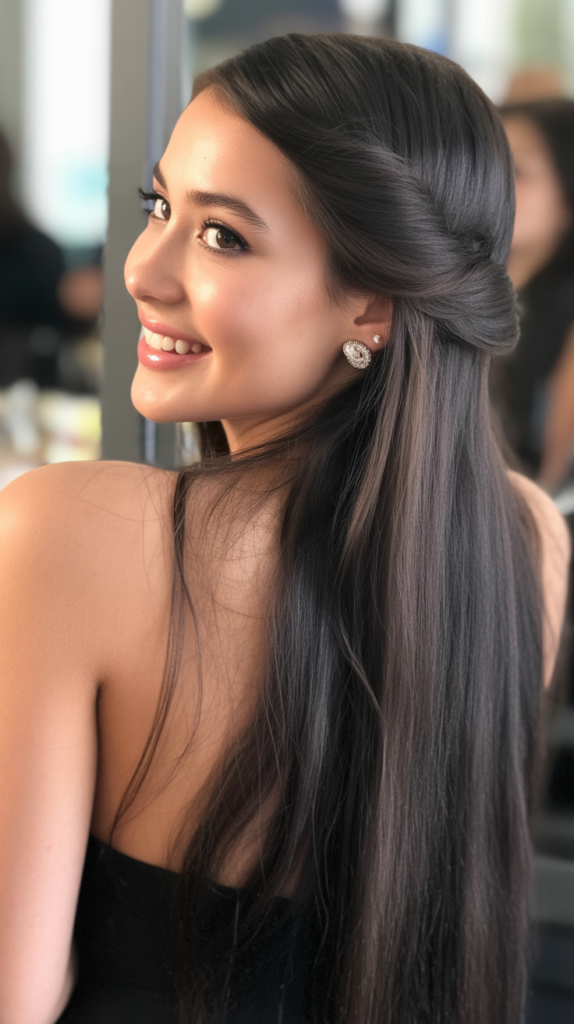
A side twist adds elegant detail without complex braiding skills. This style sweeps hair away from the face while maintaining the length and straightness of the remaining hair.
Creating the twist:
- Section out hair from the temple to behind the ear in a two-inch width
- Divide this section into two equal parts
- Twist the two sections around each other in a rope-twist pattern
- Secure behind the ear with bobby pins or a decorative clip
Variations:
- Create multiple small twists along the same side for added texture
- Twist on both sides and connect them at the back for a crown effect
- Incorporate small flowers or pins along the length of the twist
- Make the twist loose and romantic or tight and structured depending on dress style
Finishing touches:
- Gently pull on the outer edges of the twist for a fuller, softer appearance
- Straighten the remaining loose hair for contrast with the twisted section
- Apply light-hold hairspray to the twist to maintain shape
- Use a shine serum on the straight portions for maximum gloss
23. Poker Straight with No Part
Eliminating the part entirely creates a sleek, futuristic look that showcases the full beauty of straight hair. This bold choice works particularly well for those with thick, healthy hair.
Achieving the no-part look:
- While hair is wet, brush it straight back from the hairline
- Blow-dry directing all hair backward with no division
- Use a flat brush to maintain the backward direction while drying
- Straighten sections while pulling them straight back from the face
Maintaining the style:
- Apply strong-hold gel or pomade at the hairline to keep hair from naturally parting
- Use a toothbrush sprayed with hairspray to smooth the hairline area
- Avoid touching the crown area throughout the evening
- The style will naturally want to part, so check mirrors periodically for touch-ups
Considerations:
- This style requires confidence as it fully exposes the face and forehead
- Works best for oval face shapes or those comfortable with their facial features
- May require more product and frequent adjustments than parted styles
- Creates a bold, fashion-forward statement perfect for modern prom looks
24. Straight Hair with Barrette Accent
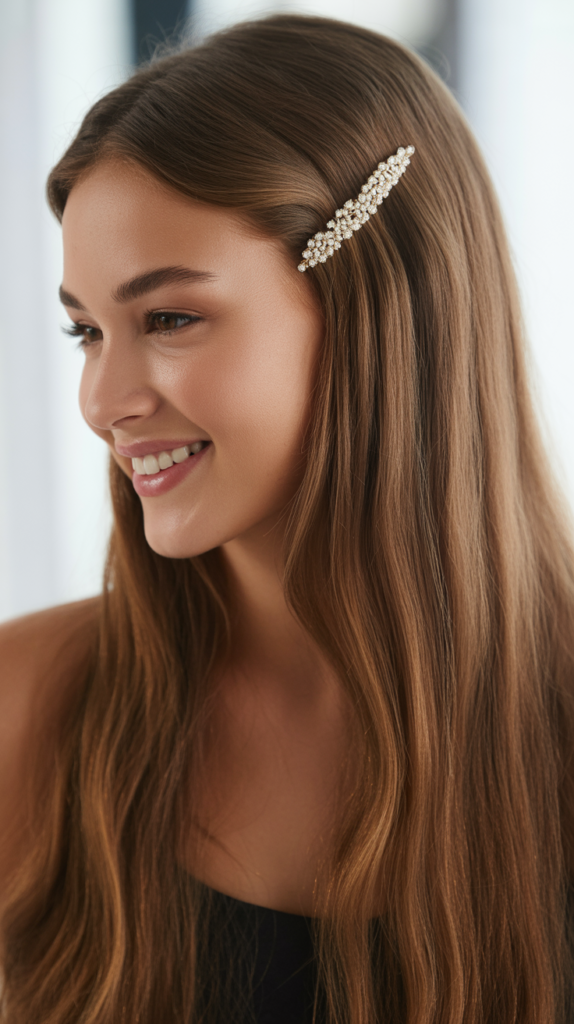
A statement barrette provides instant elegance and serves as jewelry for your hair. This accessory-focused style works beautifully with straight hair as it provides a smooth canvas for the barrette to shine.
Barrette selection:
- Choose oversized barrettes for dramatic, statement-making impact
- Consider pearl-embellished versions for classic elegance
- Metal barrettes in gold, silver, or rose gold for modern sophistication
- Geometric or art deco designs for vintage-inspired prom themes
Placement options:
- Position at temple area to sweep hair back from one side of face
- Place at the back of head securing a half-up section
- Use at the nape of neck to gather hair into a low style
- Create asymmetry by placing barrette on one side only
Securing properly:
- Ensure barrette is appropriate size for your hair thickness
- Test the grip before wearing to prom to avoid slipping
- Apply a small amount of texturizing spray where barrette will clip for better hold
- Position so decorative side faces outward and is fully visible
25. Straight Hair with Gold Leaf Accents
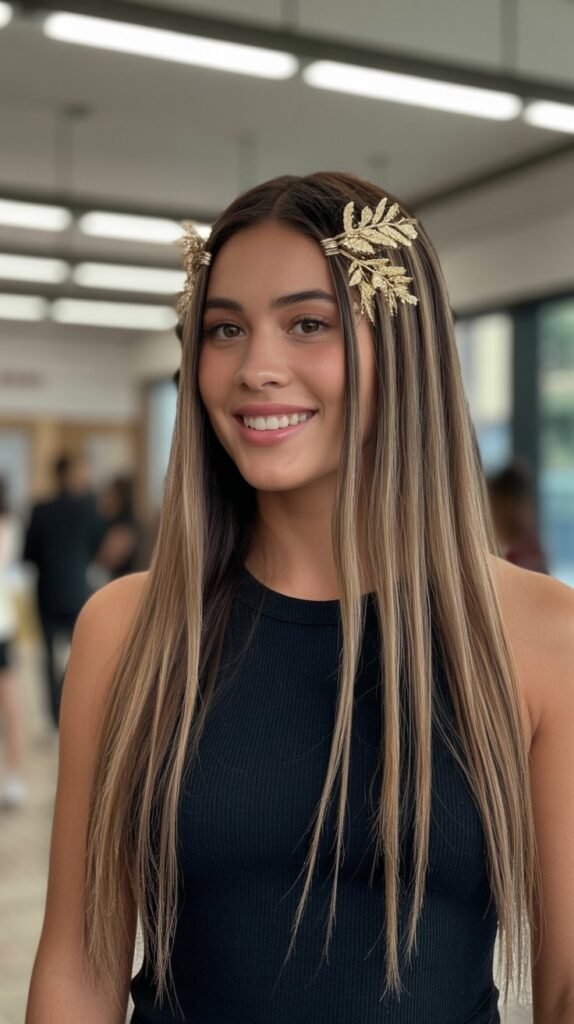
Gold leaf or metallic accents add ethereal, goddess-like beauty to straight hair. This trendy technique creates a striking, artistic prom look.
Applying gold leaf:
- Purchase cosmetic-grade gold leaf sheets or flakes specifically designed for body use
- Apply a small amount of eyelash glue or hair gel to intended placement areas
- Use tweezers to carefully place gold leaf pieces onto the adhesive
- Gently press down with a clean brush to secure
Placement strategies:
- Concentrate gold leaf along the part line for a crown-like effect
- Apply at the hairline for a delicate, frame-like accent
- Scatter small pieces throughout the top layers for subtle sparkle when hair moves
- Create a concentrated cluster at one side for asymmetrical drama
Coordinating with your look:
- Pair with warm-toned makeup (gold eyeshadow, bronze highlights) for cohesive appearance
- Choose a dress in complementary colors (ivory, champagne, rose gold, or warm neutrals)
- Keep other accessories minimal to let the gold leaf be the focal point
- Consider rose gold or copper leaf for unique variation
Application tips:
- Apply gold leaf as the final step after all other hair styling is complete
- Work in a draft-free area as gold leaf is extremely lightweight and moves easily
- Use a light misting of hairspray over gold leaf to seal it in place
- Bring extra gold leaf pieces and eyelash glue for touch-ups throughout the evening
26. Straight Hair with Deep Side Bun
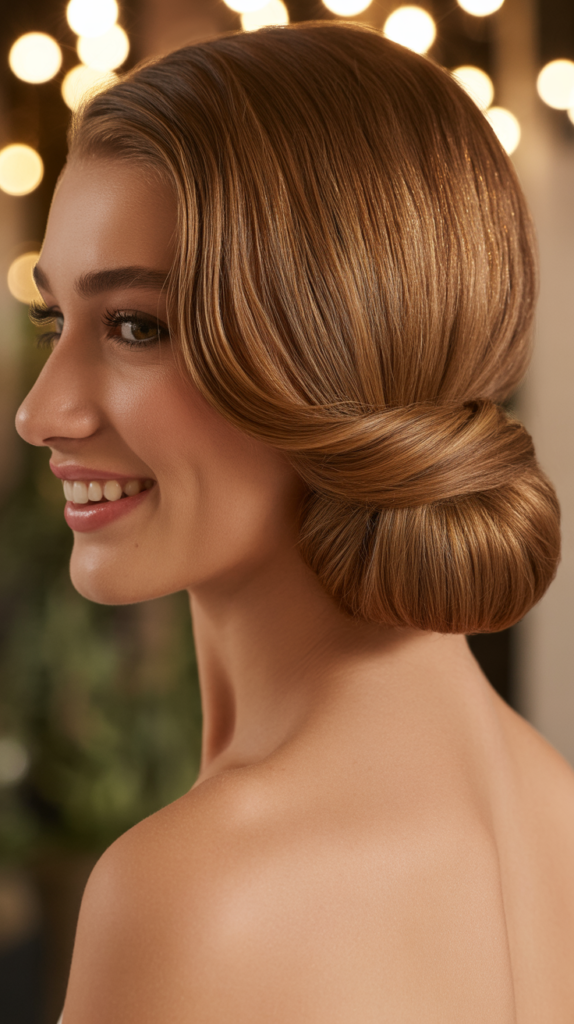
Combining straight hair with a low side bun creates romantic asymmetry while showcasing the sleekness of your hair. This style offers elegance and practicality for a long prom night.
Creating the side bun:
- Sweep all hair to one side at the nape of the neck, just behind and below the ear
- Straighten all hair thoroughly before gathering to ensure sleekness
- Twist the gathered hair and wrap into a low bun shape
- Secure with bobby pins matching your hair color, inserting them toward the center of the bun
Styling variations:
- Leave a few straight pieces out in front on the opposite side for soft framing
- Create a braided bun instead of a twisted one for added texture
- Make the bun intentionally messy and textured for bohemian appeal
- Keep it tight and polished for classic elegance
Finishing details:
- Wrap a section of hair around the bun base to conceal the elastic
- Add decorative pins, flowers, or jeweled accessories to the bun
- Ensure the bun is positioned to be visible from the front at a side angle
- Apply strong-hold hairspray to keep the style secure while dancing
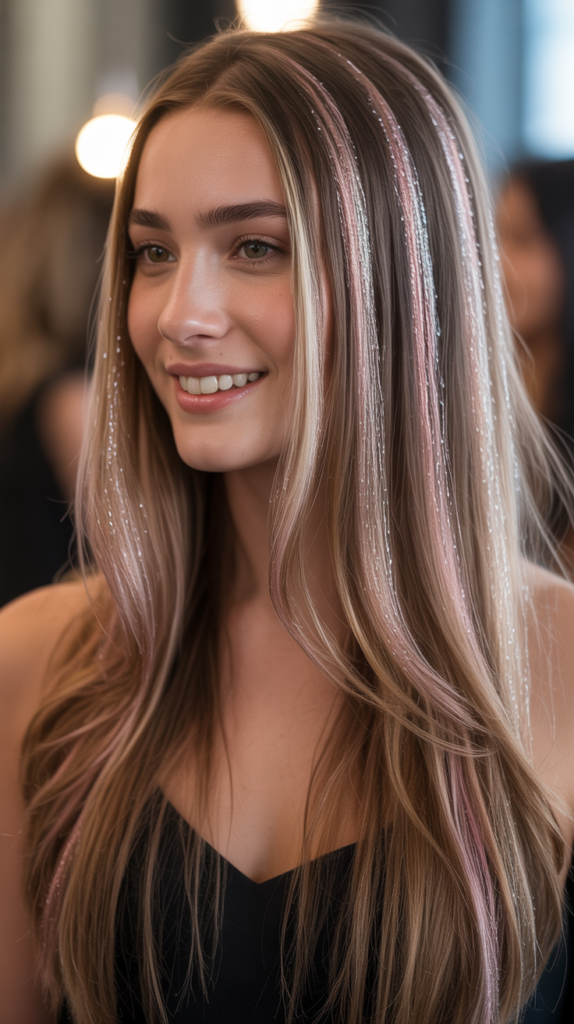
27. Straight Hair with Hair Tinsel
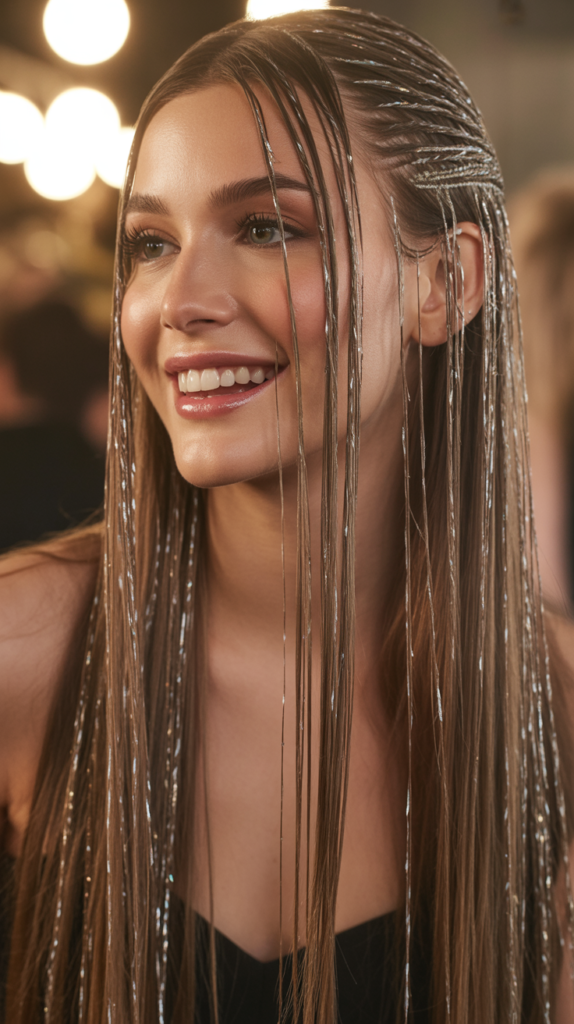
Hair tinsel adds sparkle and festive glamour to straight hair, catching light beautifully as you move. This temporary addition creates a magical, fairy-like effect perfect for prom.
Tinsel application:
- Purchase hair tinsel specifically designed for temporary hair application
- Select colors that complement your dress and overall color scheme
- Apply tinsel strands by tying them to small sections of hair near the roots
- Distribute 10-20 strands throughout the hair for subtle sparkle or 50+ for dramatic effect
Placement strategy:
- Concentrate tinsel around the face-framing areas for maximum visibility
- Add tinsel to the top layers only so it catches light when hair moves
- Create an ombre effect with more tinsel toward the ends
- Place strategically where stage or venue lighting will hit
Color coordination:
- Silver or holographic tinsel works with any dress color
- Gold tinsel pairs beautifully with warm-toned dresses and skin tones
- Colored tinsel (pink, purple, blue) can match or accent your dress
- Mix multiple colors for a rainbow or customized effect
Longevity tips:
- Tinsel can last through multiple washes if tied securely
- Straighten over the tinsel carefully at low temperatures
- Avoid excessive heat directly on tinsel as it may melt
- Remove tinsel by cutting the knot after prom or leave in for extended sparkle
28. Straight Hair with Pearl Pins
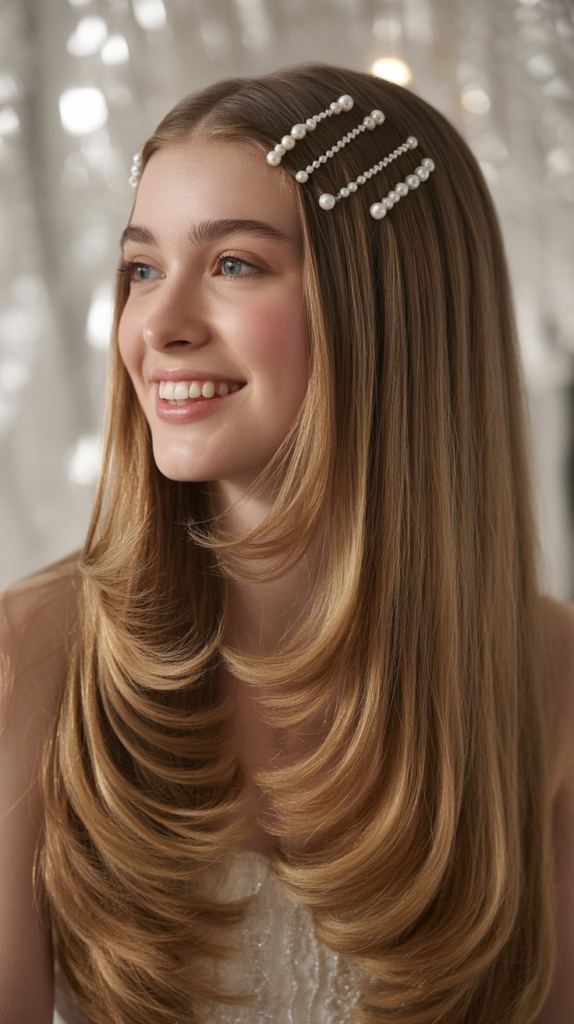
Pearl embellishments create classic, timeless elegance that never goes out of style. Pearl pins scattered through straight hair add sophistication and bridal-inspired beauty.
Pearl pin varieties:
- Individual pearl-topped bobby pins for scattered placement
- Pearl cluster pins for more dramatic focal points
- Pearl and crystal combination pins for added sparkle
- Vintage-inspired pearl pins with gold or silver settings
Placement techniques:
- Create a flowing line of pearls along a side part
- Scatter pins randomly on one side for organic elegance
- Form geometric patterns (triangles, lines, curves) for modern styling
- Concentrate pearls around face-framing areas or at a hair accessory attachment point
Securing in straight hair:
- Spray small sections with hairspray before inserting pins for better grip
- Use the twist-and-insert method with bobby pin-style pearl pins
- Cross two pins over each other if hair is particularly silky and slippery
- Insert pins at slight angles rather than perfectly perpendicular for better hold
Coordinating your look:
- Match pearls with pearl jewelry (necklace, earrings, bracelet) for cohesion
- Pair with classic dress silhouettes like ball gowns or A-line styles
- Choose cream or ivory pearls for warmth, white pearls for cool elegance
- Consider colored pearls (blush, gray, champagne) for unique sophistication
29. Straight Hair with Statement Hair Comb

A decorative hair comb serves as a crown-like focal point while keeping straight hair elegantly styled. These ornate accessories range from vintage to modern in design.
Selecting the perfect comb:
- Choose combs with secure teeth (minimum 3-4 teeth) for stability
- Consider size: larger combs for statement drama, smaller for subtle elegance
- Match metals and stones to your dress embellishments and jewelry
- Look for Art Deco, vintage, floral, or modern geometric designs based on theme
Placement options:
- Position at the crown for tiara-like regal appearance
- Place at the side above the ear for asymmetrical sophistication
- Secure at the back securing a half-up section
- Use two smaller combs on either side for balanced symmetry
Installation technique:
- Tease hair lightly at the base where the comb will be inserted for better grip
- Slide the comb in at a downward angle toward the scalp
- Push forward slightly and then down to lock the comb in place
- Secure with additional bobby pins underneath if hair is very straight and slippery
Styling around the comb:
- Keep hair perfectly straight to contrast with ornate comb detail
- Allow hair to flow naturally from the comb placement
- Consider adding subtle waves only to the ends if desired for added romance
- Ensure the comb is fully visible and not hidden by hair volume
30. Straight Hair with Side Fishtail
A side fishtail braid creates intricate, textured detail while maintaining the overall length of straight hair.
This romantic style photographs beautifully and offers visual complexity.
Fishtail braid technique:
- Section out hair from the temple down one side in a 3-4 inch width
- Divide this section into two equal parts
- Take a small piece from the outer edge of the left section and cross it to the right section
- Repeat on the opposite side, alternating back and forth down the length
- Secure the end with a clear elastic band
Enhancing the fishtail:
- Gently pull on the outer edges of the braid to create a fuller, more romantic appearance
- Loosen the braid intentionally for bohemian texture
- Keep it tight and structured for modern, polished elegance
- Weave small flowers, pearls, or ribbon through the braid for added embellishment
Integration with straight hair:
- Straighten the remaining loose hair thoroughly for textural contrast
- Allow the braid to rest over the shoulder on one side while straight hair flows on the other
- Consider starting the fishtail at the crown and continuing all the way down
- Create two fishtails on either side for symmetrical bohemian styling
Best for:
- Bohemian, rustic, or garden-themed proms
- Those wanting intricate detail without complex updo styling
- Showcasing braiding skills while maintaining length
- Creating visual interest in photos from all angles
31. Straight Hair with Glitter Roots
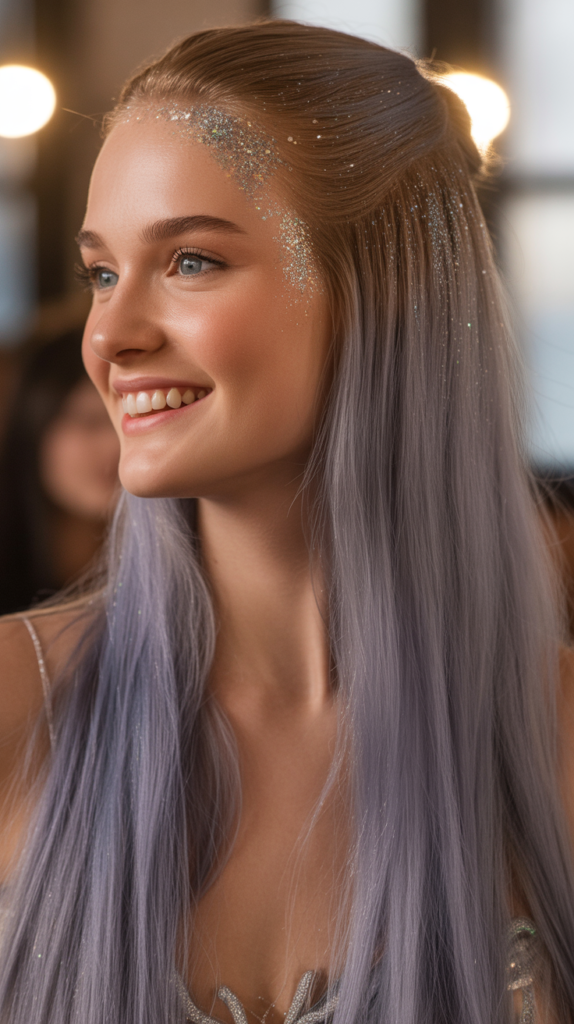
Glitter roots create a bold, festival-inspired look that’s gained popularity for prom styling. This technique adds sparkle directly at the scalp along the part line.
Applying glitter safely:
- Use cosmetic-grade glitter specifically formulated for hair and skin
- Mix glitter with aloe vera gel or hair gel for easier application
- Apply along the part line using a small brush or cotton swab
- Work in thin layers, allowing each to dry before adding more
Glitter color selection:
- Holographic or iridescent glitter works with any color scheme
- Match glitter to dress color for coordinated impact
- Silver glitter creates cool, icy elegance
- Gold glitter adds warm, glamorous sophistication
- Colored glitter (pink, blue, purple) makes bold statements
Application patterns:
- Classic application along the center part from front to crown
- Apply along a deep side part for asymmetrical sparkle
- Create a lightning bolt or zigzag pattern for playful edge
- Concentrate glitter only at the very front hairline for subtle shimmer
Removal and precautions:
- Glitter will wash out with regular shampooing, though may require multiple washes
- Avoid getting glitter in eyes during application
- Use a light hand to prevent glitter from looking excessive or costume-like
- Set with hairspray to minimize fallout throughout the evening
32. Straight Hair with Crown Twist
A crown twist creates a romantic halo effect while keeping the length of straight hair flowing freely. This style offers bohemian elegance with practical face-framing benefits.
Creating the crown twist:
- Section out hair from ear to ear across the top of the head in a 2-3 inch width
- Begin at one ear and take a small section of hair
- Twist this section while adding new hair from the front with each rotation
- Continue across the head to the opposite ear, maintaining consistent tightness
- Secure behind the ear with bobby pins
Variations:
- Create a rope twist by dividing the crown section into two and twisting them around each other
- Make a loose, romantic twist for bohemian softness
- Keep it tight and structured for polished sophistication
- Incorporate small flowers or pins along the twist length
Styling the remaining hair:
- Straighten all loose hair flowing down the back thoroughly
- Apply shine serum for glossy finish that contrasts with twisted texture
- Consider leaving a few face-framing pieces out of the twist for softness
- Ensure the transition from twist to straight hair is seamless and natural
Best occasions:
- Outdoor or garden proms where natural, romantic styling fits the theme
- Bohemian or rustic dress styles
- Those wanting to keep hair off the face while dancing
- Creating a goddess or fairy-tale inspired look
33. Straight Hair with Metallic Temporary Color
Temporary metallic hair color adds dimension and unique flair to straight hair for prom.
These washable colors allow for bold experimentation without permanent commitment.
Product selection:
- Choose temporary hair makeup, chalk, or spray designed to wash out
- Metallic options include rose gold, silver, copper, platinum, and gold
- Ensure products are specifically labeled as temporary and non-damaging
- Read reviews regarding transfer to clothing and pillowcases
Application techniques:
- Apply to dry, straight hair for best color payoff and visibility
- Concentrate color on face-framing pieces or underneath layers for peek-a-boo effects
- Create an ombre effect by applying more product toward the ends
- Use strategic placement where venue lighting will showcase the metallic shimmer
Color coordination:
- Rose gold complements warm skin tones and pink, peach, or gold dresses
- Silver adds cool, futuristic edge to blue, purple, or silver gowns
- Copper creates warmth and dimension in brown or auburn hair
- Platinum or white adds striking contrast to dark hair
Application tips:
- Test products on a small section the week before prom to ensure desired effect
- Apply a few days before if possible to gauge lasting power and transfer
- Straighten hair before applying color for smooth, even coverage
- Set with hairspray to minimize transfer to dress and minimize color fading
- Bring touch-up product for reapplication if needed during prom
Essential Styling Tips for Long Straight Hair
Heat protection is non-negotiable:
- Always apply heat protectant spray before using any hot tools
- Choose products with silicones or keratin for maximum protection
- Reapply if hair dries during styling process
- Consider using lower temperatures (300-350°F) if hair is fine or damaged
Product recommendations by hair type:
- Fine hair: lightweight serums, volumizing mousses, flexible-hold sprays
- Thick hair: heavier creams, smoothing balms, strong-hold products
- Color-treated hair: color-safe formulas with UV protection
- Damaged hair: repairing treatments, bond-building products, nourishing oils
Achieving maximum shine:
- Rinse with cool water after conditioning to seal the cuticle
- Use shine-specific products rather than heavy oils that can weigh hair down
- Straighten in the direction of hair growth (root to tip) to smooth the cuticle
- Finish with a light misting of shine spray held 12 inches away
Making styles last all night:
- Start with clean, completely dry hair
- Use appropriate products for your hair texture and desired hold
- Set styles with hairspray and allow to cool before touching
- Bring touch-up products (mini hairspray, bobby pins, shine serum) in your clutch
Pre-prom hair preparation:
- Schedule a trim 2-3 weeks before prom for healthy ends
- Do a deep conditioning treatment 3-4 days before the event
- Avoid trying new products or techniques on prom day
- Practice your chosen style at least once before the big day
Humidity management:
- Apply anti-humidity products in your styling routine
- Use strong-hold finishing sprays designed for humidity resistance
- Avoid steamy bathrooms and kitchens after styling
- Consider indoor venue locations if humidity is a concern in your area
Conclusion
33 Gorgeous Straight Hairstyles for Long Hair Prom offers an extensive range of elegant options that celebrate the natural beauty of sleek, flowing hair while providing the glamour and sophistication your special night deserves.
From minimalist center parts that exude modern confidence to elaborately adorned styles featuring flowers, jewels, and metallics, straight hair provides a versatile canvas for creating your perfect prom look.
The key to achieving prom hair perfection lies in proper preparation, using quality heat protection, selecting the right products for your hair type, and practicing your chosen style beforehand to ensure confidence and ease on the big day.
Whether you opt for ultra-sleek glass hair that reflects light like a mirror, romantic braided accents that add textural dimension, or bold accessory-forward looks that make statement-making impact, these straight hairstyles guarantee you’ll feel beautiful, confident, and ready to create lasting memories.
Remember that the best prom hairstyle is one that makes you feel like the most authentic, radiant version of yourself, complements your dress and personal style, and allows you to dance, laugh, and celebrate comfortably throughout the entire evening.
With these 33 gorgeous options and expert styling guidance, you’re fully equipped to achieve straight hair perfection that will look stunning in person and absolutely breathtaking in all your prom photographs for years to come.