Picture yourself transported to a grand medieval castle where noblewomen spent hours perfecting their elaborate hairstyles, each braid and twist telling a story of elegance and royalty.
The art of medieval hairstyling wasn’t just about beauty—it was a symbol of status, virtue, and femininity that defined an era.
Whether you’re preparing for a Renaissance fair, a themed wedding, a costume party, or simply want to channel your inner princess, mastering these historical hairstyles connects you to centuries of tradition.
This comprehensive guide to 33 Step-by-Step Medieval Hairstyles for Princesses will walk you through authentic techniques that range from simple braided crowns to intricate veiled arrangements, each designed to make you feel like royalty.
From the romantic flowing locks of young maidens to the sophisticated updos of queens, you’ll discover hairstyles that capture the essence of the Middle Ages while remaining surprisingly wearable for modern occasions.
Get ready to unlock the secrets of medieval beauty and transform your hair into a masterpiece worthy of a castle hall.
1. The Classic Crown Braid
The crown braid served as one of the most iconic medieval hairstyles, symbolizing both nobility and purity among princesses and noblewomen.
This elegant style encircles the head like a natural tiara, making it perfect for formal occasions or when you want to feel regal.
The technique has been passed down through generations and remains one of the most recognizable medieval looks.
Step-by-Step Instructions:
- Begin with clean, brushed hair that’s slightly damp or has texturizing spray applied for better grip and control.
- Part your hair down the center from forehead to nape, creating two equal sections for symmetrical braiding.
- Starting at the left side behind your ear, divide a small section into three equal strands to begin your Dutch braid.
- Cross the outer strands under the middle strand (not over) while adding small sections of hair from the hairline with each crossing.
- Continue braiding along your hairline, following the natural curve of your head toward the back, keeping tension consistent.
- When you reach the center back, secure temporarily with a clip and repeat the same process on the right side.
- Once both braids meet at the back, braid the remaining loose hair together in a standard three-strand braid.
- Wrap the braids around your head like a crown, securing with bobby pins that match your hair color.
- Tuck the ends underneath the opposite braid and pin securely to hide them from view.
- Gently pull at the edges of the braids to create a fuller, more voluminous appearance that looks authentically medieval.
- Finish with a light mist of hairspray to hold the style throughout the day.
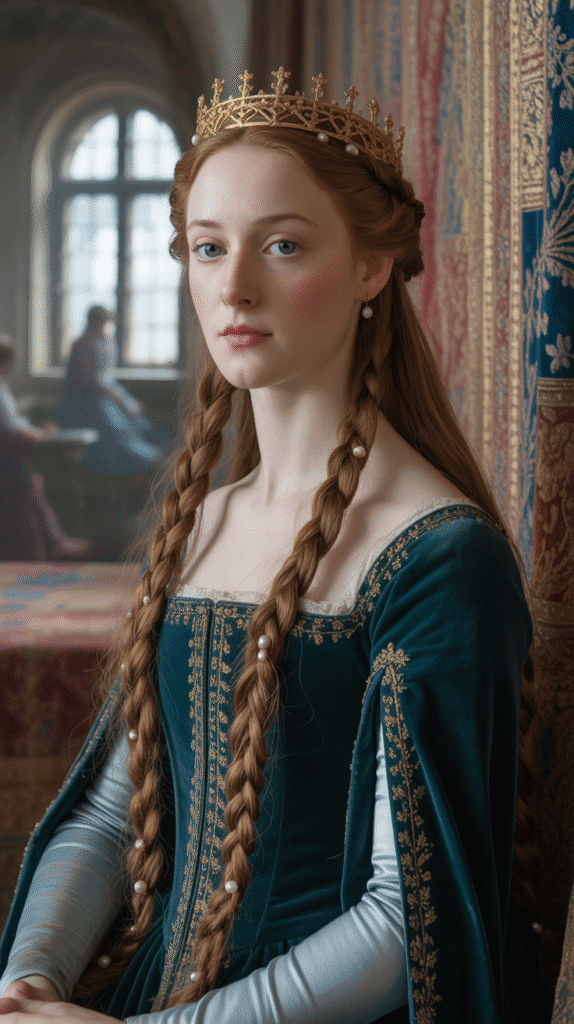
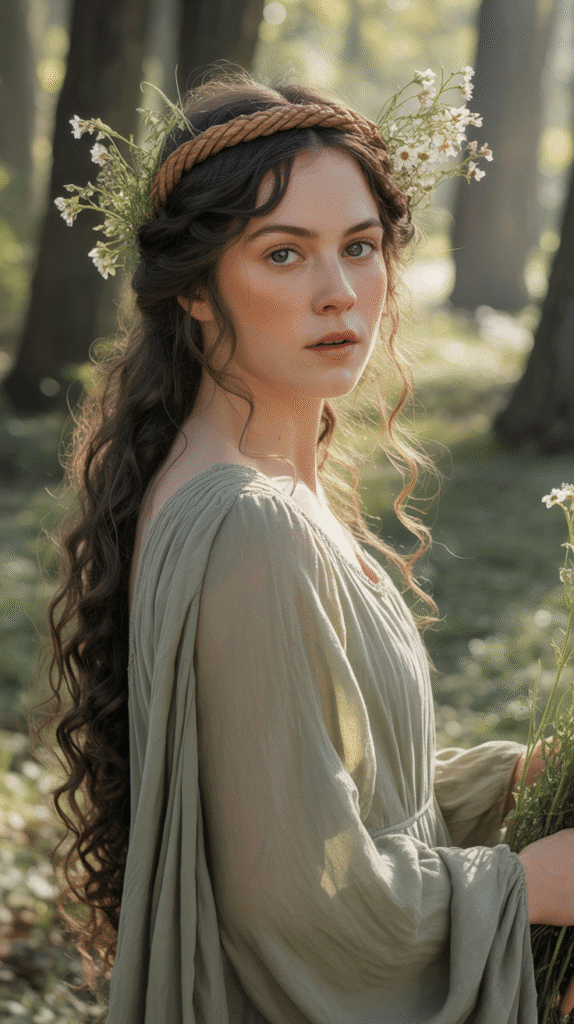
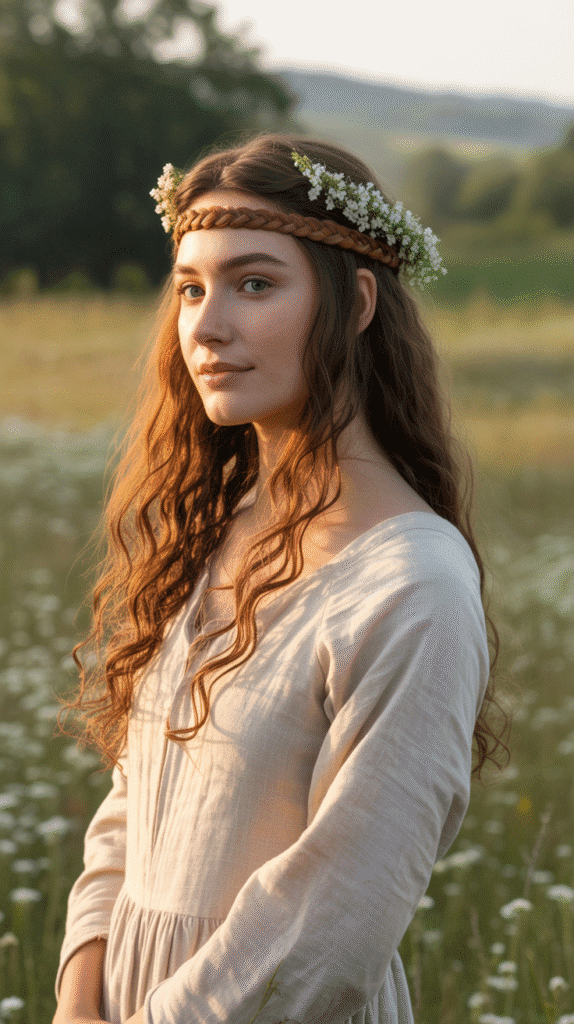
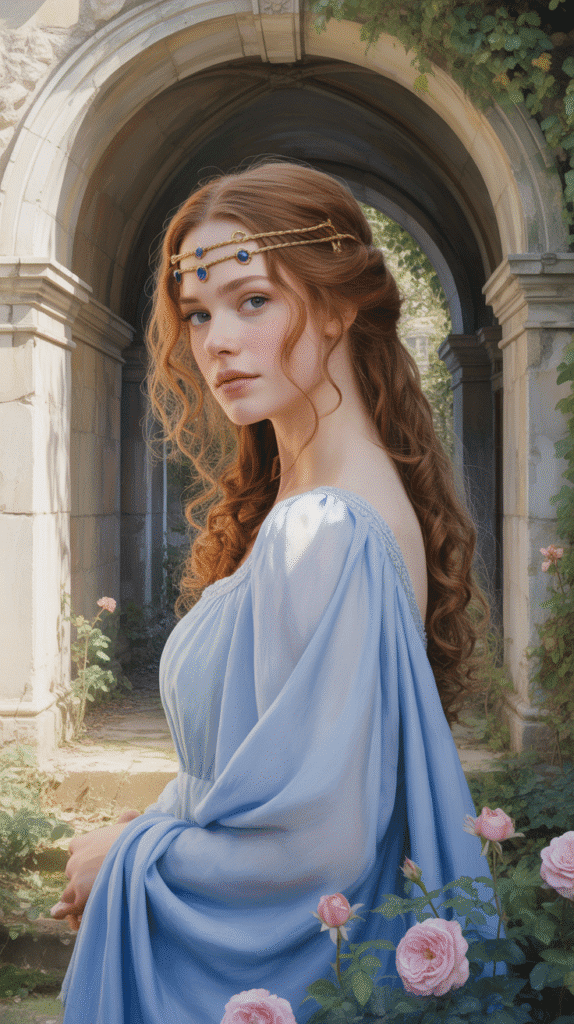
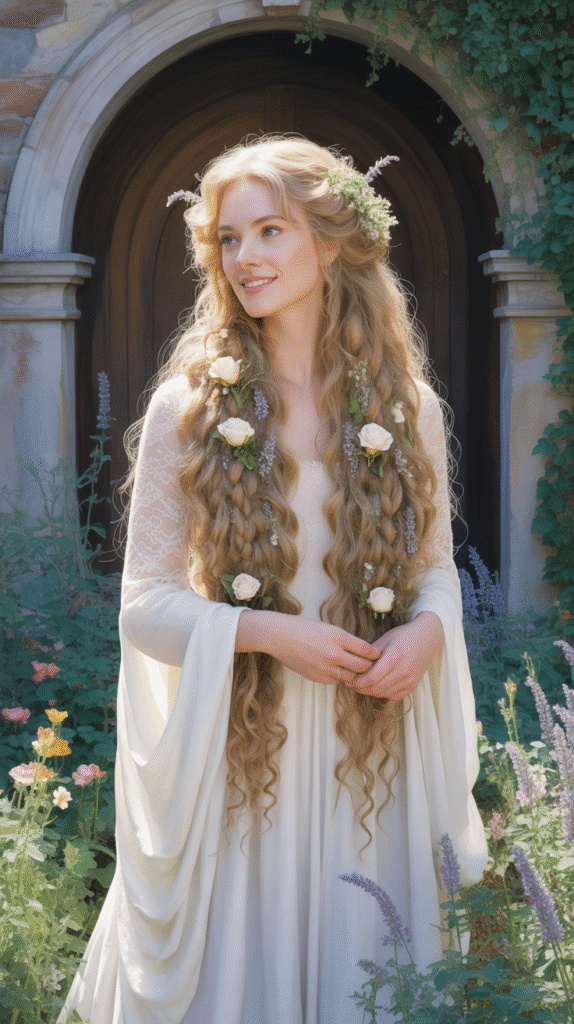
2. The Maiden’s Long Flowing Locks with Circlet
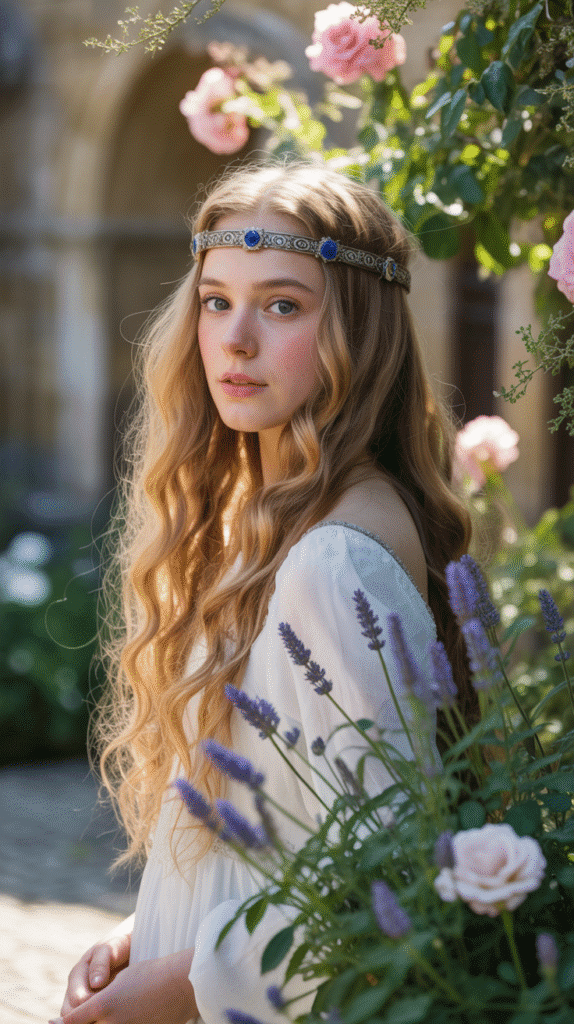
Young unmarried medieval maidens traditionally wore their hair long and loose as a symbol of youth, innocence, and availability for marriage.
This simple yet elegant style was often adorned with a metal circlet or floral crown to add a touch of sophistication.
The flowing locks represented purity and were considered the most beautiful way for young women to display their hair.
Step-by-Step Instructions:
- Start with completely dry hair that has been thoroughly brushed to remove all tangles and knots.
- Apply a heat protectant spray if you plan to add curls or waves to the hair.
- Using a large-barrel curling iron (1.5 to 2 inches), create loose, romantic waves by wrapping sections around the barrel.
- Hold each section for 8-10 seconds, then release gently and allow to cool before touching.
- Once all hair is curled, run your fingers through the waves to soften them into natural-looking texture.
- Take a small section from each side of your face (about 2 inches wide) and twist them gently backward.
- Pin these twisted sections at the back of your head with bobby pins, creating a half-up style that keeps hair off your face.
- Position a metal circlet, jeweled headband, or handmade floral crown approximately one inch back from your hairline.
- Adjust the circlet so it sits comfortably and securely without sliding forward or backward.
- Allow the remaining hair to cascade freely down your back and over your shoulders.
- For extra medieval authenticity, weave small ribbon pieces or thin braids into random sections of the flowing hair.
- Finish with a shine serum on the ends to create that healthy, lustrous appearance valued in medieval times.
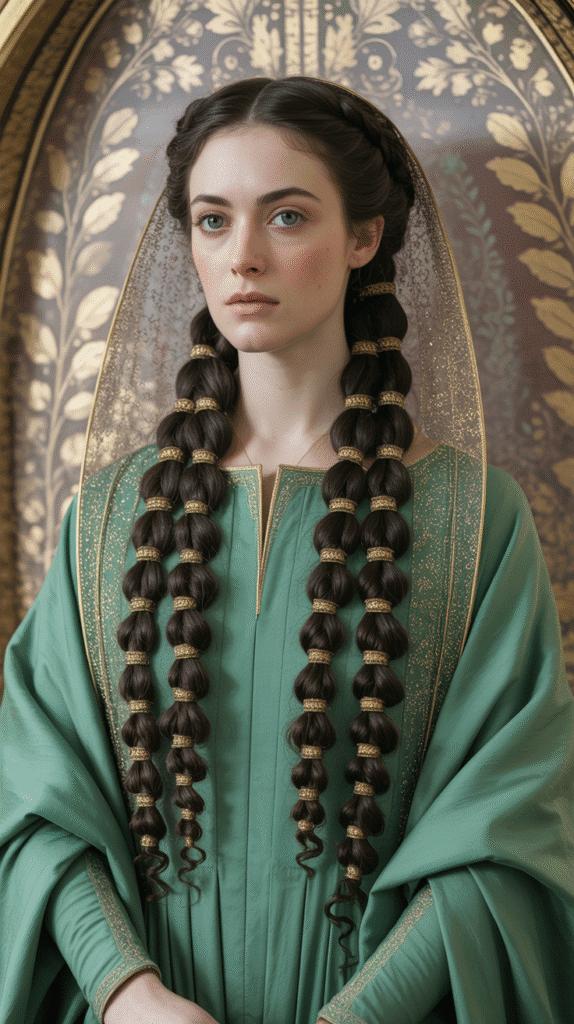
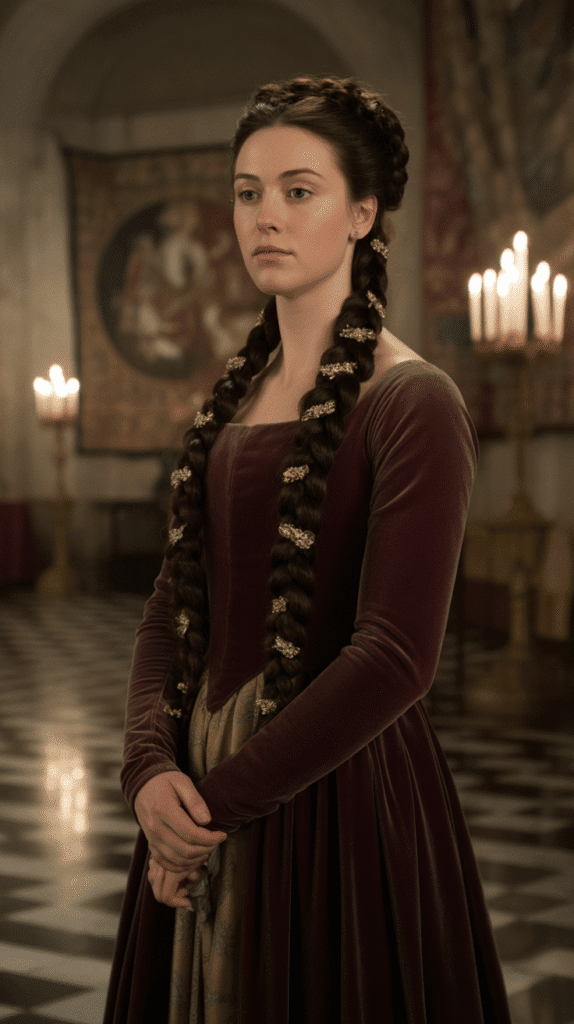
3. The Double Braided Bun
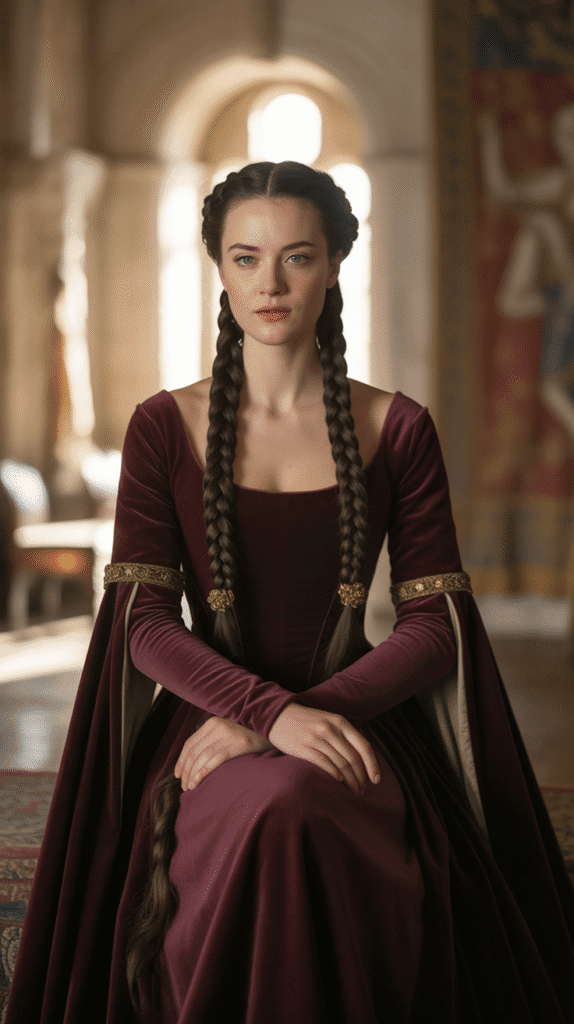
This sophisticated medieval hairstyle involved creating two separate braids that were then coiled into buns on either side of the head, resembling the famous “Princess Leia” style but with historical medieval roots.
Noble ladies wore this practical yet elegant arrangement for daily castle activities and formal court appearances.
The style kept hair secure while maintaining an air of refinement and status.
Step-by-Step Instructions:
- Begin by creating a clean center part from your forehead straight back to your nape using a rat-tail comb.
- Divide all hair into two equal sections, securing one side with a hair tie while you work on the other.
- Take the first section and brush it smooth, ensuring there are no bumps or tangles before braiding.
- Create a tight three-strand braid from the roots all the way down to the ends, securing with a small elastic band.
- Repeat the exact same process on the opposite side, making sure both braids are equally tight and positioned symmetrically.
- Take the first braid and coil it around itself at the base near your ear, forming a circular bun shape.
- Secure the bun with multiple bobby pins, inserting them at different angles to ensure the bun stays firmly in place.
- Repeat with the second braid on the opposite side, positioning it at the same height as the first bun for balance.
- Check in a mirror that both buns are symmetrical in size and placement, adjusting as needed.
- For added medieval authenticity, wrap decorative ribbon around the base of each bun or insert jeweled pins.
- Apply hairspray to smooth any flyaways and set the style for all-day wear.
- Consider adding a sheer veil that drapes between the two buns for special occasions or ceremonies.
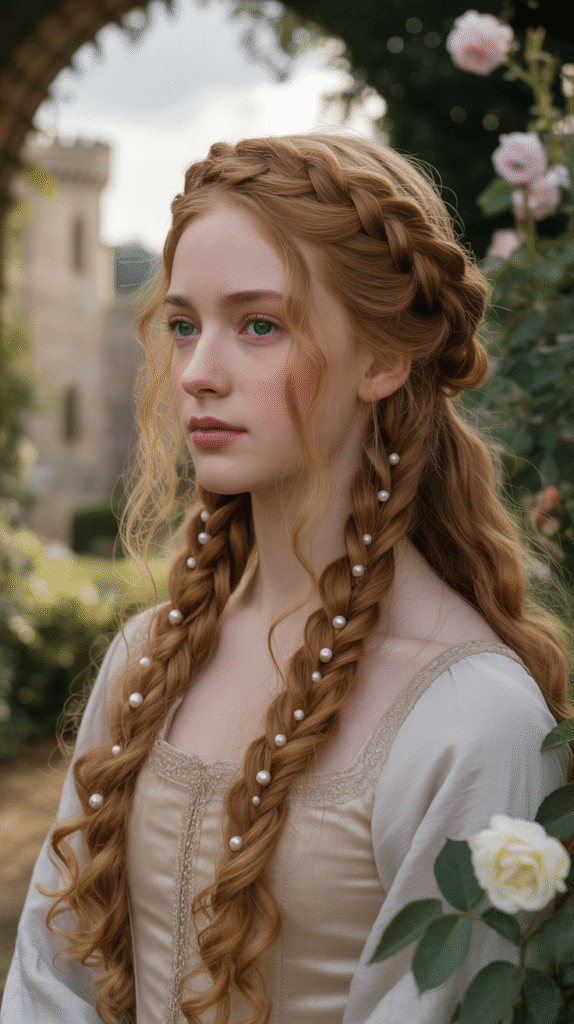
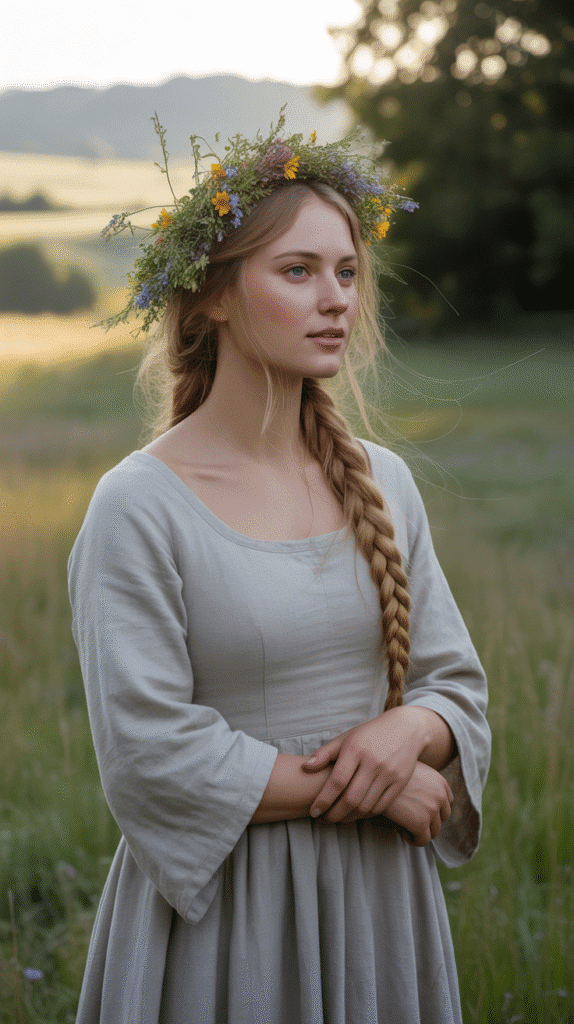
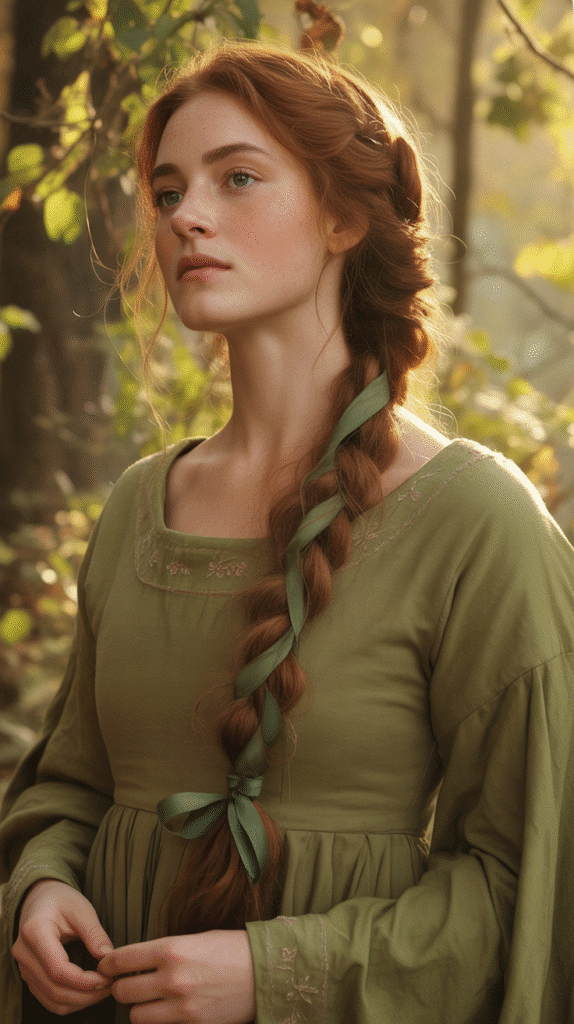
4. The Romantic Side Braid with Flowers
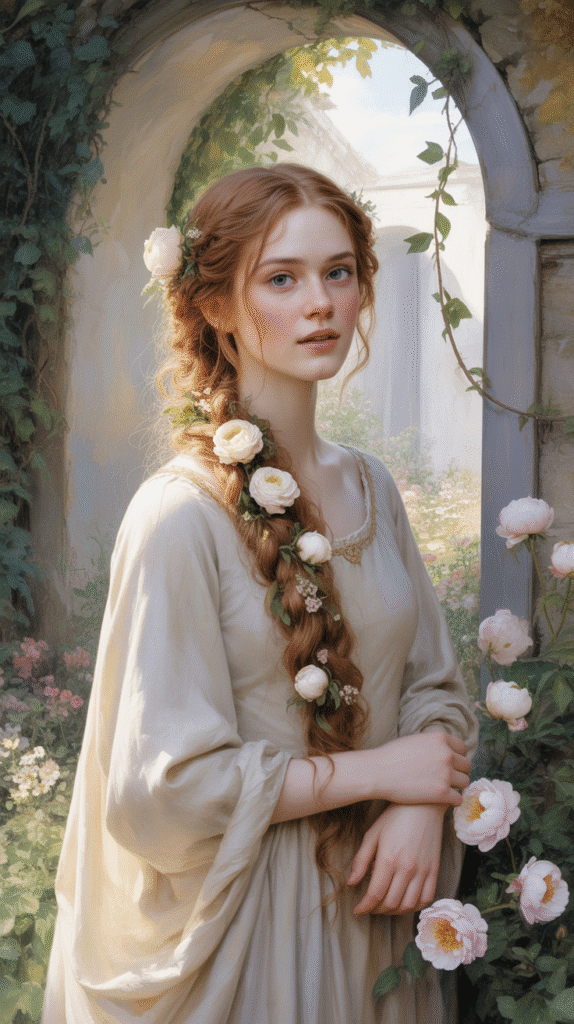
The side braid adorned with fresh flowers represented romance and femininity in medieval culture, often worn during courtship rituals and springtime celebrations.
This softer, more approachable style allowed princesses to appear both regal and approachable.
The incorporation of seasonal flowers added color, fragrance, and symbolic meaning to the hairstyle.
Step-by-Step Instructions:
- Brush all your hair to one side of your head (left or right, depending on preference) and gather at the nape of your neck.
- Create a side part on the opposite side to add volume and height at the crown before bringing hair over.
- Divide the gathered hair into three equal sections to prepare for a traditional three-strand braid.
- Begin braiding loosely, keeping tension relaxed to create a soft, romantic texture rather than a tight, severe look.
- Continue braiding all the way down to the ends, leaving about 2 inches loose at the bottom.
- Secure the end with a ribbon tie in a complementary color rather than a modern elastic band for authenticity.
- Gently pancake the braid by pulling at the edges of each section to create width and a fuller appearance.
- Select fresh flowers with sturdy stems such as roses, daisies, baby’s breath, or lavender for weaving.
- Insert flower stems into the braid at regular intervals, tucking them securely between the woven sections.
- For longer-lasting flowers, consider wrapping the stems with floral tape or using small water tubes before insertion.
- Add trailing ribbon that matches your dress, allowing it to weave through the braid and hang decoratively at the end.
- Mist lightly with hairspray, being careful not to damage the fresh flowers with too much product.
5. The Coiled Temple Braids
Temple braids were distinctive medieval hairstyles where hair at the temples was braided and coiled into decorative spirals, often covered with golden cauls or nets.
This style was particularly popular among married noblewomen and symbolized maturity and respectability.
The intricate coils demonstrated both the wearer’s patience and her access to skilled ladies’ maids.
Step-by-Step Instructions:
- Create a center part and section off the front portions of hair from each temple, about 2-3 inches wide on each side.
- Clip the back section of hair away to keep it separate while you work on the temple sections.
- Take the left temple section and divide it into three strands to create a tight, rope-like braid.
- Braid down about 4-6 inches (depending on your hair length), then secure with a small clear elastic band.
- Coil this braid into a flat spiral shape against the side of your head, starting from the end and working inward.
- Secure the coiled braid with bobby pins placed at multiple points around the spiral for stability.
- Repeat the exact same process on the right side, ensuring the coils are symmetrical in size and position.
- Style the remaining back hair in loose waves, a low bun, or leave it flowing down the back as preferred.
- For authentic medieval appearance, place decorative gold mesh cauls or nets over each coiled braid.
- Secure the cauls with small decorative pins that match the metallic finish of the netting.
- Add a jeweled headband across the crown connecting the two coiled sections for additional ornamentation.
- Set the entire style with medium-hold hairspray to prevent the coils from loosening throughout wear.
6. The Waterfall Braid Crown
The waterfall braid creates a cascading effect that mimics water flowing over stones, representing the medieval appreciation for natural beauty and fluid movement.
This romantic style became popular among younger princesses during festivals and celebrations.
The technique allows strands to fall freely while maintaining structure, combining the best of both braided and loose styles.
Step-by-Step Instructions:
- Begin with hair that has been curled or has natural wave for the best cascading effect.
- Take a small section of hair near your left temple and divide it into three equal strands.
- Start a regular braid by crossing the back strand over the middle, then the front strand over the middle.
- On the next stitch, instead of continuing the front strand, drop it and let it fall, picking up a new section from above.
- Continue this pattern around your head: braid, drop the front strand, pick up new section from above, repeat.
- The dropped strands create the “waterfall” effect as they cascade down with the rest of your hair.
- Work the waterfall braid along your hairline from left temple around the back to the right temple.
- When you reach the opposite side, secure the braid with bobby pins hidden beneath the hair.
- For a complete crown effect, you can start another waterfall braid on the other side and connect them.
- Curl any straight pieces of the waterfall strands to blend seamlessly with the rest of the styled hair.
- Gently tug at the braided sections to loosen and create a more romantic, effortless appearance.
- Finish with hairspray and consider adding small pearl pins along the braid path for medieval elegance.
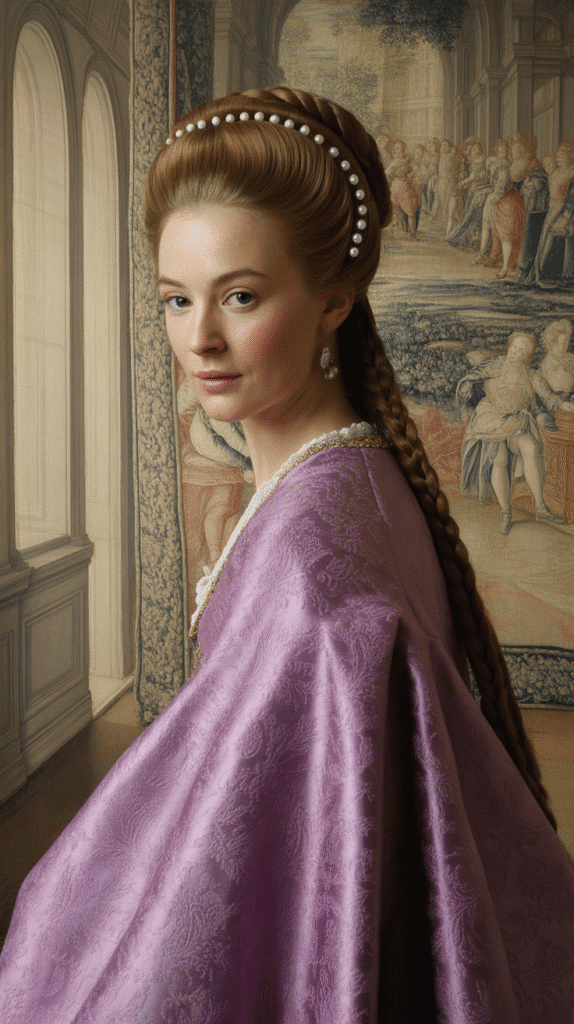
7. The Wrapped Low Bun with Veil
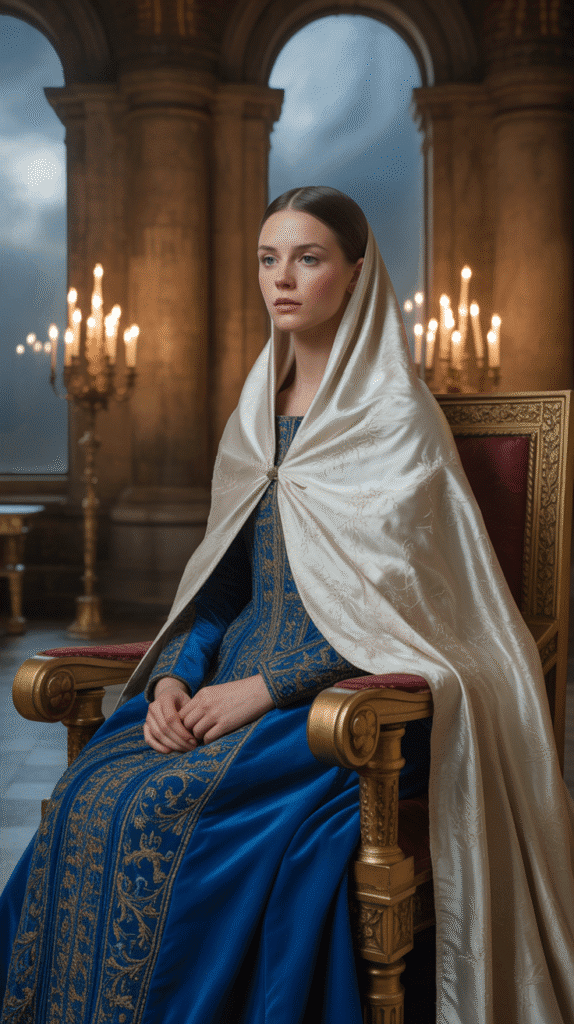
The veiled low bun represented modesty and piety among medieval noblewomen, especially married ladies and queens.
This covered hairstyle was considered proper for formal court settings and religious observances.
The elegant combination of a sleek bun and flowing veil created an air of mystery and sophistication befitting the highest-ranking women.
Step-by-Step Instructions:
- Brush all hair back smoothly from the face, using a boar bristle brush to eliminate any bumps or texture.
- Apply smoothing serum or gel to the crown area to achieve a sleek, polished appearance without flyaways.
- Gather all hair at the nape of the neck into a low ponytail, positioning it just above where the neck meets the skull.
- Secure the ponytail with a hair elastic that matches your hair color for a seamless look.
- Twist the entire ponytail into a tight rope, coiling it around the base to form a compact bun.
- Tuck the ends under the bun and secure with multiple bobby pins inserted at various angles for maximum hold.
- Take a long rectangle of sheer fabric (organza, silk, or lightweight cotton) in white, cream, or colored fabric.
- Drape the veil over your head so the center point rests on your crown and fabric falls equally on both sides.
- Bring the veil forward so it frames your face, then wrap the ends around the bun at the nape of your neck.
- Cross the veil ends over the bun and bring them back around to tie at the top of your head or tuck securely.
- Secure the veil with decorative pins that feature pearls, jewels, or metalwork for an authentic medieval touch.
- Allow any excess veil fabric to drape down your back or over your shoulders as desired for additional elegance.
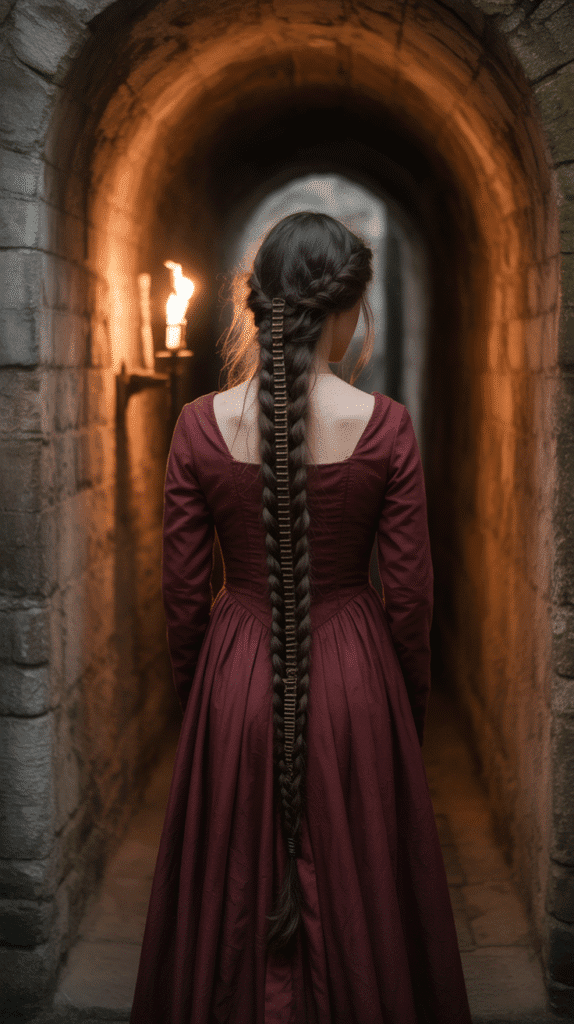
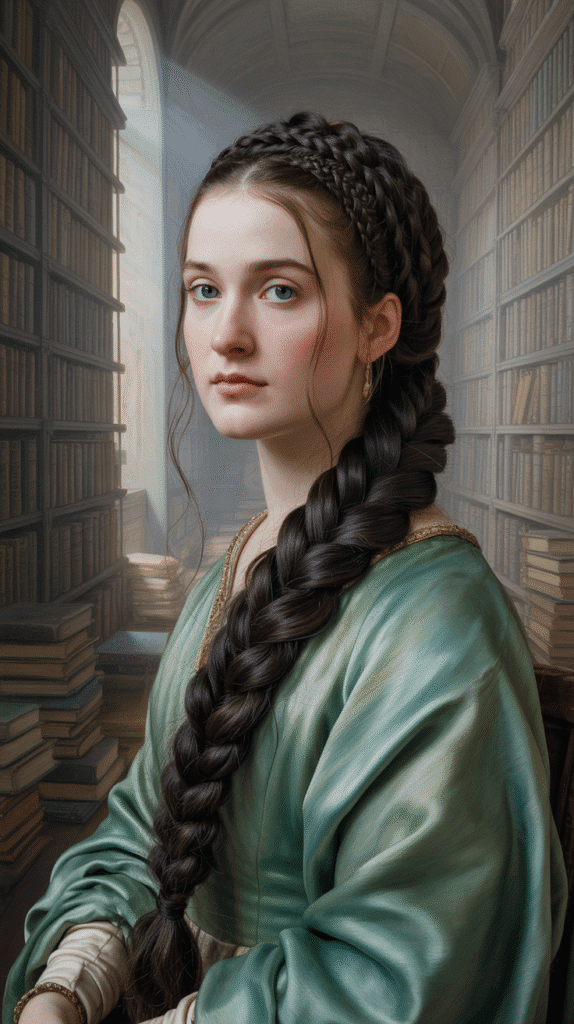
8. The Herringbone Braid Down the Back
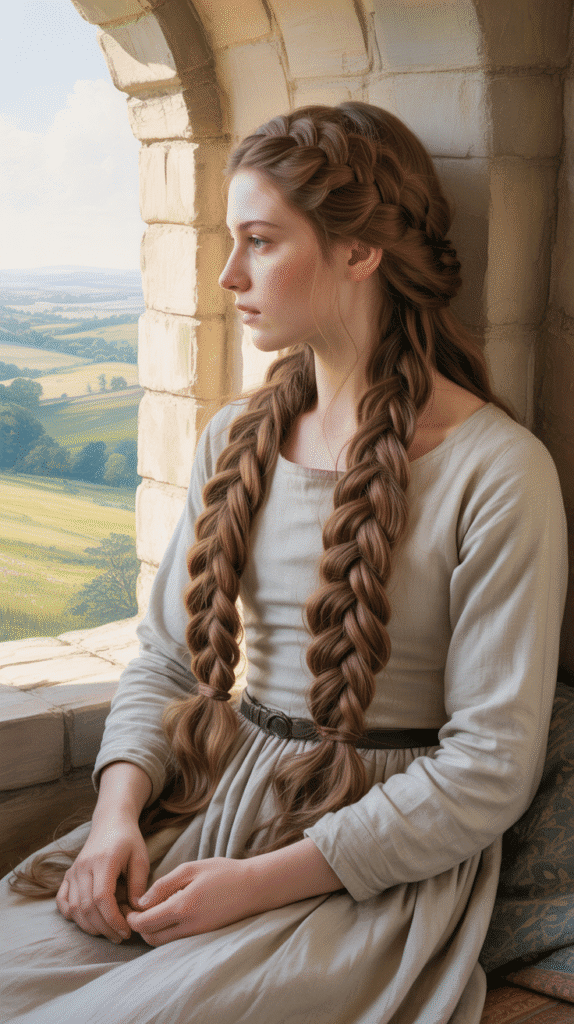
The herringbone or fishtail braid creates an intricate, woven appearance that was highly prized in medieval times for its complexity and beauty.
This style demonstrated skill in hair artistry and was often worn during special celebrations and tournaments.
The tight, detailed pattern resembles the bones of a fish, creating visual interest down the entire length of the hair.
Step-by-Step Instructions:
- Start with completely dry, thoroughly brushed hair gathered into a low ponytail at the nape of your neck.
- Divide the ponytail into two equal sections (unlike a regular braid which uses three sections).
- Take a thin strand from the outer edge of the left section and cross it over to join the right section.
- Then take a thin strand from the outer edge of the right section and cross it over to join the left section.
- Continue this alternating pattern, always taking small sections from the outer edges and crossing them to the opposite side.
- The smaller the sections you take, the more intricate and detailed your herringbone pattern will appear.
- Keep consistent tension throughout the braiding process to maintain an even, professional-looking result.
- Continue braiding all the way down to the ends of your hair, leaving only about an inch loose.
- Secure with a ribbon tie or decorative hair elastic that complements your outfit or costume.
- Gently pancake the braid by pulling at the edges to create width and emphasize the herringbone pattern.
- For medieval authenticity, weave a thin leather cord or colored ribbon throughout the braid as you work.
- Finish with a light application of shine spray to make the intricate pattern more visible and polished.
9. The Twisted Rope Crown
The rope crown utilizes twisted sections of hair instead of braids to create a simpler yet equally elegant medieval hairstyle.
This technique was favored by busy noblewomen who needed quick but sophisticated styling.
The twisted texture catches light beautifully and creates interesting dimension around the face.
Step-by-Step Instructions:
- Part your hair down the center from forehead to nape, dividing it into two completely equal sections.
- Take the left section and divide it into two smaller subsections of equal size.
- Twist each subsection clockwise (to the right) several times until they begin to coil on themselves.
- Then wrap these two twisted sections around each other counterclockwise (to the left), creating a rope-like appearance.
- The key is twisting individual sections one direction and wrapping them together in the opposite direction for tension.
- Continue the rope twist all the way down to the ends, maintaining consistent tightness throughout.
- Secure the end temporarily with a small clip while you repeat the process on the right section.
- Once both sides are rope-twisted, wrap the left rope along your hairline up and over your head like a crown.
- Secure with bobby pins every few inches, making sure the rope lies flat and smooth against your head.
- Take the right rope and wrap it along the opposite side, meeting the first rope at the back of your head.
- Pin where they meet, then wrap any remaining length around the crown or tuck ends underneath and secure.
- Add decorative elements like small flowers, pearls, or a thin metal chain along the twisted crown for enhancement.
10. The Braided Half-Crown with Curls
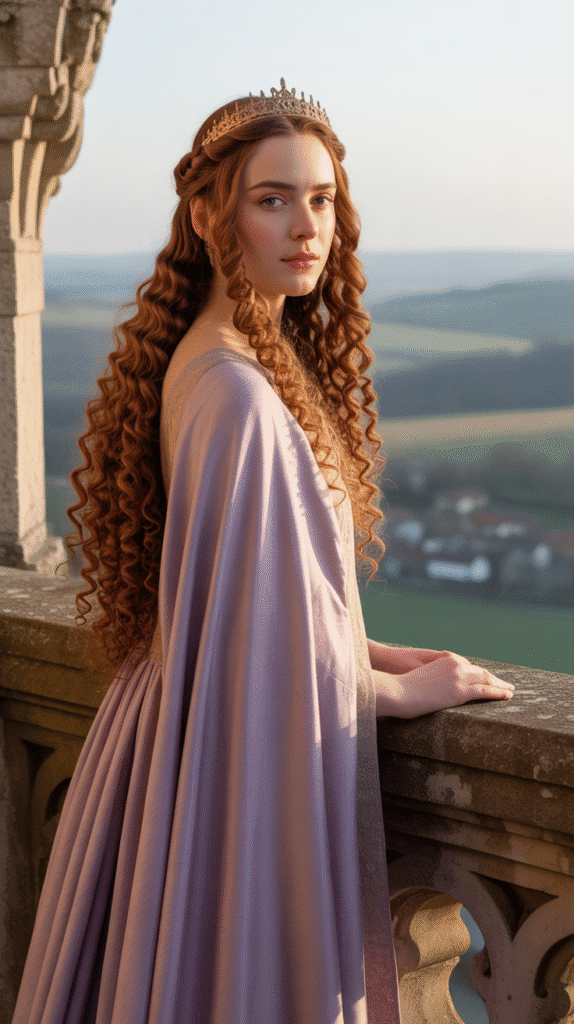
This style combines the elegance of a braided crown across the top of the head with the romance of flowing curls beneath.
It was perfect for medieval celebrations where noblewomen wanted to show off their long hair while keeping it partially controlled.
The contrast between structured braiding and loose curls created visual interest and feminine appeal.
Step-by-Step Instructions:
- Begin by curling the bottom two-thirds of your hair with a medium-barrel curling iron for bouncy, defined curls.
- Allow the curls to cool completely while pinned up before releasing them for longer-lasting hold.
- Create a deep side part on your preferred side, sweeping the majority of hair to one side.
- From the heavy side of the part, take a 2-inch section of hair near your temple to begin braiding.
- Create a Dutch or French braid (your choice) incorporating hair from the hairline as you braid toward the opposite ear.
- Keep the braid relatively tight at the roots but allow it to loosen slightly as you move away from the scalp.
- Continue braiding along the crown of your head, following the natural curve from one side to the other.
- When you reach the opposite temple area, secure the braid with bobby pins, tucking the end underneath.
- Release the curled sections beneath the braid, allowing them to cascade freely over your shoulders.
- Use your fingers to gently separate and fluff the curls for a fuller, more voluminous appearance.
- The contrast between the controlled braid on top and wild curls below creates the perfect medieval princess aesthetic.
- Add small decorative pins or jewels along the braided path, and finish with flexible-hold hairspray to maintain the style.
11. The Figure-Eight Bun
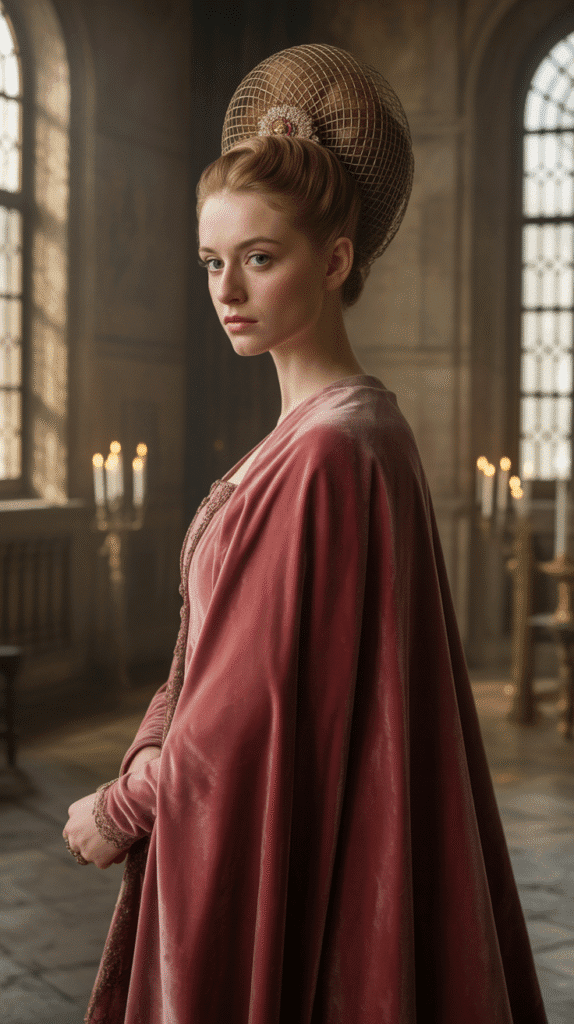
The figure-eight bun was an ingenious medieval styling technique where hair was arranged in a distinctive figure-eight or infinity symbol shape at the back of the head.
This geometric style was practical for active noblewomen while maintaining an artistic, elegant appearance.
The symmetrical loops were often enhanced with decorative nets or jeweled pins.
Step-by-Step Instructions:
- Gather all hair into a low ponytail at the nape of your neck, securing with a strong elastic band.
- Divide the ponytail into two equal sections, holding one in each hand for the figure-eight creation.
- Take the left section and loop it upward and to the left, forming the top circle of the figure-eight shape.
- Secure this loop with bobby pins at the base where it connects to the ponytail elastic.
- Take the right section and loop it upward and to the right, creating the matching circle on the opposite side.
- Pin this second loop securely, ensuring both loops are similar in size and positioned symmetrically.
- Cross any remaining lengths of hair over the center where the two loops meet, forming the intersection of the figure-eight.
- Tuck all loose ends underneath the loops and pin them invisibly so no ends are visible.
- Adjust both loops to ensure they’re equal in size and the figure-eight shape is clearly defined.
- For medieval authenticity, cover each loop with decorative gold or silver mesh netting secured with ornate pins.
- Add a jeweled brooch at the center intersection point to draw attention to the unique shape.
- Mist with strong-hold hairspray to maintain the sculptural quality throughout the day or evening.
12. The Milkmaid Braid Crown
The milkmaid braid crown evokes pastoral medieval life while remaining elegant enough for nobility, creating a halo effect around the entire head.
This practical yet beautiful style kept hair completely off the face and neck, making it ideal for warm weather or active pursuits.
Despite its rustic origins, the style was adopted by all social classes in various forms.
Step-by-Step Instructions:
- Part your hair down the middle from forehead to nape, creating two perfectly equal sections.
- Working on the left section first, create a standard three-strand braid from roots to ends.
- Keep the braid somewhat loose and relaxed rather than extremely tight for a softer, more romantic appearance.
- Secure the end with a small elastic band and set aside while you braid the second section.
- Create an identical braid on the right side, matching the tension and tightness of the first braid.
- Take the left braid and bring it up and over the top of your head like a headband, from left ear across to right ear.
- Pin the braid securely to the right side of your head with multiple bobby pins for stability.
- Take the right braid and bring it up and over your head in the opposite direction, creating a second layer.
- Position the second braid so it sits either directly on top of or just behind the first braid for dimension.
- Pin securely on the left side, tucking both ends underneath the opposite braids so they’re hidden from view.
- Gently pull at the braids to pancake them, creating fuller, more substantial-looking crowns that cover more of the head.
- Finish by adding small flowers, pearl pins, or leaving it simple, then mist lightly with hairspray.
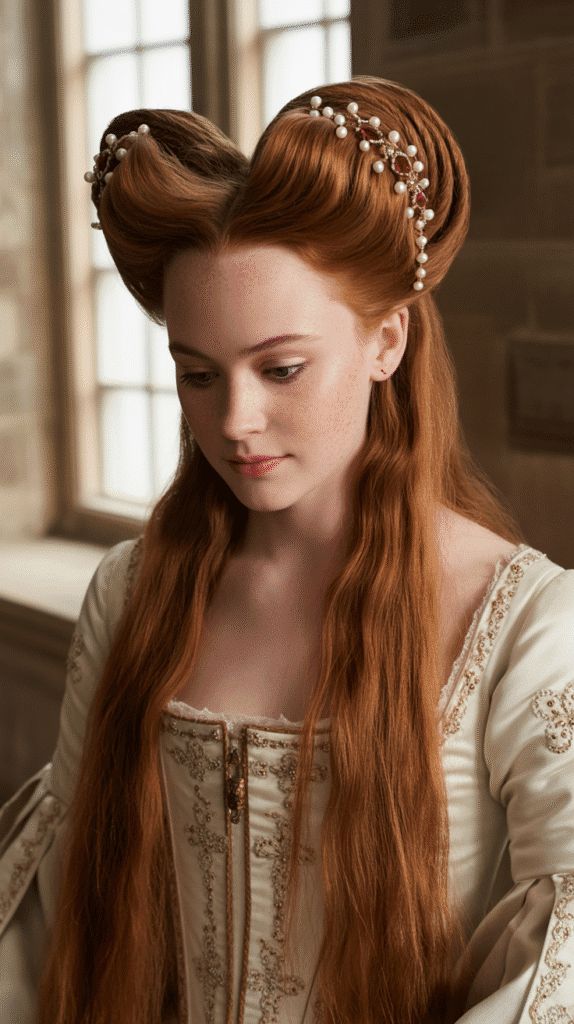
13. The Renaissance Roll with Side Accent
The Renaissance roll involved creating a padded roll of hair at the hairline, a style that bridged late medieval and Renaissance periods.
This elevated front section added height and drama while the remaining hair could be styled in various ways.
The look required padding or “rats” to achieve the proper volume and aristocratic appearance.
Step-by-Step Instructions:
- Section off the front portion of your hair from ear to ear, about 3-4 inches back from your hairline.
- Clip the back section away while you focus on creating the signature roll at the front.
- Place a hair padding piece (foam roll or “rat”) along your hairline from temple to temple for support.
- Take the front section and smooth it back over the padding, ensuring complete coverage of the support structure.
- Roll the hair ends under and around the padding toward your face, creating a rounded, tube-like shape.
- Secure the roll with bobby pins inserted vertically through the roll into the padding and your natural hair beneath.
- Ensure the roll is even in height across the entire front and sits about 2-3 inches above your natural hairline.
- Take a small decorative section from the left temple area and create a small three-strand braid as an accent.
- Drape this accent braid across the roll or pin it decoratively to the side for added visual interest.
- Style the remaining back hair in a low bun, braided bun, or allow it to hang in controlled curls.
- Add jeweled pins along the roll or place a delicate chain or ribbon across it for ornamentation.
- Set with strong-hold hairspray, paying special attention to smoothing any flyaways around the roll structure.
14. The Laced-Through Ribbon Braid
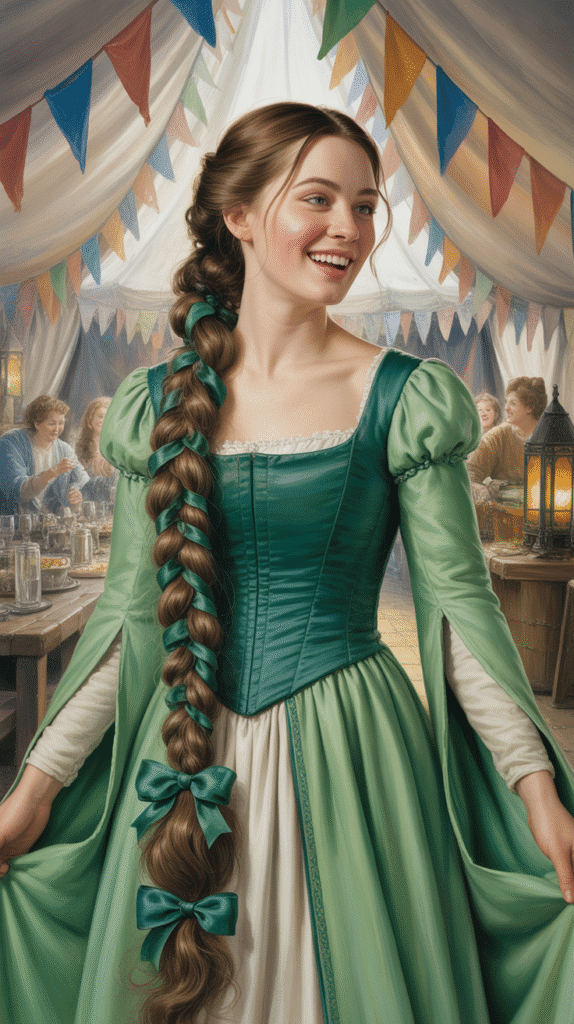
This decorative technique involved weaving ribbon through braided hair, creating a colorful and textured effect popular during medieval festivals and celebrations.
The ribbon added both visual interest and could incorporate house colors or symbolic meanings.
This style demonstrated creativity and attention to detail in personal grooming.
Step-by-Step Instructions:
- Select a ribbon that’s 1/4 to 1/2 inch wide and at least three times the length of your hair for adequate weaving.
- Choose ribbon colors that complement your outfit or represent symbolic meanings (red for passion, blue for loyalty, etc.).
- Create a standard three-strand braid starting from the crown or nape, depending on your preferred style.
- After completing 2-3 inches of the braid, take the ribbon and fold it in half to find the center point.
- Hook the center of the ribbon around one section of the braid, so you have two ribbon ends to work with.
- As you continue braiding, weave one ribbon end through each stitch, threading it over and under the braid sections.
- Alternate the ribbon through each crossing, creating a laced or corset-like appearance throughout the braid.
- Maintain even tension on both the hair and ribbon to prevent bunching or looseness in the final result.
- Continue lacing the ribbon through the entire length of the braid until you reach the ends.
- Tie the ribbon ends in a decorative bow at the bottom, allowing the excess to dangle for a festive touch.
- For multiple braids, repeat the process with matching or contrasting ribbons for varied visual effects.
- The laced ribbon not only looks beautiful but also helps secure the braid, reducing the need for multiple elastics.
15. The Covered Plait with Wimple

The wimple was a cloth covering that surrounded the neck, chin, and sides of the face, often paired with a long plait for a modest medieval appearance.
This style was particularly common among married women, religious women, and older noblewomen.
The combination provided practical warmth while adhering to medieval standards of propriety and modesty.
Step-by-Step Instructions:
- Begin with clean, brushed hair and create a center part if desired, though hair will be largely covered.
- Braid all hair into one long, tight three-strand plait down the back, starting as high as possible at the crown.
- Secure the end of the braid with a ribbon or covered elastic that matches your wimple fabric.
- Take a rectangular piece of linen or cotton fabric (approximately 36 inches long and 18 inches wide) for the wimple.
- Place the center of the wimple under your chin, bringing both ends up along the sides of your face.
- The fabric should cover your neck completely, frame your face, and extend up to your ears on both sides.
- Bring both ends of the wimple up and over your head, crossing them at the crown or slightly back.
- The crossed fabric should lie flat against your head, covering most of your hair except the braid in back.
- Secure the wimple with straight pins pushed through the layers of fabric into the hair beneath for stability.
- A fillet (headband) or circlet can be worn over the wimple to keep it in place and add decoration.
- Adjust the fabric around your face to ensure it’s comfortable but creates the proper modest, covered appearance.
- The long plait should remain visible down your back as the only hair showing with this traditional style.
16. The Butterfly Braid
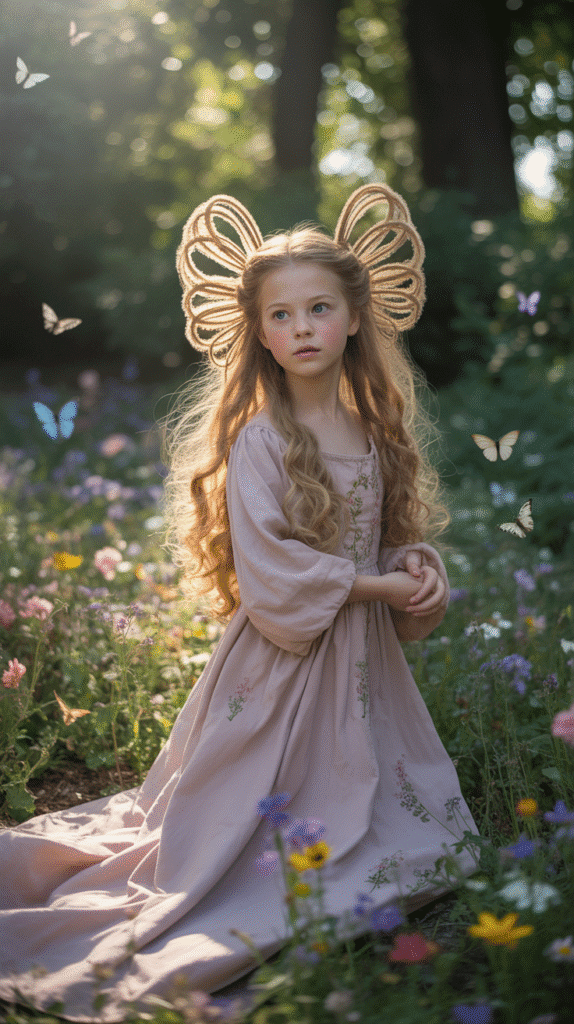
The butterfly braid creates wing-like sections that extend outward from a central braid, resembling a butterfly’s delicate wings.
This whimsical medieval style was perfect for young princesses and festive occasions.
The playful yet intricate technique demonstrated advanced braiding skills while maintaining a youthful, lighthearted aesthetic.
Step-by-Step Instructions:
- Start with hair that’s been lightly textured with dry shampoo or texturizing spray for better grip and volume.
- Create a standard Dutch braid (inverted braid) straight down the center back of your head, starting at the crown.
- As you braid, only add hair to the braid every third or fourth stitch rather than with every crossing.
- This creates loops or “wings” of hair on alternating sides as sections are left out of the main braid.
- Continue this pattern down the length of your hair: braid several stitches, add hair from one side, leave out a loop, repeat.
- The loops should be relatively equal in size on alternating sides, creating symmetrical butterfly wing shapes.
- When you reach the nape of your neck, continue with a regular braid through the remaining length.
- Secure the end with a small elastic band that matches your hair color or outfit.
- Gently pull at the loops to make them more pronounced and wing-like, adjusting their size and shape.
- You can also gently pancake the center braid to make it wider and more prominent between the wings.
- For extra butterfly effect, insert small decorative pins with jewels or pearls into the center braid.
- Mist with flexible-hold hairspray to maintain the loops without making the style stiff or crunchy.
17. The Twisted Low Chignon
The chignon was a sophisticated low bun style that originated in medieval times and evolved through the centuries.
This elegant twisted version kept hair neatly contained while appearing refined and mature.
The style was especially popular for formal court events and could be easily adorned with jeweled pins or decorative combs.
Step-by-Step Instructions:
- Brush all hair back from the face and gather it into a low ponytail at the nape of your neck.
- Secure with a hair elastic, positioning the ponytail just above where your neck meets your head.
- Divide the ponytail into two equal sections, holding one section in each hand.
- Twist the right section clockwise (to the right) several times until it begins to coil on itself.
- Twist the left section clockwise as well, keeping both twists tight and uniform in texture.
- Wrap the right twisted section around the base of the ponytail in a counterclockwise direction.
- Secure this wrapped section with bobby pins, tucking the end underneath the growing chignon.
- Wrap the left twisted section around in the same counterclockwise direction, covering the first section.
- Continue pinning as you wrap, inserting bobby pins at angles through the twists into the base for security.
- Tuck the final end underneath the chignon and secure with multiple pins to prevent loosening throughout the day.
- For a softer look, gently pull at the twisted sections to loosen them slightly and create more volume.
- Add decorative hair sticks, jeweled pins, or a ornate comb inserted into the chignon for medieval elegance and additional security.
18. The Ladder Braid Down the Back
The ladder braid creates a striking effect with horizontal sections that resemble the rungs of a ladder, showcasing advanced medieval braiding artistry.
This eye-catching style was reserved for special occasions when noblewomen wanted to display their elaborate hairstyling skills.
The geometric pattern creates incredible visual interest from behind.
Step-by-Step Instructions:
- Begin with straight or slightly wavy hair that’s completely tangle-free for the cleanest ladder effect.
- Create a horizontal part from ear to ear about 2 inches back from your hairline, clipping the front section away.
- Take a thin section of hair from behind your left ear and create a small standard three-strand braid horizontally toward the right.
- Once you’ve braided across to the right ear, secure temporarily and leave the braid hanging down as the first “rung.”
- Create another horizontal part about 2-3 inches below the first one, separating the next layer of hair.
- Thread this new section of hair through the first braid, weaving it over and under the horizontal braid like a basket weave.
- After threading through, braid this second section horizontally from left to right, creating the second rung.
- Continue this pattern: create a horizontal part, thread the hair through the braid above it, then braid horizontally across.
- Each new section weaves through the previous “rung,” creating the connected ladder appearance down your back.
- Maintain consistent spacing between each rung for a neat, uniform ladder effect throughout.
- When you reach the nape of your neck, continue with a regular braid or leave the remaining hair loose.
- Secure each horizontal braid section with small bobby pins at the ends to prevent them from unraveling.
19. The Flowered Updo with Tendrils

This romantic style involved creating a loosely gathered updo with intentional face-framing tendrils and abundant flower decorations.
The combination of structured updo and delicate loose pieces created a balanced look that was both elegant and touchable, perfect for garden celebrations and romantic encounters.
Step-by-Step Instructions:
- Before styling, use a curling iron to create loose waves throughout your hair for texture and volume.
- Leave out small sections at your temples (about 1/2 inch wide on each side) to serve as face-framing tendrils.
- Gather the remaining hair loosely at the crown of your head, allowing some pieces to fall naturally for a soft effect.
- Twist the gathered hair loosely and coil it into a messy, relaxed bun rather than a tight, structured one.
- Secure the bun with bobby pins inserted at various angles, but don’t worry about perfection—this style embraces imperfection.
- Allow some pieces to escape the bun naturally, creating wispy texture and romantic movement around the style.
- Take the tendril sections you left out earlier and curl them gently away from your face with a small curling iron.
- Pin these tendrils loosely so they frame your face but don’t hang completely free, creating a controlled cascade effect.
- Select an assortment of fresh or silk flowers in varying sizes (roses, peonies, daisies, baby’s breath work beautifully).
- Insert flower stems throughout the updo, concentrating them more heavily on one side for an asymmetrical, natural arrangement.
- Tuck some flowers deep into the bun while allowing others to sit on the surface for dimensional depth.
- Finish by misting with light-hold hairspray that won’t weigh down the soft, airy quality of the style.
20. The Celtic Knot Half-Up Style
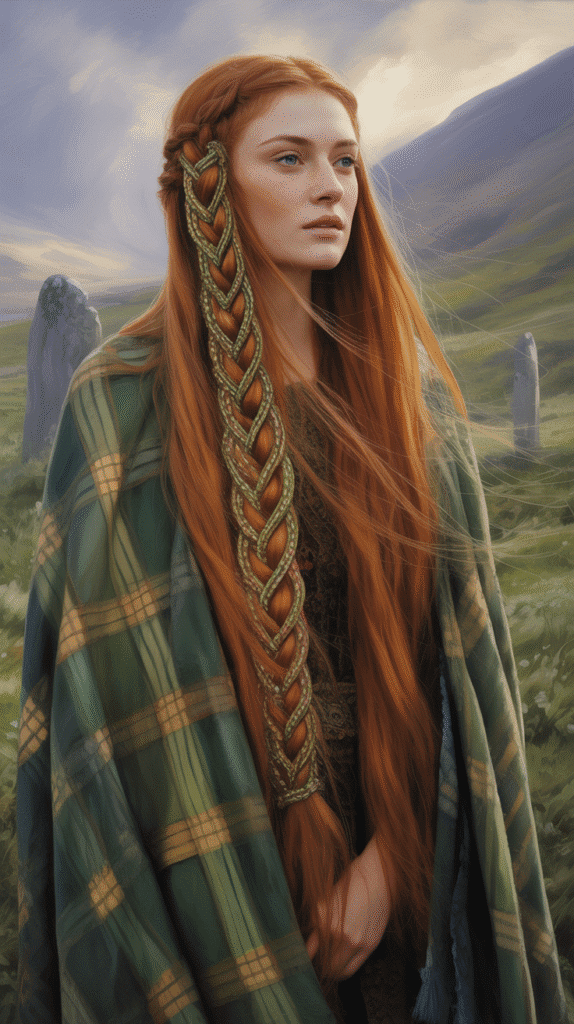
The Celtic knot hairstyle incorporated the intricate knotwork patterns found in medieval Celtic art, creating woven sections that formed symbolic designs.
This style connected wearers to their cultural heritage while displaying impressive technical skill.
The interlaced patterns could represent eternity, loyalty, or spiritual connections depending on the specific knot design chosen.
Step-by-Step Instructions:
- Section off the top half of your hair from temple to temple, leaving the bottom half down and loose.
- Divide the top section into four equal parts—two sections on each side of a center part.
- Take the two sections closest to your face and cross the right section over the left in the center.
- Bring the outer right section under the crossed sections and pull it through to the left side.
- Bring the outer left section under the crossed sections and pull it through to the right side.
- This creates the basic over-under pattern that forms the foundation of Celtic knotwork in hair.
- Continue weaving the sections in this over-under pattern, adding small amounts of hair from the sides as you work down.
- The key is maintaining clear separation between sections so the woven pattern remains visible and distinct.
- Work the Celtic knot pattern down about 4-6 inches, then secure all sections together with bobby pins or a decorative clip.
- Allow the remaining bottom half of your hair to flow freely in natural waves or curls beneath the knotted section.
- For enhanced visibility of the pattern, gently pull at the edges of each woven section to loosen and define them.
- Consider adding small metallic thread or thin ribbon in gold or silver woven through the knot for authentic Celtic appearance.
21. The Wrapped Ponytail with Jeweled Bands
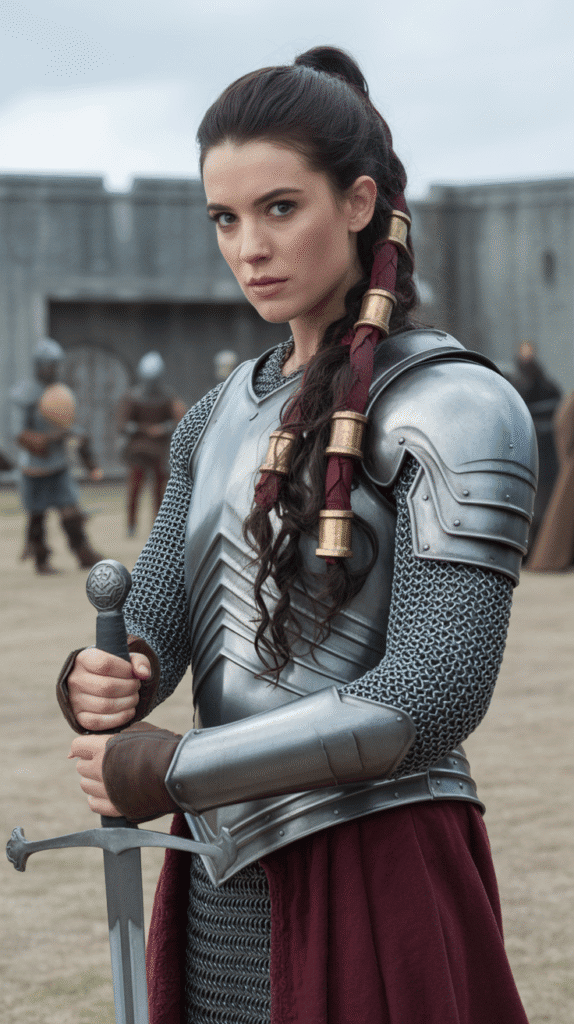
The wrapped ponytail was a practical yet decorative style where sections of the ponytail were wrapped with fabric, leather, or metal bands at intervals.
This technique added visual interest to a simple style while keeping long hair manageable during active pursuits.
The decorative wrappings could indicate social status through the materials used.
Step-by-Step Instructions:
- Brush all hair back smoothly and gather into a high or mid-level ponytail, securing with a strong elastic band.
- The ponytail should be positioned wherever you prefer—crown, mid-back, or low, depending on the desired effect.
- Take a long strip of fabric (silk, velvet, or leather for authenticity) about 1 inch wide and several feet long.
- Starting at the base of the ponytail where the elastic is, wrap the fabric strip around tightly to cover the elastic completely.
- Continue wrapping the fabric down the ponytail about 2-3 inches, then tie it off or secure with a decorative pin.
- Leave 3-4 inches of unwrapped hair, then begin wrapping again with either the same or a different colored fabric.
- Create this pattern of wrapped sections alternating with exposed hair sections down the entire length of the ponytail.
- Each wrapped section can be secured with jeweled bands, metal rings, or decorative hair cuffs for added elegance.
- The number of wrapped sections depends on your hair length—typically 3-5 sections look most balanced.
- For extra medieval authenticity, use leather cord for wrapping and attach small metal charms or bells between sections.
- Ensure all wrappings are secure enough to last throughout wear but not so tight they damage the hair.
- Leave the very end of the ponytail unwrapped and flowing freely, or tie it with a ribbon bow for a finished look.
22. The Braided Headband with Loose Waves
This effortless style combined a braided section across the crown functioning as a natural headband with the rest of the hair flowing in soft waves.
It was perfect for medieval ladies who wanted a casual yet put-together appearance for everyday castle life.
The braided headband kept hair off the face while showcasing beautiful length and texture.
Step-by-Step Instructions:
- Start with hair that has natural wave or has been curled beforehand for the best texture and movement.
- Create a deep side part on your preferred side, sweeping the majority of hair to the heavier side.
- From the lighter side of the part (the side with less hair), take a 1-inch section near your temple.
- Create a tight three-strand braid with this section, braiding straight back toward the opposite ear.
- Keep the braid close to your hairline so it acts as a headband, lying flat against the roots.
- Do not incorporate additional hair as you braid—this should be a simple three-strand braid from a single section.
- Continue braiding all the way across your head from one temple to the other, following your hairline curve.
- When you reach the opposite ear, secure the braid with a small clear elastic or bobby pins tucked behind the ear.
- Allow all remaining hair to flow freely over your shoulders in natural waves or curls.
- The contrast between the structured braid headband and loose flowing waves creates perfect medieval princess aesthetics.
- For variation, you can create braided headbands on both sides meeting at the back for a double-headband effect.
- Add small flowers or pearls along the braided headband for special occasions or enhanced decoration.
23. The Nested Braids Style
Nested braids involve creating a large, loose braid with smaller braids incorporated within it, producing a multi-dimensional, textured effect.
This complex medieval style demonstrated exceptional skill and patience in hair artistry.
The layered braiding technique created incredible depth and visual interest that caught light beautifully.
Step-by-Step Instructions:
- Begin by dividing your hair into three main sections as you would for a regular three-strand braid.
- Before starting to braid the main sections together, create a small three-strand braid within each of the three larger sections.
- These inner braids should be tight and detailed, running the full length of each section.
- Secure each small braid temporarily with a clip while you create the other two small braids.
- Once all three sections contain their own internal braid, begin braiding these three braided sections together.
- Treat each braided section as a single strand and create a large, loose braid using the standard three-strand technique.
- This creates the “nested” effect where small braids exist within the larger braid structure.
- Keep the outer braid much looser than the inner braids to ensure the nested braids remain visible.
- Continue braiding down the full length of your hair, maintaining the relaxed tension on the outer braid.
- Secure the end with a ribbon or decorative hair tie that complements the intricate nature of the style.
- Gently pancake only the outer braid, pulling at its edges to widen it and make the nested braids more prominent.
- The final effect should show clear definition between the tight inner braids and the loose outer braid containing them.
24. The Side-Swept Twist with Pearls
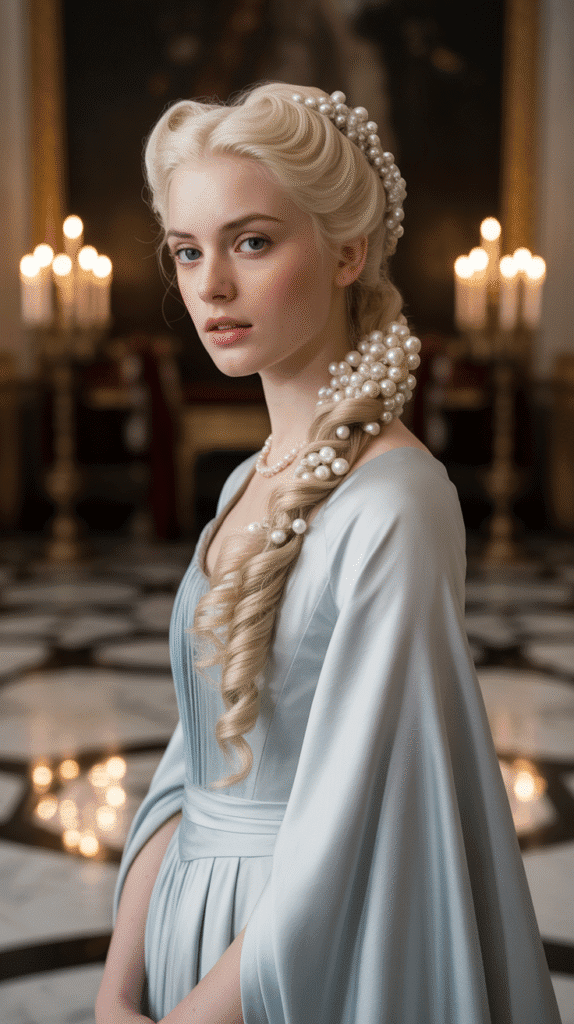
This elegant style involved sweeping all hair to one side and creating a twisted, pearl-adorned arrangement that draped over the shoulder.
It was favored for formal medieval events where showing off valuable jewelry and hair ornaments demonstrated wealth and status.
The asymmetrical nature of the style created a romantic, approachable elegance.
Step-by-Step Instructions:
- Brush all hair to one side of your head, choosing whichever side you prefer for the draping effect.
- Create a deep side part on the opposite side to allow maximum hair volume on your chosen side.
- Divide the swept hair into two equal sections once it’s gathered over your shoulder.
- Begin twisting both sections individually clockwise (toward your face) until they have some tension and structure.
- Then wrap these two twisted sections around each other counterclockwise, creating a rope twist down the length.
- The opposing directions of individual twists and the wrapping create tension that holds the style together.
- As you twist down the length, periodically insert pearl-topped pins into the twist at regular intervals.
- The pearls should be visible on the surface of the twist, creating a decorative line down the entire length.
- Continue twisting and adding pearls until you reach the ends of your hair.
- Secure the end with a ribbon or decorative elastic that has pearls attached for cohesive styling.
- For additional security, pin the twisted section to your shoulder area so it doesn’t slide backward.
- Allow a few wispy pieces to escape near your face for a softer, more romantic framing effect.
25. The Criss-Cross Crown Braid
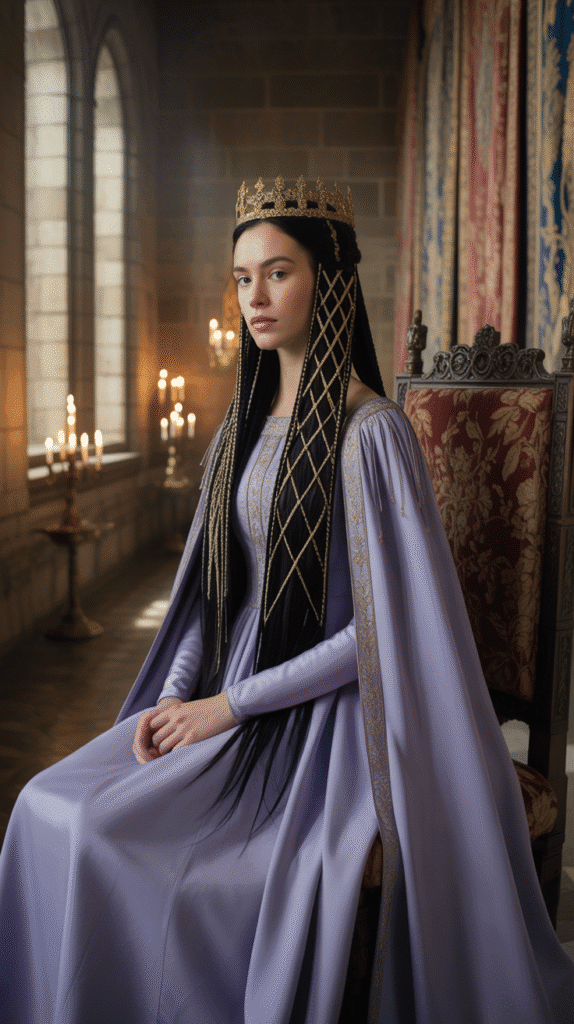
The criss-cross crown creates an intricate woven pattern across the crown of the head using multiple braids that intersect in a basketweave design.
This complex medieval style was reserved for the most important occasions and required assistance from skilled ladies’ maids.
The geometric precision of the criss-crossing braids created a crown-like effect without any actual headpiece.
Step-by-Step Instructions:
- Section your hair into four equal parts by creating a center part from front to back and an ear-to-ear part across.
- You should have four quadrants: front left, front right, back left, and back right sections.
- Clip three sections away while you work on the front left section first.
- Create a tight Dutch braid (inverted braid) starting at the front left, braiding diagonally back toward the opposite (right) ear.
- Secure this braid temporarily at the right ear with a clip and leave the ends loose.
- Move to the front right section and create another Dutch braid diagonally toward the left ear, crossing over the first braid.
- This creates the first “X” or cross pattern on your crown area.
- Take the back left section and braid diagonally forward toward the front right, weaving over and under the existing braids.
- Take the back right section and braid diagonally forward toward the front left, again weaving through existing braids.
- The key is maintaining the over-under pattern so braids truly weave through each other like a basket.
- Once all four braids meet and intersect at the crown, gather their ends together and secure in a low bun or ponytail.
- The criss-cross pattern should be clearly visible across your entire crown area, creating the intricate woven effect.
26. The Looped Half-Updo
The looped half-updo created decorative loops of hair secured at the back of the head while leaving the remaining hair flowing freely.
This style offered a perfect balance between controlled elegance and natural beauty.
The loops could be arranged symmetrically or asymmetrically depending on the desired effect and formality of the occasion.
Step-by-Step Instructions:
- Section off the top half of your hair from temple to temple, leaving the bottom half completely loose.
- Divide the top section into three equal parts—left, center, and right subsections.
- Take the center subsection, fold it in half to create a loop, and secure the ends at the crown with bobby pins.
- The loop should stand up slightly rather than lying flat, creating dimension and height.
- Take the left subsection and create another loop, positioning it slightly to the left of the center loop.
- Secure with bobby pins, ensuring this loop is approximately the same size as the center loop.
- Repeat with the right subsection, creating a third loop positioned to the right of center.
- The three loops should form a row across the back of your crown, all roughly the same height and size.
- Pin any loose ends down securely so only the smooth loops are visible from behind.
- The bottom half of your hair should hang freely in natural waves or curls beneath the looped section.
- For added medieval elegance, insert jeweled pins at the base of each loop or weave ribbon through them.
- Gently tug at the loops to adjust their size and ensure they’re prominent enough to create the desired decorative effect.
27. The Braided Low Side Ponytail
This asymmetrical style gathered all hair to one side in a low ponytail, with the gathered section featuring intricate braiding before the ponytail began.
It combined the practicality of a ponytail with the sophistication of braided details.
The side placement created visual interest and allowed the wearer to display the braided work more prominently.
Step-by-Step Instructions:
- Create a deep side part and brush all hair to one side, gathering it at the nape behind your ear.
- Before securing the ponytail, divide the gathered hair into three sections while holding it in place.
- Create a braid with these three sections for about 3-4 inches down from where the ponytail will be secured.
- This braided section will sit at the base of the ponytail, adding decorative detail before the hair flows freely.
- Secure the braid and all gathered hair together with a decorative hair tie or ribbon at the end of the braided section.
- The ponytail should sit low on your neck, positioned behind and slightly below your ear on your chosen side.
- Take a small section of hair from the ponytail and wrap it around the elastic to hide it from view.
- Secure this wrapped section underneath with a bobby pin for a polished, finished appearance.
- For additional medieval detail, add a second small braid within the loose ponytail hair itself.
- Curl the loose ponytail hair with a curling iron for romantic waves that contrast with the structured braid.
- Drape the ponytail over your shoulder to display it prominently in front rather than hanging down your back.
- Add decorative elements like ribbon woven through the braid or jeweled clips attached at the base.
28. The Triple Braid Updo
The triple braid updo involved creating three separate braids that were then woven together or pinned into an intricate bun formation.
This complex style showcased advanced braiding skills and created a substantial, impressive updo perfect for formal medieval occasions.
The multi-layered braids added incredible texture and dimension to the finished style.
Step-by-Step Instructions:
- Divide all your hair into three equal vertical sections—left, center, and right from crown to nape.
- Starting with the center section, create a tight three-strand braid from roots to ends and secure with an elastic.
- Braid the left section in the same manner, maintaining similar tightness for uniformity.
- Complete the right section with an identical braid, ensuring all three braids are secure and evenly sized.
- Take the center braid and coil it into a circular bun at the nape of your neck, pinning it securely.
- Wrap the left braid around the center bun in a counterclockwise direction, pinning as you wrap.
- Wrap the right braid around in a clockwise direction, weaving it over and under the left braid as they meet.
- The three braids should create a layered, textured bun with visible braid patterns throughout the updo.
- Tuck all loose ends underneath the updo and secure with multiple bobby pins for all-day hold.
- For extra dimension, gently pull at the outer edges of each braid before wrapping to create fuller loops.
- Add decorative elements like jeweled hair sticks inserted through the bun or a decorative net over the entire updo.
- Mist with strong-hold hairspray and check from all angles to ensure the updo is secure and symmetrical.
29. The Cascading Waterfall with Flowers
This romantic style extended the waterfall braid technique down multiple levels, creating a cascading effect with flowers woven throughout the falling strands.
It represented the height of medieval romantic styling, perfect for weddings and courtship celebrations.
The combination of structured braiding and free-flowing sections with natural elements created an ethereal, fairy-tale appearance.
Step-by-Step Instructions:
- Begin with hair that has been curled into loose, romantic waves for the best cascading effect.
- Start a waterfall braid on one side at temple level, following the technique of dropping strands as you braid.
- Continue the waterfall braid horizontally across the back of your head to the opposite temple.
- Instead of stopping there, begin a second waterfall braid just below the first, incorporating the dropped strands.
- This second tier creates additional cascade levels, with strands falling through multiple waterfall braids.
- Continue creating 3-4 tiers of waterfall braids, each one positioned below the previous tier.
- Each new tier should incorporate the previously dropped strands, creating an interconnected cascading pattern.
- The effect resembles water flowing down multiple levels of a fountain or natural waterfall.
- Once all tiers are complete, secure the final braid ends with bobby pins hidden behind your ear.
- Select small flowers on short stems (roses, daisies, baby’s breath) for weaving through the style.
- Insert flowers at the points where strands are dropped in the waterfall braids, securing them between the woven sections.
- Distribute flowers evenly throughout all tiers, creating a garden-like effect in your cascading hairstyle.
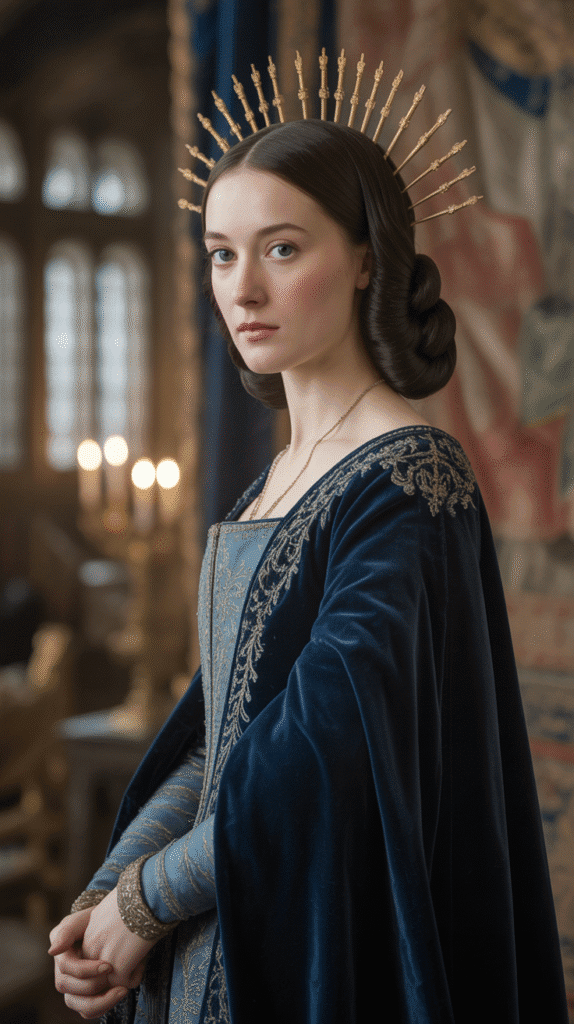
30. The Twisted Halo with Trailing Braid
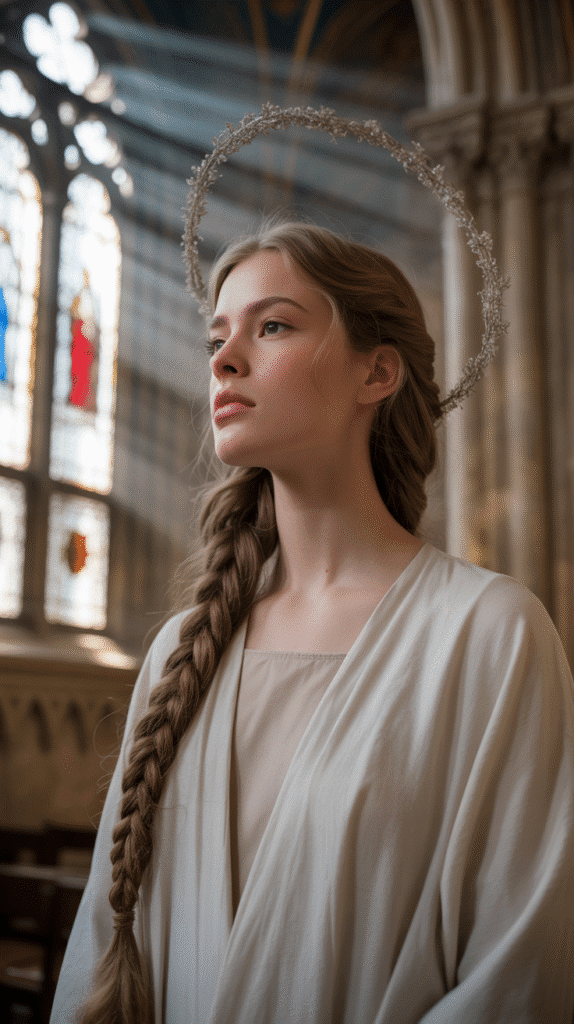
This angelic style combined a twisted halo encircling the head with a single long braid trailing down the back, merging two popular medieval techniques.
The halo represented purity and divine favor while the trailing braid showcased hair length and health.
This combination created a balanced look that was both ethereal and grounded.
Step-by-Step Instructions:
- Create a center part and section off the front portions of hair on both sides from temple to behind the ears.
- Clip the back section away temporarily while you create the halo from the front sections.
- Take the left front section and begin twisting it backward away from your face, keeping tension firm.
- Continue twisting this section along your hairline up and over your head like a headband toward the right side.
- Secure temporarily with bobby pins at the right side while you work on the opposite side.
- Take the right front section and twist it backward in the same manner, bringing it up and over toward the left side.
- The two twisted sections should meet at the back of your crown, creating a complete halo effect around your head.
- Pin where they meet securely, crossing the ends over each other and tucking them down.
- Gather all the remaining back hair and create one long, thick braid straight down the center of your back.
- Keep this braid tight at the top where it emerges from the halo, gradually loosening it toward the ends for a tapered effect.
- Secure the braid end with a ribbon or decorative elastic, leaving 2-3 inches of hair loose below the tie.
- Pancake the trailing braid gently to create width and visual weight that balances the delicate halo.
31. The Elizabethan Heart-Shaped Hairline
While technically bridging medieval and Renaissance periods, this style shaped the hairline into a distinctive heart shape through careful arrangement of hair and sometimes wire supports.
This dramatic style required significant effort but created an unforgettable aristocratic appearance.
The heart-shaped front was often combined with elaborate back styling for complete elegance.
Step-by-Step Instructions:
- This style works best with a natural widow’s peak, but can be created without one through strategic styling.
- Section off the front 3-4 inches of hair from temple to temple, clipping the back away.
- Apply strong-hold gel or pomade to the front section for maximum control and shaping ability.
- Create the heart shape by smoothing hair up and back from the center of your forehead to form the point.
- Use a fine-toothed comb to create crisp, clean lines along the sides of the heart shape at your temples.
- The sides should curve outward slightly at temple level before curving back in to meet at the center point.
- Secure the shaped hairline with small bobby pins placed along the created lines, pinning hair flat to your head.
- For authentic period appearance, you can use thin wire or padded rolls under the hair to maintain the dramatic heart shape.
- Style the remaining back hair in tight curls, a bun, or elaborate braided arrangement depending on the occasion.
- This front styling can be combined with any of the other updo techniques for a complete medieval-Renaissance look.
- Add a jeweled headband or small crown that follows the heart-shaped hairline to emphasize the dramatic shape.
- Use strong-hold hairspray to set the front styling, as this shape requires significant hold to maintain throughout wear.
32. The Bohemian Side Braids with Headwrap
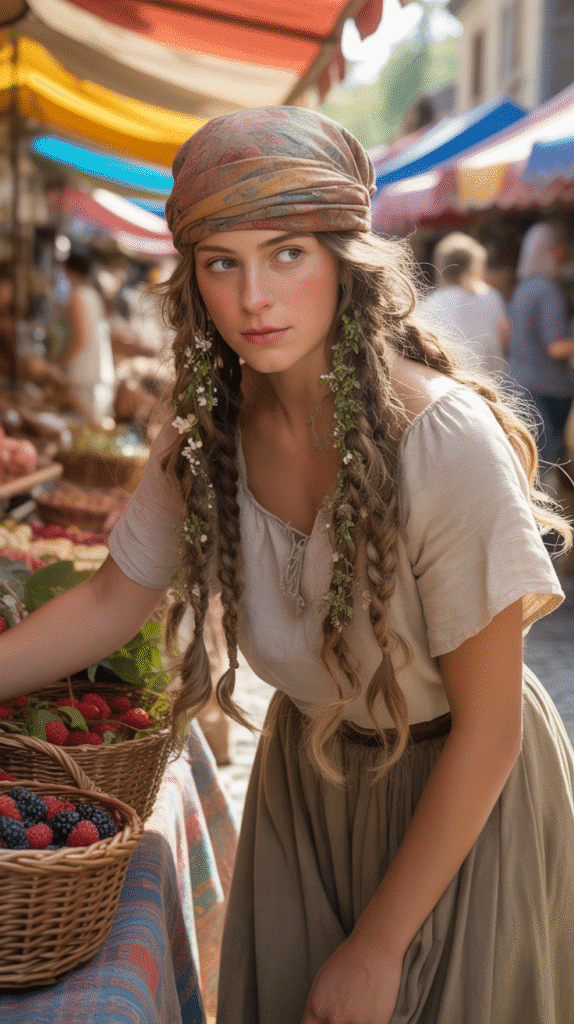
This free-spirited medieval style combined multiple small braids on each side of the head with a fabric headwrap for a romantic, bohemian aesthetic.
While maintaining medieval authenticity, this style had a more relaxed, approachable quality perfect for traveling, festivals, or casual castle life.
The combination of braids and fabric created interesting texture and cultural richness.
Step-by-Step Instructions:
- Create a center part running from forehead to nape, dividing hair into two equal sections.
- On the left side, create 3-5 small three-strand braids of varying thicknesses starting near your temple.
- Braid these sections tightly from roots to ends, spacing them randomly rather than in uniform rows.
- Leave some hair between braids loose and flowing for a natural, undone appearance.
- Repeat the same braiding pattern on the right side, creating a similar number of small braids in random placement.
- The asymmetry and randomness create the bohemian feel rather than perfect symmetry.
- Take a long strip of fabric (cotton, linen, or patterned material) about 3 inches wide and several feet long.
- Fold the fabric in half lengthwise to create a band approximately 1.5 inches wide.
- Place the center of the headwrap at your nape under the loose hair, bringing both ends up and over your head.
- Cross the ends at your forehead, then bring them back around to tie at the nape or side.
- Adjust the headwrap so it sits about 1-2 inches back from your hairline, allowing braids and loose hair to show.
- Allow all remaining loose hair and the small braids to flow freely over your shoulders and down your back for a carefree look.
33. The Royal Coronation Updo
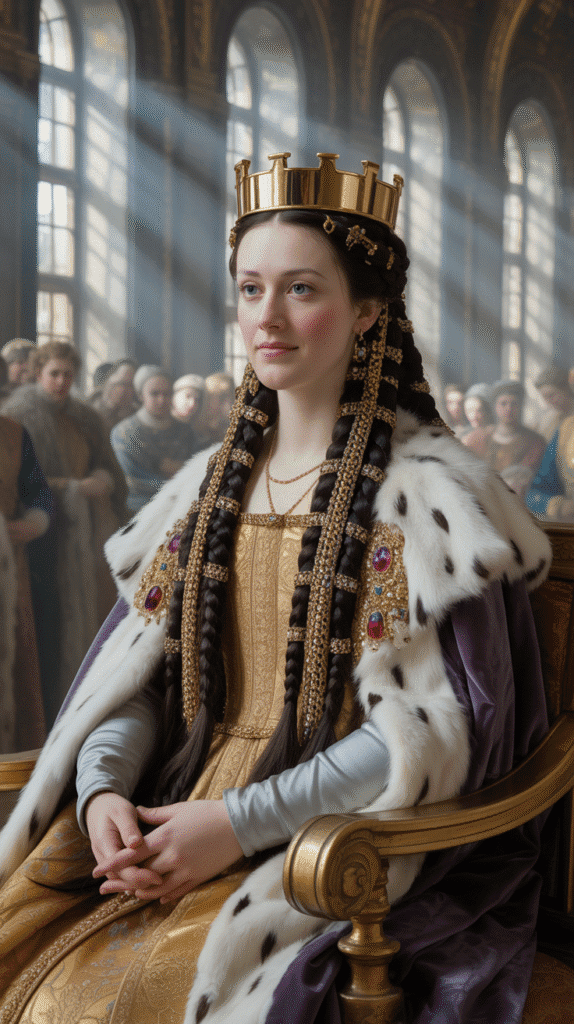
This final style represents the pinnacle of medieval hairstyling—an elaborate updo designed specifically for coronations and the most formal royal occasions.
It combined multiple techniques including braiding, twisting, pinning, and decorative elements to create a substantial style that could support a crown.
This complex arrangement required hours to create and demonstrated the ultimate in medieval hair artistry.
Step-by-Step Instructions:
- Begin with hair that’s been set in rollers or curled to create maximum volume and texture as a foundation.
- Section the hair into four main quadrants: front left, front right, back left, and back right.
- Take the front left section and create a Dutch braid along the hairline back toward the crown, keeping it tight.
- Repeat with the front right section, creating a symmetrical braid that mirrors the left side.
- Both front braids should meet at the crown area and be temporarily secured together.
- Take the back left section and twist it tightly upward toward the crown, wrapping it around the base of the front braids.
- Secure with multiple bobby pins, building height and volume at the crown where a crown would sit.
- Repeat with the back right section, twisting and wrapping it around in the opposite direction for stability.
- Continue building layers by taking remaining loose hair and creating loops, twists, and coils pinned at the crown.
- The goal is creating a substantial, elevated foundation at the crown that’s at least 3-4 inches high.
- Secure everything with an abundance of bobby pins, hairspray, and even hairpins for maximum hold.
- Add decorative elements throughout—jeweled pins, pearl strands, gold chains, or ornate combs—before placing the crown on top.
Conclusion
Mastering these 33 Step-by-Step Medieval Hairstyles for Princesses opens a world of timeless elegance that transcends centuries and connects us to the artistry of the past.
From the simple beauty of flowing locks adorned with circlets to the complex architecture of coronation updos, each style tells a story of femininity, status, and creative expression that defined medieval culture.
These hairstyles aren’t merely historical curiosities—they’re wearable works of art that continue to inspire modern fashion, costume design, and special occasion styling.
Whether you’re drawn to the romantic simplicity of braided crowns, the bohemian freedom of flower-adorned styles, or the regal sophistication of elaborate updos, you now have the knowledge to recreate authentic medieval beauty in your own life.
The techniques you’ve learned—braiding, twisting, coiling, and adorning—are skills that connect you to generations of women who took pride in their appearance and used their hair as a canvas for self-expression.
As you practice these 33 Step-by-Step Medieval Hairstyles for Princesses, remember that each style carries the weight of history while remaining wonderfully relevant for Renaissance fairs, themed weddings, costume parties, or any moment when you want to feel like royalty.
Step into your castle, gather your ribbons and flowers, and let these timeless techniques transform you into the princess you were always meant to be.