Step into the enchanting world of medieval beauty where hairstyles were more than mere fashion statements—they were symbols of power, nobility, and divine grace.
The era spanning from the 5th to the 15th century witnessed extraordinary hair artistry that transformed queens and princesses into walking masterpieces of elegance and authority.
From intricate braids adorned with jewels to elaborate veils that whispered secrets of royal courts, medieval hairstyles reflected the wearer’s social standing, marital status, and even religious devotion.
This comprehensive guide to 30 Regal Medieval Hairstyles for Princesses and Queens unveils the magnificent coiffures that graced castle halls and throne rooms across Europe, offering you authentic styling techniques, historical context, and modern adaptations that bring these timeless looks to life.
Whether you’re preparing for a Renaissance faire, a themed wedding, a theatrical production, or simply fascinated by historical beauty traditions, you’ll discover how noblewomen used their hair as a canvas to display wealth, virtue, and political influence.
Each hairstyle tells a story of craftsmanship passed down through generations, revealing the tools, accessories, and techniques that made these regal styles the crown jewels of medieval fashion.
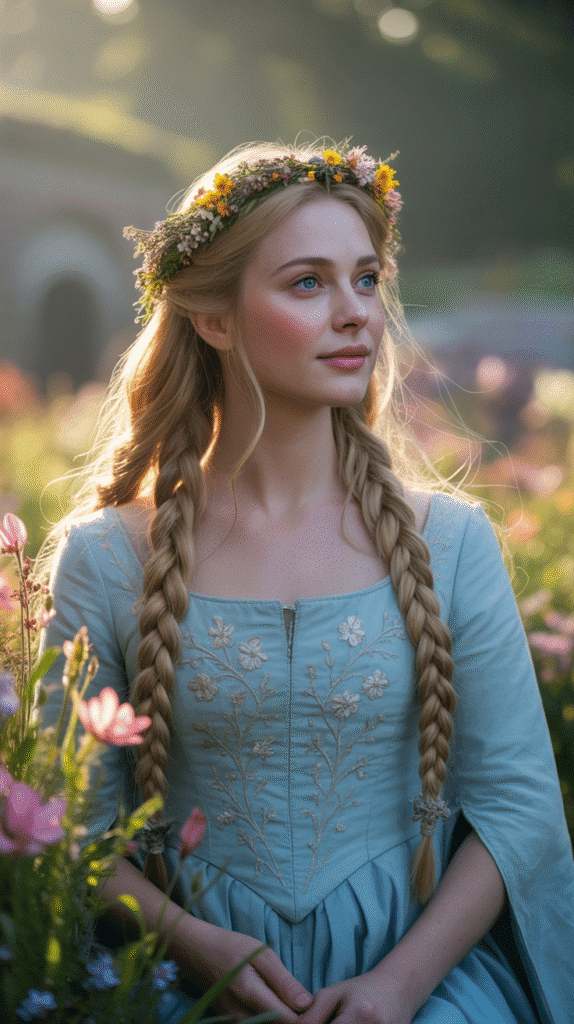
1. The Classic Crown Braid

The crown braid served as one of the most recognizable hairstyles among medieval nobility, creating a natural circlet effect that symbolized authority without requiring actual metal crowns.
This elegant style involved braiding the hair around the head’s perimeter, forming a halo-like appearance that suggested divine favor and royal birthright.
Historical Significance:
- The crown braid appeared frequently in 12th-century European courts as a practical yet regal solution for managing long hair.
- Queens often wore this style during informal court gatherings where heavy crowns would be uncomfortable.
- The circular braid represented eternity and divine right to rule in medieval symbolism.
- Noblewomen combined crown braids with jeweled pins to enhance their royal appearance during ceremonies.
Styling Technique:
- Begin with hair that reaches at least shoulder length for adequate braiding material.
- Part the hair from ear to ear across the top of the head to separate the crown section.
- Create a three-strand Dutch braid starting from one temple, working around the head’s circumference.
- Incorporate small sections of hair as you braid to maintain consistent thickness throughout the crown.
- Secure the braid end with a ribbon or small pin hidden beneath the starting point.
- Pull gently on the braid edges to create fuller, more voluminous appearance befitting royalty.
Modern Adaptations:
- Contemporary brides often choose crown braids for wedding hairstyles that evoke romantic, fairy-tale aesthetics.
- Festival attendees pair crown braids with flower crowns for bohemian medieval-inspired looks.
- Professional stylists recommend using texturizing spray on clean hair for better grip and longevity.
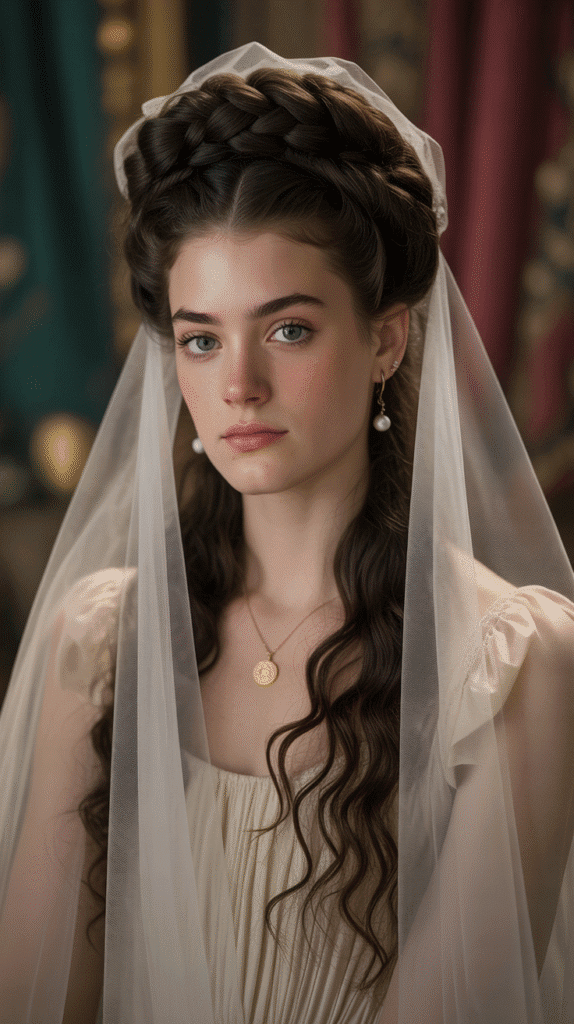
2. The Templars Veil with Center Part
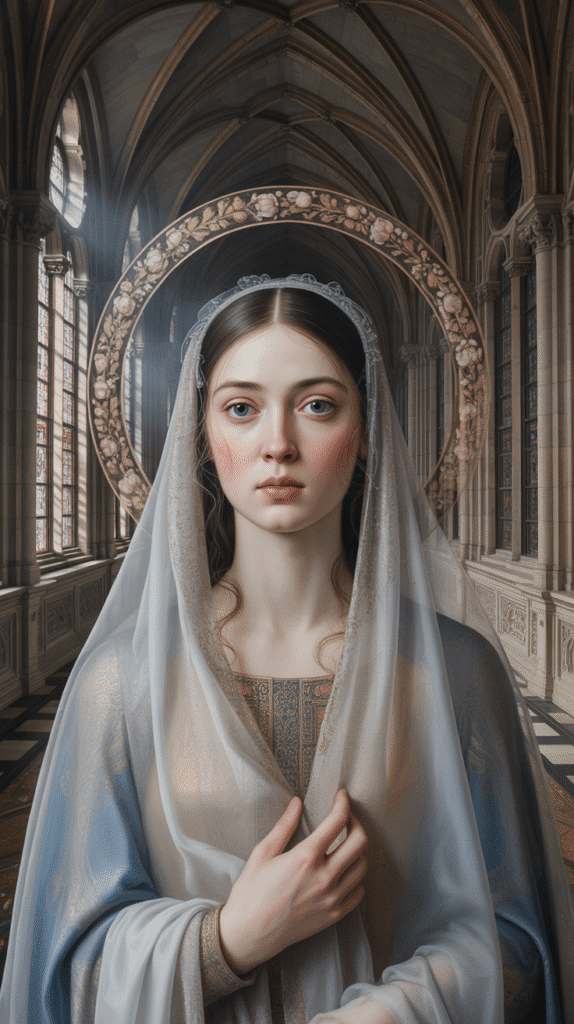
Medieval queens frequently wore veils as symbols of modesty, piety, and marital status, with the center-parted veil representing the epitome of refined elegance.
This hairstyle combined smooth, straight hair parted precisely down the middle with translucent fabric that draped from a circlet or crown.
Cultural Context:
- Christian influence in medieval Europe dictated that married women cover their hair in public spaces.
- The center part demonstrated symmetry, which medieval aesthetics valued as reflecting divine order and perfection.
- Queens used increasingly expensive veil fabrics to display their kingdom’s wealth and trading connections.
- The transparency of the veil allowed glimpses of hair color while maintaining propriety standards.
Construction Method:
- Create a razor-sharp center part from forehead to nape using a fine-toothed comb.
- Apply smoothing serum to eliminate flyaways and achieve the mirror-like finish medieval women desired.
- Secure hair behind ears or allow it to hang freely depending on the occasion’s formality.
- Position a metal circlet approximately two inches behind the hairline for optimal veil support.
- Drape a rectangular veil over the circlet, allowing equal length on both sides of the face.
- Secure the veil with small pins hidden within the hair at strategic points.
Veil Fabric Recommendations:
- Silk organza provides authentic sheen similar to medieval luxury fabrics.
- Cotton voile offers breathable comfort for extended wear during events.
- Metallic-threaded gauze adds sparkle reminiscent of gold and silver embroidery.
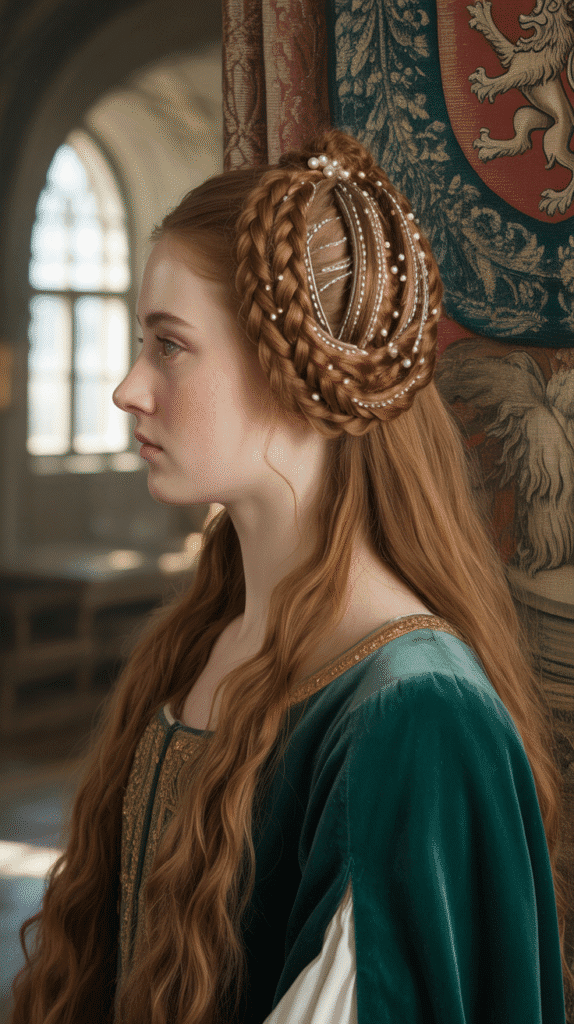
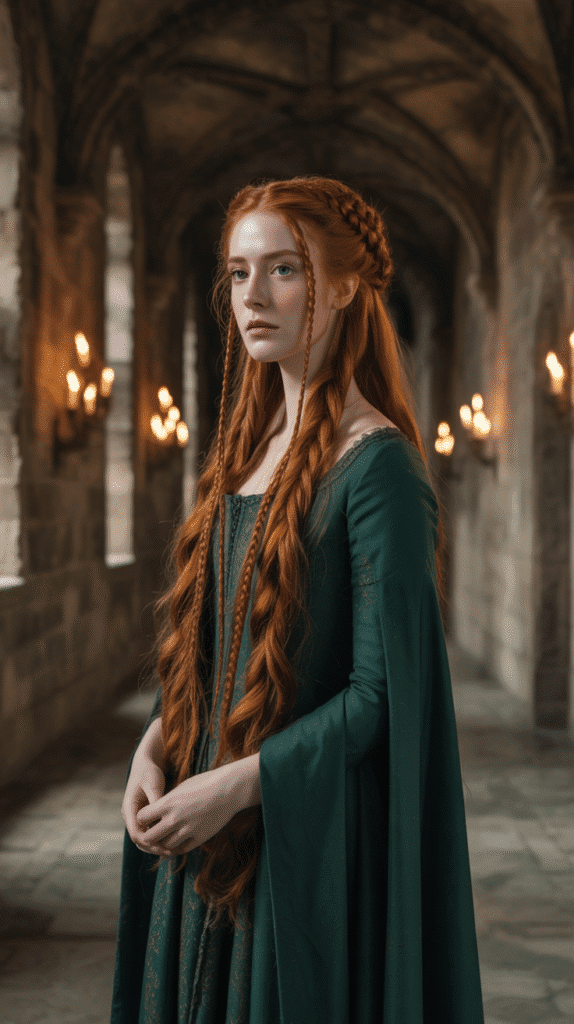
3. The Rope Twist with Jeweled Pins
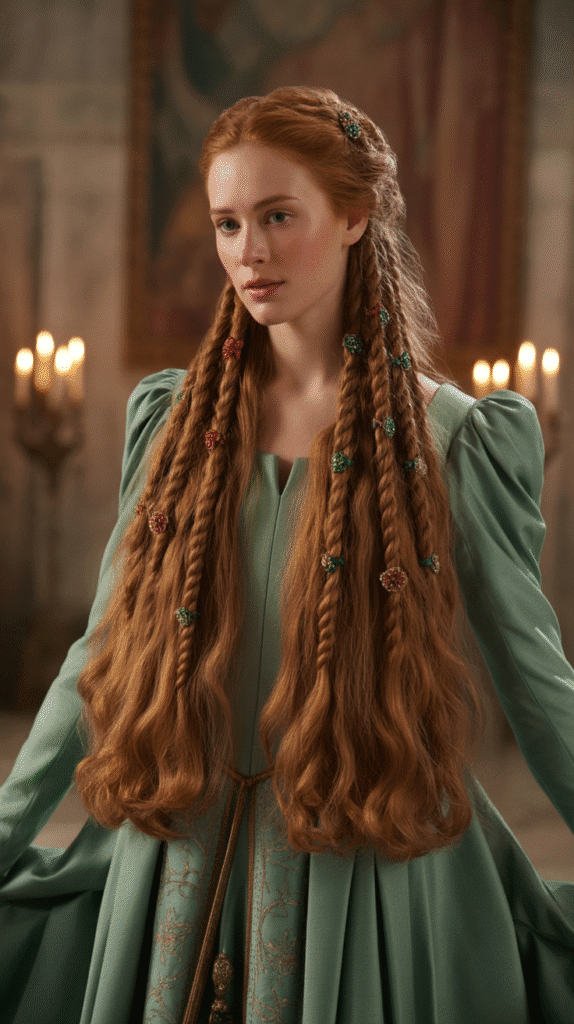
This sophisticated hairstyle involved twisting sections of hair into rope-like coils and securing them with ornamental pins encrusted with precious stones.
Noble ladies used this technique to showcase their family’s wealth while creating sculptural shapes that defied gravity.
Design Elements:
- Each rope twist required at least twelve inches of hair length to create substantial coils.
- Jeweled pins functioned as both structural support and decorative statements of affluence.
- The twisting technique created dimension and visual interest without elaborate braiding knowledge.
- Different twist thicknesses throughout the hairstyle added organic, naturalistic appeal.
Step-by-Step Process:
- Divide hair into six to eight sections depending on thickness and desired final appearance.
- Take one section and split it into two equal strands for the rope twist foundation.
- Twist both strands clockwise individually while wrapping them counterclockwise around each other.
- Continue twisting until reaching the hair ends, maintaining firm tension throughout.
- Coil the completed rope twist into a circular or oval shape against the scalp.
- Insert jeweled pins through the coil at multiple points to secure it firmly.
- Repeat with remaining sections, varying placement heights for asymmetrical medieval elegance.
Jeweled Pin Alternatives:
- Vintage brooches provide authentic appearance when inserted through twisted coils.
- Decorative hairpins with pearl or crystal ends offer affordable luxury.
- Fresh flowers tucked into twists create romantic, garden-party medieval atmosphere.
4. The Double Braid Crown
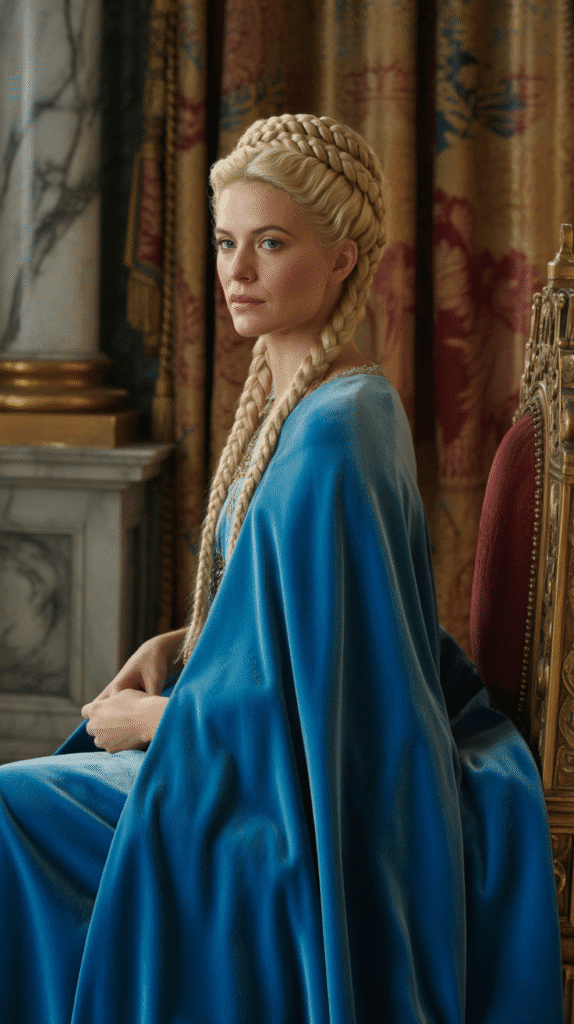
Distinguished from the single crown braid, this style featured two separate braids layered around the head to create extraordinary fullness and complexity.
Queens commissioned this elaborate hairstyle for coronations, weddings, and diplomatic receptions where they needed maximum visual impact.
Construction Complexity:
- The double braid crown required assistance from lady’s maids due to intricate back sections.
- Each braid needed to be approximately the same thickness for balanced appearance.
- Strategic pin placement prevented the upper braid from sliding off the lower foundation.
- This style worked best with hair at least twenty-four inches long for full coverage.
Creation Technique:
- Divide all hair horizontally from ear to ear, creating upper and lower sections.
- Braid the lower section first, wrapping it around the head at the natural hairline.
- Secure the lower braid with pins every two inches for stable foundation.
- Braid the upper section using slightly looser tension for contrasting texture.
- Position the upper braid approximately one inch above the lower braid.
- Interweave decorative ribbons through both braids for enhanced medieval authenticity.
Historical Variations:
- German principalities favored tighter braids with minimal ribbon adornment.
- French courts preferred looser braids with lavish silk ribbon woven throughout.
- English nobility often added small flowers between the two braid layers.
5. The Horned Hennin Hairstyle
Perhaps the most iconic medieval style, the horned hennin created dramatic pointed silhouettes that defined 15th-century Burgundian fashion.
This extraordinary look combined tightly bound hair with cone-shaped wire frames draped in luxurious fabric.
Structural Requirements:
- The hennin frame consisted of lightweight wire or stiffened linen shaped into cones.
- Hair was braided tightly against the scalp and wrapped around the head’s base to create foundation.
- Pins secured the hennin to the wrapped hair base at minimum five anchor points.
- Translucent veils attached to the hennin points and flowed down the back.
Assembly Instructions:
- Braid all hair into a single tight braid wrapped around the head like a headband.
- Secure the braid with numerous pins to create a stable base for the hennin.
- Position the hennin frame over the braided foundation, ensuring even weight distribution.
- Insert long pins through the hennin base into the braided hair beneath.
- Attach a sheer veil to each horn point using small stitches or pins.
- Ensure the hennin remains level by checking the mirror from multiple angles.
Social Commentary:
- The Catholic Church criticized hennins as prideful and excessive displays of vanity.
- Height restrictions on hennins appeared in some city ordinances during the 1400s.
- Despite controversy, the hennin remained popular for nearly fifty years among nobility.
6. The Waterfall Braid with Loose Curls
This romantic style combined structured braiding with flowing curls, creating a contrast that medieval aesthetics highly valued.
The waterfall technique allowed sections of hair to cascade freely while maintaining an organized upper structure.
Technical Execution:
- Begin with natural or heat-styled curls throughout the hair for maximum flowing effect.
- Create a standard three-strand braid starting at the temple on one side.
- After each stitch, drop the bottom strand and pick up a new section from above.
- The dropped strands create the “waterfall” effect as they blend with curls below.
- Continue the braid around the back of the head or stop at the opposite temple.
Curl Preparation:
- Medieval women achieved curls by wrapping hair around heated iron rods overnight.
- Modern recreations use curling irons with one-inch barrels for period-appropriate spiral size.
- Finger-combing curls rather than brushing maintains natural, touchable texture.
- Light hairspray application preserves curl definition throughout extended wear.
Occasion Appropriateness:
- This style suited younger unmarried noblewomen who could display their hair freely.
- Garden parties and outdoor festivities provided ideal settings for waterfall braids.
- The combination of structure and freedom symbolized the transition from girlhood to womanhood.
7. The Wrapped Coif with Barbette
Medieval married women of high status frequently wore the coif and barbette combination, which completely concealed their hair beneath structured linen wrappings.
This modest yet dignified style communicated respectability, piety, and adherence to social conventions.
Component Breakdown:
- The coif was a close-fitting cap that covered all hair, tied beneath the chin or at the nape.
- The barbette consisted of a linen band wrapped under the chin and over the head’s crown.
- A fillet or circlet often topped the barbette to indicate royal status.
- Wimples extended from the barbette to cover the neck and sometimes shoulders.
Proper Application:
- Braid all hair flat against the scalp in a spiral pattern for minimal bulk beneath the coif.
- Secure the braided hair with pins to prevent lumps or uneven surfaces.
- Place the linen coif over the prepared hair, ensuring complete coverage.
- Tie the coif securely but not painfully beneath the chin or at the neck’s base.
- Wrap the barbette under the chin and over the crown, pinning at both temples.
- Add the circlet or fillet on top of the barbette for royal distinction.
Historical Timeline:
- This style peaked in popularity during the 13th and 14th centuries across Europe.
- Widowed queens often adopted simplified coif styles to signal their changed status.
- Regional variations included different barbette widths and coif decoration levels.
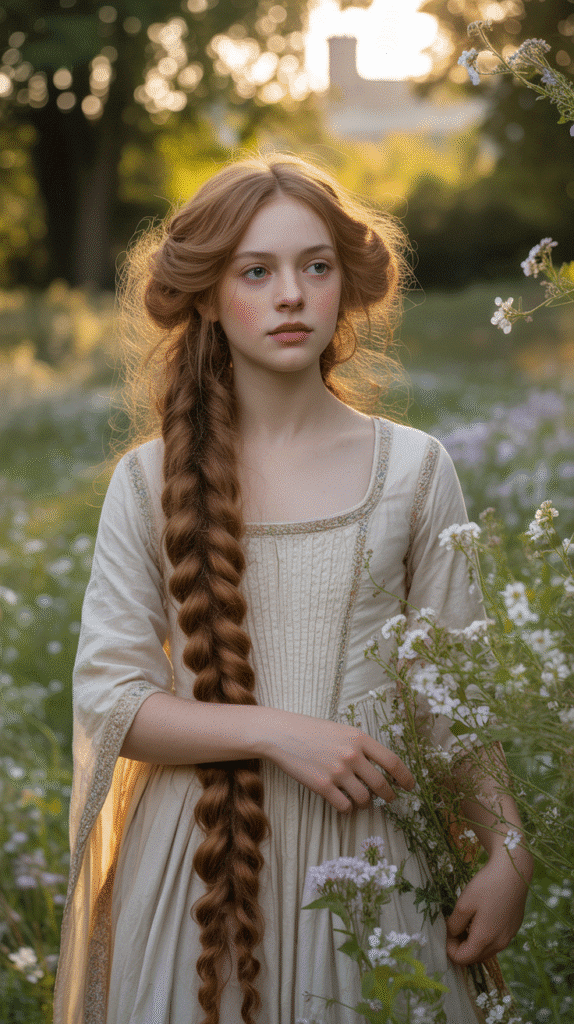
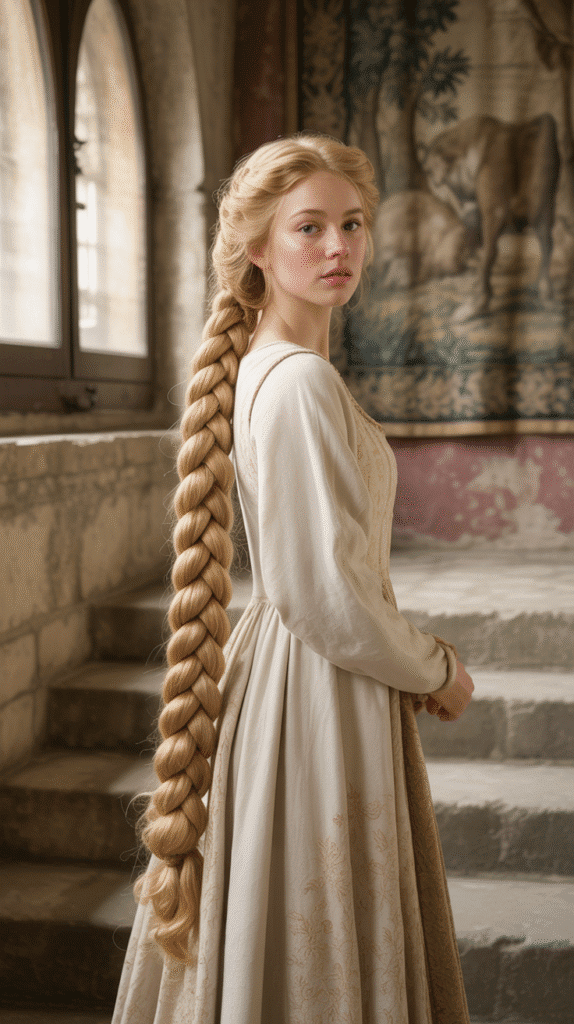
8. The Side-Swept Braided Cascade
This asymmetrical style brought all hair to one side in an elaborate braid that cascaded over the shoulder, creating a romantic and slightly informal appearance.
Princesses favored this look for private chambers and intimate court gatherings.
Aesthetic Appeal:
- The side placement created visual interest and asymmetry that medieval portraiture frequently captured.
- This style allowed the wearer to see and admire their own hair, unlike rear arrangements.
- Jewels and flowers woven into the side braid remained visible throughout events.
Braiding Method:
- Brush all hair to one side, gathering it over the preferred shoulder.
- Divide the collected hair into three equal sections for a classic braid foundation.
- Begin braiding loosely at the shoulder level rather than at the scalp.
- Weave ribbons, thin chains, or flowers into the braid at regular intervals.
- Secure the braid end with a decorative clasp or ribbon bow.
- Gently pull on braid edges to create controlled fullness and texture.
Decoration Options:
- Fresh flowers like roses or lavender provided fragrance alongside beauty.
- Silk ribbons in contrasting colors added movement and visual interest.
- Thin gold or silver chains elevated the style for formal occasions.
- Pearl strands woven through created subtle elegance for religious ceremonies.
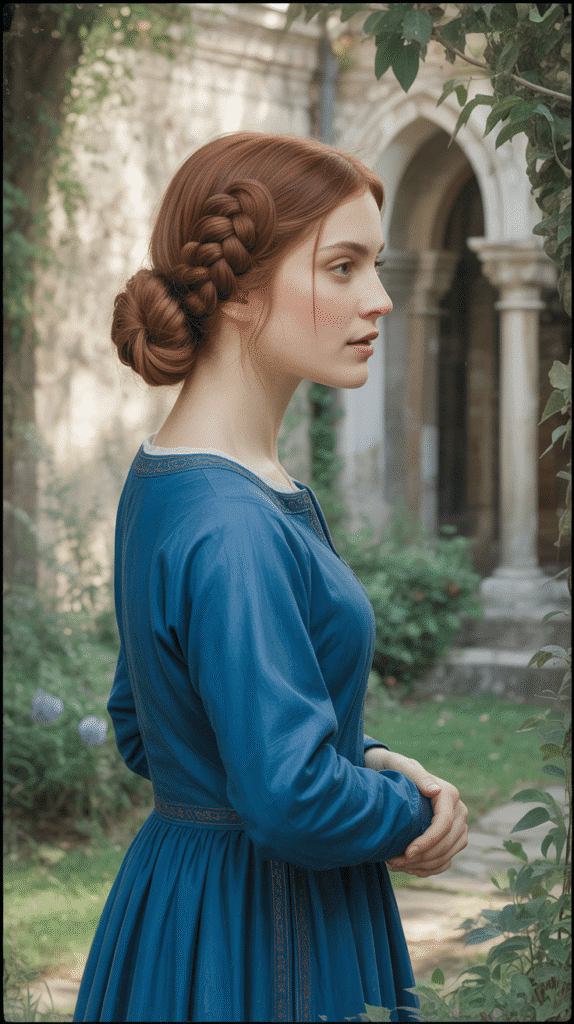
9. The Medieval Low Bun with Caul
The caul represented one of medieval fashion’s most practical yet beautiful inventions—a decorative net that encased a low bun while showcasing intricate metalwork or jeweled patterns.
Queens wore elaborate cauls to demonstrate their kingdom’s craftsmanship and wealth.
Caul Construction:
- Metal cauls featured wire frameworks arranged in geometric patterns holding the hair.
- Fabric cauls used silk or linen netting embroidered with gold or silver thread.
- Jeweled cauls incorporated precious stones at pattern intersection points.
- The caul fastened to the hair beneath using pins invisible from the exterior.
Bun and Caul Assembly:
- Create a center or side part depending on personal preference and face shape.
- Gather all hair at the nape into a low ponytail using a ribbon or cord.
- Twist the ponytail into a coil, wrapping it around its own base.
- Secure the coiled bun with pins inserted from multiple angles for stability.
- Place the caul over the bun, ensuring it fully encompasses the hair.
- Attach the caul to the surrounding hair using pins hidden beneath the netting.
Status Indicators:
- Gold cauls indicated the highest nobility and royalty.
- Silver cauls suited lesser nobility and wealthy merchant class women.
- Silk cord cauls provided affordable elegance for lower-ranking ladies-in-waiting.
10. The Fillet with Loose Flowing Hair
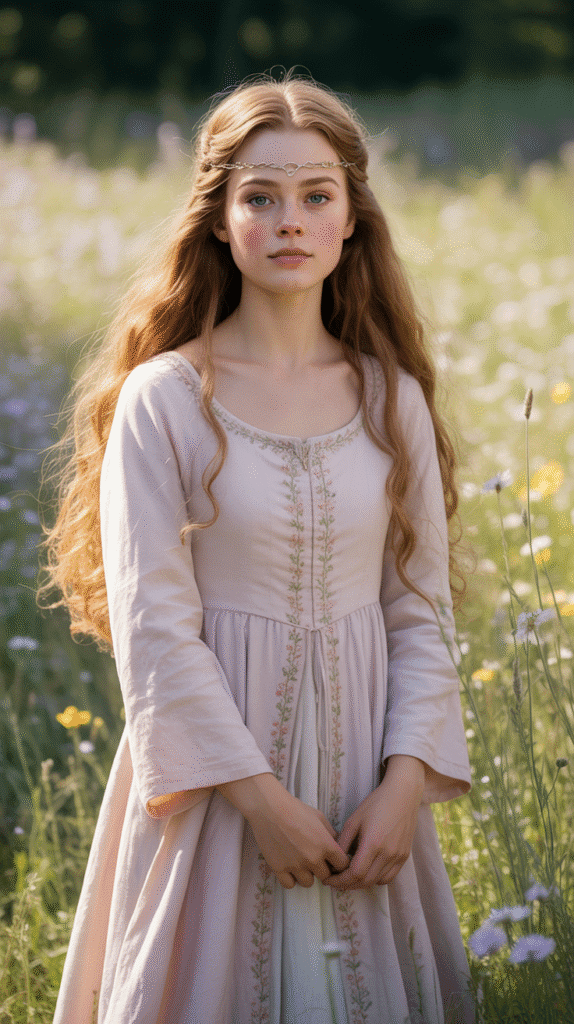
Young unmarried princesses enjoyed the privilege of displaying their unbound hair, often adorned only with a simple fillet or headband.
This style symbolized virginity, youth, and the freedom of unmarried status.
Social Significance:
- Loose hair served as a visual declaration of unmarried status in medieval society.
- The transition to bound or covered hair marked a woman’s marriage ceremony.
- Only virgins and very young girls could wear their hair completely loose in public.
- Special occasions like coronations allowed even married queens to display loose hair temporarily.
Styling Guidelines:
- Brush hair thoroughly to achieve the smooth, glossy finish medieval beauty standards required.
- Apply natural oils like argan or almond oil for shine without modern product residue.
- Position the fillet approximately two inches behind the hairline for classical proportion.
- Choose fillet decorations appropriate to the occasion’s formality level.
- Allow hair to flow naturally without modern styling techniques like layering or texturizing.
Fillet Materials and Decoration:
- Gold or silver metal fillets indicated royal or high noble birth.
- Leather fillets with embossed patterns suited less formal occasions.
- Fresh flower fillets created romantic appearances for garden celebrations.
- Jeweled fillets reserved for the most significant ceremonial events.
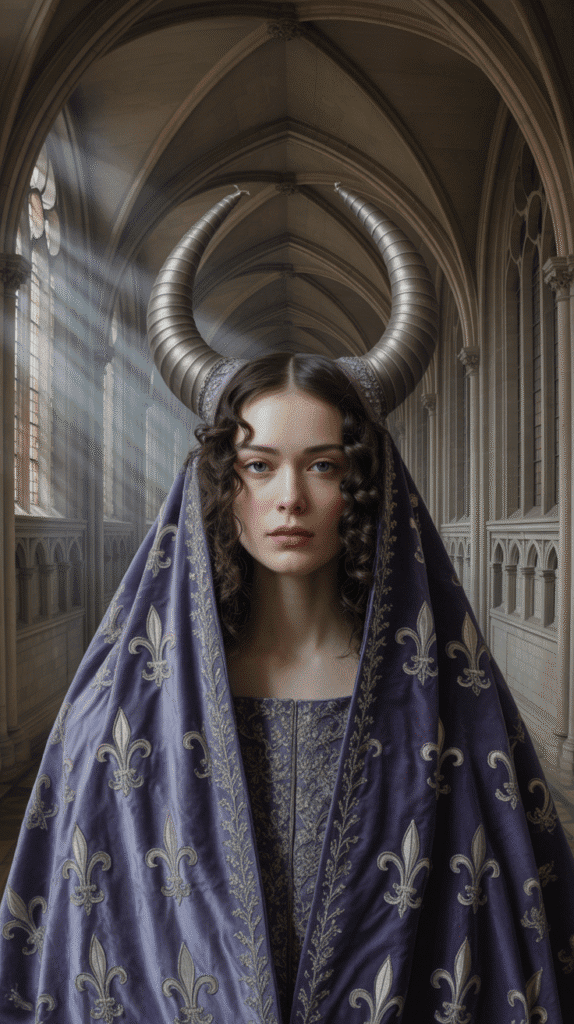
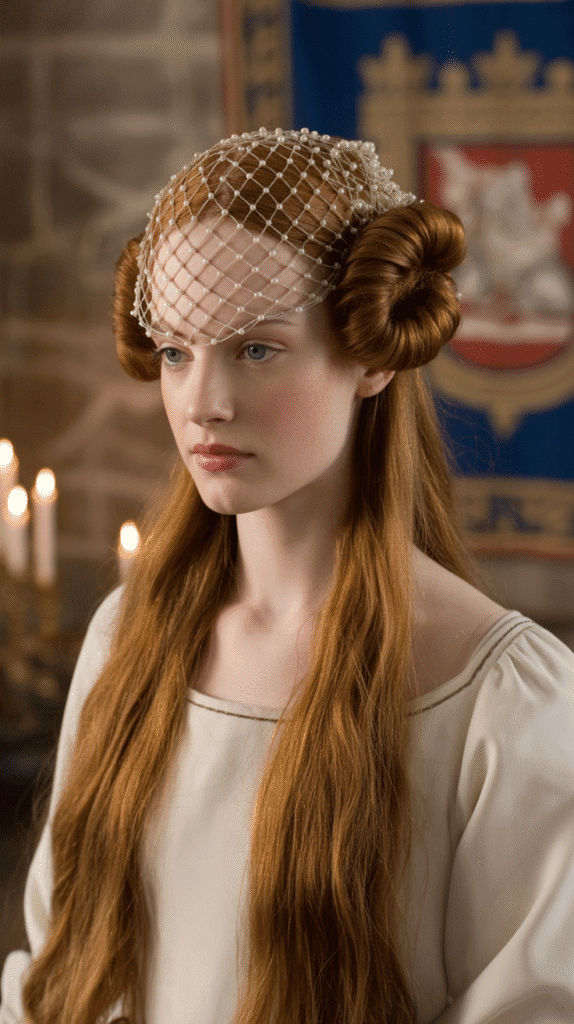
11. The Rolled and Pinned Ram’s Horns
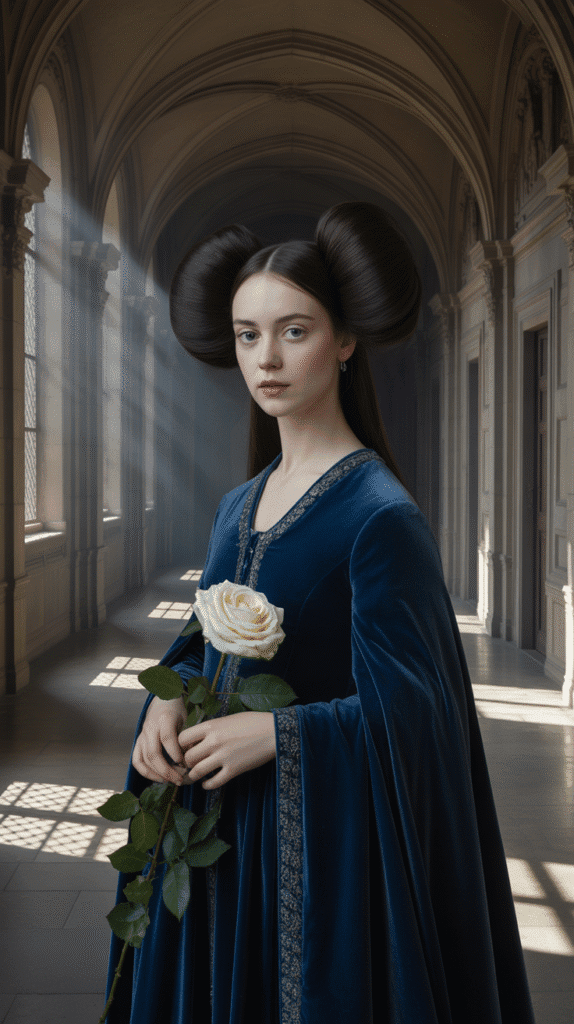
This distinctive style created two large cylindrical rolls of hair positioned above each ear, resembling a ram’s horns in profile.
The ram’s horn hairstyle dominated early 15th-century fashion before giving way to the hennin.
Construction Challenge:
- Each horn required significant hair length and thickness for proper volume and shape.
- Internal wire frames or padded rolls provided structure when natural hair volume proved insufficient.
- The hairstyle demanded precise symmetry between both sides for aesthetically pleasing appearance.
Creation Process:
- Part hair down the center from forehead to nape, dividing it into equal halves.
- Take one half and brush it smoothly over a padded roll positioned above the ear.
- Wrap the hair around the padding in a spiral motion, creating the horn shape.
- Secure with pins every half-inch around the horn’s circumference.
- Repeat the process on the opposite side, ensuring both horns match in size and position.
- Cover any visible padding with additional hair smoothed over the surface.
- Apply decorative nets or veils over the horns for enhanced ornamentation.
Historical Context:
- The style originated in Burgundian courts around 1420 and spread throughout Europe.
- Church officials condemned the horns as demonic or pagan in appearance.
- Despite criticism, fashionable noblewomen wore the style for approximately thirty years.
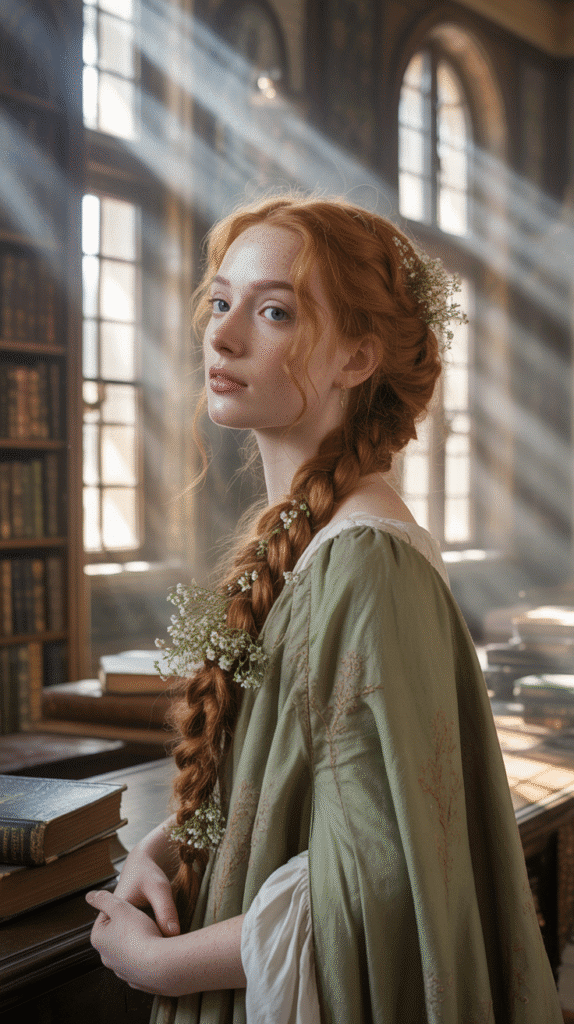
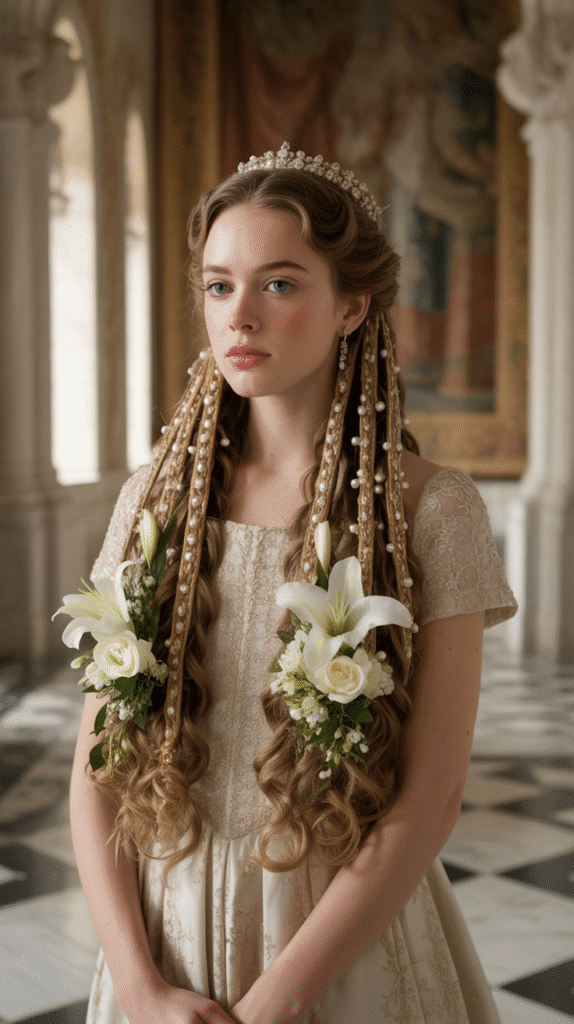
12. The Braided Updo with Fresh Flowers
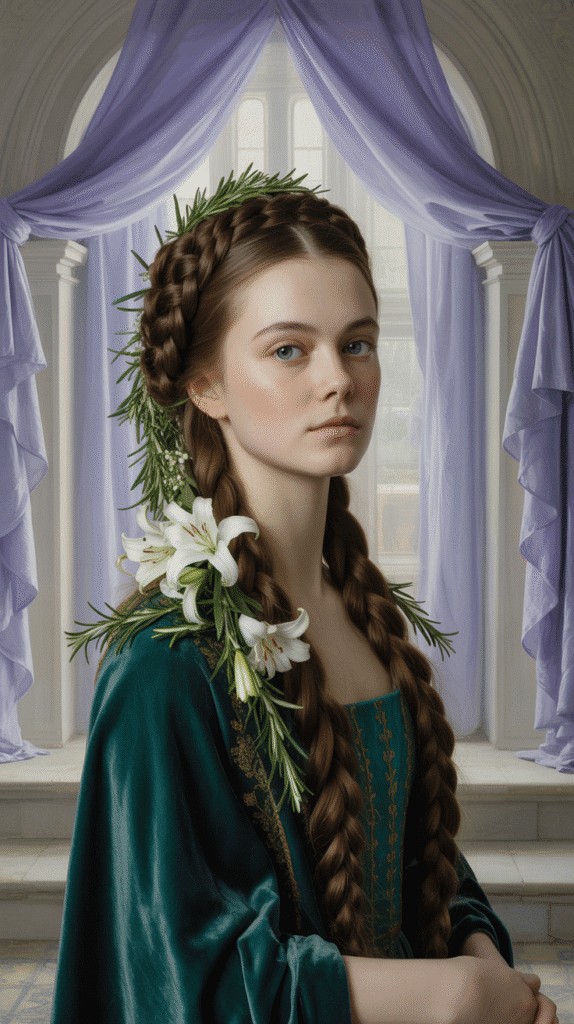
Medieval celebrations often featured hairstyles incorporating fresh flowers, herbs, and flowering branches into elaborate braided updos.
This style combined structural sophistication with natural beauty elements that enhanced the wearer’s connection to seasonal cycles.
Floral Selection:
- Roses symbolized love and beauty, making them popular for wedding hairstyles.
- Lavender represented devotion and virtue, appropriate for religious ceremonies.
- Lily of the valley signified purity and was reserved for the most innocent maidens.
- Ivy strands woven through braids represented fidelity and eternal love.
Construction Technique:
- Create multiple three-strand braids throughout the hair, varying their thickness for visual interest.
- Arrange the braids against the scalp in circular or geometric patterns.
- Secure each braid with pins at strategic points to create the updo foundation.
- Insert flower stems directly into the braided structure at the pin locations.
- Ensure flower placement follows the braid patterns for cohesive design.
- Mist the completed hairstyle with water to keep flowers fresh throughout the event.
Preservation Tips:
- Choose flowers in full bloom rather than buds for immediate visual impact.
- Keep extra flowers available for replacement if wilting occurs during extended events.
- Apply floral preservative to stems before insertion to extend freshness.
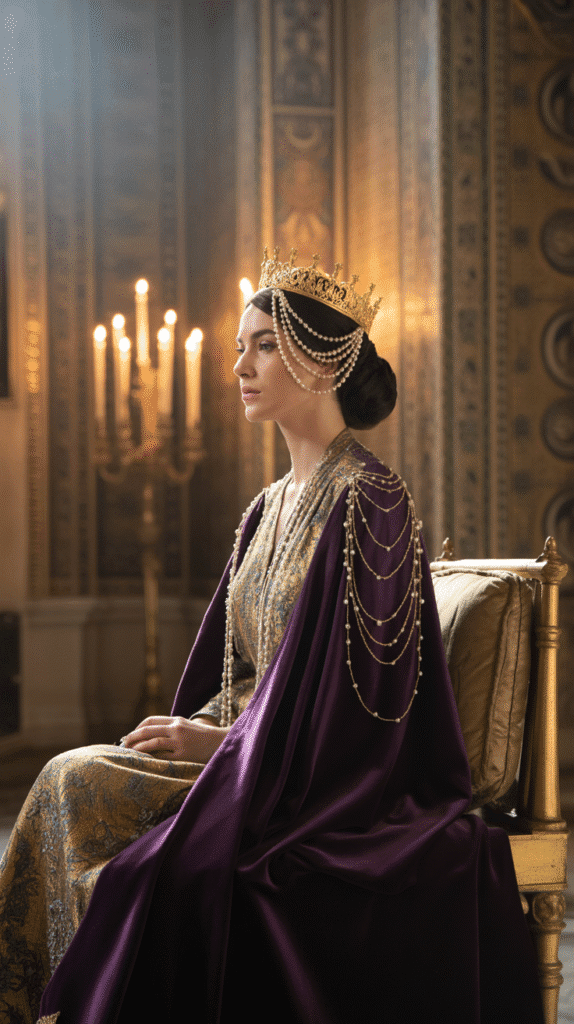
13. The Byzantine-Inspired Pearl Net
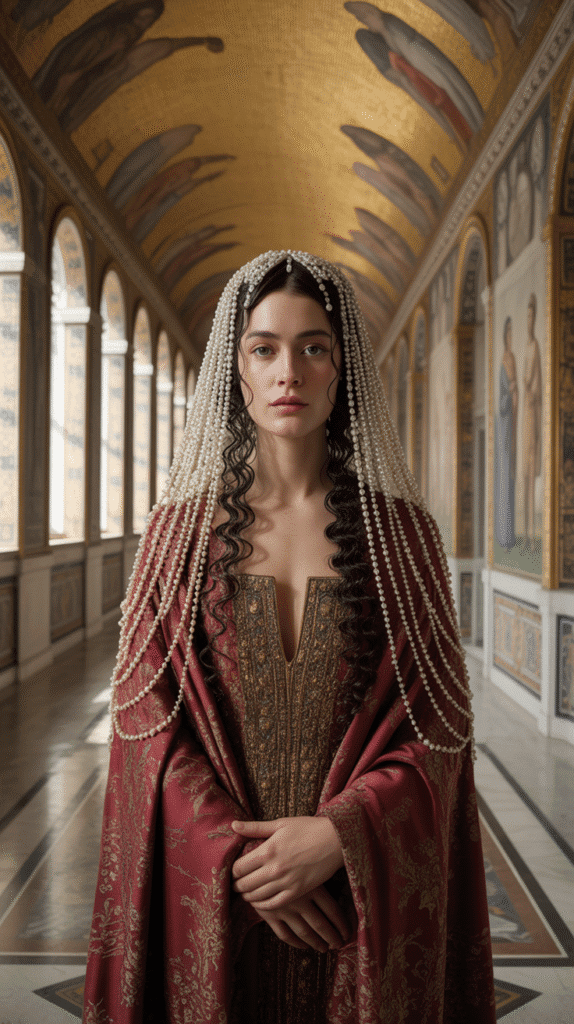
This luxurious style drew inspiration from Eastern Byzantine Empire aesthetics, featuring intricate nets woven from pearl strands that draped over carefully arranged hair.
Queens with eastern trade connections particularly favored this exotic look.
Pearl Net Construction:
- Individual pearls were strung on silk thread in diamond or hexagonal pattern formations.
- The netting required hundreds or thousands of pearls depending on coverage area desired.
- Golden or silver beads often alternated with pearls to add color contrast and sparkle.
Hair Preparation:
- Braid the hair into multiple small braids arranged in a flat spiral against the scalp.
- Pin each braid section securely to create a smooth foundation for the pearl net.
- Apply light oil to any visible hair for shine that complements the pearl luster.
- Position the pearl net over the prepared hair, centering it carefully.
- Secure the net at temples, crown, and nape with hidden pins.
- Allow excess net to drape down the back like a decorative veil.
Cultural Exchange:
- Crusades and trading routes introduced Byzantine fashions to Western European courts.
- Venice served as a major hub for importing Eastern luxury goods including pearl nets.
- This style represented wealth, sophistication, and cosmopolitan awareness.
14. The Plaited Circle with Center Knot
This elegant style arranged braided hair in a perfect circle around a central decorative knot, creating a mandala-like pattern that medieval symbolism associated with divine perfection and eternal life.
Queens wore this style for religious ceremonies and spiritual observances.
Symbolic Meaning:
- The circular form represented eternity, with no beginning or ending point.
- The center knot symbolized the divine unity from which all creation emanated.
- This hairstyle frequently appeared in religious artwork depicting the Virgin Mary and saints.
Technical Creation:
- Divide hair into four equal sections using center part and ear-to-ear horizontal part.
- Braid each section separately, maintaining consistent tension and thickness throughout.
- Arrange the first braid in a quarter-circle arc from its starting point toward the center.
- Pin the braid securely at multiple points along its curved path.
- Repeat with the remaining three braids, creating a complete circle.
- Gather all four braid ends in the center, twisting them together into an elaborate knot.
- Secure the center knot with decorative pins or clips visible from above.
Enhancement Options:
- Gold leaf application on the center knot for ceremonial grandeur.
- Ribbon weaving through the circular braids in liturgical colors.
- Small religious medallions attached to the center knot.
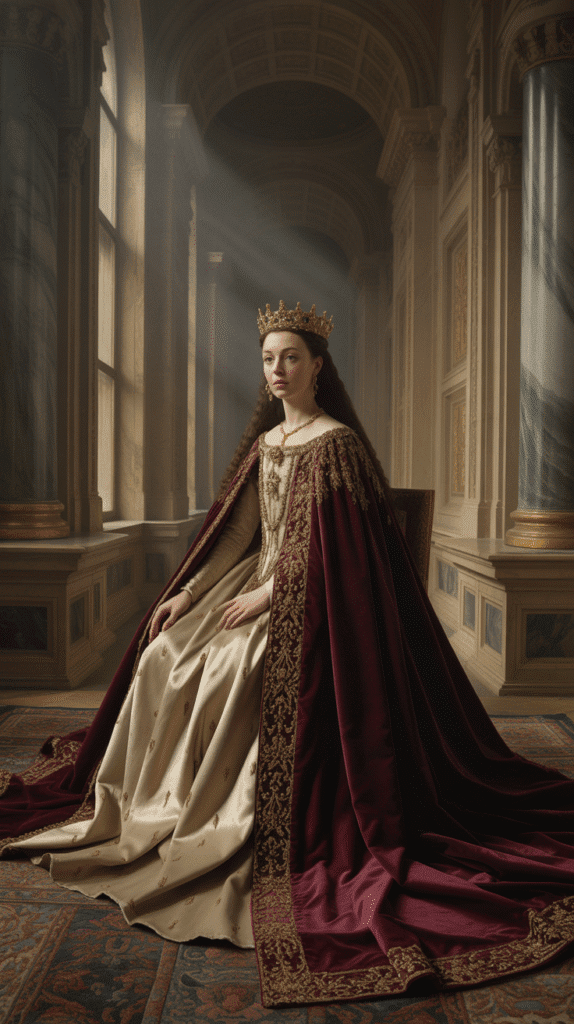
15. The Wrapped Chignon with Veil Trail
This sophisticated style combined a low wrapped chignon with an exceptionally long veil that trailed behind the wearer, creating dramatic movement and emphasizing the wearer’s processional grace.
Queens wore this style for formal entries into cities and throne room ceremonies.
Chignon Construction:
- Gather all hair at the nape into a smooth, center ponytail without bumps or irregularities.
- Twist the ponytail tightly from base to ends, creating a rope-like texture.
- Wrap the twisted hair around itself in a flat spiral against the neck.
- Secure the chignon with pins inserted horizontally through multiple layers.
- Cover the chignon with a small piece of matching silk or netting.
- Pin the covering fabric to conceal all pins and create polished appearance.
Veil Attachment:
- Position a small comb or clip at the chignon’s upper edge for veil support.
- Gather the veil fabric at one end, creating pleats for decorative fullness.
- Attach the gathered veil end to the comb or clip securely.
- Allow the veil to cascade down the back, reaching floor length or beyond.
- Weight the veil’s trailing end with small decorative tassels or embroidery to maintain elegant drape.
Processional Considerations:
- Pages or ladies-in-waiting carried the veil train during ceremonial walking.
- The veil length directly correlated to the wearer’s rank and occasion importance.
- Transparent veils allowed glimpses of elaborate embroidery on the gown beneath.
16. The Twisted Crown with Ribbon Weaving
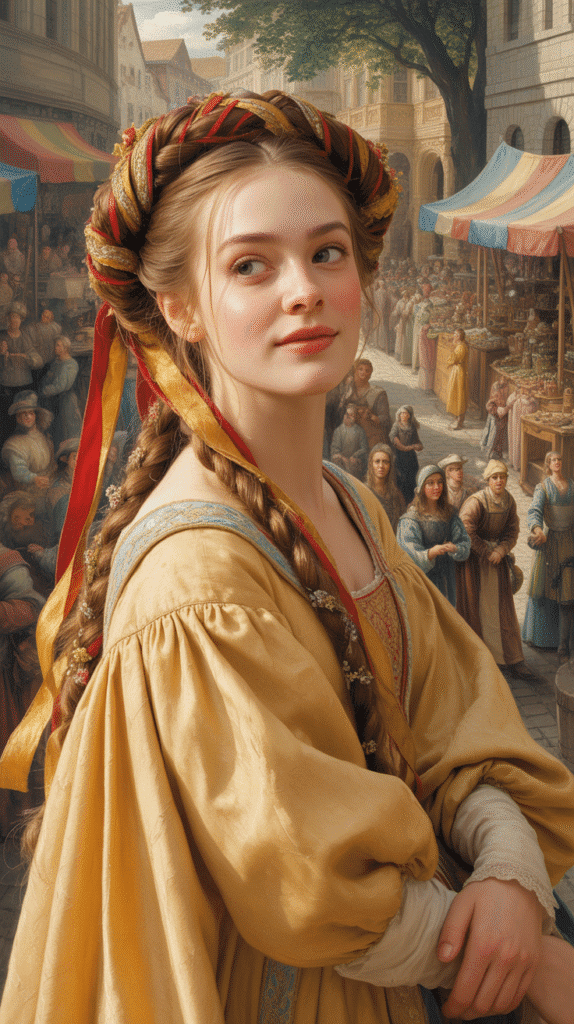
This charming style twisted sections of hair around the head’s crown area while weaving colorful ribbons throughout for added dimension and color.
Young noblewomen particularly enjoyed this style for festivals and celebrations.
Design Elements:
- Multiple narrow hair twists created texture superior to single large twists.
- Ribbon colors often coordinated with gown colors or family heraldic colors.
- The woven ribbons added structural support beyond their decorative function.
Assembly Instructions:
- Section hair from temple to temple across the crown area, leaving lower hair loose.
- Divide the crown section into four to six smaller vertical sections.
- Twist each section tightly while wrapping a ribbon around it in spiral fashion.
- Pin each twisted and ribbon-wrapped section against the scalp in its curved position.
- Ensure the twists follow the natural crown curve from one temple to the other.
- Secure ribbon ends by tucking them under the twists and pinning discreetly.
- Allow the remaining lower hair to hang freely or arrange in loose curls.
Ribbon Selection:
- Silk ribbons provided authentic period appearance and luxurious sheen.
- Velvet ribbons added texture and depth for autumn or winter occasions.
- Metallic-threaded ribbons created sparkle appropriate for evening events.
17. The Gothic Pointed Hennin with Veil
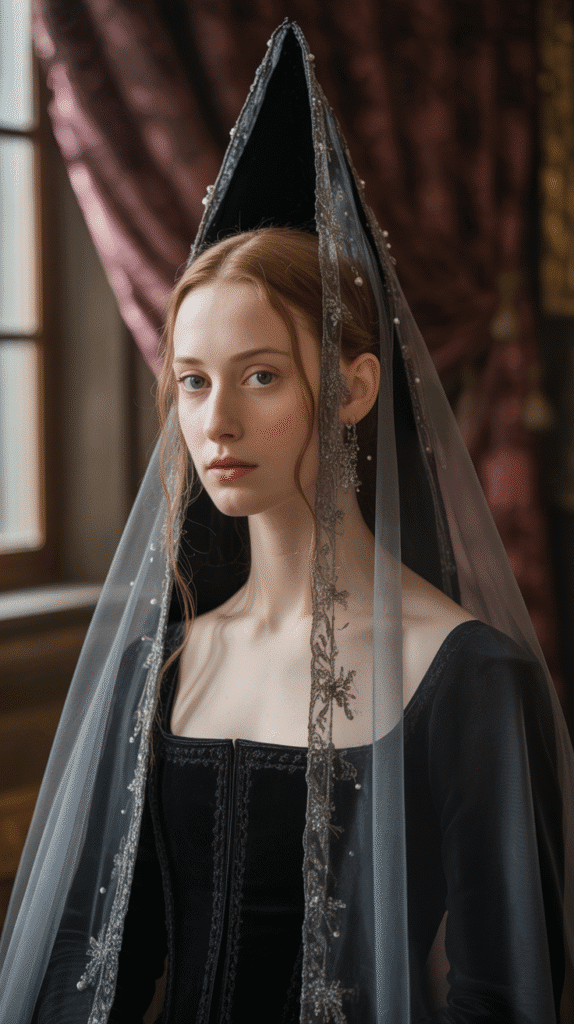
The single-pointed hennin represented the pinnacle of late medieval fashion excess, creating dramatic vertical lines that drew the eye heavenward.
This extraordinary headdress completely transformed the wearer’s silhouette and required significant engineering to maintain stability.
Structural Engineering:
- The pointed cone could reach heights of two to three feet above the head.
- Internal wire framework distributed weight across the skull’s crown area.
- Fabric covering the frame ranged from velvet to silk brocade depending on wealth.
- A stable hair foundation proved essential for supporting the hennin’s weight.
Foundation and Application:
- Braid all hair tightly against the scalp in concentric circles or a single spiral.
- Pin the braided hair thoroughly to create a dense, stable base.
- Position the hennin frame over the prepared foundation, ensuring balance.
- Insert long pins through the hennin base into the braided hair beneath at six to eight points.
- Drape the veil from the hennin point, allowing it to cascade down the back.
- Secure the veil to the hennin point with small stitches or decorative pins.
Regional Variations:
- Burgundian hennins featured steeper angles and greater heights.
- French hennins incorporated more decorative fabric patterns and embroidery.
- Flemish hennins often included jeweled pins along the cone’s front edge.
18. The Milkmaid Braids with Floral Crown
This rustic yet regal style wrapped two braids around the head like a crown while adding a separate floral crown for enhanced natural beauty.
Despite its pastoral associations, noblewomen adapted this style for garden parties and outdoor entertainments.
Pastoral Elegance:
- The milkmaid association brought idealized rural simplicity to court fashion.
- Queens and princesses enjoyed adopting “simple” styles for private leisure time.
- The combination of braids and flowers created romantic, approachable royal imagery.
Creation Method:
- Part hair down the center from forehead to nape, creating two equal sections.
- Braid each section in a three-strand braid from the nape forward toward the forehead.
- Wrap the first braid across the top of the head from ear to ear.
- Pin the first braid securely every two inches along its path.
- Wrap the second braid parallel to the first, positioned approximately one inch behind.
- Tuck both braid ends under the opposite braid and secure with hidden pins.
- Position a woven flower crown over the wrapped braids for the finishing touch.
Floral Crown Construction:
- Wire flower stems together in a circular shape matching the head circumference.
- Include various flower types and greenery for natural, gathered-from-the-garden appearance.
- Ensure the flower crown sits securely on the braided foundation without slipping.
19. The Heart-Shaped Headdress with Templers
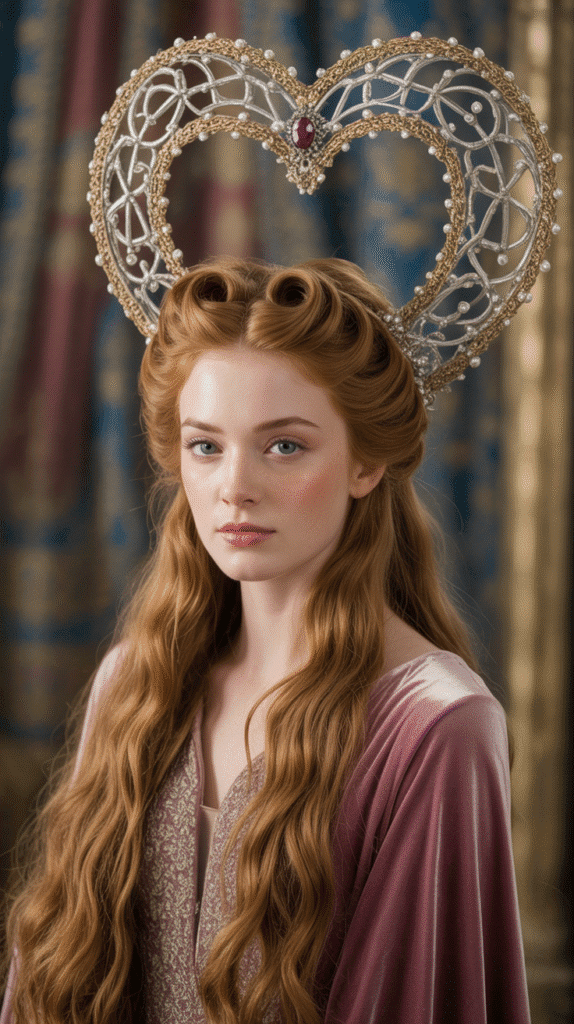
This distinctive style featured wire frames shaped into heart forms positioned above the forehead, with fabric or jewels covering the frames.
Long fabric pieces called templers hung from the headdress sides, framing the face dramatically.
Frame Construction:
- Wire was bent into a heart shape approximately six to eight inches tall at its peak.
- The heart frame attached to a metal band that circled the head for stability.
- Fabric stretched over the wire frame concealed the structural elements beneath.
- Jewels or pearls often decorated the heart outline for enhanced visual appeal.
Templers Design:
- These long fabric strips measured two to four feet in length and hung vertically beside the face.
- Lightweight fabrics like silk or fine linen prevented the templers from weighing down the headdress.
- Templers often featured embroidered borders or metallic thread decoration.
- Some versions included weighted ends to maintain elegant straight hanging.
Hair Preparation:
- Braid all hair flat against the scalp to minimize bulk beneath the headdress.
- Secure the braided hair with numerous pins for a smooth foundation surface.
- Position the heart headdress base band around the head like a crown.
- Pin the headdress to the hair foundation at the temples and back of head.
- Arrange the templers to hang straight and frame the face symmetrically.
20. The Braided Bun Cluster
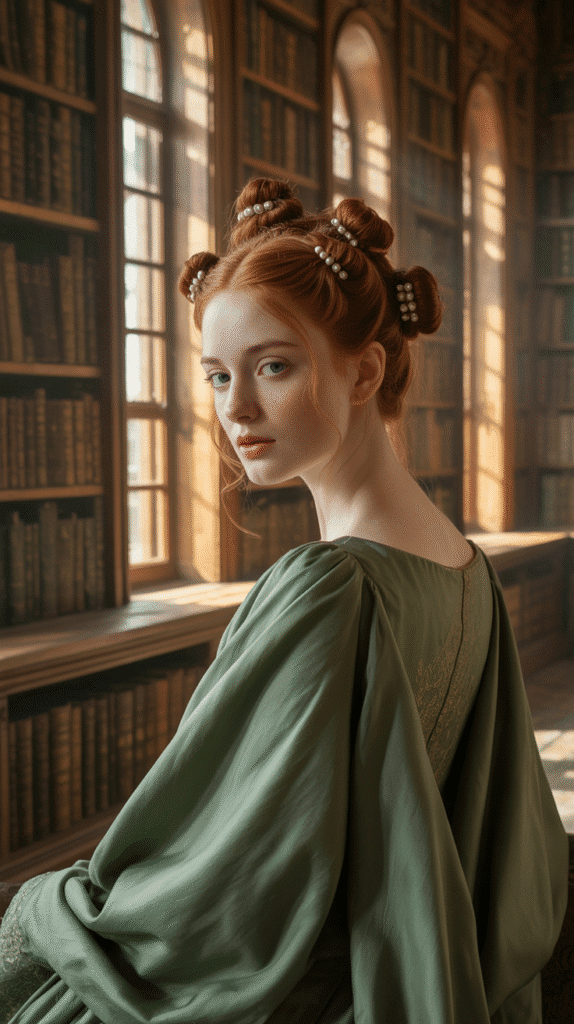
This elaborate style featured multiple small buns created from individual braids, clustered together at the back of the head to create textured dimension.
The style required considerable hair length and thickness but resulted in impressive visual complexity.
Textural Complexity:
- Each individual bun added dimension and visual interest to the overall composition.
- The braiding process prevented tangling between the separate bun elements.
- Varying the bun sizes created natural, organic appearance despite careful planning.
Step-by-Step Assembly:
- Divide all hair into six to nine sections of varying sizes throughout the head.
- Braid each section separately from root to end using three-strand technique.
- Take the first braid and coil it around itself to form a small bun shape.
- Pin the first bun securely to the scalp at the desired location.
- Create buns from the remaining braids, positioning them closely together in a cluster.
- Ensure no gaps appear between the individual buns for cohesive appearance.
- Insert decorative pins through the buns at their centers for both security and ornamentation.
Styling Variations:
- Asymmetrical cluster placement to one side created fashion-forward medieval looks.
- Centered clusters suited more conservative, traditional occasions.
- Scattered buns across the entire back of the head provided maximum coverage and drama.
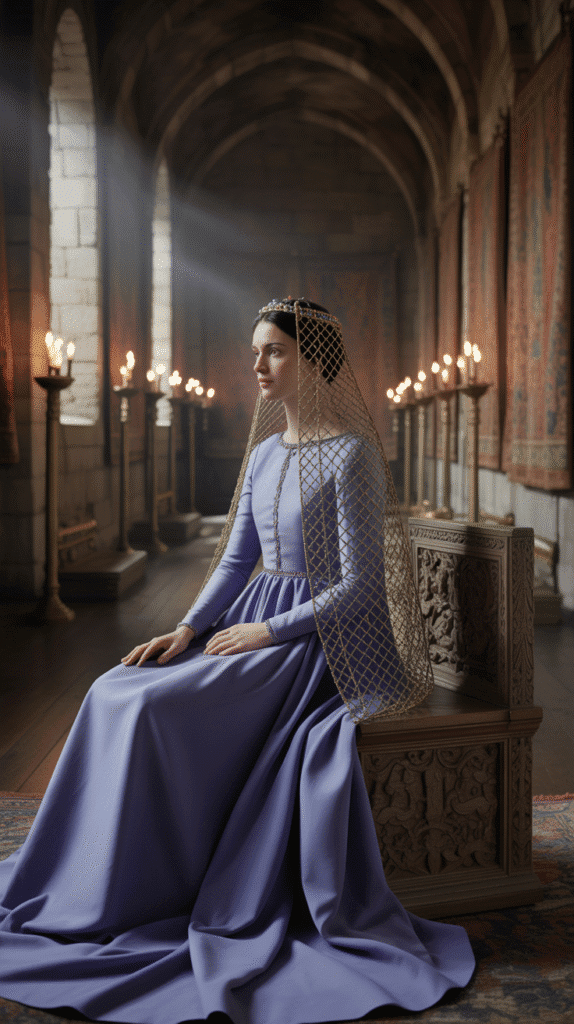
21. The Crespine Net with Side Coils
The crespine represented an ornamental hair net that encased coils or rolls of hair positioned over each ear.
This style particularly flourished in 14th-century Europe and displayed remarkable metalwork craftsmanship.
Crespine Construction:
- Fine metal wires formed the netting structure in geometric patterns.
- Gold or silver thread wove through the wire framework creating intricate designs.
- Small pearls or gems often appeared at pattern intersection points.
- The nets attached to fabric bands that crossed over the crown of the head.
Hair Coil Preparation:
- Part hair down the center and gather each half at ear level.
- Twist each gathered section tightly from root to end.
- Coil the twisted hair into a flat spiral shape against the side of the head.
- Pin each coil securely at multiple points radiating from its center.
- Ensure both coils match in size and position for symmetrical appearance.
- Place the crespine net over each coil, stretching it slightly for secure fit.
- Attach the crespine to the coiled hair beneath using small concealed pins.
Status Significance:
- Gold crespines indicated royal or high noble status and immense wealth.
- Silver crespines suited lesser nobility and wealthy merchant families.
- The complexity of the metalwork pattern reflected the family’s access to skilled artisans.
- Crespines frequently appeared in wills and dowries as valuable heirloom pieces.
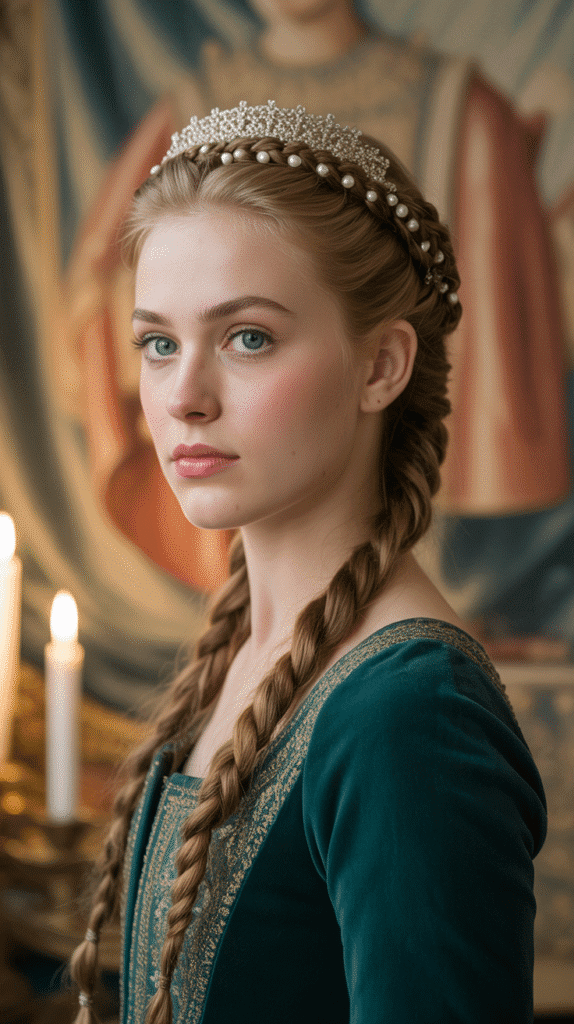
22. The Ladder Braid with Pearl Strands
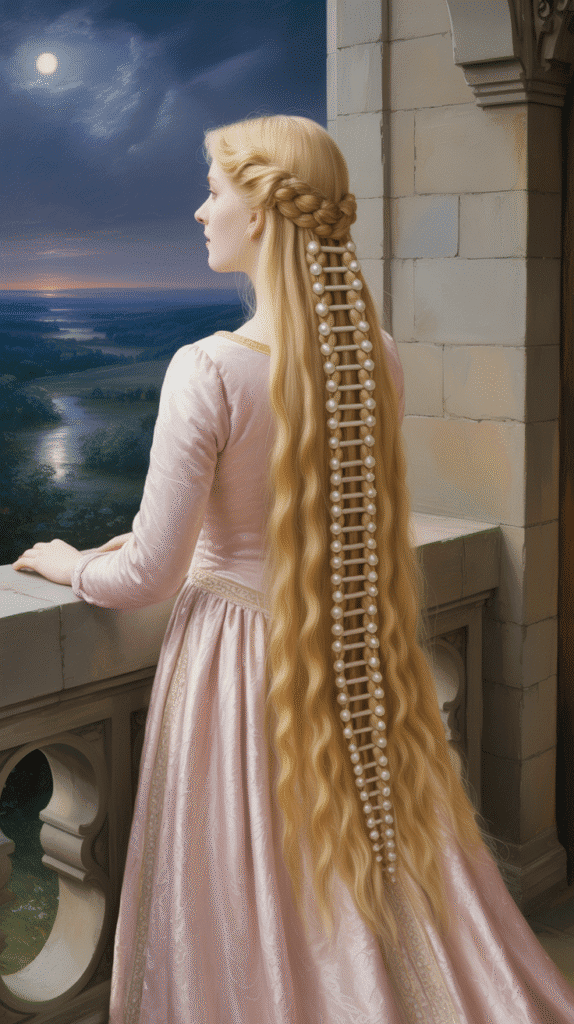
This intricate braiding technique created a ladder-like appearance by weaving pearl strands or ribbons horizontally through a vertical braid structure.
The result resembled an elaborate textile pattern within the hair itself.
Technical Complexity:
- The ladder braid required three vertical sections with horizontal elements woven between them.
- Pearl strands needed secure anchoring at each intersection to prevent slipping during wear.
- The technique worked best with straight or slightly wavy hair that showed the pattern clearly.
Braiding Technique:
- Begin with three equal vertical sections of hair as the foundation.
- Create one standard braid stitch bringing the sections together once.
- Thread a pearl strand through the outer two sections horizontally before the next stitch.
- Continue braiding and adding pearl strands at regular intervals down the entire length.
- Maintain consistent spacing between pearl strands for uniform ladder appearance.
- Secure each pearl strand with tiny hidden pins at both ends where they meet the outer hair sections.
- Finish the braid end with a decorative clasp that coordinates with the pearls.
Alternative Materials:
- Silk ribbons in jewel tones created dramatic color contrast against hair.
- Thin gold or silver chains provided metallic elegance for formal occasions.
- Leather cord strips offered rustic charm for less formal medieval recreations.
23. The Wrapped Turban-Style Headdress
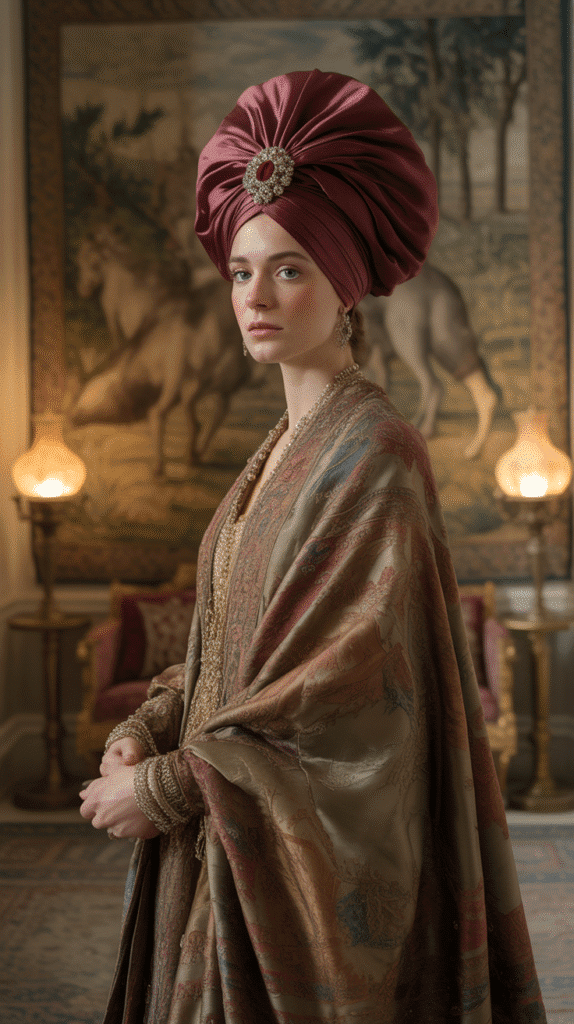
Influenced by Middle Eastern trade and Crusade contact, some medieval noblewomen adopted turban-inspired wrapped headdresses that completely enclosed the hair in elaborate fabric wrappings.
This exotic style demonstrated cosmopolitan sophistication and access to Eastern luxuries.
Cultural Context:
- Trade routes through Spain and Italy brought Islamic fashion influences to European courts.
- The style represented wealth through expensive imported fabrics like silk damask and brocade.
- Christian courts adapted the silhouette while maintaining modesty standards appropriate to their culture.
Wrapping Technique:
- Braid all hair flat against the scalp in tight cornrows or a single flat spiral.
- Pin the braided hair securely to create a smooth foundation surface.
- Begin with a long rectangular piece of silk or other luxury fabric approximately three yards long.
- Place the fabric center at the nape and bring both ends up over the crown.
- Cross the fabric ends at the forehead and wrap them around the head’s sides.
- Continue wrapping the fabric around the head in overlapping layers, building height and volume.
- Tuck the final fabric ends underneath previous layers and secure with hidden pins.
- Position a jeweled brooch or decorative pin at the front center as a focal point.
Fabric Selection:
- Silk damask with woven patterns provided rich texture and visual interest.
- Velvet created dramatic depth and absorbed light beautifully for evening appearances.
- Metallic brocade reflected candlelight for maximum sparkle at court celebrations.
24. The Figure-Eight Braid Buns
This symmetrical style created two braided buns positioned to form a figure-eight or infinity symbol when viewed from behind.
The mathematical precision of this hairstyle appealed to medieval appreciation for geometric harmony.
Symbolic Meaning:
- The figure-eight represented infinity and eternal love in medieval symbolism.
- Brides occasionally chose this style for weddings to symbolize endless devotion.
- The balanced symmetry reflected medieval ideals of harmony and divine order.
Construction Process:
- Part hair horizontally from ear to ear, dividing it into upper and lower sections.
- Create a three-strand braid from the upper section, braiding from nape toward crown.
- Coil the upper braid into a circular bun positioned at the upper-middle area of the head.
- Pin the upper bun securely, forming one circle of the figure-eight.
- Braid the lower section of hair from nape downward.
- Coil the lower braid into a circular bun positioned directly below the first.
- Ensure both buns touch slightly where they meet, creating the figure-eight intersection point.
- Pin both buns thoroughly, emphasizing their connection point with decorative pins.
Size Considerations:
- Equal-sized buns created perfect figure-eight geometry for formal occasions.
- Slightly larger upper buns provided visual interest through asymmetry.
- The style required minimum shoulder-length hair for adequate bun size.
25. The Jeweled Headband with Loose Waves
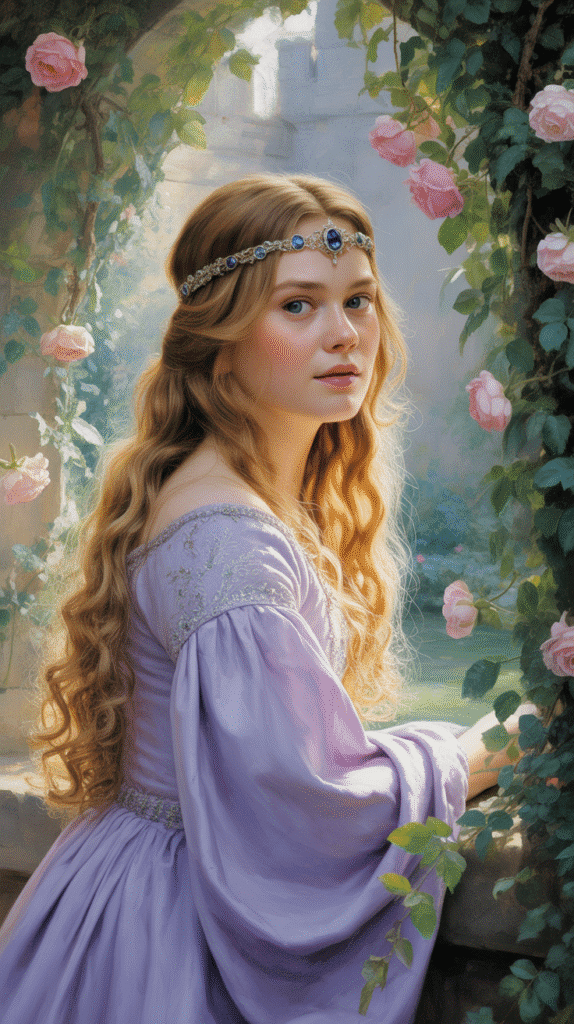
This elegant yet understated style combined gentle waves throughout the hair with an ornate jeweled headband positioned across the forehead.
Younger princesses and noblewomen favored this look for its romantic simplicity.
Wave Creation:
- Medieval women achieved waves by braiding damp hair overnight and releasing it in the morning.
- Modern recreations use large-barrel curling irons or flat iron wave techniques.
- The waves should appear soft and natural rather than structured or uniform.
Styling Process:
- Create gentle waves throughout all hair using preferred historical or modern method.
- Brush through the waves lightly with fingers rather than combs to maintain soft texture.
- Apply light oil or shine serum for the glossy finish medieval beauty standards demanded.
- Position the jeweled headband approximately two inches behind the hairline.
- Ensure the headband sits level across the forehead rather than tilted.
- Allow the waves to flow freely down the back and over the shoulders.
- Tuck small sections of hair behind the ears to keep the face visible.
Headband Styles:
- Circlets with central gems reflected royal lineage and wealth.
- Beaded headbands with pearls suited religious ceremonies and modest occasions.
- Floral metal headbands with enamel work provided spring and summer elegance.
- Chain headbands with hanging jewels created dramatic evening sophistication.
26. The Plaited Crown with Temple Braids
This complex style combined a crown braid around the head’s circumference with additional thin braids framing the temples, creating layered dimension and intricate detail.
The multiple braid elements required considerable time and assistance to create.
Dimensional Layering:
- The crown braid provided the primary structure and foundation for the entire style.
- Temple braids added delicate framing that softened the face and drew attention to features.
- The combination of thick and thin braids created visual texture through contrast.
Construction Steps:
- Begin with the crown braid following standard technique around the head’s perimeter.
- Secure the crown braid thoroughly with pins every two to three inches.
- Take a small section of hair at one temple measuring approximately one inch wide.
- Create a thin three-strand braid with the temple section, braiding close to the hairline.
- Allow the temple braid to curve naturally along the side of the face.
- Tuck the temple braid end under the crown braid at the ear and pin securely.
- Repeat the temple braid process on the opposite side for symmetrical appearance.
- Pull gently on the crown braid to increase volume and create contrast with delicate temple braids.
Occasion Appropriateness:
- Formal court appearances suited this elaborate multi-braid style perfectly.
- The style required at least two hours to create, indicating dedicated preparation time.
- Ladies-in-waiting typically assisted with the intricate back sections and symmetry checking.
27. The Byzantine Diadem with Hanging Chains
This luxurious style featured an ornate metal diadem positioned across the forehead with delicate chains hanging down to frame the face and temples.
The Byzantine influence brought Eastern opulence to Western medieval courts.
Diadem Construction:
- The diadem consisted of a curved metal band following the forehead’s natural contour.
- Intricate filigree work, enamel decoration, and gemstone settings covered the band’s surface.
- Chains attached to the diadem at multiple points and hung down beside the face.
- The chain ends often featured small pearls, gems, or metal ornaments as weights.
Styling Application:
- Style hair in a smooth, low arrangement to avoid competing with the diadem’s ornate design.
- Low buns, wrapped chignons, or braided coils provided appropriate understated foundations.
- Position the diadem across the forehead approximately one to two inches above the eyebrows.
- Ensure the diadem sits level and centered for proper chain draping.
- Allow the chains to hang naturally beside the face, framing the cheekbones.
- Secure the diadem to the hair with small hidden pins at both temple points.
Historical Significance:
- Byzantine empresses wore elaborate diadems as symbols of imperial authority.
- Western European queens adopted the style after Crusade exposure to Eastern courts.
- The hanging chains created movement and sparkle that caught candlelight dramatically.
- Diadems often appeared in coronation ceremonies and the most formal state occasions.
28. The Knotted Rope Braid
This striking braid technique created knot-like bumps along the braid’s length, producing a three-dimensional rope appearance with regular decorative interruptions.
The style required advanced braiding skills but created memorable visual impact.
Knot Creation Technique:
- The “knots” were actually small buns incorporated into the braid at regular intervals.
- Each knot section required wrapping a small portion of braid around itself before continuing.
- Consistent spacing between knots proved essential for balanced, intentional appearance.
Braiding Process:
- Begin with a standard three-strand braid at the crown or nape depending on desired start point.
- After approximately three to four inches of regular braiding, pause to create the first knot.
- Take the braid section and wrap it around itself once, creating a small loop or bun shape.
- Pin the wrapped section securely to hold the knot formation.
- Continue braiding for another three to four inches beyond the knot.
- Create subsequent knots at regular intervals down the entire braid length.
- Maintain consistent tension throughout to prevent knots from loosening.
- Secure the final braid end with a ribbon or decorative tie that complements the knot texture.
Decoration Options:
- Small flowers inserted at each knot point enhanced natural romantic appeal.
- Jeweled pins positioned through knot centers added sparkle and security.
- Ribbon woven through the spaces between knots created color contrast.
29. The Split Crown with Circlet
This regal style parted the hair down the center and brought each side up and over the crown in smooth sections, held in place by an ornate circlet.
The style’s simplicity allowed elaborate circlets to become the focal point.
Structural Simplicity:
- The smooth, sleek appearance required meticulous brushing and natural oils for shine.
- The center part needed razor-sharp precision for the refined aesthetic medieval courts demanded.
- The circlet provided all the ornamentation, so the hair remained intentionally understated.
Styling Instructions:
- Create a perfect center part from forehead to nape using a fine-toothed comb.
- Brush both sections of hair completely smooth, eliminating all texture and bumps.
- Apply light oil to create the mirror-like shine that symbolized noble grooming standards.
- Take the right section and bring it up and over the crown toward the left side.
- Pin the right section behind the left ear, keeping the surface completely smooth.
- Repeat with the left section, bringing it over the crown to the right side.
- Position the circlet over the crown where the two sections cross and overlap.
- Secure the circlet with pins inserted through it into the crossed hair beneath.
Circlet Styles:
- Open crowns with central gem settings indicated highest royal rank.
- Closed circlets completely surrounding the head suited slightly less formal occasions.
- Floral-design circlets with enamel work provided seasonal spring and summer elegance.
- Simple metal bands allowed the hair’s natural beauty to remain the primary focus.
30. The Cascading Tendril Style
This romantic style pulled most hair up into a structured arrangement while leaving strategic tendrils loose to frame the face and cascade down.
The combination of structure and softness epitomized medieval feminine ideals.
Balance Achievement:
- The updo provided necessary structure and formality for court appearances.
- The loose tendrils softened the look and added romantic, touchable appeal.
- Careful placement of tendrils determined whether the style appeared intentional versus messy.
Creation Method:
- Section out small pieces at the temples and nape before creating the main updo.
- Gather the remaining majority of hair and create a twisted or braided updo at the crown or upper back.
- Secure the updo thoroughly with pins to ensure stability throughout wear.
- Release the reserved sections and curl them gently with heat tools or wrapping techniques.
- Arrange the curled tendrils to frame the face naturally without obscuring features.
- Allow nape tendrils to cascade down naturally, creating romantic back interest.
- Set the tendrils with light product to maintain their shape while preserving soft texture.
Tendril Placement Strategy:
- Face-framing tendrils should be thin enough to appear delicate rather than chunky.
- Asymmetrical tendril placement created more fashion-forward medieval aesthetics.
- Nape tendrils connecting to the updo prevented the style from appearing unfinished.
Medieval Hair Care Practices
Medieval noblewomen maintained their elaborate hairstyles through specific care routines that preserved hair health and enhanced its natural beauty.
Washing Techniques:
- Hair washing occurred approximately once per month using herbal-infused water.
- Rosemary water promoted shine and dark color enhancement.
- Chamomile rinses brightened blonde hair naturally.
- Lavender water provided pleasant fragrance and cleansing properties.
Conditioning Methods:
- Natural oils including almond, olive, and rose oil smoothed and conditioned hair.
- Women applied oils primarily to hair lengths rather than scalp areas.
- Overnight oil treatments occurred before major events requiring exceptional hair presentation.
Growth and Health:
- Herbal tonics containing nettle, horsetail, and burdock promoted hair strength and growth.
- Protective nighttime braiding prevented tangling and breakage during sleep.
- Limited heat exposure preserved hair integrity, as most styling occurred through wrapping and braiding.
Conclusion
The magnificent world of 30 Regal Medieval Hairstyles for Princesses and Queens reveals far more than simple beauty techniques—these elaborate coiffures represented complex social codes, spiritual devotion, political power, and artistic expression woven directly into women’s hair.
From the soaring heights of Gothic hennins to the gentle romance of flower-adorned braids, each style communicated specific messages about the wearer’s status, virtue, and aspirations within medieval society’s rigid hierarchy.
The remarkable craftsmanship required to create these hairstyles, often taking hours and requiring skilled assistance, demonstrated that noble hair styling constituted a serious art form deserving respect and preservation.
Modern enthusiasts recreating these historical styles connect with centuries of tradition while discovering that medieval women possessed sophisticated aesthetic sensibilities and technical skills that rival contemporary hairstyling expertise.
Whether you’re drawn to the spiritual symbolism of wrapped coifs, the dramatic flair of jeweled cauls, or the youthful innocence of loose flowing hair adorned with simple fillets, these thirty regal hairstyles offer endless inspiration for bringing medieval elegance into contemporary contexts.
The tools may have evolved from heated iron rods to modern curling irons, but the fundamental beauty of these timeless styles continues to captivate hearts and imaginations, proving that true elegance transcends the boundaries of time and remains eternally regal.