Cutting curly hair with bangs at home might seem intimidating, but with the right techniques and guidance, you can achieve salon-worthy results in your own bathroom.
This comprehensive guide will walk you through everything you need to know about How to Cut Curly Hair with Bangs at Home – Simple Step-by-Step, from understanding your curl pattern to mastering the cutting techniques that work specifically for textured hair.
Whether you’re looking to refresh your existing bangs or create a brand-new fringe, this article covers essential preparation steps, the best tools to use, detailed cutting methods for different bang styles, and crucial aftercare tips to maintain your curls.
You’ll discover why cutting curly hair differs from straight hair, how to avoid common mistakes, and professional tricks that ensure your bangs frame your face beautifully while embracing your natural texture.
By the end of this guide, you’ll have the confidence and knowledge to take control of your curly hair journey and create gorgeous, flattering bangs that enhance your unique look.
Contents
- 1 1. Understanding Your Curl Type Before Cutting
- 2 2. Essential Tools and Products You’ll Need
- 3 3. Preparing Your Hair for the Cut
- 4 4. Determining the Right Bang Style for Your Face Shape
- 5 5. The Dry Cutting Method for Curly Bangs
- 6 6. Step-by-Step Cutting Process for Beginners
- 7 7. Common Mistakes to Avoid
- 8 8. Styling and Maintaining Your New Curly Bangs
- 9 9. When to Trim: Maintenance Schedule
- 10 10. Troubleshooting Common Bang Problems
- 11 11. Growing Out Curly Bangs Gracefully
- 12 12. Professional Tips for Salon-Quality Results
- 13 Conclusion
1. Understanding Your Curl Type Before Cutting

Before you pick up scissors, understanding your specific curl type is absolutely crucial for achieving beautiful bangs that work with your natural texture.
Curly hair ranges from loose waves to tight coils, and each type requires different cutting approaches and considerations.
Knowing your curl pattern helps you predict how much your hair will spring up after cutting, which prevents the common mistake of cutting bangs too short.
Identifying Your Curl Pattern
- The curl type system ranges from Type 1 (straight) to Type 4 (coily), with Types 2, 3, and 4 being relevant for curly hair cutting.
- Type 2 hair features loose, S-shaped waves that have minimal volume at the roots and require less shrinkage consideration when cutting bangs.
- Type 3 curls form definite spirals or ringlets, with 3A being loose curls, 3B being springy ringlets, and 3C having tight corkscrew curls.
- Type 4 hair has the tightest curl pattern with 4A having visible coils, 4B having a zigzag pattern, and 4C having the most shrinkage potential.
- Understanding shrinkage is critical because curly hair can shrink anywhere from 20% to 75% depending on the curl type after it dries.
- Always account for 1-2 inches of additional length when cutting Type 3 curls and 2-4 inches for Type 4 coils to avoid bangs that end up too short.
Hair Texture and Density Considerations
- Hair texture refers to the thickness of individual strands and comes in three categories: fine, medium, and coarse.
- Fine curly hair tends to lack volume and needs lighter, wispy bangs to avoid looking weighed down or overly blunt.
- Medium texture hair is the most versatile and can handle various bang styles from curtain bangs to full fringe.
- Coarse curly hair has more body and structure, allowing for thicker, more dramatic bang styles that maintain their shape.
- Hair density describes how many strands you have per square inch and affects how much hair you should include in your bang section.
- Low-density curly hair requires taking a smaller section for bangs to avoid making the rest of your hair look thin or sparse.
- High-density hair can support fuller bang sections and may even need more aggressive thinning to prevent overwhelming heaviness.
- Consider your hair’s porosity as well, since high-porosity curly hair may frizz more easily and needs careful cutting techniques to minimize damage.
2. Essential Tools and Products You’ll Need
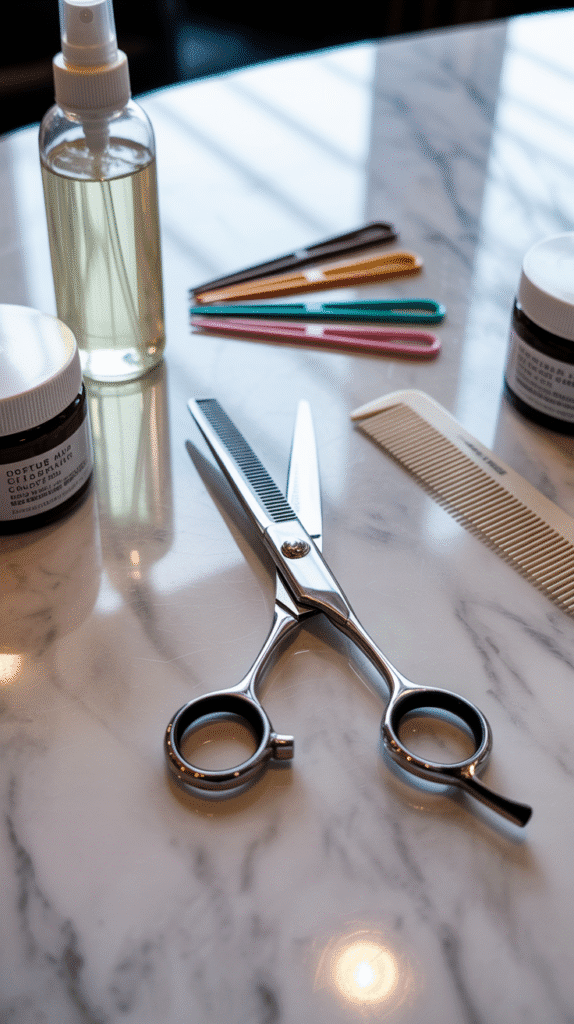
Having the right tools makes the difference between a professional-looking cut and a disaster that requires an emergency salon visit.
Investing in quality cutting tools designed specifically for curly hair ensures clean cuts that won’t cause frizz, split ends, or uneven results.
Beyond scissors, you’ll need preparation and styling products that help you work with your curls rather than against them.
Professional Cutting Tools
- Invest in professional hair-cutting shears with sharp, beveled blades rather than regular household scissors that can crush hair strands.
- Hair-cutting scissors should be at least 5.5 to 6.5 inches long for better control when cutting curly bangs.
- Thinning shears or texturizing scissors are essential for removing bulk from thick curly hair without creating harsh lines.
- A fine-tooth comb helps with precision sectioning, while a wide-tooth comb is necessary for detangling curls without disrupting their pattern.
- Sectioning clips or hair clamps keep the rest of your hair out of the way while you focus on cutting the bang area.
- A spray bottle filled with water helps maintain moisture and curl definition throughout the cutting process.
- A handheld mirror or a three-way mirror setup allows you to see your bangs from multiple angles for more accurate cutting.
- Sharp scissors should be reserved exclusively for hair cutting and never used on paper or other materials that will dull the blades.
Preparation and Styling Products
- A sulfate-free clarifying shampoo removes product buildup before cutting, ensuring your curls form their natural pattern.
- A lightweight leave-in conditioner provides moisture and slip, making curls easier to work with during the cutting process.
- Curl-defining cream or gel helps your curls form their true pattern so you can see exactly how the bangs will look when styled.
- A microfiber towel or cotton t-shirt prevents frizz when drying hair before and after cutting.
- Hair clips should be non-slip and gentle on curls to hold sections without creating creases or dents.
- Anti-frizz serum can be applied after cutting to smooth any disturbed cuticles and enhance shine.
- A diffuser attachment for your hair dryer helps you dry and style your new bangs without disrupting the curl pattern.
3. Preparing Your Hair for the Cut
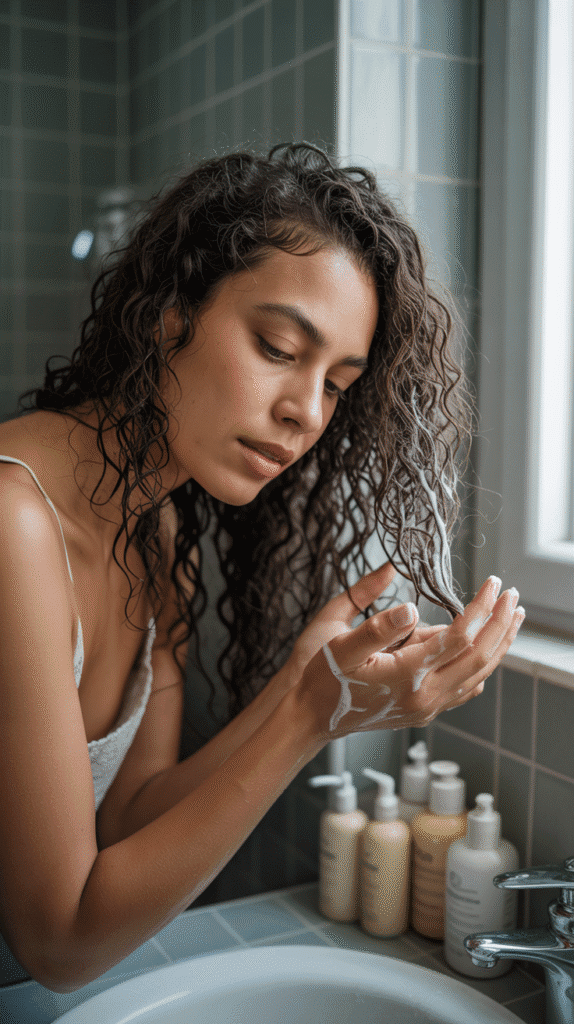
Proper preparation is the foundation of a successful at-home curly bang cutting experience.
The state of your hair when you cut it dramatically affects the final result, and curly hair requires specific preparation techniques that differ from straight hair.
Taking time to properly wash, condition, and position your curls before cutting ensures accuracy and helps you avoid common mistakes.
Washing and Conditioning Process
- Start with freshly washed hair using a sulfate-free shampoo to remove all product buildup, oils, and dirt that can weigh down curls.
- Focus shampoo application on your scalp and roots, gently massaging to cleanse without roughing up the hair cuticle.
- Apply a generous amount of moisturizing conditioner from mid-length to ends, avoiding the roots to prevent the bangs area from looking greasy.
- Use a wide-tooth comb or your fingers to detangle hair while the conditioner is still in, working from ends to roots to minimize breakage.
- Allow conditioner to sit for at least 3-5 minutes so it can penetrate the hair shaft and provide maximum moisture.
- Rinse with cool water to seal the hair cuticle and enhance shine, which also helps curls form more defined patterns.
- Gently squeeze excess water from your hair using a microfiber towel or cotton t-shirt with scrunching motions rather than rubbing.
Curl Definition and Sectioning
- Apply your curl-defining products while hair is still wet using the praying hands method or scrunching to encourage curl formation.
- Allow your hair to air dry to at least 70-80% before cutting, or use a diffuser on low heat to speed up the process.
- Never cut curly hair when it’s completely wet because you cannot accurately see the curl pattern and shrinkage.
- Part your hair in your natural part or the way you typically wear it to ensure bangs will fall correctly.
- Use a tail comb to create a triangular or curved section for your bangs, starting from your hairline and extending back toward your crown.
- The base of your bang triangle should extend from approximately where your eyebrow arches are, not wider than your temples.
- Clip the rest of your hair completely out of the way, ensuring no stray hairs can accidentally get cut with your bangs.
- Check that your curls have formed their natural pattern and are sitting the way they normally would before making any cuts.
4. Determining the Right Bang Style for Your Face Shape

Choosing the right bang style for your face shape ensures your new fringe enhances your features rather than hiding them.
Curly bangs offer various styles from full fringe to side-swept curtain bangs, and understanding which style complements your bone structure prevents disappointing results.
Your face shape, combined with your curl pattern, dictates which bang approach will be most flattering.
Curtain Bangs for Curly Hair
- Curtain bangs are the most versatile and forgiving option for beginners cutting curly hair at home because they frame the face naturally.
- This style features longer pieces on the sides that gradually get shorter toward the middle, creating a soft, face-framing effect.
- Curtain bangs work exceptionally well with all curl types because they allow curls to fall naturally without forcing them into an unnatural position.
- The center part or slight offset allows curls to spring in different directions while still maintaining a cohesive look.
- For Type 2 and 3 curls, cut the shortest central point to sit at nose length when wet, which will shrink to eyebrow level when dry.
- Type 4 curls require cutting the center point to chin length when stretched to account for significant shrinkage.
- This style is particularly flattering for round and square face shapes because the angled lines create a slimming effect.
- Curtain bangs grow out gracefully and blend seamlessly with the rest of your hair, making maintenance easier.
Full Fringe Bangs
- Full fringe bangs create a bold, statement look with curls covering the entire forehead from temple to temple.
- This style works best for heart-shaped and long face shapes because it shortens the appearance of the forehead.
- Full curly fringe requires more hair from the crown section, so you’ll need sufficient density to avoid making the rest of your hair look thin.
- Cut full fringe to approximately eyebrow length when dry, accounting for shrinkage by cutting 1-2 inches longer when wet.
- The weight of full bangs can sometimes straighten looser curl patterns, so Type 2 and 3A hair may need additional styling.
- Tighter curl patterns (3B-4C) maintain their texture better with full fringe and create beautiful, voluminous bangs.
- Regular maintenance is essential for full fringe because even slight overgrowth can obstruct vision or look unkempt.
- Consider point-cutting or using thinning shears to remove bulk and prevent your bangs from looking too heavy or helmet-like.
Side-Swept Bangs
- Side-swept bangs offer an asymmetrical, romantic look that works beautifully with curly hair’s natural movement and texture.
- This style is most flattering for square face shapes because the diagonal line softens angular features.
- Side-swept curly bangs gradually transition from shorter on one side to longer on the other, creating natural flow.
- Cut the shortest point to sit at cheekbone level when dry, allowing curls to sweep dramatically across the forehead.
- This style requires cutting at an angle rather than straight across, following the natural direction your hair wants to fall.
- Side-swept bangs work well with side parts and can be styled to either side depending on your preference.
- For very tight curls, you may need to use a blow dryer with a concentrator nozzle to encourage the side-swept direction.
- This is the lowest-maintenance bang style because it grows out naturally and doesn’t require frequent trims.
5. The Dry Cutting Method for Curly Bangs
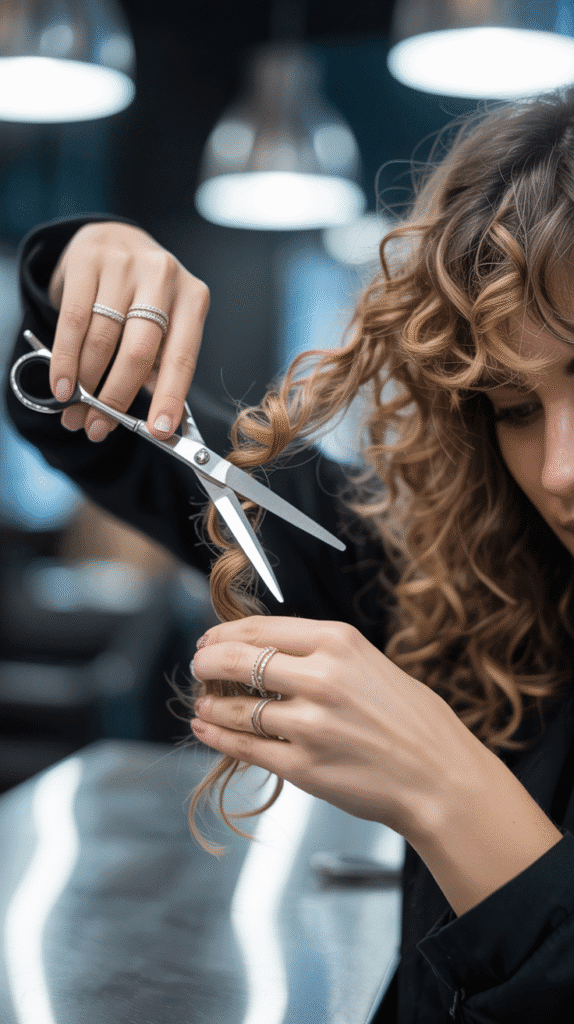
Dry cutting is the gold standard technique for cutting curly hair because it allows you to see exactly how each curl will spring and fall naturally.
Professional curly hair specialists almost exclusively use this method because it accounts for shrinkage, curl pattern, and natural movement.
Attempting to cut curly hair while wet leads to uneven results and unexpected lengths once the hair dries.
Point Cutting Technique
- Point cutting involves holding scissors vertically and cutting into the hair at an angle rather than straight across horizontally.
- This technique creates soft, textured edges that blend naturally with curly hair instead of creating harsh, blunt lines.
- Hold small sections of curls between your fingers and point the scissors toward the ends at a 45-degree angle.
- Snip small amounts (1/4 inch or less) in quick, gentle cuts rather than making one big chop.
- Point cutting removes weight and bulk while maintaining the curl’s integrity and preventing frizz.
- Work curl by curl rather than cutting multiple sections at once for maximum precision and control.
- This method is especially effective for removing triangle-shaped bulk from curly hair without sacrificing length.
- Always cut less than you think you need because you can always go shorter, but you cannot add length back.
Twist and Snip Method
- The twist and snip method works exceptionally well for individual curl definition and is perfect for Type 3 and Type 4 curls.
- Take a small section of curls, twist them gently in the direction they naturally curl to see their true length.
- Hold the twisted section taut and cut at your desired length, accounting for 1-2 inches of shrinkage.
- This technique ensures each curl ringlet is cut to the same visual length rather than the same physical length when stretched.
- The twist method prevents cutting into the middle of a curl spiral, which can cause frizz and irregular curl formation.
- Work systematically across your bang section from one side to the other, twisting and cutting individual curl clusters.
- After each cut, release the curl and observe how it springs back to ensure you’re achieving the desired length.
- This method is ideal for creating uniform curtain bangs where each curl maintains its natural spiral pattern.
Cutting Curl by Curl
- The most precise method for curly bangs involves cutting each individual curl spiral at its natural resting position.
- Allow your curls to fall naturally and identify where each curl ends or loops back on itself.
- Hold each curl gently at the point where you want to cut, using your fingers as a guide without pulling or stretching.
- Cut perpendicular to the curl direction in a single smooth motion to avoid jagged edges or damage.
- Work in small sections, completely finishing one area before moving to the next to maintain consistency.
- Stand or sit in the exact position you normally would when wearing your hair to ensure accurate length assessment.
- Check your progress frequently by stepping back from the mirror to see the overall shape and balance.
- This time-intensive method produces the most professional, customized results because it respects each curl’s unique pattern.
6. Step-by-Step Cutting Process for Beginners

Following a systematic, step-by-step approach removes guesswork and anxiety from cutting your curly bangs at home.
This detailed process breaks down each stage of the cutting procedure, ensuring you don’t miss critical steps that could affect your final result.
Taking your time and following these instructions carefully will help you achieve beautiful, professional-looking curly bangs.
Initial Section and Preparation
- Begin with completely dry or nearly dry hair (at least 90% dry) so your curls have formed their natural pattern.
- Stand in front of a large mirror in a well-lit area, preferably with natural light or bright, even overhead lighting.
- Comb through your entire head with a wide-tooth comb to remove any tangles without disturbing curl patterns.
- Create your bang section by making a triangular or curved parting that starts at the peak of your eyebrow arch on each side.
- The depth of your bang section should extend back about 2-3 inches from your hairline, not too far back toward the crown.
- Use sectioning clips to firmly secure all hair outside your bang area, ensuring nothing can accidentally fall forward.
- Mist your bang section lightly with water if any curls have lost definition, then allow them to reform before cutting.
- Take a moment to visualize your desired outcome and decide on the shortest point of your bangs.
First Cut Guidelines
- Always start by cutting your bangs longer than your target length because you can gradually go shorter if needed.
- For curtain bangs, identify the center point of your forehead and cut that section first to establish your shortest length.
- Cut the center curl cluster to sit at the bridge of your nose when pulled straight, which will shrink to eyebrow length when released.
- Use your scissors vertically in a point-cutting motion, making small snips rather than one straight cut across.
- After cutting the center section, let the curls spring back and assess the length before proceeding further.
- Make sure you’re sitting or standing in your natural posture rather than tilting your head, which affects how bangs fall.
- Cut only 1/4 to 1/2 inch at a time during your first cut, then evaluate and cut more if necessary.
- Remember that curly hair has shrinkage, so what looks long when stretched will appear much shorter when curling naturally.
Blending and Refining
- After establishing the shortest center point, move to the sections on either side and cut them slightly longer to create gradual length.
- For curtain bangs, each section moving toward your temples should be progressively longer by about 1/2 inch increments.
- Hold your scissors at an angle that follows the natural flow from short to long, creating a seamless blend.
- Use point-cutting throughout to soften any hard lines and create natural-looking texture that complements your curls.
- Step back from the mirror every few cuts to assess overall balance and symmetry from a distance.
- Check both sides of your bangs to ensure they’re even in length and flow, making micro-adjustments as needed.
- If you notice any rogue curls that are longer or shorter than intended, address them individually with careful snips.
- Once you’ve achieved your desired shape, use thinning shears sparingly on the interior sections if your bangs feel too heavy or bulky.
Final Touches and Adjustments
- Mist your finished bangs lightly with water and scrunch in a small amount of curl cream to re-form any disrupted curls.
- Allow your bangs to air dry completely or use a diffuser on low heat to see the true final result.
- Once fully dry, identify any pieces that need additional trimming or shaping and make conservative adjustments.
- Check your bangs from multiple angles using a handheld mirror to view the sides and ensure everything blends properly.
- If you created full fringe bangs, ensure the edges near your temples blend smoothly into the rest of your hair.
- Address any stray hairs or outliers by cutting them individually rather than re-cutting entire sections.
- Take photos of your finished bangs from the front and sides for reference during future maintenance trims.
- If you’re uncertain about the length, wait 24 hours and live with your new bangs before making any additional cuts.
7. Common Mistakes to Avoid
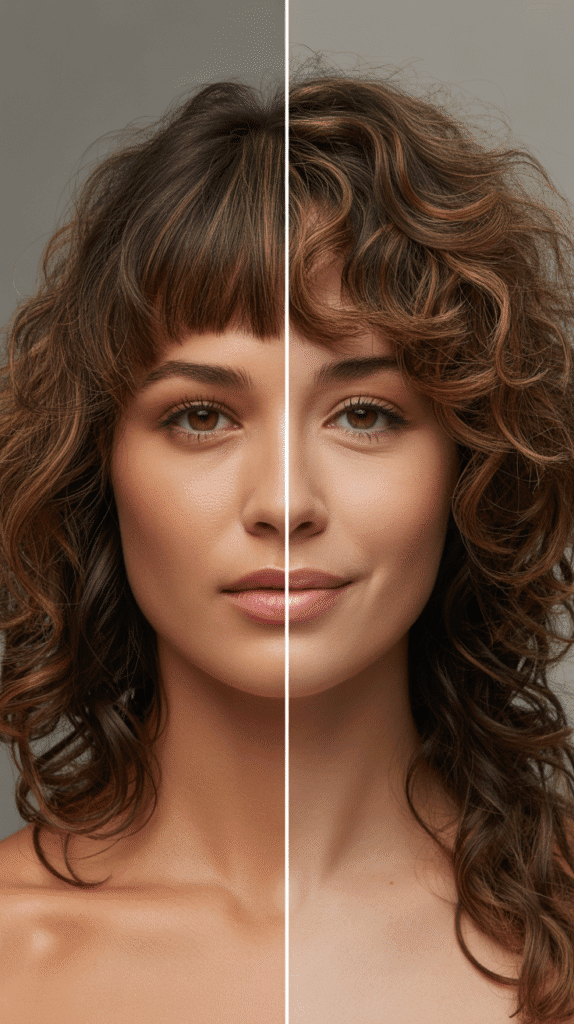
Even with careful planning, certain mistakes can compromise your curly bang cutting results and leave you frustrated with the outcome.
Understanding these common pitfalls before you start cutting helps you avoid them entirely, saving you from potential hair disasters.
Learning from others’ mistakes is far easier than fixing your own, so pay close attention to these frequently made errors.
Cutting Too Short
- The most common and devastating mistake is cutting curly bangs too short without accounting for shrinkage.
- Curly hair can shrink up to 75% depending on curl pattern, meaning 4 inches of length might become just 1 inch when dry.
- Always cut your first pass conservatively long, then gradually trim shorter rather than cutting to your target length immediately.
- If you accidentally cut too short, there’s no immediate fix except waiting for regrowth, which takes months.
- Use the “cut less, assess, cut more” approach rather than committing to a dramatic chop all at once.
- Remember that bangs will continue to shrink as they dry if you cut them damp or only partially dry.
- When in doubt, cut your bangs a full inch longer than where you think they should end up.
Cutting While Wet
- Cutting curly hair while wet is a recipe for disaster because you cannot see the true curl pattern or anticipate shrinkage accurately.
- Wet curls hang elongated and weighted down by water, giving a false impression of length and shape.
- Many people cut their bangs while wet thinking they’ll dry beautifully, only to discover they’re inches shorter than intended.
- The only time to cut curly hair wet is if you’re intentionally stretching it, but this should be done by professionals.
- Wet cutting also makes it impossible to see how individual curls will spring and interact with each other when dry.
- If your hair gets wet during the cutting process, stop and allow it to dry completely before continuing.
- Professional curly hair stylists charge premium prices specifically because they use dry cutting techniques for accuracy.
Using Dull or Wrong Scissors
- Regular household scissors, craft scissors, or dull cutting shears will crush and damage curly hair instead of cleanly cutting through it.
- Damaged cuts create split ends, frizz, and irregular curl formation that ruins the appearance of your bangs.
- Dull scissors require more pressure to cut through hair, which leads to uneven, jagged edges and potential hand strain.
- Using kitchen scissors or craft scissors may seem convenient but guarantees poor results and damaged hair.
- Professional hair-cutting shears cost $20-50 for quality options and are essential investments for at-home cutting success.
- Never use your hair scissors for any other purpose, as cutting paper, plastic, or fabric will dull the blades quickly.
- If your scissors snag, pull, or bend hair rather than cutting cleanly through, they’re too dull and need sharpening or replacement.
Ignoring Face Shape and Symmetry
- Cutting bangs without considering your face shape results in unflattering styles that emphasize rather than balance your features.
- Many people create perfectly symmetrical bangs without considering that most faces have natural asymmetry in eyes, eyebrows, or hairlines.
- Cutting both sides to exactly the same measurement doesn’t account for how hair naturally falls or where your part sits.
- Ignoring your natural part and trying to force a center part when your hair wants to part on the side creates constant styling frustration.
- Tilting your head while cutting, even slightly, throws off your perception of level and creates uneven bangs.
- Not considering your forehead height in relation to bang length can result in bangs that constantly fall into your eyes.
- Always cut your bangs while looking straight into the mirror with your head in a natural, level position.
8. Styling and Maintaining Your New Curly Bangs
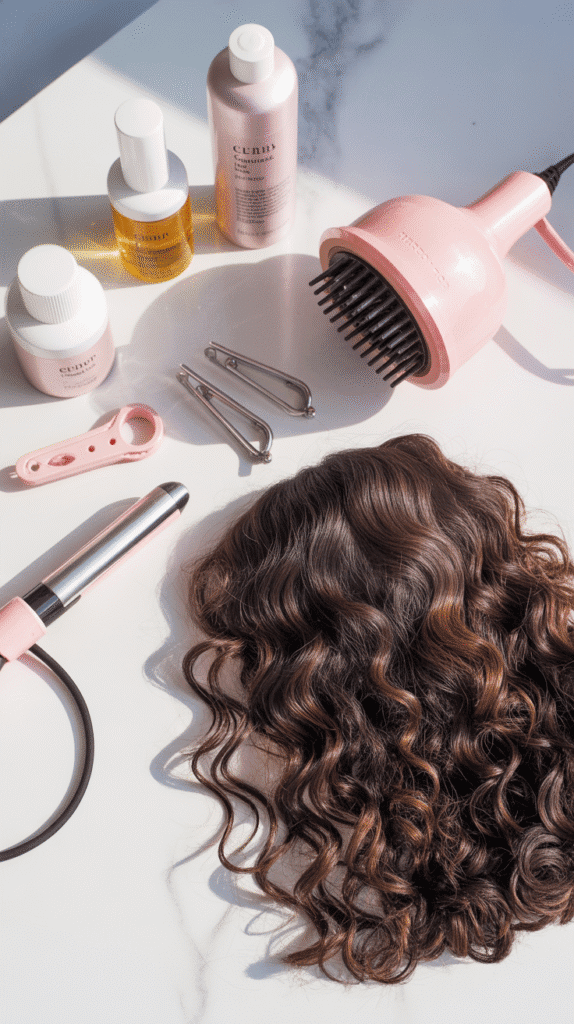
Creating beautiful curly bangs is only half the battle; knowing how to style and maintain them ensures they continue looking fresh and intentional.
Curly bangs require different styling approaches than the rest of your hair and benefit from specific products and techniques.
Proper maintenance extends the time between trims and keeps your bangs healthy, defined, and frizz-free.
Daily Styling Techniques
- Start with damp (not soaking wet) bangs by misting with water or applying dampened hands to reactivate your curls.
- Apply a small amount of curl cream or gel (about a dime-sized amount) by scrunching it into your bangs from ends to roots.
- Use the “praying hands” method by smoothing product between your palms, then pressing hands together with your bangs in between.
- Scrunch your bangs upward toward your scalp in gentle pulsing motions to encourage curl formation and definition.
- Clip your bangs up and away from your forehead using a styling clip while they dry to create volume at the roots.
- Use a diffuser on low heat and low speed, cupping your bangs gently in the diffuser bowl without disturbing the curl pattern.
- Alternatively, allow your bangs to air dry for the most natural result, though this takes significantly longer.
- Once completely dry, scrunch out any gel cast by gently scrunching with your hands or a microfiber towel.
Product Recommendations and Application
- Lightweight leave-in conditioners prevent frizz without weighing down curly bangs or making them look greasy.
- Curl-defining gels provide hold and definition for Type 2 and 3 curls without the crunchiness of traditional gels.
- Curl creams work better for Type 3 and 4 curls, offering moisture and definition while maintaining softness and natural movement.
- Anti-frizz serums containing silicone can be applied sparingly to seal the cuticle and add shine without heaviness.
- Avoid heavy oils or butter-based products on your bangs as they can quickly make the fringe area appear greasy.
- Apply products to bangs separately from the rest of your hair because bangs often need less product due to proximity to facial oils.
- Refresh products like curl revitalization sprays help reanimate second- and third-day bangs without rewashing your entire head.
- A light hairspray can set your styled bangs in place for special occasions, but use flexible-hold formulas that don’t create stiffness.
Nighttime Care and Protection
- Use a silk or satin pillowcase to minimize friction and frizz while sleeping, which especially affects delicate bang area.
- Consider wearing a silk bonnet or scarf to protect your curls and bangs overnight while maintaining their definition.
- If you use a pineapple method for your hair, be careful not to include your bangs in the high ponytail as this can distort their shape.
- Some people prefer to clip their bangs up and away from their face at night to preserve curl pattern and prevent flattening.
- Apply a small amount of leave-in conditioner or curl refresher to your bangs before bed to maintain moisture overnight.
- Avoid sleeping with wet bangs as this creates unpredictable curl patterns and can lead to mildew smell in dense, curly hair.
- In the morning, mist your bangs lightly with water and reshape any flattened or distorted curls with your fingers.
- If your bangs lose all definition overnight, it’s better to fully rewet and restyle them rather than trying to fix badly misshapen curls.
9. When to Trim: Maintenance Schedule
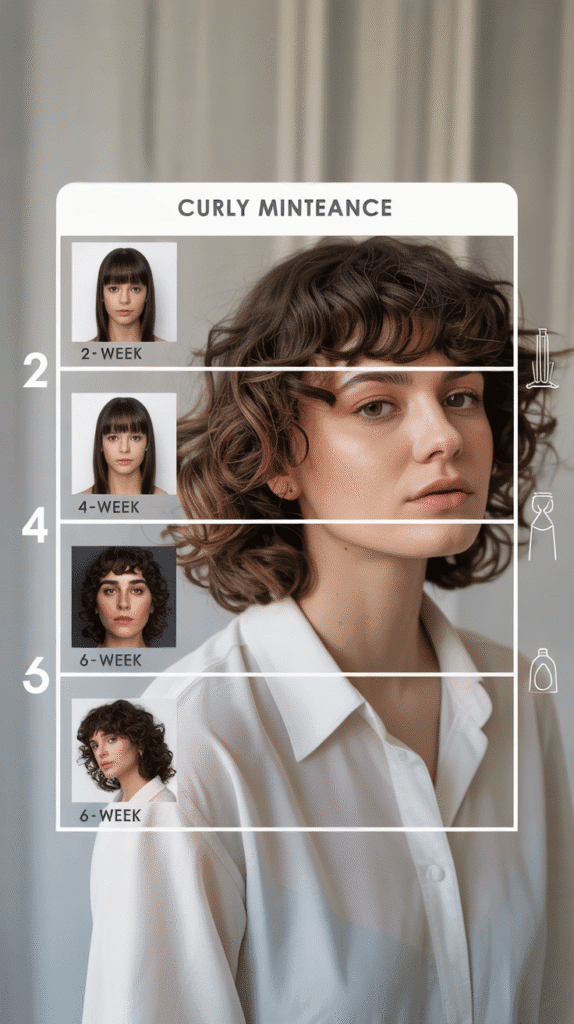
Knowing when and how often to trim your curly bangs prevents them from looking unkempt and maintains the intentional shape you created.
Curly bangs grow at the same rate as the rest of your hair, but because of their prominent position framing your face, overgrown bangs are more immediately noticeable.
Establishing a maintenance routine keeps your bangs looking fresh without requiring frequent salon visits.
Growth Rate and Trim Frequency
- Human hair grows an average of 1/2 inch per month, but individual growth rates vary based on genetics, health, and nutrition.
- Curly bangs typically need maintenance trims every 3-4 weeks for fast-growing hair or 5-6 weeks for slower growth.
- Full fringe bangs require more frequent trims than curtain or side-swept styles because length changes are more obvious.
- Type 4 curls can often go longer between trims (6-8 weeks) because shrinkage disguises some of the growth.
- Looser curl patterns (Type 2-3A) show length changes more obviously and may need trims every 3-4 weeks.
- Schedule maintenance trims before your bangs start falling into your eyes or losing their intended shape.
- Trimming small amounts more frequently (1/4 inch every 3-4 weeks) maintains shape better than infrequent large trims.
- Keep photos of your bangs immediately after cutting as reference for when they need refreshing.
Signs Your Bangs Need Trimming
- The most obvious sign is when your bangs consistently fall into your eyes or obstruct your vision during daily activities.
- If you find yourself constantly tucking, pinning, or pushing your bangs to the side, they’ve grown too long.
- Loss of the original shape you created indicates it’s time for a trim, even if length hasn’t dramatically increased.
- When your bangs start blending completely into the rest of your hair with no distinct separation, maintenance is overdue.
- Split ends or frizzy ends on your bang curls suggest the hair needs trimming to remove damaged portions.
- If styling your bangs becomes increasingly difficult or they won’t hold their curl pattern, the ends may be too damaged.
- Your bangs taking noticeably longer to dry than they did initially can indicate they’ve become too heavy with length.
- When maintenance becomes more time-consuming than when you first cut your bangs, a trim will restore easy styling.
Between-Trim Touch-Ups
- You can do minor touch-ups between full maintenance trims by addressing only the most problematic or overgrown sections.
- Focus touch-ups on the shortest center sections of curtain bangs or the front-most layer of full fringe.
- Cut only 1/8 to 1/4 inch during touch-ups to maintain shape without dramatically changing the overall length.
- Address individual rogue curls that have grown faster than others by cutting just those pieces to match surrounding hair.
- Use the same dry-cutting technique you used initially, working curl by curl for precision.
- Avoid doing touch-ups more than once between full trims, as this can lead to gradually shorter and shorter bangs.
- Schedule a full maintenance trim every 4-6 weeks regardless of whether you’ve done touch-ups in between.
10. Troubleshooting Common Bang Problems
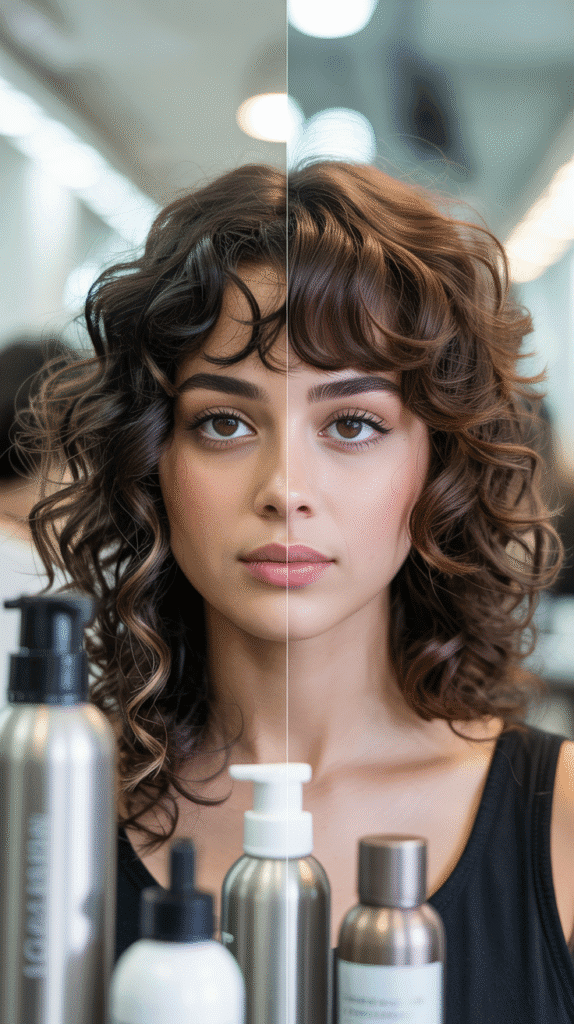
Even with perfect cutting technique, you may encounter challenges as you live with and style your new curly bangs.
Understanding how to troubleshoot common issues prevents frustration and helps you adapt your styling routine for optimal results.
Most bang problems have simple solutions that don’t require re-cutting or drastic changes.
Dealing with Uneven or Wonky Curls
- Individual curls in your bangs may behave differently due to varying curl patterns even within the same section of hair.
- If one side of your bangs curls tighter or differently than the other, adjust cutting length on that side slightly longer to compensate.
- Wonky curls that stick out or don’t blend properly can often be re-trained with strategic clipping while drying.
- Apply more product to stubborn sections that won’t hold their curl pattern, using a stronger-hold gel if necessary.
- Try finger-coiling problematic curls while they’re wet to encourage them to form more uniform spirals.
- Sometimes curls appear uneven due to your natural part shifting; ensure you’re consistently parting your hair the same way.
- If a particular curl is significantly longer than others, don’t hesitate to trim just that one curl to match its neighbors.
- Remember that perfect uniformity is neither achievable nor desirable in natural curly hair; embrace some natural variation.
Fixing Bang Positioning Issues
- Bangs that constantly fall to one side instead of staying centered may indicate your natural part isn’t where you thought it was.
- Work with your hair’s natural inclination rather than fighting it; adjust your bang placement to match your natural part.
- If your bangs separate too much in the middle, you may have cut the section too wide or not taken enough hair depth.
- Bangs that sit too high on your forehead likely shrank more than anticipated and may need to grow out before being re-trimmed.
- Use a blow dryer with a concentrator nozzle to direct stubborn bangs into your preferred position while they’re damp.
- Strategic root clipping while hair dries can train bangs to sit where you want them rather than falling flat.
- If your bangs constantly stick to your forehead, you may be using too much product or products that are too heavy.
- Apply a small amount of dry shampoo or texturizing powder at the roots to create lift and prevent bangs from lying flat.
Managing Frizz and Definition Loss
- Frizz in curly bangs typically results from either damaged ends, incorrect products, or environmental factors like humidity.
- Refresh frizzy bangs by lightly misting with water.
- Use the “glaze and scrunch” method by rubbing product between your palms and gently glazing over the frizzy areas without disturbing curls.
- If frizz persists, your bang ends may be damaged and need trimming to remove split or frayed portions.
- Consider using a microfiber towel or t-shirt instead of regular towels when drying bangs, as terry cloth creates friction and frizz.
- Apply products to soaking wet hair rather than damp hair for maximum frizz control and curl definition.
- Avoid touching your bangs while they’re drying, as this disrupts the curl formation and creates frizz.
- In humid environments, use humidity-resistant products with hold to seal the hair cuticle and prevent moisture from penetrating.
- If your bangs lose definition by midday, keep a small spray bottle with diluted leave-in conditioner for quick refreshes.
Addressing Volume and Flatness
- Flat bangs that lack volume often result from using too much product or products that are too heavy for your hair type.
- Reduce the amount of cream or gel you’re applying and focus application on the mid-lengths and ends rather than roots.
- Clip your bangs up at the roots while they dry to create lift and prevent them from drying flat against your forehead.
- Use a diffuser with your head tilted forward or to the side so gravity helps create volume rather than pulling curls down.
- Consider using a volumizing mousse at the roots before applying your regular styling products.
- If your bangs are too heavy due to thickness, use thinning shears to remove interior bulk without affecting the overall shape.
- Sleeping with your bangs clipped up can help maintain volume and prevent overnight flattening.
- For extremely flat bangs, try the root clipping method where you insert clips at the root area perpendicular to your scalp while hair dries.
11. Growing Out Curly Bangs Gracefully

Not everyone loves their bangs forever, and knowing how to grow them out gracefully prevents the awkward in-between phase from becoming unbearable.
The transition from bangs to longer hair requires patience and strategic styling, but with the right approach, you can maintain a polished look throughout the process.
Planning your grow-out strategy before you get frustrated helps you commit to the process.
Strategic Trimming During Growth
- Counterintuitively, getting small trims during the grow-out process helps bangs blend more naturally with the rest of your hair.
- Focus trims on shaping rather than maintaining length, gradually creating longer layers that frame your face.
- Every 6-8 weeks, trim the shortest pieces slightly to match the longer surrounding sections, creating a gradual progression.
- The goal is to transform your bangs into face-framing layers rather than letting them grow into a blunt, disconnected shelf.
- Point-cut the ends during growth-phase trims to create soft, blended edges that integrate with your existing hair length.
- Avoid trimming the longest pieces of your bangs, allowing them to continue growing while evening out the shorter sections.
- Be patient with the process, as growing out bangs typically takes 3-6 months to reach a length that blends seamlessly.
- Keep reference photos of layered cuts you like to show your stylist (or guide your own trimming) during the transition.
Styling Solutions for Awkward Lengths
- Headbands and hair scarves are your best friends during the bang grow-out phase, adding style while controlling unruly lengths.
- Wide, elastic headbands push growing bangs back while accommodating curly hair volume without causing breakage.
- The half-up, half-down style works beautifully for securing growing bangs while showing off your curls.
- Use bobby pins to create a side-swept look, pinning bangs behind your ear for a sophisticated, intentional appearance.
- Deep side parts help disguise awkward bang lengths by incorporating them into the swept-across section of hair.
- Braiding your bangs into a small braid along your hairline creates a boho look while keeping them controlled and out of your face.
- Hair gel or strong-hold mousse can slick back shorter bang pieces into a low bun or ponytail for sleek, polished looks.
- Mini claw clips positioned strategically can hold back growing bangs while adding a trendy, youthful accessory element.
Products and Techniques for Control
- Use stronger-hold styling products during the grow-out phase to keep awkward lengths in place throughout the day.
- Edge control products designed for natural hair work excellently for smoothing and holding back shorter bang pieces.
- Bobby pins coated in hairspray before inserting hold much more securely and prevent slipping throughout the day.
- Apply a small amount of styling cream or gel to damp growing bangs, then blow-dry them in your desired direction with a concentrator nozzle.
- Curl clips or flat clips can train growing bangs to sweep to the side or stay back while you sleep, creating memory in the hair.
- Consider getting a silk-lined headband or scarf to wear at night, keeping growing bangs in place without causing frizz or breakage.
- Hair oil or serum helps weigh down shorter pieces slightly, preventing them from sticking up or out at awkward angles.
- If all else fails, embrace the textured, lived-in look and work with your curls’ natural tendency rather than forcing strict control.
12. Professional Tips for Salon-Quality Results
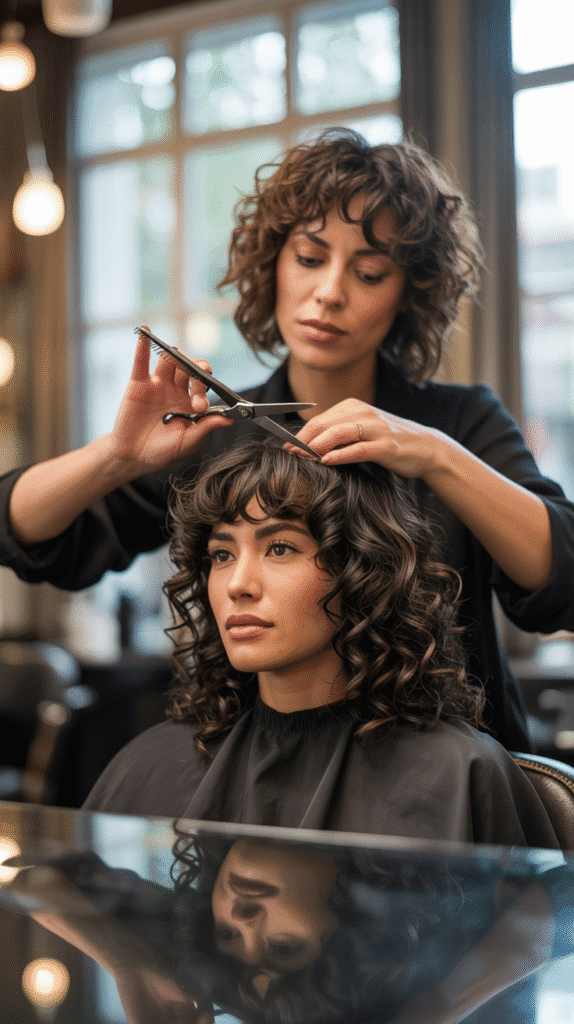
Learning techniques that professional stylists use elevates your at-home curly bang cutting from amateur to expert level.
These insider tips come from years of professional experience working specifically with curly and textured hair.
Incorporating even a few of these professional methods dramatically improves your results and builds your confidence for future cuts.
Professional Cutting Techniques
- The “rake and shake” method involves raking your fingers through curl sections, letting them fall naturally, then cutting at that natural position.
- Professional stylists never cut more than one curl ring at a time, working painstakingly curl by curl for ultimate precision.
- Use the “channel cutting” technique where you cut into the interior of the bang section to remove bulk without affecting the perimeter shape.
- Hold scissors perpendicular to the curl direction and use tiny, nibbling cuts rather than long slicing motions for better control.
- The “twist cutting” method where you twist small sections and cut into the twist creates internal texture without visible layering.
- Professional curly hair cutters invest in multiple scissor types: cutting shears, thinning shears, and texturizing shears for different purposes.
- Always cut with the curl’s natural fall and direction rather than pulling hair taut or forcing it into unnatural positions.
- Take breaks during the cutting process to step back, assess from a distance, and let your eyes refresh before continuing.
Assessing Curl Pattern and Behavior
- Professionals spend several minutes simply observing how curls form, fall, and interact before making any cuts.
- Notice whether individual curls in your bang section spiral clockwise or counterclockwise, as this affects cutting angles.
- Identify the “curl family” in your bangs—groups of curls that clump together naturally—and cut them as units rather than separating them.
- Watch how your bangs respond to moisture, products, and touch to understand how much manipulation they can handle.
- Assess the curl’s diameter (pencil-sized, marker-sized, or finger-sized) as this indicates how much shrinkage to expect.
- Notice whether your curls form immediately at the root or start spiraling several inches down from your scalp.
- Observe whether your bang curls are more prone to frizz than the rest of your hair, which may indicate different porosity levels.
- Professional stylists know that not all hair on your head has the same curl pattern, so they treat each section according to its unique behavior.
Creating Dimension and Movement
- Dimension comes from varying the lengths slightly throughout the bang section rather than cutting everything uniformly.
- Create “spotlight pieces”—a few strategically longer or shorter curls that draw the eye and add interest to your bangs.
- Use the “invisible layering” technique where you cut slightly shorter pieces in the interior while maintaining length on the perimeter.
- Point-cut at different depths into various curls to create varied endpoints that appear more natural and lived-in.
- Professionals often cut the curls closest to the face slightly longer to create a soft, face-framing effect.
- Add “micro-layers” within the bang section by taking horizontal sections and cutting each progressively longer moving forward.
- Texture is your friend with curly hair; avoid creating blunt, uniform lines that look artificial and heavy.
- The most natural-looking curly bangs have intentional imperfection with varied curl lengths and mixed textures throughout.
Conclusion
Mastering How to Cut Curly Hair with Bangs at Home – Simple Step-by-Step empowers you to take control of your hair journey and create a look that celebrates your natural texture.
By understanding your unique curl pattern, investing in the right tools, using professional dry-cutting techniques, and following a systematic approach, you can achieve beautiful, flattering bangs without expensive salon visits.
Remember that cutting curly hair requires patience, precision, and respect for each individual curl’s behavior—never rush the process or cut without considering shrinkage and natural movement.
Whether you choose romantic curtain bangs, bold full fringe, or soft side-swept styles, the key to success lies in cutting conservatively, working curl by curl, and embracing your hair’s natural texture rather than fighting against it.
With proper maintenance, styling techniques, and troubleshooting knowledge, your new curly bangs will frame your face beautifully and boost your confidence.
The journey to perfect at-home curly bangs may require practice, but armed with this comprehensive guide and professional tips, you have everything you need to create salon-quality results in your own bathroom.
Embrace the learning process, be patient with yourself, and most importantly, celebrate the unique beauty of your curls as you embark on this exciting transformation.