
Cutting your own hair at home might sound intimidating, but achieving beautiful layers doesn’t require professional training or expensive salon visits.
Whether you’re looking to save money, enjoy the convenience of styling at home, or simply want to try something new, this guide will walk you through every step of creating an Easy At-Home Layered Haircut — No Experience Needed.
This comprehensive article covers everything from essential tools and preparation techniques to detailed cutting methods and common mistakes to avoid.
You’ll discover multiple layering techniques suitable for different hair types and lengths, along with professional tips that make the process straightforward and stress-free.
By the end of this guide, you’ll have the confidence and knowledge to transform your hair with salon-quality layers in the comfort of your own home.
1. Understanding Hair Layers and Why They Work
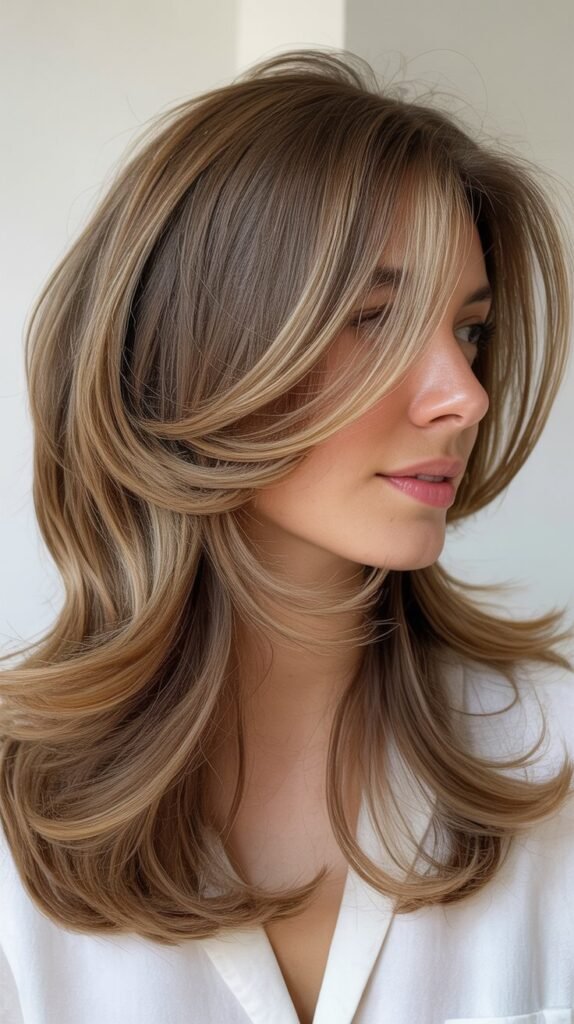
Layers are one of the most versatile haircutting techniques that add dimension, movement, and volume to any hairstyle.
Before picking up scissors, understanding the basic concept of layering helps you visualize the end result and approach the cut with confidence.
- Layers work by creating different lengths throughout your hair, with shorter sections on top and gradually longer sections underneath
- The technique removes bulk and weight, allowing hair to move more naturally and appear fuller
- Different layer styles create various effects: face-framing layers soften features, while long layers add subtle movement
- Layering is beneficial for thick hair to reduce heaviness and for fine hair to create the illusion of volume
- The spacing between layers determines how dramatic the effect will be
- Understanding your face shape helps determine which layer placement will be most flattering
- Layers can disguise uneven hair growth and add texture to straight, flat hair
2. Essential Tools You’ll Need
Having the right tools makes the difference between a successful at-home haircut and a frustrating experience.
Investing in quality basics ensures cleaner cuts and better results.
- Professional hair cutting scissors are essential and should never be replaced with regular household scissors
- Hair cutting shears typically range from 5 to 7 inches and should have sharp, precise blades
- Sectioning clips help divide hair into manageable portions and keep sections separated during cutting
- A fine-tooth comb allows for smooth, tangle-free sections and precise cutting lines
- A spray bottle filled with water keeps hair damp throughout the cutting process
- A handheld mirror enables you to see the back and sides of your head clearly
- A cape or old towel protects clothing from falling hair
- Good lighting is crucial for seeing exactly where you’re cutting
| Tool | Purpose | Price Range |
|---|---|---|
| Hair Cutting Scissors | Clean, precise cuts | $15-$50 |
| Sectioning Clips | Hair separation | $5-$15 |
| Fine-Tooth Comb | Detangling and sectioning | $3-$10 |
| Spray Bottle | Keeping hair damp | $3-$8 |
| Handheld Mirror | Viewing back and sides | $10-$25 |
3. Preparing Your Hair for Cutting

Proper preparation sets the foundation for a successful layered haircut and prevents common mistakes that occur when hair isn’t properly prepped.
- Start with freshly washed and conditioned hair to remove all products, oils, and buildup
- Towel-dry hair until it’s damp but not dripping wet for easier cutting
- Comb through hair thoroughly to remove all tangles and knots before sectioning
- Avoid cutting dry hair as it’s harder to control and can lead to uneven results
- Dampening hair makes it easier to see the cutting line and achieve precision
- Section hair into four quadrants by creating a part down the middle and another from ear to ear
- Secure each section with clips to keep hair organized and prevent accidental cutting
- Ensure you’re in a well-lit area with access to mirrors on multiple sides
4. The Ponytail Method for Basic Layers
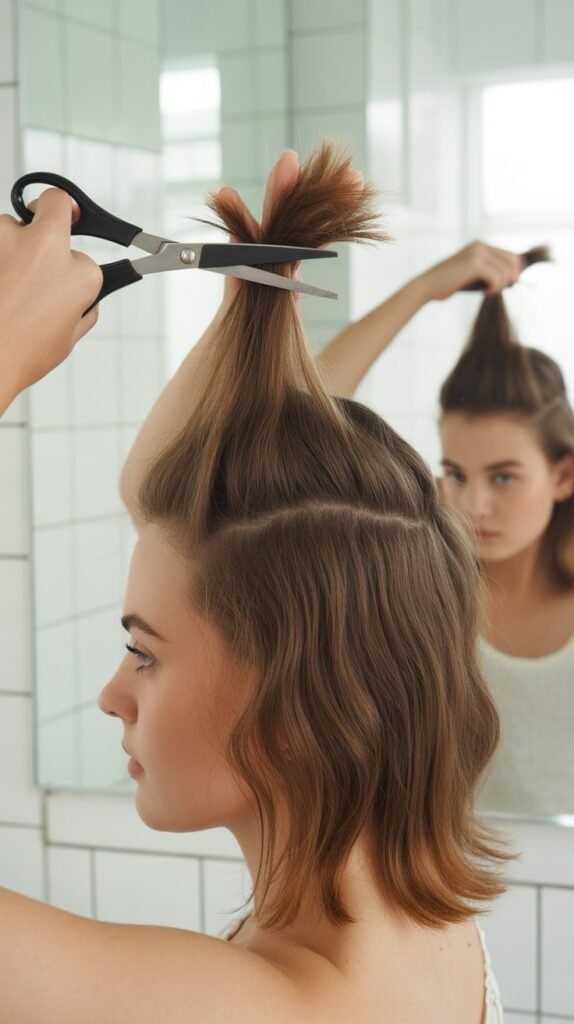
The ponytail method is the simplest technique for creating layers at home and requires minimal skill while delivering impressive results.
- Flip your head upside down and gather all hair into a high ponytail at the very top of your head
- Make sure the ponytail is positioned at the crown and perfectly centered for even layers
- Hold the ponytail straight up toward the ceiling with firm tension
- Slide your fingers or elastic band down to where you want to cut
- Cut straight across the ponytail end, being conservative with the amount you remove
- This method automatically creates shorter layers at the crown and longer layers at the bottom
- Release the ponytail and shake out your hair to see the layered effect
- The higher the ponytail placement, the more dramatic the layers will be
- Start with cutting less than you think you need, as you can always cut more later
5. The Face-Framing Layer Technique
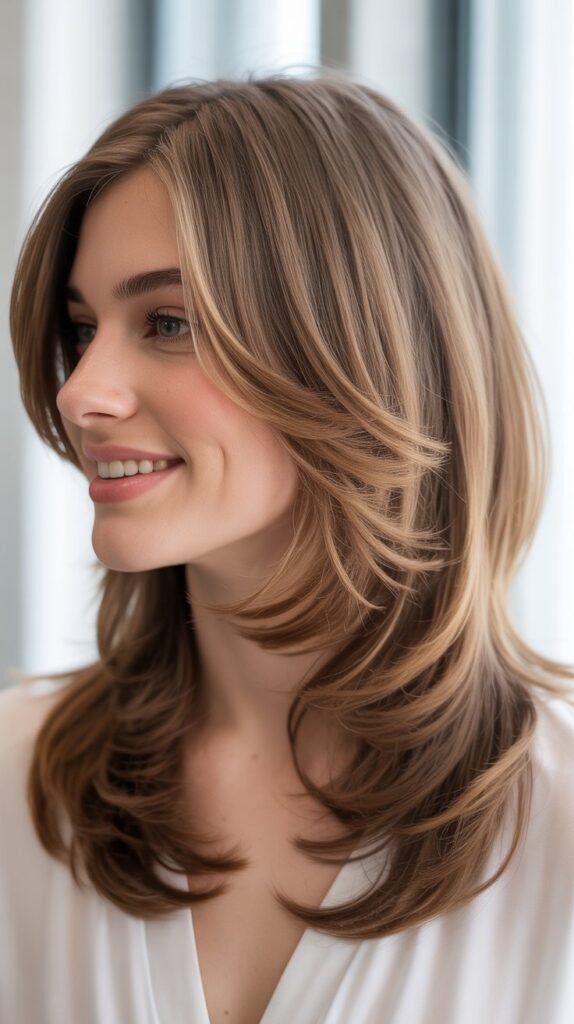
Face-framing layers add softness around the face and are perfect for those who want subtle enhancement without a full layered cut.
- Section out the front portions of hair on both sides of your face, about 2-3 inches wide
- Clip the rest of your hair back to keep it out of the way
- Pull one front section straight down and decide where you want the shortest layer to hit
- Hold the hair between your index and middle fingers at the desired cutting point
- Angle your scissors slightly to create a soft, graduated cut rather than a blunt line
- Cut small amounts at a time, checking both sides for symmetry
- Repeat the process on the other side, ensuring both sections match in length
- Face-framing layers typically start at cheekbone or chin level
- These layers blend naturally with the rest of your hair when styled
6. The Twist and Cut Method for Textured Layers
This technique creates soft, natural-looking layers with built-in texture, ideal for those wanting a more effortless, lived-in appearance.
- Divide hair into multiple sections throughout your head
- Take one section and twist it tightly from the roots to the ends
- Hold the twisted section away from your head at a 90-degree angle
- Cut into the twisted hair at various points, removing small amounts
- The twisting technique naturally creates different lengths and soft layers
- Repeat with each section, maintaining consistency in how much you remove
- This method works especially well for wavy or curly hair
- The irregular cutting pattern prevents harsh lines and creates movement
- Untwist each section after cutting to see the textured result
7. The Vertical Sectioning Method for Long Layers
Vertical sectioning creates subtle, flowing layers that maintain length while adding dimension and is perfect for those with longer hair.
- Part hair down the middle from forehead to nape
- Create vertical sections about 2 inches wide from the front to the back
- Start with a section near your face and comb it straight out from your head
- Hold the section between your fingers perpendicular to the head
- Cut at a slight downward angle to create a gradual layer
- Each vertical section should be slightly longer than the one before it
- This creates layers that blend seamlessly without obvious separation lines
- Work systematically from front to back on one side, then repeat on the other
- Check your progress frequently in the mirror to ensure evenness
8. Common Mistakes to Avoid
Understanding what not to do is just as important as knowing proper techniques, helping you avoid irreversible cutting errors.
- Never cut large chunks of hair at once, as this leads to unevenness and overcutting
- Avoid cutting completely dry hair, which can result in choppy, uneven layers
- Don’t use dull or regular household scissors that crush and damage hair
- Refrain from cutting hair when you’re tired, rushed, or distracted
- Never pull hair too tightly when sectioning, as this distorts the natural fall
- Avoid cutting in dim lighting where you can’t see details clearly
- Don’t attempt complex layering techniques without practicing basic methods first
- Never cut more than half an inch at a time until you’re experienced
- Avoid comparing wet cutting length to dry styling length, as hair shrinks when dry
- Don’t skip checking both sides regularly to maintain symmetry
9. Checking and Adjusting Your Layers

After completing the initial cut, proper checking and fine-tuning ensure professional-looking results and catch any unevenness.
- Use two mirrors to see the back and sides of your head from multiple angles
- Run your fingers through your hair to feel for any uneven spots or bulk
- Check that both sides match in length and layer placement
- Look for any obvious separation lines or choppy areas that need blending
- Make small adjustment cuts only where necessary
- Dry your hair partially to see how layers fall naturally
- Point cut any harsh lines by holding scissors vertically and snipping into the hair
- Check layers while standing in natural lighting for the most accurate view
- Have someone else look at your hair if possible to catch anything you missed
- Remember that minor imperfections often aren’t noticeable once hair is styled
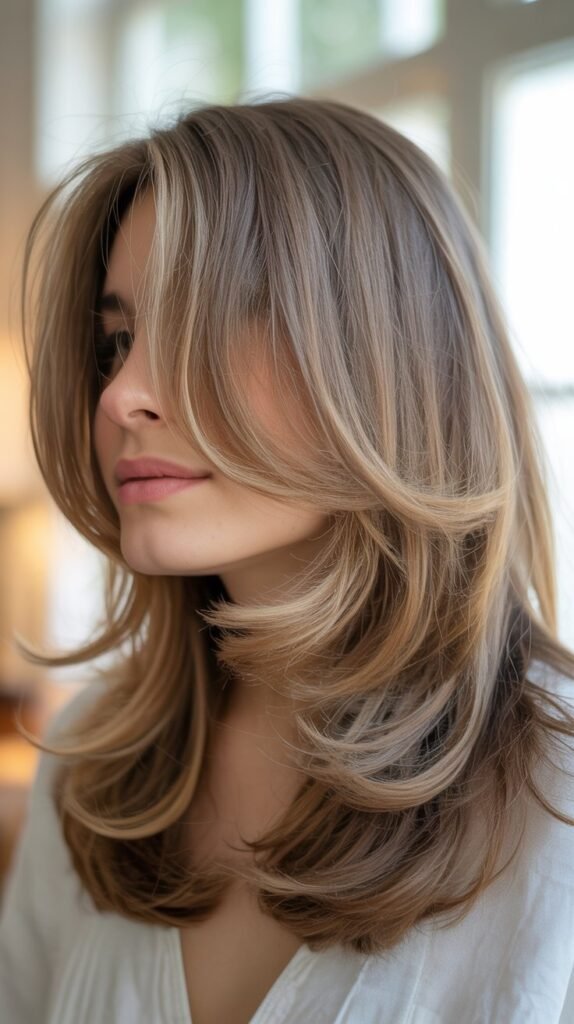
10. Styling and Maintaining Your New Layers
Proper styling brings your layers to life and regular maintenance keeps them looking fresh between cuts.
- Blow-dry layers with a round brush to enhance volume and movement
- Use styling products like mousse or texturizing spray to define layers
- Curl or wave hair to showcase the dimensional effect of layers
- Apply products mainly to mid-lengths and ends to avoid weighing down layers
- Trim ends every 6-8 weeks to maintain layer shape and remove split ends
- Sleep on a silk or satin pillowcase to reduce friction and frizz
- Use heat protectant spray before using hot tools on layered hair
- Deep condition regularly to keep layers healthy and prevent breakage
- Experiment with different partings to see how layers fall differently
- Touch up face-framing layers more frequently as they grow out faster
11. Troubleshooting Layer Problems
Even with careful cutting, issues can arise, but most layer problems have simple solutions you can implement at home.
- If one side is shorter than the other, carefully trim the longer side to match
- Choppy layers can be softened using point cutting or the twist method
- Overly dramatic layers may need the longer sections trimmed slightly to balance
- Too much bulk remaining can be addressed with additional thinning at the ends
- If layers are too short, there’s no quick fix except patience while growing out
- Blend harsh lines by holding scissors vertically and making small snips
- Use a razor or thinning shears sparingly to soften heavy, blunt layers
- Style hair differently while growing out problematic layers
- Consult online tutorials specific to your issue before making more cuts
- When in doubt, visit a professional stylist to correct significant mistakes
12. Layer Variations for Different Hair Types

Different hair textures and types require modified approaches to layering for optimal results.
- Fine hair benefits from long, subtle layers that create fullness without removing too much density
- Thick hair requires more aggressive layering to remove weight and allow movement
- Curly hair should be cut when dry or slightly damp to account for shrinkage
- Wavy hair looks best with layers that enhance natural texture and wave pattern
- Straight hair can handle more precise, geometric layers without appearing choppy
- Coarse hair needs softer, more blended layers to avoid a triangular shape
- Thin hair should have conservative layering to maintain the appearance of thickness
- Natural hair requires understanding curl patterns and cutting at the right angle
- Color-treated hair may need gentler layering to avoid emphasizing damage
| Hair Type | Best Layer Style | Key Consideration |
|---|---|---|
| Fine/Thin | Long, subtle layers | Maintain density |
| Thick | Heavy, dramatic layers | Remove bulk |
| Curly | Curl-specific layers | Account for shrinkage |
| Straight | Precise, geometric layers | Clean lines |
| Wavy | Texture-enhancing layers | Follow wave pattern |
13. Safety Tips and Precautions
Cutting your own hair involves sharp tools and requires attention to safety to prevent injury and poor results.
- Always cut hair when you’re calm, focused, and have adequate time
- Keep scissors pointed away from your face and eyes at all times
- Store cutting tools safely in a case or drawer when not in use
- Sit in a stable chair or stand with good posture to prevent neck and back strain
- Never let children or pets near your cutting area
- Clean up cut hair immediately to prevent slipping hazards
- Keep your non-cutting hand clear of the scissor blades
- Take breaks if you feel fatigued or your hands start cramping
- Never attempt to cut someone else’s hair without their full consent and understanding of your experience level
- Stop immediately if you feel uncertain and seek professional help rather than risk a major mistake
14. When to Seek Professional Help
Knowing your limitations and when to visit a professional stylist can save you from costly mistakes and hair disasters.
- If you want a dramatic transformation or very short layers, consult a professional first
- Complex cuts like shag haircuts or heavily textured styles require trained expertise
- When correcting a significant mistake, a professional can salvage the situation better
- If you have very curly or textured hair and haven’t cut it before, seek expert guidance
- Major changes in style or length are best handled by experienced stylists
- If you’re unsure about face-framing or have asymmetrical facial features, get professional advice
- Wedding, job interviews, or important events warrant professional styling
- When growing out layers or changing from short to long, professionals can create better transition cuts
- Chemical treatments like coloring or perming should be professionally done
- If you feel overwhelmed or anxious about cutting your own hair, it’s okay to visit a salon
Conclusion
Creating an Easy At-Home Layered Haircut — No Experience Needed is entirely achievable when you have the right tools, techniques, and patience.
This comprehensive guide has walked you through multiple layering methods, from the simple ponytail technique to more advanced vertical sectioning, ensuring you can choose the approach that best suits your hair type and comfort level.
Remember to start conservatively, cutting less rather than more, and always work with damp hair in good lighting.
The key to success lies in careful preparation, systematic sectioning, and regular checking as you progress through the cut.
While mistakes can happen, most are easily correctable with point cutting or professional help when needed.
With practice and confidence, you’ll develop the skills to maintain beautiful, salon-quality layers at home, saving both time and money while enjoying the creative freedom of styling your own hair.
Whether you’re looking for subtle face-framing pieces or dramatic dimension throughout, these techniques empower you to take control of your hair care routine and achieve professional-looking results without ever leaving your house.
Additional Resources:
For more detailed information on hair cutting techniques, visit the professional guides at Cosmopolitan’s Hair Section and Allure’s Hair Care Tips.
For video demonstrations and visual guidance, check educational content on platforms like YouTube’s Beauty Channels where professional stylists share cutting techniques.
To purchase quality hair cutting tools, browse reputable retailers like Sally Beauty or Ulta Beauty for professional-grade scissors and accessories.