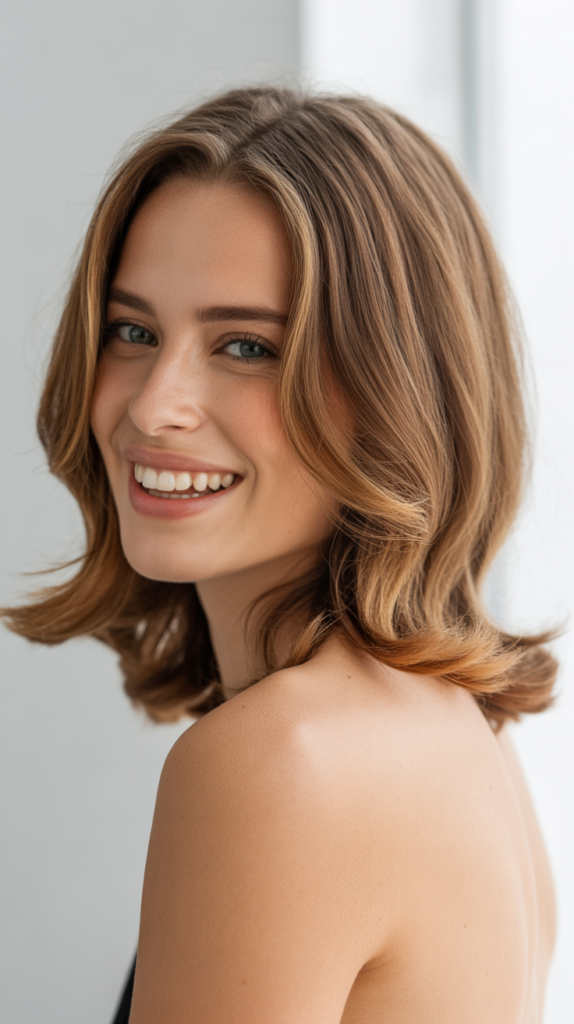
Tired of wearing the same hairstyle every day? Medium-length hair offers the perfect canvas for countless stunning looks that bridge the gap between short and long styles.
Whether you’re preparing for a special occasion or simply want to refresh your everyday appearance, mastering a few versatile techniques can completely transform your hair game.
This comprehensive guide will walk you through eight easy, achievable steps to create beautiful hairstyles for medium hair, from effortless waves to elegant updos.
You’ll discover professional styling secrets, time-saving tricks, and foolproof methods that work for various hair textures and types.
By the end of this article on How to Hairstyles for Medium Hair: 8 Easy Steps to Stunning Looks, you’ll have the confidence and knowledge to recreate salon-worthy styles in the comfort of your own home.
1. Prepare Your Hair with the Right Foundation
Before diving into any hairstyle, proper preparation makes the difference between a look that lasts five minutes and one that stays flawless all day.
Clean, well-conditioned hair accepts styling products better and holds shapes more effectively than unwashed or over-processed strands.
Start with freshly washed hair:
- Cleanse your medium-length hair with a sulfate-free shampoo suited to your hair type
- Apply conditioner from mid-length to ends, avoiding the roots to prevent greasiness
- Rinse thoroughly with cool water to seal the hair cuticles and add natural shine
- Gently squeeze out excess water with a microfiber towel rather than rubbing vigorously
Apply heat protectant and styling products:
- Spray a quality heat protectant evenly throughout damp hair before any heat styling
- Work a golf-ball-sized amount of mousse through your roots for added volume
- Apply a small amount of smoothing serum to your ends to combat frizz and flyaways
- Let your hair air-dry to about 80% before using heat tools to minimize damage
Consider your hair texture and type:
- Fine hair benefits from volumizing products and lighter-hold styling sprays
- Thick hair requires stronger-hold products and more sectioning during styling
- Wavy or curly hair needs moisture-rich products and diffuser attachments for blow-drying
- Straight hair holds styles better with texturizing sprays and dry shampoo at the roots
2. Master the Classic Beach Waves
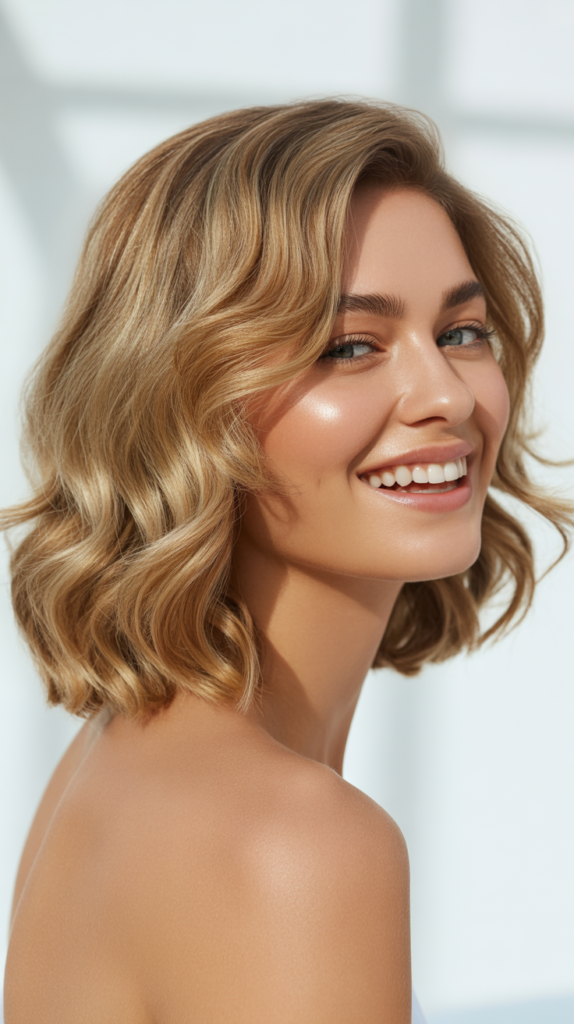
Beach waves remain one of the most requested hairstyles because they look effortlessly chic while working for virtually any occasion.
This timeless style adds texture, movement, and volume to medium hair without appearing overly structured.
Prepare your hair for waves:
- Divide your completely dry hair into 2-inch sections using clips
- Start with the bottom layers and work your way up to the crown
- Ensure each section is untangled and smooth before applying heat
- Keep a heat-resistant glove on your non-dominant hand for safety
Create the waves with a curling iron or wand:
- Use a 1-inch to 1.5-inch barrel curling wand heated to 350-380°F
- Wrap each section around the barrel away from your face, leaving the last inch uncurled
- Hold each section for 8-10 seconds, then release carefully into your palm
- Alternate the direction of curls on different sections for a more natural, tousled appearance
- Pin each curl up with a clip while it cools to help the wave set properly
Finish and style your beach waves:
- Once all sections have cooled completely, release the clips and gently shake out your hair
- Run your fingers through the waves to separate and soften them
- Spray a sea salt texturizing spray throughout for enhanced definition and grip
- Apply a light-hold hairspray from 10-12 inches away for lasting hold without stiffness
- Scrunch sections gently with your hands to create additional texture and volume
Alternative heatless method:
- Divide damp hair into 4-6 sections and twist each section loosely
- Secure twists with soft scrunchies and sleep on them overnight
- Release in the morning and finger-comb for natural, gentle waves
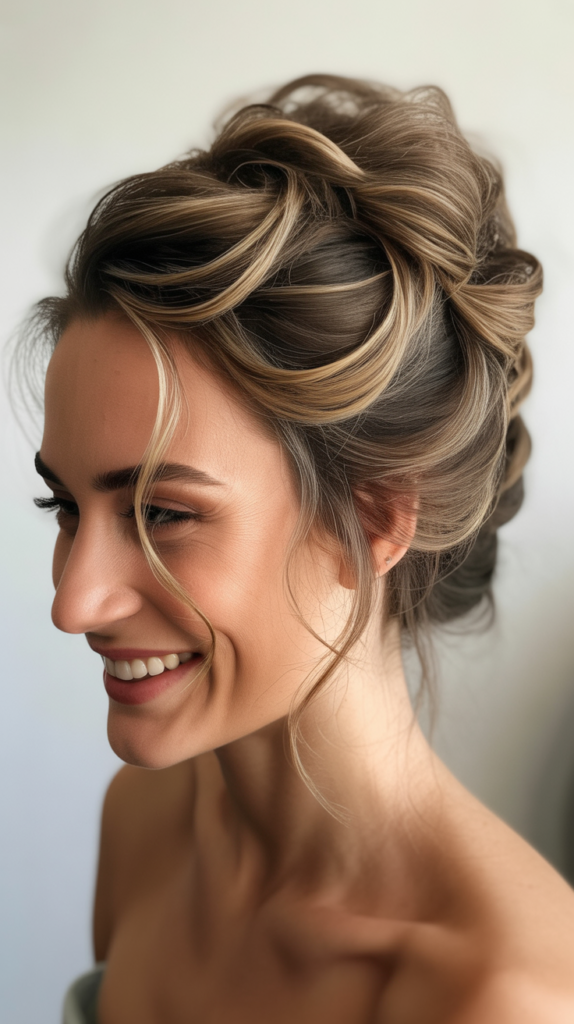
3. Create an Elegant Half-Up Half-Down Style

The half-up half-down hairstyle offers the perfect balance between sophistication and casual comfort, making it ideal for both professional settings and social gatherings.
This versatile look keeps hair out of your face while showcasing the length and texture of your medium hair.
Section and prepare the top portion:
- Brush your hair thoroughly to remove all tangles and create a smooth base
- Create a horizontal part from the top of one ear to the other, about 3-4 inches back from your hairline
- Gather the top section and secure it temporarily with a clip
- Tease the crown area lightly with a fine-tooth comb for added height and volume
Secure the half-up section stylishly:
- Smooth the gathered top section back with a brush while maintaining volume at the crown
- Twist the section loosely or braid it for added interest before securing
- Fasten with a clear elastic band positioned at the center back of your head
- Wrap a small section of hair around the elastic to conceal it, securing with a bobby pin underneath
- Pull out a few face-framing pieces for a softer, more romantic appearance
Style the remaining half-down portion:
- Curl or wave the bottom section using your preferred method for added texture
- Apply a smoothing cream or oil to the lengths for extra shine and polish
- Use a wide-tooth comb to blend the top and bottom sections seamlessly
- Adjust the volume and shape of both sections until balanced and proportionate
- Set the entire style with a flexible-hold hairspray for all-day wear
4. Perfect the Messy Bun for Effortless Chic
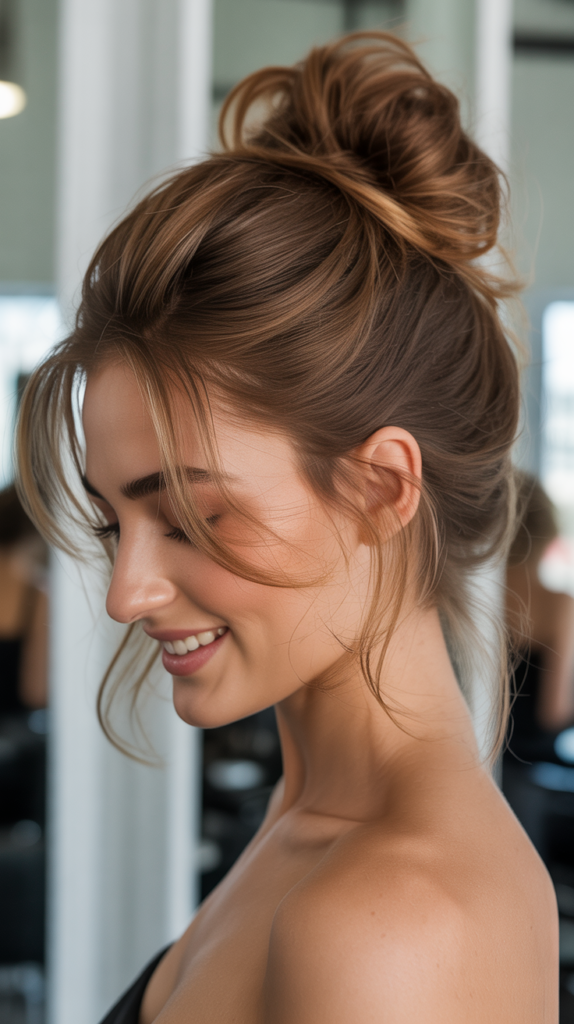
The messy bun has evolved from a lazy-day default into a deliberately styled look that exudes confidence and casual elegance.
When executed correctly on medium hair, it creates the perfect balance between undone and intentional.
Create texture for the perfect messy foundation:
- Start with second-day hair or apply dry shampoo to clean hair for better grip
- Tease your hair at the crown and throughout the lengths using a teasing brush
- Spray texturizing spray generously to create separation and hold
- Flip your head upside down and shake your hair to distribute products evenly
Build your messy bun structure:
- Gather your hair into a high or mid-level ponytail using your hands rather than a brush
- Leave the ponytail slightly loose and allow some shorter pieces to fall naturally
- Twist the ponytail loosely without pulling too tightly
- Wrap the twisted hair around the base of the ponytail in a circular motion
- Secure with bobby pins inserted vertically for the strongest hold, using 4-6 pins total
Perfect the deliberately messy appearance:
- Gently pull sections of the bun outward to create volume and a fuller shape
- Allow small pieces to fall around your face and neck for a softer frame
- Pull out a few loops from the bun itself to create intentional texture
- Use your fingers to adjust and position flyaways strategically rather than smoothing them down
- Finish with a light mist of flexible-hold hairspray to maintain the style without stiffness
- Avoid over-manipulating the bun—imperfection is the goal for this look
5. Style a Sleek Low Ponytail with Volume
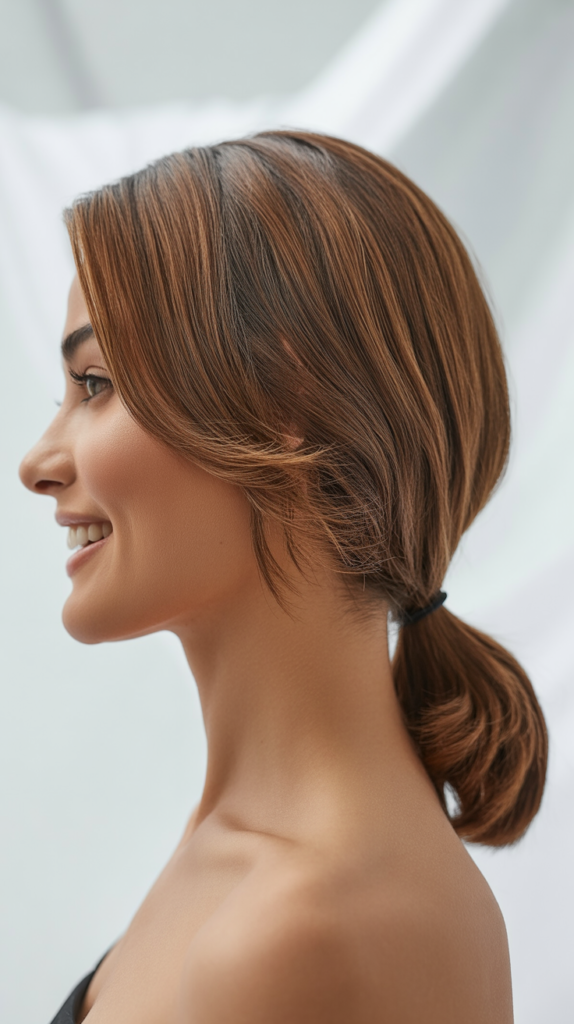
The sleek low ponytail combines sophistication with simplicity, offering a polished look that works beautifully for professional environments and formal occasions.
This style proves that medium hair doesn’t limit your ability to create impactful, elegant hairstyles.
Achieve the sleek foundation:
- Apply a smoothing serum or cream throughout dry, brushed hair
- Use a paddle brush to smooth hair back from the hairline toward the nape
- Create a deep side part or center part depending on your face shape and preference
- Run a flat iron over small sections if needed to eliminate any frizz or waves
- Apply a small amount of shine spray for a glossy, polished finish
Create strategic volume before securing:
- Backcomb the crown section gently with a fine-tooth comb to build height
- Smooth the top layer over the teased section to hide the texture while maintaining lift
- Use a tail comb to perfect your part and ensure clean, precise lines
- Position your hands where you want the ponytail to sit (typically at or below the nape)
- Secure with a hair elastic that matches your hair color for a seamless appearance
Elevate the basic ponytail:
- Take a 1-inch section from the underside of the ponytail and wrap it around the elastic
- Secure the wrapped section underneath with a bobby pin for a concealed finish
- Gently tug at the crown to adjust volume and create the perfect height
- Apply edge control or pomade to smooth any baby hairs or flyaways at the hairline
- Finish the ponytail ends with a slight curl or wave for added sophistication
- Set the style with strong-hold hairspray, focusing on the smoothed sections
6. Design a Romantic Braided Crown

A braided crown transforms medium hair into a romantic, bohemian masterpiece that works beautifully for weddings, garden parties, or any occasion requiring a touch of whimsy.
This style appears complex but becomes manageable once you understand the basic technique.
Prepare your hair for braiding:
- Create texture by curling your hair loosely or working with second-day waves
- Apply a texturizing spray throughout to help the braids grip and hold
- Part your hair down the middle or create a deep side part based on preference
- Section your hair horizontally from ear to ear across the back of your head
Create the crown braids:
- Starting on one side, take a 2-inch section near your temple
- Begin a Dutch braid (reverse French braid) by crossing sections under rather than over
- Incorporate small amounts of hair as you braid along your hairline toward the back
- Keep the braid slightly loose and pull on the outer edges to create fullness
- Secure the first braid temporarily with a clear elastic at the back
- Repeat the same braiding process on the opposite side
Connect and finish the crown:
- Bring both braids across the back of your head, overlapping them to form a crown
- Tuck the ends of each braid underneath the opposite braid
- Secure with bobby pins, placing them vertically under the braids for invisible hold
- Pull small sections from the braids to create a fuller, more romantic appearance
- Allow face-framing pieces to fall naturally or curl them gently
- Mist with hairspray while gently holding the braids to maintain their softness and texture
7. Execute the Trendy Bubble Ponytail
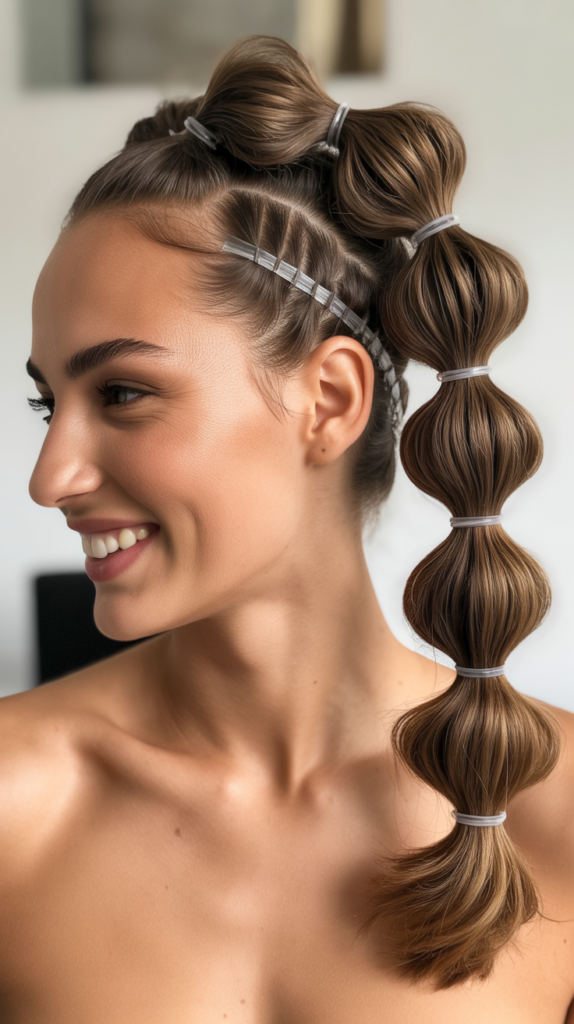
The bubble ponytail brings a playful, modern twist to traditional ponytail styles and works exceptionally well with medium-length hair.
This Instagram-worthy look adds instant dimension and interest while remaining surprisingly simple to create.
Build the foundation ponytail:
- Brush hair into a high, mid, or low ponytail depending on your preference
- Secure tightly with a strong elastic band that won’t slip
- Apply dry shampoo or texturizing spray throughout the length of the ponytail
- Gently tease the ponytail with a brush to create volume and grip for the bubbles
Create the signature bubbles:
- Measure 2-3 inches down from the first elastic and place another clear elastic band
- Gently pull and pancake the section between elastics to create a rounded bubble shape
- Continue adding elastics every 2-3 inches down the length of your ponytail
- Adjust each bubble by pulling hair outward from the center to make them fuller and more dramatic
- Ensure all bubbles are similar in size for a cohesive, intentional appearance
Enhance and secure the bubble effect:
- Use bobby pins between elastics if bubbles feel too loose or start to fall
- Apply edge control around the base of the ponytail for a polished start
- Wrap a small section of hair around the first elastic to conceal it
- Spray each bubble section individually with hairspray for lasting hold
- Pull out a few wispy pieces around your face for a softer overall look
- Consider decorating the elastics with small hair accessories or ribbons for added flair
8. Craft a Textured Twisted Updo
A twisted updo offers the elegance of a formal hairstyle without requiring advanced braiding skills or excessive time.
This sophisticated style works beautifully for medium hair and can be dressed up or down depending on the occasion.
Section and prepare for twisting:
- Apply volumizing mousse to clean, dry hair for better grip and texture
- Divide your hair into three sections: left side, right side, and back
- Clip the back section away temporarily while working on the sides
- Tease each section at the roots to create a foundation of volume
Create the twisted sections:
- Take the left side section and twist it tightly away from your face
- Bring the twisted section toward the back center of your head
- Secure with 2-3 bobby pins placed horizontally for maximum hold
- Repeat the same process with the right side section, twisting and pinning at the center back
- Release the back section and divide it into two equal parts
Assemble the updo:
- Twist each back section loosely and pin them upward, tucking the ends under
- Arrange all twisted sections to create a textured, layered appearance at the back
- Pull small pieces from each twist to add dimension and a slightly undone effect
- Use additional bobby pins wherever the style feels loose or insecure
- Smooth any flyaways at the top and sides with pomade or hairspray on a toothbrush
- Set the entire updo with strong-hold hairspray from all angles
- Add decorative pins, clips, or fresh flowers for special occasions
Conclusion
Mastering hairstyles for medium hair opens up a world of creative possibilities that many people overlook when they’re stuck in a styling rut.
Through this guide on How to Hairstyles for Medium Hair: 8 Easy Steps to Stunning Looks, you’ve discovered that medium-length hair offers incredible versatility, from romantic braided crowns to sleek professional ponytails and effortless beach waves.
Each technique builds upon fundamental skills that become easier with practice, and the beauty of these styles lies in their adaptability to your unique hair texture, personal style, and daily needs.
Remember that the key to any successful hairstyle is proper preparation, the right products for your hair type, and the confidence to experiment until you find what works best for you.
With these eight approaches in your styling repertoire, you’ll never again feel limited by your hair length, and you’ll always have the perfect look ready for whatever your day brings.