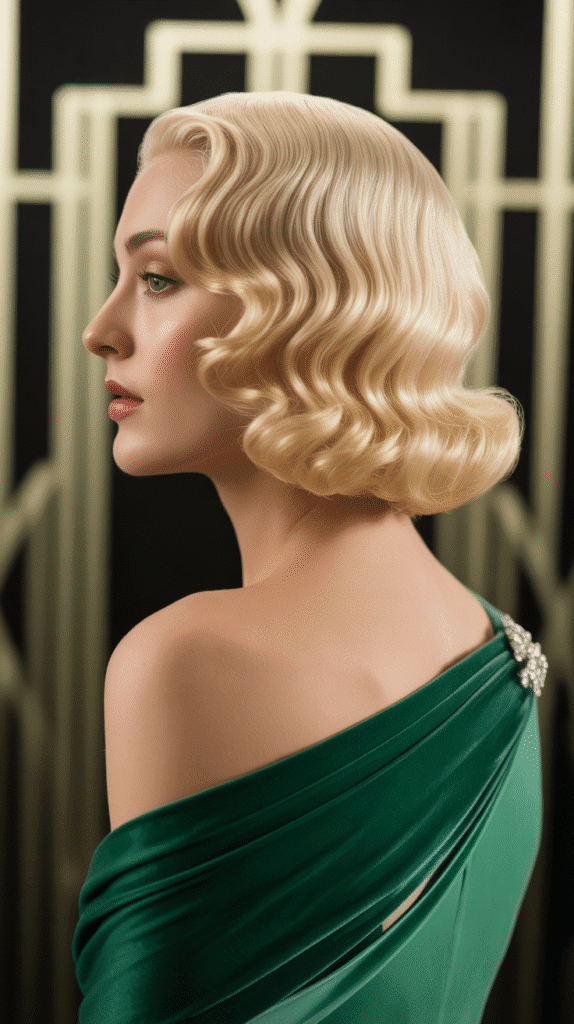
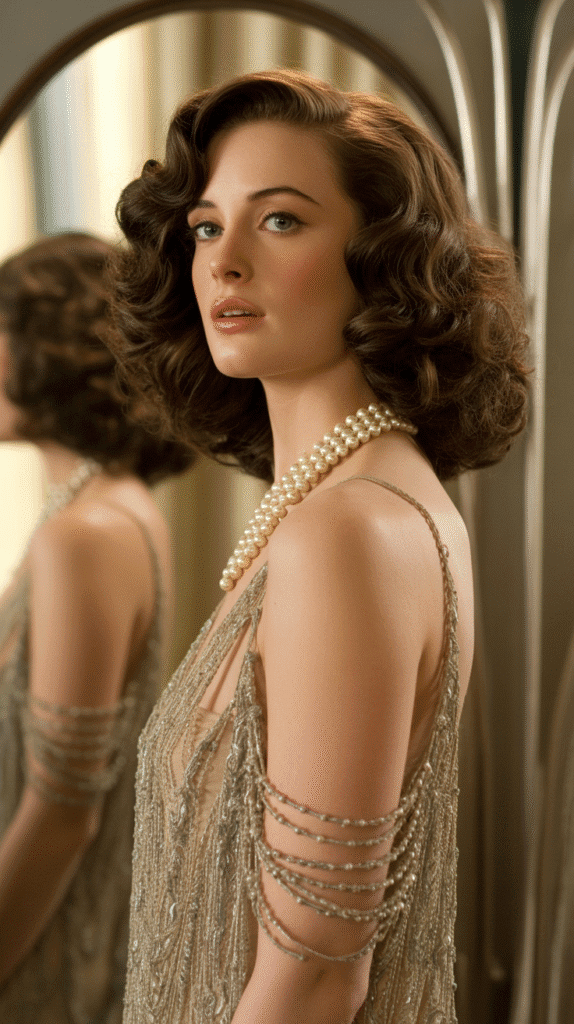
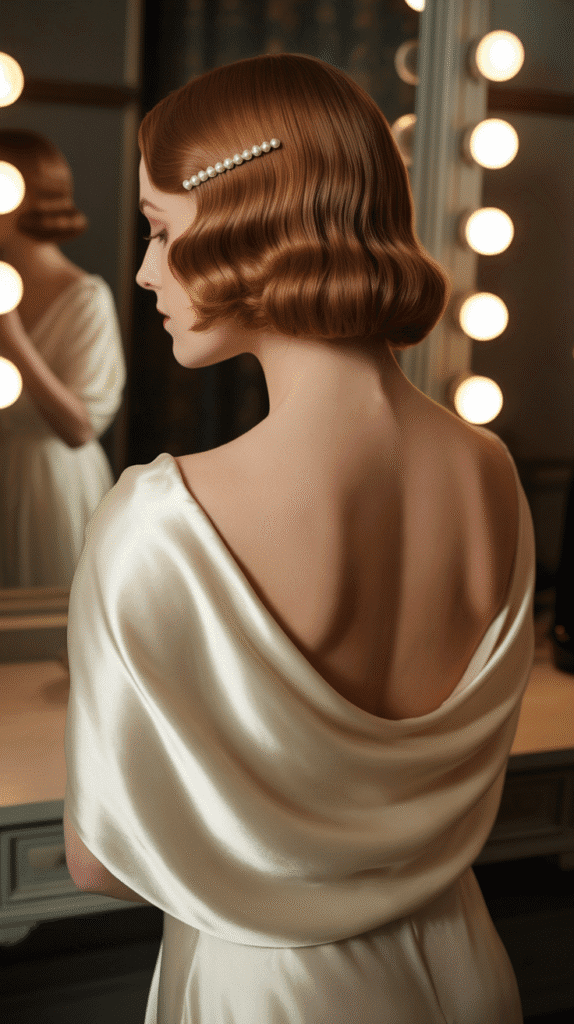
The glamorous era of the 1930s brought us some of the most elegant and timeless hairstyles that continue to captivate fashion enthusiasts today.
If you’ve ever admired the sophisticated waves, intricate pin curls, and vintage elegance worn by Hollywood starlets like Jean Harlow and Greta Garbo, you’re about to discover how surprisingly achievable these iconic looks are for your own long hair.
This comprehensive guide on “27 Easy 1930s Hairstyles for Long Hair Tutorial for Beginners” will walk you through the most beautiful and manageable vintage styles, from the classic finger waves to the romantic victory rolls, each broken down into simple steps that require minimal tools and experience.
Whether you’re preparing for a themed event, a wedding, or simply want to add a touch of old-world charm to your everyday look, these tutorials will transform you into a 1930s beauty icon without the need for a professional stylist.
You’ll learn the fundamental techniques, discover the essential tools, understand the historical context behind each style, and gain the confidence to recreate these stunning looks in the comfort of your own home.
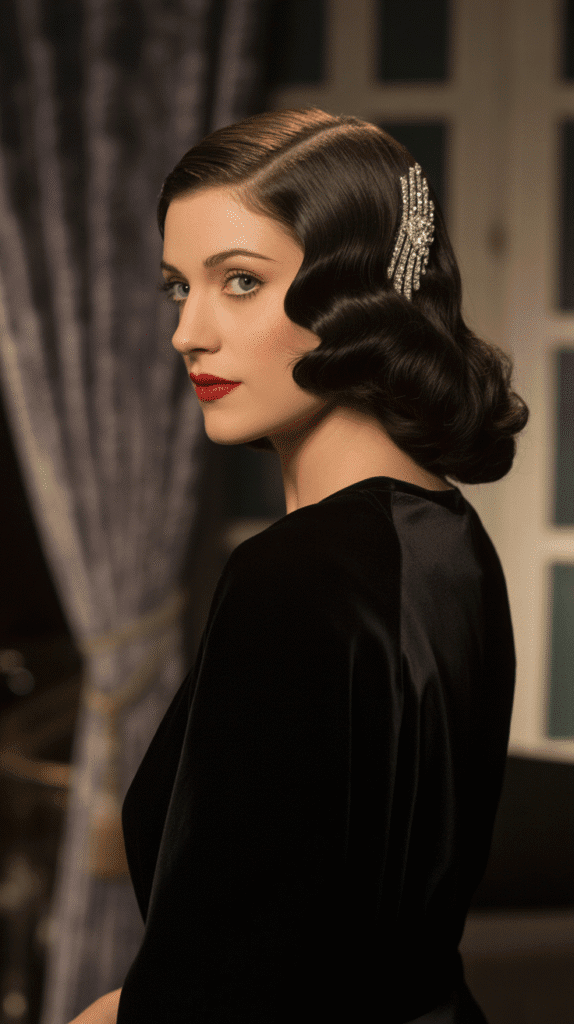
1. Classic Finger Waves
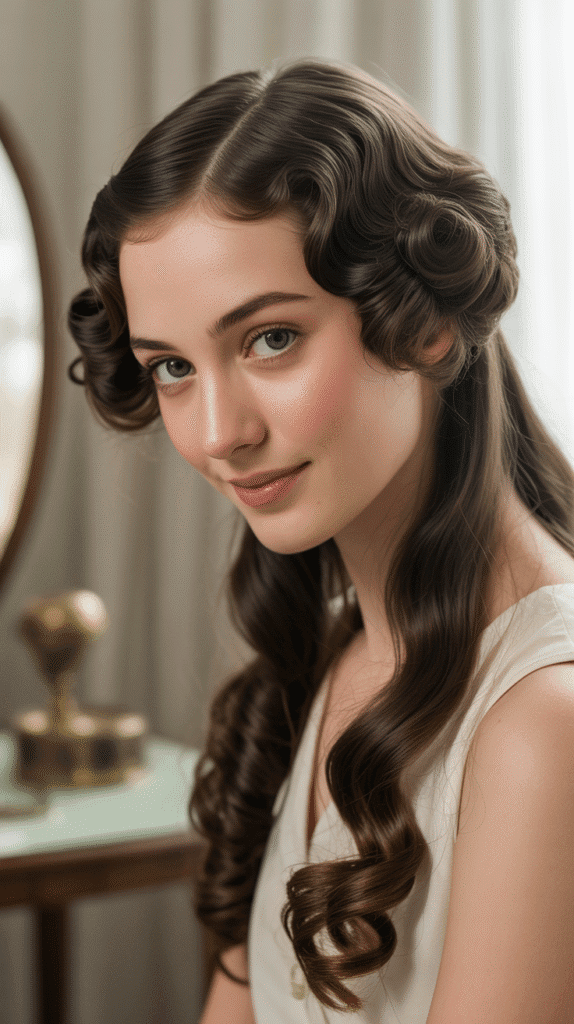
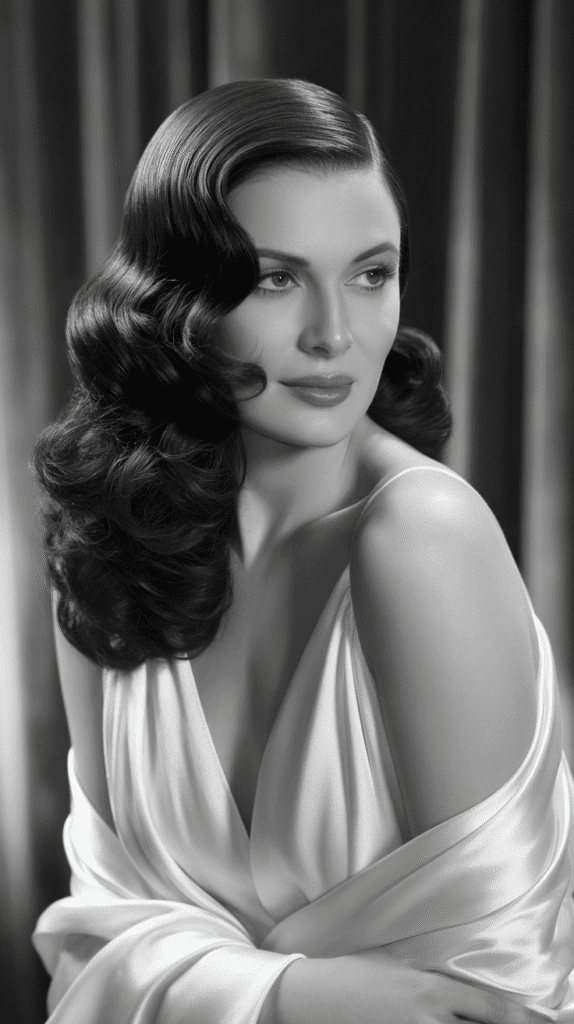
The finger wave stands as the quintessential hairstyle of the 1930s, characterized by its distinctive S-shaped curves that create a rippling effect across the hair.
This technique was born from the Marcel wave but evolved into a more refined, sculpted look that defined the decade’s aesthetic.
Finger waves work exceptionally well on long hair because the length provides more surface area to create dramatic, cascading waves that frame the face beautifully.
Step-by-Step Tutorial:
- Start with clean, damp hair and apply a generous amount of setting lotion or mousse to provide hold.
- Part your hair deeply to one side, as side parts were the preferred style of the 1930s era.
- Take a fine-toothed comb and create the first wave by combing a section of hair forward toward your face.
- Place your index finger flat against your scalp about an inch from the part, creating a ridge.
- Use the comb to push the hair in the opposite direction, forming an S-curve while holding the ridge firmly in place.
- Secure each wave with a metal wave clip or bobby pin to hold the shape as it dries.
- Continue creating alternating waves down the length of your hair, ensuring each wave flows smoothly into the next.
- Allow your hair to air dry completely or sit under a hooded dryer for faster results.
- Once dry, carefully remove the clips and gently brush through with your fingers to soften the waves.
- Finish with a light mist of hairspray to maintain the style throughout the day.
2. Marcel Wave Curls
The Marcel wave technique predates the 1930s but reached its peak popularity during this decade, offering a more voluminous alternative to finger waves.
Named after French hairstylist Marcel Grateau who invented the Marcel iron, this style creates deep, uniform waves that add incredible body and movement to long hair.
Unlike finger waves that are created with combs and pins, Marcel waves are achieved using a curling iron technique that produces more prominent, three-dimensional waves.
Step-by-Step Tutorial:
- Begin with completely dry hair, as Marcel waves are created with heat styling tools.
- Apply a heat protectant spray throughout your hair to prevent damage from high temperatures.
- Divide your hair into 2-inch horizontal sections, starting from the bottom layer.
- Heat a Marcel iron or modern curling iron (1-1.5 inches in diameter) to approximately 350°F.
- Take a small section of hair and clamp the iron near the roots, ensuring the hair is wrapped around the barrel.
- Rotate the iron 180 degrees away from your face, hold for 5-8 seconds, then rotate back.
- Move the iron down about 2 inches and repeat the rotation in the opposite direction to create the wave pattern.
- Continue this alternating rotation pattern down the entire length of the hair section.
- Release the curl and allow it to cool completely before moving to the next section.
- Once all sections are waved, gently brush through with a paddle brush to blend the waves together.
- Pin any unruly sections and set with hairspray for a polished, vintage finish.
3. Low Chignon with Waves
The low chignon represented sophistication and refinement in the 1930s, often paired with soft waves framing the face for a romantic, feminine appearance.
This elegant updo was favored for formal occasions and evening events, as it showcased the neck and shoulders while keeping long hair neatly contained.
The combination of face-framing waves with a sleek, low bun creates a balanced look that’s both practical and breathtakingly beautiful.
Step-by-Step Tutorial:
- Start by creating finger waves or soft curls in the front sections of your hair from the part to just behind your ears.
- Secure these waved sections temporarily with clips while you work on the back.
- Gather the remaining hair at the nape of your neck, smoothing it back with a natural bristle brush.
- Twist the ponytail loosely and wrap it around its base to form a low bun.
- Secure the chignon with bobby pins, tucking in any loose ends for a polished appearance.
- Release the front waved sections and arrange them to frame your face elegantly.
- Use additional bobby pins to secure the waves where they meet the chignon.
- Tuck any remaining length into the bun or allow soft tendrils to escape for a more romantic look.
- Apply hairspray to set the waves and ensure the style lasts throughout the day.
- Add vintage hair accessories like jeweled clips or small feathers for authentic 1930s flair.
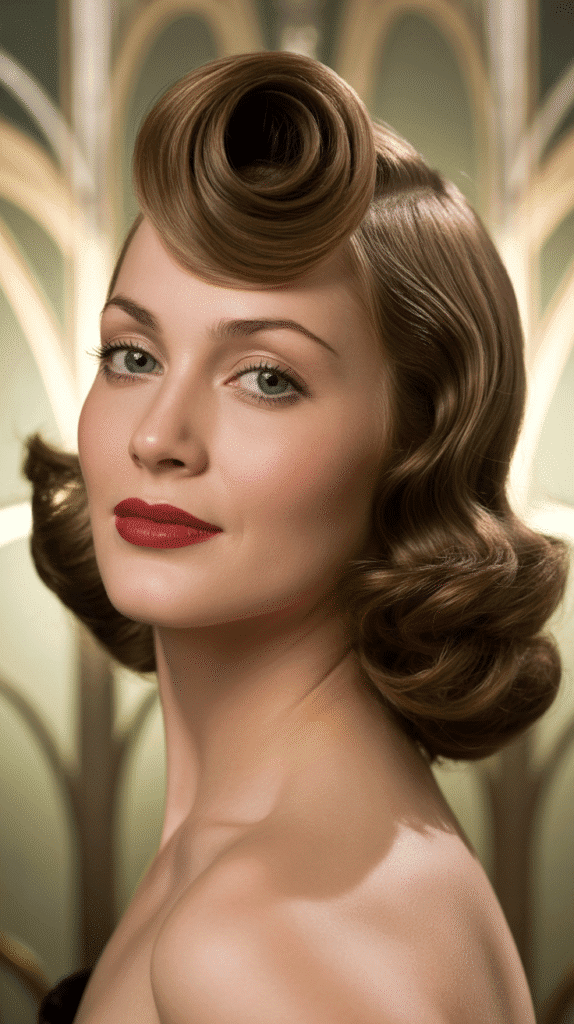
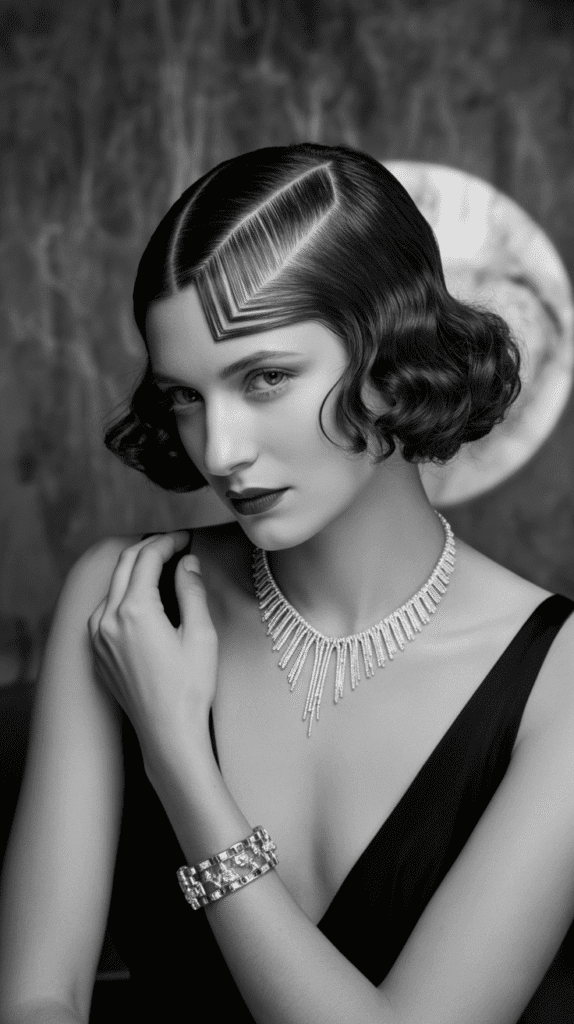
4. Victory Rolls
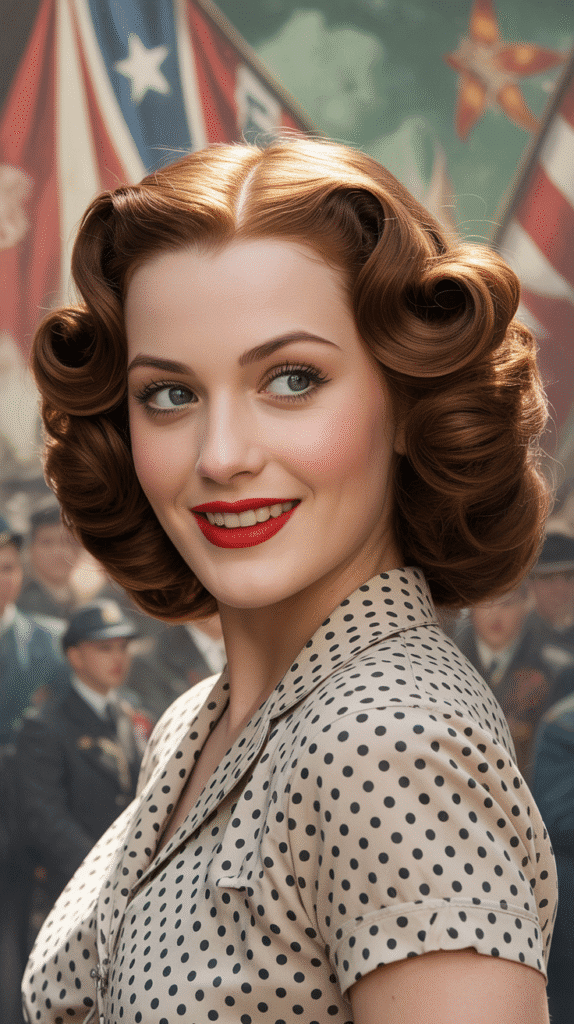
Victory rolls became increasingly popular in the late 1930s and dominated the early 1940s, representing patriotism and feminine strength during wartime.
This iconic hairstyle features rolled sections of hair swept up and away from the face, creating volume and height while maintaining the era’s polished aesthetic.
For long hair, victory rolls can be created in various sizes and positions, allowing for creative interpretation while staying true to the vintage spirit.
Step-by-Step Tutorial:
- Begin with second-day hair or apply dry shampoo to add texture and grip to freshly washed hair.
- Create a deep side part or center part, depending on your preferred style.
- Section off a rectangular portion of hair from your hairline to about 3 inches back on one side.
- Backcomb this section at the roots to create volume and help the roll hold its shape.
- Smooth the top layer of hair with a comb while keeping the backcombed volume underneath.
- Hold the section straight up from your head and begin rolling it backward toward your scalp.
- Continue rolling tightly until the hair forms a tube-like roll sitting on top of your head.
- Secure the roll with bobby pins inserted through the bottom of the roll into your scalp.
- Repeat the process on the opposite side, ensuring both rolls are symmetrical in size and placement.
- Style the remaining length of hair in loose curls, waves, or pull it back into a low bun.
- Set the victory rolls with strong-hold hairspray and add decorative pins if desired.
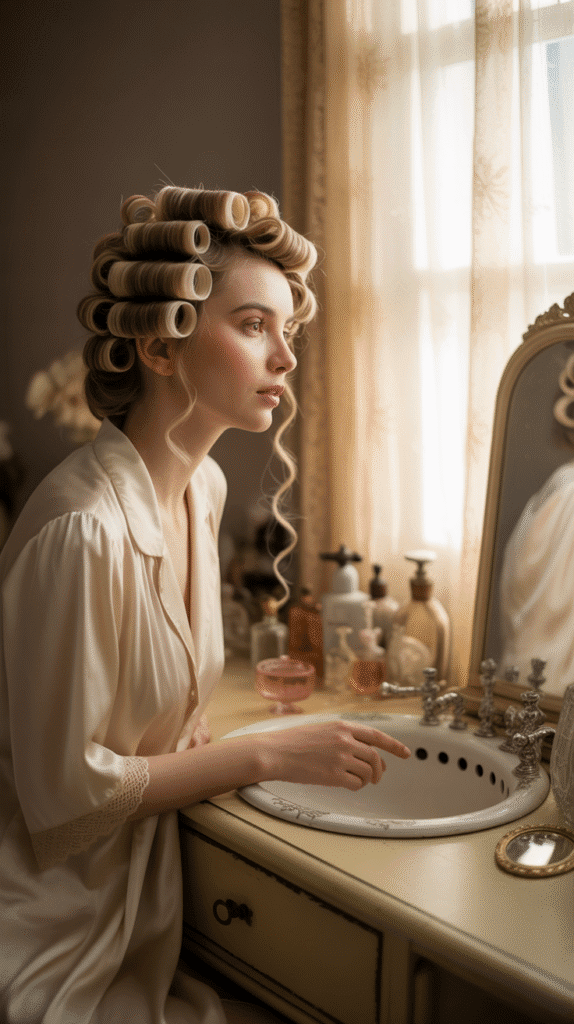
5. Pin Curl Set
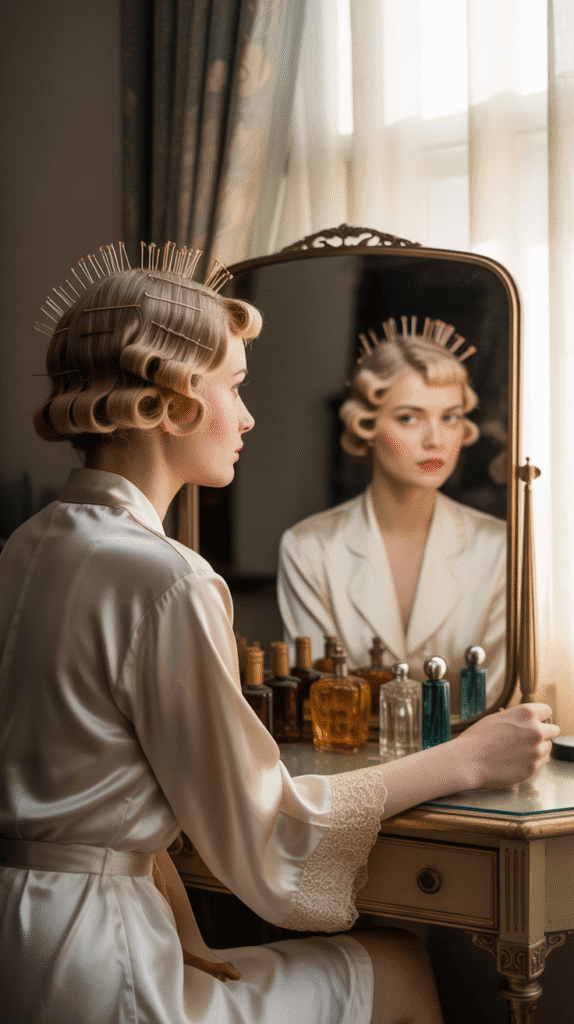
Pin curls were the foundation of most 1930s hairstyles, serving as the primary method for creating curls and waves before modern hot tools.
This versatile technique involves wrapping small sections of damp hair into flat coils and securing them against the scalp to dry.
Long hair benefits tremendously from pin curls as they create uniform, bouncy curls that can be brushed out into various styles or left as defined ringlets for maximum vintage authenticity.
Step-by-Step Tutorial:
- Wash your hair and towel dry until damp but not dripping wet.
- Apply a setting lotion or foam mousse evenly throughout your hair for better hold.
- Part your hair in your desired style and divide it into 1-inch square sections using a rattail comb.
- Take the first section and comb it smooth, then hold the ends between your fingers.
- Wrap the hair around your finger in a circular motion, rolling it toward your scalp.
- Once the curl is formed flat against your head, slide your finger out carefully.
- Secure the pin curl with two bobby pins crossed in an X pattern to hold it firmly.
- Continue creating pin curls in neat rows across your entire head, working from front to back.
- For more volume, roll some curls toward your face and others away to create directional movement.
- Cover your hair with a silk scarf and allow it to air dry completely, preferably overnight.
- Carefully remove all bobby pins and gently separate the curls with your fingers.
- Brush through lightly with a paddle brush or shape individual curls with your fingers for your desired finish.
6. Pageboy Bob Illusion
The pageboy was technically a shorter hairstyle, but women with long hair cleverly created the illusion through strategic tucking and rolling techniques.
This style features hair that appears to end at the jawline or just below, with ends rolled under in a smooth, continuous curve.
The pageboy illusion allowed long-haired women to participate in the fashionable bob trend without sacrificing their length, making it perfect for those who wanted versatility.
Step-by-Step Tutorial:
- Start with clean, dry hair and create soft waves or curls throughout using your preferred method.
- Part your hair on the side in classic 1930s fashion for authentic styling.
- Gather the bottom half of your long hair and roll it under, tucking it up toward the back of your head.
- Secure this rolled section with numerous bobby pins placed horizontally to hold the weight.
- Allow the top layers of hair to fall naturally over the pinned section, concealing your work.
- Use a curling iron to roll the visible ends under, creating the characteristic pageboy curve.
- Ensure the sides are smooth and sleek, using a flat iron or setting gel if necessary.
- The final look should show hair that appears to end at chin or shoulder length with ends rolled under.
- Use a natural bristle brush to smooth any flyaways and blend the layers seamlessly.
- Apply medium-hold hairspray to maintain the style without making it stiff.
- Add a vintage hair accessory on one side for extra 1930s charm.
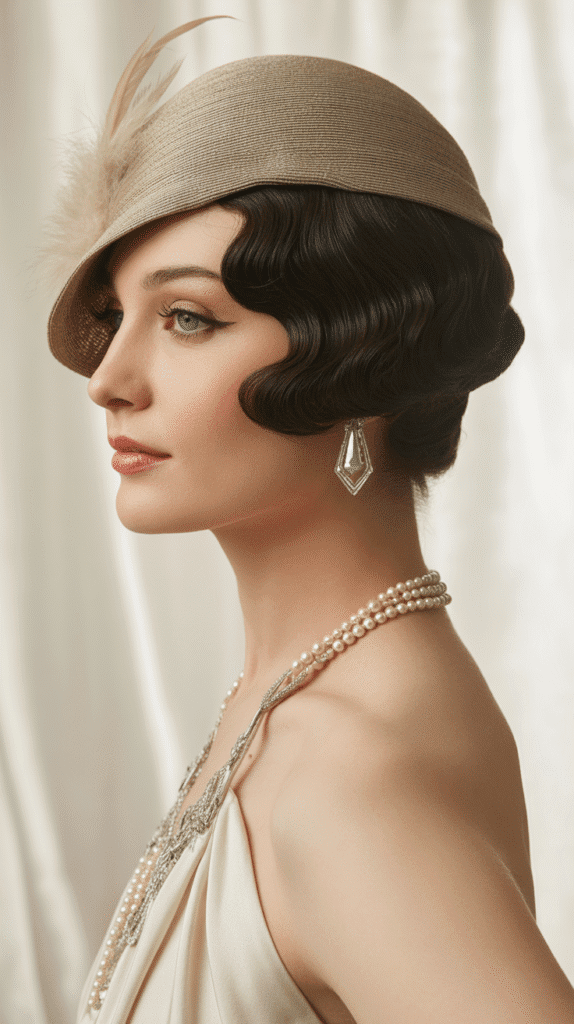
7. Deep Side Part with Peek-a-Boo Waves
The deep side part was a defining characteristic of 1930s hairstyling, creating dramatic asymmetry that emphasized the face’s best features.
When combined with peek-a-boo waves—soft waves that partially cover one eye—this style exudes mystery and Old Hollywood glamour.
This look works exceptionally well for long hair as the weight helps waves fall naturally and sensuously across the face.
Step-by-Step Tutorial:
- Create a deep side part, positioning it approximately 2-3 inches from the center of your head.
- The heavy side should contain about 70% of your hair for maximum dramatic effect.
- Apply setting lotion to damp hair and create large pin curls on the heavy side of the part.
- For the lighter side, create smaller, tighter pin curls for more defined waves.
- Allow the pin curls to dry completely, then remove pins and gently brush through.
- Sweep the heavy side forward, allowing waves to fall across one eye in the iconic peek-a-boo style.
- Pin the lighter side behind your ear with an elegant bobby pin or decorative clip.
- Create additional finger waves on the heavy side if desired for more definition.
- The back length can be left in loose waves, curled, or styled into a low bun.
- Use minimal hairspray on the side-swept section to maintain natural movement.
- Adjust the waves throughout the day to maintain the mysterious, face-framing effect.
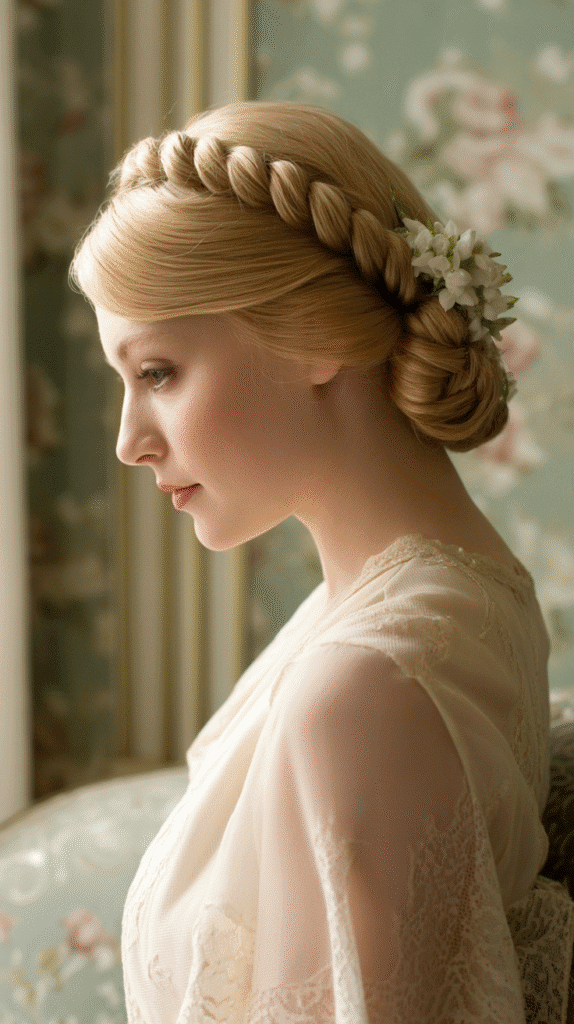
8. Halo Braid with Loose Ends
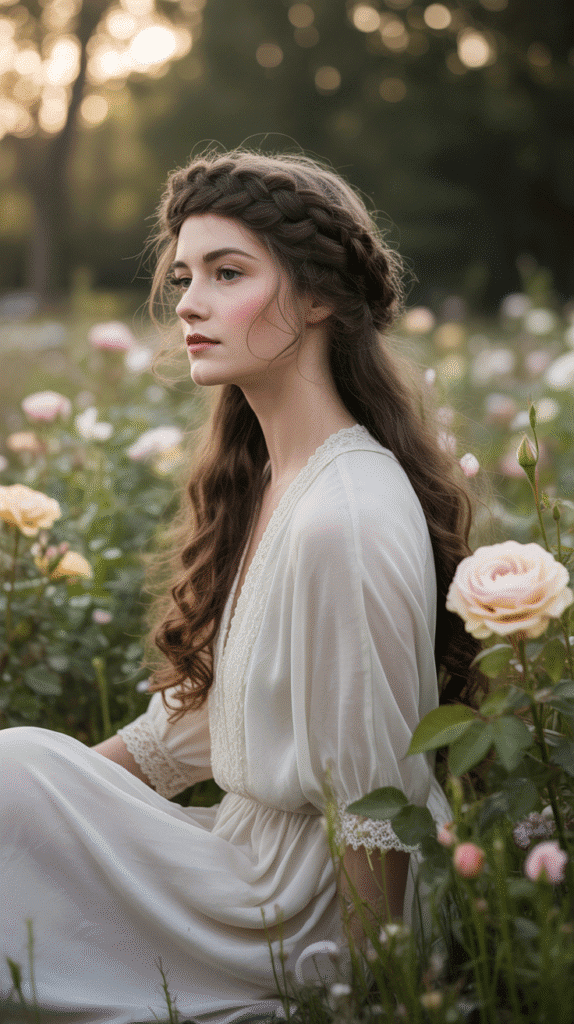
The halo braid, also known as a crown braid, gained popularity in the 1930s as a romantic, ethereal style perfect for daytime wear.
This technique involves braiding the hair around the head like a crown while allowing the length to cascade down in soft waves or curls.
For long hair, this style is particularly striking as the loose ends provide a beautiful contrast to the structured braid, creating a balanced look that’s both practical and feminine.
Step-by-Step Tutorial:
- Begin with slightly textured hair—second-day hair works perfectly for better grip.
- Create a deep side part and separate a 2-inch section of hair from the hairline.
- Begin a Dutch braid (reverse French braid) by crossing sections under rather than over.
- Continue braiding along your hairline, following the curve of your head like a crown.
- Add small sections of hair to the braid as you work your way around your head.
- When you reach the opposite side, continue braiding the remaining length without adding new sections.
- Bring the braid around to meet your starting point, creating a complete halo effect.
- Tuck the end of the braid under the beginning section and secure with bobby pins.
- Allow the remaining long hair to hang freely in waves or curls from the back.
- Gently pull on the edges of the braid to create a fuller, more romantic appearance.
- Curl the loose ends with a curling iron for added vintage authenticity.
- Finish with light hairspray and add small flowers or decorative pins along the braid for special occasions.
9. Barrel Curls

Barrel curls, also called tube curls or sausage curls, were a popular 1930s technique that created uniform, cylindrical curls running vertically down the length of the hair.
Unlike spiral curls, barrel curls are smoother and more structured, contributing to the polished, put-together aesthetic that defined the era.
These curls work beautifully on long hair, creating a cascading effect that’s both sophisticated and playful.
Step-by-Step Tutorial:
- Start with completely dry hair to ensure the curls set properly with heat.
- Apply a heat protectant spray and divide your hair into 1.5-inch vertical sections.
- Heat a curling iron (1-inch barrel) to approximately 350°F for optimal results.
- Take your first section and clamp the iron at the ends of your hair.
- Roll the hair around the barrel vertically, keeping the iron perpendicular to the floor.
- Hold for 8-10 seconds, then release the curl directly into your palm.
- Pin the curl in a coil against your head with a bobby pin to cool completely.
- Continue this process throughout all sections, working from the bottom layer upward.
- Allow all curls to cool for at least 10 minutes before unpinning.
- Once cool, remove pins and gently separate each curl into two or three smaller sections.
- Use your fingers to arrange the barrel curls, keeping them separate for definition.
- Apply a light-hold hairspray, spraying from underneath the curls to maintain their shape.
- For extra authenticity, pin one side back with a jeweled clip while allowing the other to cascade freely.
10. Pompadour Roll
The pompadour roll added height and drama to 1930s hairstyles, featuring a voluminous roll of hair swept up from the forehead.
This style was often combined with curls or waves in the length, creating a sophisticated look that elongated the face and added elegance.
For long hair, the pompadour roll is particularly effective as the length provides ample hair to create an impressive roll while still having plenty left for styling the back.
Step-by-Step Tutorial:
- Section off the front portion of hair from the hairline to about 3-4 inches back.
- Backcomb this section thoroughly at the roots to create a strong foundation for volume.
- Smooth the top layer of hair with a fine-toothed comb while maintaining the teased volume underneath.
- Roll the section backward toward the crown of your head, keeping the roll tight and uniform.
- The roll should sit approximately 2-3 inches above your hairline for authentic 1930s height.
- Secure the pompadour with bobby pins placed horizontally through the base of the roll.
- Add additional pins vertically through the roll to ensure it stays in place all day.
- Style the remaining hair in soft waves, curls, or a low bun to complement the dramatic front.
- Use a strong-hold hairspray on the pompadour to maintain its shape and height.
- For extra security, cross two bobby pins in an X formation at the base of the roll.
- Adjust the front of the roll to ensure it’s smooth and even across your forehead.
11. Twisted Crown Updo
The twisted crown updo combines the elegance of twisted ropes of hair with the sophistication of an updo, creating a regal look perfect for formal 1930s occasions.
This style involves twisting sections of hair and arranging them around the head like a crown, then securing the remaining length in a low bun or chignon.
The technique showcases the beauty of long hair while keeping it completely off the face and neck.
Step-by-Step Tutorial:
- Part your hair down the middle or on the side, depending on your preference.
- Take a 2-inch section from the front hairline on one side and divide it into two equal parts.
- Twist these two sections around each other like a rope, moving toward the back of your head.
- Add small amounts of hair to the twist as you work backward, similar to a French braid technique.
- Secure the twist temporarily with a clip when you reach behind your ear.
- Repeat the twisting process on the opposite side, ensuring both twists are symmetrical.
- Gather the remaining loose hair at the nape of your neck, including the ends of both twists.
- Create a low bun or roll with this hair, tucking all ends neatly inside.
- Secure the bun with multiple bobby pins for a secure, all-day hold.
- Arrange the twists so they frame your face elegantly and meet at the back.
- Add decorative vintage pins, combs, or small flowers where the twists meet for extra glamour.
- Apply hairspray to smooth any flyaways and maintain the polished appearance.
12. S-Wave Bob Fake
The S-wave bob fake allowed women with long hair to achieve the trendy short bob appearance while maintaining their length for versatility.
This style creates the illusion of a chin-length bob with pronounced S-shaped waves, achieved by cleverly pinning the length up and under.
The technique required skill and plenty of bobby pins but resulted in a convincing short hairstyle that could be let down at the end of the day.
Step-by-Step Tutorial:
- Create deep S-waves throughout your hair using the finger wave technique on damp hair.
- Allow the waves to dry completely and set before attempting the bob illusion.
- Once dry, divide your hair horizontally into two sections at ear level.
- The bottom section will be pinned up to create the bob illusion.
- Roll the bottom section upward toward your head, tucking it under the top section.
- Use numerous bobby pins placed horizontally to secure this rolled section against your head.
- The pins should be hidden beneath the top layer of waved hair.
- Arrange the top layer of S-waves to fall naturally over the pinned section.
- The hair should appear to end at chin length with waves flowing continuously.
- Use a curling iron to refine the wave at the apparent “ends” of the bob.
- Smooth the sides with pomade or setting gel for that sleek 1930s finish.
- Set everything with hairspray and add a vintage clip on one side for authenticity.
13. Gibson Tuck
The Gibson Tuck, named after the Gibson Girl era but reimagined for the 1930s, involves tucking the hair up and under to create a sophisticated roll at the nape of the neck.
This style was perfect for long hair, as the length provided enough bulk to create an impressive tuck that appeared both elegant and voluminous.
Combined with soft waves framing the face, the Gibson Tuck embodied the romantic yet refined aesthetic of the decade.
Step-by-Step Tutorial:
- Begin by creating soft waves throughout your hair using pin curls or a curling iron.
- Leave the front sections around your face waved but separate them from the back temporarily.
- Gather all the hair from the back and sides (excluding the front face-framing pieces).
- Hold this gathered hair at the nape of your neck, smoothing it with a natural bristle brush.
- Create a horizontal pocket by pushing your fingers up under the gathered hair from below.
- Tuck the ends of your hair up into this pocket, rolling them under and upward.
- Continue tucking until all the length is secured inside the roll at your nape.
- Secure the Gibson Tuck with multiple bobby pins inserted vertically through the roll.
- Release the front waved sections and arrange them to softly frame your face.
- Pin these front sections where they meet the Gibson Tuck for seamless integration.
- Adjust the size and shape of the tuck for your desired level of volume.
- Finish with hairspray and add a decorative comb or pin at the base of the tuck.
14. Overnight Set with Rag Curls
Rag curls were a gentle, heat-free method used throughout the 1930s to create soft, bouncy curls perfect for long hair.
This technique involves rolling damp hair around strips of fabric and sleeping in them overnight, resulting in natural-looking curls without damage.
Women of the era relied heavily on this method as it was economical, safe for hair health, and produced beautiful results that could be styled into various 1930s looks.
Step-by-Step Tutorial:
- Cut an old cotton t-shirt or fabric into strips approximately 6 inches long and 1 inch wide.
- Wash your hair and towel dry until damp, then apply a setting lotion throughout.
- Part your hair in your desired style and divide it into 1-inch sections using a rattail comb.
- Take the first section and place a fabric strip at the ends of your hair.
- Roll the hair around the fabric strip toward your scalp, keeping the tension even.
- Once rolled to the roots, tie the ends of the fabric strip together to secure the curl.
- Continue this process throughout your entire head, working in organized rows for consistency.
- Cover your hair with a silk scarf or bonnet to protect the curls while sleeping.
- Sleep on the rag curls overnight, ensuring they remain undisturbed for proper setting.
- In the morning, carefully untie each fabric strip and gently unroll the curls.
- Separate each curl into smaller sections with your fingers for a fuller appearance.
- Style the curls into your desired 1930s look—waves, pin-up style, or loose and flowing.
- Apply a light mist of hairspray to hold the style without making it stiff.
15. Asymmetrical Wave Pattern

The asymmetrical wave pattern epitomized 1930s innovation, featuring waves that deliberately differed in size and depth from one side of the head to the other.
This style added visual interest and sophistication, with deeper, more pronounced waves on one side and softer, looser waves on the other.
Long hair provided the perfect canvas for this artistic styling approach, allowing the asymmetry to be displayed dramatically.
Step-by-Step Tutorial:
- Start with damp hair and create a deep side part at approximately 3 inches from center.
- Apply setting lotion to the heavy side where you’ll create more dramatic waves.
- On the heavy side, create tight, defined finger waves with narrow spacing between ridges.
- Use wave clips to hold these deeper waves in place with more pressure for definition.
- On the lighter side, create softer, wider waves with more space between ridges.
- Use fewer clips on the lighter side to allow for more natural, relaxed waves.
- The contrast between the two sides should be noticeable but still harmonious.
- Allow both sides to dry completely, keeping the clips in place for maximum hold.
- Remove all clips carefully and avoid brushing through the defined side too much.
- The deeper-waved side should frame one side of your face dramatically.
- Style the back length in soft curls that complement both wave patterns.
- Use hairspray on the tighter-waved side to maintain its definition throughout the day.
- Add a vintage brooch or clip on the softer side to emphasize the asymmetry.
16. Rolled Updo with Face-Framing Curls
This style combined the practicality of an updo with the femininity of face-framing curls, representing the perfect balance in 1930s hairstyling.
The bulk of the long hair is rolled and secured at the back or crown, while strategic sections are left out and curled to soften the face.
This versatile style worked equally well for daytime activities and evening events, making it a favorite among women of the era.
Step-by-Step Tutorial:
- Section off 2-inch wide strips of hair from your hairline on both sides of your face.
- Clip these sections away temporarily—they’ll become your face-framing curls.
- Gather the remaining hair and smooth it back toward the crown of your head.
- Begin rolling this gathered hair forward toward your forehead, creating a large horizontal roll.
- The roll should sit at the crown of your head, parallel to your hairline.
- Secure the roll with bobby pins placed vertically through its base into your scalp.
- Tuck any excess length into the roll or create a small bun at the base for added volume.
- Release the front sections you set aside earlier and divide each into 2-3 smaller sections.
- Curl these sections with a small-barrel curling iron, rolling away from your face.
- Allow the curls to cool in your palm before releasing them.
- Arrange the face-framing curls to fall naturally around your cheeks and temples.
- Pin one or two curls strategically if needed, but keep most flowing freely.
- Apply hairspray to the rolled section for hold while keeping the curls soft and bouncy.
17. Waterfall Waves
Waterfall waves create a cascading effect where waves appear to fall continuously down the length of long hair like flowing water.
This romantic 1930s style requires patience and precision but produces stunning results that showcase the full beauty of long hair.
The technique involves creating consistent, flowing waves from root to tip, with each wave seamlessly transitioning into the next for an uninterrupted pattern.
Step-by-Step Tutorial:
- Begin with clean, damp hair and apply a generous amount of setting lotion for hold.
- Create a side part and section your hair into 2-inch vertical strips from front to back.
- Starting with the section closest to your face, create a finger wave at the hairline.
- As you move down the same section, continue the wave pattern without interruption.
- Each subsequent wave should flow naturally from the one above it, creating a waterfall effect.
- Use wave clips to secure each curve as you work down the length of the section.
- Complete the entire section from roots to ends before moving to the next vertical strip.
- Continue this process across your entire head, maintaining consistent wave depth and spacing.
- Ensure that waves on adjacent sections align horizontally for a cohesive look.
- Allow your hair to dry completely with all clips in place—this may take several hours.
- Once dry, carefully remove all clips, working from bottom to top.
- Gently separate the waves with your fingers to create fullness without destroying the pattern.
- The final result should show waves that flow continuously from your scalp to your ends.
- Apply a light hairspray to maintain the waterfall effect while keeping natural movement.
18. Pin-Up Curls with Bandana
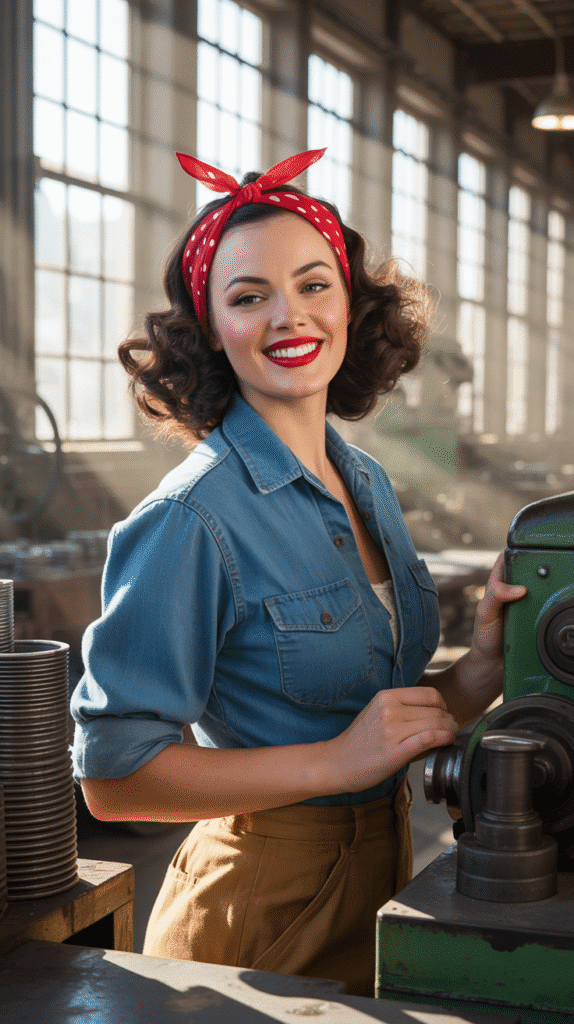
This style bridges the late 1930s with early 1940s fashion, incorporating the practical bandana with glamorous pin-up curls.
The bandana serves both functional and aesthetic purposes—keeping front hair off the face during work while adding a pop of color and pattern.
The remaining long hair is styled in voluminous curls that bounce and move, creating a playful yet sophisticated look.
Step-by-Step Tutorial:
- Create large, bouncy curls throughout your hair using a medium-barrel curling iron or hot rollers.
- Section off the front 3-4 inches of hair from ear to ear across your forehead.
- Brush this front section back smoothly, applying pomade or gel for sleekness.
- Fold a vintage-style bandana into a 2-3 inch wide strip.
- Position the bandana across your hairline, wrapping it around your head like a headband.
- Tie the bandana at the top of your head, creating a knot or bow for decorative effect.
- Tuck the front section of hair under and behind the bandana to keep it secure.
- Allow the curls in the back to fall freely, showcasing their volume and bounce.
- Use your fingers to separate and arrange the curls for maximum fullness.
- Consider pinning one or two curls forward over your shoulder for pin-up style.
- The contrast between the smooth, bandana-covered front and bouncy curls creates visual interest.
- Apply hairspray to the curls while scrunching gently to maintain their shape.
- Choose bandana colors and patterns that complement your outfit for authentic 1930s coordination.
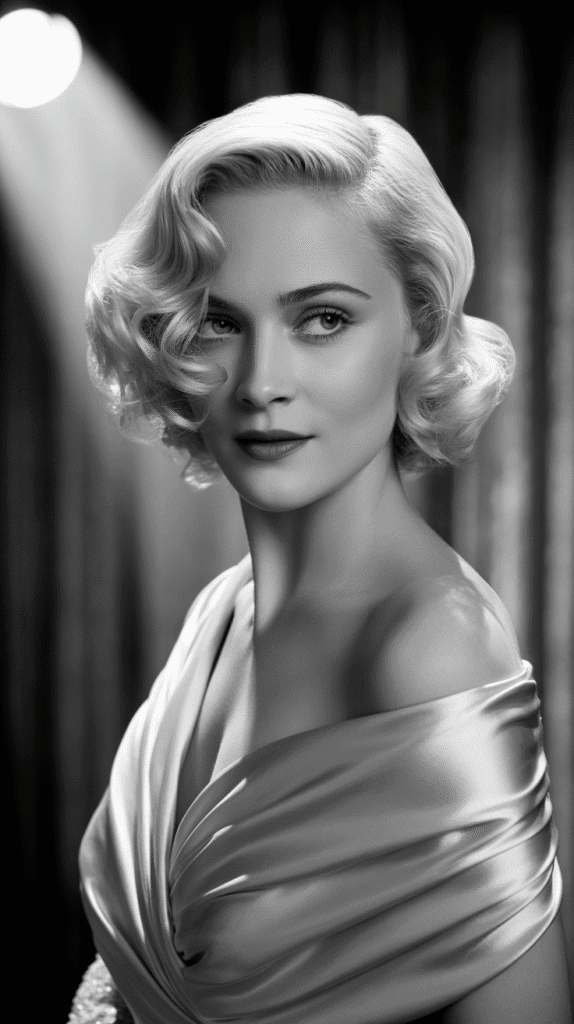
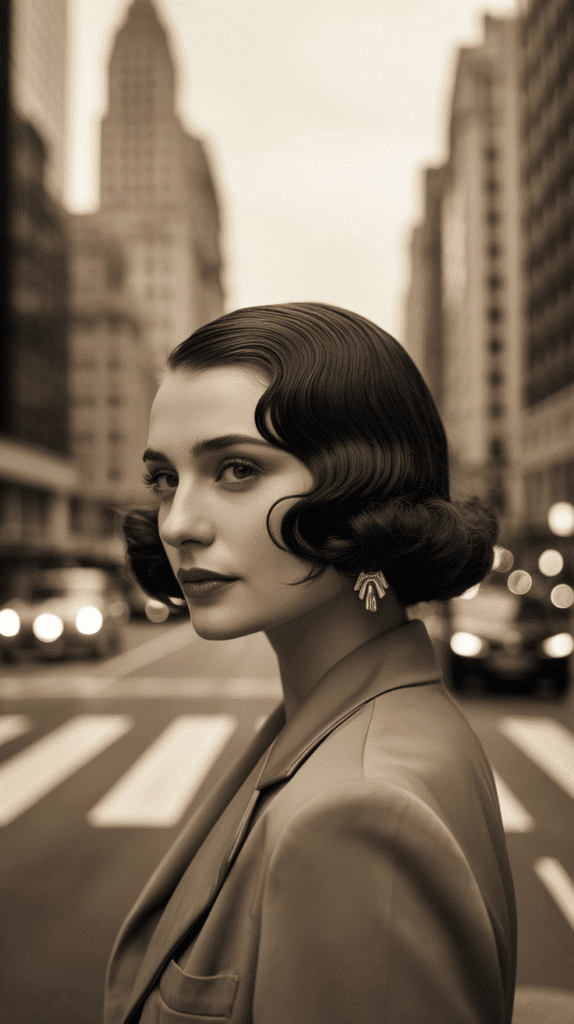
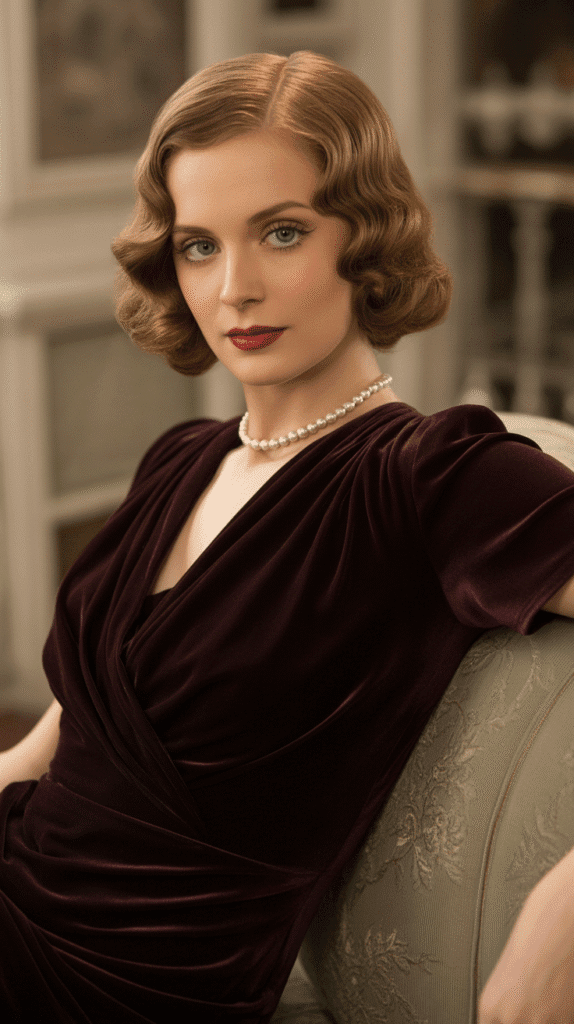
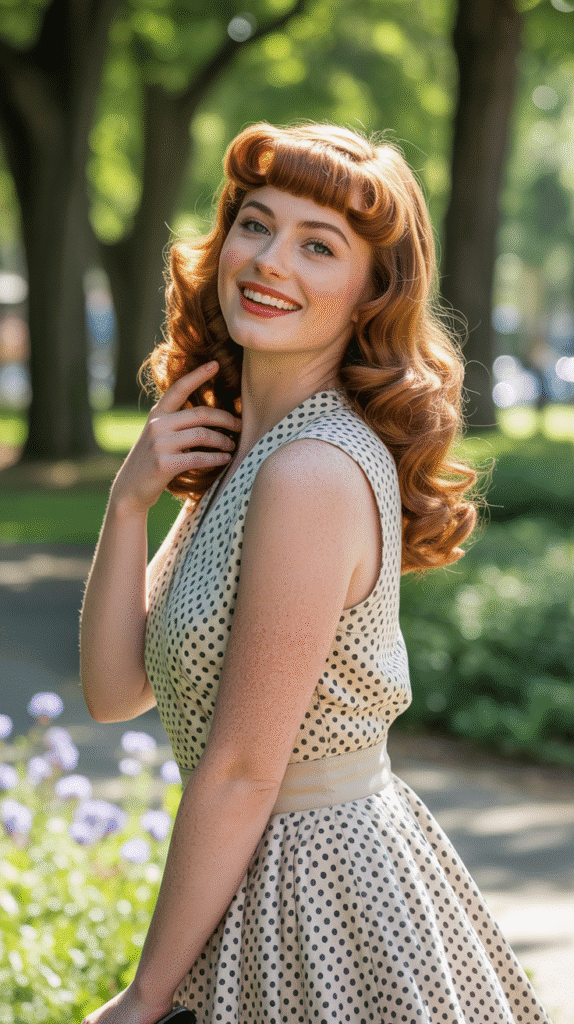
19. Classic Hollywood Waves
Hollywood waves represent the pinnacle of 1930s glamour, featuring large, glossy waves that create an undulating pattern down long hair.
This style was worn by every major film star of the era and remains one of the most iconic vintage looks.
The waves are larger and looser than finger waves but more structured than natural beach waves, creating a perfect balance of sophistication and sensuality.
Step-by-Step Tutorial:
- Start with clean, dry hair and apply a heat protectant throughout.
- Create a deep side part for maximum vintage authenticity.
- Heat a 1.5-inch curling iron to 375°F for optimal wave formation.
- Section hair into 2-inch horizontal layers, starting from the bottom.
- Take a section and clamp the iron at the roots, wrapping hair around the barrel.
- Hold for 10 seconds, then move down 2 inches and wrap in the opposite direction.
- Continue alternating the wrap direction every 2 inches down the section.
- Pin each freshly curled section into a flat coil against your head to cool.
- Complete all sections, ensuring consistent size and direction changes for uniform waves.
- Allow all curls to cool completely for at least 15 minutes before unpinning.
- Once cool, brush through all curls with a paddle brush in long, sweeping strokes.
- The brushing will blend the curls into smooth, flowing waves.
- Use your fingers to enhance the S-shape of the waves
- Apply a shine serum or light oil to create the glossy, luminous finish characteristic of Hollywood waves.
- Set the style with a flexible-hold hairspray to maintain movement and natural bounce.
20. Double Roll Victory Style
The double roll victory style features two parallel rolls running along the sides of the head, creating symmetrical volume and height.
This bold look exemplified the confidence and strength of women in the late 1930s and became even more popular during the war years.
For long hair, this style offers the advantage of creating impressive rolls while still having length to style in the back, providing multiple styling options.
Step-by-Step Tutorial:
- Part your hair down the center from forehead to crown for perfect symmetry.
- Section off a 3-inch wide strip along your hairline on each side of the part.
- These sections should extend from your forehead to just behind your ears.
- Backcomb each section heavily at the roots to create a strong foundation for the rolls.
- Take the right section and smooth only the top layer while keeping the backcombed volume.
- Roll this section backward toward your scalp, keeping it tight and uniform.
- The roll should sit approximately 2 inches above your ear, running parallel to your part.
- Secure with bobby pins inserted horizontally through the base of the roll.
- Repeat the exact process on the left side, ensuring both rolls are identical in size and height.
- Use a measuring tape if necessary to achieve perfect symmetry between the two rolls.
- Style the remaining back hair in soft curls, waves, or a low ponytail.
- Both rolls should frame your face and meet at the crown of your head.
- Apply strong-hold hairspray to maintain the rolls’ shape throughout the day.
- Add matching decorative pins on each roll for extra vintage flair.
21. Faux Bob with Curls
The faux bob with curls created the illusion of a curly bob hairstyle while preserving long hair length.
This technique involved pinning the length up and under while leaving the surface hair in bouncy curls that ended at chin or shoulder length.
The style was perfect for women who wanted to experiment with the fashionable short bob trend without committing to cutting their long hair.
Step-by-Step Tutorial:
- Create uniform curls throughout your hair using a 1-inch curling iron or hot rollers.
- Allow all curls to cool completely before beginning to style.
- Divide your hair horizontally at the level where you want the “bob” to end (typically chin to shoulder).
- The bottom section contains the length that will be hidden to create the bob illusion.
- Roll the bottom section upward and inward, tucking it securely against your head.
- Use multiple bobby pins placed horizontally to anchor this rolled section firmly.
- Ensure the pins are hidden well beneath the top layer of curls.
- The top section of curls should fall naturally over the pinned area, concealing it completely.
- Arrange the curls to create the appearance of a complete, curly bob hairstyle.
- Check all angles in a mirror to ensure no pins or tucked hair are visible.
- Use a fine-toothed comb to lift and separate the curls for added volume.
- The style should appear as if your hair naturally ends in bouncy curls at the desired length.
- Set with hairspray and adjust individual curls for the most flattering frame around your face.
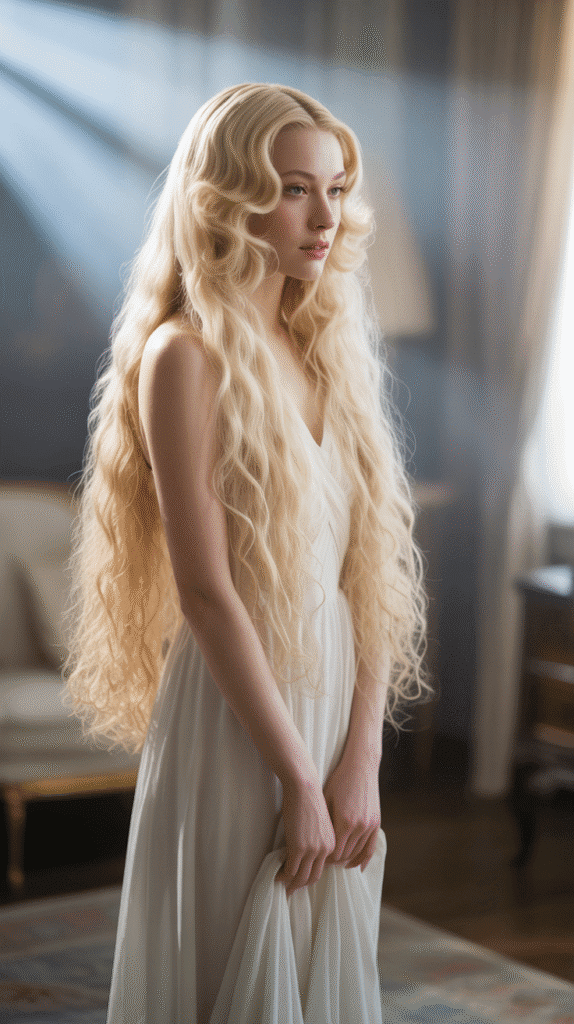
22. Grecian-Inspired Waves
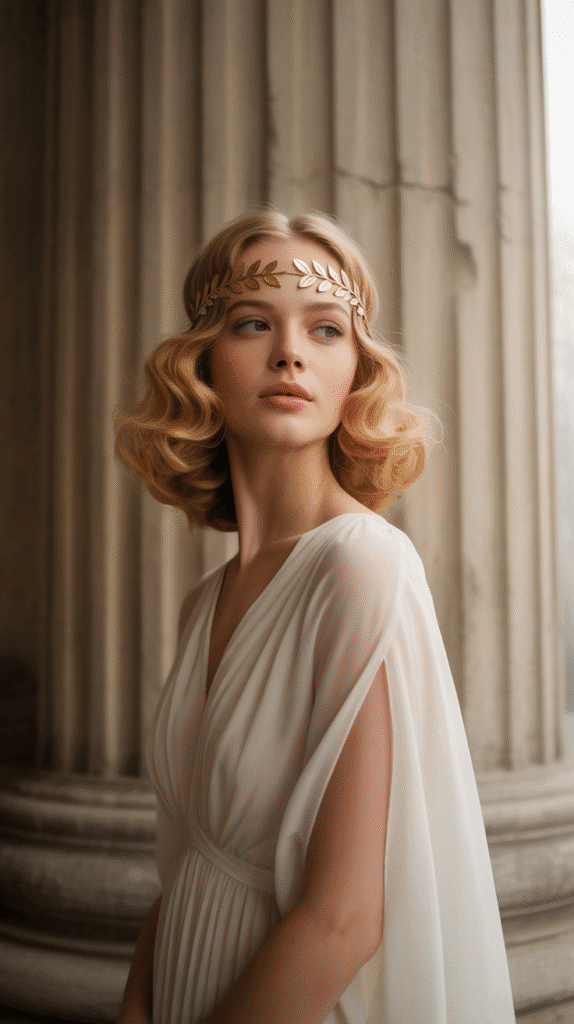
The Grecian-inspired waves brought classical beauty to 1930s hairstyling, featuring soft, romantic waves that evoked ancient Greek statuary.
This style incorporated waves that flowed naturally rather than being sharply defined, often accompanied by decorative elements like headbands or laurel-inspired accessories.
Long hair was ideal for this look as the length allowed waves to cascade gracefully, creating an ethereal, goddess-like appearance.
Step-by-Step Tutorial:
- Begin with damp hair and apply a lightweight mousse for soft hold.
- Create loose pin curls throughout your hair, making them larger than standard pin curls.
- The curls should be approximately 2 inches in diameter for softer waves.
- Allow the pin curls to dry completely, either air drying or using a diffuser.
- Once dry, remove all pins and gently brush through with a paddle brush.
- Use your fingers to rake through the waves, creating a soft, flowing pattern.
- The waves should appear natural and loose rather than structured and defined.
- Create a center part or pull the front hair back with a decorative headband.
- Consider using a gold or silver headband across your forehead for authentic Grecian style.
- Allow the waves to flow freely down your back and over your shoulders.
- Weave small decorative elements like pearls or gold thread through sections if desired.
- The overall effect should be romantic, soft, and reminiscent of classical artwork.
- Use minimal hairspray to keep the waves looking natural and touchable.
23. Side-Swept Elegance
Side-swept elegance was a staple of 1930s formal hairstyling, featuring all the hair dramatically swept to one side of the head and secured there.
This asymmetrical style showcased the neck and one shoulder while creating volume and interest on the opposite side.
Long hair was particularly stunning in this style as the weight and length created a luxurious cascade that embodied Old Hollywood glamour.
Step-by-Step Tutorial:
- Create soft waves or curls throughout your hair using your preferred method.
- Create a deep side part, positioning it about 3 inches from the center.
- Brush all hair from the lighter side across to the heavy side, sweeping it dramatically.
- Use bobby pins to secure the hair just behind your ear on the heavy side.
- The hair should drape over one shoulder, leaving the other side of your neck exposed.
- Continue pinning the hair along the curve behind your ear for secure hold.
- Arrange the swept hair so it falls in an elegant cascade over your shoulder.
- Use your fingers to enhance the waves and create volume in the swept section.
- The lighter side should be completely smooth and sleek against your head.
- Apply pomade or gel to the smooth side to eliminate any flyaways.
- Consider adding a decorative comb, brooch, or flowers where the hair is pinned.
- The pinned area becomes a focal point for vintage hair accessories.
- Finish with hairspray, focusing on the smooth side while keeping the swept side touchable.
- This style pairs beautifully with gowns that have asymmetrical necklines.
24. Rope Braid Low Bun
The rope braid low bun combined textured braiding with the classic elegance of a low chignon, creating a sophisticated style perfect for formal 1930s occasions.
The rope braid technique involves twisting two sections of hair around each other, creating a textured, dimensional braid that adds visual interest.
When formed into a low bun, this style keeps long hair neatly contained while showcasing intricate detail.
Step-by-Step Tutorial:
- Brush your hair smooth and gather it into a low ponytail at the nape of your neck.
- Secure the ponytail with an elastic band that matches your hair color.
- Divide the ponytail into two equal sections for the rope braid.
- Twist the right section clockwise several times until it begins to coil on itself.
- Twist the left section clockwise as well, keeping the same tension as the right.
- Now twist the two sections around each other counter-clockwise to create the rope effect.
- Continue twisting the sections together down the entire length of your ponytail.
- Secure the end with a small elastic band to prevent the rope braid from unraveling.
- Coil the rope braid around the base of the ponytail in a circular motion.
- Tuck the end of the braid underneath the bun and secure with bobby pins.
- Insert pins around the perimeter of the bun to ensure it’s firmly attached.
- The rope texture should be visible on the surface of the bun, adding dimension.
- Apply hairspray and add a decorative hairnet for an authentic 1930s touch.
- Consider adorning the bun with vintage pins, combs, or small flowers.
25. Zigzag Part with Waves
The zigzag part added a playful, artistic element to 1930s hairstyling, creating visual interest at the crown while complementing waves throughout the length.
This technique involved creating a part that zigzagged across the head rather than following a straight line, demonstrating the era’s experimentation with geometric patterns.
Combined with soft waves in long hair, this style balanced whimsy with sophistication.
Step-by-Step Tutorial:
- Start with dry hair and use a rattail comb for precision parting.
- Begin at your hairline and create a diagonal part about 1 inch long toward one side.
- Change direction and create another 1-inch diagonal part angling the opposite way.
- Continue alternating diagonal sections to create a zigzag pattern toward your crown.
- The zigzag should extend about 3-4 inches back from your hairline.
- After the zigzag ends, continue with a straight part or let the hair fall naturally.
- Apply setting lotion and create waves throughout the remaining hair using pin curls.
- The waves should flow from the zigzag part down through the length of your hair.
- Once the waves are set and dry, remove pins and gently brush through.
- The zigzag part creates a unique geometric element that contrasts with soft waves.
- Use a small amount of gel or pomade along the zigzag lines to define them clearly.
- This style works best when the zigzag is kept sharp and visible against the waved hair.
- Apply hairspray to maintain both the part definition and the wave pattern.
- Consider adding small rhinestones or decorative pins along the zigzag for evening events.
26. Rolled Bangs with Long Curls
Rolled bangs became increasingly popular in the late 1930s, featuring the front hair rolled upward into a tube-like shape while the remaining long hair fell in curls or waves.
This style created height at the forehead and offered a youthful, energetic appearance. The contrast between the structured rolled bangs and flowing curls made this a versatile style suitable for both daytime and evening wear.
Step-by-Step Tutorial:
- Section off the front 2-3 inches of hair from ear to ear across your forehead.
- Clip the remaining hair away to work on it separately.
- Backcomb the bang section at the roots to create volume and help the roll hold.
- Smooth the top layer of the bang section while maintaining the backcombed volume underneath.
- Roll the bang section backward toward your crown, creating a tube shape.
- The roll should sit approximately 1-2 inches above your forehead, creating visible height.
- Secure the rolled bangs with bobby pins inserted horizontally through the base.
- Add additional pins through the top of the roll if needed for extra security.
- Release the back section and create curls using a curling iron or hot rollers.
- Curl sizes can vary from tight ringlets to loose waves depending on your preference.
- Allow the curls to cool completely before styling them.
- Arrange the curls to flow naturally from the rolled bangs down your back and shoulders.
- The contrast between the smooth roll and bouncy curls creates the signature look.
- Set everything with hairspray and add a decorative pin on one side of the roll.
27. Crown Braids with Flowing Waves
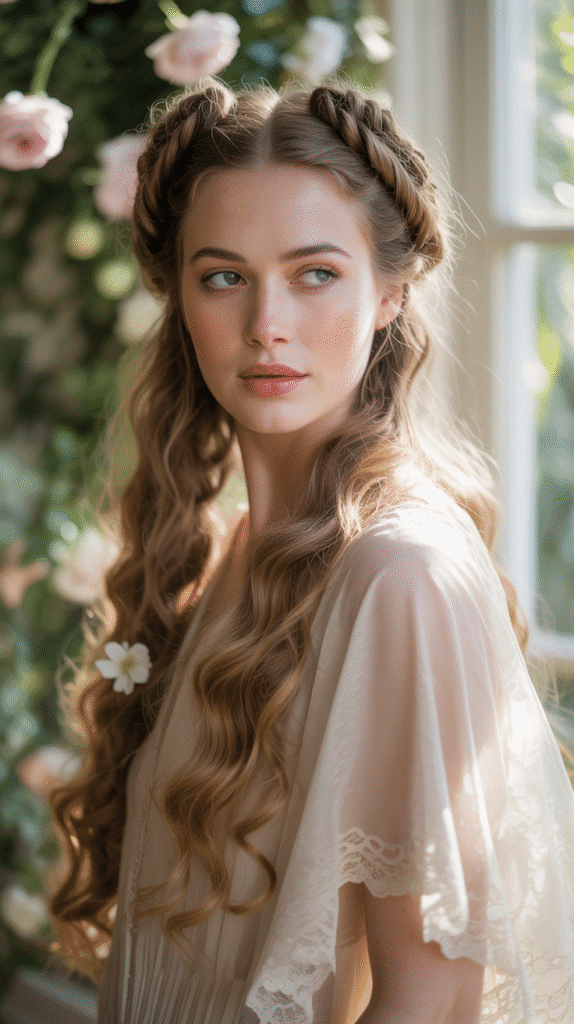
Crown braids with flowing waves combined the structure of braiding with the romance of loose waves, creating a style that was both practical and beautiful.
The braids formed a crown around the head, keeping hair off the face while allowing the length to flow freely in soft waves.
This style was perfect for long hair, as it showcased the length while providing the security of an updo element.
Step-by-Step Tutorial:
- Create waves throughout your hair using your preferred method and allow them to set.
- Part your hair down the center from forehead to crown.
- Section off a 2-inch strip along each side of the part from forehead to behind your ears.
- Begin a regular three-strand braid on the right side, starting at the hairline.
- Braid along the hairline toward the back, keeping the braid close to your head.
- When you reach behind your ear, continue braiding without adding new hair.
- Repeat the braiding process on the left side, creating a matching braid.
- Bring both braids to meet at the back center of your head.
- Cross the braids over each other and secure them with bobby pins.
- Tuck the ends of the braids under themselves for a seamless finish.
- Allow the remaining hair to flow freely in waves down your back.
- The crown braids frame your face while the waves showcase your hair’s length.
- Gently pull on the edges of the braids to make them appear fuller and more romantic.
- Finish with light hairspray and add small flowers or pins along the braids for special occasions.
Essential Tools for 1930s Hairstyling
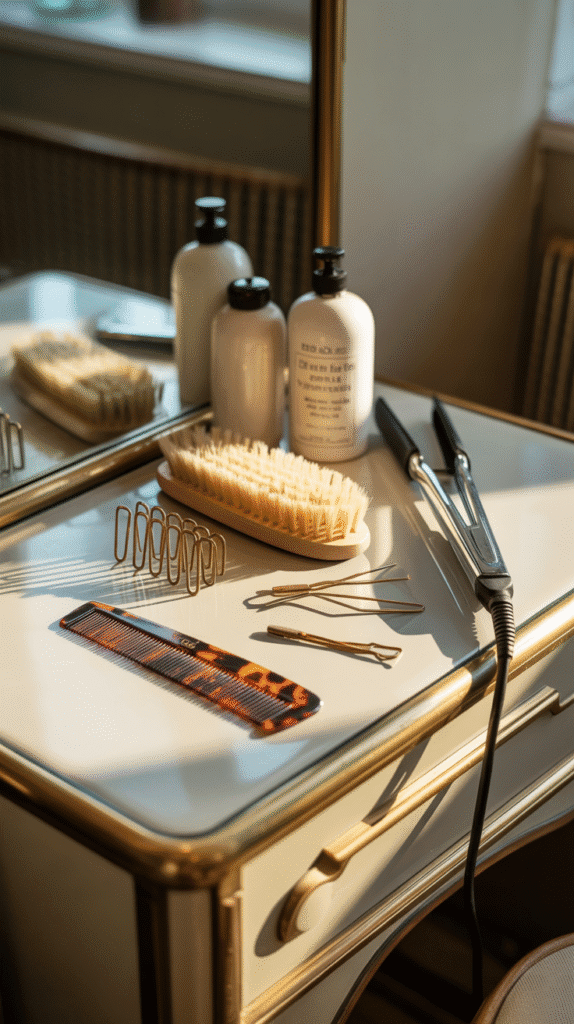
To successfully recreate authentic 1930s hairstyles with long hair, having the right tools makes all the difference between frustration and success.
Must-Have Tools:
- Wave clips or setting clips: These metal clips hold waves in place while hair dries and are essential for finger waves and Marcel waves.
- Rattail comb: The pointed end helps create precise parts while the fine teeth are perfect for smoothing sections.
- Bobby pins: Stock up on plenty of bobby pins in your hair color for securing rolls, tucks, and updos invisibly.
- Setting lotion or mousse: Modern alternatives to the pomades used in the 1930s, these products provide hold without heaviness.
- Curling iron (multiple sizes): A 1-inch barrel for tight curls and a 1.5-inch for larger waves gives you versatility.
- Natural bristle brush: This type of brush smooths hair without creating static, perfect for brushing out vintage curls.
- Heat protectant spray: Essential for protecting your hair when using hot tools to recreate these styles.
- Strong-hold hairspray: Necessary for maintaining intricate styles throughout the day without making hair stiff.
- Decorative accessories: Vintage-inspired clips, combs, flowers, and headbands add authentic finishing touches.
Tips for Maintaining 1930s Hairstyles
Once you’ve invested time in creating a beautiful 1930s hairstyle, proper maintenance ensures it lasts throughout the day or evening.
- Sleep on a silk pillowcase to reduce friction that can disturb waves and curls overnight.
- Use a silk or satin scarf to wrap your hairstyle before bed, protecting the structure while you sleep.
- Touch up with a curling iron in the morning to refresh any curls that may have loosened.
- Carry bobby pins and a small comb for quick fixes when you’re away from home.
- Apply hairspray strategically throughout the day, focusing on areas that tend to fall first.
- Avoid touching your hair excessively, as natural oils from your hands can cause styles to lose their shape.
- Refresh finger waves by misting with water and re-clipping for 10-15 minutes.
- Use dry shampoo at the roots if your hair becomes oily, as many 1930s styles work better on second-day hair.
- Store decorative accessories properly to prevent damage and keep them looking vintage-perfect.
- Learn your hair’s holding pattern to understand which styles work best with your hair type and texture.
Conclusion
Mastering “27 Easy 1930s Hairstyles for Long Hair Tutorial for Beginners” opens up a world of timeless elegance and vintage glamour that transcends decades.
These carefully curated tutorials demonstrate that recreating the sophisticated beauty of the 1930s is entirely achievable with patience, practice, and the right techniques.
From the sculptural artistry of finger waves to the romantic softness of Grecian-inspired waves, each style offers a unique way to celebrate your long hair while honoring a transformative era in fashion history.
The beauty of these hairstyles lies not only in their visual appeal but also in their versatility—whether you’re attending a themed event, planning a vintage wedding, or simply want to infuse your everyday look with classic Hollywood charm, these tutorials provide the foundation for endless creative expression.
Remember that even the most experienced hairstylists started as beginners, and with each attempt, your skills will improve and your confidence will grow. The 1930s taught us that true beauty comes from attention to detail, patience in craft, and the courage to embrace elegance.
As you embark on your vintage hairstyling journey, embrace the process, enjoy the transformation, and let these timeless styles remind you that some things never go out of fashion—they simply wait to be rediscovered by a new generation of beauty enthusiasts who appreciate the art of classic glamour.