
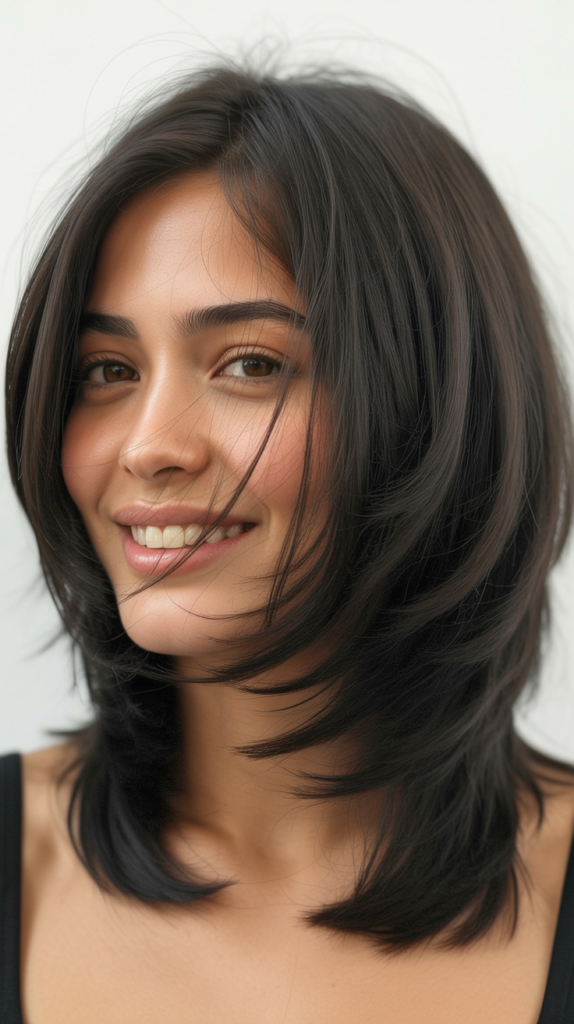
If you’ve been blessed with thick wavy hair, you already know it’s both a gift and a challenge.
The volume is enviable, the texture is gorgeous, but styling can feel like wrestling with a beautiful beast every morning.
What if I told you that your thick waves don’t need to be tamed—they need to be celebrated? This comprehensive guide to 27 Stunning Hairstyles for Thick Wavy Hair That Look Effortless will transform how you see your hair.
We’re diving deep into cuts, styles, and techniques that work with your natural texture instead of against it.
From beachy layers that enhance your waves to elegant updos that showcase your volume, you’ll discover hairstyles that look like you spent hours in the salon but actually take minutes to achieve.
Whether you’re heading to the office, a wedding, or just running errands, these styles prove that thick wavy hair is your secret weapon for looking effortlessly chic.
Get ready to fall in love with your hair all over again and finally understand why people pay good money to get the texture you were born with.
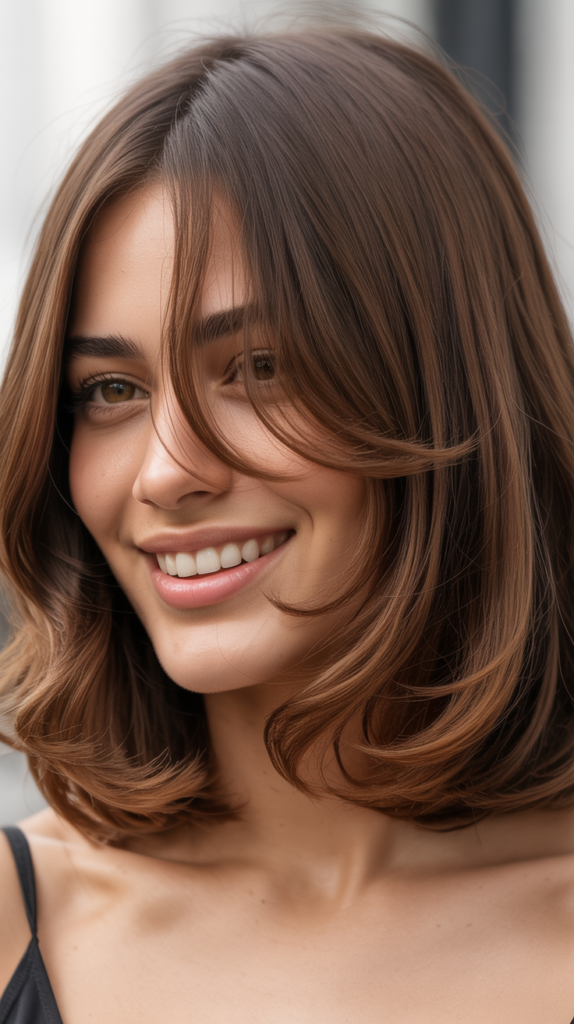
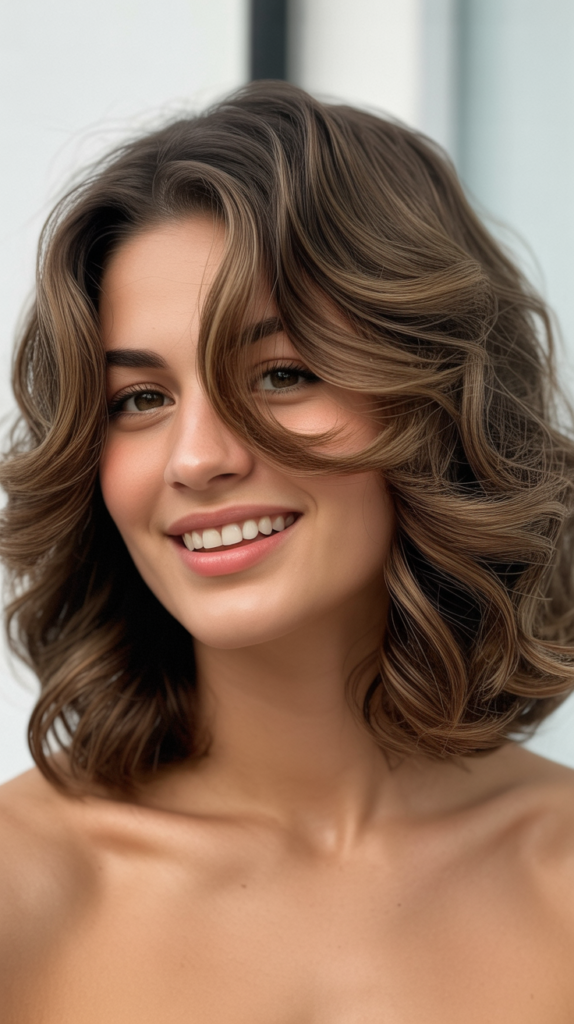
1. Long Layered Waves with Face-Framing Pieces
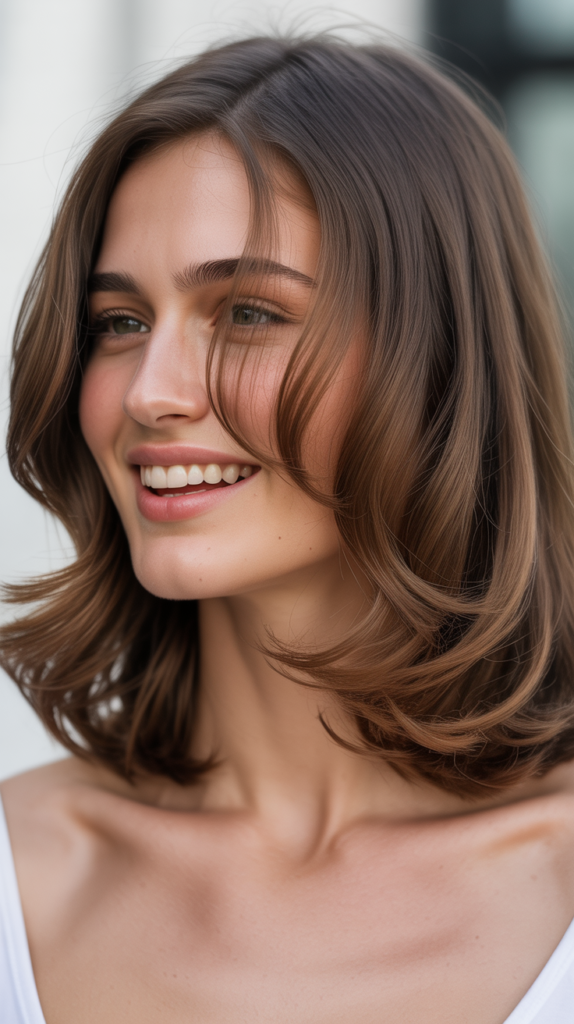
Long layers are the foundation of effortless styling for thick wavy hair because they remove bulk without sacrificing length.
Face-framing pieces add dimension and draw attention to your best features while keeping the overall look soft and romantic.
Why This Works for Thick Wavy Hair
- Layers distribute weight throughout your hair, preventing the dreaded triangle shape that happens when thick hair is cut blunt.
- The strategic removal of bulk allows your natural wave pattern to form more defined spirals rather than becoming a shapeless mass.
- Face-framing layers create movement around your face, softening angular features and adding a flattering frame.
- This cut works beautifully with air-drying, meaning you can literally wash and go most days.
Styling Tips
- Apply a lightweight mousse to damp hair, focusing on mid-lengths to ends.
- Scrunch gently while air-drying or use a diffuser on low heat to enhance wave definition.
- Once completely dry, run a tiny amount of hair oil through the ends to add shine and reduce any frizz.
- Sleep with hair in a loose braid or pineapple to maintain waves overnight.
2. The Modern Shag Cut
The shag cut has made a massive comeback, and it’s particularly stunning on thick wavy hair. This heavily layered style creates incredible texture and movement while significantly reducing styling time.
The Magic of the Shag
- Multiple short layers throughout create natural volume at the crown without needing teasing or backcombing.
- The choppy, piece-y texture disguises any frizz as intentional style rather than a hair disaster.
- Shags work at virtually any length, from shoulder-grazing to long, making them incredibly versatile.
- This cut is particularly forgiving as it grows out, meaning fewer trips to the salon.
How to Style Your Shag
- Work a texturizing spray through damp hair for enhanced piece-y definition.
- Rough-dry with your hands, scrunching as you go, or use a diffuser while tipping your head in different directions.
- Once dry, use your fingers to separate layers and create more texture.
- A light hold hairspray will keep the style in place without making it crunchy or stiff.
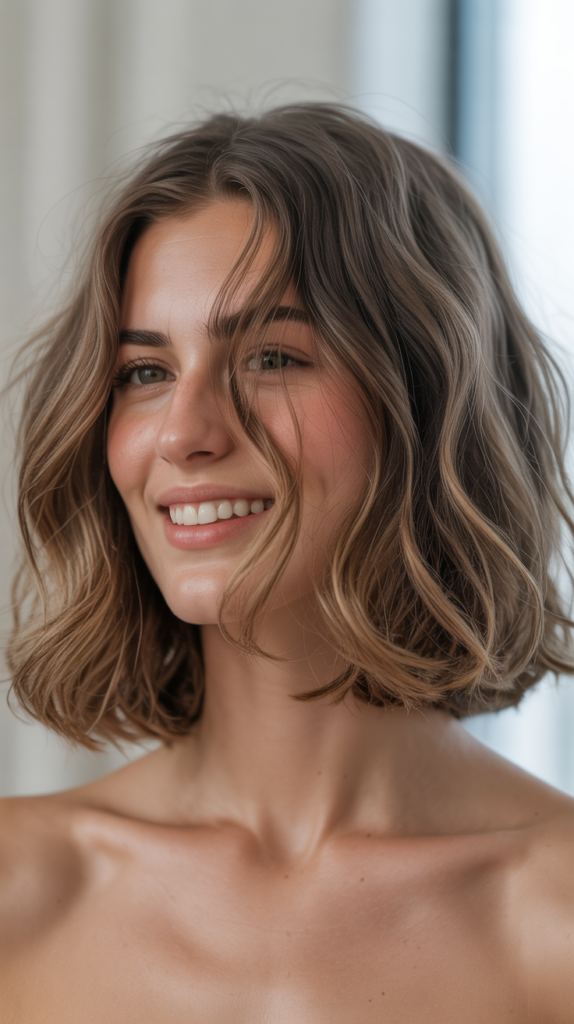
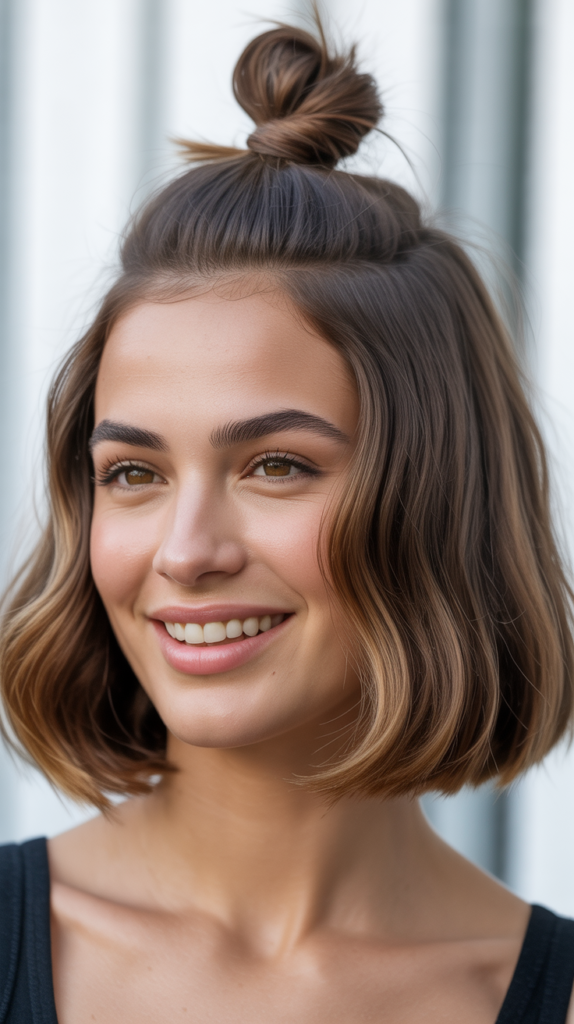
3. Shoulder-Length Bob with Soft Waves
A shoulder-length bob is the sweet spot for thick wavy hair—long enough to tie back when needed but short enough to feel fresh and modern.
The soft waves add femininity and movement to what could otherwise be a heavy style.
Why Bobs Work Beautifully
- Removing length automatically reduces weight, which allows waves to spring up more freely and with better definition.
- Shoulder-length is universally flattering and works for virtually every face shape when customized with the right layers.
- This length is professional enough for corporate environments while still being stylish and contemporary.
- Maintenance is minimal compared to longer styles, with trims needed every 8-10 weeks instead of 6-8.
Creating Perfect Bob Waves
- Apply a curl-enhancing cream to towel-dried hair, distributing evenly from roots to ends.
- Part hair to your preferred side and let it air-dry about 80% of the way.
- Use a large-barrel curling wand on random sections to enhance natural waves, curling away from your face.
- Finish with a flexible hold hairspray and gently shake out curls with your fingers for a lived-in look.
4. Beachy Waves with Sea Salt Spray
Beachy waves are the ultimate effortless style because they’re meant to look undone. For thick wavy hair, this style is practically built into your DNA—you just need to know how to bring it out.
Achieving the Beach Hair Look
- Sea salt spray is your best friend for creating that textured, just-got-back-from-the-ocean appearance.
- The salt in the spray actually enhances your natural wave pattern by adding grip and texture to each strand.
- This style works equally well on day-old hair, making it perfect for those mornings when you hit snooze one too many times.
- Beachy waves look intentionally imperfect, so any frizz or flyaways just add to the authentic vibe.
Step-by-Step Beach Wave Method
- Start with damp (not soaking wet) hair and spray sea salt spray generously throughout.
- Scrunch sections of hair upward toward your scalp to encourage wave formation.
- Let hair air-dry completely or use a diffuser on the cool setting to speed up the process.
- Once dry, rough up the roots with your fingers for added volume and shake your head to loosen waves.
- Apply a small amount of texturizing paste to ends for additional definition and hold.
5. Half-Up Half-Down with Volume
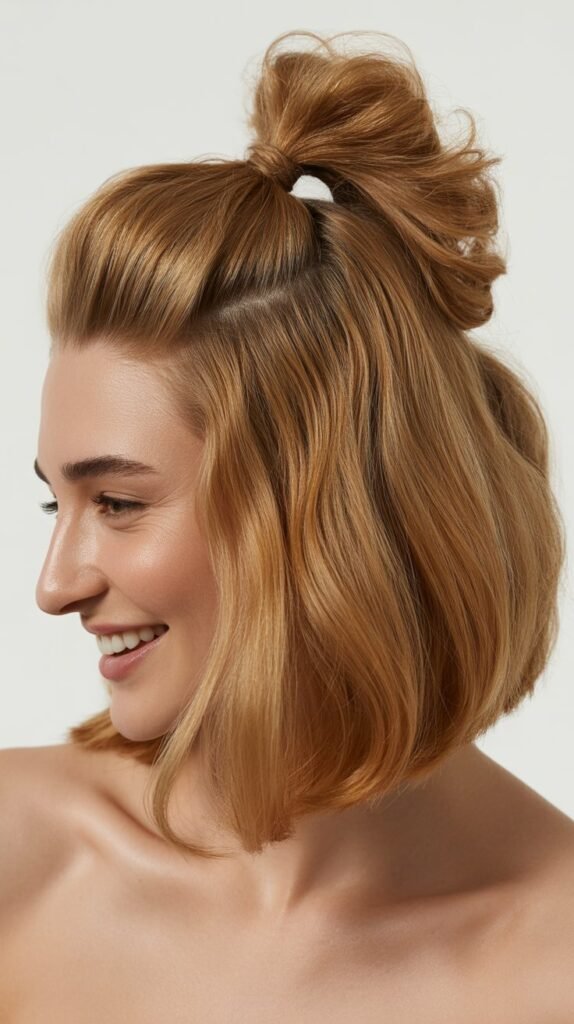
The half-up half-down style is classic for good reason—it keeps hair out of your face while showcasing your length and volume. For thick wavy hair, this style is both practical and incredibly flattering.
Why This Style Never Goes Out of Fashion
- Pulling the top section back highlights your facial features while the bottom section shows off your gorgeous waves.
- This style works for virtually any occasion, from casual brunch to formal weddings, depending on how you accessorize.
- The volume at the crown creates a lifted, youthful appearance that’s universally flattering.
- It’s one of the fastest styles to create, taking literally three minutes once you get the hang of it.
Creating the Perfect Half-Up
- Tease the crown section gently with a fine-tooth comb to create a lifted base.
- Gather hair from temple to temple, about an inch or two back from your hairline.
- Secure with bobby pins in an X formation for a grip that lasts all day, or use a clear elastic for a more casual look.
- Pull out a few face-framing pieces and gently tug at the crown section to create more volume.
- Curl the bottom section loosely with a large-barrel iron if you want more defined waves.
6. Deep Side Part with Voluminous Waves
A deep side part is one of the simplest ways to instantly elevate your look and add drama to thick wavy hair. The asymmetry creates visual interest and showcases your volume beautifully.
The Power of the Side Part
- A deep side part creates an instantly more polished and sophisticated appearance compared to a center part.
- The larger section of hair naturally has more volume, which balances facial features and creates a glamorous vibe.
- This parting style works exceptionally well with thick hair because you have enough volume to make the style impactful.
- Side parts are particularly flattering for oval, round, and heart-shaped faces.
Styling Your Side Part
- Create your part while hair is still damp for better hold and direction.
- Apply volumizing mousse to the roots on the larger side of the part.
- Blow-dry the roots on the larger side in the opposite direction of how you want them to lay, then flip them back over for maximum lift.
- Use a large round brush to smooth and direct hair as you dry.
- Set the part and volume with a blast of cool air from your dryer, then finish with light hairspray.
7. Messy Bun with Wispy Pieces
The messy bun is the go-to style when you need to look put-together in under two minutes. For thick wavy hair, this style actually benefits from your natural texture and volume.
Why Messy Buns Work
- Thick wavy hair creates a fuller, more substantial bun without needing padding or teasing.
- The natural texture means your bun won’t look too polished or severe—it’ll have that perfect lived-in vibe.
- Wispy pieces around your face soften the look and prevent the style from appearing too tight or harsh.
- This is one of the best second-day or third-day hairstyles because slightly dirty hair holds better.
Creating the Effortless Messy Bun
- Flip your head upside down and gather hair into a high ponytail without brushing it smooth.
- Twist the ponytail loosely and wrap it around the base, securing with bobby pins as you go.
- Pull out face-framing pieces intentionally, and gently tug at the bun to loosen it and create more volume.
- Use your fingers to rough up the texture and pull out a few additional wispy pieces for that perfectly imperfect finish.
- A light texturizing spray will help hold the style while maintaining the casual, effortless appearance.
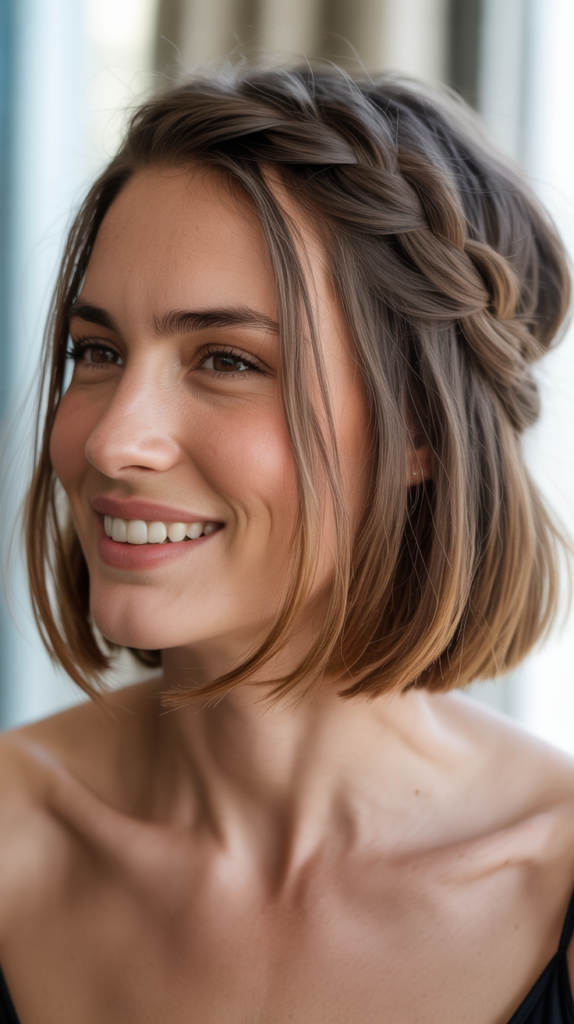
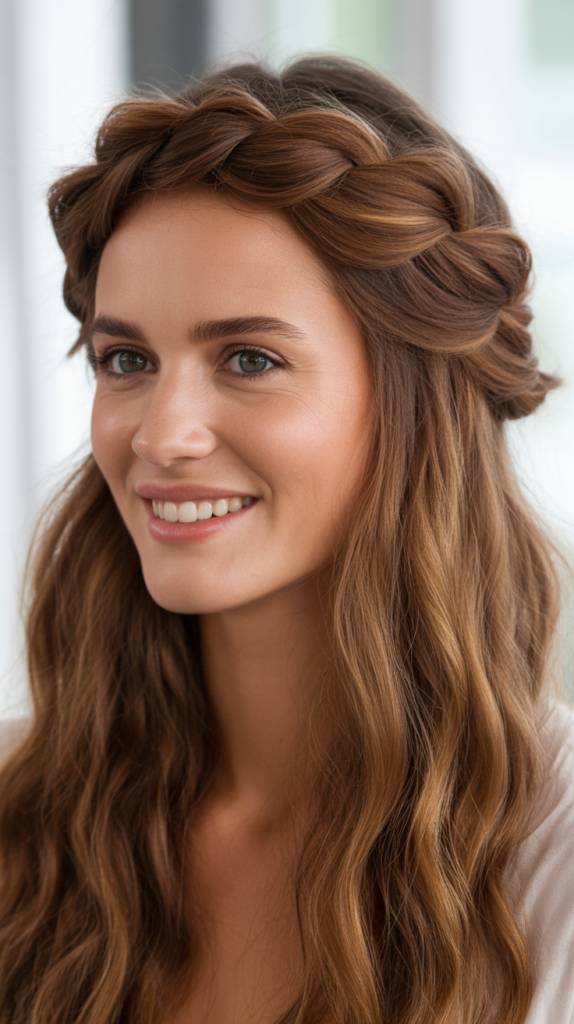
8. Braided Crown with Loose Waves
A braided crown combines the romance of braids with the beauty of loose waves, creating a style that looks intricate but is surprisingly simple to achieve.
This works wonderfully for thick wavy hair because you have plenty of texture to work with.
The Romantic Appeal
- Braided crowns keep hair off your face while showcasing your length and wave pattern.
- The combination of structured braids and loose waves creates beautiful contrast and visual interest.
- This style works for both casual and formal occasions depending on how you finish it.
- Thick hair means your braids will be fuller and more impressive without needing extensions.
How to Create Your Braided Crown
- Start with day-old hair that has natural texture and isn’t freshly washed.
- Part hair down the middle and separate into two sections.
- Create a Dutch braid or regular three-strand braid on each side, starting at the hairline and braiding back toward your nape.
- Wrap the braids around your head like a crown, securing with bobby pins underneath where they meet.
- Pull gently at the braids to loosen them for a softer, more romantic appearance.
- Leave the remaining length loose and wavy, or create additional curls with a curling wand.
9. Curtain Bangs with Wavy Layers
Curtain bangs are having a major moment, and they’re particularly stunning on thick wavy hair. The middle-parted bangs frame your face beautifully while the wavy layers add movement and dimension.
Why Curtain Bangs Are Perfect
- The center part and outward sweep of curtain bangs elongate your face and draw attention to your eyes.
- Unlike blunt bangs, curtain bangs blend seamlessly with your layers, creating a cohesive, flowing look.
- They’re low-maintenance because they’re meant to blend into your hair rather than sit as a distinct line across your forehead.
- Thick wavy hair provides the perfect amount of volume to make curtain bangs look full and intentional.
Styling Your Curtain Bangs
- Apply a smoothing cream to damp bangs to control any wild pieces.
- Use a small round brush to blow-dry bangs away from your face, directing one side left and the other right.
- Create a soft curve by rolling the brush slightly as you dry.
- For the rest of your hair, enhance waves with a curl-defining cream and air-dry or diffuse.
- Use a small flat iron to touch up bangs if needed, wrapping them around the iron for a gentle curve away from your face.
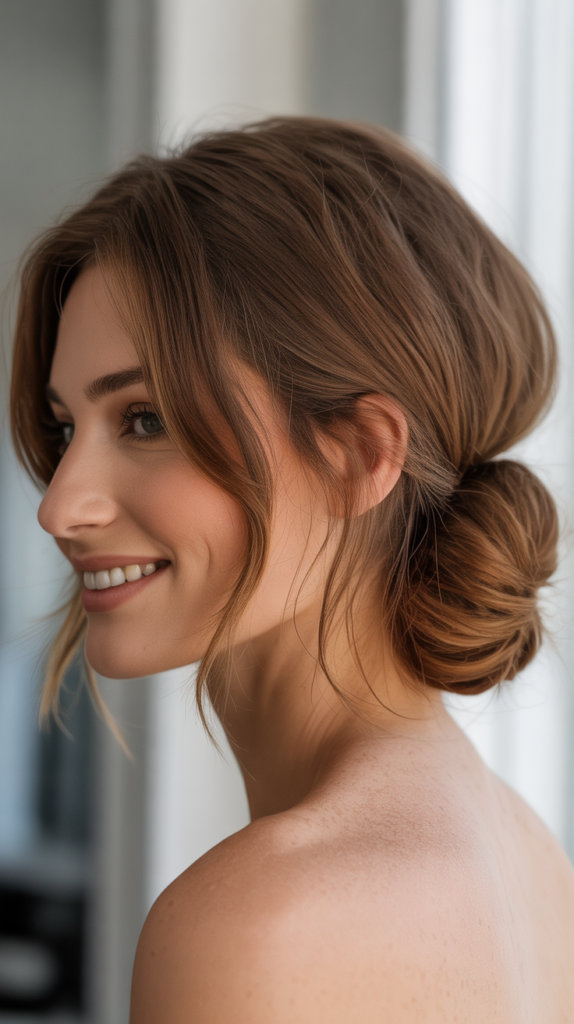
10. Low Ponytail with Wrapped Hair Section
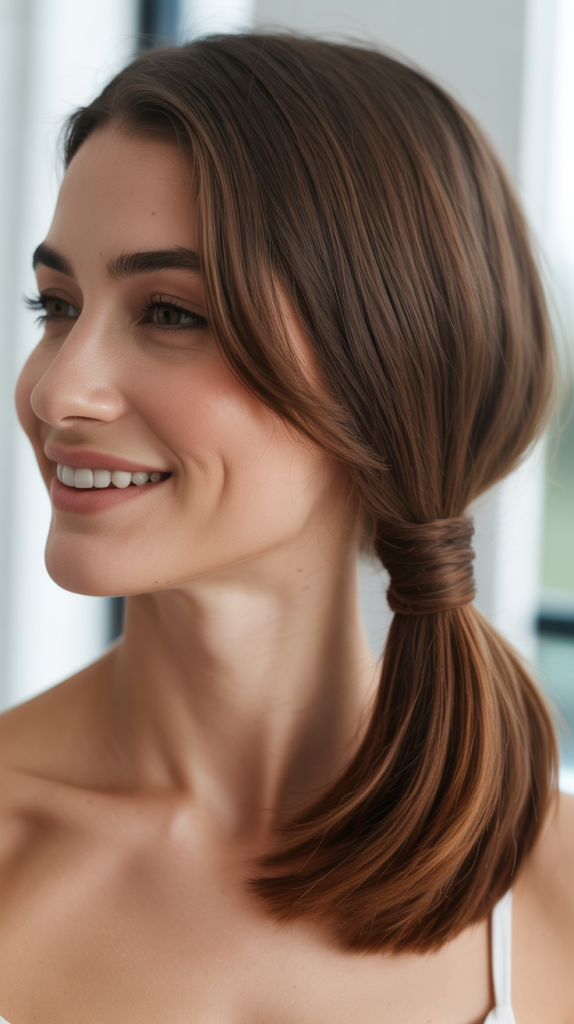
A low ponytail wrapped with a section of your own hair is simple elegance at its finest. For thick wavy hair, this style looks polished and sophisticated while still being incredibly easy to create.
The Sophistication Factor
- Wrapping a section of hair around the elastic instantly elevates a basic ponytail into something special.
- Low ponytails are flattering on virtually everyone and work for both professional and social settings.
- The wavy texture prevents the ponytail from looking too severe or uptight.
- This style keeps hair secure and out of your way while still looking intentional and stylish.
Creating a Polished Low Ponytail
- Gather hair at the nape of your neck and secure with an elastic band.
- Separate a small section (about an inch wide) from the underside of the ponytail.
- Wrap this section around the elastic, covering it completely, and secure the end with a bobby pin underneath.
- Gently pull at the ponytail to create more volume and texture.
- Pull out a few face-framing pieces if desired for a softer look.
- Apply a shine serum to the wrapped section to make it really stand out and look polished.
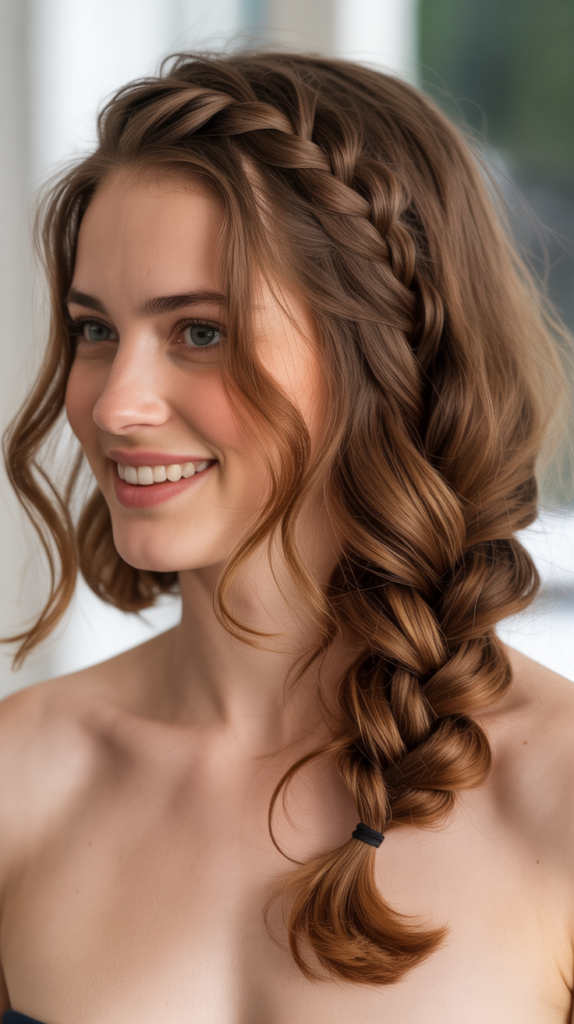
11. Loose French Braid
A loose French braid is romantic, practical, and absolutely gorgeous on thick wavy hair. The looseness keeps it from looking too formal or childish, while the braid itself showcases your hair’s natural volume.
The Timeless Appeal of French Braids
- French braids work with your natural texture rather than requiring pin-straight hair.
- The technique of incorporating hair as you braid creates a secure style that lasts all day.
- Pulling the braid apart after creating it makes it look fuller and more intentional.
- This style protects your hair from damage while looking beautiful.
Braiding Technique for Thick Wavy Hair
- Start with hair that has texture—either naturally wavy or enhanced with texturizing spray.
- Begin your French braid at the crown, taking three sections and incorporating more hair with each stitch.
- Keep your sections loose rather than pulling tightly for a more relaxed appearance.
- Once you reach the nape, finish with a regular three-strand braid.
- Secure with a clear elastic and then gently pull at each section of the braid to loosen and volumize.
- Pull out face-framing pieces and a few wispy tendrils at the nape for added softness.
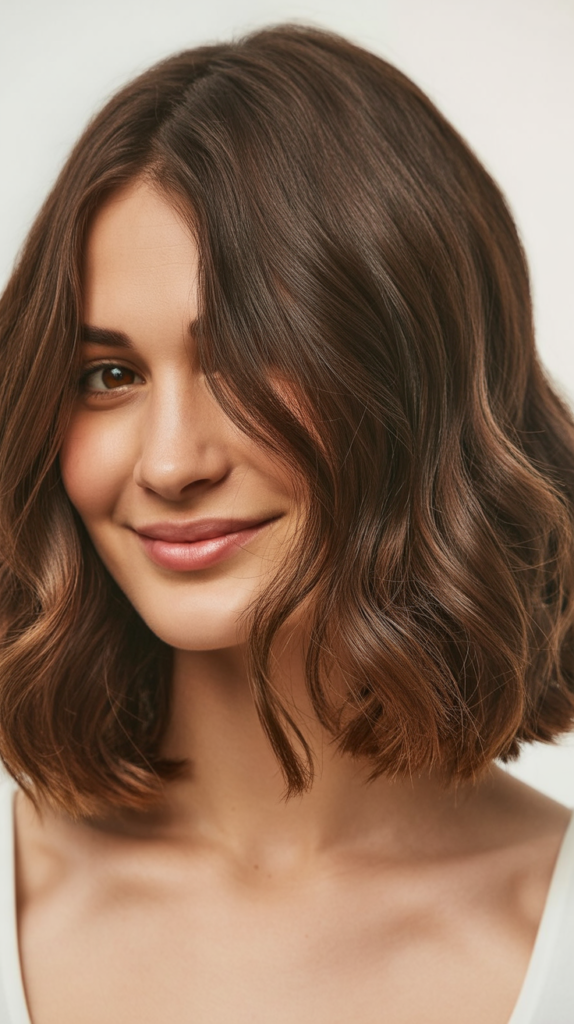
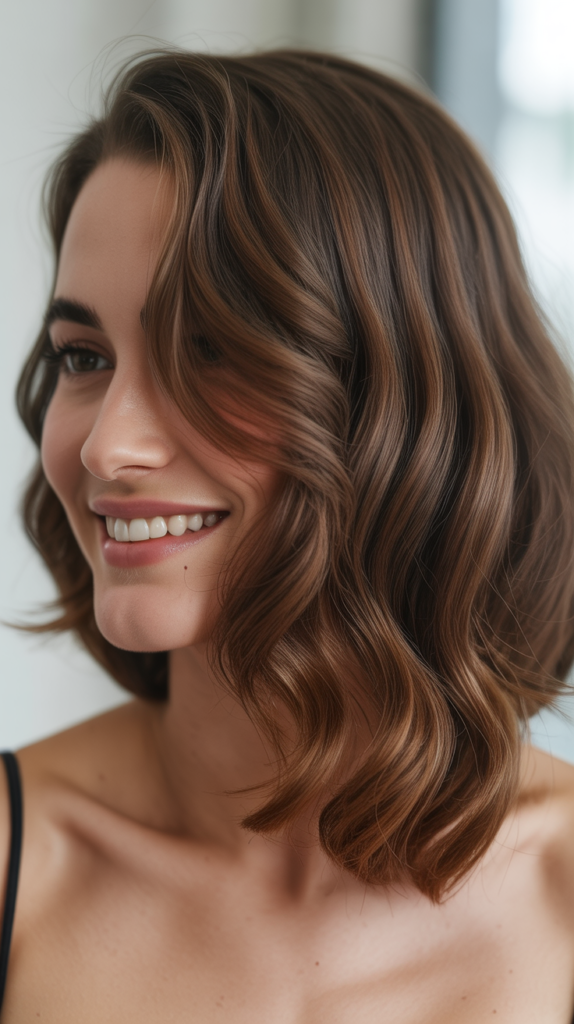
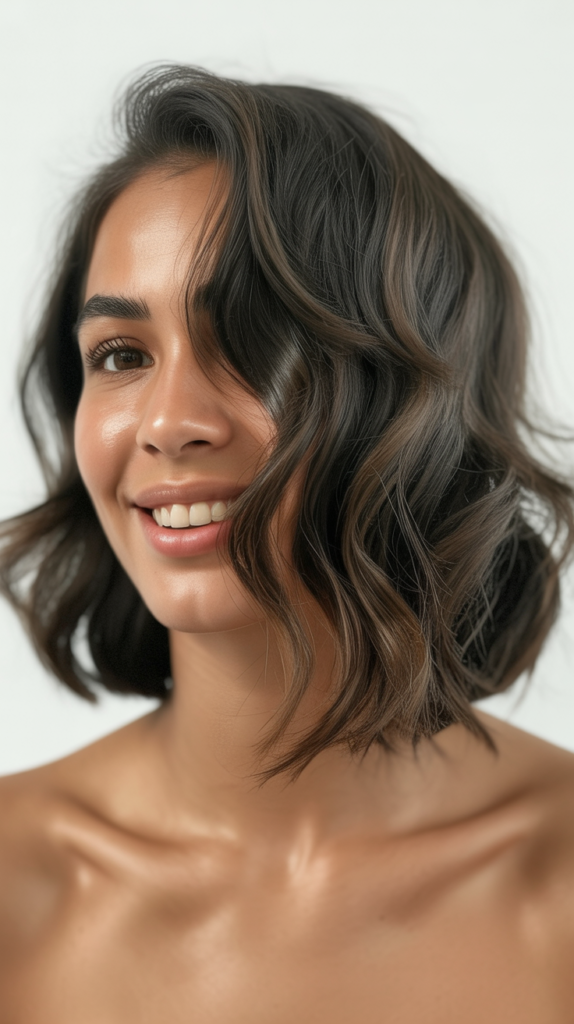
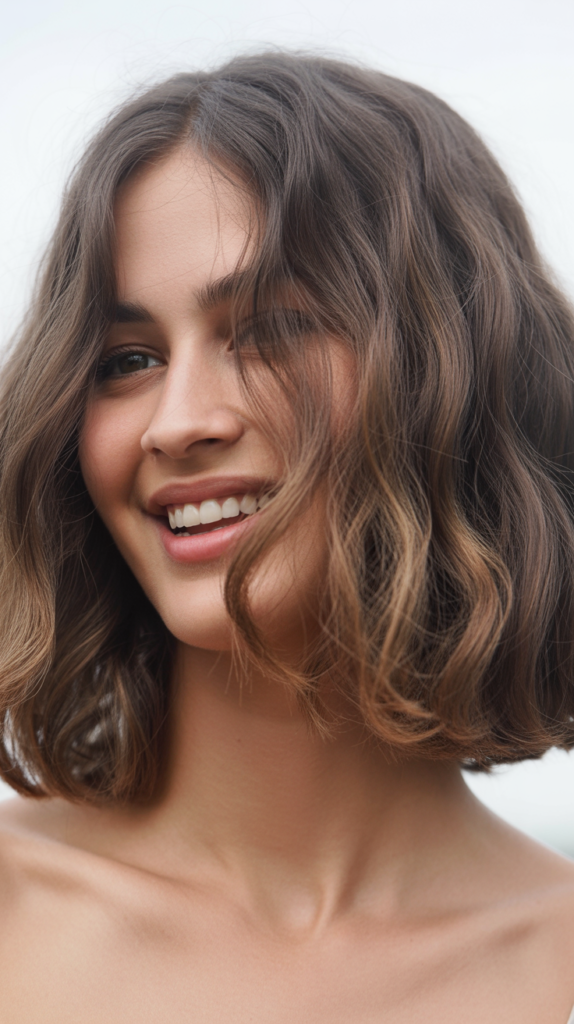
12. Textured Lob with Tousled Waves
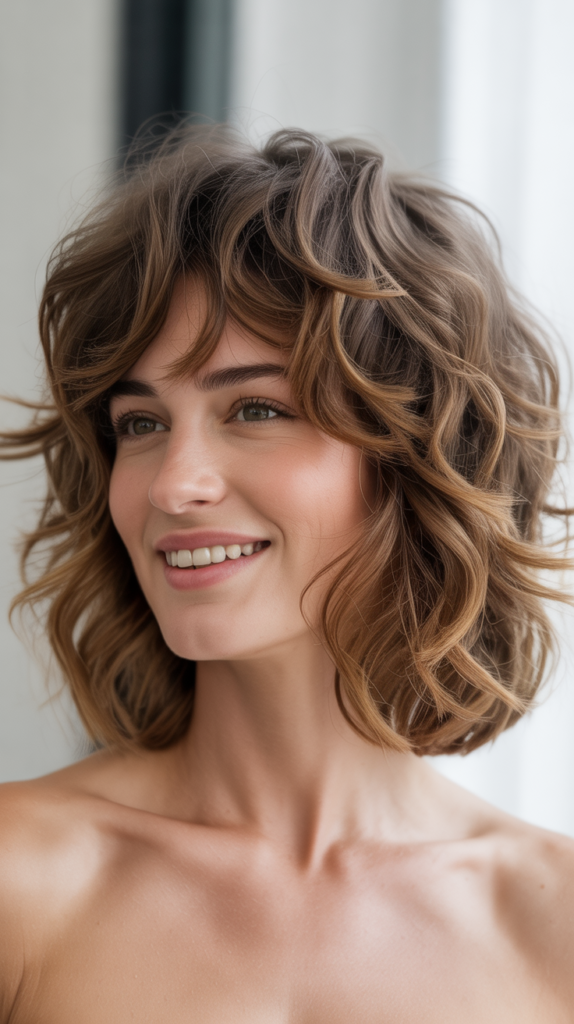
The lob (long bob) is one of the most versatile haircuts for thick wavy hair. When paired with tousled, textured waves, it creates an effortlessly cool vibe that works for any lifestyle.
Why the Lob Is Universally Flattering
- The lob sits at that perfect length—typically between chin and collarbone—that flatters every face shape.
- Removing excess length allows your natural wave pattern to be more pronounced and defined.
- This length is short enough to feel fresh but long enough to pull back when needed.
- Styling time is cut in half compared to longer hair, making mornings significantly easier.
Achieving the Perfect Tousled Lob
- Apply texturizing mousse to damp hair and scrunch upward to enhance natural waves.
- Air-dry or diffuse on low heat, continuously scrunching as you dry.
- Once hair is completely dry, take random sections and twist them around a curling wand, alternating directions.
- Don’t curl every section—leave some pieces natural for that undone, tousled appearance.
- Run your fingers through everything to break up the curls into soft, textured waves.
- Finish with a texturizing spray for hold and additional piece-y definition.
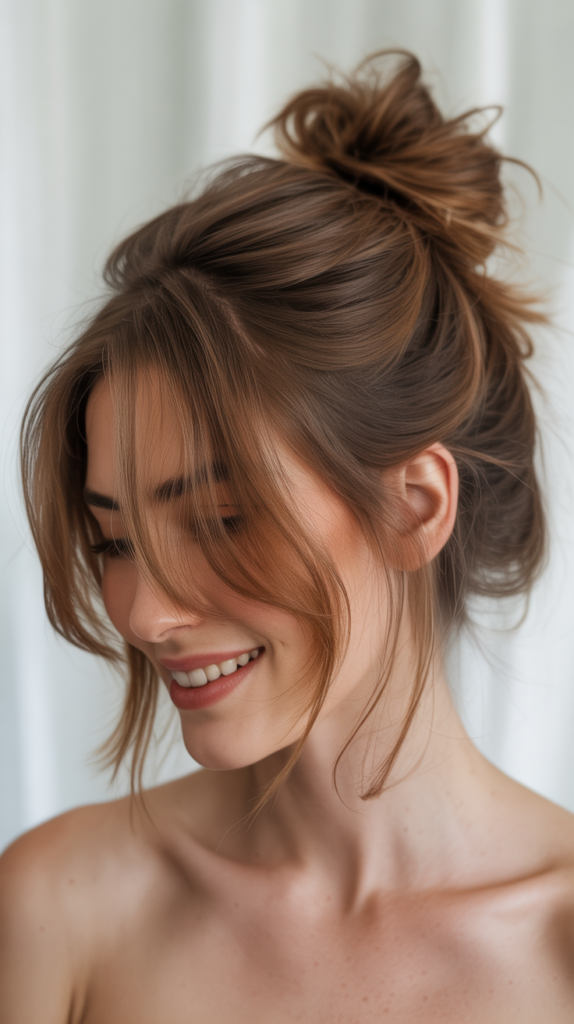
13. Top Knot with Face-Framing Waves
The top knot is the ultimate lazy-day hairstyle, but when you leave out face-framing waves, it transforms into something actually stylish.
For thick wavy hair, you’ll have plenty of volume to create a substantial knot.
The Perfect Balance
- Top knots keep all your hair secure and off your neck, perfect for workouts, hot days, or just getting things done.
- Leaving out the front sections prevents the style from looking too severe or harsh.
- The wavy texture of the face-framing pieces adds softness and femininity to balance the bold bun.
- This style works beautifully on second or third-day hair when your waves have settled into their natural pattern.
Creating Your Top Knot
- Flip head upside down and gather hair into a high ponytail at your crown before flipping back up.
- Leave out front sections on both sides, about one to two inches wide.
- Twist the ponytail and wrap it around the base, securing with bobby pins throughout.
- Use a curl-enhancing cream on the face-framing pieces and either air-dry or use a curling wand to define them.
- Loosen the bun by pulling at it gently for more volume and a less polished appearance.
- Secure everything with a flexible hold hairspray.
14. Waterfall Braid with Cascading Waves
The waterfall braid is stunning and intricate-looking while being surprisingly achievable with a bit of practice.
For thick wavy hair, this style showcases both your braiding skills and your gorgeous natural texture.
The Beauty of Waterfall Braids
- This braid creates a crown-like effect across the top or side of your head while letting the length cascade down.
- The “waterfall” sections—strands that are dropped and replaced as you braid—create a woven appearance that’s incredibly pretty.
- Thick wavy hair makes the braid look fuller and more substantial, and the waves below the braid create beautiful movement.
- This style is perfect for special occasions but also works for everyday elegance.
Mastering the Waterfall Technique
- Start with a side part and gather a three-strand section near your part.
- Begin a regular French braid, but after the first stitch, drop the strand closest to your face and pick up a new section behind it.
- Continue this pattern—braiding one stitch, dropping the front strand, and replacing it with a new section from behind.
- Braid horizontally across your head toward the opposite ear.
- Secure with a small clear elastic or bobby pin hidden beneath your hair.
- The dropped strands will naturally blend with your waves, creating that cascading waterfall effect.
15. Slicked-Back Low Bun
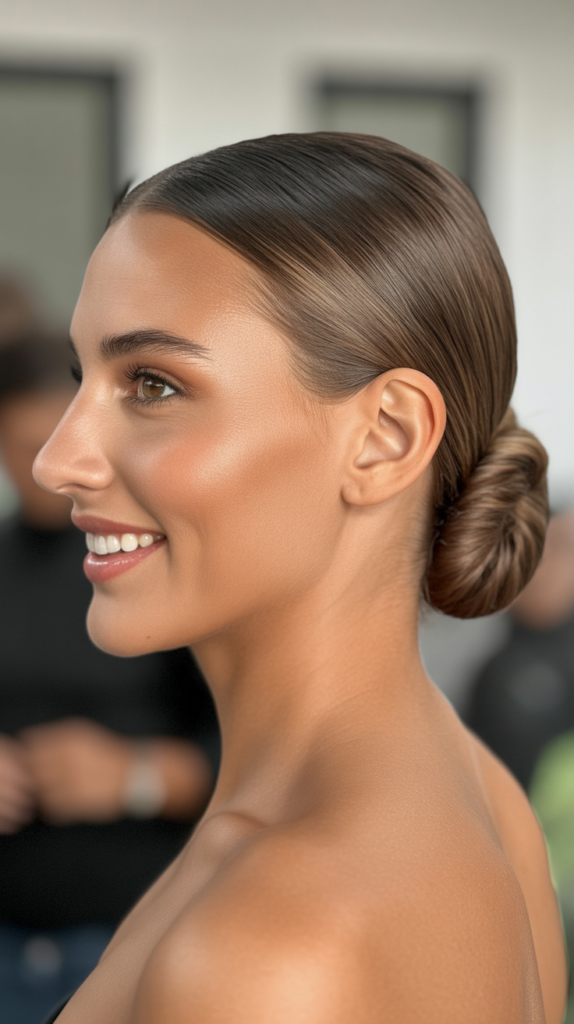
For those days when you need to look polished and professional, a slicked-back low bun is your answer. Even thick wavy hair can achieve this sleek look with the right products and technique.
The Professional Polish
- Slicking back the front creates a clean, sophisticated appearance that’s perfect for formal events or business settings.
- The low bun position is classic and elegant without being stuffy or outdated.
- Even though the front is smooth, you can leave texture in the bun itself to prevent it from looking too severe.
- This style keeps every strand in place, meaning you won’t be fiddling with your hair during important meetings or events.
Achieving Sleek Perfection
- Start with slightly damp hair for easier control when slicking back.
- Apply a smoothing gel or cream to the front section, using a fine-tooth comb or brush to smooth everything back.
- Gather hair at the nape and secure with an elastic.
- Twist the length and wrap into a low bun, securing with bobby pins.
- You can keep the bun textured and loose for interest, or smooth it completely for maximum polish.
- Use a strong-hold hairspray and a toothbrush to smooth any flyaways along your hairline.
16. Fishtail Braid on One Side
A side fishtail braid is eye-catching and beautiful while being more forgiving than it looks. Thick wavy hair creates a fuller, more impressive fishtail without requiring you to be a professional braider.
Why Fishtail Braids Stand Out
- The intricate pattern of a fishtail braid looks far more complicated than it actually is to create.
- Side braids keep hair off your face while still showcasing your length and creating visual interest.
- Pulling the braid apart after creating it makes it look fuller and gives it that coveted “effortless” appearance.
- Thick wavy hair provides the perfect amount of grip and texture to make the braid hold without needing excessive product.
Creating Your Fishtail
- Gather all hair over one shoulder and divide into two equal sections.
- Take a small piece from the outside of the left section and cross it over to join the right section.
- Then take a small piece from the outside of the right section and cross it over to join the left section.
- Continue this pattern, alternating sides, taking small pieces from the outer edges and crossing them over.
- Secure at the end with a clear elastic.
- Gently pull apart the braid from bottom to top, tugging on the outer edges to create width and volume.
- Pull out a few face-framing pieces for a softer, more romantic finish.
17. Voluminous Blowout with Bouncy Waves
A professional-looking blowout is absolutely achievable at home, even with thick wavy hair.
The key is the right technique and tools to create those bouncy, voluminous waves that look like you just left the salon.
The Salon-Worthy Blowout
- A proper blowout smooths the hair cuticle, creating incredible shine and reducing frizz dramatically.
- The volume achieved through strategic blow-drying lifts the roots and creates body throughout.
- Bouncy waves add movement and keep the style from looking flat or limp.
- This style typically lasts several days with proper care, making it worth the time investment.
Home Blowout Technique
- Start with freshly washed hair and apply a heat protectant spray throughout.
- Rough-dry hair to about 60% dry using your hands to scrunch and lift at the roots.
- Section hair into manageable pieces and use a large round brush to blow-dry each section.
- Roll sections up toward the crown and blast with heat, then cool air to set the curl.
- Once completely dry, create additional waves with a large-barrel curling iron if desired.
- Run your fingers through to soften the waves and finish with a light hairspray.
- The key is tension on the brush and directing heat down the hair shaft to smooth the cuticle.
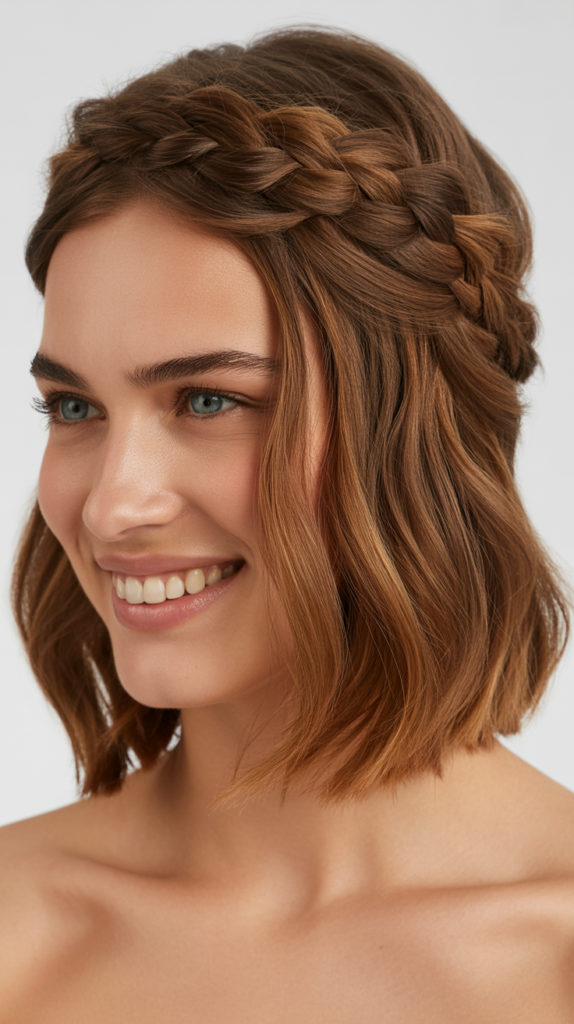
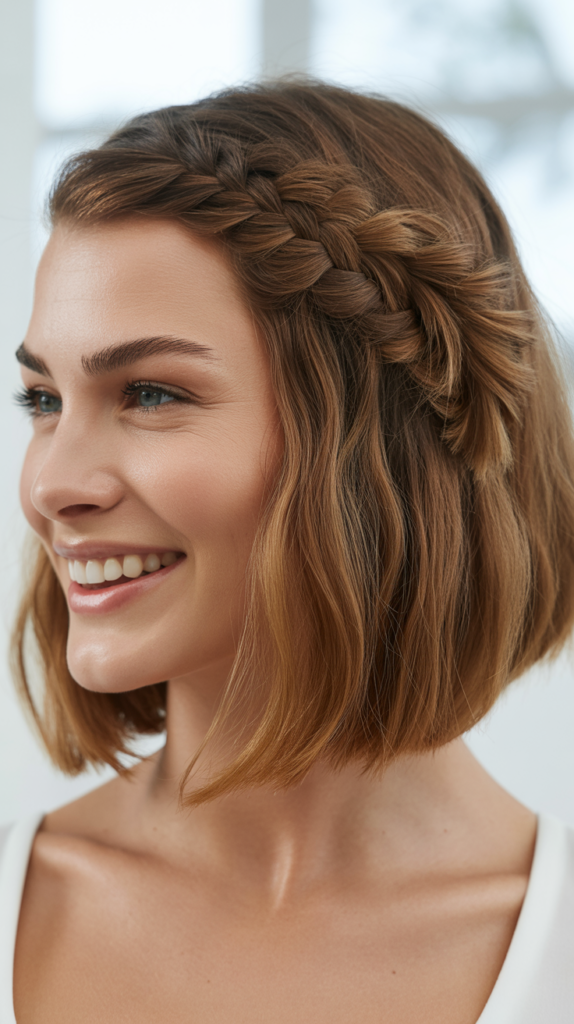
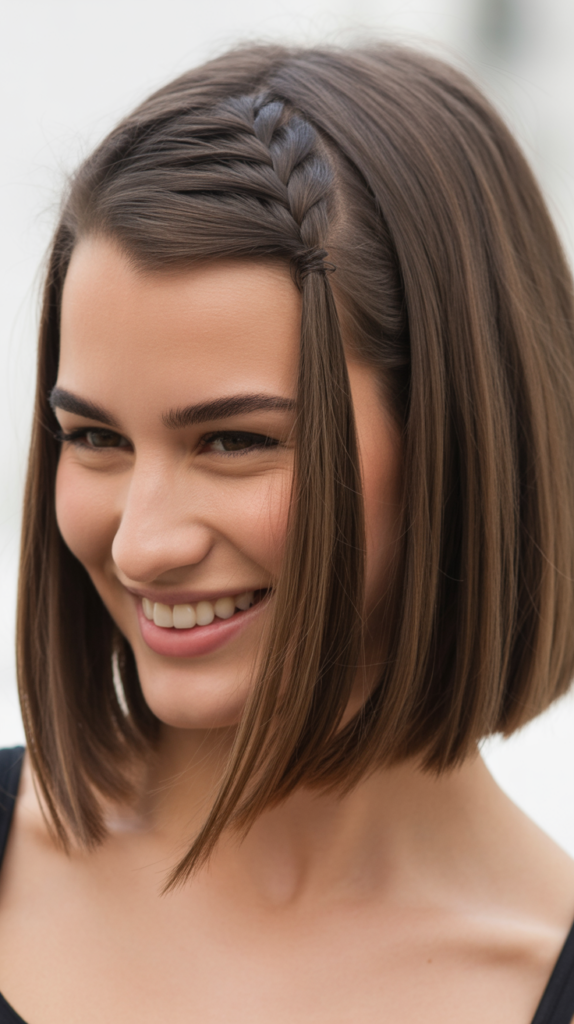
18. Braided Headband with Down Waves
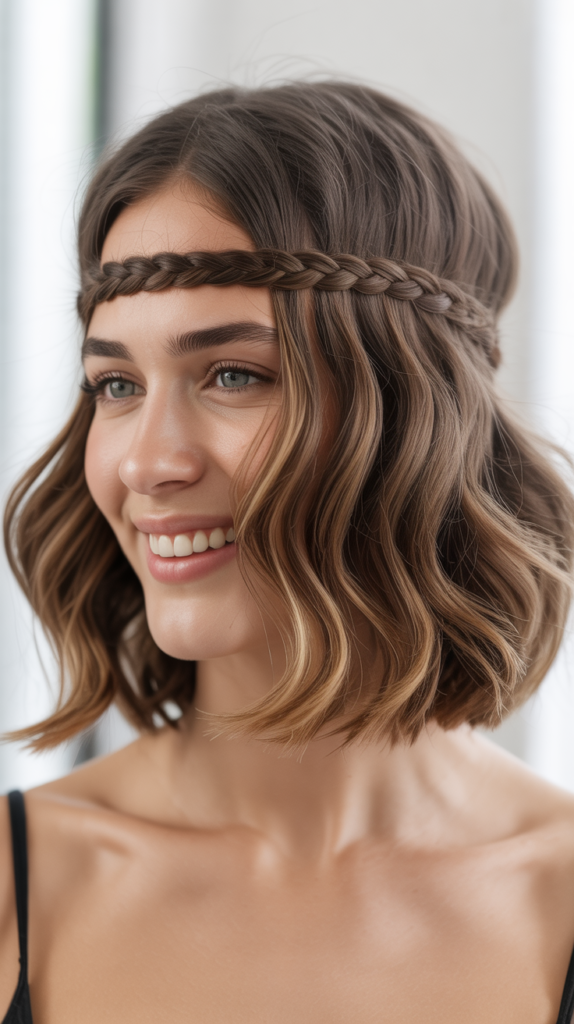
A braided headband is a sweet, feminine style that keeps hair off your face while showcasing your waves.
For thick wavy hair, this style works beautifully because you have plenty of hair to create both the braid and the flowing waves.
The Feminine Charm
- A braided headband creates a crown-like effect that’s both practical and pretty.
- This style keeps flyaways and baby hairs controlled without requiring harsh gels or pins.
- The contrast between the structured braid and loose waves creates beautiful visual interest.
- It’s a versatile style that works for both casual and dressy occasions.
Creating Your Braided Headband
- Part hair to your preferred side and take a small section near one ear.
- Create a regular three-strand braid along your hairline, incorporating small sections as you go like a French braid.
- Braid all the way to the opposite ear and secure with bobby pins hidden underneath.
- Leave all remaining hair down and enhance your natural waves with curl cream or mousse.
- Gently loosen the braid by pulling at the edges for a softer, more romantic appearance.
- Pull out a few face-framing pieces in front of the braid for added softness.
19. Asymmetric Cut with Textured Waves
An asymmetric cut is bold and modern, and when paired with textured waves, it creates a style that’s both edgy and wearable.
Thick wavy hair can pull off this dramatic look because you have enough volume to balance the uneven lengths.
The Dramatic Edge
- Asymmetric cuts create immediate visual interest and make a statement without requiring wild colors or extreme styling.
- The longer side showcases your waves beautifully while the shorter side keeps things from feeling too heavy.
- This cut is surprisingly versatile—you can wear it smooth and sleek or wavy and textured.
- The uneven lengths create natural movement that works with your wave pattern.
Styling Your Asymmetric Cut
- Apply a texturizing spray to damp hair to enhance natural wave formation.
- Scrunch hair while air-drying or use a diffuser, focusing more attention on the longer side.
- Once dry, use a flat iron or curling wand on random sections to create additional texture and definition.
- The shorter side can be tucked behind your ear or styled forward across your face depending on your mood.
- Finish with a texturizing paste on the ends for piece-y definition.
- The dramatic difference in lengths means minimal styling can create maximum impact.
20. Double Dutch Braids
Double Dutch braids are sporty, practical, and surprisingly chic when done on thick wavy hair.
The raised appearance of Dutch braids (braiding under instead of over) creates dimension and really showcases your hair’s volume.
The Athletic Chic Appeal
- Dutch braids keep every strand secured, making them perfect for workouts, outdoor activities, or just busy days.
- The raised braiding technique creates fuller-looking braids that really stand out against your scalp.
- Thick hair creates substantial braids that look intentional and impressive rather than thin and wimpy.
- When you take the braids out, you’re left with incredible crimped waves for your next hairstyle.
Dutch Braiding Technique
- Part hair straight down the middle from forehead to nape, creating two equal sections.
- Start on one side at the hairline with three small sections.
- Instead of crossing sections over the middle strand (regular braid), cross them under the middle strand.
- Incorporate new hair with each stitch, adding it to the outer sections before crossing under.
- Braid tightly for security or loosely for a softer appearance.
- Secure each braid at the nape with a clear elastic.
- Repeat on the other side, ensuring both braids are at the same height and tension for symmetry.
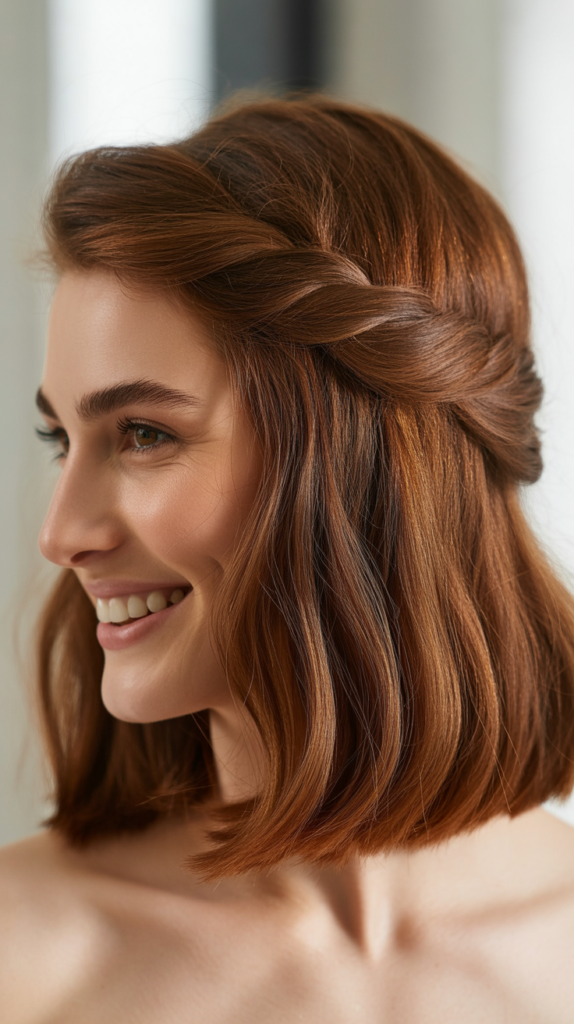
21. Twisted Crown Updo
A twisted crown updo combines the elegance of an updo with the romance of twisted sections, creating a style that’s perfect for weddings, formal events, or date nights.
Thick wavy hair creates fuller twists that look luxurious and intentional.
The Elegant Romance
- Twisted sections are easier to create than braids but look equally impressive.
- This updo keeps hair completely off your neck and shoulders while looking soft and romantic.
- The wavy texture adds dimension to the twists, preventing them from looking too smooth or stiff.
- This style stays secure all day or night, making it reliable for long events.
Creating Your Twisted Crown
- Part hair down the middle and section into four quadrants.
- Take the front right section and twist it back toward the crown, securing with bobby pins.
- Repeat with the front left section, twisting back and securing where it meets the first twist.
- Take the back sections and twist them upward, tucking the ends under and securing throughout.
- Gently pull at the twists to loosen them slightly for added volume and texture.
- Finish with bobby pins throughout to ensure everything is secure.
- Apply hairspray and use a toothbrush to smooth any flyaways.
22. Pineapple Updo for Sleeping
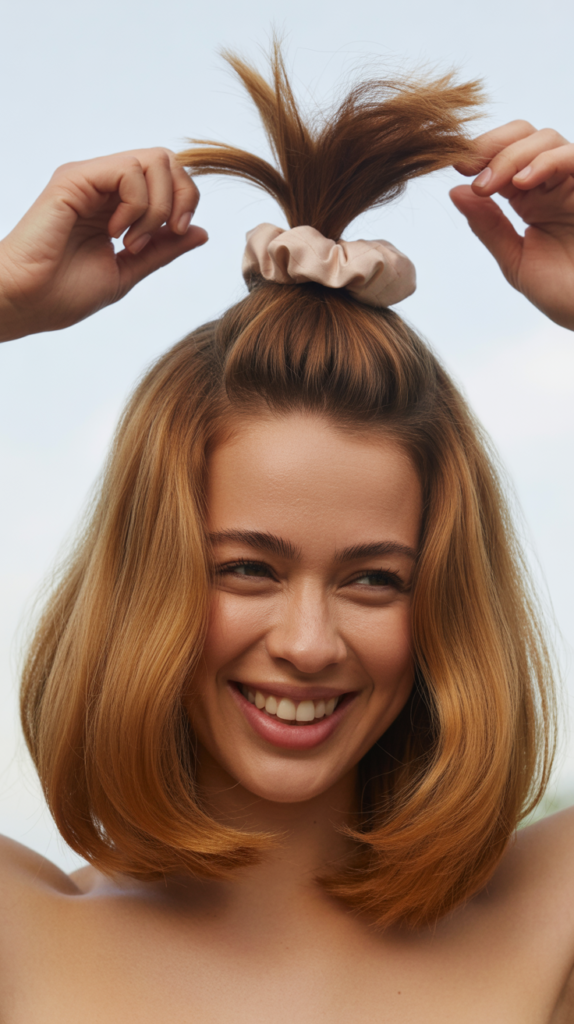
The pineapple method isn’t just for sleeping—it’s also a quick daytime style that protects your waves while looking cute and casual.
For thick wavy hair, this technique preserves your wave pattern overnight and creates effortless volume.
The Protective Style
- The pineapple method gathers all your hair at the crown, preventing waves from getting crushed while you sleep.
- During the day, this style keeps hair off your face while showcasing your volume and length.
- The high placement creates lift at the roots that lasts long after you take it down.
- Using a scrunchie instead of regular elastics prevents creasing and breakage.
The Pineapple Technique
- Flip head upside down and gather all hair at the very top of your head, at the crown or slightly forward.
- Use a scrunchie or cloth hair tie to secure loosely—you want it to hold without creating tension.
- Don’t pull the hair all the way through on the last wrap, leaving it in a loose loop.
- For sleeping, wear a silk or satin bonnet over the pineapple to protect against friction.
- In the morning, release the scrunchie and shake out your waves—they should be preserved and voluminous.
- Fluff at the roots with your fingers and apply a light curl refresher spray if needed.
23. Wet Look Slicked Waves
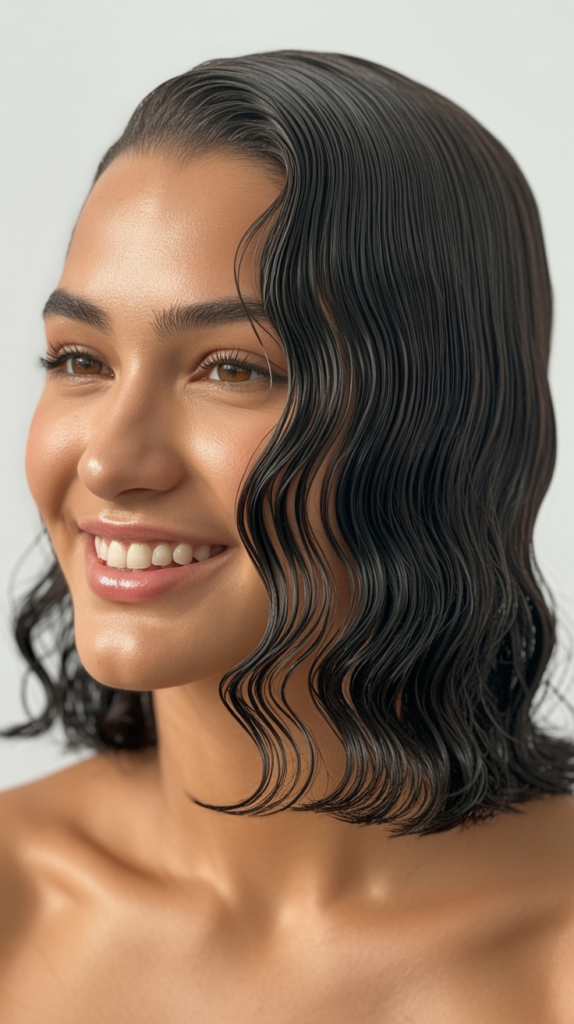
The wet look is bold and editorial, and it works surprisingly well on thick wavy hair. This style combines slicked, shiny sections with defined waves for a look that’s both edgy and glamorous.
The High-Fashion Edge
- The wet look creates a sleek, intentional appearance that feels modern and editorial.
- Gel or styling cream enhances your natural wave pattern while adding incredible shine.
- This style photographs beautifully, making it perfect for special events or photo shoots.
- The slicked appearance provides a polished contrast to the textured waves.
Achieving the Wet Look
- Start with freshly washed, dripping wet hair—don’t towel dry at all.
- Apply a generous amount of strong-hold gel or wet-look styling cream throughout.
- Use a wide-tooth comb to distribute product evenly and define wave pattern.
- Scrunch sections upward to encourage wave formation.
- Let hair air-dry completely without touching it—the more you touch, the more frizz you’ll create.
- Once dry, you can gently scrunch to break up any crunchiness from the gel while maintaining the shine.
- The result should be glossy, defined waves with a intentionally wet appearance.
24. Mohawk Braid
A mohawk braid combines edginess with elegance,creating a statement style that’s actually easier than it looks. For thick wavy hair, this dramatic braid showcases your volume beautifully while keeping sides sleek.
The Statement Style
- The mohawk braid creates immediate impact and drama without requiring shaved sides or extreme commitment.
- This style is surprisingly versatile—dress it up or down depending on how you finish it.
- Thick hair creates a substantial center braid that really stands out and makes a statement.
- The sleek sides contrast beautifully with the textured center braid.
Creating Your Mohawk Braid
- Section hair into three parts: left side, center strip from forehead to nape, and right side.
- Apply gel or smoothing cream to the side sections and brush them flat against your head, securing with bobby pins.
- Take the center section and create a Dutch or French braid from your forehead back.
- Keep the braid fairly tight for a raised, prominent appearance.
- Pull gently at the braid to widen it and create more volume.
- Secure at the nape and either leave the tail loose or tuck it under and pin for a complete faux-hawk effect.
25. Loose Chignon with Wispy Pieces
A loose chignon is effortlessly elegant and perfect for thick wavy hair because your natural texture creates beautiful, romantic imperfection.
This low bun style works for everything from weddings to work meetings.
The Effortless Elegance
- Chignons sit low at the nape, creating a sophisticated silhouette that elongates the neck.
- The loose, textured version prevents the style from looking too formal or stuffy.
- Wispy face-framing pieces soften the overall look and prevent severity.
- Thick wavy hair creates a fuller chignon without needing padding or excessive teasing.
Creating Your Chignon
- Start with hair that has texture—either natural waves or enhanced with texturizing spray.
- Gather hair into a very low ponytail at the nape, leaving out face-framing pieces.
- Don’t pull the ponytail tight—keep it loose and relaxed.
- Twist the length gently and wrap it around the base of the ponytail.
- Secure with bobby pins throughout, tucking ends underneath.
- Pull gently at the bun to loosen it and create a softer, more voluminous appearance.
- Pull out additional wispy pieces around the hairline and nape for added softness.
26. Vintage Hollywood Waves
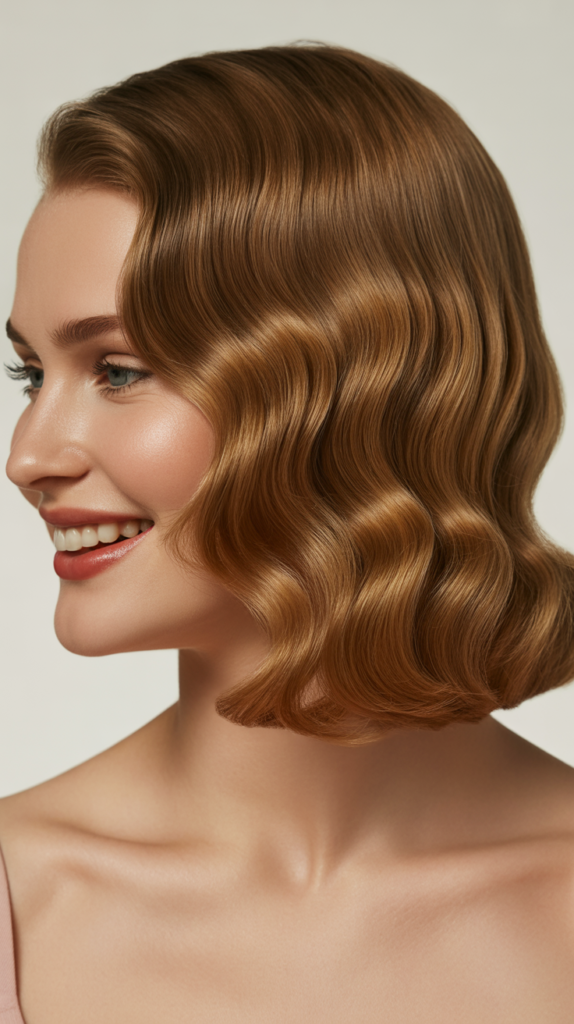
Hollywood waves are glamorous and timeless, and thick wavy hair is perfect for creating these iconic, structured waves. This style requires some technique but delivers red-carpet-worthy results.
The Timeless Glamour
- Hollywood waves create an S-shaped wave pattern that’s incredibly elegant and sophisticated.
- This style works beautifully with a deep side part for maximum drama and old-school glamour.
- The structured waves require some effort but last for days when set properly.
- Thick hair holds these waves beautifully and creates a luxurious, full appearance.
Creating Hollywood Waves
- Start with freshly washed hair and apply setting lotion or mousse throughout.
- Create a deep side part and section hair into horizontal layers.
- Use a flat iron or Marcel iron to create deep, structured waves by bending the hair in alternating directions.
- Clip each wave in place with large duckbill clips to set while cooling.
- Once all sections are waved and cooled, remove clips and gently brush through with a boar bristle brush.
- The brushing blends the waves into one another while maintaining the S-shaped pattern.
- Finish with strong-hold hairspray and use clips to set the waves one more time if desired for maximum longevity.
27. Natural Air-Dried Waves
Sometimes the best hairstyle is simply embracing your natural texture with minimal intervention.
For thick wavy hair, learning to air-dry properly creates beautiful, defined waves without heat damage or excessive styling time.
The Beauty of Going Natural
- Air-drying eliminates heat damage, keeping your hair healthier and your waves more defined over time.
- This is the ultimate low-maintenance approach—wash, apply product, and go.
- Natural waves have a lived-in, authentic quality that looks effortlessly beautiful.
- Learning to work with your natural texture saves time, money, and hair health.
The Perfect Air-Dry Method
- Start with soaking wet hair immediately after washing—don’t wait for it to start drying.
- Apply a curl-enhancing cream or gel, raking it through with your fingers to distribute evenly.
- Use the scrunching method: flip head upside down and scrunch sections upward toward your scalp.
- If desired, use a microfiber towel or t-shirt to scrunch out excess water—never rub or rough-dry.
- Let hair air-dry completely, avoiding touching it as much as possible to prevent frizz.
- Once fully dry, scrunch gently to break up any product crunchiness.
- If needed, apply a tiny amount of hair oil to ends for shine and frizz control.
Comparison Table: Quick Style Reference
| Style Category | Time Required | Skill Level | Best For | Longevity |
|---|---|---|---|---|
| Layered Cuts (1, 2, 3, 12) | 5-10 min | Beginner | Daily wear | All day |
| Braided Styles (11, 14, 16, 20, 24) | 10-20 min | Intermediate | Active days, special events | 1-2 days |
| Updos (7, 10, 13, 15, 21, 25) | 5-15 min | Beginner-Intermediate | Work, formal events | All day-evening |
| Waves & Curls (4, 17, 23, 26, 27) | 10-30 min | Beginner-Advanced | Any occasion | 1-3 days |
| Half-Up Styles (5, 18) | 5-10 min | Beginner | Casual, semi-formal | Several hours |
conclusion
In this comprehensive guide to 27 Stunning Hairstyles for Thick Wavy Hair That Look Effortless, we’ve explored everything from quick everyday styles to show-stopping looks for special occasions.
The beauty of thick wavy hair lies in its versatility and natural texture—you’re already starting with gorgeous volume and movement that others spend hours trying to create.
Whether you prefer the simplicity of air-dried natural waves, the drama of Hollywood glamour, or the practicality of braided styles, there’s something here for every preference and skill level.
Remember that the “effortless” part comes from working with your natural texture rather than fighting against it.
Invest in quality products designed for wavy hair, learn which techniques work best for your specific wave pattern, and don’t be afraid to experiment until you find your signature looks. Your thick wavy hair is an asset that deserves to be celebrated, not tamed.
With these 27 styles in your repertoire, you’ll never have another bad hair day—just endless possibilities for looking fabulous with minimal effort.
Embrace your waves, experiment with confidence, and enjoy the compliments that are sure to come your way.