
Long hair opens up a world of styling possibilities, and finding the perfect school hairstyle can transform your daily routine from mundane to magnificent.
Whether you’re rushing through busy mornings or preparing for a special school event, having a repertoire of trendy, practical hairstyles makes all the difference.
This comprehensive guide to 30 Trendy School Hairstyles for Long Hair Every Student Will Love brings you an exciting collection of looks that balance style with functionality—from quick five-minute fixes to more elaborate designs for special occasions.
You’ll discover classic braids with modern twists, elegant updos that stay put through gym class, playful ponytails that add personality, and creative half-up styles that showcase your length while keeping hair manageable.
Each hairstyle has been selected for its student-friendly approach, ensuring you can achieve salon-worthy results without professional help or excessive time investment.
Get ready to revolutionize your morning routine and turn heads in the hallways with these inspiring, easy-to-follow hairstyle ideas designed specifically for students with long hair.
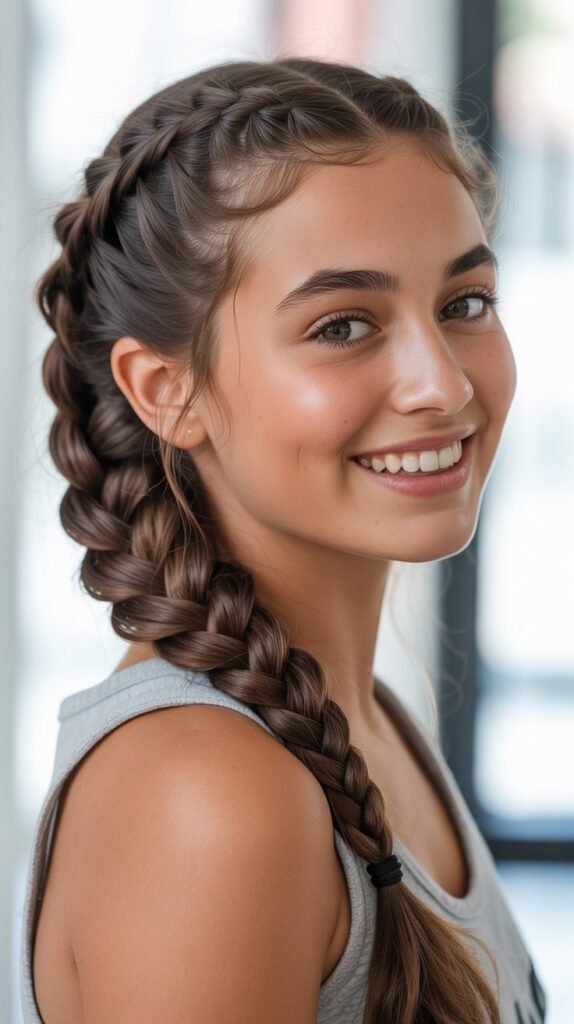
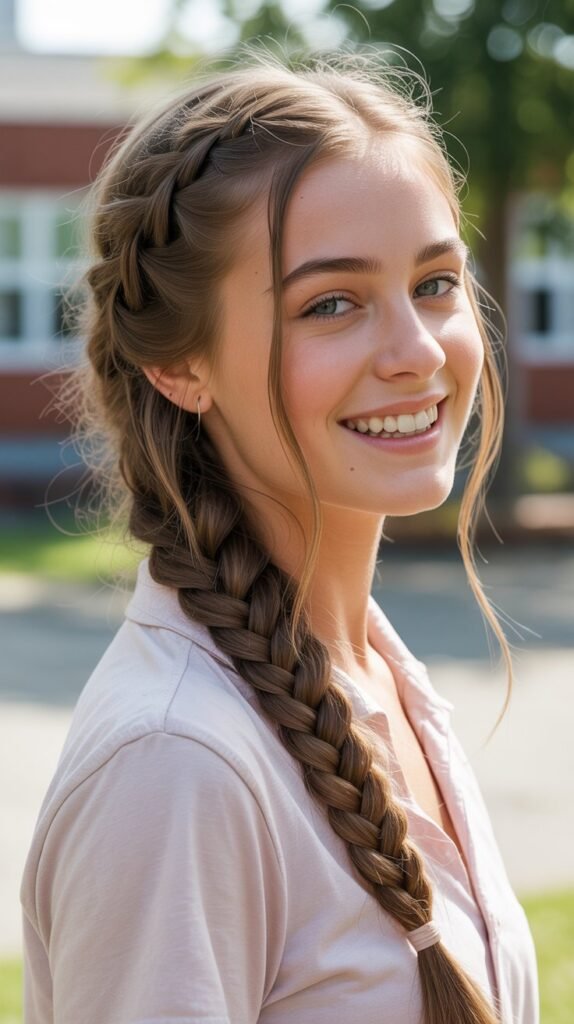
1. Classic French Braid
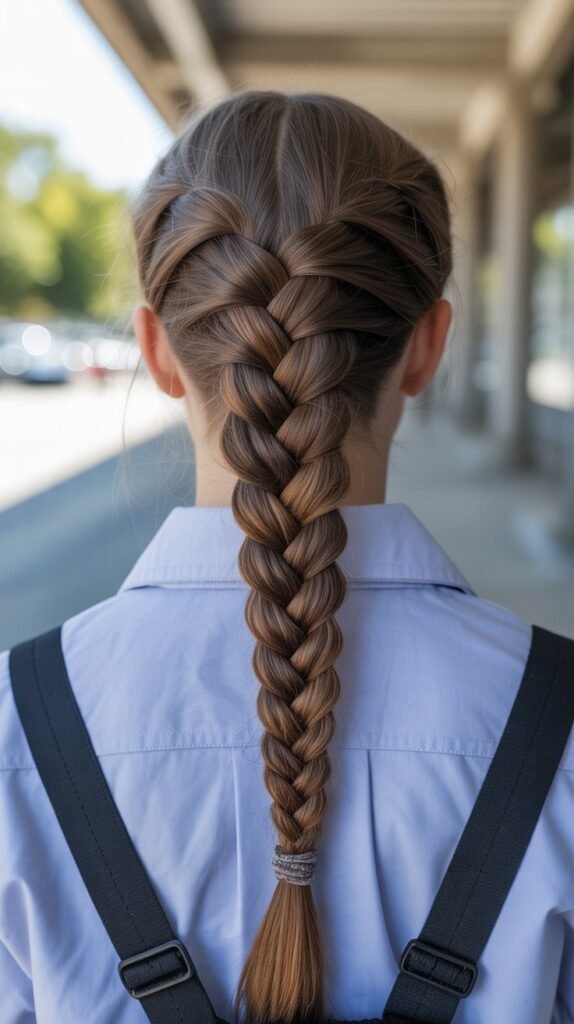
The French braid remains an timeless favorite that combines elegance with practicality for school settings.
This versatile style keeps hair completely secured while creating a sophisticated look that works for everything from regular classes to presentations.
The technique involves weaving three sections of hair while gradually incorporating additional strands as you move down the head.
How to Create:
- Start by brushing all hair backward to remove tangles and create a smooth base.
- Take a section of hair at the crown and divide it into three equal parts.
- Begin a regular braid by crossing the right section over the middle, then the left section over the new middle.
- Before each subsequent cross, gather a small section of loose hair from that side and add it to the strand you’re about to cross over.
- Continue this pattern of adding hair and braiding down to the nape of your neck.
- Once all hair is incorporated, finish with a regular three-strand braid to the ends.
- Secure with a hair elastic and gently pull on the braid edges to create fuller, more textured appearance.
Why It Works for School:
- Keeps hair completely off your face and neck during activities and studying.
- Stays secure throughout an entire school day without requiring touch-ups.
- Appropriate for all school dress codes and academic settings.
- Can be dressed up with ribbons or kept simple for everyday wear.
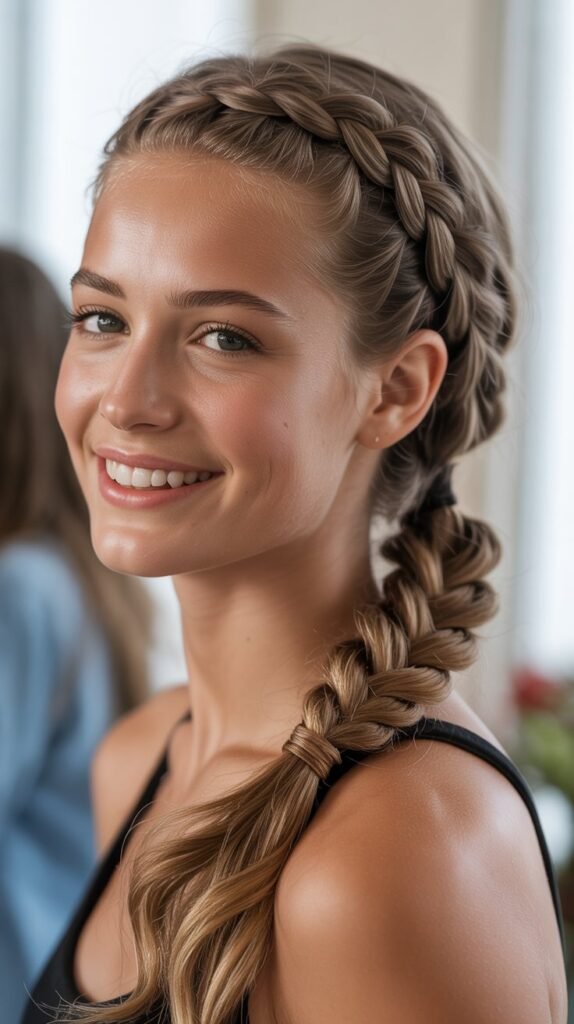
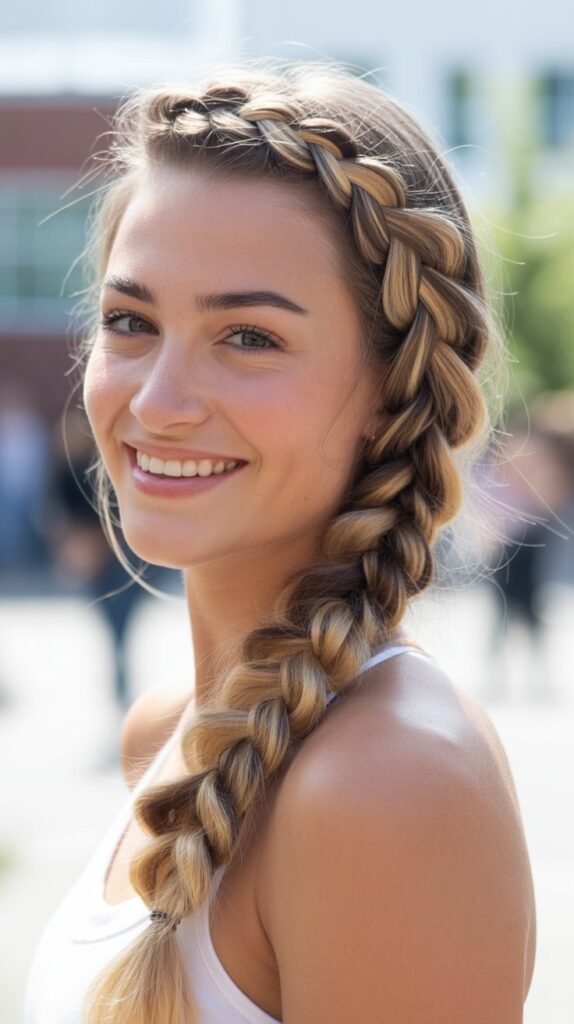
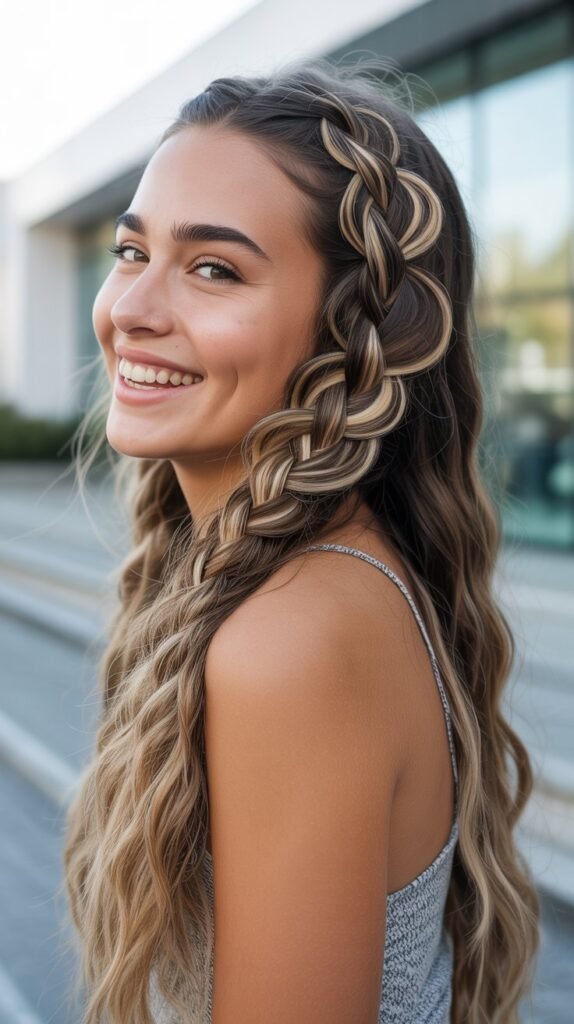
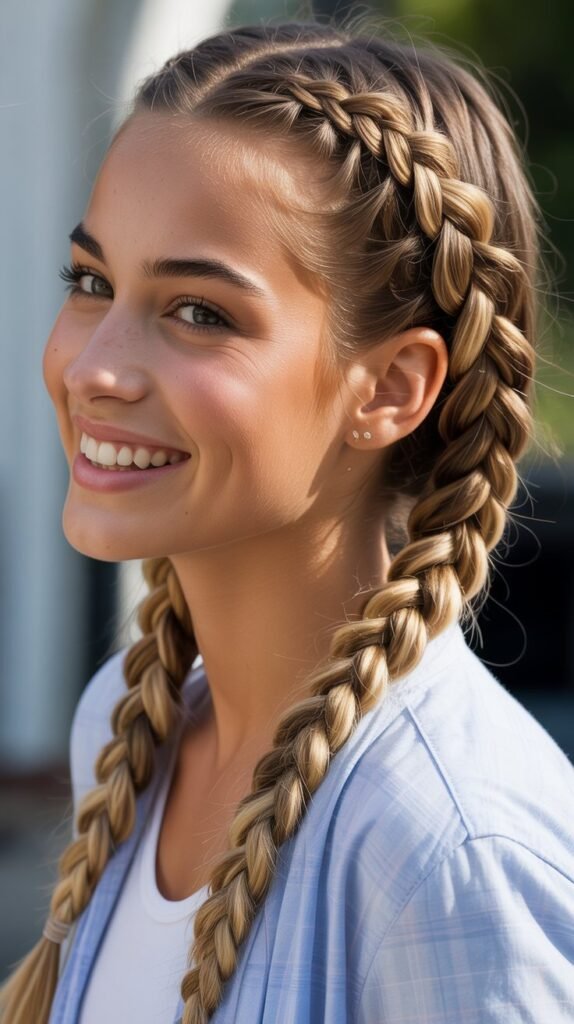
2. Dutch Braid (Inverted French Braid)
The Dutch braid creates a raised, three-dimensional effect that stands out more dramatically than its French counterpart.
By crossing sections under rather than over, this style produces a braid that sits prominently on top of the hair, creating visual interest and dimension.
Technique Differences:
- Follow the same sectioning approach as a French braid at the crown.
- Instead of crossing sections over the middle, cross them underneath.
- Add new hair to each section before crossing it under the middle strand.
- This reverse technique causes the braid to pop out from the head rather than lying flat.
- Pull slightly tighter than a French braid to emphasize the raised effect.
- Finish by securing and gently loosening the edges for a fuller appearance.
Styling Advantages:
- Creates a more noticeable statement than traditional French braids.
- Works exceptionally well for sports and physical activities due to secure hold.
- Adds volume and dimension to finer hair types.
- Easier to see your own work while braiding compared to French braids.
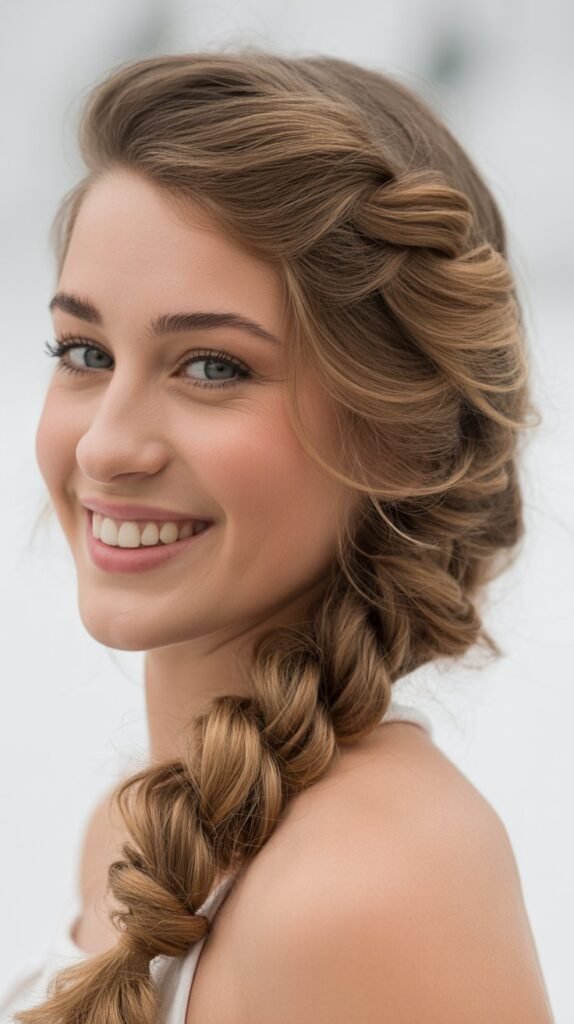
3. Fishtail Braid
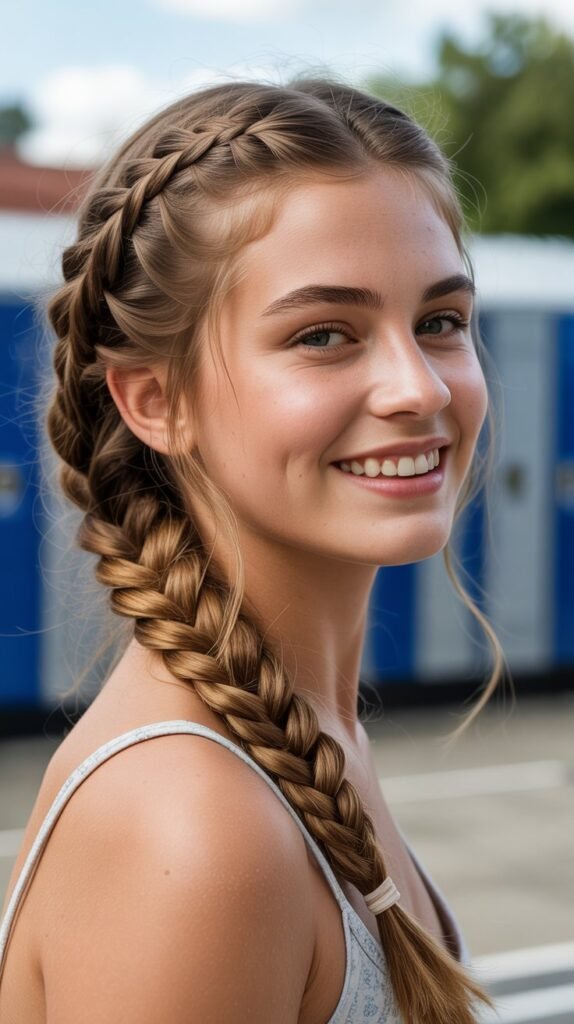
The fishtail braid delivers an intricate, woven appearance that looks complex but requires only basic braiding skills.
This bohemian-inspired style uses just two sections instead of three, creating a unique texture that catches the eye.
Step-by-Step Instructions:
- Divide all hair into two equal sections at the nape of the neck.
- Take a thin strand from the outer edge of the left section.
- Cross this thin strand over to join the right section.
- Take a thin strand from the outer edge of the right section.
- Cross it over to join the left section.
- Continue alternating sides, always taking thin pieces from the outer edges.
- The thinner your sections, the more intricate and detailed the final braid appears.
- Secure at the bottom and gently pull apart for a fuller, more relaxed look.
Perfect For:
- Students who want an artistic, creative appearance.
- Days when you have slightly more time for styling in the morning.
- Creating a bohemian or relaxed aesthetic while maintaining neatness.
- Showcasing hair color or highlights through the woven pattern.
4. High Ponytail with Wrapped Section
Elevating the classic ponytail with a wrapped hair section transforms a basic style into something polished and put-together. This simple addition takes just an extra minute but significantly upgrades the overall appearance.
Creation Process:
- Brush hair upward and gather at the crown into a high ponytail.
- Secure with a strong elastic that matches your hair color.
- Leave out a small section of hair from the underside of the ponytail before securing.
- Wrap this reserved section around the elastic multiple times to completely conceal it.
- Secure the wrapped section underneath the ponytail with a bobby pin.
- Use hairspray on a toothbrush to smooth any flyaways around the wrap.
- Optional: curl the ponytail length for added volume and movement.
Why Students Love It:
- Takes a basic style from ordinary to refined in seconds.
- Keeps hair completely off the neck and shoulders.
- Works well for both casual school days and more formal events.
- The height creates a lifted, energetic appearance.
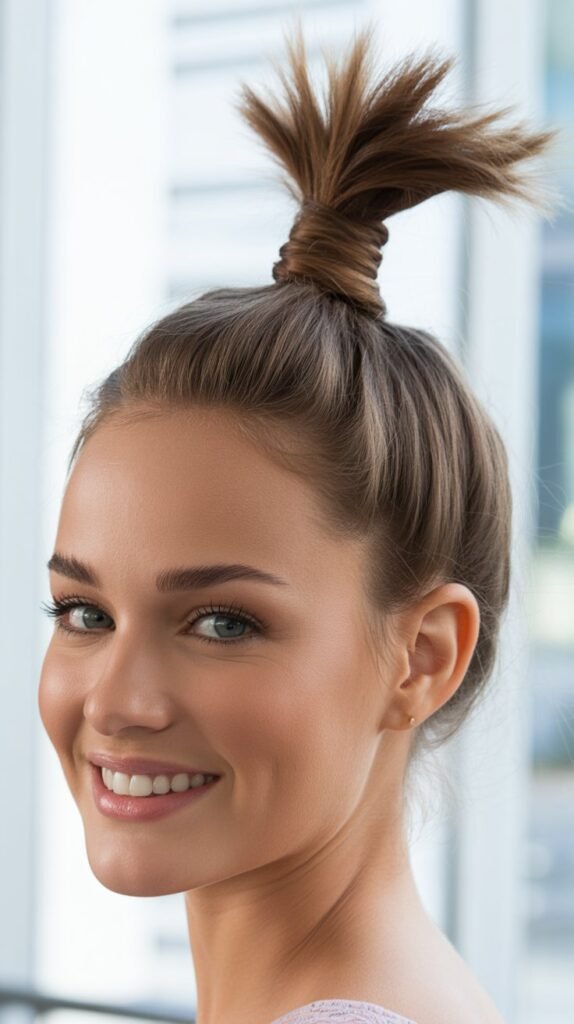
5. Messy Bun
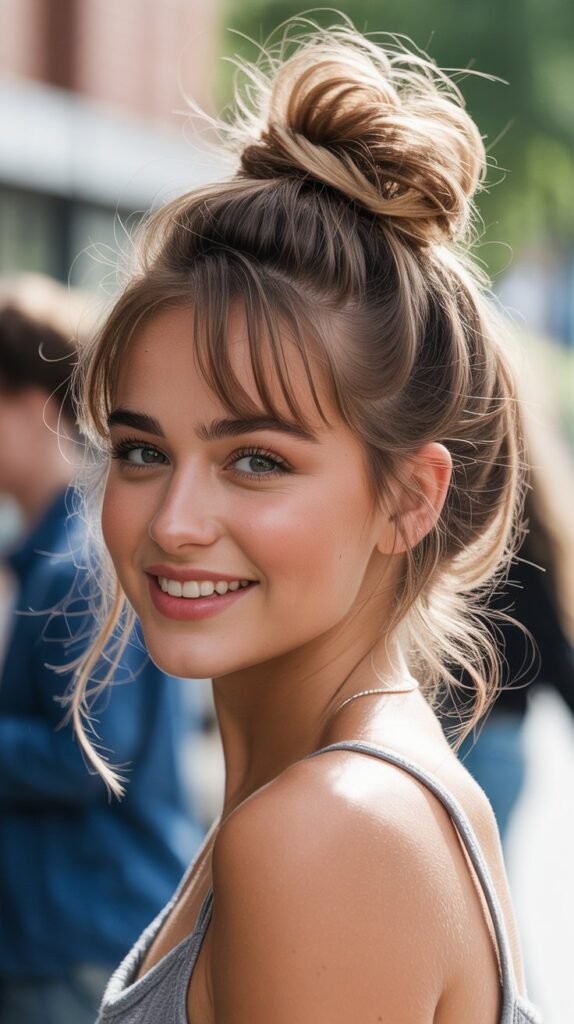
The intentionally undone messy bun strikes the perfect balance between casual and stylish while being incredibly quick to execute.
This effortless style works with various hair textures and doesn’t require perfection to look great.
Quick Assembly:
- Flip your head upside down and gather hair into a high ponytail without worrying about smoothness.
- Twist the ponytail loosely around its base.
- Wrap the twisted hair around the elastic to form a bun shape.
- Secure with another elastic or use bobby pins to hold sections in place.
- Gently pull out small sections to create deliberate texture and volume.
- Allow a few face-framing pieces to fall naturally for a softer look.
- Use fingers rather than a brush to maintain the intentionally imperfect texture.
Perfect Timing:
- Ideal for rushed mornings when you’re running late.
- Great for second or third-day hair when natural texture adds to the style.
- Works for athletic activities and remains secure during movement.
- Transitions easily from classroom to after-school activities.
6. Low Twisted Bun
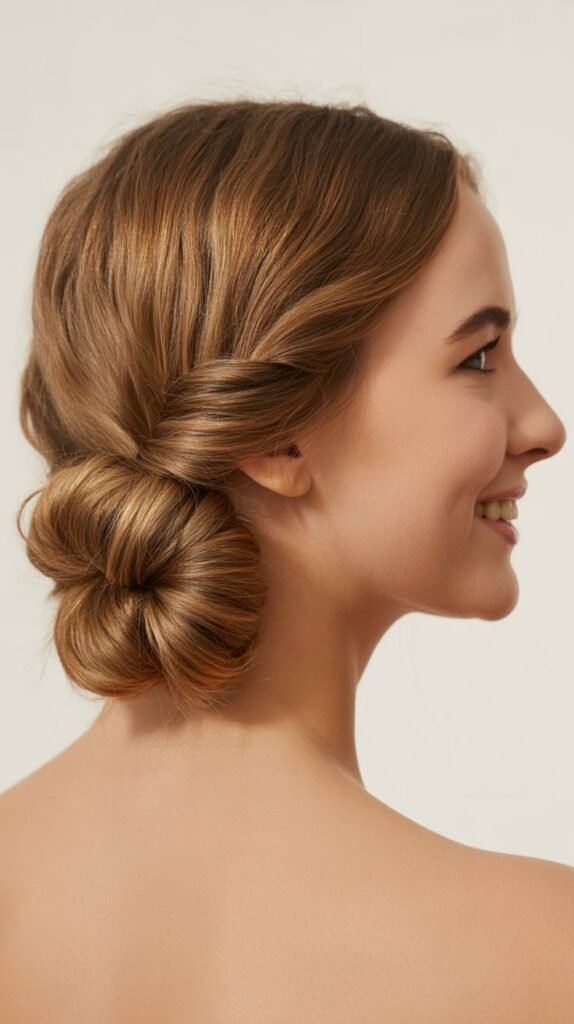
The low twisted bun exudes sophistication and works beautifully for presentations, school pictures, or formal school events.
This elegant style sits at the nape of the neck and creates a refined, mature appearance.
Elegant Construction:
- Gather hair into a low ponytail at the nape of your neck.
- Divide the ponytail into two equal sections.
- Twist each section clockwise until it begins to coil on itself.
- Wrap both twisted sections around the base of the ponytail in opposite directions.
- This creates a rope-like effect with interesting dimension.
- Secure with bobby pins by inserting them through the bun into the hair beneath.
- Use hairspray to set the style and control any loose pieces.
Appropriate Occasions:
- School presentations or speaking engagements where professionalism matters.
- Formal school events like awards ceremonies or honor society meetings.
- Picture day when you want a timeless, classic look.
- Days when you want to project maturity and confidence.
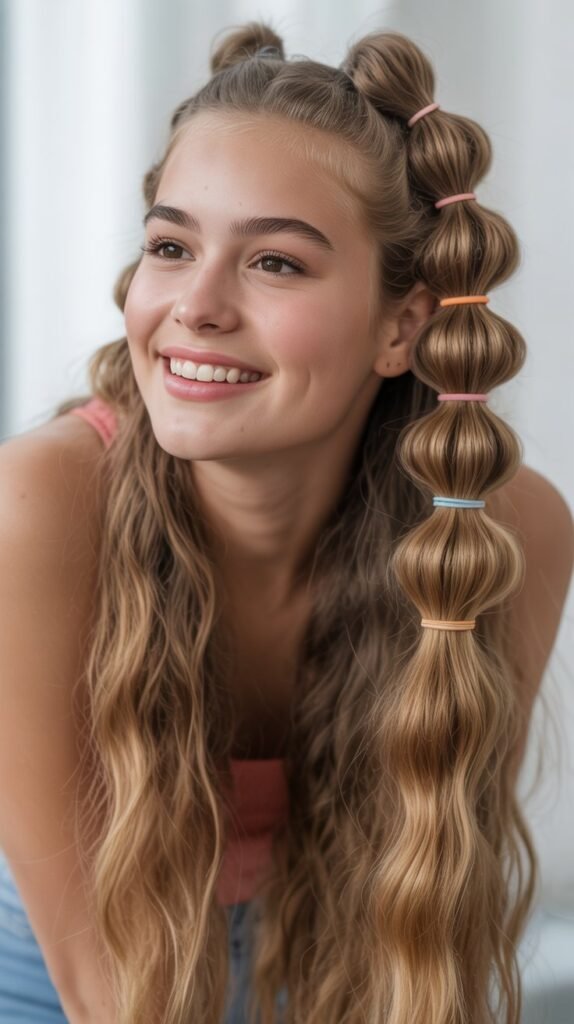
7. Bubble Ponytail
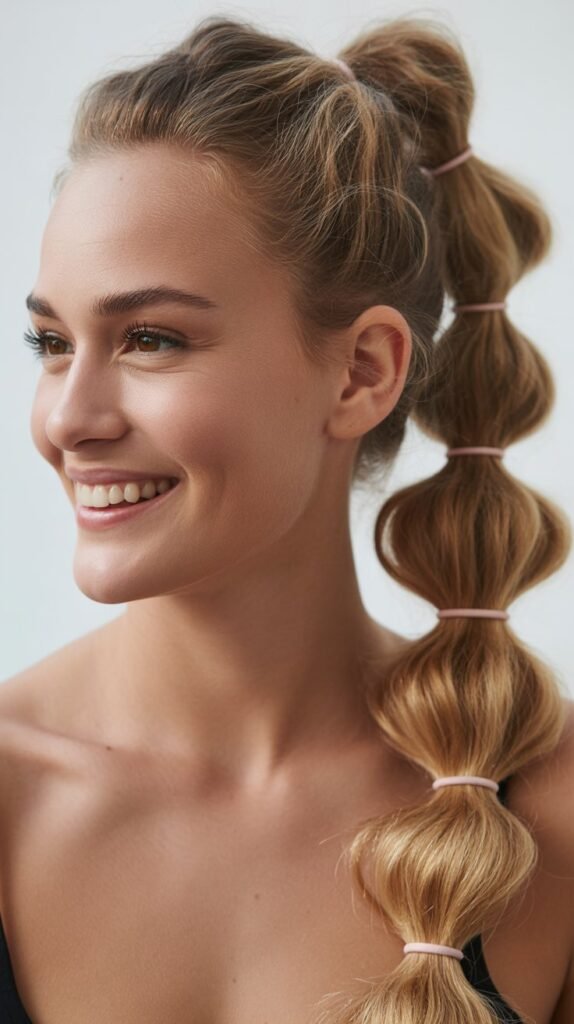
The bubble ponytail adds playful dimension to a standard ponytail through strategic elastic placement. This trendy style went viral on social media and remains popular for its fun, youthful appearance.
Building Bubbles:
- Create a high or mid-level ponytail as your foundation.
- Place a second elastic two to three inches down from the first.
- Gently pull the hair between the two elastics outward from all sides to create a rounded bubble shape.
- Add another elastic two to three inches below the second one.
- Repeat the pulling process to create another bubble.
- Continue this pattern down the entire length of your ponytail.
- Use as many elastics as your hair length allows, typically three to six bubbles.
Customization Options:
- Use colorful or decorative elastics to enhance the playful aesthetic.
- Vary the size of bubbles for an asymmetrical, artistic effect.
- Position the initial ponytail at different heights for different looks.
- Works with straight or curly hair textures equally well.
8. Half-Up Top Knot
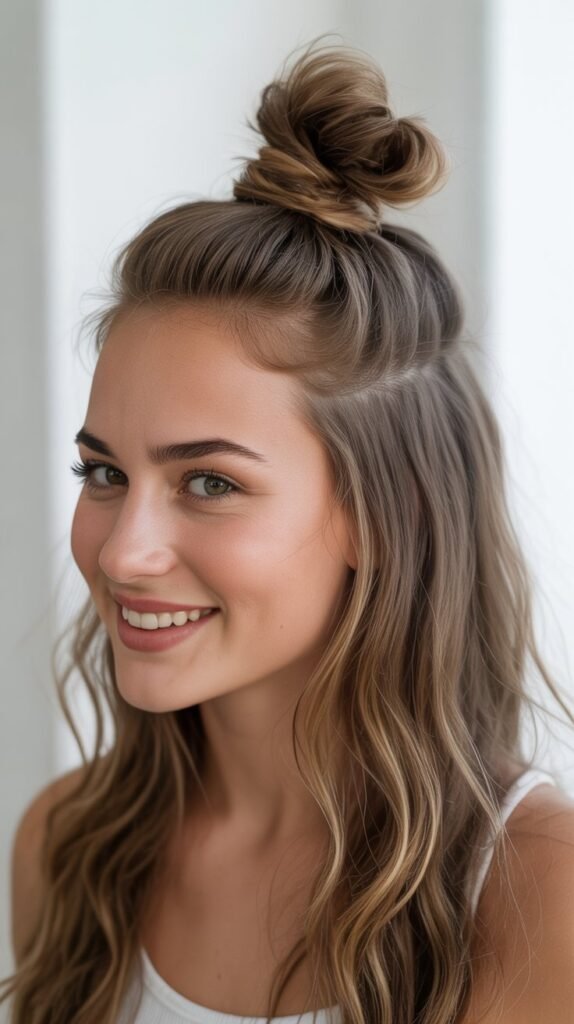
The half-up top knot combines the best of both worlds by securing the top section while allowing length to flow freely. This balanced style keeps hair out of your face while showcasing your length.
Construction Method:
- Section off the top half of your hair from ear to ear across the crown.
- Gather this top section and secure it into a high ponytail.
- Twist the ponytail and wrap it around its base to form a small knot.
- Secure the knot with bobby pins or an additional elastic.
- Leave the bottom half of your hair down and styled as desired.
- Straighten or curl the loose bottom section for added polish.
- Pull out a few face-framing pieces if desired for a softer look.
Versatility Benefits:
- Keeps hair away from your face during classes and activities.
- Allows you to show off hair length and color simultaneously.
- Easy to adjust throughout the day if needed.
- Works equally well for casual and slightly dressy occasions.
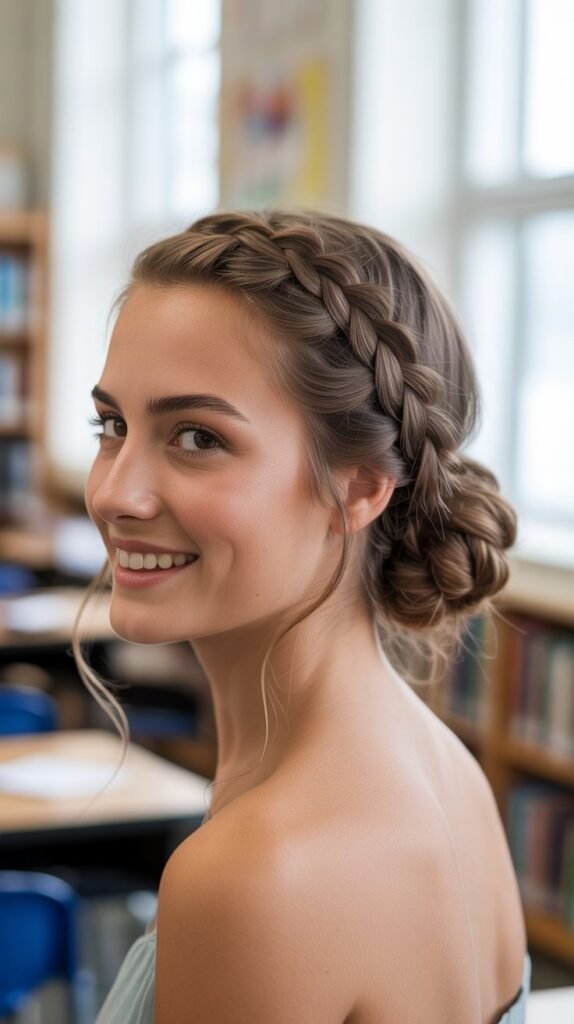
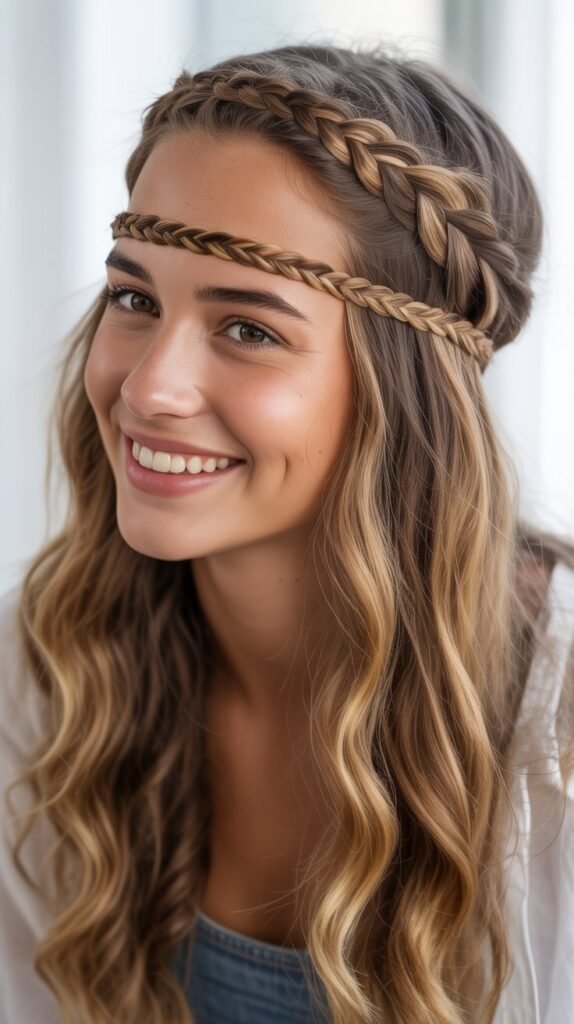
9. Braided Crown
The braided crown creates a romantic, ethereal look by wrapping braids around the head like a natural headband. This style works beautifully for special school events or when you want to feel extra special.
Crown Creation:
- Create a deep side part on your preferred side.
- Take a section of hair from the front on the heavier side of the part.
- Begin a Dutch or French braid following your hairline toward the opposite ear.
- Continue braiding along the hairline, incorporating hair as you go.
- When you reach behind the opposite ear, finish with a regular braid.
- Wrap the remaining braid back toward where you started and pin it underneath.
- Secure all pins invisibly beneath the crown for a seamless appearance.
Special Occasion Perfect:
- Ideal for school dances, homecoming, or prom events.
- Beautiful for spring and summer school activities.
- Photographs exceptionally well for yearbooks and social media.
- Can be adorned with small flowers or decorative pins for extra flair.
10. Sleek Low Ponytail
The sleek low ponytail embodies minimalist sophistication with its smooth, polished appearance. This refined style works particularly well for formal school settings and professional presentations.
Achieving Sleekness:
- Apply smoothing serum or cream to damp hair before blow-drying.
- Use a paddle brush while blow-drying to create maximum smoothness.
- Brush all hair straight back and down toward the nape of the neck.
- Secure with an elastic at the nape, ensuring no bumps or irregularities.
- Take a small section from the ponytail and wrap it around the elastic.
- Use a flat iron on the ponytail itself if needed for extra sleekness.
- Finish with shine spray and use a toothbrush with hairspray for flyaways.
Professional Applications:
- Perfect for debate team competitions or mock trial events.
- Appropriate for school job fairs or scholarship interviews.
- Works well for student government official functions.
- Creates a mature, confident impression for leadership positions.
11. Side Braid with Loose Curls
Combining a side braid with loose flowing curls creates a romantic, dimensional style that feels both casual and special. This asymmetrical approach adds visual interest while maintaining practicality.
Dual Texture Technique:
- Curl all hair using a curling iron or wand before beginning the braid.
- Create a deep side part on your preferred side.
- Take a section from the front on one side and begin braiding along the hairline.
- Use a Dutch braid technique so the braid stands out against the curls.
- Continue the braid down past the ear and secure with a small elastic.
- Allow the rest of the curled hair to fall naturally over the opposite shoulder.
- Gently separate some curl sections for a softer, more voluminous appearance.
Textural Interest:
- The contrast between structured braid and soft curls creates dynamic appeal.
- Works beautifully for school events that are semi-formal.
- Allows you to practice both braiding and curling techniques.
- Photographs exceptionally well from multiple angles.
12. Space Buns
Space buns bring a playful, youthful energy with their distinctive double-bun placement at the top of the head.
This fun style became popular through pop culture and remains a favorite for casual school days.
Double Bun Assembly:
- Create a clean center part from forehead to nape.
- Divide hair into two equal sections on either side of the part.
- Gather one section into a high ponytail positioned above the ear.
- Twist the ponytail and wrap it around the base to form a rounded bun.
- Secure with bobby pins and repeat on the opposite side.
- Ensure both buns are positioned at the same height for symmetry.
- Pull out small wispy pieces around the face for a softer effect.
Fun Factor:
- Perfect for spirit days or themed school events.
- Shows personality and creativity within school guidelines.
- Works well for students with thick hair that creates substantial buns.
- Can be adapted to lower positioning for a more subtle version.
13. Twisted Half-Up Style
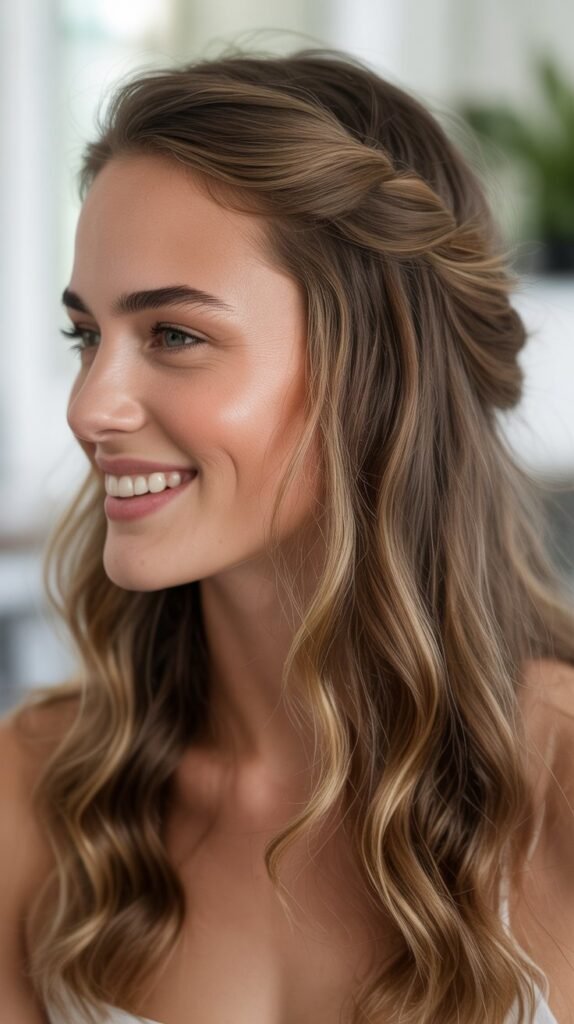
The twisted half-up style offers an elegant alternative to basic half-up looks by incorporating twisted sections that meet at the back.
This romantic style adds interest without complicated braiding.
Twist Technique:
- Take a section of hair from above your temple on one side.
- Twist this section away from your face, keeping the twist tight and smooth.
- Bring the twisted section toward the back center of your head.
- Secure temporarily with a clip while you work on the opposite side.
- Create a matching twist on the other side and bring it to meet the first.
- Secure both twisted sections together at the back with bobby pins or an elastic.
- Allow the remaining hair to flow naturally down your back.
Refined Appearance:
- Creates a polished look that’s appropriate for any school setting.
- Takes less than five minutes once you master the technique.
- Works well with both straight and wavy hair textures.
- Can be dressed up with decorative pins or kept simple.
14. High Bun with Braid Wrap
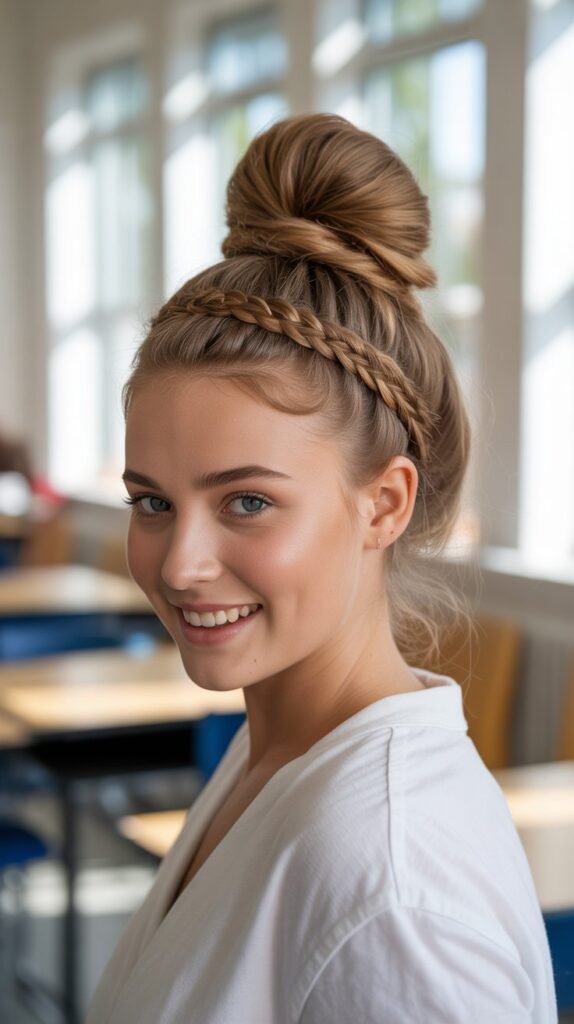
Wrapping a braid around a high bun elevates a basic updo into something special and unique. This style combines two techniques for added visual interest and holds securely throughout the day.
Combined Construction:
- Leave out a small section of hair before creating your high bun.
- Gather the remaining hair into a high ponytail at the crown.
- Twist and wrap the ponytail into a bun shape and secure with pins.
- Take the reserved section and create a three-strand braid.
- Wrap the braid around the base of the bun like a headband.
- Tuck the end of the braid under the bun and secure with bobby pins.
- Use hairspray to ensure the braid stays smooth and in place.
Elevated Impact:
- Transforms a basic bun into something more interesting and artistic.
- The braid adds texture and dimension to the overall style.
- Holds very securely for athletic activities or long school days.
- Shows attention to detail and personal style.
15. Waterfall Braid

The waterfall braid creates a cascading effect where strands fall through the braid like a flowing waterfall. This intricate-looking style is surprisingly achievable and creates stunning visual impact.
Cascading Method:
- Begin with a French braid starting near your temple on one side.
- After the first stitch, drop the bottom strand and let it fall naturally.
- Pick up a new section of hair from the top to replace the dropped strand.
- Continue braiding but keep dropping the bottom strand each time.
- Each dropped strand creates the waterfall effect as it cascades down.
- Continue the pattern across the back of your head toward the opposite side.
- Secure with a small elastic behind the opposite ear or continue into a regular braid.
Romantic Effect:
- Creates an ethereal, fairytale-like appearance perfect for special occasions.
- Works beautifully with curled hair to emphasize the cascading strands.
- Can be combined with a half-up style for added dimension.
- Requires practice but becomes easier with repetition.
16. Criss-Cross Ponytail
The criss-cross ponytail uses clever elastic placement to create an interesting geometric pattern down the length of a ponytail. This modern style adds architectural interest to a basic foundation.
Pattern Creation:
- Start with a basic ponytail positioned at your desired height.
- Place an elastic a few inches down from the first one.
- Divide the section between elastics into two equal parts.
- Pull these sections apart to create an opening in the center.
- Add another elastic below and bring the previously separated sections back together above it.
- Continue this pattern of dividing, pulling apart, and rejoining down the ponytail length.
- The result creates diamond-shaped openings connected by crossed hair sections.
Modern Appeal:
- Offers a contemporary geometric aesthetic that stands out.
- Works particularly well for thick hair that creates substantial sections.
- Can be worn to school or casual social events.
- Shows creativity and awareness of current hair trends.
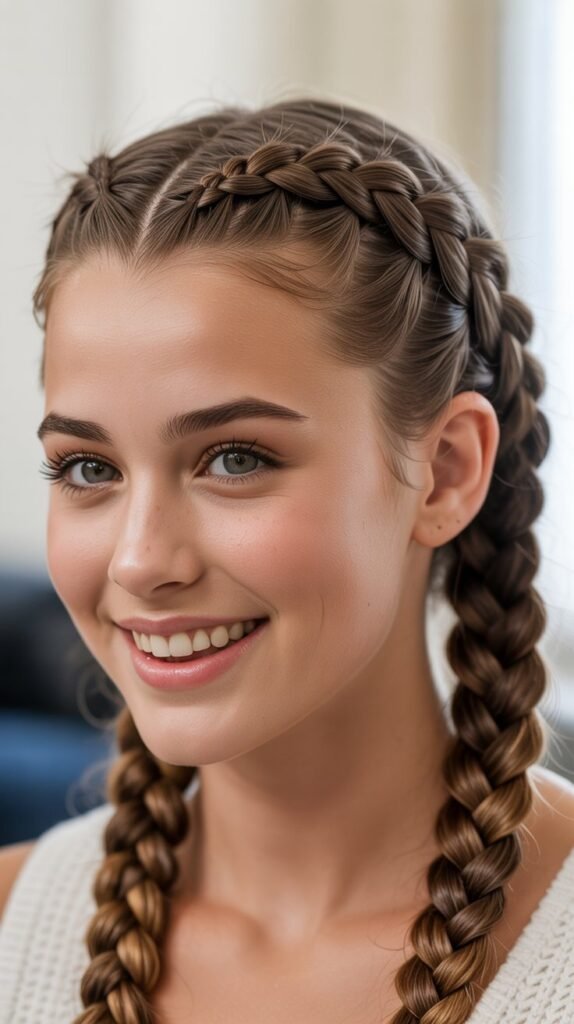
17. Braided Pigtails
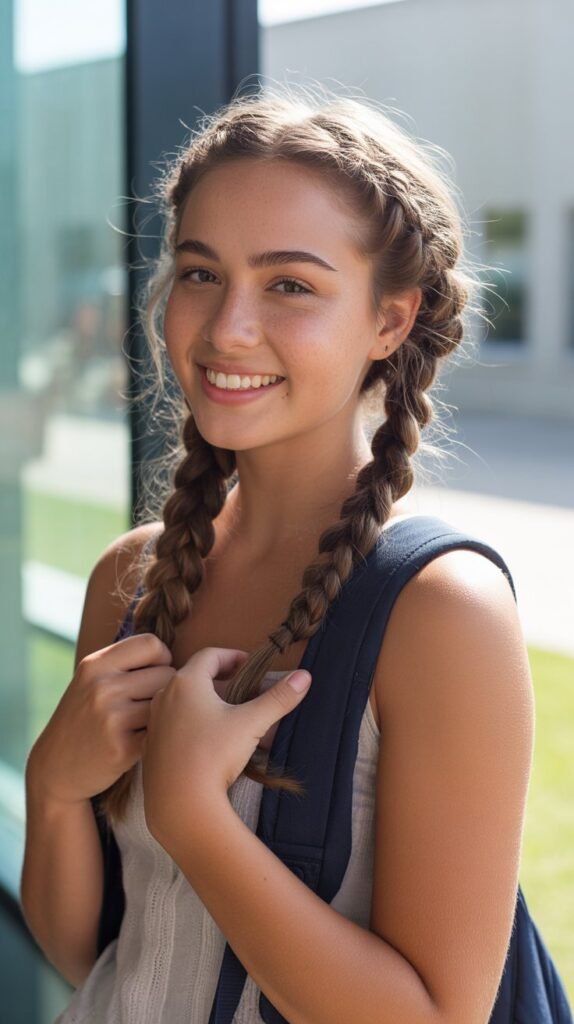
Braided pigtails bring a youthful, playful energy while providing excellent security for active school days. This classic style has been updated with modern variations that keep it fresh and relevant.
Classic Execution:
- Create a clean center part from forehead to nape dividing hair into two equal sections.
- Gather one section and create a traditional three-strand braid starting near the scalp.
- Keep consistent tension throughout the braid for even appearance.
- Secure the end with an elastic and repeat on the opposite side.
- Ensure both braids are positioned at the same height and angle.
- Gently pull on the braid edges if you want a fuller, more textured look.
- Add ribbons or colorful elastics to customize the style.
Practical Benefits:
- Keeps all hair completely secured for sports and physical activities.
- Appropriate for students of all ages with age-appropriate styling variations.
- Prevents tangling throughout busy school days.
- Can be slept in and refreshed the next morning with minimal effort.
18. Rope Braid Ponytail
The rope braid creates a twisted, corded appearance that’s simpler to execute than traditional braids while delivering impressive visual results. This technique works particularly well in ponytail form.
Rope Twist Technique:
- Secure hair into a ponytail at your preferred height.
- Divide the ponytail into two equal sections.
- Twist both sections individually in the same direction until they begin to coil.
- Then wrap these two twisted sections around each other in the opposite direction.
- The opposing twist directions create tension that holds the rope braid together.
- Continue twisting and wrapping down to the ends of your hair.
- Secure with an elastic and the rope braid will maintain its shape.
Simple Sophistication:
- Easier to execute than traditional three-strand braids for many people.
- Creates interesting texture and dimension with minimal effort.
- Holds very securely without unraveling throughout the day.
- Works well with various hair thicknesses and textures.
19. Low Side Ponytail with Braid

Positioning a ponytail to one side and incorporating a braid creates an asymmetrical style with romantic appeal. This look balances casual and dressy elements effectively.
Asymmetrical Assembly:
- Brush all hair to one side, either left or right based on preference.
- Secure into a low ponytail positioned over your shoulder.
- Take a section from the ponytail and create a three-strand braid.
- Wrap this braid around the ponytail or let it hang alongside as an accent.
- Alternatively, braid the entire ponytail for full textured effect.
- Pull gently on the braid sections to create fuller appearance.
- Add curls to the non-braided portions for mixed texture.
Versatile Styling:
- Can be adjusted from casual to dressy based on finishing touches.
- The side placement feels more relaxed and approachable than center styles.
- Works well for students who prefer hair falling forward rather than down their back.
- Easy to modify throughout the day if desired.
20. Crown Braid with Low Bun
Combining a crown braid with a low bun creates an elegant, sophisticated style perfect for formal school events. This regal look makes a strong impression while remaining completely practical.
Regal Construction:
- Create a braided crown following the hairline from one side to the other using the technique from style number nine.
- When you reach the opposite side, gather all remaining hair including the braid end.
- Form a low bun at the nape using a twisting or traditional bun technique.
- Pin the crown braid securely to ensure it stays in place above the bun.
- Tuck any braid ends into the bun to hide them seamlessly.
- Use multiple bobby pins to secure both the crown and bun elements.
- Finish with hairspray for all-day hold.
Formal Elegance:
- Perfect for school formals, dances, or special ceremonies.
- Creates a mature, sophisticated impression.
- Keeps all hair completely secured without any loose pieces.
- Photographs beautifully from every angle.
21. Half-Up Bubble Style
Combining the half-up concept with bubble technique creates a playful, dimensional style that’s both trendy and practical. This hybrid approach offers the best elements of both styles.
Hybrid Creation:
- Section off the top half of hair from ear to ear as in a traditional half-up style.
- Secure this top section into a ponytail at the crown or mid-head level.
- Create two to three bubble sections in this half-up ponytail using additional elastics.
- Pull each bubble section outward to create rounded, dimensional shapes.
- Leave the bottom section of hair flowing naturally down your back.
- The contrast between structured bubbles and flowing hair creates visual interest.
- Add curls or waves to the bottom section for additional texture.
Trendy Practicality:
- Keeps face-framing hair secured while showing off length.
- Incorporates current bubble trend in a wearable way.
- Easy to create in just a few minutes with practice.
- Works for everyday school wear or casual weekend activities.
22. Twisted Side Updo
The twisted side updo gathers hair to one side with elegant twisted sections creating a romantic, asymmetrical design. This style works beautifully for semi-formal school events.
Elegant Assembly:
- Brush all hair to one side, choosing your preferred side.
- Take small sections from the front and twist them back toward the gathering point.
- Pin each twisted section as you work your way around the head.
- Continue creating twisted sections that all meet at the same side point.
- Once all sections are twisted and pinned, gather the ends together.
- Form the gathered ends into a loose bun or leave them as a ponytail depending on preference.
- Allow a few soft pieces to fall around the face for a romantic finish.
Romantic Occasions:
- Beautiful for school dances or special evening events.
- The side placement photographs well and looks elegant from all angles.
- Can be customized with pins, flowers, or other accessories.
- Works well for students who want something more unique than center updos.
23. Four-Strand Braid
The four-strand braid creates an intricate, woven appearance that’s more complex than traditional three-strand braids. This advanced technique impresses with its detailed, basket-weave texture.
Advanced Technique:
- Divide hair into four equal sections instead of the traditional three.
- Cross the far right section under the section next to it.
- Then cross it over the following section moving toward the left.
- Take the far left section and cross it under its neighbor.
- Then cross it over the next section moving toward the right.
- Continue this pattern of under-over, alternating from each side.
- The result creates a more complex, basket-like woven texture.
Challenge Reward:
- Takes practice to master but creates impressive results.
- Shows dedication to learning advanced styling techniques.
- Creates more visual interest than simpler braid types.
- Works well for students who enjoy developing new skills.
24. Pull-Through Braid
The pull-through braid creates a voluminous, chain-like effect without actual braiding technique. This clever style uses ponytails pulled through each other to mimic braid appearance.
No-Braid Braiding:
- Create a half-up ponytail at the crown and secure with an elastic.
- Create another ponytail directly below it using the remaining top section of hair.
- Split the first ponytail in half and bring both halves down on either side of the second ponytail.
- Create a third ponytail below the second, incorporating loose hair from the sides.
- Take the two halves of the first ponytail and secure them together below the third ponytail.
- Continue this pattern of splitting, pulling through, and creating new ponytails down the head.
- Gently pull on each section to create fuller, more voluminous appearance.
Volume Builder:
- Creates the illusion of a much thicker, fuller braid.
- Perfect for students with finer hair who want more dramatic styles.
- Easier for some people than traditional braiding techniques.
- Creates impressive results with relatively simple execution.
25. Braided Headband with Down Hair
Creating a braid that acts as a natural headband keeps face-framing hair secured while allowing length to flow freely. This style combines practical and aesthetic elements beautifully.
Headband Construction:
- Take a section of hair from above one ear going across the front hairline.
- Create a Dutch braid so it stands out from the head like an actual headband.
- Braid along the hairline toward the opposite ear, incorporating hair as you go.
- When you reach the other ear, secure the braid with a small elastic.
- Tuck the elastic and braid end behind your ear and pin in place.
- Leave all remaining hair down and style as desired.
- The braid keeps face-framing pieces secured while showcasing length.
Practical Beauty:
- Keeps hair out of your face during classes without fully pulling it back.
- Works well for sports and activities while maintaining a feminine look.
- Can be combined with curls, waves, or straight styling on the loose hair.
- Appropriate for all school settings while adding personal style.
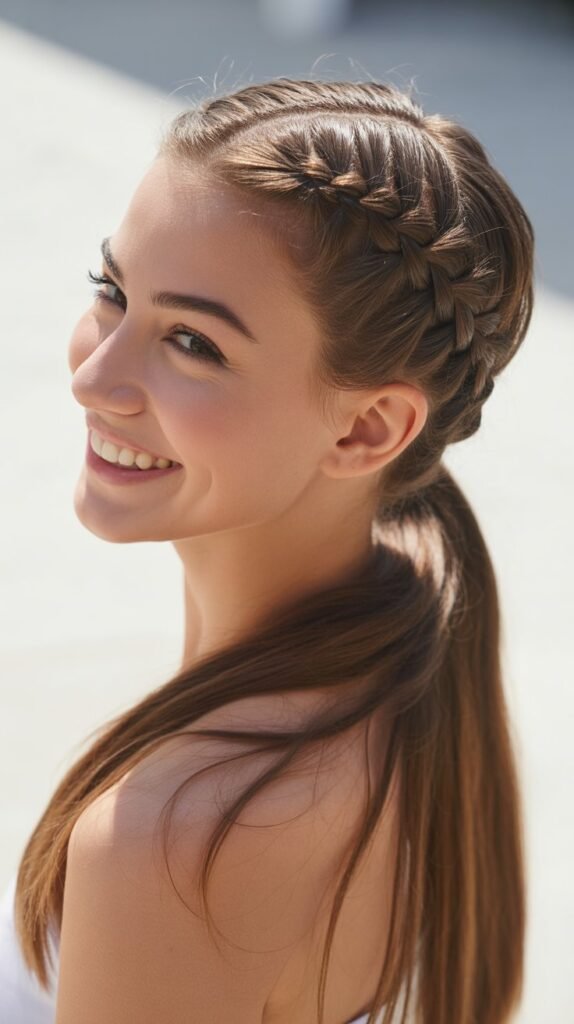
26. Low Braided Ponytail

Incorporating a braid into a low ponytail adds texture and interest to a classic, comfortable style. This combination offers security with visual appeal.
Combined Approach:
- Gather hair into a low ponytail at the nape of your neck.
- Secure with a strong elastic that will hold throughout the day.
- Divide the ponytail into sections and create a braid using your preferred technique.
- Options include traditional three-strand, fishtail, or rope braids depending on desired effect.
- Braid all the way to the ends and secure with another elastic.
- Gently pull on the braid sections to create fuller texture.
- The combination of ponytail and braid offers both comfort and style.
Comfortable Style:
- The low positioning reduces tension on the scalp compared to high styles.
- Braiding the ponytail prevents tangling throughout the day.
- Easy to execute even when tired or rushed in the morning.
- Professional enough for school while being comfortable for all-day wear.
27. Infinity Braid
The infinity braid creates a figure-eight pattern that appears complex and mathematical. This unique style stands out for its distinctive, almost architectural appearance.
Figure-Eight Technique:
- Divide hair into two sections like preparing for a rope braid.
- Take a small piece from the outer edge of the left section.
- Wrap it over the left section, under the right section, and back over to join the left.
- Take a small piece from the outer edge of the right section.
- Wrap it over the right section, under the left section, and back over to join the right.
- This creates the infinity or figure-eight pattern as you work down the length.
- Continue alternating sides using this over-under-over pattern.
Mathematical Beauty:
- Appeals to students who enjoy geometry and patterns.
- Creates conversation and stands out in school hallways.
- Takes significant practice to master but yields impressive results.
- Shows dedication to learning complex styling techniques.
28. Wrapped Low Bun

The wrapped low bun uses hair wrapped around a bun base to create a smooth, sophisticated finish. This polished style works for formal school occasions and photographs beautifully.
Smooth Construction:
- Gather hair into a low ponytail at the nape and secure with elastic.
- Take small sections from the ponytail and wrap them around the base individually.
- Pin each wrapped section as you go to build the bun gradually.
- Continue wrapping and pinning until all hair is incorporated into the bun shape.
- The result is smoother and more controlled than twist-and-wrap methods.
- Use additional pins to ensure security and smoothness.
- Finish with hairspray and smooth any flyaways with a toothbrush.
Refined Occasions:
- Perfect for school performances, recitals, or formal presentations.
- Creates a ballet-inspired, classic aesthetic.
- Photographs exceptionally well without distracting texture.
- Projects maturity and attention to detail.
29. Side Fishtail Braid
Bringing the fishtail braid to one side creates a relaxed, bohemian look that’s both trendy and manageable. The side placement makes the intricate pattern more visible and accessible.
Side-Swept Execution:
- Brush all hair to your preferred side, over one shoulder.
- Divide the hair into two equal sections as in a regular fishtail braid.
- Take thin pieces from the outer edges and cross them over to the opposite section.
- Continue this pattern working down the length of the braid.
- The side placement allows you to see your work more easily as you braid.
- Secure at the end and gently pull sections for fuller appearance.
- The bohemian style works well for casual school days and weekends.
Relaxed Appeal:
- More casual and approachable than center-back styling.
- Easier to create since you can see the braid as you work.
- The intricate pattern gets showcased more prominently in side placement.
- Works beautifully for students who prefer relaxed, artistic styles.
30. Triple Braid Combination
Combining three different braid types into one hairstyle creates maximum visual interest and showcases diverse braiding skills. This advanced style makes a statement for special school occasions.
Ultimate Combination:
- Create a Dutch braid on one side of the head along the hairline.
- Create a French braid on the opposite side following a similar path.
- Gather all hair including both braids into a ponytail.
- Create a fishtail braid with the ponytail to add a third braid type.
- Secure at the bottom and gently enhance each braid’s texture by pulling sections.
- This combination showcases mastery of multiple techniques in one style.
- The variety creates incredible visual interest and demonstrates skill.
Showcase Style:
- Perfect for showing off braiding abilities at school events.
- Creates a unique look that won’t be duplicated by other students.
- Can be documented in photos to share on social media or portfolios.
- Represents the ultimate achievement in combining multiple styling techniques.
Finding your signature school hairstyle has never been easier with these 30 Trendy School Hairstyles for Long Hair Every Student Will Love at your fingertips.
From quick five-minute solutions that rescue rushed mornings to elaborate designs that steal the spotlight at special events, this collection offers something for every student, every skill level, and every occasion.
The beauty of having long hair lies in its versatility, and these styles prove that practical doesn’t mean boring—each option keeps hair manageable while expressing personal style and creativity.
Whether you gravitate toward classic braids that stand the test of time, modern bubble and pull-through techniques that embrace current trends, or elegant updos that project confidence and maturity, you now have a comprehensive toolkit to transform your daily look.
Start with the beginner-friendly options to build your confidence and skills, then gradually challenge yourself with more advanced techniques as your abilities grow.
Remember that practice makes perfect, and even the most complex styles become second nature with repetition. With this guide to 30 Trendy School Hairstyles for Long Hair Every Student
Will Love, you’re equipped to make every school day a good hair day, expressing your unique personality while keeping your long locks beautifully styled and perfectly practical for whatever your schedule brings.