
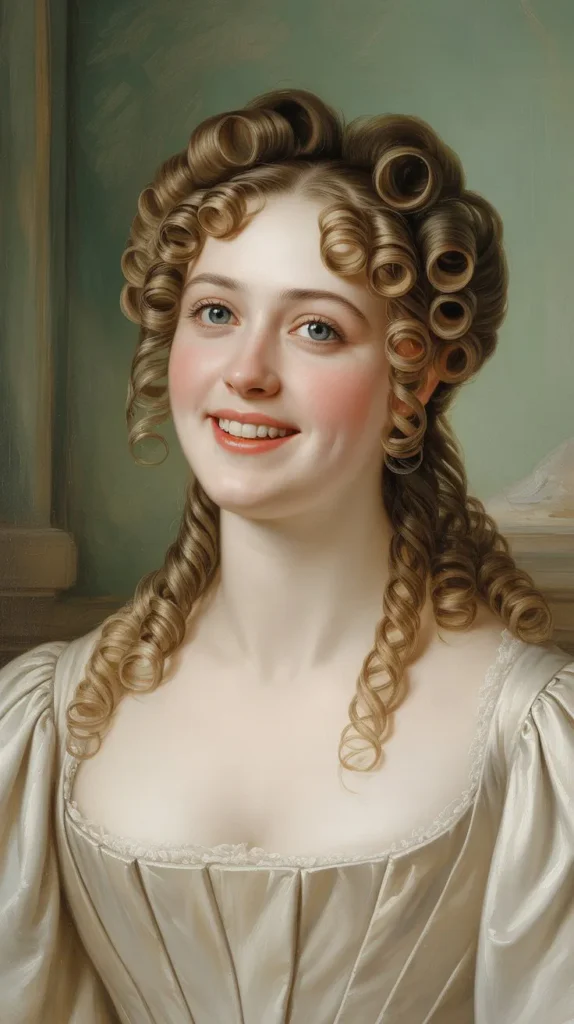
When you think of Bridgerton, you imagine elaborate updos cascading with curls, adorned with tiapers and flowers, seemingly impossible without yards of hair.
But what if I told you that the Regency-era elegance can be yours, even with a chic bob or pixie cut?
Whether you’re preparing for a themed party, a wedding, or simply want to infuse your everyday style with historical romance, this guide unveils 35 breathtaking Bridgerton-inspired hairstyles specifically designed for short hair.
From delicate pin curls and jeweled headbands to strategic volume and artful accessories, each look proves that you don’t need Rapunzel-length locks to channel Daphne’s grace or Eloise’s rebellious charm.
Get ready to discover styling secrets, product recommendations, and step-by-step techniques that will transform your short hair into a Regency masterpiece worthy of the ton’s approval.
1. Romantic Ribbon-Wrapped Crown
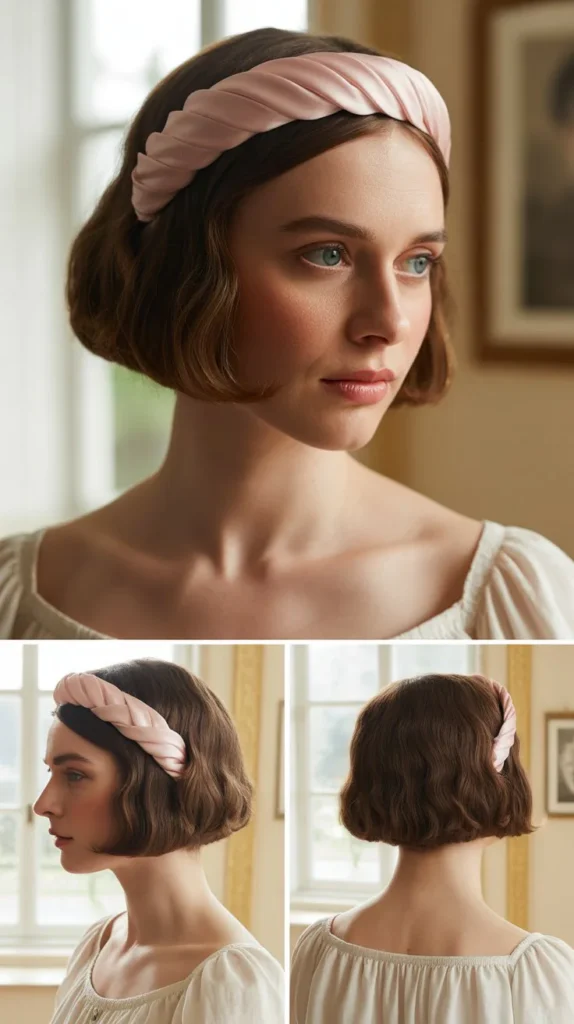
The ribbon-wrapped crown brings instant Bridgerton charm to short hair by weaving a delicate silk or velvet ribbon through your strands to create a headband effect that sits like a coronet.
This style works beautifully for bobs and lobs, adding a feminine touch that’s both easy to achieve and remarkably elegant.
How to Create This Look
- Begin with freshly washed and dried hair that has natural volume and texture.
- Choose a ribbon that’s approximately 1-1.5 inches wide in silk, satin, or velvet fabric for authentic period appeal.
- Part your hair in the center or slightly off-center, depending on your face shape preference.
- Starting at one temple, weave the ribbon over and under small sections of hair, creating a braided appearance.
- Continue wrapping the ribbon around your crown, securing it periodically with small bobby pins that match your hair color.
- Allow a few face-framing tendrils to escape for softness and romance.
- Tie the ribbon ends in a small bow at the nape of your neck or tuck them discreetly under your hair.
- Finish with a light-hold hairspray to keep everything in place without stiffness.
Best Occasions and Hair Types
- Perfect for garden parties, afternoon teas, Bridgerton-themed events, or spring weddings.
- Works exceptionally well on straight to wavy hair textures that hold shape easily.
- Ideal for bob lengths between chin and shoulder, though adaptable for longer pixie cuts with sufficient length on top.
- Suitable for fine to medium hair densities, as the ribbon adds visual weight without requiring thick hair.
2. Delicate Pin Curl Clusters
Pin curls are the cornerstone of Regency hairstyling, and when adapted for short hair, they create charming clusters of tight ringlets that frame the face with period-appropriate elegance.
These sculptured curls were a signature of the era and remain one of the most authentic ways to achieve Bridgerton beauty.
Styling Technique and Product Recommendations
- Start with slightly damp hair, applying a setting lotion or mousse that provides heat protection and hold.
- Divide your hair into small sections, approximately one inch square, working systematically from the front hairline backward.
- Wrap each section tightly around your finger, creating a flat spiral coil against your scalp.
- Secure each curl with a duckbill clip or bobby pin, ensuring the curl sits flat and smooth.
- Once all curls are pinned, either sit under a hooded dryer for 30-45 minutes or allow to air-dry for several hours.
- After completely dry, remove pins carefully and use your fingers to gently separate curls into smaller clusters.
- Avoid brushing, which will destroy the curl definition and create unwanted frizz.
- Set the style with a flexible-hold hairspray that allows natural movement while maintaining curl integrity.
Maintenance and Longevity Tips
- Pin curls can last 2-3 days when properly set and maintained with nighttime protection.
- Sleep with a silk or satin bonnet to preserve curls and prevent flattening.
- Refresh curls on day two or three by lightly misting with water and re-wrapping any loose sections.
- Use a small amount of lightweight oil or serum on your fingertips to smooth flyaways without weighing down curls.
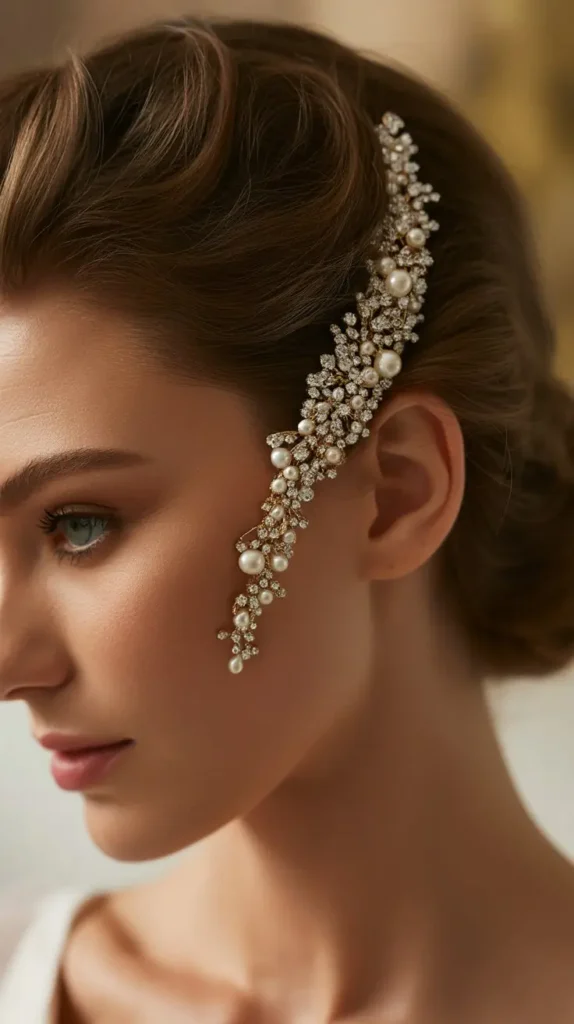
3. Pearl-Studded Side Sweep
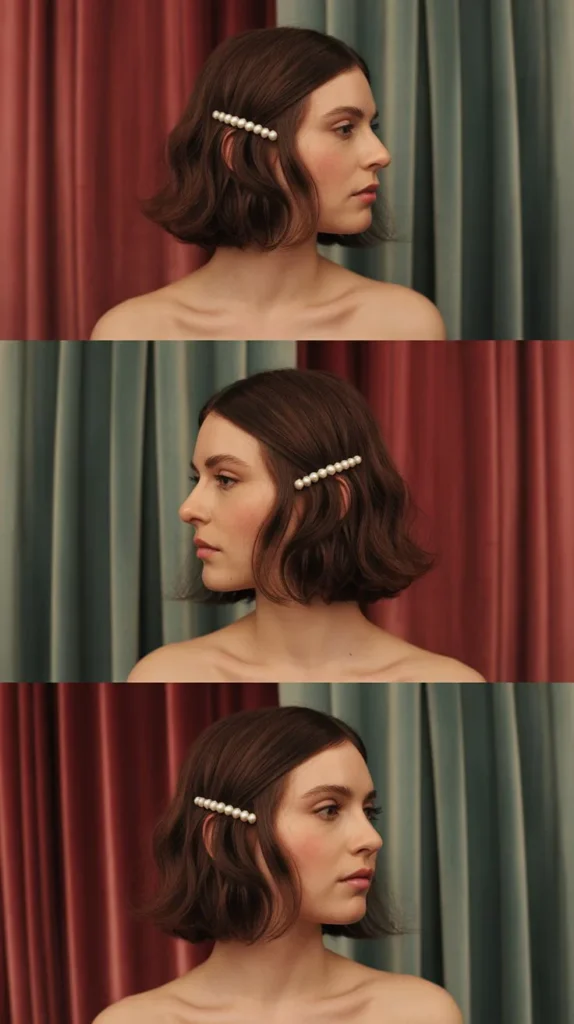
Pearls embody Regency refinement, and when incorporated into a side-swept short hairstyle, they create an asymmetrical elegance that’s both modern and historically inspired.
This look channels the understated luxury seen throughout Bridgerton’s costume design.
Pearl Accessory Selection
- Invest in pearl-headed bobby pins, hairpins, or decorative combs available from bridal or vintage-inspired accessory retailers.
- Consider the size of pearls relative to your hair volume—smaller pearls suit fine hair while larger ones complement thicker textures.
- Mix authentic freshwater pearls with high-quality faux options to create varying visual interest without excessive cost.
- Look for accessories with secure backing that won’t slip from short hair throughout wear.
Step-by-Step Creation Process
- Create a deep side part, sweeping the majority of your hair to one side.
- Apply smoothing cream or gel to tame flyaways and create a sleek surface on the heavier side.
- Use a flat iron if necessary to achieve maximum smoothness and shine.
- Position pearl accessories in a curved line following the natural arc from your part down toward your ear.
- Space pins approximately one inch apart for balanced visual weight.
- On the lighter side, tuck hair behind your ear and secure with a single pearl pin for symmetry.
- Finish with shine spray to enhance the lustrous quality that complements pearls beautifully.
4. Textured Crown Volume with Headband
Crown volume defines the Bridgerton silhouette, and short hair can achieve this dramatic height through strategic teasing and the support of an embellished headband.
This style creates the illusion of a fuller updo while working within the limitations of shorter lengths.
Building Volume on Short Hair
- Begin with completely dry hair, as damp hair won’t hold teasing effectively.
- Section the crown area from ear to ear, isolating the hair you’ll be working with.
- Starting at the back of this section, take small horizontal subsections and backcomb toward the scalp using a fine-toothed comb.
- Work forward toward your hairline, creating progressively more volume as you go.
- Once adequate volume is achieved, smooth the very top layer gently with a soft brush without disturbing the teased foundation.
- Spray the teased area with strong-hold hairspray, allowing it to dry before positioning your headband.
Headband Placement and Styling
- Choose a headband with Regency-appropriate embellishments like rhinestones, pearls, or metallic threading.
- Position the headband approximately one inch back from your natural hairline to showcase volume.
- Ensure the headband sits securely without sliding, adjusting tension if needed.
- Allow side sections to remain smooth and sleek, creating contrast with the voluminous crown.
- Gently pull a few strands from the sides to create subtle face-framing softness.
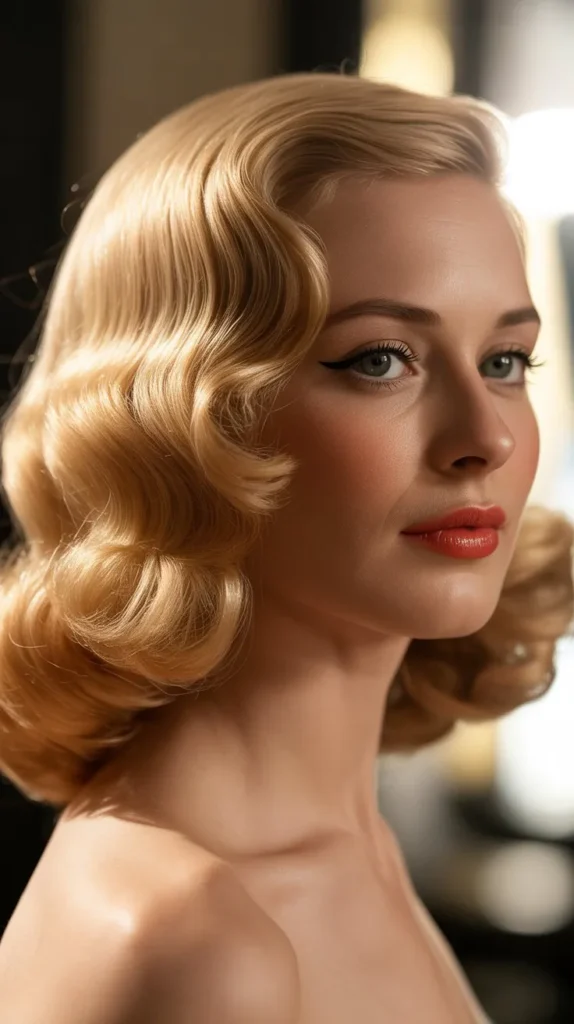
5. Vintage Finger Waves
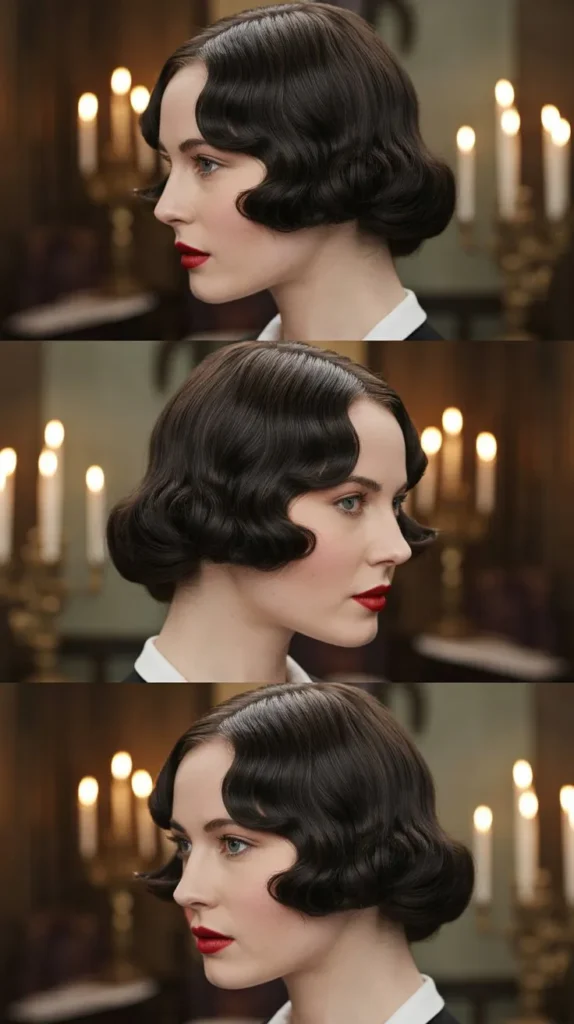
Finger waves epitomize 1920s glamour but have deep roots in earlier hairstyling traditions, making them a sophisticated choice for Bridgerton-inspired looks on short hair.
These sculptured S-shaped waves create undulating patterns that catch light beautifully and speak to meticulous styling artistry.
Mastering the Finger Wave Technique
- This style requires setting lotion or gel with strong hold—vintage formulas work particularly well.
- Begin with damp, freshly combed hair that’s completely tangle-free.
- Apply generous amounts of setting product throughout, ensuring even saturation.
- Create your first wave by forming a C-shape curve with your fingers while using a comb to push hair into the opposite direction.
- Hold the formed wave firmly with one hand while using your comb to create the reverse curve below it.
- Continue this alternating pattern down the length of your hair, pinning each wave ridge with metal clips.
- Allow hair to dry completely—this is crucial and may take several hours or require hooded dryer assistance.
- Remove clips carefully and avoid touching waves excessively, which can disturb the pattern.
Modern Adaptations for Wearability
- Finger waves can be concentrated just at the front hairline for a vintage accent rather than covering the entire head.
- Combine finger waves with smooth, slicked-back sections for contemporary contrast.
- Use modern styling gels that dry with more flexibility than traditional setting lotions for movable waves.
- Consider applying waves only on one side for an asymmetrical, fashion-forward interpretation.
6. Floral Crown Embellishment
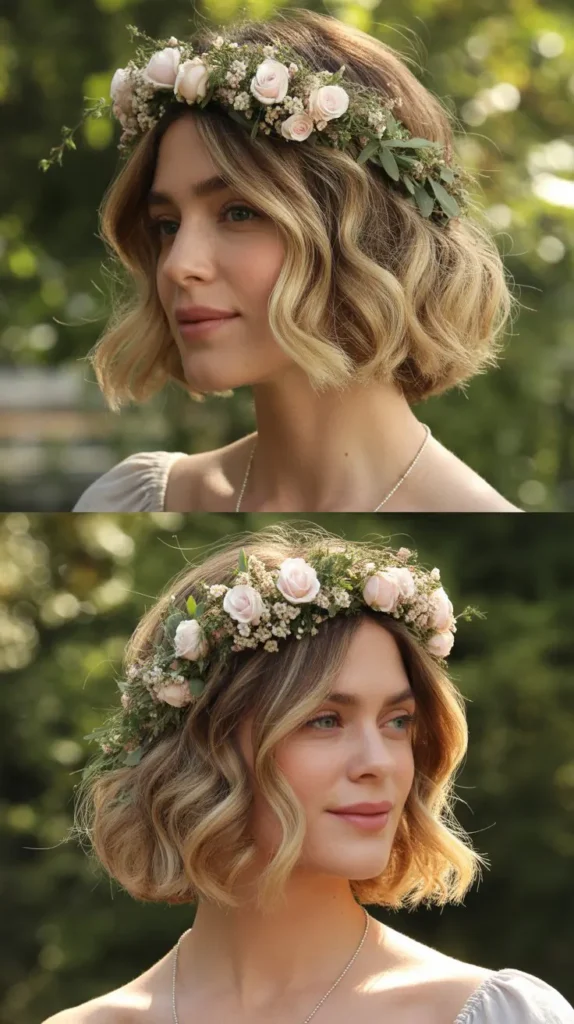
Fresh or artificial flowers worn as a crown or clustered at one side instantly evoke Bridgerton’s garden party scenes and countryside aesthetics.
For short hair, flowers provide the decorative impact that longer styles achieve through elaborate braiding and pinning.
Flower Selection and Preparation
- Choose flowers that complement your coloring and the occasion’s formality—roses, peonies, and hydrangeas suit formal events while wildflowers and daisies work for casual gatherings.
- Fresh flowers require preparation with floral wire and tape to create secure attachment points.
- Artificial flowers should be high-quality silk or foam varieties that appear realistic from conversational distance.
- Consider bloom size relative to your head and hair volume—oversized flowers can overwhelm petite features or sparse hair.
Attachment Methods for Short Hair
- Create a base structure with bobby pins arranged in a circular or linear pattern where flowers will sit.
- Use floral wire to attach individual blooms to bobby pins or directly to your hair.
- Build clusters gradually, starting with larger focal flowers and filling gaps with smaller supporting blooms.
- Incorporate greenery like eucalyptus or fern fronds to add texture and hide any visible attachment points.
- Test the security of your arrangement by gently shaking your head—flowers should remain firmly attached.
- Spray fresh flowers with water throughout the event to maintain appearance and prevent wilting.
7. Jeweled Barrette Elegance
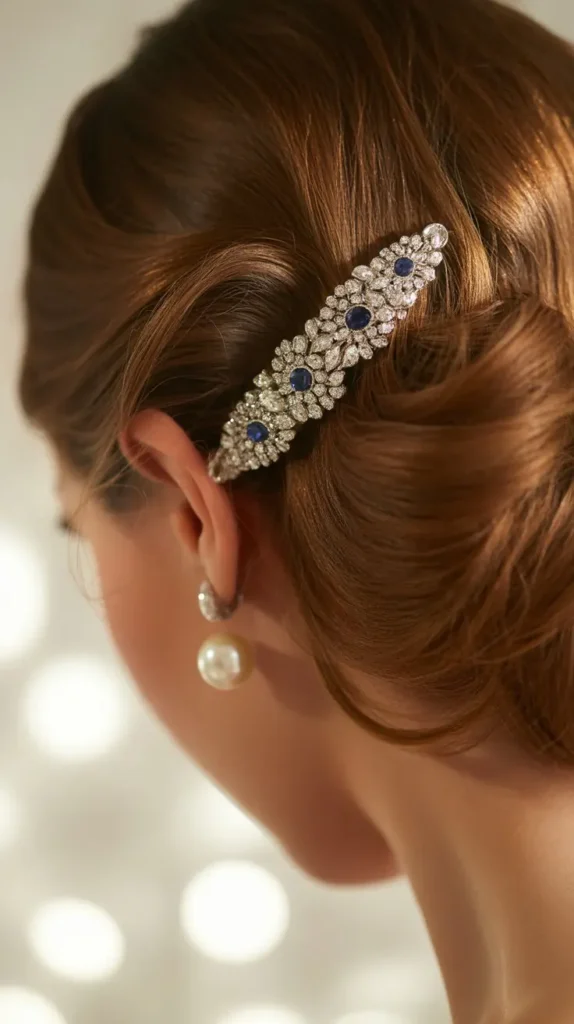
Decorative barrettes adorned with crystals, jewels, or ornate metalwork serve as the centerpiece of this effortlessly elegant style.
These accessories do the heavy lifting of creating Bridgerton glamour while requiring minimal actual hairstyling.
Barrette Styles and Era Appropriateness
- Seek barrettes with Victorian or Edwardian design elements that align with Regency aesthetics, such as filigree patterns and genuine or simulated gemstones.
- Antique shops, estate sales, and reproduction jewelry retailers offer authentic-looking options.
- Consider the weight of the barrette relative to your hair’s ability to support it—short hair requires lightweight accessories.
- Choose metals that complement your skin tone: gold for warm undertones, silver for cool, and rose gold for neutral.
Styling for Maximum Impact
- Create a sleek, smooth canvas by blow-drying hair straight or using a flat iron for polish.
- Apply shine serum to enhance the reflective quality that complements jeweled accessories.
- Position the barrette at your temple, slightly above the ear, sweeping hair back and away from your face.
- Secure smaller sections of hair behind the barrette with hidden bobby pins for additional security if needed.
- Leave the opposite side smooth and tucked behind the ear or allow it to fall naturally with soft texture.
- This style works beautifully for evening events, formal dinners, or any occasion requiring understated sophistication.
8. Soft Twisted Updo Variation
Even short hair can achieve a twisted updo effect by creating small twisted sections that are pinned close to the head, building a textured, dimensional style that reads as complex from a distance.
This technique proves that length isn’t necessary for elegant formal styling.
Section-by-Section Construction
- Begin with hair that has some natural texture or has been curled with a small-barrel curling iron.
- Apply texturizing spray or dry shampoo to create grip that helps twisted sections hold their shape.
- Divide hair into approximately eight to twelve small sections depending on hair density and length.
- Take one section at a time, twist it firmly from root to end, and pin it flat against your head using crossed bobby pins.
- Vary the direction of twists to create visual interest—some going horizontal, others diagonal or vertical.
- Layer twisted sections over one another to build dimension and hide any visible scalp or pins.
- Pay particular attention to the crown and sides, where twists should be most concentrated.
- Finish by gently pulling at the twisted sections to loosen them slightly for a softer, more romantic appearance.
Troubleshooting Common Issues
- If twists won’t stay pinned, spray each section with firm-hold hairspray before twisting.
- Short layers that fall out can be incorporated into face-framing tendrils rather than forced into the style.
- Use pins that match your hair color exactly to minimize visibility.
- If the style feels too tight or severe, massage your scalp gently and pull small pieces forward around the hairline.
9. Velvet Ribbon Accent
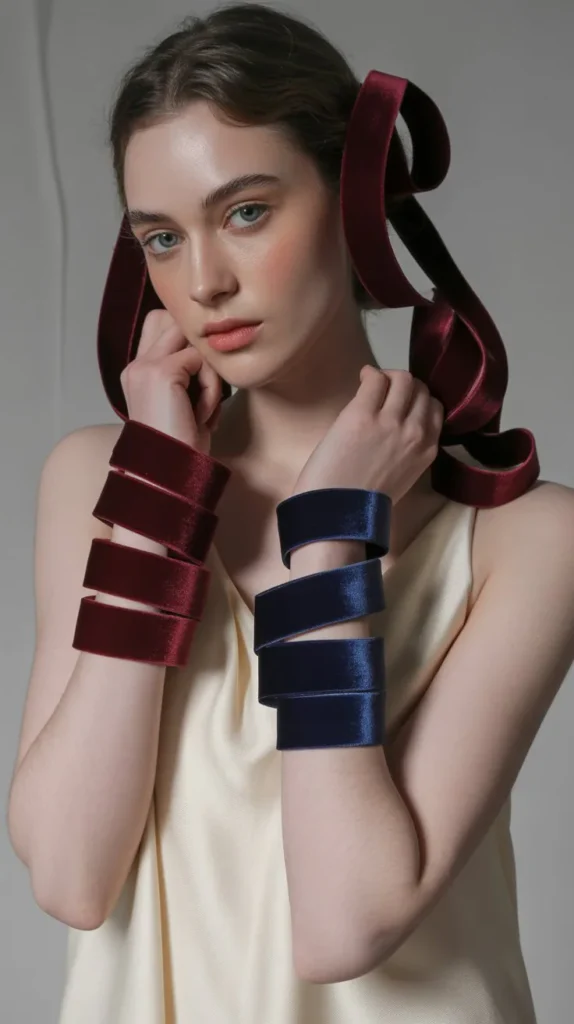
Velvet ribbons tied as bows, headbands, or woven through curls add sumptuous texture and rich color that epitomizes Regency luxury.
The tactile quality of velvet elevates even the simplest short hairstyle into something worthy of a period drama.
Velvet Ribbon Integration Techniques
- Select velvet ribbon in jewel tones like sapphire, emerald, ruby, or amethyst for maximum period authenticity.
- For a headband effect, tie the ribbon around your head with the bow positioned at the crown or slightly to one side.
- Thread ribbon through pinned curls by attaching it to bobby pins and weaving it through your hairstyle.
- Create a bow separately and attach it to a barrette or clip for easy repositioning and reuse.
- Consider ribbon width—narrow ribbons (1/2 inch) suit delicate features while wider ribbons (2-3 inches) make bold statements.
Color Coordination Strategies
- Match ribbon color to your eye color to draw attention to facial features.
- Choose complementary colors to your hair—burgundy or navy for blondes, emerald or sapphire for redheads, ruby or gold for brunettes.
- Consider your outfit’s color palette to create a cohesive overall appearance.
- Darker, richer colors photograph beautifully and feel more formal than pastels.
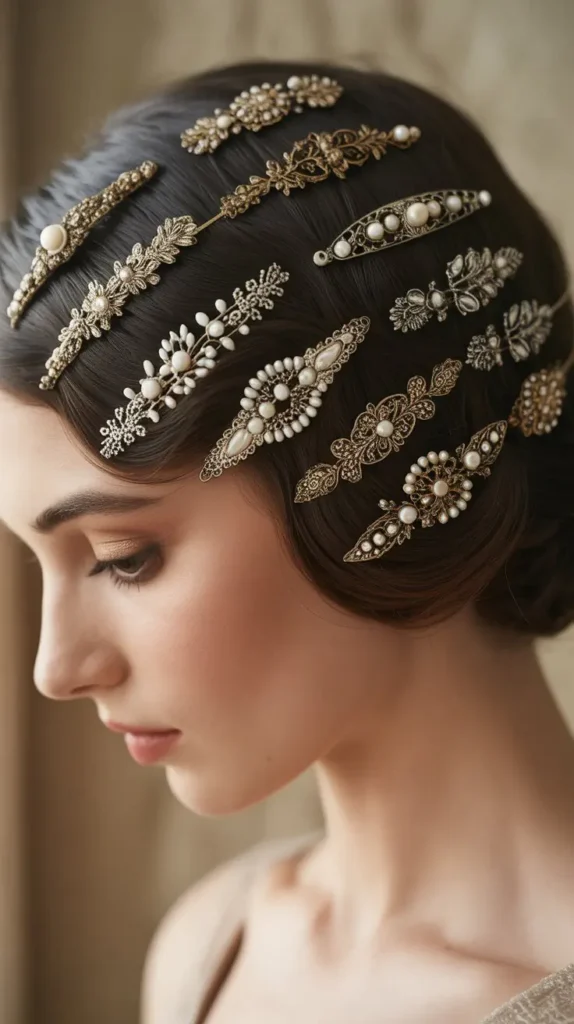
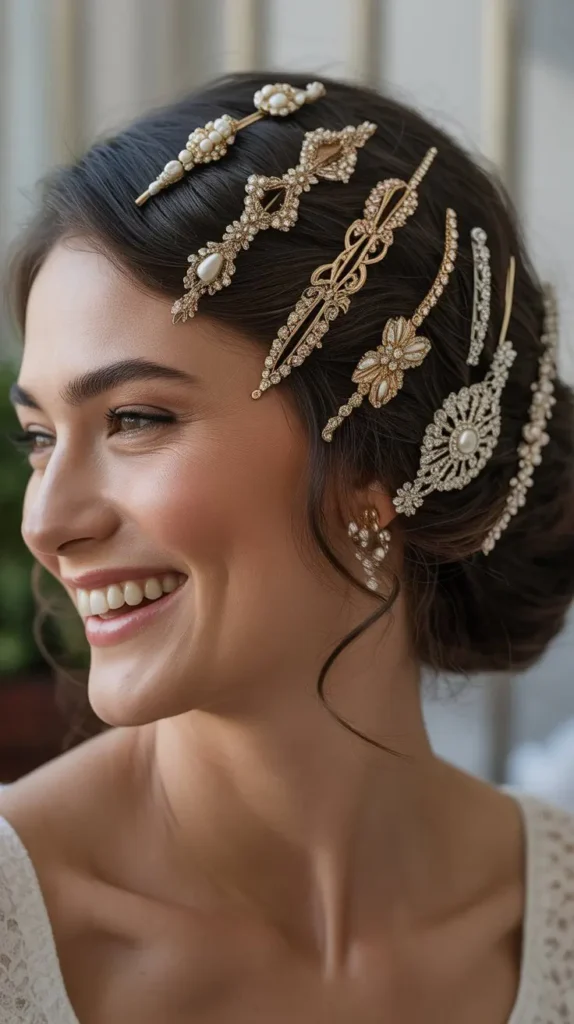
10. Strategic Hair Jewelry Placement
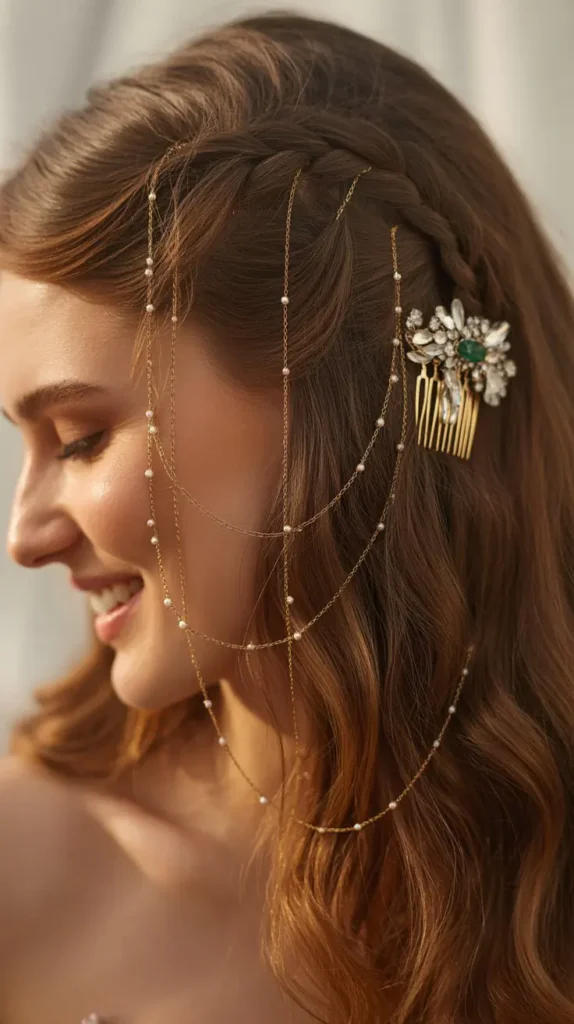
Hair jewelry—decorative pins, chains, combs, and ornamental accessories—can transform short hair through thoughtful, strategic placement that creates focal points and adds sparkle without requiring elaborate styling.
This approach relies on accessory quality and positioning rather than complex technique.
Building a Hair Jewelry Collection
- Invest in pieces with Regency-inspired design elements: filigree work, nature motifs like leaves and flowers, and classical geometric patterns.
- Mix metals and stones to create visual richness—combine gold pins with silver combs and rose gold accents.
- Start with bobby pins that have decorative ends featuring pearls, crystals, or small charms.
- Add statement pieces like jeweled combs or ornamental hairpins for special occasions.
- Consider vintage and antique pieces from estate sales or online marketplaces for authentic character.
Composition and Balance Principles
- Cluster small pieces together for impact rather than scattering them thinly throughout your hair.
- Create intentional asymmetry by concentrating jewelry on one side of your head.
- Balance a heavily decorated temple with smooth, sleek hair on the opposite side.
- Use larger statement pieces sparingly—one decorative comb or major pin per style typically suffices.
- Layer jewelry at different depths within your hair for dimensional interest.
- Step back and view your entire head from multiple angles to ensure balanced composition.
11. Regency-Inspired Bandeau
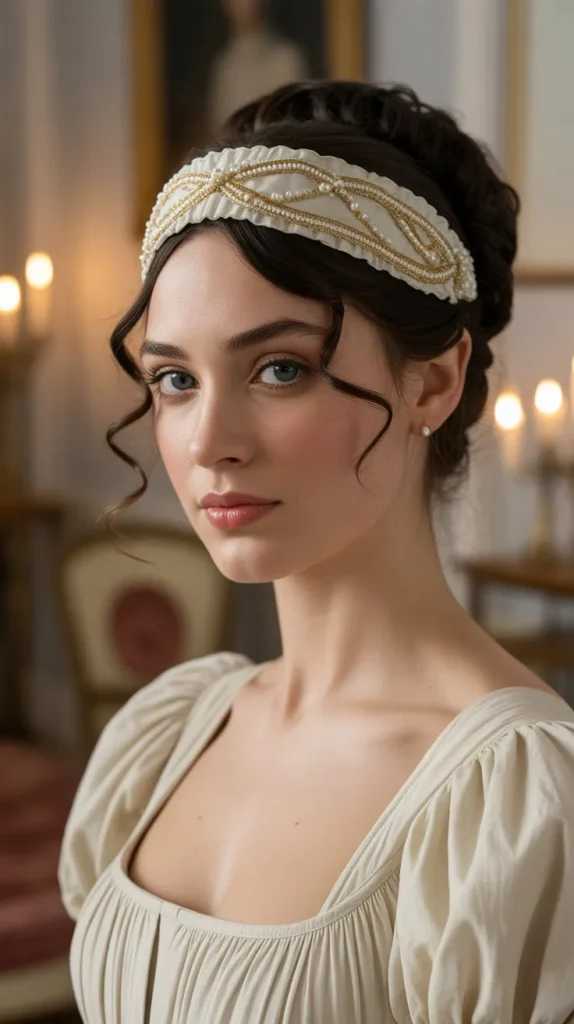
The bandeau—a decorative band worn across the forehead or around the crown—was a signature Regency accessory that’s perfectly suited to short hair.
These ornamental bands add instant period authenticity while requiring zero hairstyling skill.
Bandeau Styles and Historical Accuracy
- Authentic Regency bandeaus featured embroidery, beading, metallic threading, and jewel embellishments on silk or velvet bases.
- Modern reproductions can be found through bridal accessory retailers, costume shops, and vintage-inspired jewelry makers.
- Elastic bandeaus offer convenience but look less authentic than tie-back styles with ribbon ends.
- Consider width—narrow bandeaus (1/2-1 inch) suit everyday looks while wider styles (2-3 inches) work for formal events.
Styling and Wearing Guidelines
- Position the bandeau approximately one inch back from your hairline for the most flattering placement.
- Ensure the band sits level across your forehead by checking in a mirror from the front.
- Tuck any stray hairs underneath the bandeau’s edges for a polished appearance.
- Allow your hair to fall naturally around the bandeau rather than slicking everything back.
- Add soft curls or waves to the hair around your face to create romantic framing.
- This style particularly suits square and heart-shaped faces by softening angular features.
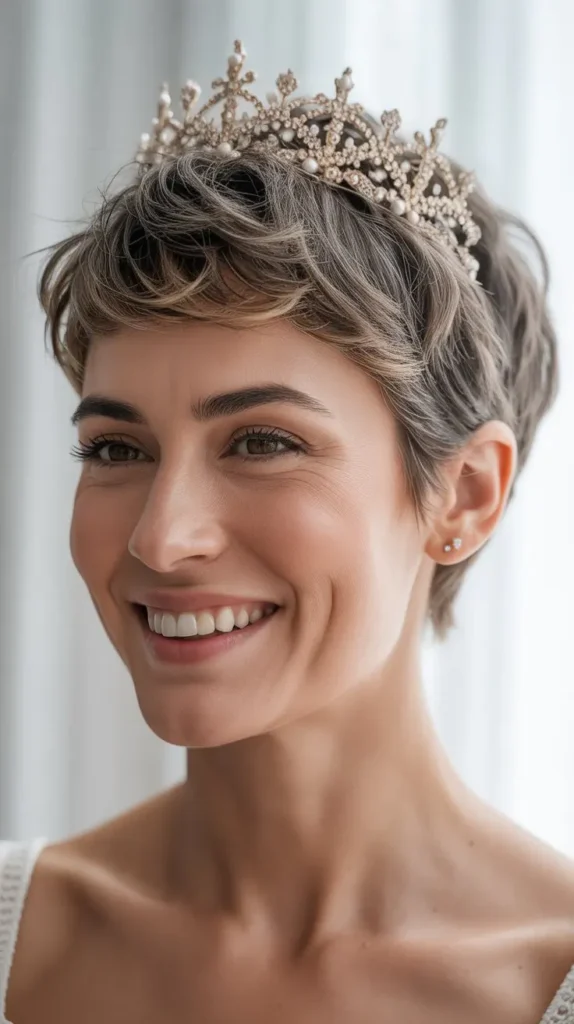
12. Miniature Tiara Statement
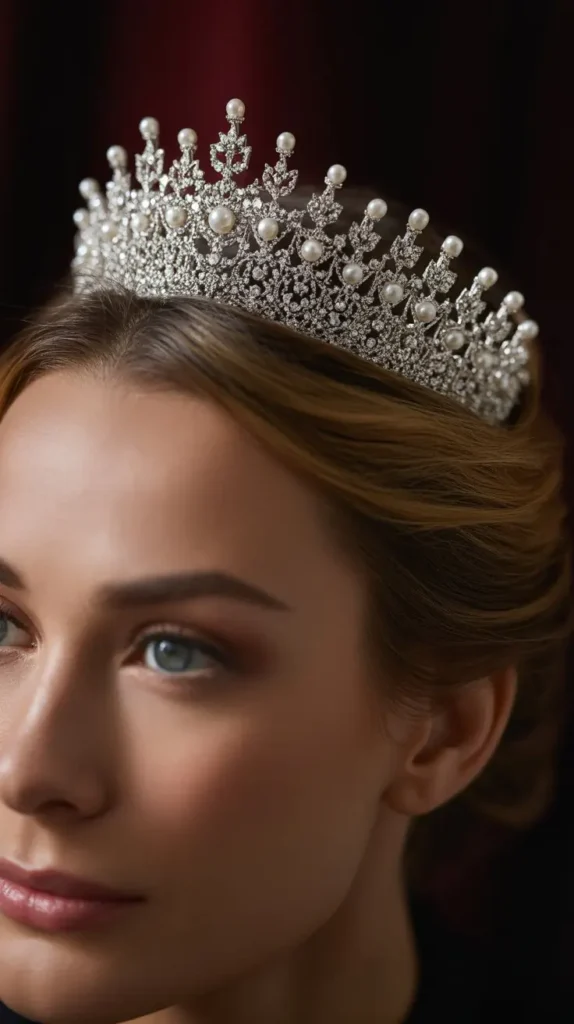
Who says tiaras are only for long, upswept hair?
Miniature tiaras designed specifically for shorter styles create instant princess glamour while honoring Bridgerton’s ballroom opulence.
These scaled-down crowns prove that regality comes in all sizes.
Selecting the Right Tiara Scale
- Choose tiaras with a maximum height of 1-1.5 inches to maintain proportion with short hair.
- Delicate, narrow band styles work better than wide, tall, traditional wedding tiaras.
- Look for pieces described as “hair jewelry” or “hair crowns” rather than formal tiaras for appropriate scale.
- Ensure the tiara has adequate combs or loops for secure attachment to short hair.
Secure Attachment Methods
- Position the tiara approximately one inch back from your hairline, similar to headband placement.
- Tease hair slightly underneath where the tiara will sit to create grip and foundation.
- Insert the tiara’s combs firmly into the teased section, pushing downward and slightly forward.
- Add bobby pins on either side of the tiara, inserting them through the tiara’s structure and into your hair.
- Cross pins in an X formation for maximum security and stability.
- Test the tiara’s stability by gently shaking your head—it should feel firmly attached without pulling.
- Add small curls or waves around the tiara to integrate it naturally into your hairstyle.
13. Curled Ends with Center Part
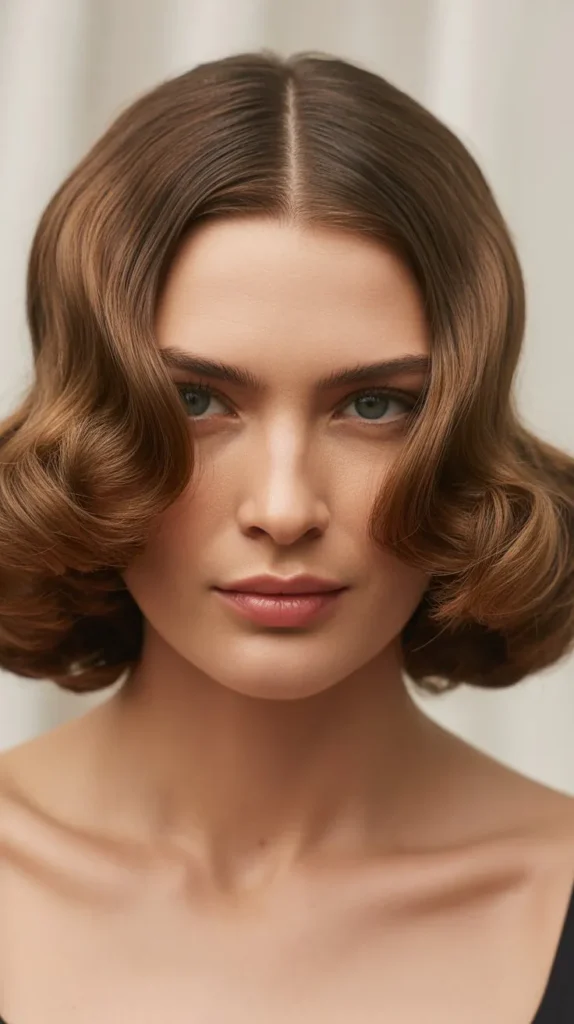
This deceptively simple style creates Regency romance through carefully curled ends combined with a precise center part.
The symmetry and curl pattern evoke period portraits while remaining entirely achievable with modern tools and short hair.
Creating Perfect Symmetry
- Begin with freshly washed, thoroughly dried hair to ensure your part will be crisp and defined.
- Use a rattail comb to create a precise center part from your forehead back to the crown.
- Apply heat protectant spray throughout your hair before using hot tools.
- Divide hair into left and right sections, clipping one side away while working on the other.
- Take small vertical sections (approximately one inch wide) and curl with a small-barrel curling iron.
- Alternate curl direction—one section curling away from your face, the next toward it—for natural-looking movement.
- Mirror the curl pattern on the opposite side for symmetrical balance.
- Allow curls to cool completely before touching them to maximize hold.
Finishing and Longevity
- Once all curls are cooled, run your fingers through them gently to separate and soften.
- Apply lightweight texturizing spray for piece-y definition without stiffness.
- Use a tiny amount of pomade on the part itself to keep it crisp and prevent flyaways.
- This style can last 2-3 days with proper nighttime maintenance using a silk pillowcase.
- Refresh on day two by re-curling just the front sections around your face.
14. Decorated Comb Cluster
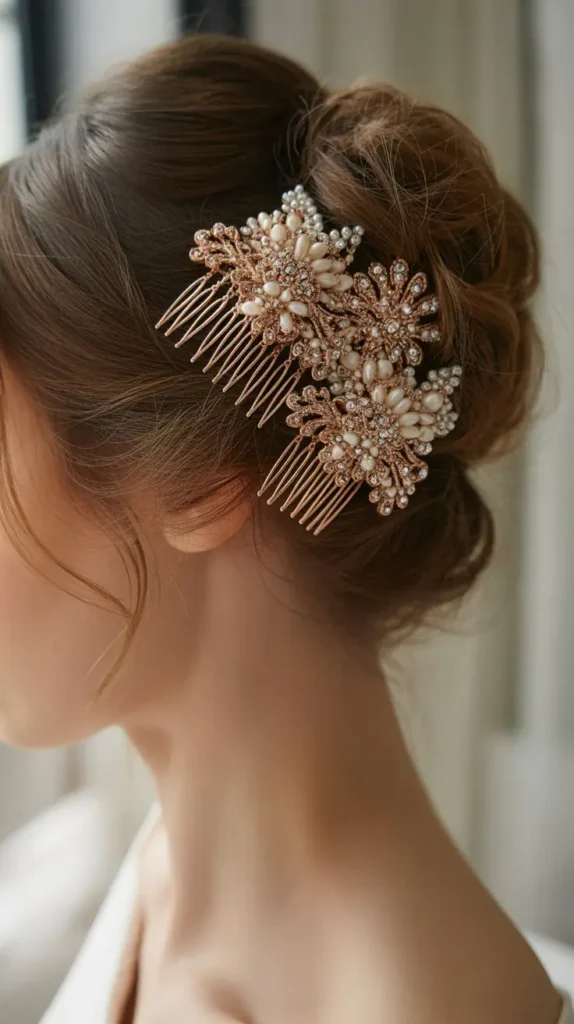
Decorative combs positioned in clusters create the illusion of an ornate updo even on the shortest hair.
This technique strategically places multiple combs to build visual interest and height while keeping the styling process relatively simple.
Comb Selection and Preparation
- Invest in combs of varying sizes—at least one large focal comb (3-4 inches) and several smaller accent combs (1-2 inches).
- Choose combs with design continuity, whether that’s matching metals, similar stones, or coordinating decorative patterns.
- Ensure combs have adequate teeth (at least 3-4) to grip short hair securely.
- Vintage and reproduction combs often feature more elaborate designs than contemporary options.
Strategic Positioning Technique
- Start with textured hair that has some grip—either naturally wavy or enhanced with texturizing spray.
- Tease small sections where combs will be placed to create a foundation for secure attachment.
- Position the largest, most decorative comb first, typically at the back of the crown or slightly to one side.
- Insert the comb by sliding it forward against your scalp, then pressing down and slightly back to anchor it.
- Add smaller accent combs on either side of the focal comb, angling them toward the center for cohesive composition.
- Consider placing one small comb at the temple for asymmetrical interest.
- Ensure all combs feel secure—they should not shift with gentle head movement.
15. Romantic Side Tendrils
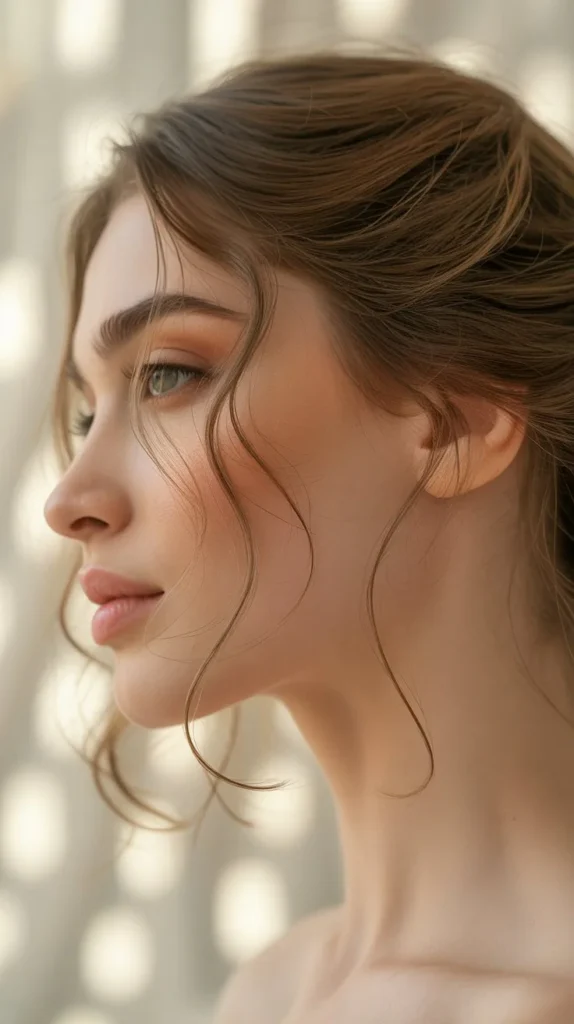
Face-framing tendrils strategically left loose while the rest of the hair is styled create soft, romantic framing that was ubiquitous in Regency portraiture.
This technique softens any hairstyle and is particularly flattering for short hair.
Tendril Selection and Preparation
- Choose face-framing sections approximately 1/4 to 1/2 inch wide at the temples and in front of the ears.
- These sections should be separated before styling the rest of your hair to ensure they’re intentionally left loose.
- Consider your face shape when determining tendril thickness—fuller faces benefit from thinner tendrils while narrow faces can support wider pieces.
- Multiple thin tendrils generally look more period-appropriate than one or two thick sections.
Curl Technique for Natural-Looking Tendrils
- Use a small-barrel curling iron (1/2 to 3/4 inch) for tight, springy curls that will relax into softer waves.
- Wrap tendrils away from your face in a spiral motion for the most flattering direction.
- Hold each tendril in the curling iron for only 5-7 seconds to avoid over-processing short sections.
- Immediately after removing from the iron, pin each curled tendril flat against your cheek until completely cool.
- Release the cooled curls and allow them to spring naturally without pulling or brushing.
- Apply a tiny amount of lightweight oil to your fingertips and gently piece out the curls for separation.
16. Lace Bow Detail
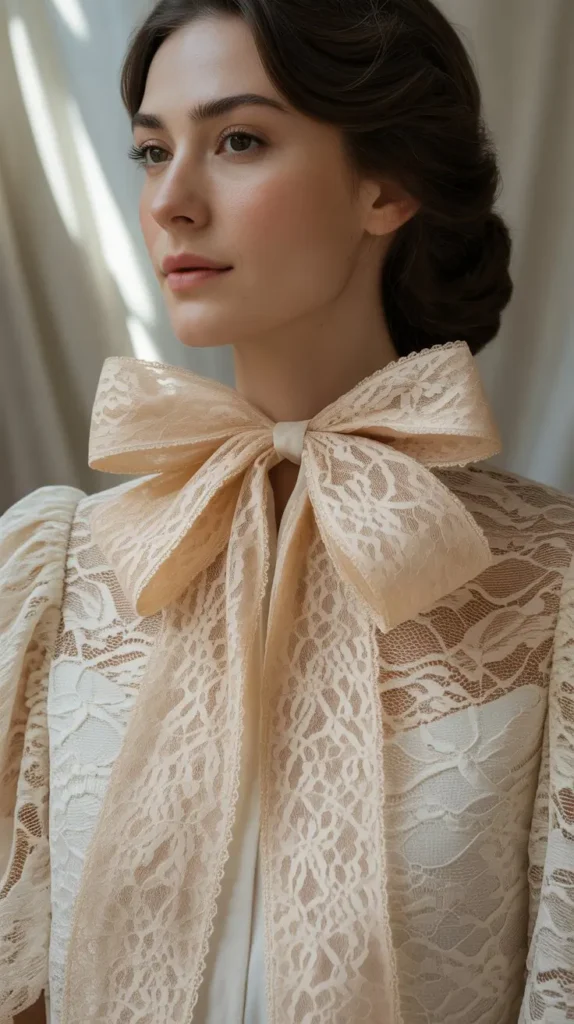
Delicate lace bows pinned into short hairstyles create vintage femininity with minimal effort.
The intricate texture of lace adds visual interest and period-appropriate detail that references the lace trims seen throughout Bridgerton’s costumes.
Lace Bow Creation and Selection
- Purchase pre-made lace bows from craft stores, bridal suppliers, or create custom bows from vintage lace trim.
- Choose lace with fine, intricate patterns rather than large, bold designs for period authenticity.
- Ivory, cream, and white lace suit formal occasions while colored lace can add playful personality.
- Bow size should be proportional to your head—generally between 2-4 inches across for short hair.
- Attach bows to bobby pins or barrettes before styling for secure, reusable accessories.
Positioning and Styling Integration
- Lace bows work beautifully at the back of the crown, slightly off-center, or at one temple.
- For back placement, create a small bump of volume at the crown first, then position the bow to emphasize the height.
- Side placement works well with asymmetrical styles where hair is swept to one direction.
- Allow the bow’s streamers (if any) to trail naturally down the back of your hair or along your neck.
- Coordinate the lace bow with lace elements in your clothing for cohesive styling.
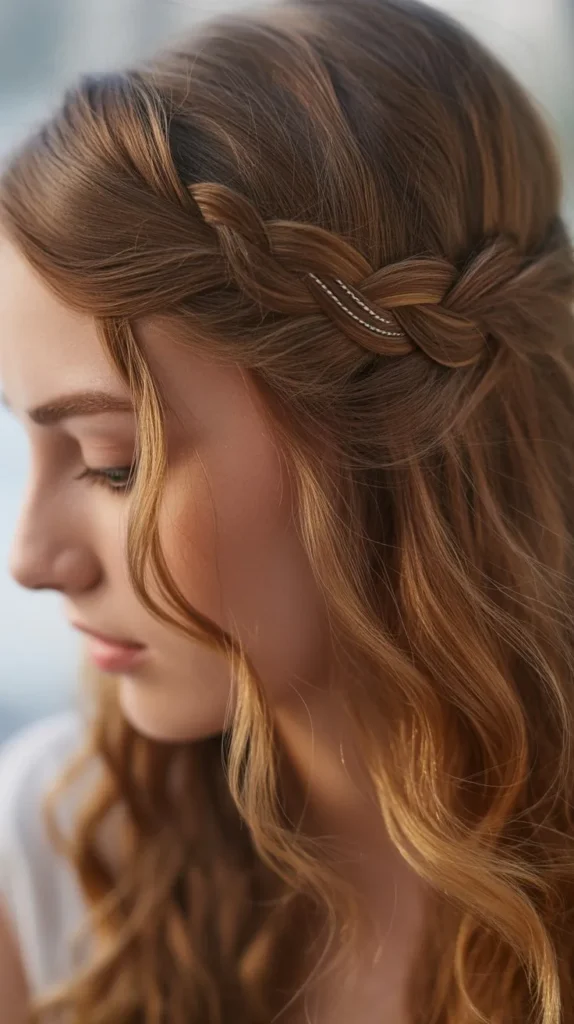
17. Braided Crown Illusion

Creating a braided crown on short hair requires clever techniques that give the appearance of a full braid encircling the head.
Small sections, strategic placement, and possible hair extensions can achieve this romantic Bridgerton staple.
Short Hair Braiding Strategies
- Divide hair into small sections around the perimeter of your head where the crown will sit.
- Create multiple small braids rather than attempting one continuous braid.
- Use Dutch braiding technique (reverse French braid) to make braids sit on top of hair rather than sinking into it.
- Braid each section as far as length allows, even if it’s only 1-2 inches of actual braid.
- Stretch each braid gently by pulling at the outer edges to make it appear fuller and wider.
- Position braids end-to-end in a circular pattern, pinning each securely with bobby pins.
- Use small braided clip-in extensions in a matching color to fill gaps if your natural hair is too short.
Blending and Finishing Techniques
- Backcomb hair underneath and around the braided sections to help blend and add volume.
- Pull small wisps from the braids to create texture and hide any visible transitions between sections.
- Spray with strong-hold hairspray before and after assembly for maximum longevity.
- Add small flowers, pearls, or decorative pins along the braided crown for enhanced elegance.
18. Sleek Hollywood Wave
The Hollywood wave adapts vintage glamour for short hair through smooth, glossy waves that are brushed into formation rather than achieved through setting.
This technique creates sophisticated movement that references Regency portraiture’s polished aesthetic.
Product Selection for Shine and Hold
- Begin with a smoothing shampoo and conditioner that enhance shine without weighing hair down.
- Apply a heat protectant with built-in shine enhancers before blow-drying.
- Use a gel or mousse with strong hold but flexible finish for creating waves that maintain shape.
- Finish with a high-shine serum applied sparingly to avoid greasiness while maximizing light reflection.
Wave Creation Process
- Blow-dry hair completely smooth using a round brush to create foundational straightness.
- Apply a generous amount of setting gel throughout your hair, combing through for even distribution.
- Using a fine-toothed comb, create deep S-shaped waves by combing hair forward, then back, then forward again.
- Hold each wave in place for several seconds to allow the gel to begin setting.
- Continue this combing pattern around your entire head, creating consistent wave depth.
- Secure each wave peak with a duckbill clip or metal setting clip.
- Allow gel to dry completely—use a diffuser on cool setting to speed the process without disturbing wave formation.
- Remove clips carefully and apply shine spray without brushing or disturbing the wave pattern.
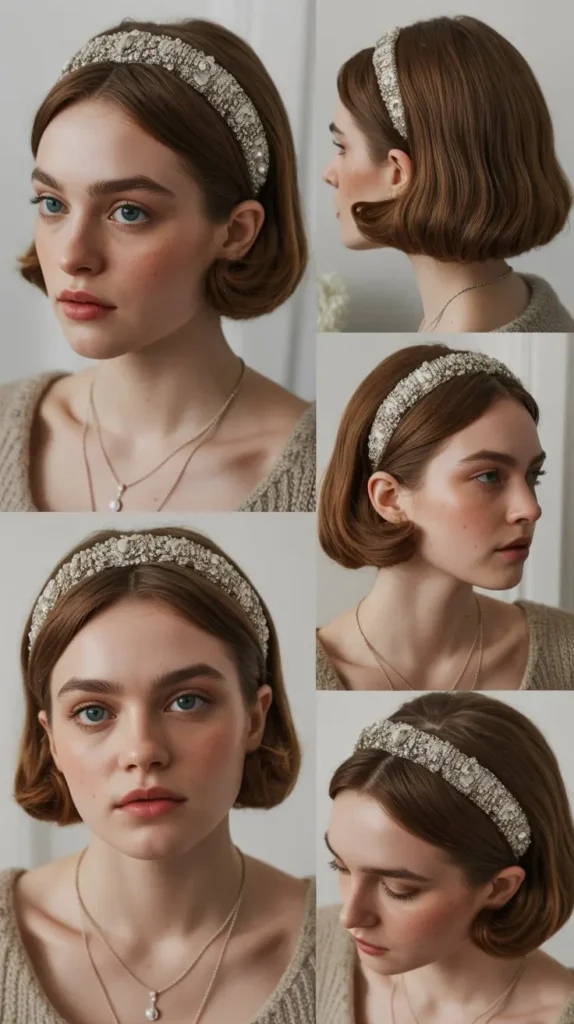
19. Crystal Headband Sparkle
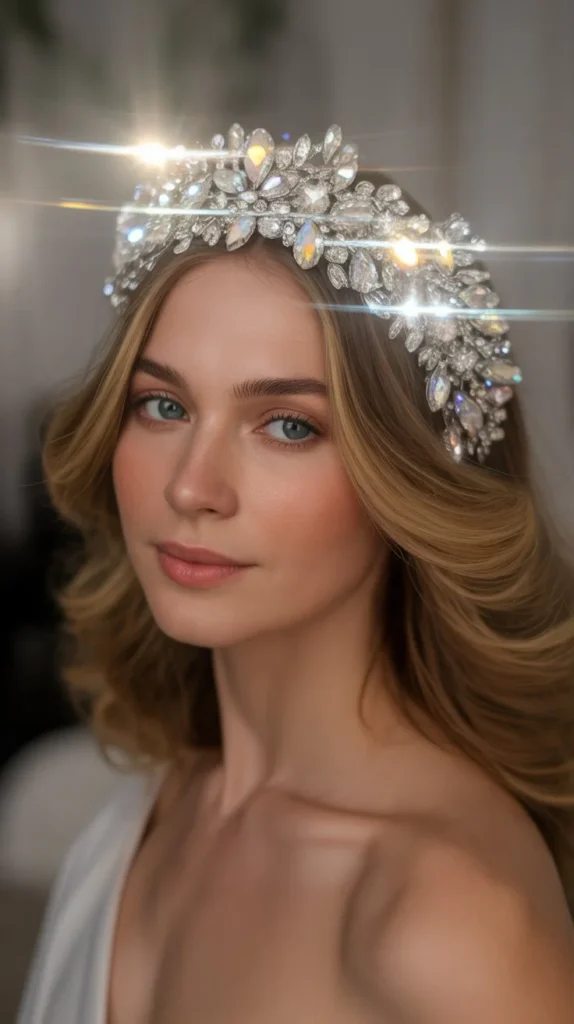
Crystal-embellished headbands add dazzling sparkle that catches ballroom light beautifully, requiring zero hairstyling while providing maximum visual impact.
These accessories reference the jeweled adornments favored during the Regency period’s most formal occasions.
Crystal Headband Selection Guide
- Choose headbands with Swarovski crystals or high-quality rhinestones that genuinely sparkle rather than flat, plastic alternatives.
- Consider crystal color—clear crystals suit all occasions while colored crystals should coordinate with your outfit.
- Headband base material matters—metal bands feel more formal than plastic, while wrapped fabric bases offer comfort for extended wear.
- Width and coverage vary from delicate single-row crystal bands to wide, fully-encrusted statement pieces.
Styling to Maximize Sparkle
- Create a completely smooth, sleek hairstyle to provide contrast with the textured, sparkling headband.
- Position the headband approximately one inch back from your hairline to showcase both hair and accessory.
- Use strong-hold gel or pomade to slick hair back from your face, eliminating any flyaways that compete with sparkle.
- Add soft curls at the nape or around the ears if your hair length allows, creating a romantic contrast to the sleek top.
- Choose clothing with minimal embellishment to let the headband remain the focal point.
- Consider makeup with subtle highlighting to echo the headband’s luminosity without competing.
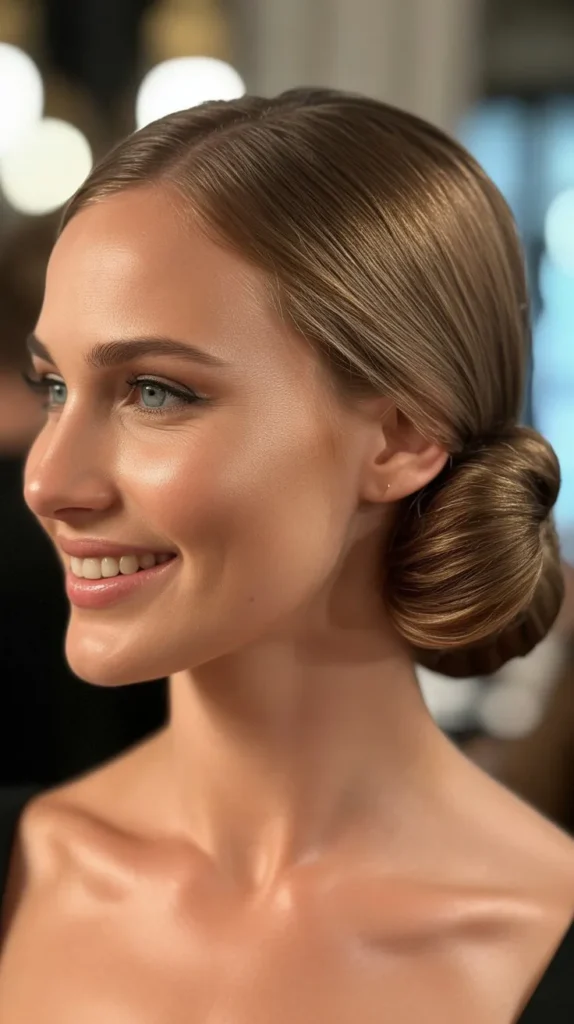
20. Elegant Chignon Adaptation
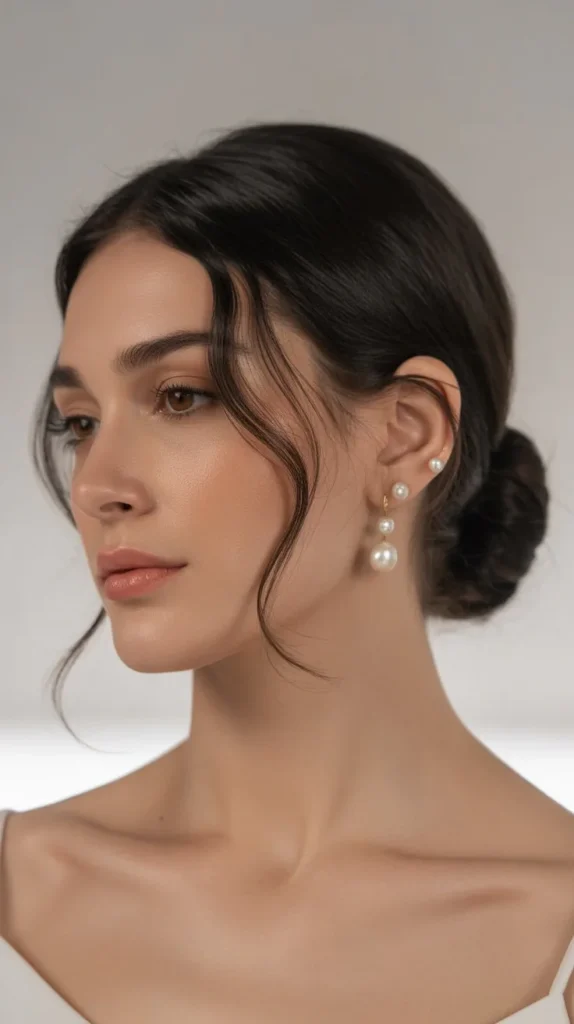
The chignon—a low bun traditionally worn at the nape—can be adapted for short hair through clever pinning, twisting, and potentially the strategic use of a small hairpiece.
This classic updo remains one of the most elegant Bridgerton-inspired options.
Faux Chignon Construction
- Begin with textured or curled hair that has grip and volume.
- Divide hair into sections, separating the crown, sides, and back.
- Tease each section at the roots to create volume and foundation.
- Starting with the back section, twist and coil the hair, pinning it flat against your head near the nape.
- Take side sections and twist them toward the center, pinning each over the initial coiled section.
- Layer twists and coils to build the appearance of a gathered bun, even if individual sections are quite short.
- Leave small pieces unpinned to create textured, intentional messiness that adds romantic appeal.
- Consider using a small mesh bun form or sock bun underneath your natural hair to add volume and shape.
Hair Extensions and Hairpieces
- For very short hair (above chin length), a clip-in hairpiece designed as a chignon can be integrated seamlessly.
- Choose a hairpiece that matches your natural color exactly and has a realistic texture.
- Secure your natural hair flat against your head, then clip the hairpiece over this foundation.
- Blend the edges by pulling small sections of your natural hair over the hairpiece’s perimeter.
- Incorporate decorative combs, flowers, or pins into the chignon to add authenticity and distraction from any visible integration points.
21. Netted Snood Effect
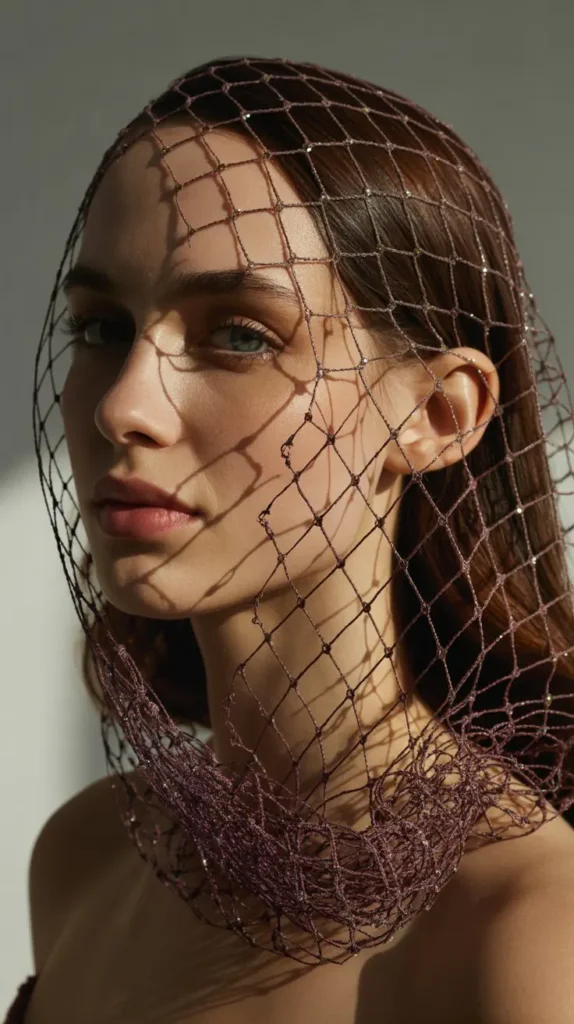
The snood—a decorative hairnet worn at the back of the head—can be adapted for short hair to create period-appropriate texture and visual interest.
Modern snoods come in various materials from crocheted cotton to jeweled mesh.
Snood Styles and Selection
- Pearl snoods feature strands of beads woven into net patterns, creating luminous texture.
- Crocheted cotton or silk snoods offer vintage authenticity with intricate handwork patterns.
- Metal chain snoods provide edgier interpretation while maintaining period-appropriate structure.
- Size matters—choose small snoods designed for shorter styles rather than oversized versions meant for long hair.
Application Technique for Short Hair
- Gather as much hair as possible from the crown and back sections, leaving face-framing sections loose if desired.
- Create texture by lightly teasing the gathered section before containing it.
- Position the snood over the gathered hair, ensuring it sits securely at the crown attachment point.
- Bobby pins inserted through the snood’s mesh and into your hair provide essential security.
- Adjust the snood’s positioning to create pleasing fullness rather than flat containment.
- Allow small pieces of hair to escape artfully through the snood’s openings for romantic texture.
22. Asymmetrical Jeweled Clip
A single statement jeweled clip positioned asymmetrically creates modern elegance with period-appropriate embellishment.
This styling approach proves that sometimes simplicity combined with quality accessories yields the most stunning results.
Clip Selection Criteria
- Invest in one or two high-quality, substantial clips rather than multiple cheaper alternatives.
- Vintage brooches can be converted into hair clips by adding clip backs at jewelry repair shops.
- Look for clips with secure mechanisms—spring-loaded clips with strong tension hold short hair most effectively.
- Consider gemstone colors that flatter your complexion and coordinate with your wardrobe staples.
Asymmetrical Styling Technique
- Create a deep side part, sweeping the majority of hair to one side.
- Apply smoothing serum to the heavier side, creating sleek polish with a flat iron if necessary.
- Gather a section from the lighter side (approximately 2-3 inches wide) and twist it slightly back.
- Position the jeweled clip to secure this twisted section, angling the clip slightly downward for secure hold.
- Ensure the clip’s decorative face is prominently displayed and visible from the front.
- Leave the opposite side smooth and flowing for balance.
- This style particularly suits oval and heart-shaped faces by creating horizontal visual interest.
23. Pompadour Volume with Pearls
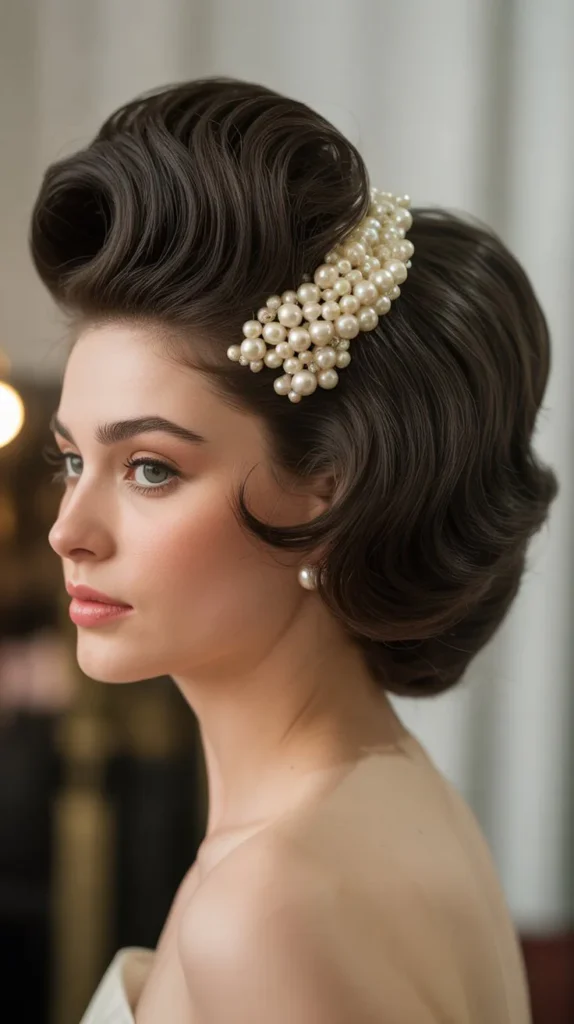
The pompadour—volume created at the front hairline that’s swept upward and back—translates beautifully to short hair and gains Regency flair when adorned with pearl accessories.
This style creates height and drama that reads as formal elegance.
Creating Structured Pompadour Volume
- Begin with completely dry hair that’s been treated with volumizing products at the roots.
- Section off the front 2-3 inches of hair from your hairline back to the crown.
- Backcomb this section thoroughly, starting at the back and working toward the hairline.
- Smooth the very top layer gently with a soft brush without disturbing the teased foundation.
- Roll the teased section upward and back, creating the characteristic pompadour shape.
- Pin the roll in place with crossed bobby pins inserted at the base where it meets the crown.
- Spray with firm-hold hairspray before adding pearl accessories.
Pearl Accessory Placement
- Position pearl-headed pins in a horizontal line across the front of the pompadour roll.
- Space pins approximately one inch apart for balanced visual weight.
- Ensure pins are inserted securely through the rolled section, anchoring into the hair beneath.
- Additional pins can be placed vertically along the sides of the pompadour for extra security and decoration.
- Choose pearl sizes that suit your pompadour’s scale—larger, more dramatic rolls can support bigger pearls.
24. Cascading Side Curls
Concentrating curls on one side while keeping the other sleek creates dramatic, photo-ready asymmetry that references the cascading ringlets seen in period portraiture.
This style proves short hair can achieve impressive curl volume when strategically placed.
Curl Creation Strategy
- Divide hair with a deep side part, establishing which side will be curled versus smooth.
- On the smooth side, apply anti-frizz serum and use a flat iron for maximum sleekness.
- On the curl side, section hair into 1/2-inch subsections for maximum curl definition.
- Use a small-barrel curling iron (1/2 to 3/4 inch) to create tight, springy ringlets.
- Curl each section away from your face for the most flattering direction.
- Pin each curl immediately after curling to allow cooling in perfect shape.
- Once all curls are cooled, remove pins and separate each curl into 2-3 smaller ringlets with your fingers.
Maintaining Asymmetrical Contrast
- Keep the smooth side pristine by periodically flat-ironing throughout the day if necessary.
- Refresh curls by misting with water and re-curling any sections that have fallen.
- Bobby pin the curled side slightly back behind your ear to showcase the full volume.
- Add a jeweled clip or decorative pin at the point where smooth transitions to curled for visual emphasis.
25. Chain Headpiece Drama
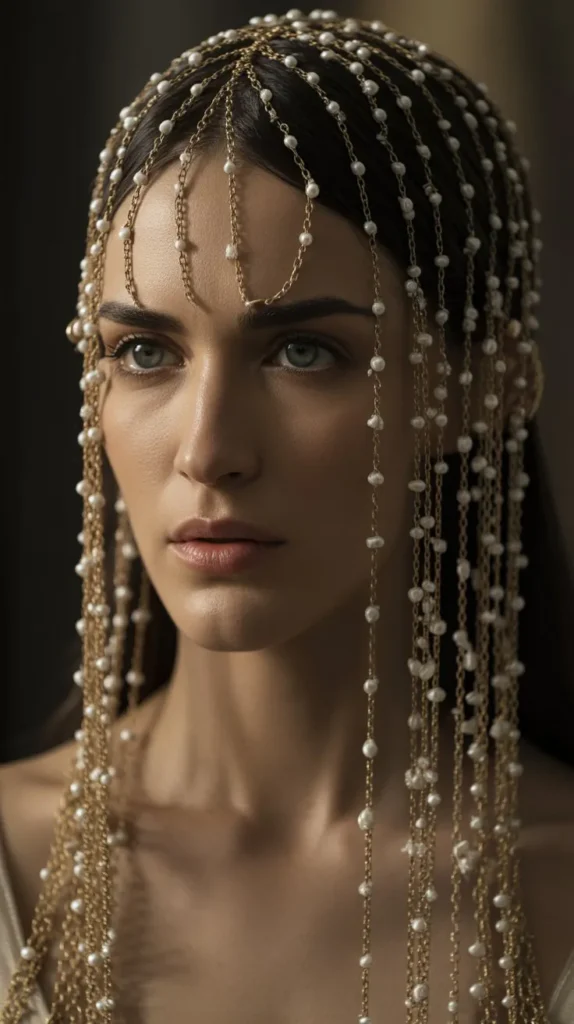
Delicate chains draped across the crown or forehead create bohemian elegance with historical roots in various cultures’ ornamental traditions.
While not specifically Regency, chain headpieces align with the era’s love of decorative metalwork and jewels.
Chain Headpiece Styles
- Forehead chains (tikiyas) drape horizontally across the forehead with chains extending up and over the crown.
- Crown chains sit across the top of the head like a circlet with chains radiating from a central point.
- Side chains attach at one temple and drape across the crown to the opposite side.
- Look for pieces with adjustable chains that can be customized to fit your head size and hair volume.
Styling and Secure Attachment
- Begin with smooth, sleek hair to allow the chain to sit flat and secure.
- Position the headpiece according to its design—forehead chains typically sit 1/2 inch above eyebrows.
- Use bobby pins to secure chain links at strategic points, preventing shifting during wear.
- Hair texture generally needs to be straight or gently waved—tight curls make chain positioning difficult.
- Consider your face shape: forehead chains particularly suit longer face shapes while crown chains flatter round faces.
26. Vintage Hair Combs in Rows
Multiple decorative combs arranged in horizontal or vertical rows create architectural interest and build the appearance of elaborate styling without complex technique.
This approach uses accessories as the styling method itself.
Creating Visual Rhythm with Multiple Combs
- Select 3-7 combs in the same style, material, and size for cohesive repetition.
- Arrange combs in geometric patterns—parallel horizontal rows, vertical columns, or triangular formations.
- Maintain consistent spacing between combs for intentional, designed appearance rather than random placement.
- Begin placement from the center and work outward to ensure symmetrical balance.
- Each comb should be firmly inserted with teeth angled slightly back for security.
Design Patterns and Compositions
- Two horizontal rows create classical formality suitable for traditional events.
- A vertical column of combs along one side adds modern asymmetry to vintage accessories.
- Triangular arrangement with one comb at the crown and others fanning downward creates dynamic visual interest.
- Graduated sizing with larger combs at the focal point and smaller ones radiating outward adds dimensional layering.
27. Braided Accent Strand
Even if your hair is too short for a full braided style, a single small braid incorporated as an accent adds textural interest and nods to traditional hairstyling.
This technique works with hair as short as 3-4 inches at its longest point.
Micro-Braiding Techniques
- Select a thin section of hair (approximately 1/4 inch wide) from the temple or crown area.
- Create a tight three-strand braid, incorporating small amounts of additional hair as you work if length allows.
- Even very short sections can be braided for 2-3 inches, which provides enough length for visual impact.
- Secure the braid’s end with a clear elastic band that disappears into your hair color.
- Gently stretch the braid by pulling at its outer edges to make it appear fuller and wider.
Embellishment and Integration
- Thread tiny beads, pearls, or charms onto the braid by inserting bobby pins through the braid and hanging decorative elements.
- Pin the braided section to your head rather than letting it hang loose if it’s very short.
- Create multiple thin braids (3-5) rather than one single braid for more impact with short hair.
- Allow the braided accent to trail naturally along your hairline or tucked behind your ear.
28. Wrapped Bun with Fabric
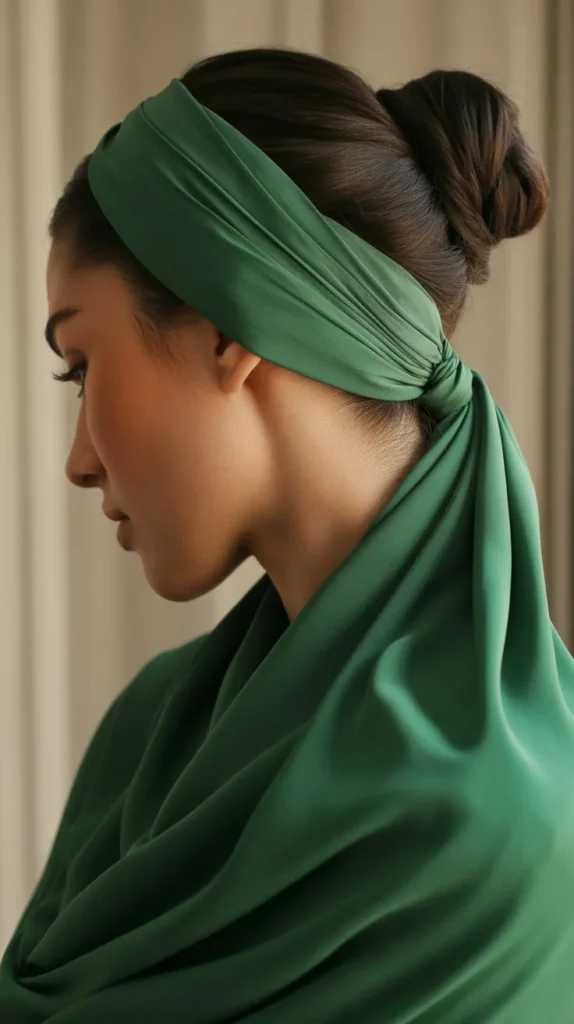
A small bun created from gathered short hair and wrapped with decorative fabric creates texture, color, and period-appropriate styling with minimal technical skill required.
The fabric wrap adds visual interest and helps contain shorter lengths.
Fabric Selection and Preparation
- Choose silk, satin, or fine cotton fabrics that drape smoothly without excessive bulk.
- Cut fabric into strips approximately 2-3 inches wide and 10-12 inches long.
- Jewel-toned velvets work beautifully for evening events while lighter silks suit daytime occasions.
- Consider coordinating fabric with your clothing’s color palette or creating intentional contrast.
Bun Creation and Wrapping Technique
- Gather as much hair as possible from your crown and back, creating a small ponytail.
- Twist the ponytail and coil it into a bun shape, securing with bobby pins in an X formation.
- Place the center of your fabric strip at the base of the bun.
- Wrap the fabric around the bun in a spiral motion, crossing the ends as you work upward.
- Tuck and pin the fabric’s ends securely into the bun’s base or tie them in a small bow.
- Add a decorative brooch, vintage pin, or jeweled clip at the fabric’s crossing point for additional elegance.
29. Graduated Pearl Pins
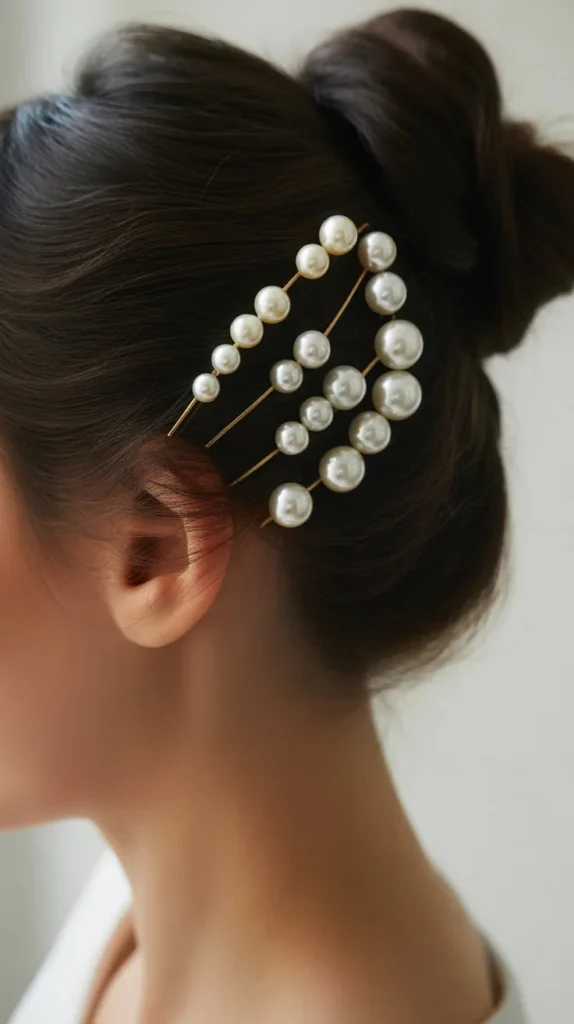
Pearl pins arranged in graduated sizes create dimensional interest that guides the eye through your hairstyle.
This technique uses accessory placement as the primary styling element, proving that thoughtful decoration can transform even the simplest short haircut.
Creating Graduated Visual Flow
- Select pearl pins in at least three different sizes ranging from small (4-6mm) to large (10-12mm).
- Arrange pins in ascending or descending size order to create directional flow.
- Position smallest pins at the starting point of your design, typically near the hairline or temple.
- Space pins approximately 3/4 to 1 inch apart, gradually increasing spacing as pearl size increases.
- Follow the natural curves of your head rather than creating rigid straight lines.
Design Applications
- Curved line from temple to crown creates elegant arc framing.
- Vertical column along the side showcases graduated sizing through height rather than width.
- Radiating pattern with smallest pearls at the center and largest at the perimeter creates a sunburst effect.
- Random placement in graduated clusters creates modern, artistic interpretation while maintaining size progression for visual interest.
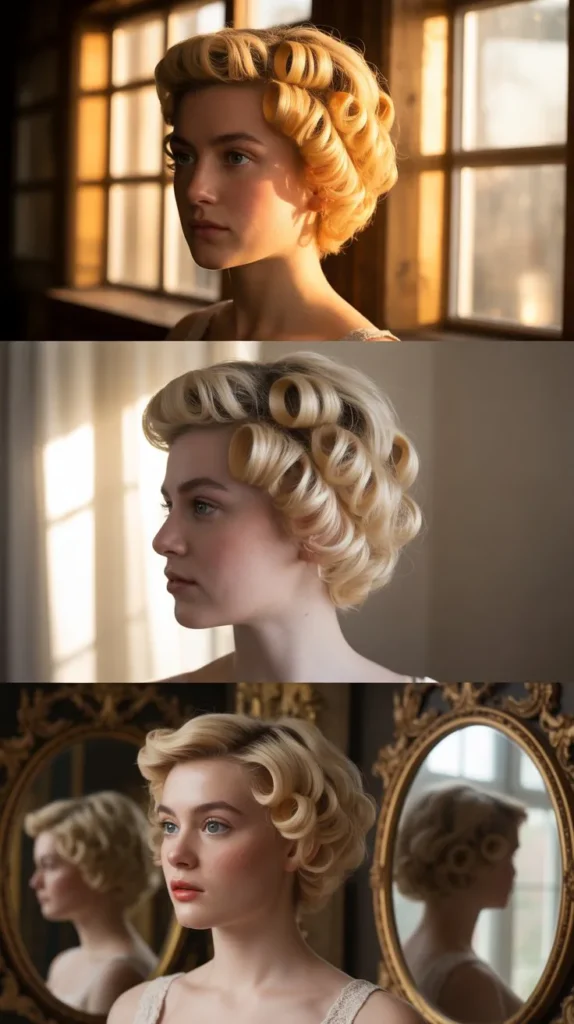
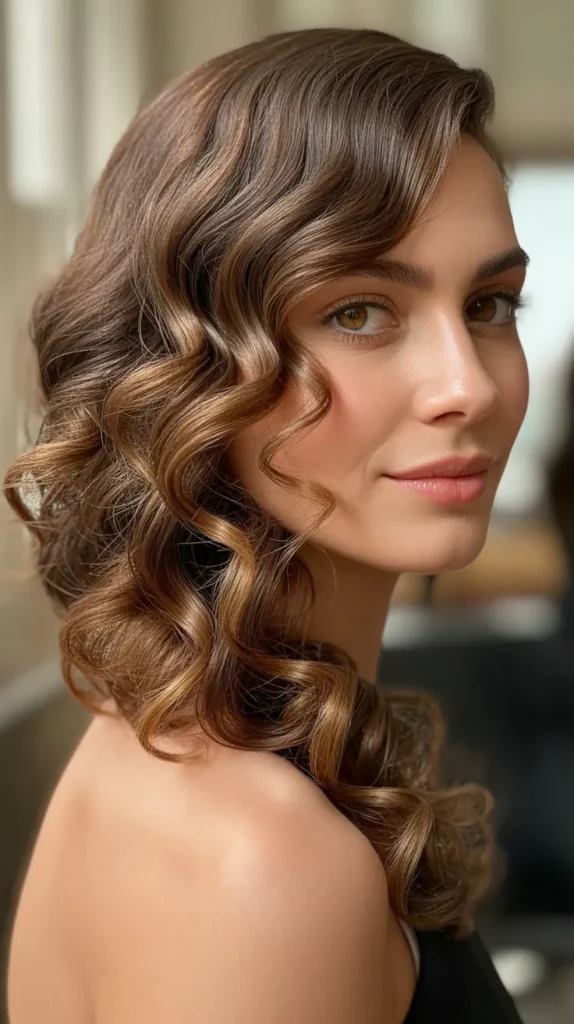
30. Regency Ringlets
Tight, bouncy ringlets evoke the most iconic Regency hairstyles and can be created on short hair through careful curl technique and setting.
These spiraling curls were the hallmark of the era’s feminine beauty standards.
Achieving Perfect Ringlets
- Begin with clean, dry hair that’s been treated with heat protectant.
- Use a very small barrel curling iron (1/4 to 1/2 inch) or heated rollers in the smallest size available.
- Section hair into small subsections (no larger than 1/2 inch square) for maximum curl definition.
- Wrap each section tightly around the curling iron, holding vertically rather than horizontally for true ringlet formation.
- Hold each section in the iron for 8-10 seconds to ensure heat fully penetrates.
- Immediately pin each curl flat against your head or around your finger to cool in perfect spiral shape.
- Once all curls are completely cooled (this is crucial), remove pins and avoid touching or brushing.
Ringlet Maintenance and Longevity
- Ringlets can last 2-3 days when properly set and protected at night.
- Sleep with hair protected in a silk bonnet or carefully pinned to preserve curl shape.
- Refresh individual ringlets by wrapping them around your finger and pinning briefly, then releasing.
- Avoid humidity, which causes ringlets to relax and lose definition.
- Apply lightweight gel or mousse before curling for maximum hold that extends wear time.
31. Ornate Hairpin Collection
A curated collection of ornate hairpins positioned throughout your hairstyle creates the appearance of elaborate styling through decorative accumulation.
Each pin becomes a miniature work of art contributing to the overall design.
Building Your Pin Collection
- Invest in pins with diverse designs but cohesive aesthetic—nature motifs work particularly well together.
- Mix sizes from tiny accent pins (1/2 inch) to statement pieces (2-3 inches).
- Collect pieces over time from estate sales, vintage shops, and artisan jewelers for unique character.
- Ensure each pin has secure backing with substantial grip capable of holding through an event.
Composition and Arrangement Principles
- Distribute pins throughout your hairstyle rather than clustering them in one area.
- Create visual balance by matching the weight of decorative elements on left and right sides.
- Use larger, more ornate pins as focal points with smaller pins supporting and complementing.
- Consider the negative space between pins as part of your design—some breathing room prevents overcrowding.
- Step back frequently during arrangement to assess overall balance and adjust positioning.
- Remove any pin that doesn’t contribute meaningfully to the composition rather than over-accessorizing.
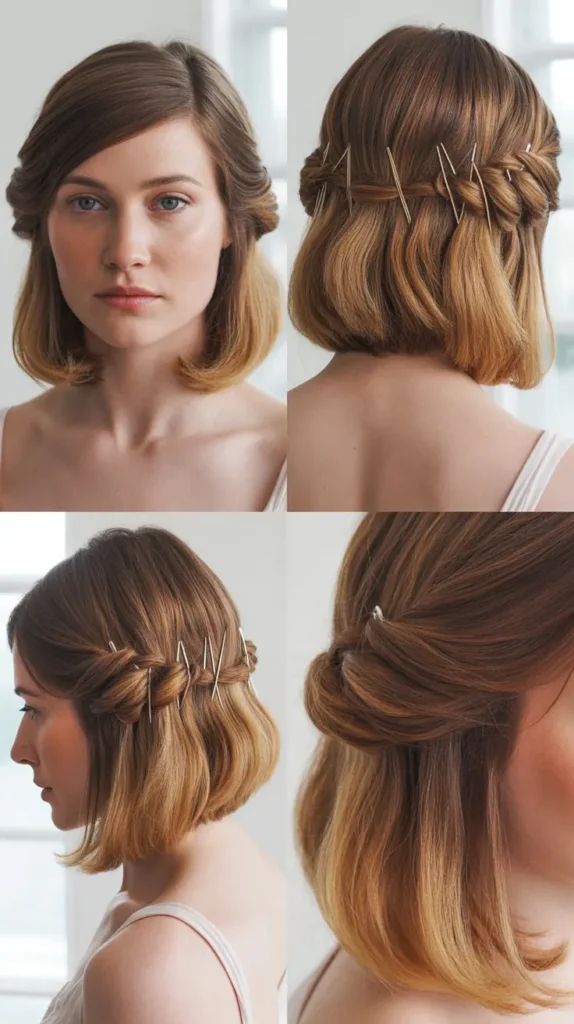
32. Half-Up with Decorative Back Detail
The half-up style—where the top section is secured while the bottom hangs freely—adapts perfectly for short hair when the secured section features decorative elements like twists, braids, or ornamental accessories.
Creating the Half-Up Foundation
- Section hair horizontally from temple to temple across the crown of your head.
- Gather the top section, creating slight volume by gently backcombing at the roots before securing.
- Twist the gathered section loosely before pinning to add texture rather than creating a flat, tight pull.
- Position the secured section at the crown’s apex for maximum visible impact.
- Allow the bottom section to hang naturally with its existing texture or add curls for contrast.
Decorative Back Detail Options
- Secure with an ornate comb pushed into the gathered section for instant elegance.
- Create small twists or braids within the secured section before pinning for textural interest.
- Wrap the gathered section with ribbon, securing with pins and allowing streamers to trail down.
- Position multiple small decorative pins in a cluster at the gathering point.
- Add fresh or artificial flowers tucked into the secured section for romantic garden party appeal.
33. Textured Pixie with Crown Embellishment
Even the shortest pixie cuts can embrace Bridgerton elegance through textured styling and strategic crown embellishment that draws the eye upward and creates the illusion of traditional updo sophistication.
Pixie Texturing Techniques
- Apply texturizing paste or clay to dry hair, working through with fingers for piece-y separation.
- Use a small amount of product—pixie cuts require minimal product for maximum effect without greasiness.
- Create directional flow by pushing hair upward and forward at the crown for lift and volume.
- Use a flat iron or small round brush to create subtle bends and texture in longer pixie sections.
- Allow different sections to move in varying directions for intentional messiness that appears artfully styled.
Crown Embellishment for Very Short Hair
- Mini tiaras or decorative crowns designed specifically for short hair sit forward on the crown area.
- Position embellishments approximately one inch back from your hairline so they don’t slide forward.
- Bobby pin crowns securely by inserting pins through the crown’s structure and into teased hair beneath.
- Choose lightweight embellishments that won’t pull or feel heavy on short hair.
- Balance bold crown pieces with minimal makeup for elegant restraint rather than overwhelming decoration.
34. Sophisticated Low Side Twist
A low side twist gathered at the nape on one side creates asymmetrical elegance that’s both modern and period-inspired.
This style works particularly well for bobs and lobs, offering sophistication with minimal technical difficulty.
Creating Smooth Side Gathering
- Begin with smooth, straight hair achieved through blow-drying with a paddle brush or flat-ironing.
- Apply smoothing serum throughout to eliminate any texture or frizz.
- Create a deep side part, sweeping all hair dramatically to one side.
- Use strong-hold gel along the swept side to create sleek, sculptural smoothness.
- Gather all hair at the nape just below and behind one ear.
Twist Formation and Securing
- Divide the gathered hair into two equal sections.
- Twist these sections around each other, creating a rope-like twist.
- Coil the twist into a small spiral shape against your neck.
- Pin securely using crossed bobby pins that anchor the twist to your head.
- Add decorative pins, a jeweled clip, or small flowers at the twist’s base for elegance.
- Allow a few short face-framing pieces to escape on the lighter side for softness.
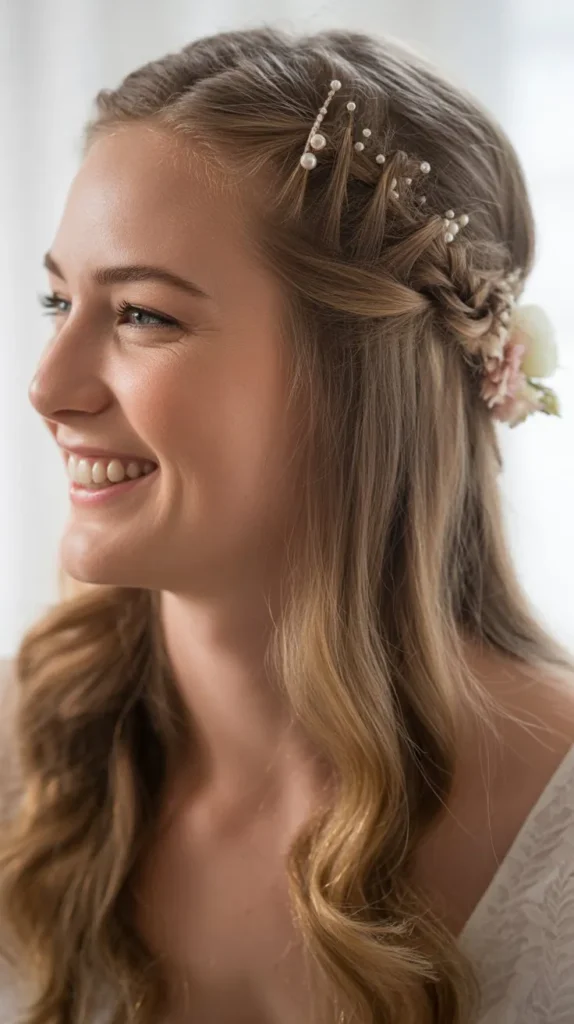
35. Ethereal Loose Waves with Floral Accent
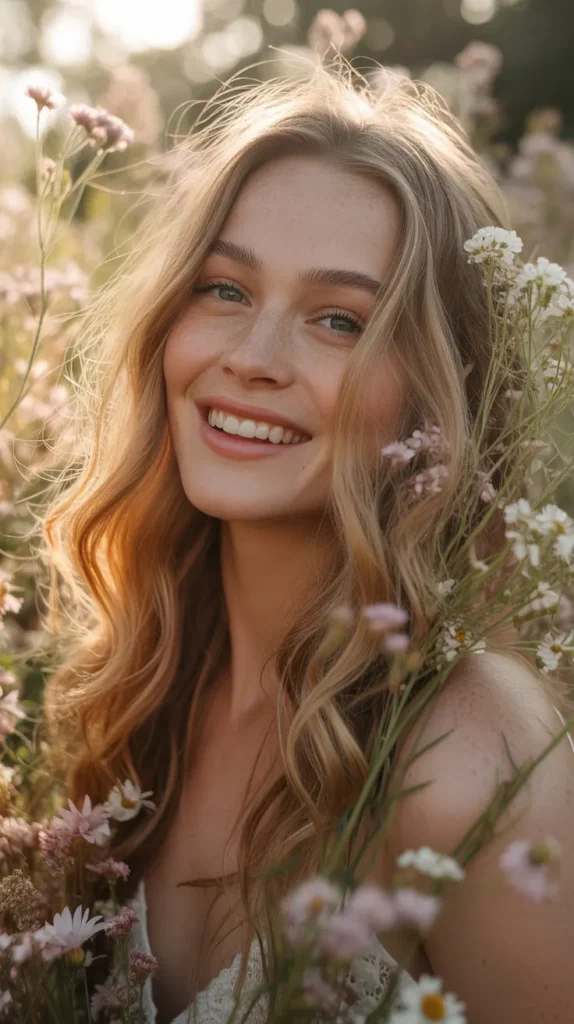
Soft, loose waves combined with a single elegant floral accent creates effortless romance that’s less structured than many Bridgerton styles but equally beautiful.
This approach suits casual Regency-inspired occasions and emphasizes natural beauty.
Creating Natural-Looking Waves
- Begin with damp hair, applying wave-enhancing mousse or sea salt spray.
- Scrunch hair upward toward your scalp while blow-drying to encourage natural wave formation.
- For enhanced definition, wrap random sections around a large-barrel curling iron (1.5-2 inches) briefly without creating distinct curls.
- Alternate curl directions randomly rather than following a pattern for authentic, undone appearance.
- Once all sections have been loosely waved, shake your head vigorously to break up any structure.
- Finish with texturizing spray and tousle with fingers for piece-y, relaxed waves.
Floral Accent Placement
- Select one perfect bloom—rose, peony, or camellia work beautifully—either fresh or high-quality artificial.
- Trim the stem to approximately one inch if using fresh flowers.
- Position the flower just behind and above one ear, nestled into your waves.
- Secure with bobby pins inserted through the stem and crossed through the flower’s base into your hair.
- Ensure the flower faces outward, displaying its most beautiful angle.
- This single, simple accent provides elegance without overwhelming the soft, natural wave styling.
Conclusion
Whether you’re attending a Regency ball, hosting a themed afternoon tea, planning a historically-inspired wedding, or simply love the romantic elegance of the Bridgerton aesthetic, these 35 Bridgerton Hairstyles for Short Hair That Stun prove that elaborate period beauty is entirely achievable regardless of your hair length.
From the simplicity of a velvet ribbon crown to the complexity of graduated pearl arrangements, from authentic pin curls to modern interpretations with chain headpieces, short hair offers a versatile canvas for Regency-inspired creativity.
The secret lies not in length but in technique, quality accessories, and thoughtful styling that honors the era’s attention to detail and love of embellishment.
As you experiment with these looks, remember that the true essence of Bridgerton style isn’t perfection—it’s the confidence and joy of wearing something beautiful that makes you feel like the belle of the ball.
So gather your pearls, practice your pin curls, and step into your own Regency romance knowing that your short hair is not a limitation but an opportunity to showcase these stunning historical styles in fresh, modern ways.