
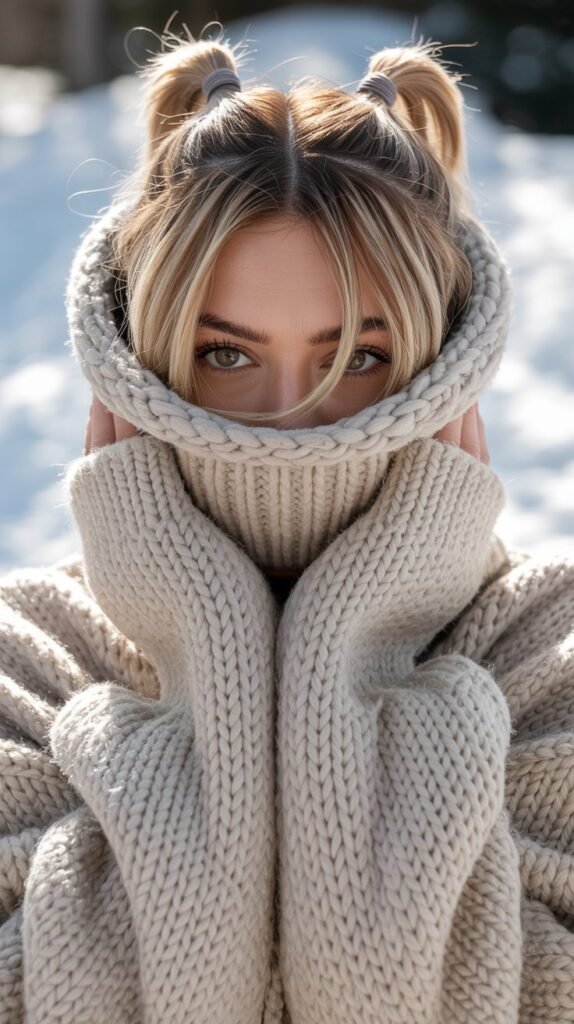
Winter is the season when warmth meets style, and there’s no better combination than pairing your favorite beanie with a gorgeous hairstyle that keeps you cozy and camera-ready.
Whether you’re heading to a snowy mountain retreat, grabbing coffee with friends, or simply running errands on a chilly day, the right beanie hairstyle can transform your entire look from ordinary to absolutely stunning.
The struggle of hat hair is real, but with the right techniques and styling tricks, you can rock a beanie while maintaining beautiful, Instagram-worthy hair that doesn’t sacrifice comfort for style.
This comprehensive guide to 33 Cozy Cute Winter Hairstyles with Beanies will walk you through everything from effortless messy buns to sleek ponytails, from romantic braided styles to playful pigtails, ensuring that you’ll never have a bad beanie day again.
You’ll discover hairstyles perfect for every hair length, texture, and personal style preference, complete with easy-to-follow instructions that work whether you’re a hairstyling novice or a beauty enthusiast.
Get ready to embrace the cold weather with confidence, knowing that your beanie and hairstyle combination will turn heads wherever you go while keeping you wonderfully warm throughout the winter season.
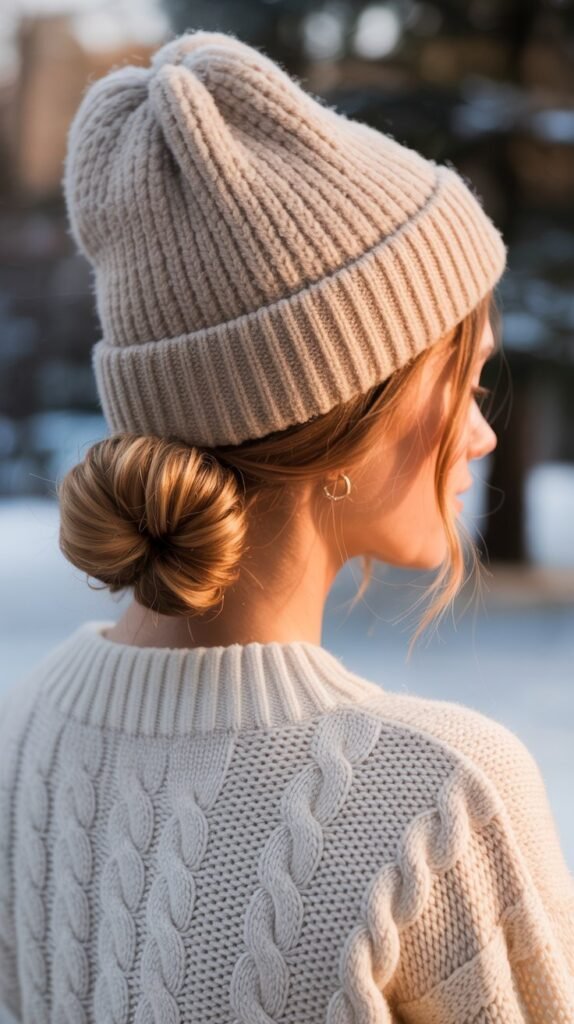
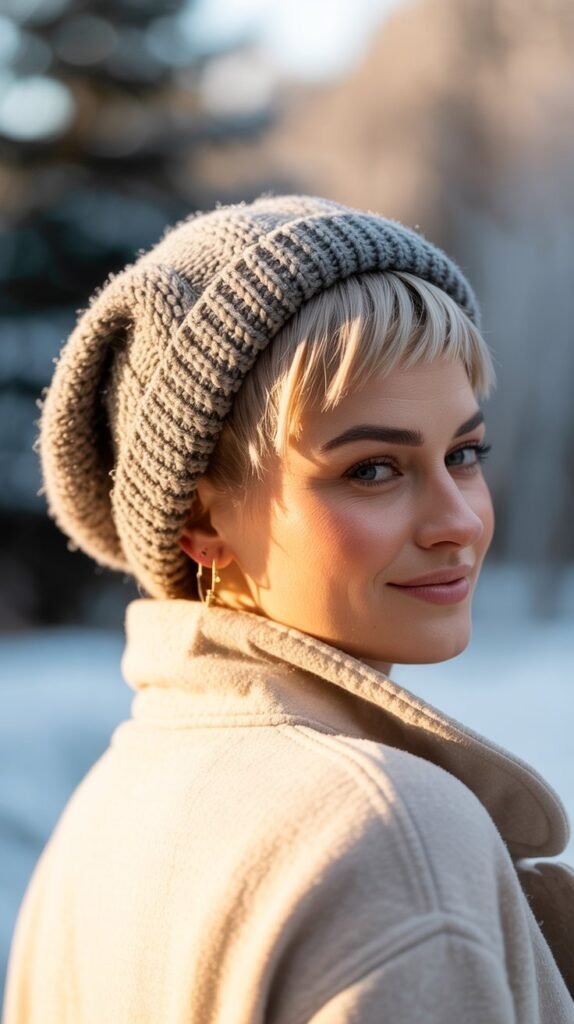
1. Messy Low Bun with Slouchy Beanie
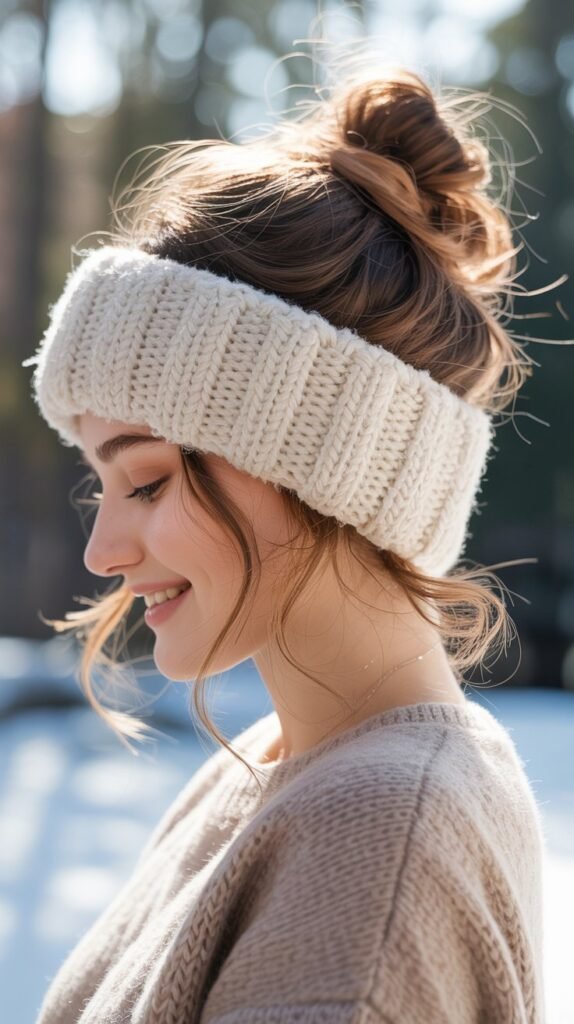
The messy low bun with a slouchy beanie creates an effortlessly chic look that’s perfect for casual winter days.
This style works beautifully because the beanie sits comfortably on your head without flattening your hair, while the low bun peeks out from underneath, adding dimension and style.
How to Create This Look:
- Gather your hair at the nape of your neck and twist it loosely into a bun shape
- Secure the bun with bobby pins or a hair tie, intentionally leaving some strands loose for that perfectly imperfect texture
- Pull the slouchy beanie over your head, positioning it slightly back to showcase the bun
- Gently tug at the bun to create more volume and loosen it further for that coveted messy appearance
- Pull out a few face-framing pieces around your temples and ears to soften the overall look
2. High Ponytail Through Beanie Hole
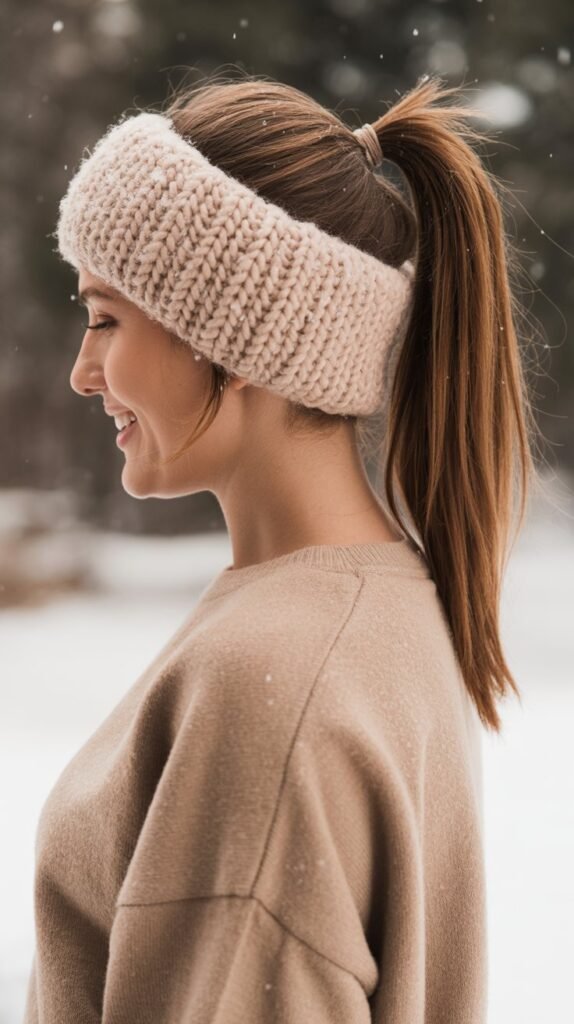
The high ponytail pulled through a beanie hole is a sporty yet feminine style that’s gained massive popularity on social media.
This look requires a beanie specifically designed with a hole at the crown, allowing your ponytail to flow freely while your head stays toasty warm.
Step-by-Step Instructions:
- Brush your hair up into a high ponytail at the crown of your head, securing it tightly with an elastic band
- Smooth any bumps or flyaways with a brush or your hands, applying hairspray if needed for a sleeker finish
- Position your beanie with the hole opening at the top of your head, right where your ponytail base sits
- Thread your ponytail through the hole opening, adjusting the beanie to sit comfortably around your hairline
- Curl the ends of your ponytail with a curling iron or let it flow naturally for different styling options
- Add volume to the ponytail by gently teasing it or wrapping small sections around the elastic to hide it
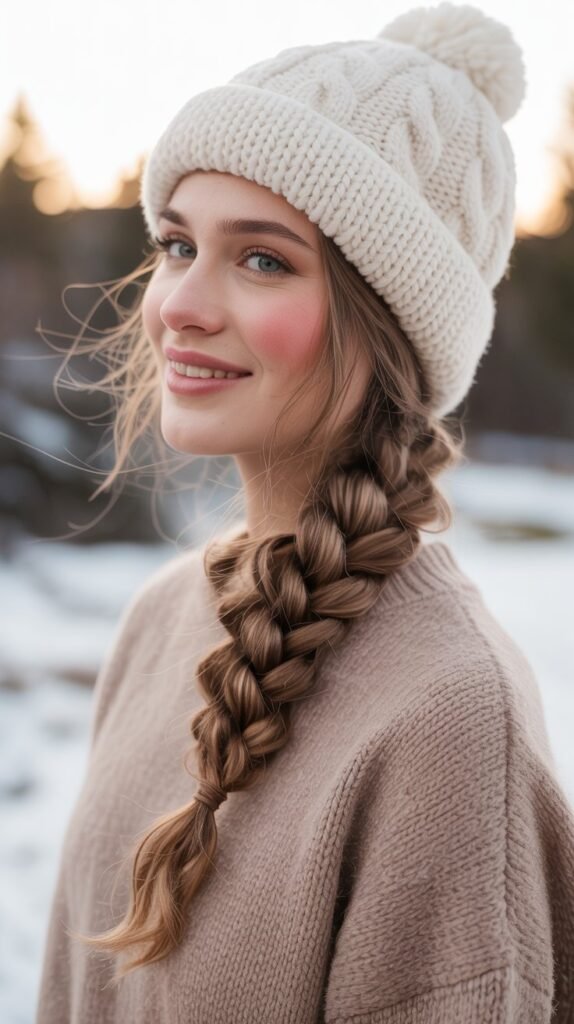
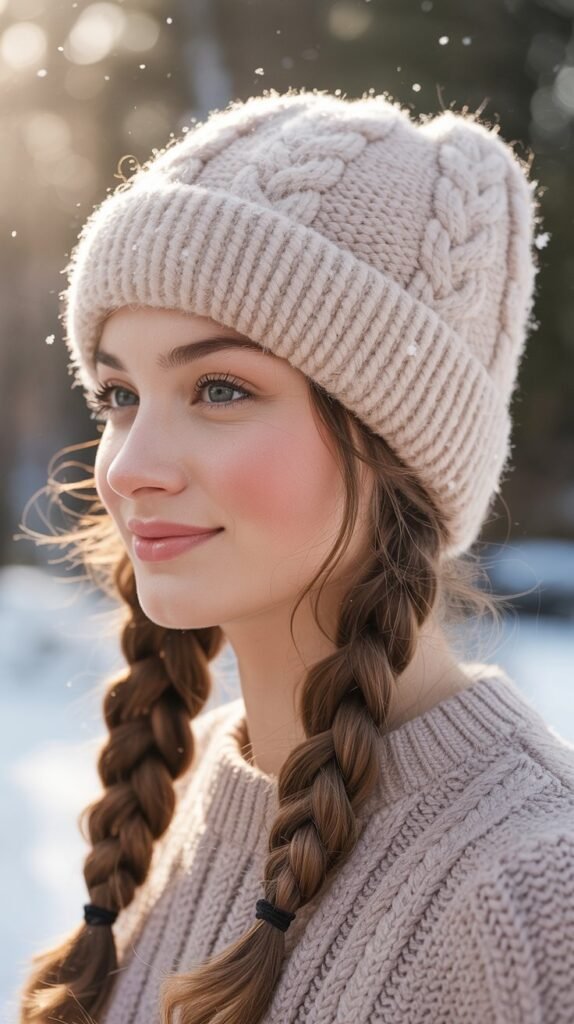
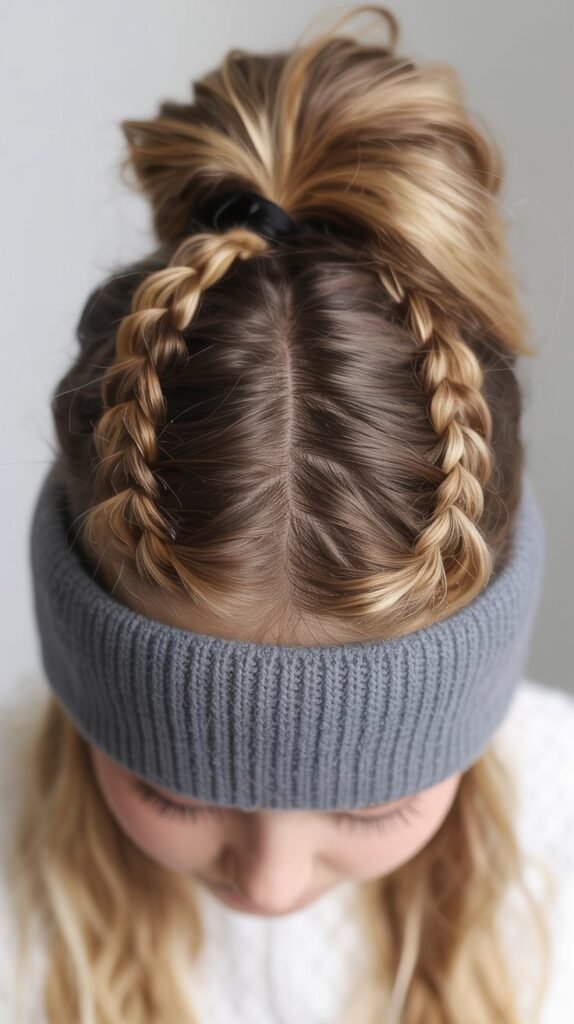
3. Double Dutch Braids with Fitted Beanie
Double Dutch braids paired with a fitted beanie create an athletic, youthful look that’s incredibly practical for active winter days.
The braids lie flat against your head, making them perfect for wearing under a beanie without creating uncomfortable bulk.
Braiding Technique:
- Part your hair down the center from your forehead to the nape of your neck, creating two equal sections
- Start Dutch braiding on one side by taking a section at your hairline and dividing it into three strands
- Cross the outer strands under the middle strand rather than over, adding small sections of hair as you braid downward
- Continue the Dutch braid all the way down to the ends, securing with a small elastic band
- Repeat the exact same process on the other side, ensuring both braids are symmetrical and tight
- Pull the fitted beanie over the braids, letting the ends peek out from underneath for added style
Pro Styling Tips:
- Apply a smoothing serum before braiding to minimize flyaways and create sleeker braids
- Tug gently at the braid sections after completing them to create fuller, more dimensional braids
- Cross the braid ends over your shoulders for a cute finishing touch that frames your face
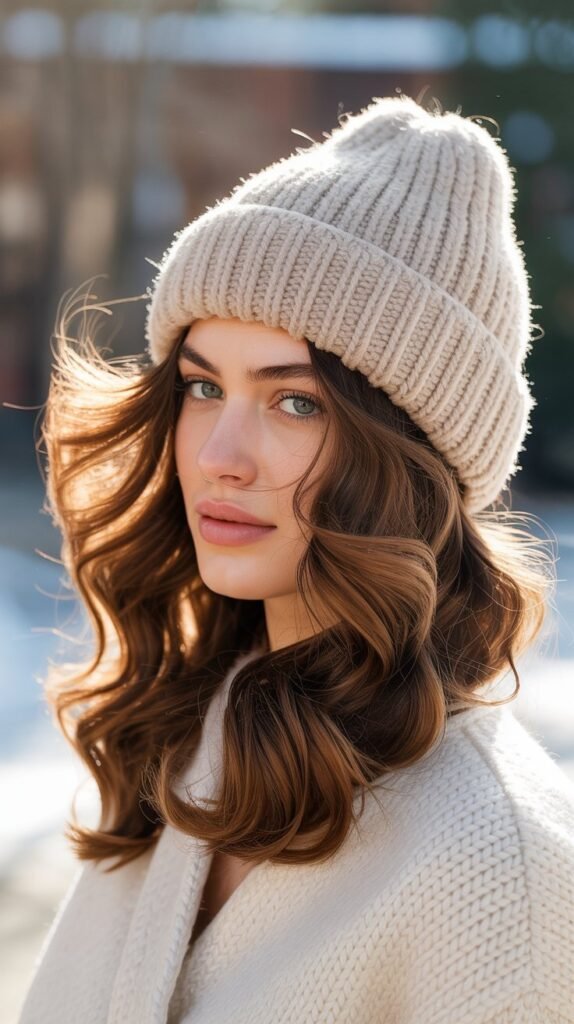
4. Side-Swept Waves with Cuffed Beanie
Side-swept waves combined with a cuffed beanie deliver romantic, feminine vibes perfect for date nights or winter gatherings.
This style showcases your waves while the beanie adds a casual-cool element that prevents the look from feeling too formal.
Creating the Perfect Waves:
- Curl your hair in large sections using a 1.5-inch curling iron, wrapping the hair away from your face
- Allow the curls to cool completely before touching them to help them set and last longer
- Gently run your fingers through the curls to break them up into soft, natural-looking waves
- Sweep all your hair to one side, securing it loosely behind one ear with bobby pins if needed
- Place the cuffed beanie on your head, positioning it further back to showcase your waves and forehead
- Adjust the waves to cascade over your shoulder, creating that effortlessly romantic appearance
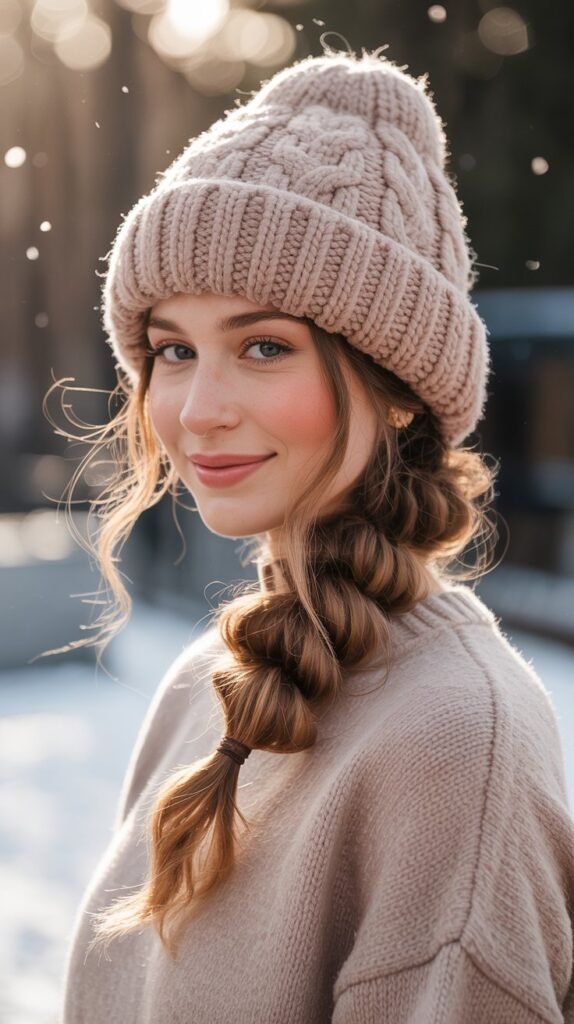
5. Low Pigtails with Oversized Beanie
Low pigtails paired with an oversized beanie create an adorable, playful look that’s surprisingly sophisticated when styled correctly.
This youthful hairstyle works wonderfully for those who want to embrace a fun, carefree winter aesthetic.
How to Style Low Pigtails:
- Part your hair down the middle or slightly to one side, depending on your preference
- Gather each section of hair at the nape of your neck, positioning the pigtails low rather than at ear level
- Secure each pigtail with elastic bands, making sure they’re positioned at equal heights for symmetry
- Curl the ends of the pigtails or leave them straight for different styling options
- Pull the oversized beanie over your head, allowing it to slouch back slightly for a relaxed appearance
- Adjust the pigtails so they rest on your shoulders or chest, visible beneath the beanie
Adding Extra Charm:
- Wrap small sections of hair around the elastic bands to hide them and create a more polished look
- Add ribbons or small hair accessories to the pigtails for extra cuteness without overwhelming the style
6. Textured Half-Up Top Knot with Beanie
The textured half-up top knot with a beanie combines practicality with trendy style, keeping hair out of your face while creating visual interest.
This look works exceptionally well because it adds height and dimension without requiring your entire head of hair to be styled.
Creating the Top Knot:
- Section off the top half of your hair from ear to ear, leaving the bottom half down
- Gather the top section into a high ponytail at the crown of your head
- Twist the ponytail and wrap it around its base to create a small knot shape
- Secure the knot with bobby pins, leaving the ends sticking out for added texture
- Tease the bottom half of your hair to create volume and texture that complements the top knot
- Position your beanie just behind the top knot, allowing the knot to sit proudly above the beanie’s edge
Texture Enhancement:
- Use a dry texture spray on the bottom half of your hair to create that perfectly undone, lived-in appearance
- Pull small pieces from the top knot to make it look intentionally messy and relaxed
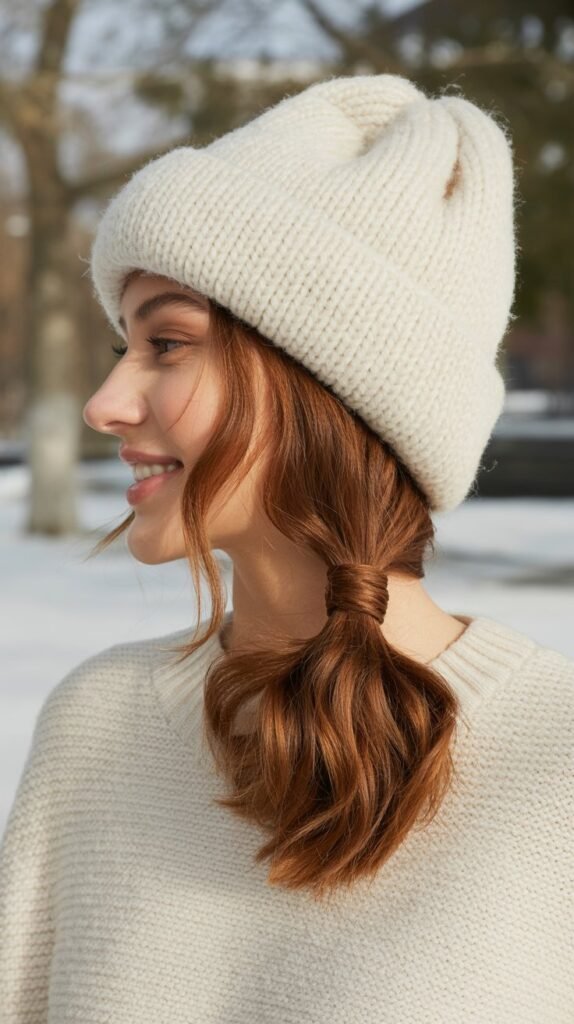
7. Sleek Low Ponytail with Classic Beanie
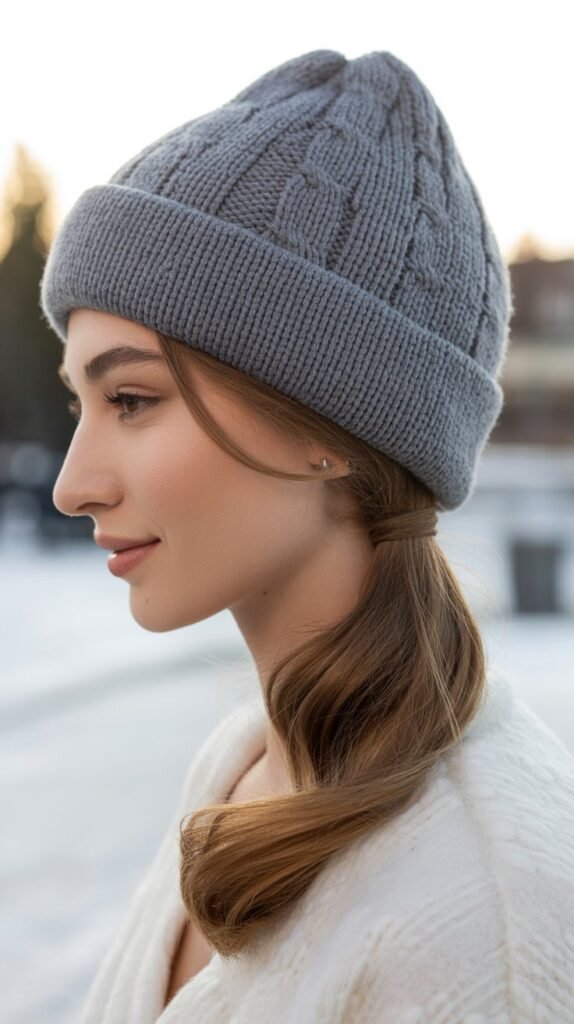
The sleek low ponytail paired with a classic beanie is a timeless, sophisticated option perfect for professional settings or polished casual looks.
This style emphasizes simplicity and elegance while keeping you warm and comfortable.
Achieving the Sleek Look:
- Apply a smoothing cream or gel to damp or dry hair to eliminate frizz and flyaways
- Brush your hair straight back and gather it at the nape of your neck into a low ponytail
- Secure the ponytail with a hair elastic, making sure there are no bumps along the top or sides
- Take a small section of hair from the ponytail and wrap it around the elastic to conceal it
- Secure the wrapped section with a bobby pin tucked underneath the ponytail
- Place the classic beanie on your head, positioning it at your natural hairline for a clean appearance
Finishing Touches:
- Apply a light-hold hairspray to keep everything in place throughout the day
- Use a boar bristle brush for the smoothest possible finish that looks polished and intentional
8. Crimped Hair with Slouchy Beanie
Crimped hair with a slouchy beanie brings back nostalgic ’90s vibes with a modern twist.
The added texture from crimping creates incredible volume that looks fantastic peeking out from underneath a beanie.
Crimping Method:
- Divide your hair into small sections, working from the bottom layers up to the top
- Use a hair crimper on each section, holding it for a few seconds before releasing
- Continue crimping all sections except for the very front pieces near your face
- Gently separate the crimped sections with your fingers to create even more volume and texture
- Place the slouchy beanie on your head, positioning it back far enough to show your hairline
- Let the crimped hair flow freely from underneath the beanie, creating a dramatic, voluminous effect
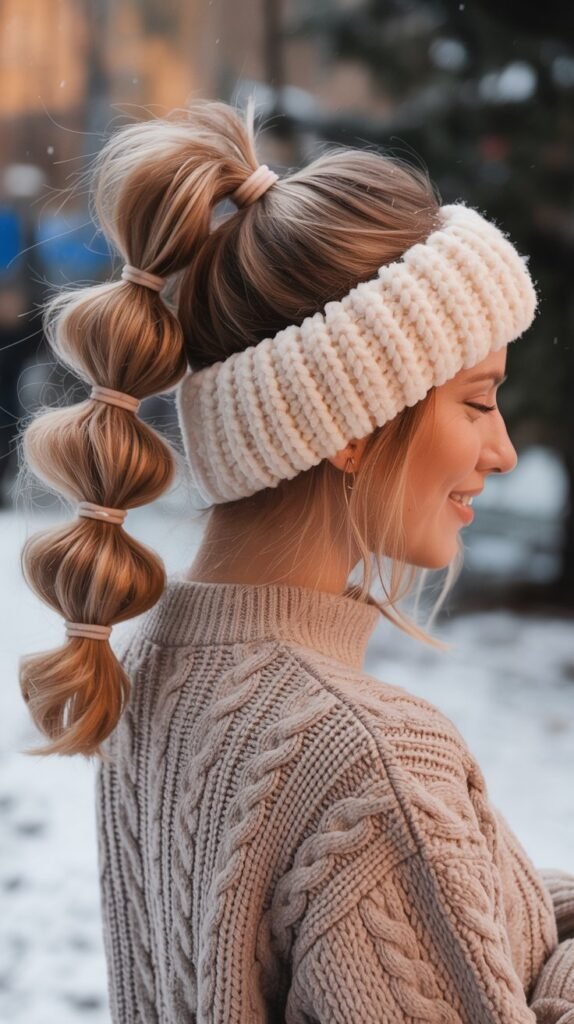
9. Bubble Ponytail with Fitted Beanie
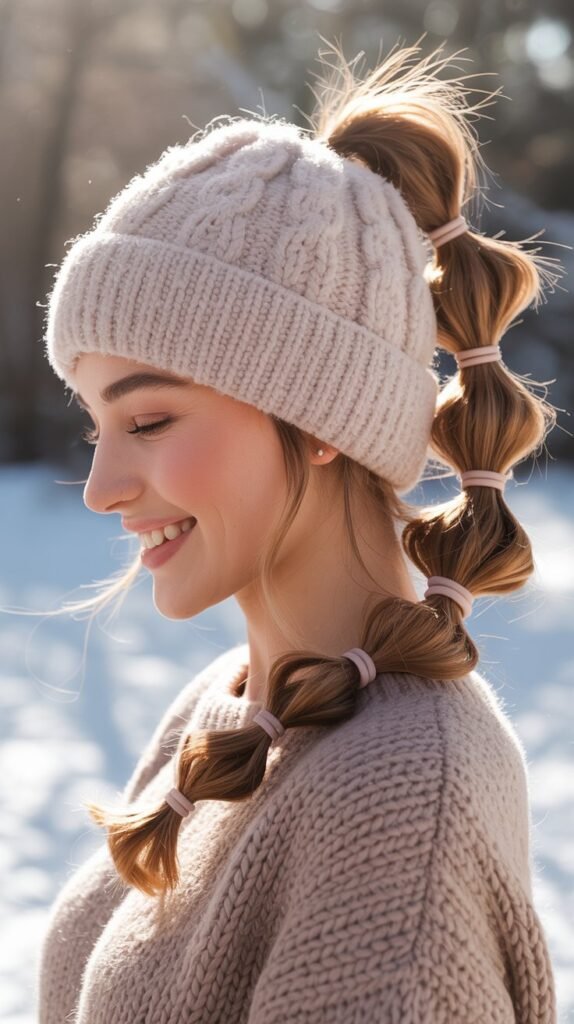
The bubble ponytail is a fun, eye-catching style that works surprisingly well with fitted beanies.
The segmented bubbles create visual interest and dimension while the beanie keeps your head warm without interfering with the unique hairstyle.
Creating Bubble Ponytail:
- Pull your hair into a high or mid-level ponytail, securing it tightly with an elastic
- Place additional elastic bands down the length of the ponytail at equal intervals, about 2-3 inches apart
- Gently tug and pull at each section between the elastics to create rounded bubble shapes
- Continue this pattern all the way down to the ends of your ponytail
- Position your fitted beanie on your head, ensuring the ponytail base sits comfortably
- Adjust each bubble to maintain its rounded shape after placing the beanie
Bubble Enhancement:
- Use clear elastic bands to make the bubbles appear as if they’re floating without visible ties
- Add small decorative clips or pins between bubbles for extra personality and sparkle
10. Loose Fishtail Braid with Beanie
A loose fishtail braid paired with a beanie creates a bohemian, relaxed winter look that’s both practical and beautiful.
The intricate braid pattern adds visual interest while staying comfortably flat under a beanie.
Fishtail Braiding Steps:
- Gather your hair to one side or down the center back, depending on your preference
- Divide the hair into two equal sections instead of the traditional three
- Take a small piece from the outer edge of the left section and cross it over to join the right section
- Repeat on the opposite side, taking a small piece from the outer right section and crossing it to the left
- Continue alternating sides all the way down to the ends, keeping the sections loose for a relaxed appearance
- Secure the end with a small elastic and gently pull at the braid sections to create fullness
- Place your beanie on your head, allowing the braid to drape over your shoulder
Achieving the Perfectly Messy Look:
- Pancake the braid by pulling at the edges of each section to create width and dimension
- Pull out a few small strands around your face for a softer, more romantic finish
11. Space Buns with Beanie
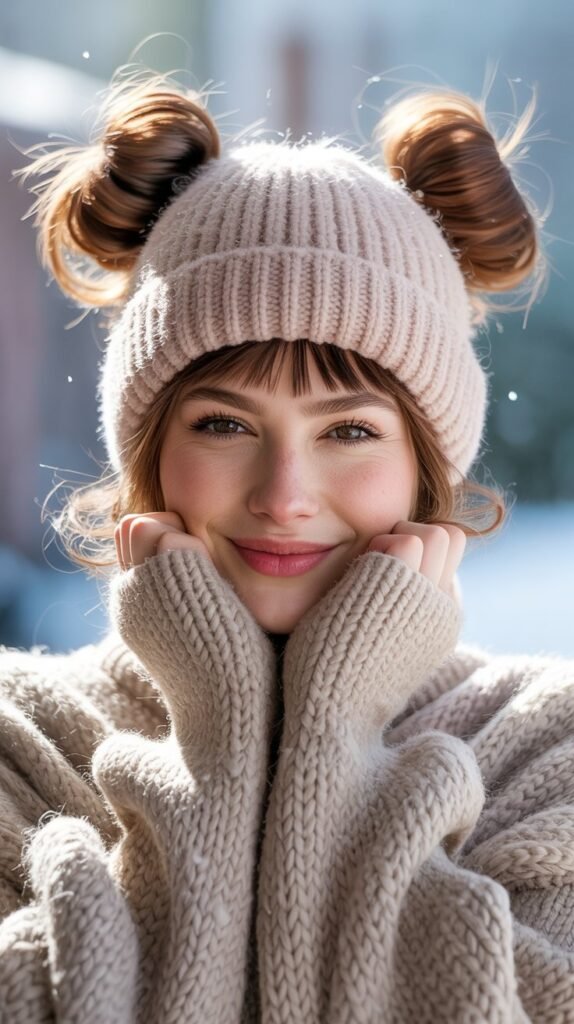
Space buns with a beanie create a quirky, youthful look that’s perfect for fun winter outings.
This playful style requires a beanie that sits higher on the head to accommodate the buns underneath.
Creating Space Buns:
- Part your hair straight down the middle from forehead to nape, creating two equal sections
- Gather one section into a high ponytail positioned above your ear, securing it tightly
- Twist the ponytail and wrap it around its base to create a compact bun shape
- Secure the bun with bobby pins and repeat the exact process on the other side
- Ensure both buns are positioned at equal heights and similar sizes for symmetry
- Place your beanie over the space buns, adjusting it to sit comfortably while the buns create shape underneath
Beanie Selection for This Style:
Choose a stretchy, larger beanie that can accommodate the added volume from the buns without feeling too tight or uncomfortable.
12. Twisted Low Bun with Slouchy Beanie
The twisted low bun with a slouchy beanie offers an elegant, refined look perfect for dressier winter occasions.
The twisting technique adds sophistication to a simple bun while the slouchy beanie keeps the overall vibe casual and approachable.
Twisting Technique:
- Gather your hair at the nape of your neck and divide it into two equal sections
- Twist each section individually in the same direction until they’re tightly wound
- Cross the two twisted sections over each other in the opposite direction, creating a rope-like effect
- Continue wrapping the twisted rope around itself to form a low bun shape at the nape
- Secure the bun with bobby pins, making sure all ends are tucked in neatly
- Place the slouchy beanie on your head, positioning it to showcase the intricate twisted bun
Adding Elegance:
- Pull out a few wispy pieces around your face and neck for a softer, more romantic appearance
- Use bobby pins that match your hair color for a seamless, invisible hold
13. Voluminous Blowout with Beanie
A voluminous blowout paired with a beanie creates a glamorous yet practical winter look.
The key is creating enough volume that survives being under a beanie without getting completely flattened.
Blowout Technique:
- Start with damp hair and apply a volumizing mousse from roots to ends
- Section your hair into manageable pieces and blow-dry each section with a round brush
- Roll the brush away from your face while directing heat from roots to ends for maximum lift
- Focus extra attention on the crown area, lifting the roots as you dry for added height
- Once completely dry, blast your hair with cool air to set the volume and create lasting hold
- Place your beanie on your head at an angle, positioning it back far enough to preserve your blowout volume
14. French Braid Crown with Beanie
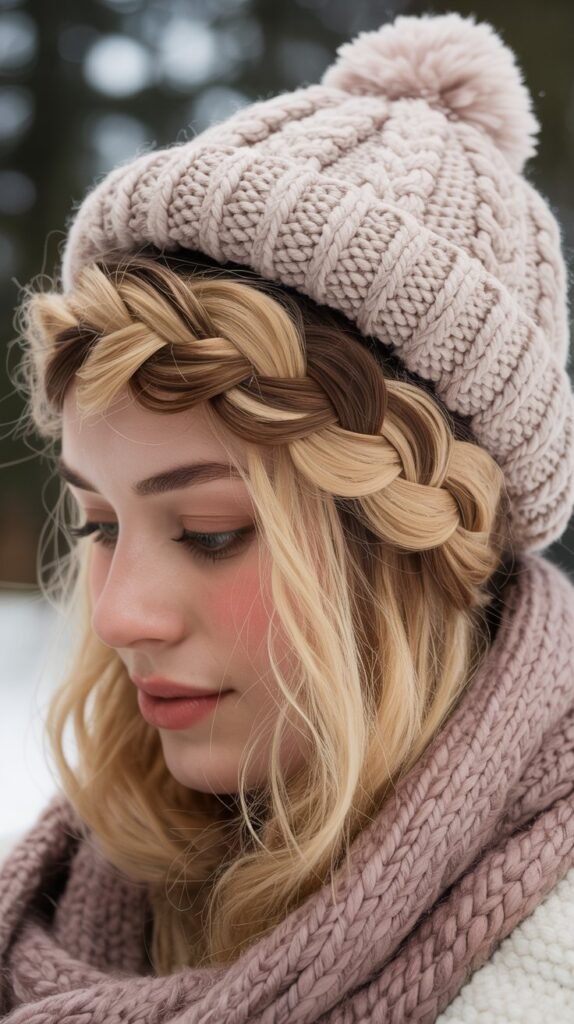
The French braid crown with a beanie is a romantic, whimsical style that works beautifully for special winter events.
The braid wraps around your head like a crown, sitting perfectly under a beanie without adding uncomfortable bulk.
Crown Braid Instructions:
- Part your hair deeply to one side, starting the braid on the side with more hair
- Begin a French braid at your part line, braiding along your hairline toward your ear
- Continue the French braid around the back of your head, following your hairline like a crown
- Keep the braid tight and close to your head to ensure it lays flat under a beanie
- Secure the end with a small elastic and tuck it under the braid, pinning it invisibly
- Place your beanie over the crown braid, adjusting it to sit comfortably without disrupting the braid
Romantic Finishing:
- Pull out small pieces around your face to create a softer, more ethereal appearance
- Add small pearl or crystal pins along the visible parts of the braid for extra elegance
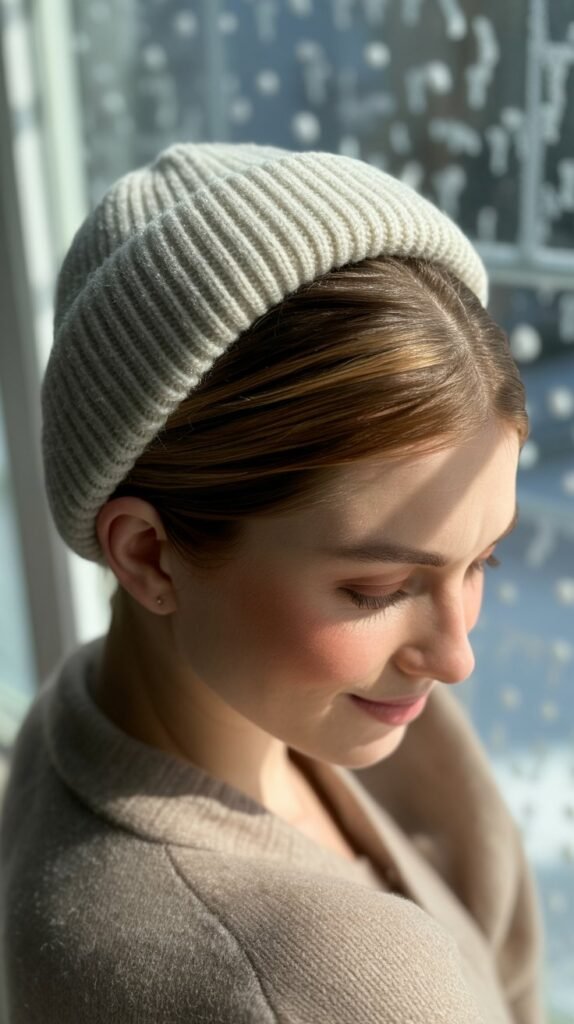
15. Straight Hair with Center Part and Beanie
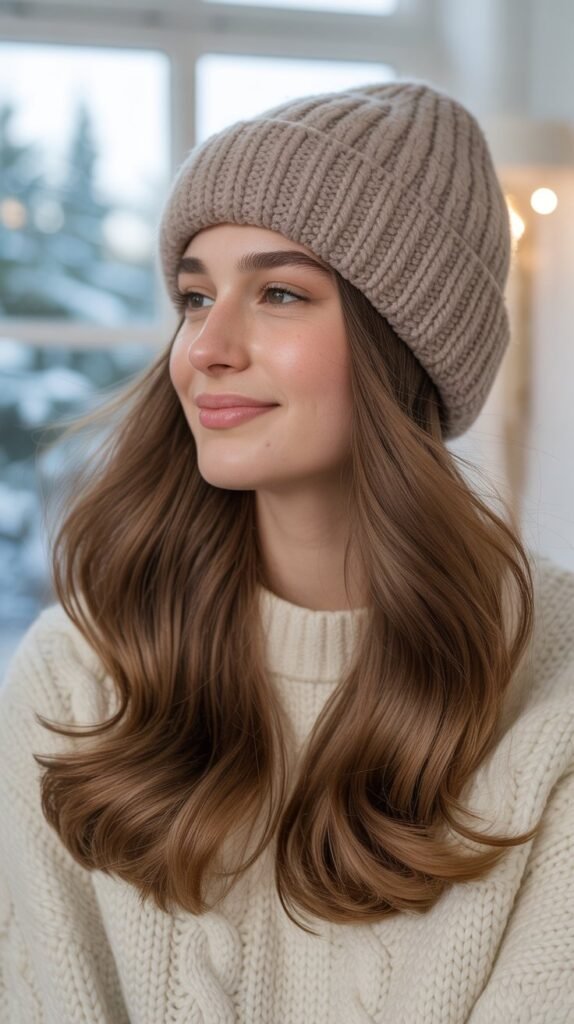
Sleek, straight hair with a center part and beanie creates a minimalist, modern look that’s effortlessly chic.
This simple style emphasizes the beauty of healthy, shiny hair while the beanie adds a casual-cool element.
Achieving Perfectly Straight Hair:
- Apply a heat protectant spray throughout your hair before using any hot tools
- Section your hair into small pieces and flat iron each section from roots to ends
- Move the flat iron slowly and steadily to ensure the hair is completely straight with one pass
- Create a precise center part using a rat-tail comb for a clean, symmetrical look
- Apply a shine serum to the ends to enhance gloss and eliminate any remaining frizz
- Position your beanie on your head, letting the straight hair flow naturally from underneath
Maintaining the Sleek Look:
- Use a ceramic or titanium flat iron for the smoothest results and least damage
- Apply a small amount of anti-humidity spray to keep hair sleek even in damp winter conditions
16. Messy Top Knot with Oversized Beanie
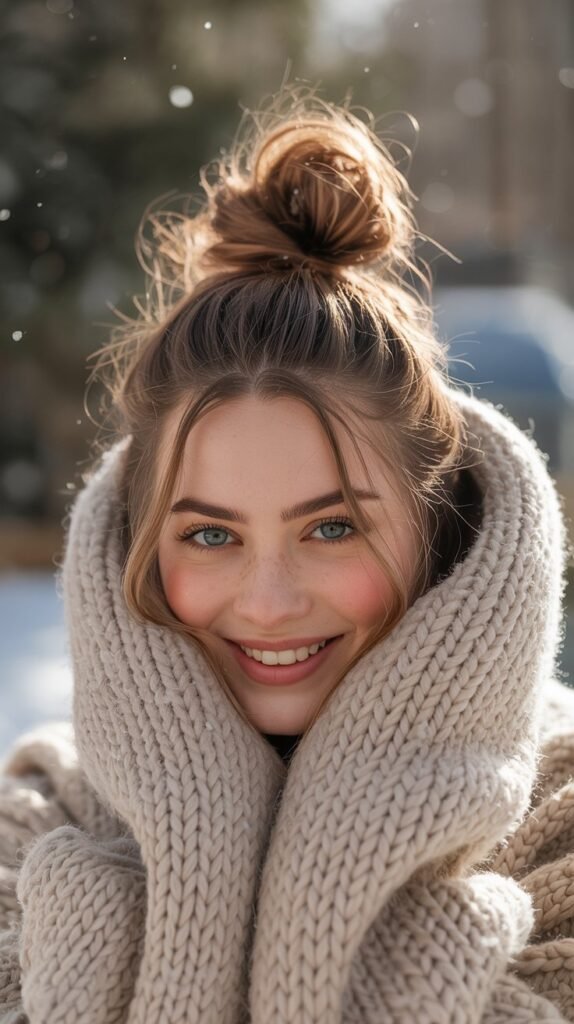
The messy top knot with an oversized beanie is the ultimate lazy-day hairstyle that somehow looks intentionally stylish.
This effortless combination is perfect for those mornings when you need to look put-together without spending much time.
Quick Top Knot Method:
- Flip your head upside down and gather all your hair at the crown of your head
- Twist the hair as you pull it through the elastic, stopping halfway to create a loop
- Leave the ends sticking out of the top knot rather than tucking them in completely
- Allow pieces to fall naturally and messily for that perfectly imperfect appearance
- Stand upright and pull the oversized beanie over your head, allowing it to slouch back
- Adjust the top knot so it sits above the beanie, creating height and visual interest
Embracing the Mess:
- Don’t worry about smoothing bumps or flyaways—they add to the intentionally undone aesthetic
- Pull a few face-framing pieces loose to soften the look and create dimension
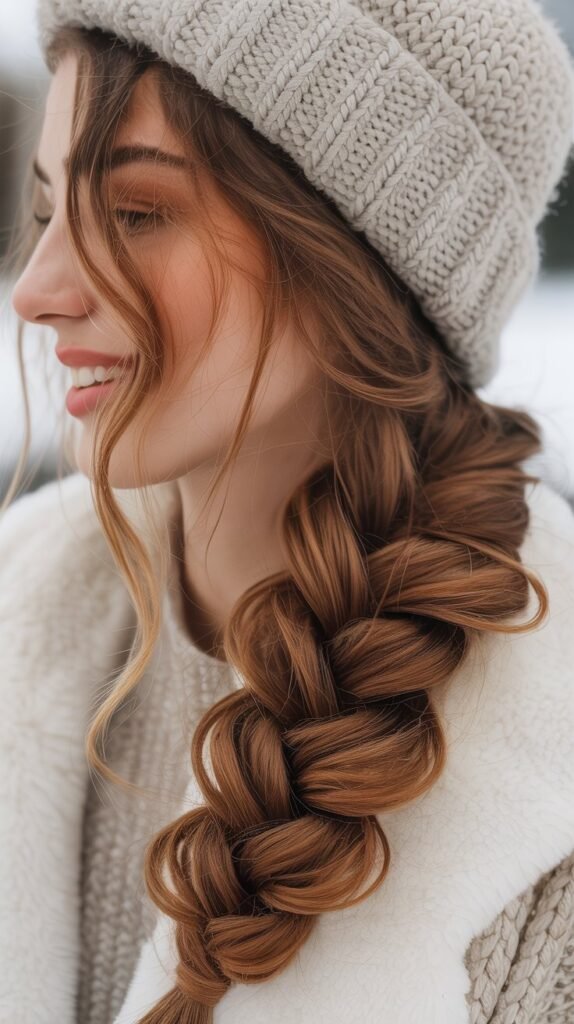
17. Rope Braid Ponytail with Beanie
The rope braid ponytail with a beanie is a sophisticated yet simple style that adds texture and interest to a basic ponytail.
This technique creates a twisted, rope-like effect that looks intricate but takes minimal effort.
Rope Braid Technique:
- Pull your hair into a ponytail at your desired height, securing it with an elastic
- Divide the ponytail into two equal sections
- Twist each section tightly in the same direction, either both clockwise or both counterclockwise
- Once both sections are twisted, wrap them around each other in the opposite direction
- The sections will naturally coil together, creating a rope-like appearance
- Secure the end with another elastic and place your beanie comfortably on your head
Preventing Unraveling:
- Apply a light-hold hairspray before creating the rope braid to help it stay twisted throughout the day
- Use elastics that grip well to prevent the rope from loosening at the base or ends
18. Vintage Victory Rolls with Beanie
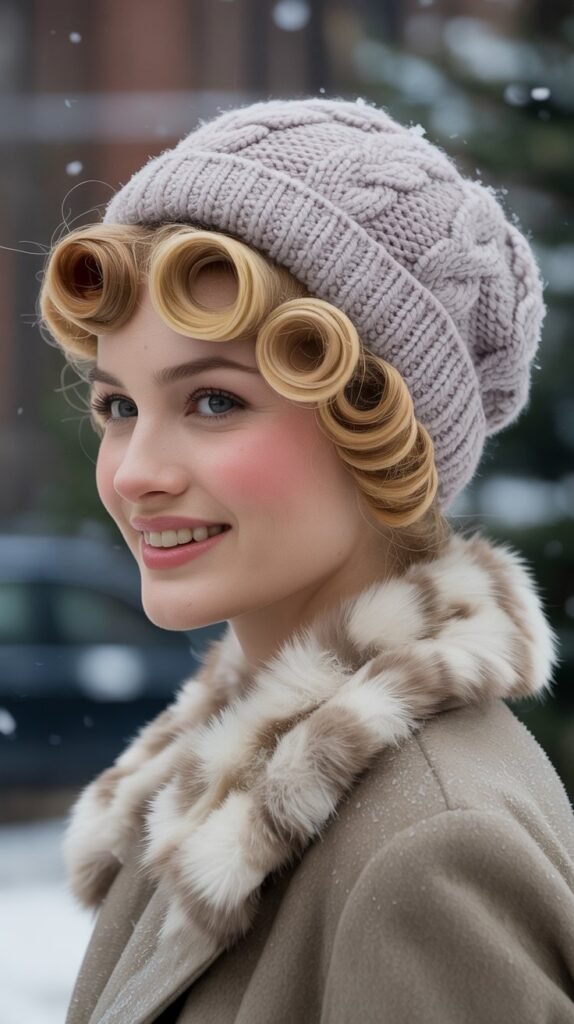
Vintage victory rolls paired with a beanie create a unique retro-inspired look that’s perfect for those who love classic styling.
This 1940s-inspired hairstyle works surprisingly well with modern beanies for a blend of old and new.
Creating Victory Rolls:
- Section off the front portions of your hair on both sides, leaving the back down or styled separately
- Backcomb each front section at the roots to create volume and texture
- Roll each section upward and inward toward your scalp, creating a cylindrical roll shape
- Pin each roll securely against your head with bobby pins, ensuring they’re symmetrical
- Style the remaining hair in waves or leave it straight, depending on your preference
- Position your beanie behind the victory rolls, allowing them to be the star of the show
19. Waterfall Braid with Beanie
The waterfall braid with a beanie creates a romantic, cascading effect that looks stunning while keeping your hair under control.
This intricate-looking braid is actually quite simple and works beautifully with winter accessories.
Waterfall Braid Instructions:
- Start with a small section of hair near your temple and divide it into three strands
- Begin a regular braid by crossing the strands once
- On the next cross, drop the bottom strand and let it fall like a waterfall
- Pick up a new section of hair to replace the dropped strand and continue braiding
- Repeat this drop-and-replace pattern as you braid along your hairline toward the back
- Secure the end with a small elastic and place your beanie to showcase the braid
Showcasing the Waterfall:
- Position your beanie further back on your head so the waterfall effect is clearly visible
- Curl the loose strands that fall through the braid for added dimension and romance
20. Multiple Mini Braids with Slouchy Beanie
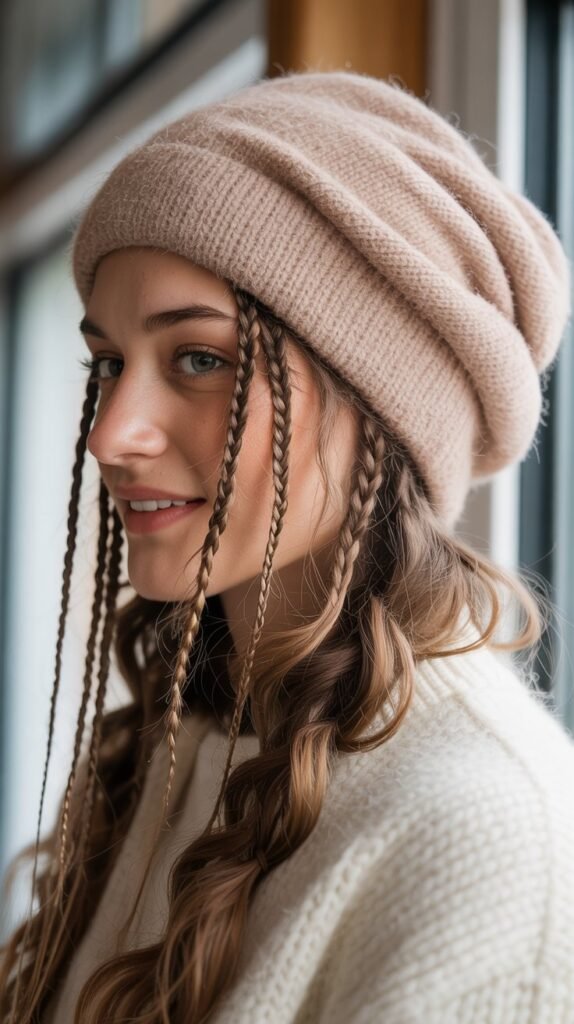
Multiple mini braids scattered throughout your hair with a slouchy beanie create a boho-chic look that’s perfect for festival-style winter fashion.
These small braids add texture and visual interest without overwhelming your overall style.
Creating Mini Braids:
- Section off small, random pieces of hair throughout your head in varying locations
- Create tight, regular three-strand braids with each small section
- Secure each mini braid with a small, clear elastic at the end
- Leave the majority of your hair down and loose between the braids
- Create anywhere from three to seven mini braids, depending on the look you want
- Pull the slouchy beanie over your head, allowing the mini braids to peek out naturally
Braid Placement Strategy:
- Place mini braids around your face, temples, and throughout the length for the most visual impact
- Vary the thickness of each mini braid to create a more organic, natural appearance
21. Low Twisted Ponytail with Classic Beanie
The low twisted ponytail with a classic beanie is an elevated take on the standard ponytail.
The twisting adds sophistication and texture while keeping the style simple and practical.
Twisting Method:
- Gather your hair into a low ponytail at the nape of your neck
- Secure it with an elastic, leaving a small gap between the elastic and your scalp
- Create an opening above the elastic by separating the hair into two sections
- Flip the ponytail up and through the opening, creating a twist at the base
- Gently pull the ponytail to tighten the twist and create a polished appearance
- Place your classic beanie on your head at a comfortable position
Adding Extra Detail:
- Create a second twist further down the ponytail for added visual interest
- Wrap a small section of hair around the elastic to conceal it and create a seamless look
22. Pulled-Through Braid with Fitted Beanie
The pulled-through braid with a fitted beanie creates the illusion of an intricate braid without actual braiding skills.
This technique uses multiple ponytails that are pulled through each other for a stunning effect.
Pull-Through Technique:
- Create a half-up ponytail at the crown of your head, securing it with a clear elastic
- Create a second ponytail directly below the first, gathering hair from the sides
- Split the top ponytail in half and bring those sections down around the second ponytail
- Create a third ponytail below, incorporating the split sections from the first ponytail
- Continue this pattern down the length of your hair until you reach the ends
- Gently pull at each section to create volume and the appearance of a thick braid
- Position your fitted beanie to sit comfortably without disrupting the pulled-through effect
Creating Maximum Volume:
- Tease each ponytail section before pulling it through for even fuller results
- Use clear elastics to maintain the illusion of a continuous braid without visible ties
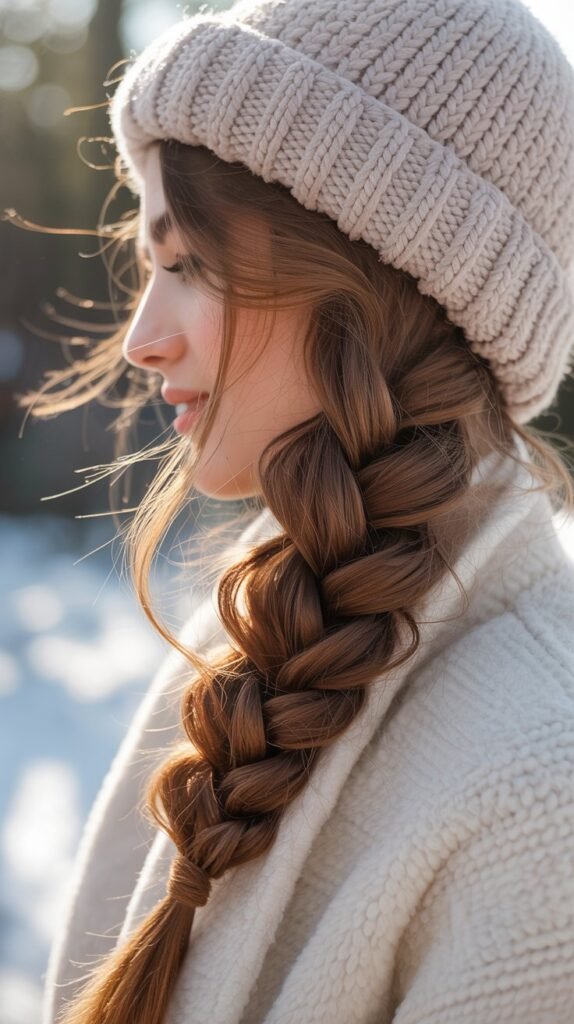
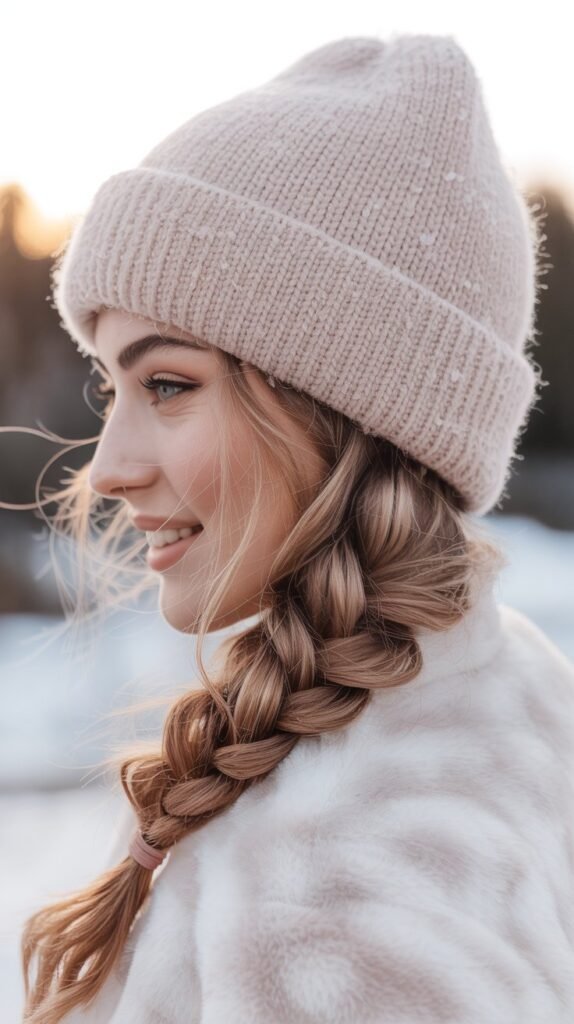
23. Side Braid with Oversized Beanie

A side braid with an oversized beanie combines practicality with style, keeping all your hair secure and warm while creating a romantic, asymmetrical look.
This simple style works for any occasion and hair type.
Side Braid Steps:
- Sweep all your hair over to one shoulder, gathering it to one side of your neck
- Divide the hair into three equal sections and begin a traditional three-strand braid
- Braid all the way down to the ends, keeping the tension consistent throughout
- Secure the end with an elastic that complements your hair color
- Gently pull at the braid sections to create width and a softer, more relaxed appearance
- Place the oversized beanie on your head, allowing it to slouch back for a casual vibe
Braid Variations:
- Try a fishtail or Dutch braid on the side for a different texture and visual interest
- Add ribbon or incorporate small accessories throughout the braid for extra personality
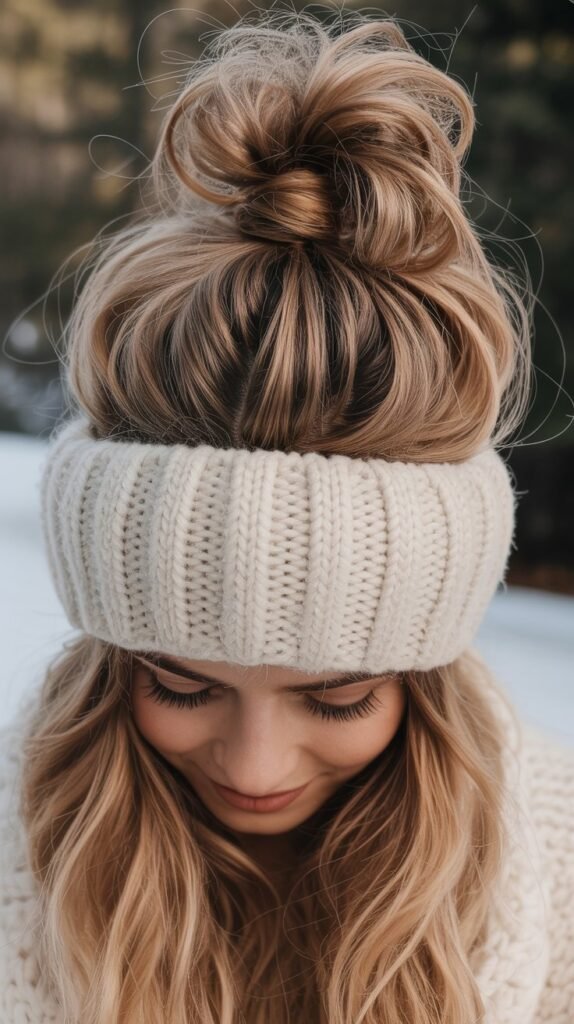
24. Curly Hair with Headband and Beanie
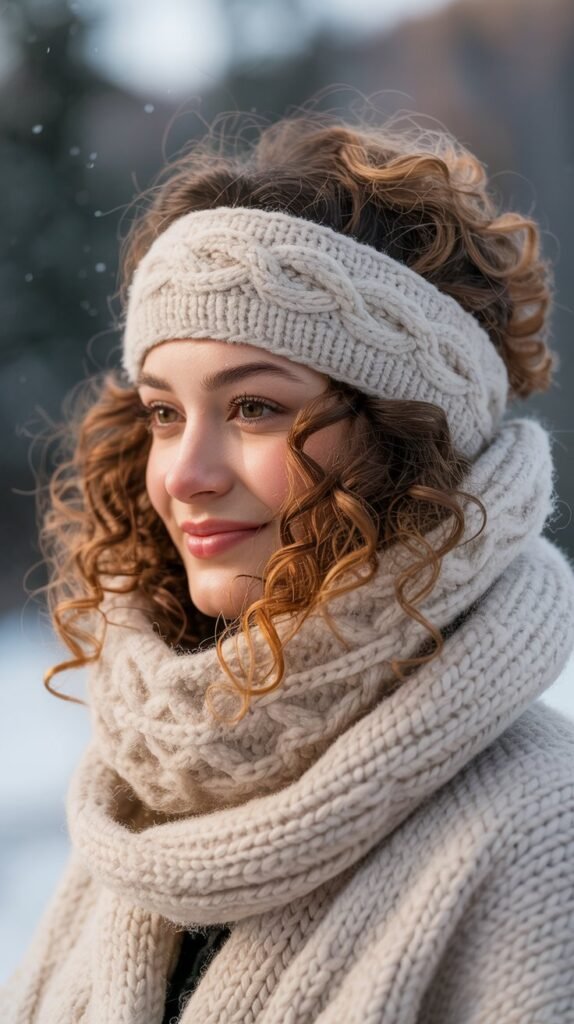
Curly hair with a headband under a beanie creates a structured, polished look that prevents curls from getting flattened.
The headband helps maintain curl definition while adding an extra layer of style.
Styling Curly Hair:
- Apply a curl-defining cream to damp hair and scrunch it upward to enhance curl pattern
- Allow curls to air dry or use a diffuser attachment on your blow dryer for faster results
- Once completely dry, place a wide fabric headband around your hairline
- Gently pull the beanie over the headband and curls, being careful not to flatten them
- Adjust the beanie to sit further back, showcasing your curls and the headband detail
- Pull out some curls around your face to create softness and frame your features
25. Faux Hawk with Beanie
The faux hawk with a beanie creates an edgy, fashion-forward look that’s perfect for those who want to make a statement.
This punk-inspired style works surprisingly well with the cozy casualness of a winter beanie.
Creating the Faux Hawk:
- Apply a strong-hold gel or mousse to damp hair, concentrating on the top sections
- Use a blow dryer and round brush to create height along the center of your head
- Tease the hair at the crown to create even more volume and lift
- Smooth the sides of your hair down flat against your head with gel or pomade
- Use bobby pins to secure any loose sections and maintain the hawk shape
- Position your beanie to sit on the flatter side sections while the faux hawk remains visible
Beanie Placement for Edge:
- Choose a beanie that sits low on your forehead for a more dramatic, edgy appearance
- Opt for a beanie in leather, studs, or dark colors to complement the punk aesthetic
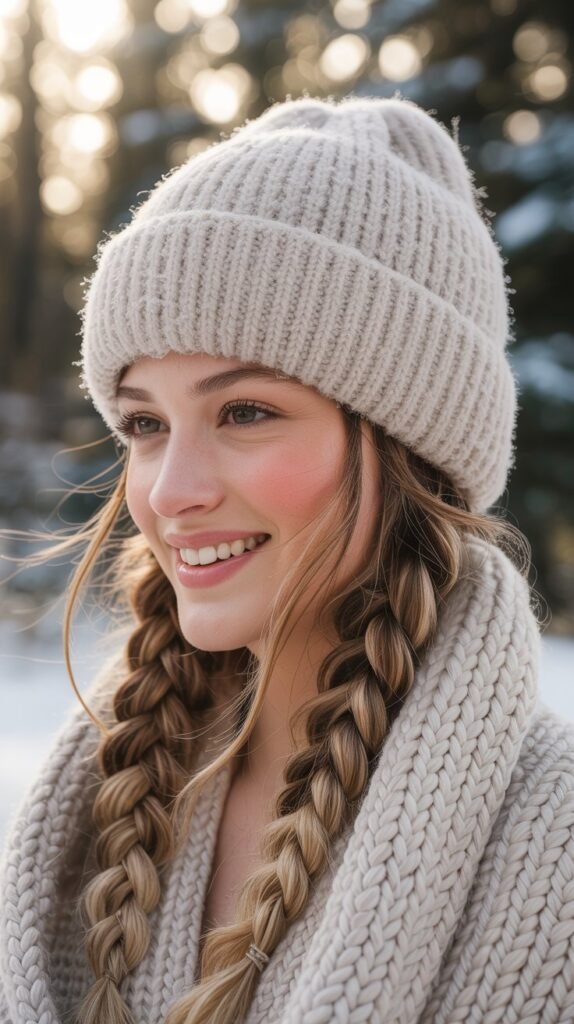
26. Braided Pigtails with Slouchy Beanie
Braided pigtails with a slouchy beanie create a youthful, playful look that’s both cute and practical.
This style keeps all your hair secure while adding a fun, whimsical element to your winter outfit.
Pigtail Braiding:
- Part your hair down the center from your forehead to the nape of your neck
- Gather one section into a ponytail at the desired height on the side of your head
- Divide the ponytail into three equal strands and begin braiding in a standard three-strand pattern
- Continue braiding all the way to the ends, maintaining even tension throughout
- Secure the end with a small elastic and repeat the entire process on the other side
- Ensure both braids are positioned at matching heights and similar tightness for symmetry
- Pull the slouchy beanie over your head, letting the braided pigtails drape over your shoulders
Customizing the Look:
- Make the braids tight for a more athletic, sporty appearance or loose for a softer, romantic vibe
- Add colorful hair ties or ribbons at the ends for a pop of personality and color
27. Slicked Back Hair with Fitted Beanie
Slicked back hair with a fitted beanie creates a sleek, modern look that’s both minimalist and sophisticated.
This style emphasizes facial features while maintaining a polished, put-together appearance.
Slicked Back Technique:
- Apply a strong-hold gel or pomade to damp hair, working it through from roots to ends
- Use a fine-tooth comb to brush all hair straight back from your hairline
- Continue combing until the hair lies completely flat against your head with no bumps
- Create a deep side part or slick it straight back without a part, depending on preference
- Allow the product to set for a few minutes before placing the beanie on your head
- Position the fitted beanie at your natural hairline, ensuring it doesn’t disrupt the slicked appearance
Achieving Long-Lasting Hold:
- Use a combination of gel and hairspray for maximum hold that withstands beanie wear
- Apply the beanie carefully to avoid creating bumps or disrupting the smooth surface
28. Half-Up Bubble Ponytail with Beanie
The half-up bubble ponytail with a beanie combines two trendy styles for a playful, dimensional look.
This style adds volume and visual interest while keeping the bottom half of your hair flowing freely.
Half-Up Bubble Creation:
- Section off the top half of your hair from ear to ear, leaving the bottom section down
- Pull the top section into a ponytail at the crown of your head
- Place elastic bands down the length of the ponytail at 2-3 inch intervals
- Gently pull and tug at each section between elastics to create rounded bubble shapes
- Leave the bottom half of your hair straight, wavy, or curled according to your preference
- Position your beanie on your head, ensuring the bubbles remain visible and defined
Creating Balance:
- Keep the bubbles relatively uniform in size for a polished, intentional appearance
- Add texture to the bottom section with waves or curls to complement the structured bubbles
29. Low Braided Bun with Classic Beanie
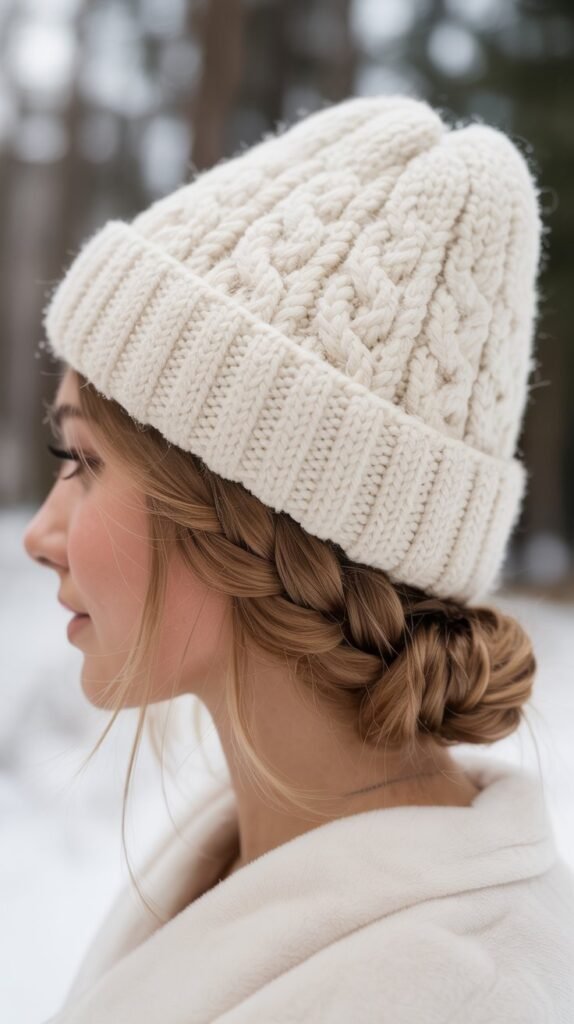
The low braided bun with a classic beanie offers an elegant, intricate style perfect for special occasions.
The braid adds texture and sophistication to a simple bun, creating a look that’s both practical and beautiful.
Braided Bun Instructions:
- Gather all your hair into a low ponytail at the nape of your neck
- Braid the entire ponytail using your preferred braiding technique (three-strand, fishtail, or Dutch)
- Secure the end of the braid with a small elastic
- Wrap the braid around the base of the ponytail in a circular motion to create a bun shape
- Tuck the end of the braid under the bun and secure everything with bobby pins
- Place the classic beanie on your head, positioning it to showcase the elegant braided bun
Adding Refinement:
- Pull gently at the braid sections before wrapping them into a bun for a fuller, more dimensional appearance
- Use decorative pins or small accessories on the bun for special events or added elegance
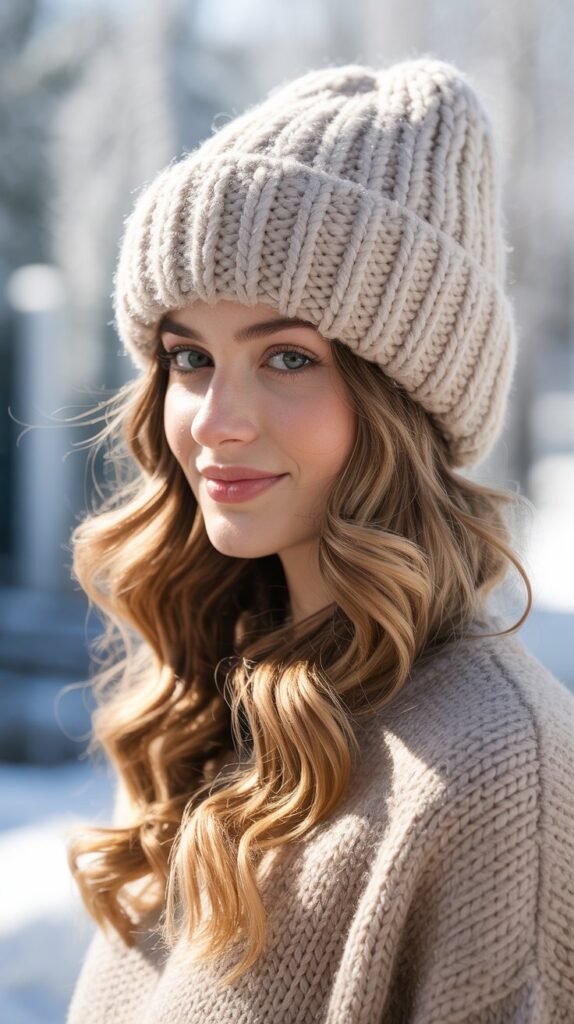
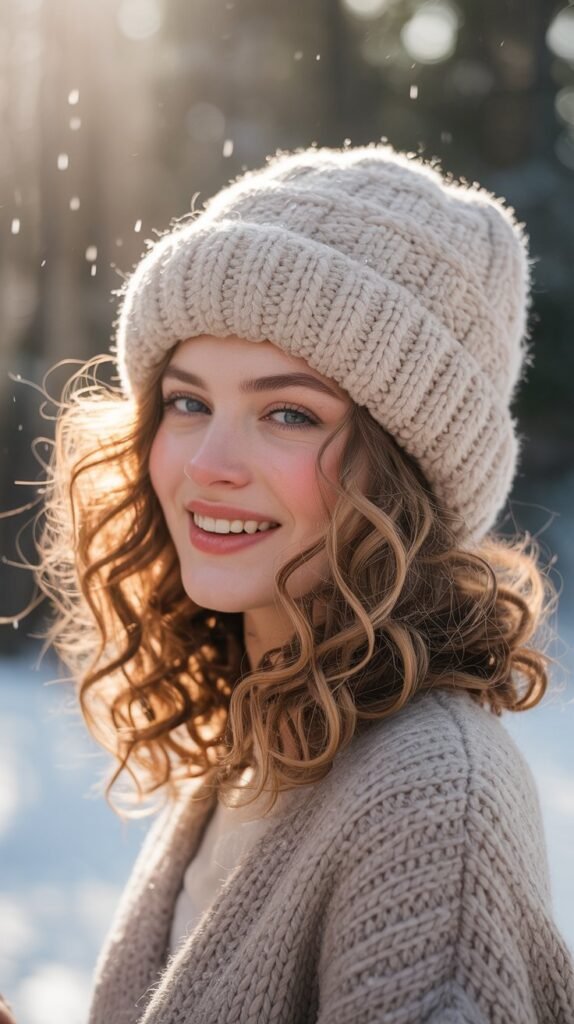
30. Textured Beach Waves with Cuffed Beanie

Textured beach waves with a cuffed beanie create a laid-back, effortlessly cool look perfect for casual winter days.
This style brings summer vibes to winter fashion while keeping you warm and stylish.
Creating Beach Waves:
- Apply a sea salt spray to damp hair, scrunching it upward to enhance natural texture
- Braid your hair into several loose braids and allow it to air dry completely
- Once dry, remove the braids and gently separate the waves with your fingers
- Apply a texturizing spray for added grip and piece-y definition
- Scrunch the hair upward once more to revive the wave pattern
- Place the cuffed beanie on your head, allowing the textured waves to flow freely underneath
31. Mohawk Braid with Fitted Beanie
The mohawk braid with a fitted beanie creates a bold, statement-making look that combines edginess with intricate styling.
This Dutch braid runs down the center of your head, creating a raised effect that looks stunning with a beanie.
Mohawk Braid Technique:
- Part your hair to separate a wide section down the center of your head from forehead to nape
- Clip the side sections away to keep them separate from the center mohawk section
- Begin a Dutch braid at your hairline, crossing strands under rather than over
- Continue the Dutch braid down the center, keeping it tight and raised off your head
- Secure the end with an elastic once you reach the nape of your neck
- Smooth the side sections down flat with gel or pomade and pin them behind your ears
- Position your fitted beanie to showcase the raised mohawk braid running down the center
Creating Maximum Impact:
- Pull gently at the braid sections to make the mohawk even more prominent and dimensional
- Use a strong-hold product on the side sections to keep them sleek and flat for contrast
32. Loose Curls with Half-Up Twist and Beanie

Loose curls with a half-up twist and beanie create a romantic, feminine look perfect for dates or social gatherings.
The twist adds structure while the curls provide softness and movement.
Half-Up Twist Method:
- Curl your hair in large sections using a curling wand, leaving the ends slightly straighter
- Allow the curls to cool completely before touching them
- Section off hair from your temples, twisting each section back toward the crown
- Cross the twisted sections at the back of your head and secure them with bobby pins
- Leave the bottom half of your curls flowing freely for a romantic, cascading effect
- Place your beanie on your head, positioning it to show the twisted section and curls
Curl Longevity:
- Apply a light-hold hairspray before and after curling to help the style last throughout the day
- Use a curling wand without a clamp to create more natural-looking, bouncy curls
33. Wrapped Low Ponytail with Oversized Beanie
The wrapped low ponytail with an oversized beanie is a polished yet simple style that adds a touch of sophistication to a casual look.
The wrapped section elevates a basic ponytail into something special.
Ponytail Wrapping Technique:
- Gather your hair into a low ponytail at the nape of your neck, securing it with an elastic
- Take a small section of hair from the underside of the ponytail
- Wrap this section around the elastic multiple times, completely covering it
- Secure the wrapped section with a bobby pin tucked underneath the ponytail where it’s invisible
- Apply a small amount of hairspray to smooth any flyaways on the wrapped section
- Pull the oversized beanie over your head, allowing the wrapped ponytail to hang naturally
Creating a Seamless Wrap:
- Use a section of hair that’s thin enough to wrap multiple times but thick enough to cover the elastic
- Match your bobby pin color to your hair color for the most seamless, professional appearance
Conclusion
Winter fashion no longer means sacrificing style for warmth, and these 33 Cozy Cute Winter Hairstyles with Beanies prove that you can have both beautiful hair and comfortable coverage during the coldest months.
From intricate braids and romantic waves to sleek ponytails and playful buns, there’s a beanie-friendly hairstyle for every personality, hair type, and occasion in this comprehensive collection.
The key to mastering beanie hairstyles lies in understanding which styles work best with different beanie types, how to maintain volume and texture under hats, and which techniques prevent the dreaded hat hair that so many people struggle with during winter.
Whether you’re drawn to the bohemian charm of loose fishtail braids, the athletic appeal of high ponytails, the romantic elegance of crown braids, or the edgy boldness of faux hawks, you now have a complete toolkit of styling options to explore throughout the season.
Remember that the best hairstyle is one that makes you feel confident and comfortable, so don’t be afraid to experiment with different combinations until you find your perfect match.
These 33 Cozy Cute Winter Hairstyles with Beanies are designed to inspire creativity, simplify your morning routine, and ensure that every cold-weather day is a good hair day.
Embrace the season with confidence, stay warm and stylish, and let your beanie become your favorite winter accessory that enhances rather than hides your beautiful hairstyles.
