
Cutting your own hair at home might seem intimidating, but mastering the art of layering can transform your look without expensive salon visits.
The “Perfect Layers Every Time: Simple Self-Haircut Method” is designed to give you salon-quality results in the comfort of your home, saving both time and money while maintaining complete control over your hairstyle.
Whether you’re dealing with thick, thin, curly, or straight hair, this comprehensive guide walks you through essential preparation steps, proper tool selection, sectioning techniques, and precise cutting methods that professional stylists use.
You’ll discover how to create natural-looking layers that add volume, movement, and dimension to your hair, along with troubleshooting tips to fix common mistakes and maintenance strategies to keep your layers looking fresh between cuts.
This article provides a complete roadmap from gathering your tools to styling your finished cut, ensuring you achieve beautiful, layered hair that looks professionally done every single time.
1. Understanding Hair Layers and Why They Matter

Layers are graduated sections of hair cut at different lengths to create depth, movement, and shape throughout your hairstyle.
Before you pick up scissors, understanding what layers actually do for your hair helps you make informed decisions about placement, length, and the overall cutting approach.
Benefits of Layered Hair
- Layers remove excess weight from thick hair, making it more manageable and easier to style on a daily basis.
- Strategic layering adds the illusion of fullness and body to thin or fine hair that naturally falls flat.
- Properly placed layers enhance your natural hair texture, whether you have waves, curls, or straight strands.
- Face-framing layers can soften angular features or add structure to round faces, acting as a natural contouring technique.
- Layered cuts reduce styling time because hair naturally falls into place with minimal effort required.
Different Types of Layers
- Long layers feature subtle length variations with minimal difference between the shortest and longest sections, creating movement without dramatic shape changes.
- Short layers involve significant length differences that create choppy, textured looks with lots of volume concentrated at specific areas.
- Face-framing layers specifically target the hair around your face, starting anywhere from cheekbone to chin length.
- Internal layers remove bulk from within the hair without affecting the overall outline or perimeter length.
- Graduation creates stacked layers where hair is progressively shorter toward the back, commonly seen in bob haircuts.
How Layers Affect Different Hair Types
- Thick, coarse hair benefits most from internal layering that removes weight without creating frizzy, separated ends.
- Fine hair requires careful layering with longer variations to avoid looking thin or wispy at the ends.
- Curly hair needs layers cut when dry to account for shrinkage and curl pattern variations throughout the head.
- Wavy hair responds beautifully to layering that enhances natural movement and prevents the dreaded triangle shape.
- Straight hair showcases layers most dramatically, making precise cutting techniques especially important for clean results.
2. Essential Tools and Materials for Self-Haircutting
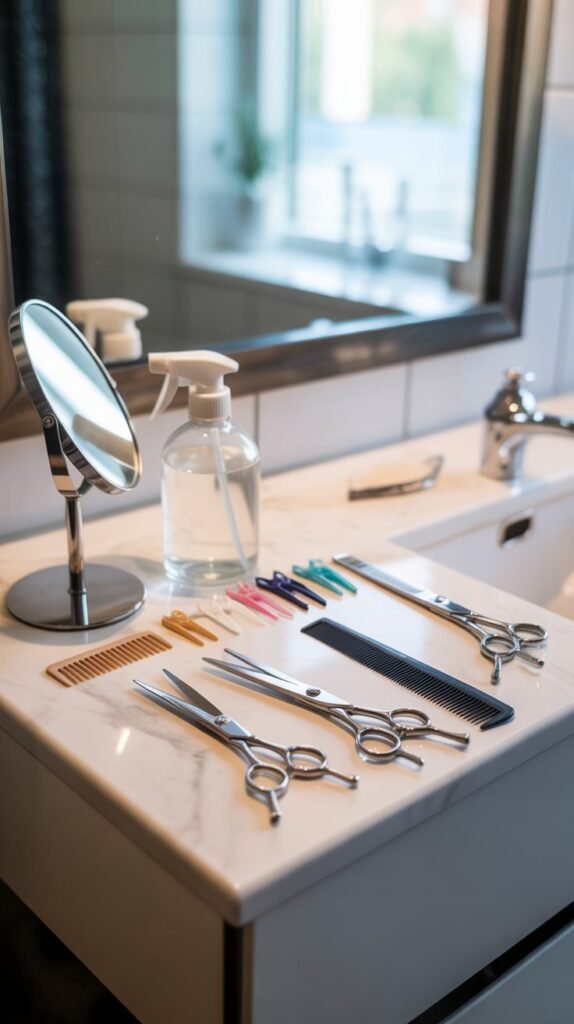
Having professional-quality tools makes the difference between a successful home haircut and a disaster that requires professional correction.
Investment in proper equipment pays for itself after just a few self-cuts, and quality tools last for years with proper maintenance.
Must-Have Cutting Tools
- Professional hair cutting shears with 6-7 inch blades provide the sharpness and precision necessary for clean cuts without damaging hair structure.
- Thinning shears (also called texturizing scissors) help blend layers and remove bulk without creating harsh lines.
- Sectioning clips in various sizes keep hair organized and out of the way while you work on specific sections.
- Fine-tooth comb allows for precise parting and measuring of hair sections with accurate tension control.
- Spray bottle filled with water keeps hair damp and manageable throughout the cutting process for consistent results.
- Hand mirror positioned behind you helps check the back sections and ensures even cutting all around.
- Cape or old towel protects your clothing from falling hair and makes cleanup significantly easier afterward.
Tool Quality Indicators
| Tool | Quality Markers | Price Range | Lifespan |
|---|---|---|---|
| Hair Cutting Scissors | Stainless steel, adjustable tension screw, smooth blade action | $30-$150 | 5-10 years with proper care |
| Thinning Shears | 20-40 teeth, one serrated blade, comfortable handle grip | $25-$100 | 5-8 years |
| Sectioning Clips | Strong spring mechanism, smooth edges, variety of sizes | $10-$30 for set | 3-5 years |
| Combs | Seamless construction, anti-static material, comfortable spacing | $5-$20 | Indefinite with care |
Where to Purchase Professional Tools
- Beauty supply stores specializing in professional products offer quality tools with knowledgeable staff assistance.
- Online retailers like Sally Beauty and Amazon provide extensive selections with customer reviews to guide purchases.
- Professional cosmetology suppliers often sell to the public and offer higher-grade equipment than general retailers.
- Avoid purchasing hair scissors from general craft or office supply stores, as these aren’t designed for cutting hair.
- Look for tools with warranties or satisfaction guarantees that protect your investment in case of defects.
Tool Maintenance Essentials
- Clean scissors after each use with rubbing alcohol to remove product buildup and prevent rust formation.
- Have professional shears sharpened annually or after approximately 300-500 haircuts to maintain cutting precision.
- Store scissors in a protective case or pouch to prevent damage to the blade edges from other objects.
- Oil the tension screw periodically with clipper oil to maintain smooth opening and closing action.
- Never drop scissors on hard surfaces, as this can misalign blades and create nicks that snag hair.
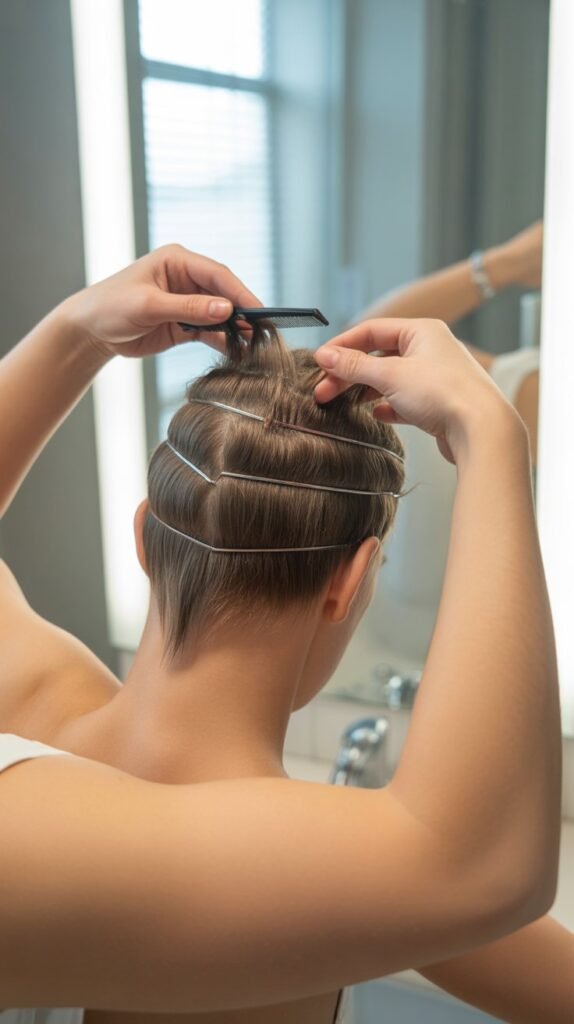
3. Preparing Your Hair and Workspace
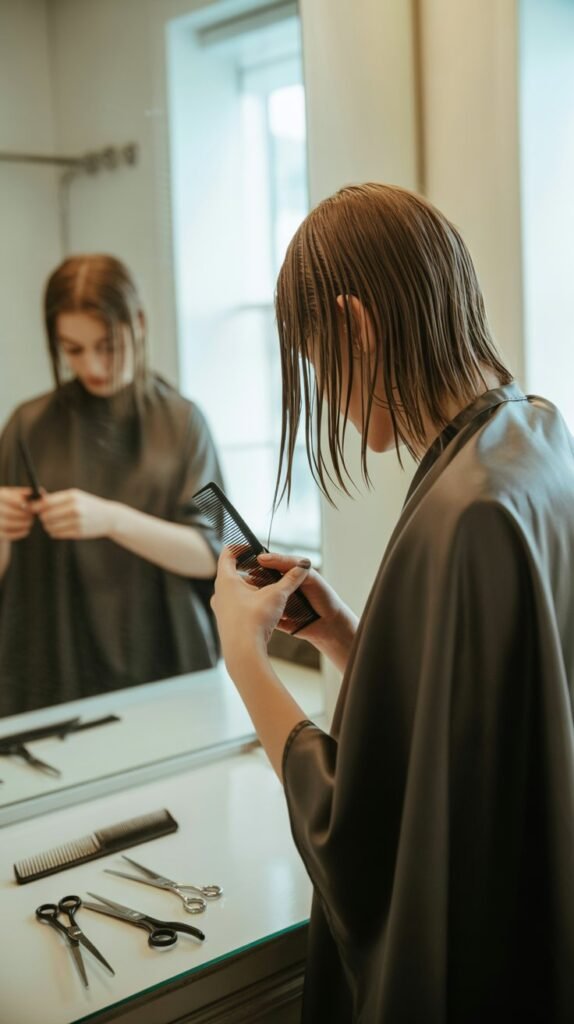
Proper preparation is the foundation of successful self-haircutting, creating the optimal conditions for accurate, even results.
A well-organized workspace and correctly prepared hair eliminate many common mistakes before you make the first cut.
Workspace Setup
- Choose a location with excellent overhead and natural lighting that allows you to see your hair color and texture accurately.
- Position a large wall mirror with a handheld mirror behind you to create a complete 360-degree view of your head.
- Clear all counters and surfaces of unnecessary items to prevent contamination of your clean tools.
- Lay down old newspapers or a sheet around your cutting area for easy hair cleanup afterward.
- Ensure comfortable standing or sitting height so you can maintain good posture throughout the cutting process without straining.
- Keep your phone or camera nearby to document your progress and check angles you might otherwise miss.
Hair Washing and Conditioning
- Wash your hair with your regular shampoo to remove all styling products, oils, and dirt that affect cutting precision.
- Apply conditioner only to the mid-lengths and ends, avoiding the roots to prevent hair from becoming too slippery.
- Rinse thoroughly with cool water to close the hair cuticle and provide a smoother cutting surface.
- Gently squeeze excess water from hair using a towel rather than rubbing, which creates tangles and frizz.
- For curly hair specifically, consider cutting completely dry to see true curl pattern and length after shrinkage.
Detangling and Sectioning
- Start detangling from the ends and work upward toward roots using a wide-tooth comb to minimize breakage.
- Work through small sections methodically rather than attempting to comb through all hair at once.
- Ensure hair is completely tangle-free before beginning to cut, as knots create uneven lengths and inaccurate sections.
- Dampen hair evenly with your spray bottle until it’s uniformly moist but not dripping wet.
- Part hair into major sections (top, sides, back) using your comb and secure with sectioning clips out of the way.
Pre-Cut Checklist
- Workspace is clean, well-lit, and organized with all tools within easy reach
- Hair is freshly washed, conditioned, and completely detangled from roots to ends
- Hair is evenly dampened (or dry for curly hair) without dripping or dry patches
- Large mirror and hand mirror are properly positioned for full visibility
- You’re wearing clothing you don’t mind getting hair on or have proper protective covering
- You have allocated sufficient time (45-90 minutes) without interruptions or rushing
- Reference photos or videos of your desired layer placement are accessible for consultation
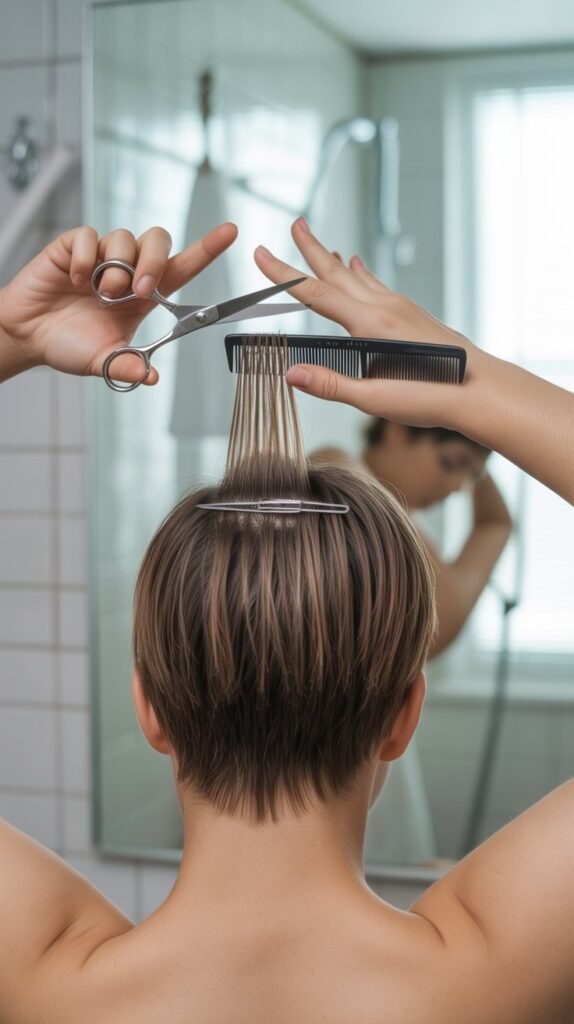
4. Basic Layering Technique: The Ponytail Method
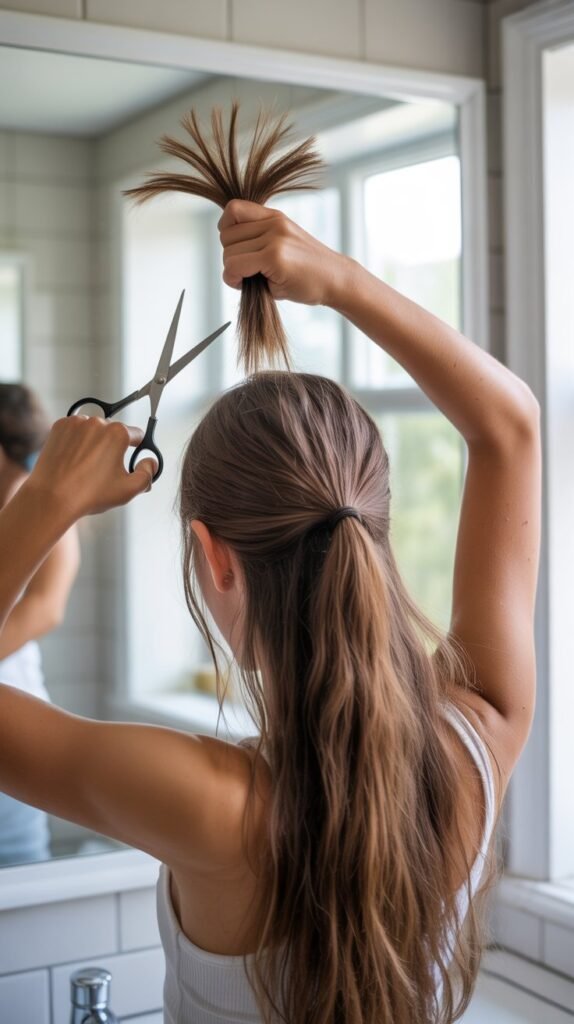
The ponytail method is the simplest and most foolproof technique for creating even, graduated layers throughout your hair.
This beginner-friendly approach requires minimal skill while delivering professional-looking results that work for various hair lengths and textures.
Step-by-Step Ponytail Method
- Brush all hair forward and gather it into a high ponytail at the very top center of your head (the apex).
- Secure the ponytail tightly with a strong elastic band, ensuring no bumps or loose sections at the base.
- Slide another elastic band down the ponytail to the point where you want to make your cut.
- Hold the ponytail straight up, perpendicular to your head, maintaining even tension throughout the entire length.
- Comb through the ponytail one final time to ensure all hairs are aligned smoothly without twists.
- Cut straight across above the second elastic band, removing the desired amount in one clean, decisive motion.
- For longer layers, cut less hair (1-2 inches); for shorter, more dramatic layers, cut more (3-4 inches).
- Release the ponytail and shake your hair out to see the graduated layers falling naturally around your face.
Positioning for Different Layer Effects
- High ponytail (at crown) creates the most dramatic layering with shortest pieces at the top and longest at the bottom.
- Forward ponytail (at forehead) produces face-framing layers concentrated around the front while leaving length in back.
- Center ponytail (mid-head) generates moderate, evenly distributed layers throughout all sections for balanced movement.
- Low ponytail (nape) results in subtle layering with minimal length variation, ideal for conservative changes.
- Side ponytail creates asymmetrical layers that are shorter on one side, perfect for adding interest to one-length cuts.
Ponytail Method Tips
- Use a mirror to ensure your ponytail is centered and straight before cutting to prevent uneven results.
- Keep constant upward tension on the ponytail throughout cutting so hair doesn’t slip and create angled cuts.
- Make your cut slightly longer than you think necessary, as you can always cut more but cannot add length back.
- Cut straight across rather than at an angle unless you specifically want graduated or angled ends.
- If you have very thick hair, cut through in multiple small cuts across the ponytail rather than one sawing motion.
- For extremely long hair, twist the ponytail before cutting to create even more texture and blending throughout.
Common Ponytail Method Mistakes
| Mistake | Consequence | Solution |
|---|---|---|
| Ponytail placed off-center | Layers longer on one side than the other | Use mirrors and section marks to center perfectly |
| Cutting too much length | Dramatic, choppy layers that are difficult to style | Start conservatively, cut less initially |
| Uneven tension while cutting | Staggered, uneven layer lengths throughout | Maintain firm, consistent upward pull |
| Damp hair becomes dry mid-cut | Inconsistent cutting behavior and frayed ends | Re-dampen with spray bottle before cutting |
| Elastic band too loose | Hair slips from gathered position during cutting | Use strong elastics and check tightness before cutting |
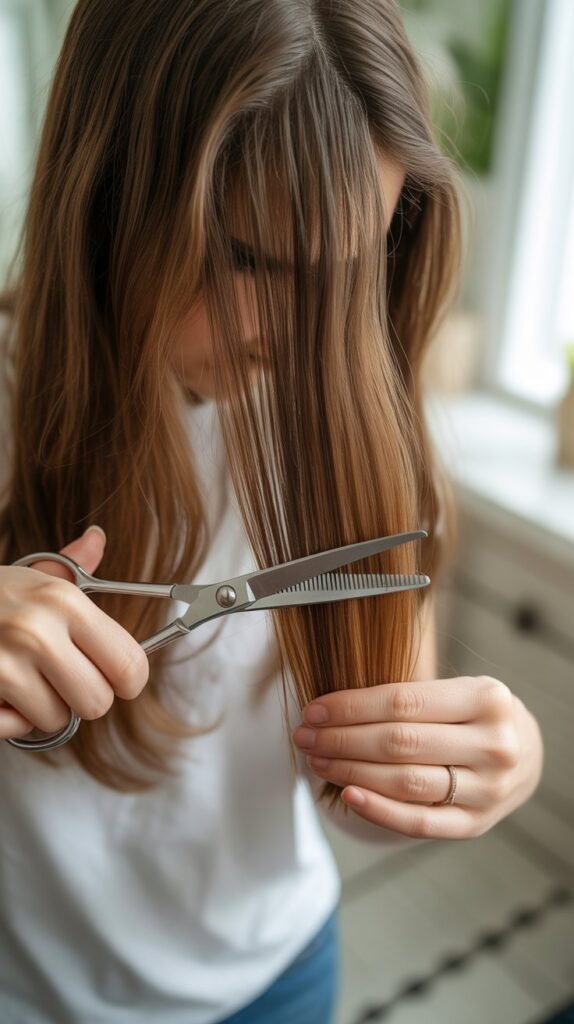
5. Advanced Layering: Vertical Sectioning Method
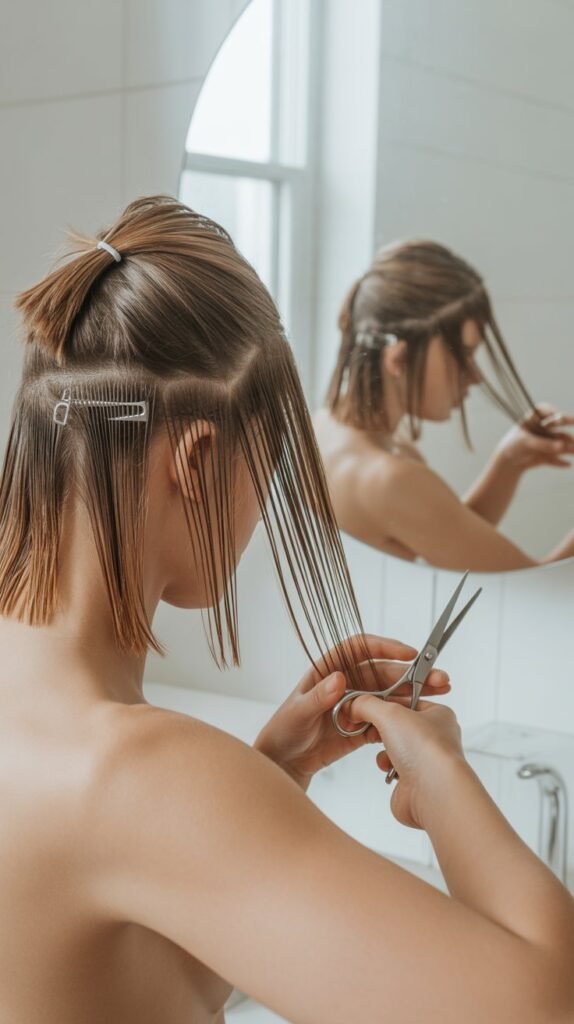
For those ready to move beyond basic techniques, vertical sectioning offers precise control over layer placement and allows for customized shaping.
This method mirrors professional salon approaches and works exceptionally well for creating specific styles with intentional structure.
Preparing Vertical Sections
- Part your hair down the center from forehead to nape, creating two equal halves of hair.
- Within each half, create vertical sections approximately 1-2 inches wide running from part to ear.
- Clip away all sections except the one you’re actively cutting to maintain organization and visibility.
- Number or mentally note each section to ensure consistent technique application throughout the entire head.
- Start cutting from the back sections and work forward toward the face for easiest control.
Cutting Vertical Sections
- Take one vertical section and comb it straight out from the head at a 90-degree angle.
- Hold the section firmly between your index and middle fingers, sliding them down to your desired cutting length.
- The angle at which you hold the scissors determines your layer intensity: horizontal cuts create weight, vertical cuts create texture.
- Cut the section while maintaining tension, using the previously cut section as a guide for consistency.
- After cutting each section, comb through and check for any uneven pieces that need refinement.
- Use the first section cut on each side as your guide length for all subsequent sections on that side.
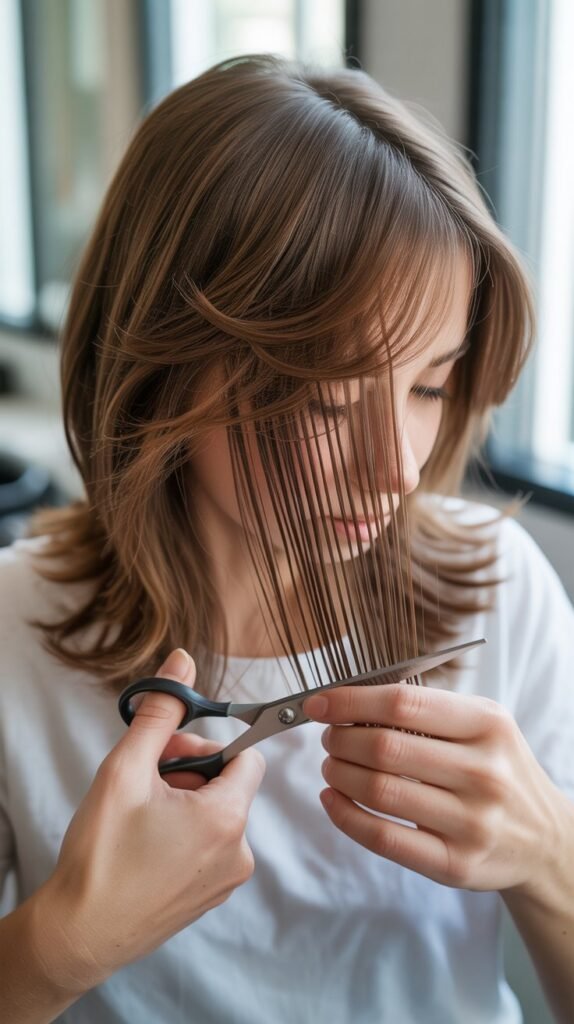
Creating Face-Framing Layers
- Isolate a triangular section at the front of your head, with the point at your hairline and base at your crown.
- Determine your desired shortest layer length based on your face shape (cheekbone, chin, or collarbone).
- Pull this front section forward to your nose and cut straight across at your chosen length.
- This technique automatically creates graduated layers that get longer as they move back toward your crown.
- Blend these face-framing layers into your side sections by taking diagonal subsections and connecting the lengths.
Angle Guide for Different Effects
- 0-degree elevation (cutting hair lying flat against head) creates weight and blunt lines with minimal layering.
- 45-degree elevation produces soft, gradual layers that add movement without removing significant weight.
- 90-degree elevation (perpendicular to head) creates the most dramatic layering with maximum texture and volume.
- 180-degree elevation (pulling hair straight up over head) generates shortest layers at bottom and longest at top.
- Varying elevation throughout the head allows for customized volume placement where you want it most.
Blending and Refining
- After cutting all vertical sections, comb through your entire head to identify any disconnected or uneven areas.
- Use point cutting (cutting into hair ends at an angle) to soften harsh lines and create seamless blending.
- Check your layers by running your fingers through your hair in different directions to feel for inconsistencies.
- Mist hair with water if it has dried during the process, as dry hair behaves differently under scissors.
- Make micro-adjustments to individual pieces rather than re-cutting entire sections when refining.
6. Creating Internal Layers to Remove Bulk
Internal layering is the secret technique professional stylists use to reduce thickness and weight without changing the overall silhouette or length of your hair.
This approach is especially valuable for thick, heavy hair that needs management without visible layering.
Understanding Internal Layering
- Internal layers involve cutting hair within the interior sections while leaving the outer perimeter completely intact.
- This technique removes weight and creates space between hair strands without affecting the style’s shape or outline.
- Internal layering is invisible when hair is down but creates significant difference in manageability and styling ease.
- The removed bulk allows hair to move more freely, dry faster, and hold styles longer without feeling heavy.
- This approach works particularly well for bob haircuts, one-length cuts, and hair that tangles easily due to density.
Internal Layering Technique
- Section hair horizontally from ear to ear across the back of your head, clipping the top section away.
- Take the bottom section and further divide it into smaller vertical subsections approximately one inch wide.
- Hold each subsection straight down and use thinning shears to remove bulk from the middle section only, avoiding the top two inches and bottom two inches.
- Make 2-3 cuts with thinning shears through each subsection, opening and closing the shears while sliding down slightly.
- Move methodically through all bottom sections before releasing the next horizontal layer and repeating the process.
- Never use thinning shears on the very top layer or outer perimeter, as this creates frizz and visible texture.
Strategic Bulk Removal Areas
- Nape area often holds the most weight and benefits significantly from internal thinning for comfort and style.
- Crown section can be internally layered to reduce that “mushroom” effect that thick hair creates when growing out.
- Behind the ears tends to stick out awkwardly in thick hair and responds well to targeted bulk removal.
- Around the face requires careful internal layering to prevent pieces from sticking out or creating unwanted volume.
- Avoid internal layering at the very top surface layer, as this is what people see and should remain smooth.
Thinning Shears Best Practices
| Practice | Reason | Technique |
|---|---|---|
| Use on dry hair when possible | Better assessment of actual bulk and texture | Allows you to see realistic results immediately |
| Never cut horizontally across | Creates visible shelf lines in hair | Always cut vertically or at an angle |
| Start conservatively | You can always remove more bulk later | Use thinning shears sparingly at first |
| Keep 2 inches from ends | Prevents wispy, damaged-looking ends | Only thin middle sections of hair length |
| Clean blades between uses | Product buildup reduces effectiveness | Wipe with alcohol after each session |
Knowing When to Stop
- Stop removing bulk when you can run your fingers through hair easily without it feeling “stuck” or heavy.
- If you start seeing individual separated pieces when hair is combed smooth, you’ve removed too much.
- Fine-textured hair (even if dense) typically needs very minimal internal layering to avoid looking thin.
- Check your progress frequently by drying a small section to see how it behaves with realistic styling.
- Remember that hair continues to settle and blend over the week following your cut as you wash and style it.
7. Troubleshooting Common Self-Cutting Mistakes
Even experienced home haircutters occasionally make mistakes, but most cutting errors can be corrected or minimized with the right remedial techniques.
Understanding how to identify and fix problems prevents panic and saves trips to professional salons for emergency corrections.
Identifying Common Problems
- Uneven layers appear when one side of your hair is noticeably shorter or longer than the other side.
- Choppy, disconnected layers occur when there are dramatic length differences between sections without smooth transitions.
- Too-short pieces result from cutting too aggressively or losing track of your guide sections during cutting.
- Weight lines are visible horizontal lines where one layer abruptly ends and another begins, creating unflattering ledges.
- Frizzy ends happen when scissors are dull or when you saw through hair rather than making clean cuts.
Fixing Uneven Layers
- Part your hair down the middle and pull matching sections from each side forward in front of your shoulders.
- Hold these matching sections together at the same distance from your head to compare exact lengths accurately.
- Identify which side is longer and carefully trim the longer side to match the shorter side’s length.
- Work in small increments, cutting only 1/4 inch at a time and rechecking frequently to prevent over-correction.
- Always err on the side of cutting less rather than more, as you can always make additional adjustments.
Blending Choppy Layers
- Use point cutting technique by holding scissors vertically and cutting into the ends at varying depths.
- This creates texture and softness that disguises harsh lines between disconnected layers throughout your hair.
- Take small vertical sections between your fingers and make tiny point cuts into the ends, cutting no more than 1/4 inch deep.
- Angle your scissors slightly when point cutting to create the most natural, feathered appearance.
- Check your work by running your fingers through your hair to feel for remaining harsh edges.
Managing Too-Short Pieces
- Resist the urge to cut surrounding hair shorter to match mistakes, as this creates a cascading problem.
- Instead, use longer surrounding sections to create a gradual blend into the too-short pieces over time.
- Apply texturizing product specifically to shorter pieces to help them integrate better with the overall style.
- Consider using thinning shears on the longer sections around short pieces to create better blending through texture.
- Bobby pins, small clips, and strategic styling can camouflage problematic short pieces while hair grows.
When to Seek Professional Help
- If you’ve cut more than two inches shorter than intended, professional assessment prevents further damage from attempted corrections.
- Significant unevenness (more than one inch difference side to side) often requires professional rebalancing and shaping.
- Chemical damage, breakage, or extremely split ends combined with cutting mistakes may need professional treatment first.
- When you feel overwhelmed or unsure about correction steps, professional guidance prevents making problems worse.
- American Board of Certified Haircolorists can help locate qualified professionals for complex corrections if needed.
8. Styling and Maintaining Your Layered Cut
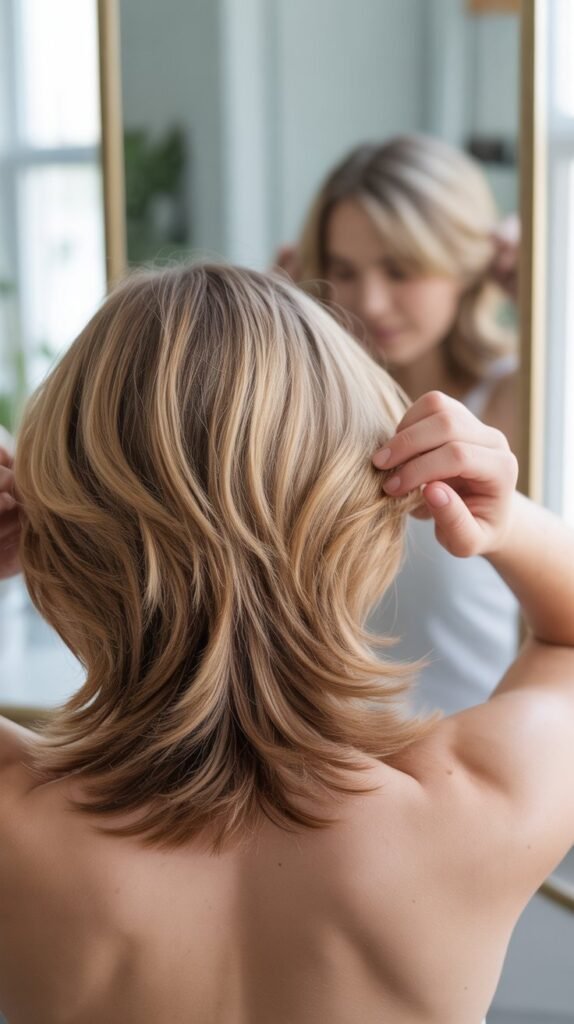
The real beauty of your layered haircut emerges through proper styling techniques and ongoing maintenance between cuts.
Understanding how to work with your layers maximizes their movement, volume, and overall aesthetic impact while keeping your style looking fresh.
Styling Techniques for Layered Hair
- Blow-dry hair upside down to maximize volume at the roots, which layered cuts are specifically designed to enhance.
- Use a round brush while blow-drying to direct layers away from your face and create professional-looking bend and movement.
- Apply heat protectant before any hot tool use to prevent damage that’s especially visible on layered hair ends.
- Work in sections when styling, focusing on one area completely before moving to the next for consistent results.
- Finish with cool air from your dryer to set the style and add shine to your completed look.
Product Recommendations for Layered Hair
- Volumizing mousse applied to damp roots provides lift and body that accentuates your layers’ shape and movement.
- Texturizing spray or sea salt spray enhances natural texture and creates piece-y definition between layer sections.
- Light-hold hairspray maintains your style without weighing down the airy movement that makes layers attractive.
- Shine serum applied sparingly to ends adds polish and prevents the frizzy appearance that can affect layered cuts.
- Dry shampoo extends time between washes while adding volume and texture that complements layered styles beautifully.
Maintenance Schedule
| Maintenance Task | Frequency | Purpose |
|---|---|---|
| Trim ends | Every 6-8 weeks | Prevents split ends from traveling up the hair shaft |
| Deep conditioning treatment | Weekly | Maintains hair health and prevents breakage in shorter layer pieces |
| Clarifying shampoo | Every 2-3 weeks | Removes product buildup that weighs down layers |
| Re-layer or shape adjustment | Every 3-4 months | Maintains intended layer structure as hair grows |
| Professional assessment | Annually | Ensures home cutting technique isn’t creating long-term damage |
Growing Out Layers
- Be patient with the awkward growing-out phase, which typically lasts 3-6 months depending on layer intensity.
- Trim the shortest layers every 6-8 weeks to gradually bring them closer to the length of longer sections.
- Use strategic accessories like headbands, clips, and pins to manage unflattering in-between lengths creatively.
- Consider getting professional shaping every 2-3 months during the grow-out process to maintain an intentional style.
- Embrace transitional styles like half-up looks or braids that work with varied lengths rather than against them.
Long-Term Hair Health
- Protect hair from environmental damage (sun, chlorine, saltwater) which affects shorter layer pieces more dramatically than length.
- Sleep on silk or satin pillowcases to reduce friction breakage, especially important for fragile layered ends.
- Avoid over-washing hair, as this strips natural oils that keep layers looking healthy and defined.
- Use regular protein treatments if your hair is fine or damaged to strengthen the structure of shorter layer sections.
- Stay hydrated and maintain good nutrition, as hair health reflects overall wellness and affects how your layers look.
9. Adapting Techniques for Different Hair Types
Each hair type responds differently to cutting techniques, requiring specific adaptations for optimal results.
Understanding your hair’s unique characteristics allows you to modify the self-layering methods for your particular texture, density, and behavior patterns.
Layering Thick, Coarse Hair
- Cut thick hair in smaller subsections to maintain control and ensure even results throughout the dense mass.
- Focus heavily on internal layering techniques to remove bulk without creating an overly shaped silhouette.
- Consider cutting thick hair completely dry so you can see realistic bulk distribution and fall pattern.
- Use both regular cutting shears and thinning shears alternately to create dimension without harsh lines.
- Allow extra time for thick hair cuts, as rushing leads to missed sections and uneven results.
Layering Fine, Thin Hair
- Create longer, more subtle layers in fine hair to avoid removing precious volume and density.
- Avoid using thinning shears on fine hair, as they make hair look even thinner and more wispy.
- Cut fine hair when slightly damp rather than very wet, as excessive water weight stretches hair inaccurately.
- Use point cutting exclusively on fine hair ends to create soft texture without removing substantial length.
- Keep layers primarily around the face and crown rather than throughout the entire head for strategic volume.
Layering Curly and Wavy Hair
- Always cut curly hair dry in its natural state to accurately assess true length after shrinkage occurs.
- Cut curls individually rather than in sections, as each curl has its own pattern and spring factor.
- Use the “curl-by-curl” method, gently pulling each curl down and cutting at an angle to match surrounding curl lengths.
- Never cut curly hair straight across in a ponytail, as this creates uneven, unpredictable results when curls spring back.
- Start very conservatively with curly hair layers, as you can always cut more but curls amplify every cutting decision.
Layering Color-Treated or Damaged Hair
- Handle chemically-treated hair with extra care, as it’s more fragile and prone to breakage during cutting.
- Use extremely sharp scissors on damaged hair to prevent snagging and further splitting of compromised ends.
- Cut color-treated hair slightly longer than intended, as damaged hair appears shorter due to lack of weight and structure.
- Focus on removing damaged ends first before creating decorative layers in compromised hair.
- Follow up immediately with intensive conditioning treatments to protect newly exposed ends from additional damage.
Hair Type Adaptation Chart
| Hair Type | Key Consideration | Recommended Technique Modification |
|---|---|---|
| Thick/Coarse | Excessive bulk and weight | Heavy internal layering, smaller sections, dry cutting |
| Fine/Thin | Lack of volume and body | Minimal layering, longer length variations, avoid thinning shears |
| Curly | Shrinkage and unpredictable curl pattern | Dry cutting, curl-by-curl approach, conservative length removal |
| Wavy | Balance between volume and definition | Moderate layering when damp, focus on face-framing pieces |
| Straight | Shows every cutting imperfection clearly | Precise sectioning, careful guide maintenance, clean cuts |
| Damaged | Fragility and breakage tendency | Sharp scissors, gentle handling, health-focused trimming first |
10. Safety Considerations and Best Practices
Self-haircutting involves working with sharp instruments near your head and face, making safety awareness essential for preventing injuries and achieving successful results.
Implementing proper safety protocols protects you while ensuring the best possible cutting conditions.
Scissor Safety
- Always hold scissors with the blade tips pointing away from your head, face, and body at all times.
- Never walk around with open scissors or leave them open on surfaces where they could cause injury.
- Keep scissors closed when not actively making cuts, developing this habit prevents accidental injuries completely.
- Store scissors in a protective case or blade cover immediately after use to prevent dulling and injury.
- If you drop scissors, step back and let them fall rather than attempting to catch them mid-air.
Physical Safety and Ergonomics
- Stand or sit in a comfortable position with good posture to prevent back and neck strain during extended cutting sessions.
- Take breaks every 15-20 minutes to rest your arms, neck, and eyes, especially during complex cutting techniques.
- Ensure adequate ventilation in your cutting space, particularly if using any chemical treatments alongside cutting.
- Position mirrors at heights that don’t require excessive neck bending or arm reaching for prolonged periods.
- Wear non-slip footwear when cutting in bathrooms or other spaces where hair clippings might create slippery conditions.
Preventing Cross-Contamination
- Thoroughly clean all tools with isopropyl alcohol before and after each use to prevent bacterial growth.
- Wash your hands before beginning your haircut to avoid transferring dirt or bacteria to clean hair and tools.
- Never share hair cutting tools with others without complete sanitization between users to prevent infection transmission.
- Replace elastics and hair ties between uses rather than reusing ones that have fallen on the floor or been contaminated.
- Keep your cutting workspace clean and free from old hair clippings that can harbor bacteria.
Emergency Preparedness
- Keep a basic first aid kit nearby including adhesive bandages, antiseptic wipes, and gauze for minor cuts.
- Know the location of your nearest emergency facility in case of serious injury requiring professional medical attention.
- Have styptic powder or cornstarch available to quickly stop bleeding from minor skin nicks if they occur.
- Keep your phone fully charged and nearby in case you need to call for assistance during cutting.
- Never cut hair when feeling ill, tired, rushed, or under the influence of substances that impair coordination.
What to Avoid
- Never cut hair in dim lighting conditions, as poor visibility leads to mistakes and potential safety hazards.
- Avoid cutting your own hair when emotional, upset, or making impulsive decisions about dramatic style changes.
- Don’t attempt advanced techniques you haven’t researched thoroughly or practiced on mannequin heads first.
- Never use regular craft scissors, kitchen shears, or fabric scissors for cutting hair, as they cause damage and require excessive force.
- Avoid watching television, using your phone, or other distractions while actively cutting your hair with scissors open.
Professional Consultation Guidelines
- Consult with a licensed professional stylist at least once yearly even when regularly cutting your own hair at home.
- Seek professional advice through virtual consultations when uncertain about technique modifications for your specific hair type.
- Consider taking a basic haircutting class at a community college or beauty school to learn proper foundational techniques.
- Professional Beauty Association offers resources for finding qualified professionals and educational materials for self-improvement.
- Remember that professional stylists train for thousands of hours, so expecting perfection from yourself immediately is unrealistic.
Conclusion
Mastering the “Perfect Layers Every Time: Simple Self-Haircut Method” empowers you with the confidence and skills to maintain beautiful, professionally-styled hair from the comfort of your home.
Throughout this comprehensive guide, you’ve learned the fundamental principles of layering, gathered essential tools and materials, discovered multiple cutting techniques from basic to advanced, and developed the ability to troubleshoot common mistakes while maintaining your cut between sessions.
By understanding how to adapt these techniques to your specific hair type, prioritizing safety throughout the cutting process, and implementing proper styling and maintenance routines, you now possess a complete roadmap for achieving salon-quality layered haircuts independently.
Remember that haircutting is a skill that improves with practice, so approach each self-cut as a learning opportunity rather than expecting perfection from your first attempt.
With patience, careful technique application, and the knowledge you’ve gained from this article, you’ll consistently achieve the dimensional, flattering layers that enhance your natural beauty while saving significant time and money.
