
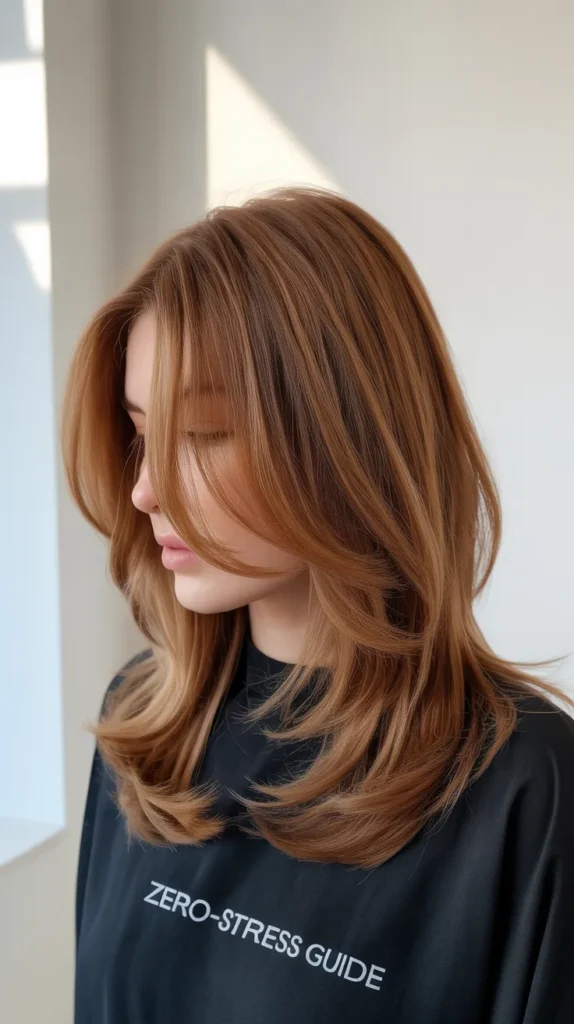
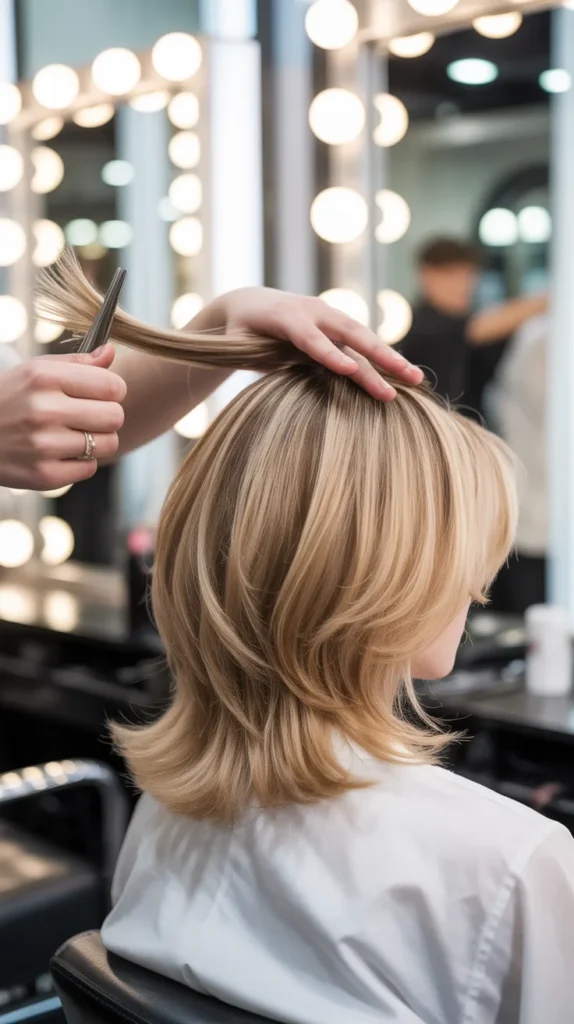
Cutting your own hair at home doesn’t have to be a disaster waiting to happen.
If you’ve ever stood in front of the mirror, scissors in hand, wondering if you could actually pull off creating beautiful layers without professional help, you’re not alone.
The truth is, with the right techniques and a calm approach, transforming your hairstyle with DIY layers is entirely achievable.
A Zero-Stress Guide to Cutting Your Own Layers will walk you through every step of the process, from understanding what layers actually are to mastering the techniques that prevent common mistakes.
This comprehensive guide covers essential preparation steps, various layering methods for different hair types, and troubleshooting tips that ensure you walk away with salon-worthy results.
Whether you have straight, wavy, curly, or thick hair, you’ll discover practical strategies that remove the intimidation factor from home haircutting.
Get ready to save money, gain confidence, and enjoy the freedom of styling your hair exactly how you want it, all from the comfort of your own bathroom.
1. Understanding Hair Layers and Why They Work
Before picking up scissors, understanding the fundamental concept of layers will give you confidence and clarity.
Layers are simply sections of hair cut at different lengths to create dimension, movement, and shape throughout your hairstyle.
They work by removing weight from specific areas while maintaining length in others, which is why they can make hair appear fuller, lighter, or more structured depending on the cutting technique.
- Layers function by creating visual depth through strategic length variation across different sections of your head
- The technique removes bulk from thick hair while adding movement to fine or flat hair textures
- Short layers sit closer to the scalp and create volume at the crown area
- Long layers maintain overall length while adding subtle movement throughout the ends
- Face-framing layers draw attention to your facial features and can soften angular jawlines
- Internal layers remove weight from inside the hair without affecting the outer perimeter length
- Layering works with your hair’s natural growth pattern rather than against it
- Different layer placements create distinct results, from dramatic choppy textures to soft blended transitions
- Understanding your hair texture helps determine which layer style will work best for your specific needs
- The angle at which hair is held during cutting determines the intensity and placement of layers
2. Essential Tools and Preparation
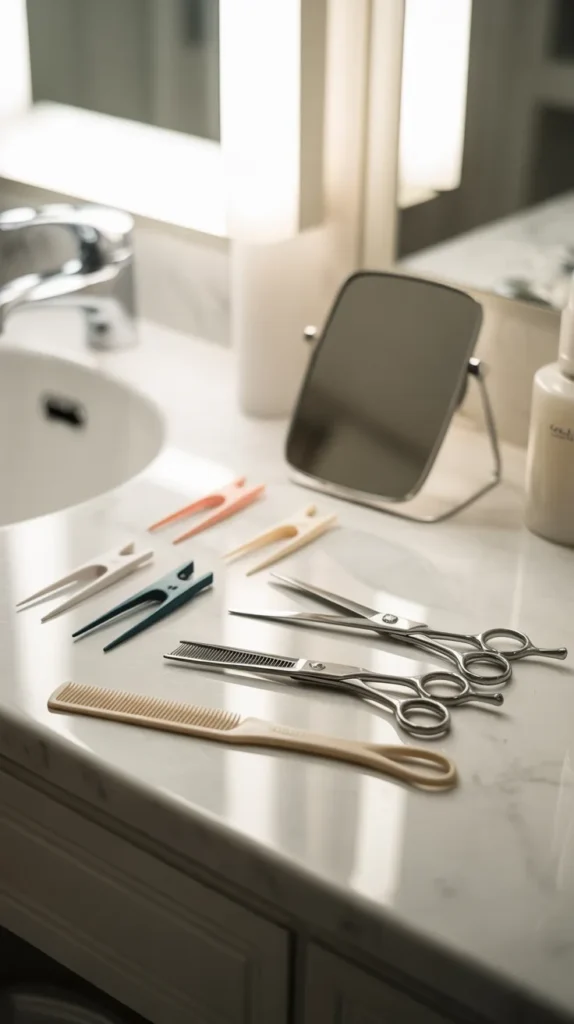
Setting yourself up with the proper equipment eliminates unnecessary stress and creates professional-quality results.
Having sharp, appropriate tools makes the difference between clean cuts and damaged, split ends that require correction.
- Professional haircutting shears with 5.5 to 6.5-inch blades provide better control than regular household scissors
- Sharp scissors are non-negotiable as dull blades crush hair strands instead of cleanly cutting them
- Sectioning clips keep hair organized and prevent accidentally cutting areas you want to preserve
- A fine-tooth comb helps create clean partings and smooth sections for even cutting
- A spray bottle filled with water keeps hair damp throughout the cutting process
- A handheld mirror allows you to check the back and sides of your head for symmetry
- Good lighting from multiple angles prevents shadowy areas that hide uneven sections
- A cape or old towel protects your clothing from falling hair clippings
- Hair elastics create guide ponytails for certain layering methods discussed later
- Working in a space with easy cleanup makes the entire process less stressful
- Clean, detangled hair before starting ensures accurate length assessment
- Setting up your workspace near a large mirror with a clear counter provides optimal working conditions
3. Preparing Your Hair for the Cut
Proper preparation prevents disappointing results and ensures your layers fall exactly where you intend them.
The condition and state of your hair before cutting directly impacts the final outcome.
- Wash your hair with regular shampoo to remove oils, products, and buildup that affect how hair falls
- Skip heavy conditioners or oils before cutting as they weigh hair down artificially
- Detangle completely using a wide-tooth comb starting from ends and working toward roots
- Hair should be damp, not dripping wet, as soaking hair appears longer than it actually is
- Allow naturally curly or wavy hair to dry partially so you can see its true texture pattern
- Straight hair can remain damper throughout the cutting process for easier sectioning
- Part your hair exactly as you normally wear it so layers frame your face correctly
- Consider your hair’s natural growth patterns including cowlicks and crown direction
- Check for any previous uneven areas that need correction before adding new layers
- Have realistic expectations based on your starting length and density
- Taking before photos helps you track progress and identify areas needing adjustment
- Create a calm environment by removing distractions and giving yourself plenty of time
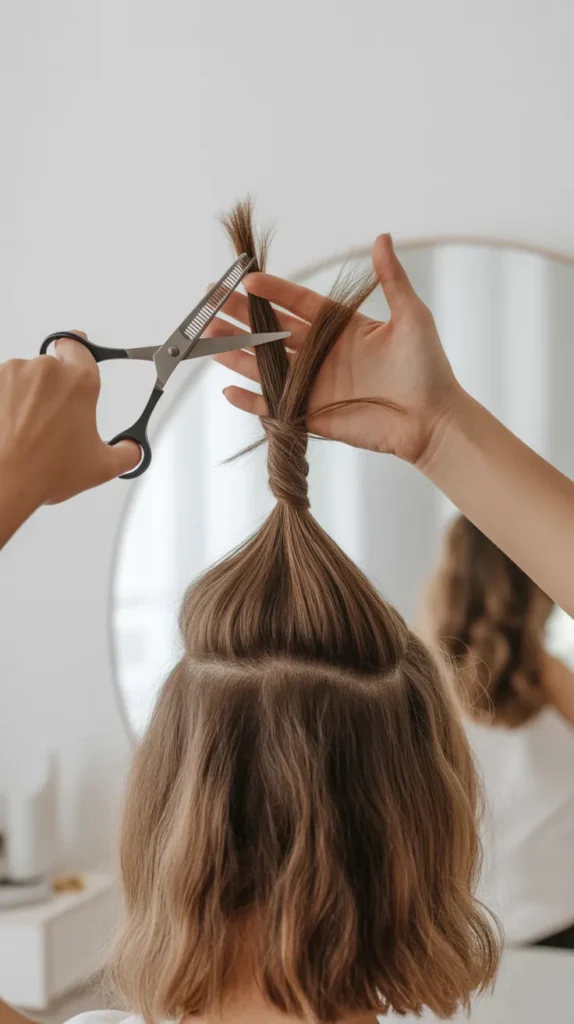
4. The Ponytail Method for Basic Layers
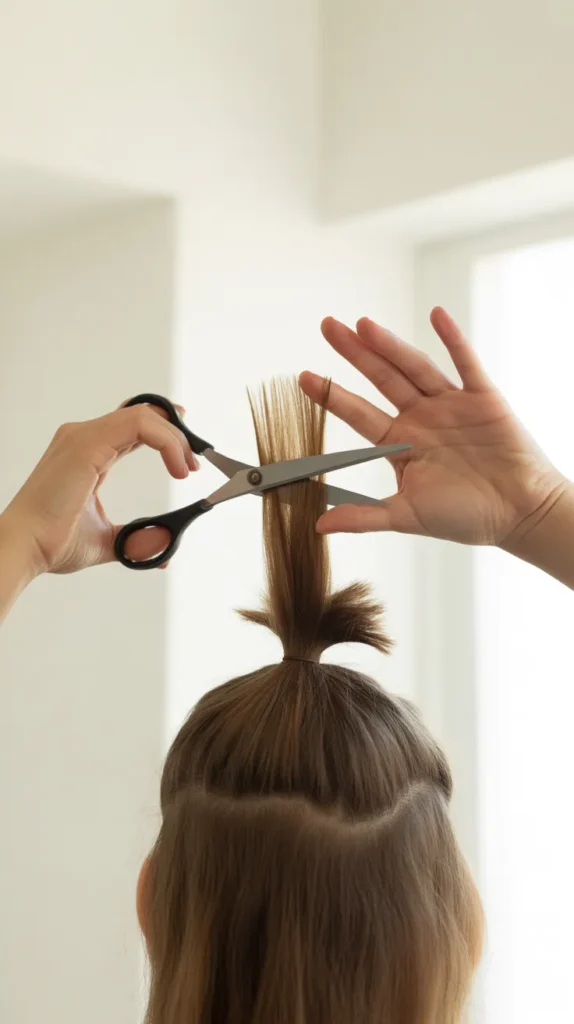
This beginner-friendly technique creates beautiful layers with minimal complexity and maximum stress reduction.
The ponytail method works particularly well for those attempting DIY layers for the first time.
- Flip your head upside down and brush all hair forward toward your forehead smoothly
- Gather all hair into a high ponytail at the very top front of your head near your forehead
- Secure tightly with a hair elastic, making sure no bumps or loose sections remain
- The ponytail should sit perpendicular to your head when you’re upright for even results
- Slide a second elastic down the ponytail to mark where you’ll cut
- Position this guide elastic considering how much length you want to remove
- Hair closer to your scalp will become shorter layers while ends remain longer
- Hold the ponytail straight up and cut horizontally across just below the guide elastic
- Use multiple small snips rather than one large cut for better control
- Keep scissors parallel to the elastic for an even, blunt cut across all strands
- Release the ponytail and shake out your hair to reveal instant, face-framing layers
- This method creates a V-shaped layer pattern with shortest pieces at the front
- The technique works best on medium to long hair lengths
- Avoid this method if you want very precise or subtle layering results
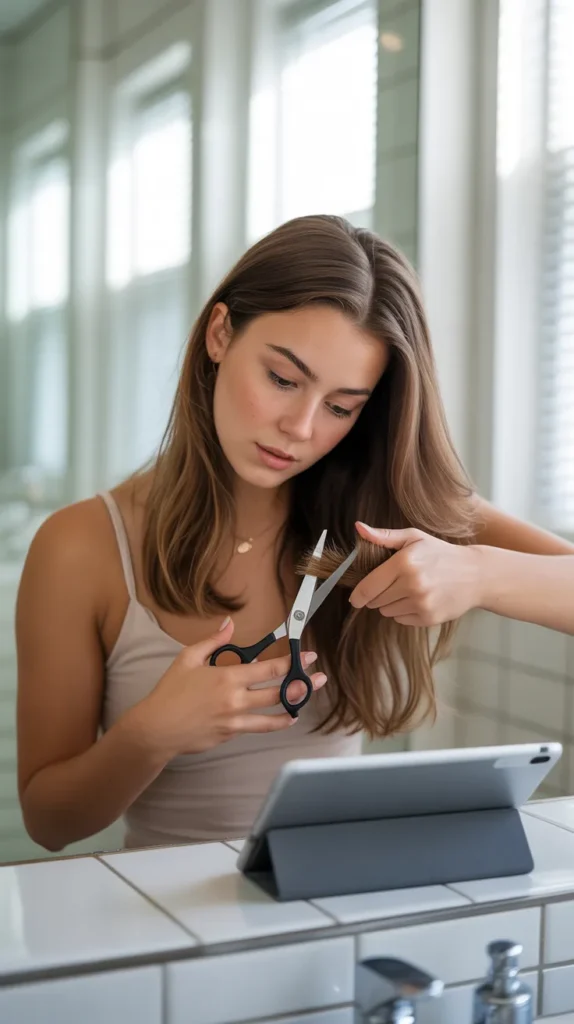
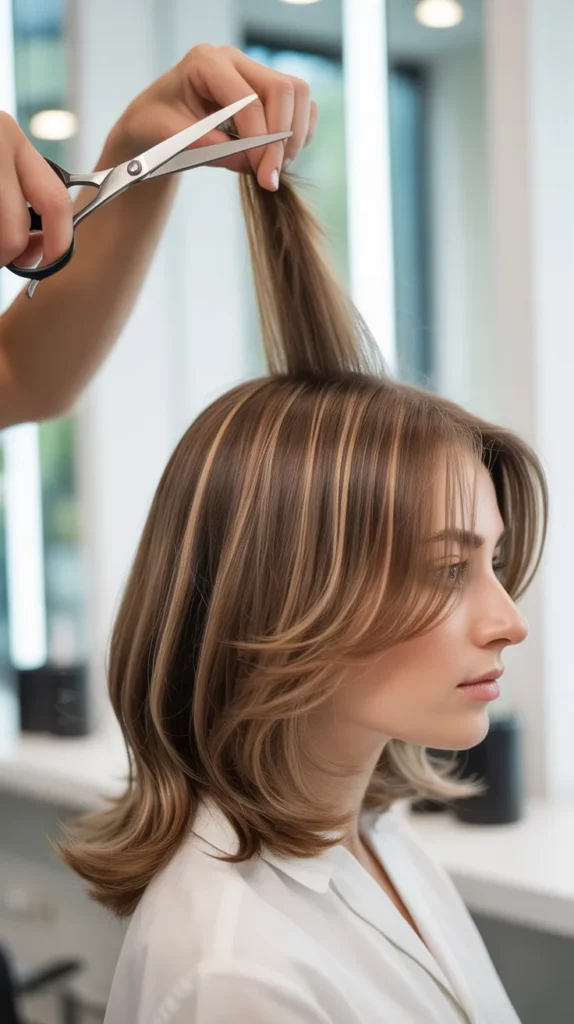
5. The Twist and Cut Technique for Soft Layers
Creating softer, more blended layers requires a slightly different approach that offers more customization.
The twist method allows for gradual, natural-looking dimension throughout your hair.
- Divide damp hair into multiple vertical sections from front hairline to nape of neck
- Work with sections approximately one to two inches wide for manageable control
- Take one section and twist it loosely from roots to ends like a rope
- The twisting motion naturally staggers hair lengths within the section
- Hold the twisted section away from your head at the desired layer angle
- Point-cut into the twist by positioning scissors vertically and making small snips
- Point-cutting creates soft, feathered edges rather than blunt, harsh lines
- Cut more from the bottom portions and less near the top for graduated layers
- Untwist the section and comb through to see the blended result
- Repeat this process on all sections around your entire head
- This method prevents the shelf-like appearance that sometimes results from horizontal cutting
- The technique works exceptionally well for wavy and curly hair textures
- Take your time with each section to maintain consistency across your whole head
- Mirror placement behind you helps ensure back sections match the front
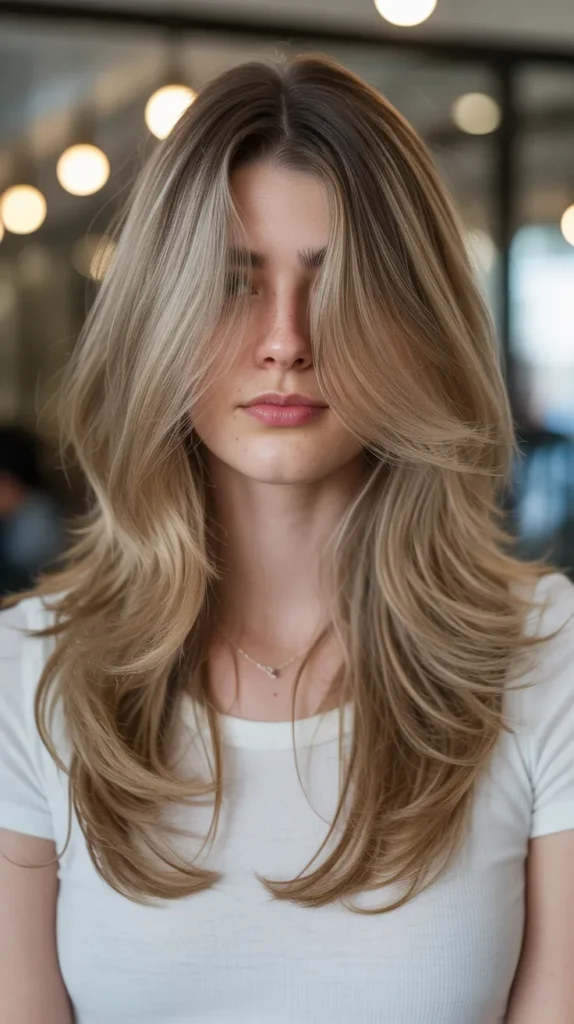
6. Face-Framing Layers for Dimension
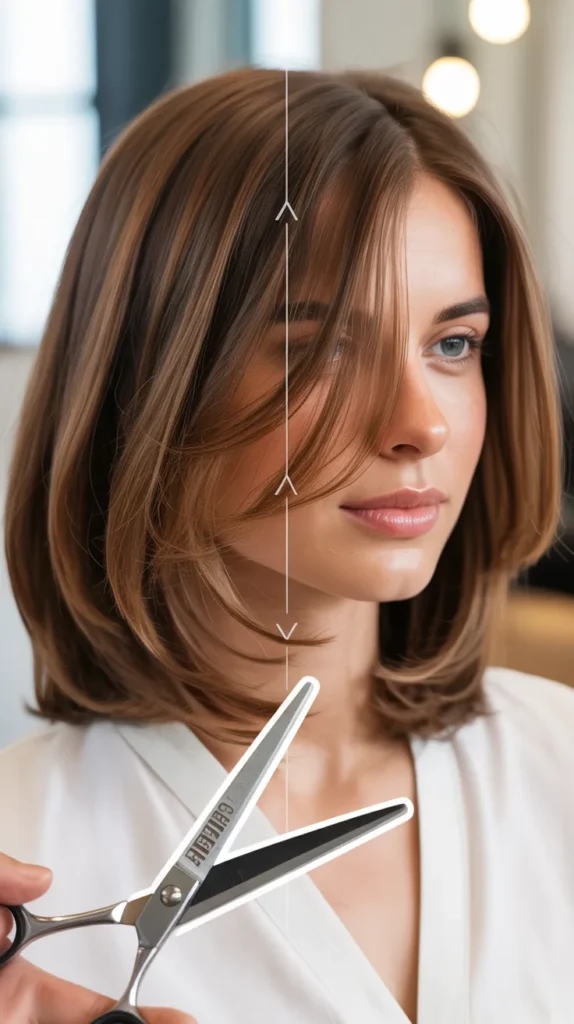
Strategic face-framing pieces create instant style impact and draw attention to your best features.
These targeted layers require precision but deliver maximum visual payoff.
- Section out the front portions of hair on both sides of your face from temple to ear
- These sections should be approximately one inch deep from your hairline backward
- Decide which facial features you want to emphasize with layer placement
- Cheekbone-length layers create width and work well for narrow or long face shapes
- Chin-length pieces soften square jawlines and add movement around the face
- Longer face-framing layers starting at collarbone blend seamlessly with overall length
- Pull one front section forward and hold it where you want the shortest point
- Cut at a slight diagonal angle moving downward from front to back
- This angle creates a gentle graduation that blends with the rest of your hair
- Repeat on the opposite side, ensuring both sections match in length and angle
- Use your first cut as a guide by pulling both sections forward together to compare
- Point-cut into the ends for texture rather than cutting straight across
- Face-framing layers should be the shortest pieces in your overall layering scheme
- These pieces make the biggest impact on how your hairstyle frames your face
7. Layering for Different Hair Types
Your unique hair texture determines which techniques will work best and which to avoid.
Customizing your approach based on texture ensures beautiful, maintainable results.
Fine or Thin Hair
- Fine hair benefits from long, subtle layers that create the illusion of fullness
- Avoid excessive layering which removes needed volume and makes hair appear thinner
- Keep layers concentrated around the face and crown for strategic lift
- Blunt cuts mixed with minimal layering maintain the appearance of density
- Internal layers remove weight without sacrificing the outer perimeter thickness
Thick or Coarse Hair
- Thick hair requires aggressive layering to remove bulk and create movement
- Interior layers significantly reduce weight while maintaining outer length
- Shorter layers throughout add dimension without the heavy, triangle shape
- Razoring or point-cutting techniques work well for softening thick ends
- Multiple shorter layers stacked throughout create better shape control
Wavy Hair
- Wavy texture naturally enhances layered looks with built-in movement
- Layers should follow the natural wave pattern for cohesive results
- Cutting hair while slightly damp allows you to see wave formation
- Avoid cutting too short as waves bounce up more than straight hair
- Face-framing layers beautifully showcase natural wave patterns
Curly Hair
- Curly hair must be cut dry or barely damp to account for shrinkage
- Each curl should be evaluated individually as lengths vary significantly
- Creating layers on curly hair removes weight and enhances curl definition
- Cut curls individually rather than in sections for customized results
- Longer layers work better than short choppy ones for curl management
8. Common Mistakes and How to Avoid Them
Understanding what can go wrong before you start cutting prevents frustration and damage control.
Learning from others’ mistakes saves you from making the same errors.
- Cutting hair while soaking wet causes layers to appear much shorter when dry
- Removing too much length at once leaves no room for correction or adjustment
- Cutting straight across creates blunt shelf-like layers instead of blended transitions
- Inconsistent sectioning results in uneven layers that lack symmetry
- Using dull or incorrect scissors damages hair and creates ragged edges
- Rushing through the process leads to mistakes that require professional correction
- Cutting curly hair while wet fails to account for shrinkage and bounce
- Holding hair at inconsistent angles creates irregular layer patterns
- Neglecting to check the back view results in visible unevenness
- Taking too large of sections makes precise cutting nearly impossible
- Comparing wet hair lengths inaccurately shows results before styling
- Cutting layers too short near the crown creates awkward stick-up pieces
- Ignoring your natural part and hair growth patterns fights against how hair naturally falls
| Common Mistake | Why It Happens | How to Prevent It |
|---|---|---|
| Uneven layers | Inconsistent sectioning or angles | Use clips to maintain clean sections and check angles repeatedly |
| Too short | Hair shrinks when dry | Cut conservatively and trim more if needed after drying |
| Choppy appearance | Cutting straight across | Use point-cutting technique for softer edges |
| Asymmetry | Not comparing sides | Pull sections forward together to match lengths |
9. Finishing and Styling Your New Layers
Proper finishing techniques showcase your DIY layers and ensure they blend seamlessly into your hairstyle.
How you complete and style the cut matters as much as the cutting itself.
- Check your hair completely dry before doing any final adjustments
- Dried hair reveals the true length and how layers actually fall
- Point-cut any remaining harsh lines by holding scissors vertically into the ends
- Remove tiny amounts to soften edges rather than changing lengths
- Blow-dry hair using a round brush to see how layers move with styling
- Apply lightweight styling products that enhance texture without weighing hair down
- Evaluate layers from multiple angles using mirrors to catch uneven areas
- Have someone else check the back if possible for objective assessment
- Trim any obviously longer pieces that stand out after complete drying
- Style hair as you normally would to ensure layers work with your routine
- Take after photos from the same angles as before pictures for comparison
- Wait at least 24 hours before making any additional cuts to avoid over-correcting
- Celebrate your accomplishment and the money saved by cutting your own layers
- Remember that hair grows and small imperfections become less noticeable quickly
10. Maintenance and Growing Out Layers

Understanding long-term layer maintenance helps you enjoy your cut longer and plan future adjustments.
Proper care extends the life and appearance of your DIY layers.
- Layers require trimming every 6-8 weeks to maintain shape and prevent split ends
- Regular trims of just the ends preserve layer placement without removing length
- Deep conditioning treatments keep layered ends healthy and prevent fraying
- Heat protectant sprays are essential when using hot styling tools on layered hair
- Growing out layers gracefully involves gradually trimming shorter pieces longer
- Patience during grow-out phases prevents impulsive cutting that creates more unevenness
- Face-framing pieces can be trimmed more frequently than interior layers
- Healthy hair shows off layers better than damaged, split ends
- Quality shampoo and conditioner specifically for your hair type enhance layer appearance
- Protective hairstyles at night prevent tangling and maintain layer definition
- Touch-ups between major cuts keep layers looking fresh without full recutting
- Documenting your technique helps you replicate successful results in future cuts
Conclusion
A Zero-Stress Guide to Cutting Your Own Layers proves that achieving beautiful, professional-looking layered hair at home is completely within your reach.
Throughout this guide, you’ve learned the fundamental principles behind why layers work, discovered multiple cutting techniques suited to different skill levels, and gained insight into customizing approaches for your specific hair type.
From the simple ponytail method to more advanced twist-and-cut techniques, you now have a toolkit of strategies that remove the intimidation from DIY haircutting.
Remember that confidence comes with practice, and even professional stylists started as beginners learning their craft.
The money you’ll save over time, combined with the convenience of touching up your layers whenever needed, makes this skill incredibly valuable.
Start conservatively with your first attempt, cutting less than you think necessary since you can always trim more but cannot add length back.
With patience, proper tools, and the techniques outlined in this guide, you’re fully equipped to create gorgeous layers that enhance your natural beauty and give you complete control over your hairstyle.