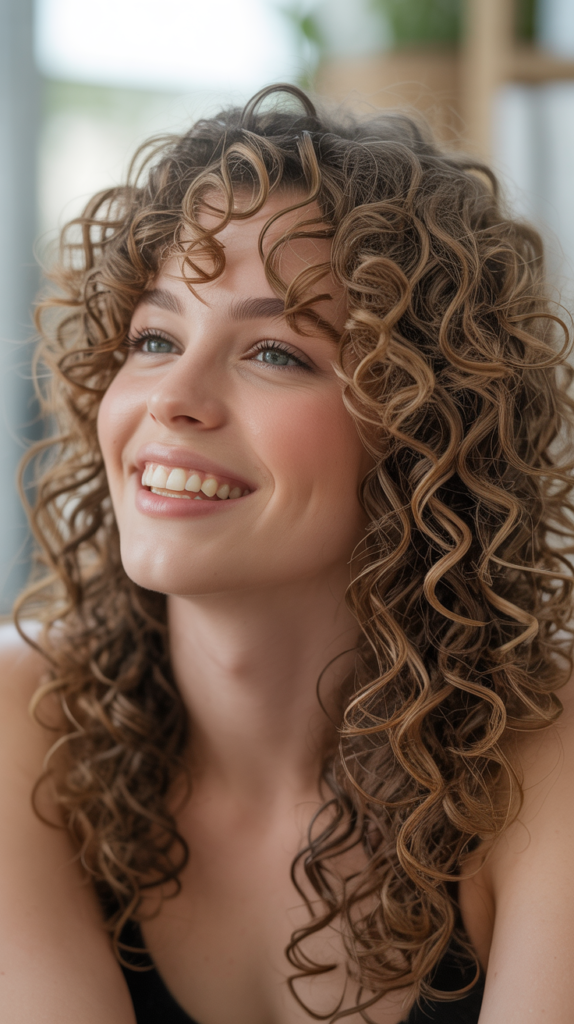
Curly hair possesses a unique personality that demands specialized cutting techniques and understanding.
Whether you’re a professional stylist looking to refine your skills or someone brave enough to trim your own curls at home, mastering the art of cutting curly hair can transform unruly spirals into stunning, well-defined coils.
This comprehensive guide on How to Cut Curly Hair: Best Tips for Perfect Curls will walk you through everything from understanding curl patterns and preparing your tools to advanced cutting techniques that celebrate the natural bounce and volume of textured hair.
You’ll discover why cutting curly hair differs fundamentally from straight hair, learn the best methods for different curl types, and gain confidence in creating shapes that enhance rather than fight against natural curl patterns.
By the end of this article, you’ll be equipped with professional insights that will help you achieve salon-worthy results while maintaining the health and integrity of every precious curl.
1. Understanding Different Curl Types Before Cutting
Before picking up scissors, you must identify the specific curl pattern you’re working with, as each type requires different approaches and techniques.
Curly hair ranges from loose waves to tight coils, and understanding these variations is fundamental to achieving successful results.
The Curl Type Classification System
- The most widely recognized system categorizes curls from Type 2 (wavy) to Type 4 (coily), with subcategories A, B, and C indicating increasing tightness.
- Type 2A-2C hair features gentle S-shaped waves that range from loose and easy to straighten to more defined waves with some frizz.
- Type 3A-3C encompasses true curls with springy, well-defined S-patterns, from loose spirals to tighter corkscrew formations.
- Type 4A-4C represents coily and kinky textures with Z-shaped patterns, ranging from defined coils to tightly packed strands with less visible curl definition.
- Understanding your curl type helps determine cutting angle, technique, and length considerations since curls shrink significantly when dry.
Why Curl Pattern Matters for Cutting
- Looser curl patterns (2A-3A) can handle more traditional cutting techniques but still benefit from curl-specific methods to prevent triangle shapes.
- Tighter curls (3B-4C) require more careful consideration because of extreme shrinkage, which can result in cuts appearing much shorter than intended.
- Each curl type has different weight distribution needs; some benefit from layering to remove bulk, while others need weight to prevent excessive volume.
- The density and porosity of hair often correlate with curl type, affecting how the hair responds to cutting and styling.
- Recognizing individual curl clumping patterns within a head of hair allows for customized cutting that works with natural groupings rather than against them.
2. Essential Tools for Cutting Curly Hair
Professional results require professional tools specifically designed for the unique challenges of cutting textured hair. Having the right equipment makes the difference between a successful cut and a disaster.
Must-Have Cutting Tools
- Professional haircutting shears with sharp, beveled blades (at least 5.5 to 6.5 inches) are essential for clean cuts that don’t create frizz or split ends.
- Texturizing or thinning shears help remove bulk from thick, dense curls without creating blunt lines that disrupt curl formation.
- A spray bottle filled with water or a water-conditioner mix keeps curls hydrated and defined during the cutting process.
- Wide-tooth combs and detangling brushes specifically designed for curly hair prevent breakage while sectioning.
- Professional sectioning clips that hold hair securely without creating dents or disturbing curl patterns are crucial for organization.
- A handheld mirror allows you to check all angles, especially the back and sides, ensuring balanced results.
Tool Maintenance and Selection
- Sharp scissors are non-negotiable; dull blades tear rather than cut, leading to split ends and frizz that ruin curl definition.
- Invest in scissors made from high-quality steel (Japanese steel or German stainless) that maintain their edge longer and provide smoother cutting action.
- Clean and oil your shears regularly to prevent rust and maintain optimal performance throughout their lifespan.
- Consider ergonomic handles if you’ll be cutting frequently, as they reduce hand fatigue and improve cutting precision.
- Replace or professionally sharpen scissors every 6-12 months depending on usage frequency to maintain cutting quality.
3. Wet vs. Dry Cutting: Which Method to Choose
The debate between cutting curly hair wet versus dry represents one of the most important decisions in curly hair cutting, with each method offering distinct advantages.
Understanding when to use each approach maximizes the success of your cut.
Dry Cutting Advantages
- Cutting dry curls allows you to see the hair’s natural fall, curl pattern, and true length, eliminating guesswork about shrinkage.
- The dry cutting method reveals exactly how each cut will look in the hair’s natural state, making it ideal for shaping and removing bulk.
- Individual curl formations are visible when dry, enabling precise trimming of specific curls that are out of place or damaged.
- Dry cutting works exceptionally well for maintenance trims and shape refinements between major cuts.
- This method is preferred by many curl specialists because it honors the hair’s natural texture rather than fighting against it.
Wet Cutting Benefits
- Cutting wet hair provides more control and precision, making it easier to create even, straight lines across sections.
- Wet cutting reduces frizz during the cutting process, as the water weight temporarily smooths the cuticle and defines curl patterns.
- This traditional method works well for creating foundational shapes and removing significant length.
- Wet cutting allows for better visibility of the hair’s structure and natural part lines.
- Stylists trained in traditional cutting techniques often feel more comfortable starting with wet cuts before transitioning to dry refinements.
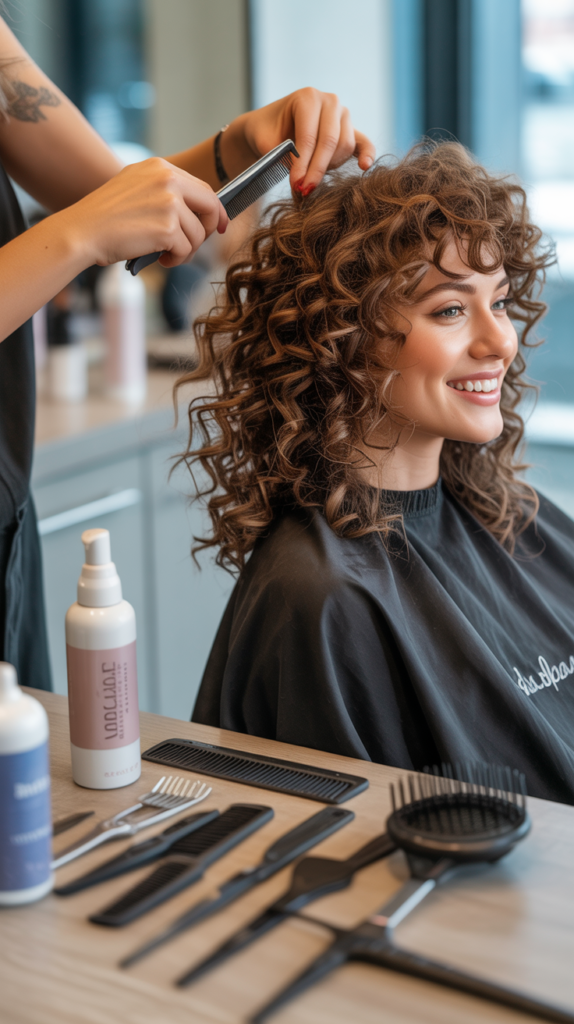
4. Preparation Steps Before Cutting
Proper preparation sets the foundation for a successful curly haircut and prevents common mistakes that lead to disappointing results.
Taking time to prepare the hair correctly ensures optimal cutting conditions.
Washing and Conditioning Protocol
- Start with freshly washed hair using a sulfate-free shampoo that cleanses without stripping natural oils necessary for curl health.
- Apply a generous amount of moisturizing conditioner, focusing on mid-lengths to ends where curls are most prone to dryness and damage.
- Detangle hair thoroughly while conditioner is applied, using fingers first and then a wide-tooth comb to work through knots gently.
- Rinse with cool water to seal the cuticle and enhance shine, which also helps curls clump together naturally.
- For dry cutting, allow hair to air-dry completely in its natural state with curl-enhancing products applied to see true curl pattern.
Sectioning Strategy
- Divide hair into manageable sections (typically four to six quadrants) based on density and the complexity of the desired cut.
- Use the natural part as a guide for initial sectioning, working with the hair’s growth pattern rather than against it.
- Secure sections with clips that don’t create dents or disrupt curl formation, leaving one section down to work on at a time.
- For wet cutting, keep a spray bottle handy to re-wet sections as needed, since curly hair dries quickly and unevenly.
- Take smaller subsections within each quadrant as you cut, never attempting to cut too much hair at once which reduces precision.
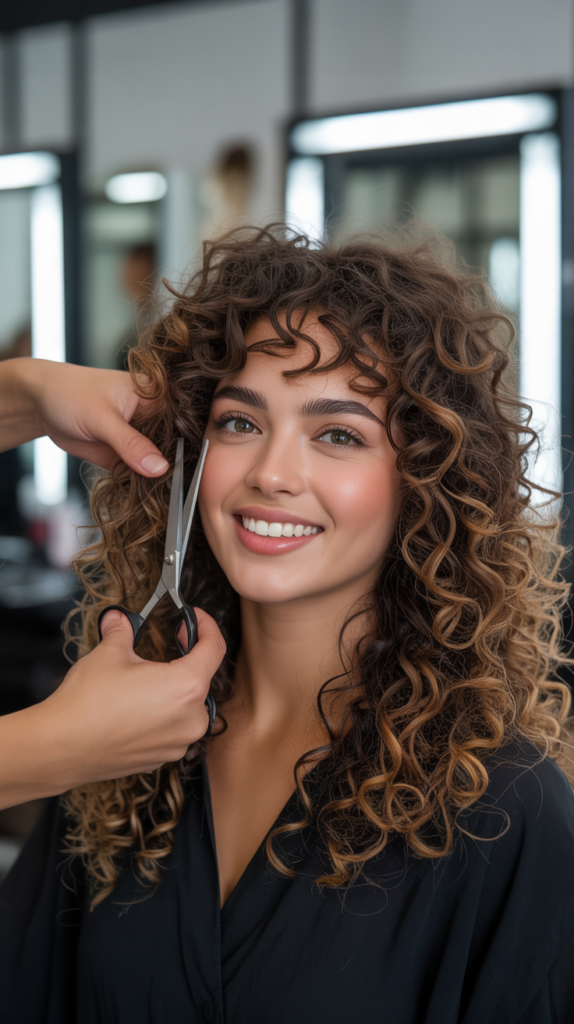
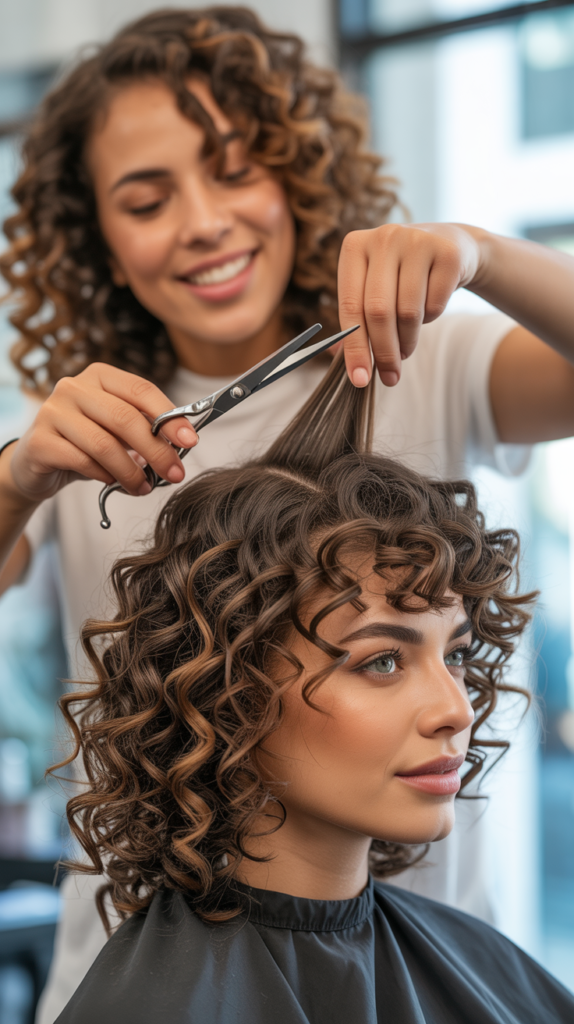
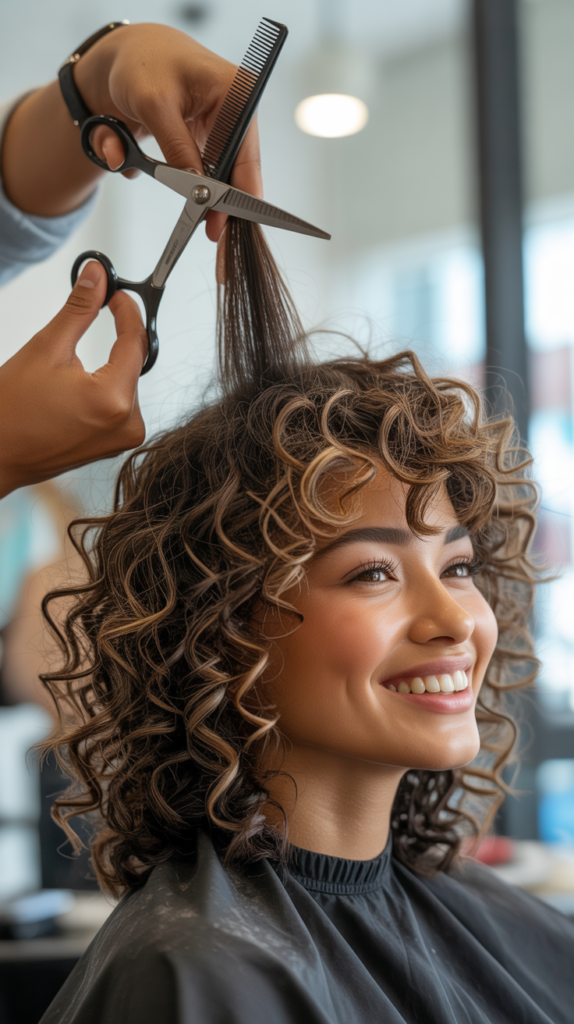
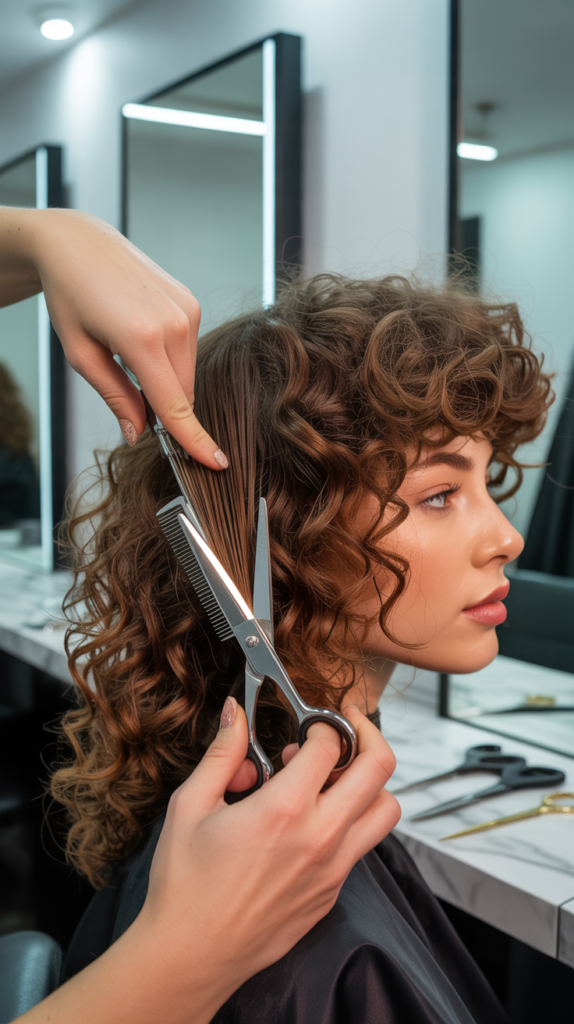
5. The Curl-by-Curl Cutting Technique
This revolutionary approach treats each curl as an individual entity, resulting in personalized cuts that enhance natural curl patterns.
The curl-by-curl method has transformed the curly hair cutting industry.
Understanding the Curl-by-Curl Philosophy
- This technique recognizes that curls don’t grow uniformly and each spiral has its own personality, length, and shape that deserves individual attention.
- By cutting each curl separately in its natural dry state, you maintain the integrity of curl clumps and prevent disrupting natural pattern formation.
- The method requires patience and time but delivers superior results with curls that fall naturally and blend seamlessly.
- Curl-by-curl cutting eliminates the triangle shape common in traditionally cut curly hair by removing weight strategically where needed.
- This approach is particularly effective for mixed curl patterns where different textures exist on the same head.
Step-by-Step Curl-by-Curl Process
- Start with completely dry hair styled in its natural state with curl-defining products so you see exactly how the hair behaves.
- Begin at the front hairline or face-framing sections where precision matters most for overall appearance.
- Isolate individual curl spirals by gently separating them from neighboring curls without disturbing their natural formation.
- Hold the curl gently at the point where you want to cut, allowing the curl to remain in its natural position without stretching.
- Make small, precise cuts at varying points along the curl to create movement and remove damaged ends without creating blunt lines.
- Work systematically through all sections, constantly stepping back to assess overall shape and balance.
- Check for any stray long pieces or curls that stick out awkwardly from the overall silhouette.
6. Layering Techniques for Curly Hair
Strategic layering removes weight, adds movement, and creates dimension in curly hair without sacrificing fullness or creating frizzy, disconnected pieces.
Proper layering technique is essential for balanced, beautiful curls.
Creating Effective Layers
- Layers in curly hair should be more subtle than in straight hair because curl shrinkage naturally creates visible length variation.
- The key to successful layering is maintaining connection between layers so curls don’t appear choppy or separated from the overall shape.
- Long layers (starting below the chin) work best for most curl types as they remove weight while preserving length and fullness.
- Avoid short layers near the crown on very curly or coily hair unless specifically desired, as these can create unwanted volume and pyramid shapes.
- Use elevation and finger angle carefully when cutting layers, typically holding sections at 45 to 90 degrees depending on desired result.
Layer Placement Strategy
- Face-framing layers should be cut conservatively, as they significantly impact the overall style and curl shrinkage makes them appear much shorter.
- Create internal layers by removing weight from the interior of the hair rather than just cutting perimeter length, which maintains fullness while reducing bulk.
- Consider the client’s curl pattern when determining layer placement; tighter curls need fewer, more strategic layers to avoid excessive volume.
- Graduate layers smoothly from shortest to longest to ensure seamless blending and natural movement throughout the style.
- Always check layers from multiple angles and in different lighting to ensure even distribution and balanced proportions.
Common Layering Mistakes to Avoid
- Cutting too many short layers near the crown creates the dreaded pyramid or triangle shape that plagues curly hair.
- Disconnected layers that don’t blend properly result in an unfinished, choppy appearance rather than cohesive style.
- Over-layering removes too much weight, causing the hair to become frizzy, lack definition, and lose its curl pattern integrity.
- Ignoring face shape when placing layers leads to unflattering results that don’t complement the individual’s features.
- Using straight-hair layering techniques without adjustments for curl shrinkage results in dramatically shorter finished length than intended.
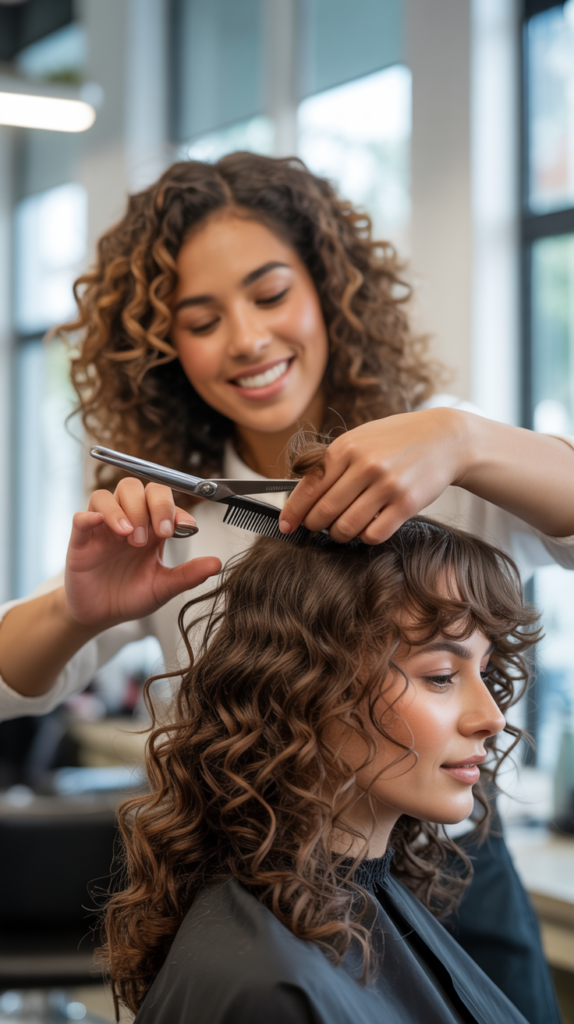
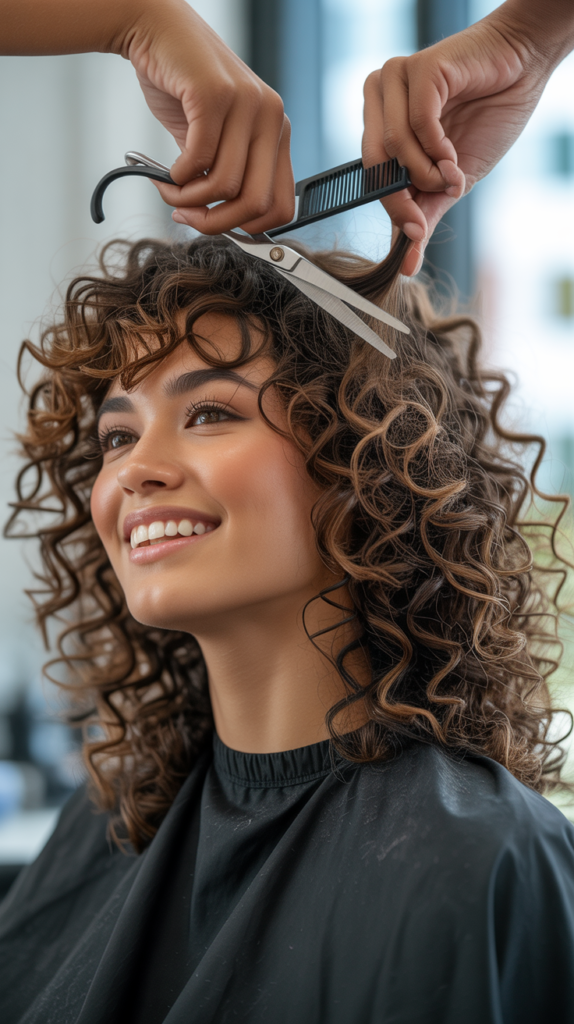
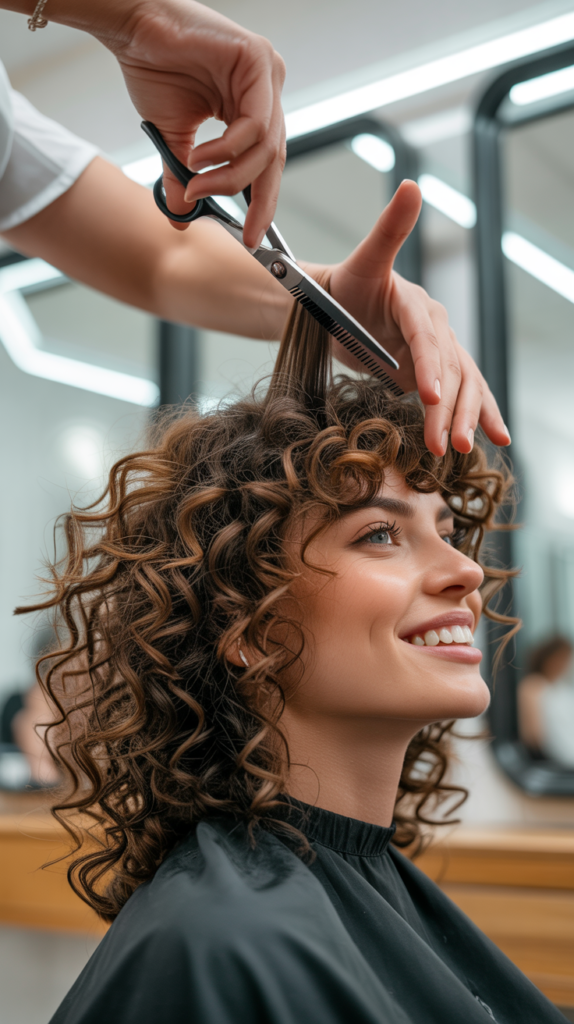
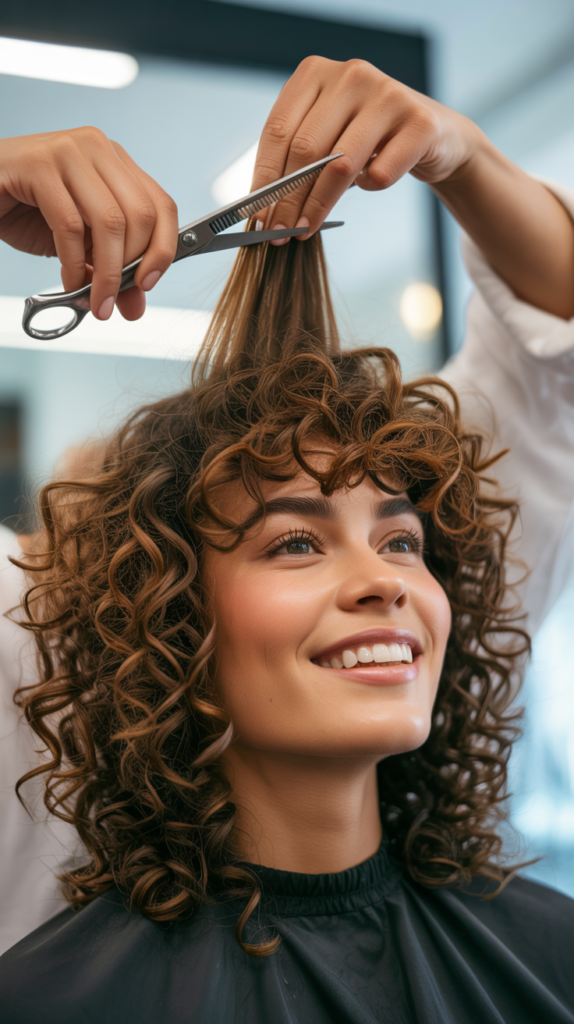
7. Point Cutting and Texturizing Methods
Advanced cutting techniques like point cutting and texturizing add softness and remove bulk without creating harsh lines that work against natural curl patterns.
These refined methods separate amateur cuts from professional results.
Point Cutting Fundamentals
- Point cutting involves holding scissors vertically and cutting into the hair ends at various depths to create soft, textured edges.
- This technique softens blunt lines, reduces bulk at the ends, and creates movement that enhances natural curl formation.
- Point cutting is performed on dry curls in their natural state for maximum precision and control over the final result.
- The depth of point cuts varies from shallow (removing minimal length) to deep (removing more bulk and creating significant texture).
- Use point cutting sparingly on very fine or fragile curls to avoid over-thinning and creating frizz.
Texturizing Shear Techniques
- Texturizing shears (also called thinning shears) have one serrated blade that removes weight while leaving some hair intact for fullness.
- Use texturizing shears on the interior of the hair, at least two inches from the scalp and never on the very ends where they create frizz.
- Make diagonal cuts with texturizing shears rather than straight across to avoid creating visible lines or steps in the hair.
- Limit texturizing to areas with excessive bulk, typically in the densest sections around the crown and nape.
- Never use texturizing shears on the top layer or perimeter of curly hair where thinning creates frizzy, broken-looking pieces.
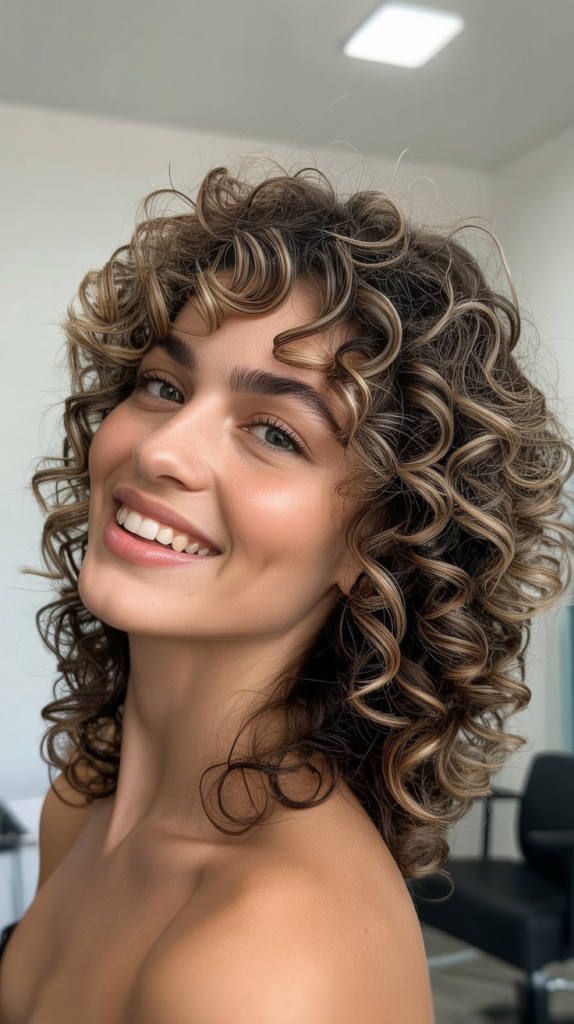
8. Maintaining Curl Shape and Definition
Preserving natural curl clumping and definition throughout the cutting process ensures the finished style showcases the hair’s natural beauty rather than disrupting it.
Strategic cutting maintenance techniques keep curls looking their best.
Protecting Natural Curl Clumps
- Identify natural curl clumps (groups of spirals that naturally twist together) and treat them as units rather than separating individual strands unnecessarily.
- Cut along the natural curl clump boundaries rather than through them to maintain definition and prevent frizz.
- Avoid combing or brushing through curls once they’re formed and dry, as this disrupts the curl pattern you’re trying to enhance.
- When sectioning, use fingers to gently separate curl clumps along natural divisions rather than forcefully pulling hair apart.
- Mist sections lightly with water if cutting dry hair begins to create static or disrupts curl formation.
Maintaining Proper Moisture During Cutting
- Keep a spray bottle filled with water and a small amount of leave-in conditioner to refresh curls as you work.
- Curly hair dries quickly, especially in low-humidity environments, so regular misting keeps curls defined throughout the cutting session.
- Apply light amounts of curl cream or gel before cutting if the hair appears dry, frizzy, or lacks definition in its natural state.
- Work in a temperature-controlled environment without excessive air movement from fans or air conditioning that dries hair prematurely.
- Consider humidity levels when scheduling cuts; high humidity helps maintain curl definition while very low humidity creates challenges.
9. Fixing Common Curly Hair Cutting Mistakes
Even experienced stylists encounter challenges when cutting curly hair, but knowing how to correct common mistakes prevents panic and salvages potentially problematic cuts.
Understanding solutions builds confidence and skill.
Correcting the Triangle or Pyramid Shape
- The pyramid shape occurs when too much weight is removed from the sides and bottom while leaving excess weight on top.
- Fix this by removing weight from the crown area through internal layering and texturizing, never by cutting more length from the sides.
- Add face-framing layers that are slightly longer than the bulk of the hair to create visual width at the bottom and narrow the top.
- Use point cutting and texturizing techniques in the crown to reduce volume without creating visible shorter pieces.
- Sometimes allowing the hair to grow slightly longer while maintaining shape provides enough weight to pull down the top and balance proportions.
Repairing Uneven or Choppy Cuts
- Uneven cutting often results from not accounting for curl shrinkage or cutting sections at inconsistent angles.
- Assess the hair completely dry and styled naturally to identify truly uneven areas versus curls that appear different due to pattern variation.
- Spot-correct only the truly problematic areas using curl-by-curl cutting rather than re-cutting entire sections.
- Blend choppy areas by carefully point cutting and softening hard lines between disconnected sections.
- If one side is significantly shorter, embrace asymmetry and make it intentional by creating a deliberately uneven but balanced style.
Addressing Over-Thinned or Frizzy Results
- Over-thinning occurs from excessive texturizing or using thinning shears on already fine hair or curl ends.
- Unfortunately, there’s no quick fix for over-thinned hair; the solution is growing it out while minimizing further damage.
- Focus on intensive moisturizing treatments, protein treatments, and gentle handling to improve the appearance while waiting for regrowth.
- Style over-thinned hair with heavier products that add artificial weight and definition to compensate for removed density.
- Trim regularly to remove damaged ends while the hair recovers, being extremely conservative with each cut.
10. Cutting Curly Hair at Different Lengths
Each length category presents unique challenges and opportunities for curly hair, requiring adjusted techniques and considerations.
Understanding length-specific approaches ensures successful results regardless of the desired style.
Short Curly Haircuts
- Short curly cuts require exceptional precision since there’s minimal length to hide mistakes and curl shrinkage dramatically affects the final appearance.
- Always cut short curly hair dry so you see exactly how short the style will be, accounting for 25-50% shrinkage depending on curl type.
- Consider face shape carefully when going short, as curly pixies and short crops can emphasize features more dramatically than longer styles.
- Leave slightly more length than desired initially, then refine gradually since you can always cut more but can’t replace removed length.
- Short curly styles require frequent maintenance (every 4-6 weeks) to maintain shape and prevent growing out awkwardly.
Medium-Length Curly Hair
- Medium lengths (chin to shoulder) offer versatility but can create the dreaded triangle shape if not cut strategically.
- Focus on removing weight from the interior while maintaining perimeter length to prevent the hair from appearing bottom-heavy.
- This length benefits most from long layers that start around chin-level to create movement without sacrificing fullness.
- Face-framing layers are crucial at medium length to prevent the style from looking one-dimensional or dated.
- Medium curly hair often looks best slightly longer in front than in back to create flattering angles around the face.
Long Curly Hair Considerations
- Long curly hair (past shoulders) requires careful layer placement to prevent excessive weight that drags down curls and reduces definition.
- The primary challenge with long curls is maintaining volume at the roots while preventing stringy, separated ends from lack of proper cutting.
- Use long, subtle layers throughout to create movement and remove weight without drastically changing the overall length.
- Focus on maintaining healthy ends through regular trims (every 8-12 weeks) since long curly hair is prone to splitting and breakage.
- Consider the hair’s density and curl tightness when determining how many layers to incorporate; denser hair can handle more layers than fine hair.
11. Tools for Curly Hair Maintenance Between Cuts
Proper at-home care and maintenance tools extend the life of a great curly haircut and keep curls looking fresh between salon visits.
Investing in quality maintenance tools pays dividends in long-term curl health.
Essential At-Home Maintenance Tools
- Professional-grade trimming scissors allow for careful spot-correction of damaged ends or stray curls between appointments.
- A microfiber towel or old t-shirt for drying prevents frizz caused by rough terry cloth towels that disrupt curl formation.
- Satin or silk pillowcases reduce friction during sleep, preventing tangling, breakage, and frizz that regular cotton creates.
- A wide-tooth comb or detangling brush specifically designed for curly hair enables gentle detangling without breakage.
- Quality curl-specific products including leave-in conditioner, curl cream, and gel maintain definition and moisture levels.
Creating an Effective Maintenance Routine
- Establish a regular trimming schedule based on your hair’s growth rate and tendency toward split ends, typically every 8-12 weeks.
- Learn to identify and trim single-strand knots (fairy knots) that commonly plague curly hair and travel up the hair shaft causing damage.
- Protective styling at night using loose braids, pineappling (high loose ponytail), or a silk/satin cap preserves the cut’s shape.
- Deep condition weekly to maintain moisture levels essential for curl definition and preventing breakage that requires more frequent trims.
- Refresh curls between wash days using water and leave-in conditioner mixture rather than cutting hair you think looks bad when it’s just poorly styled.
12. Professional Tips from Expert Curl Specialists
Learning from professionals who have dedicated careers to mastering curly hair cutting provides invaluable insights that accelerate your learning curve.
These expert tips represent years of accumulated knowledge.
Advanced Cutting Wisdom
- Never rush a curly haircut; rushing leads to mistakes that can’t be undone, so schedule adequate time for proper assessment and execution.
- Trust the curl pattern and work with it rather than trying to force curls into unnatural shapes or positions they won’t maintain.
- Invest in education through workshops, classes, and certified training programs specifically focused on curly and textured hair cutting techniques.
- Study curl science and hair structure to understand why certain techniques work, enabling you to adapt approaches for different curl types.
- Build a relationship with your client (or yourself if self-cutting) to understand lifestyle, styling routine, and realistic maintenance commitment.
Client Communication Essentials
- Conduct thorough consultations discussing realistic expectations, lifestyle factors, and maintenance requirements before cutting.
- Use visual references like photos while managing expectations about how different curl patterns affect achieving certain looks.
- Educate clients about proper home care, styling techniques, and product selection to maintain the cut’s integrity between appointments.
- Explain curl shrinkage clearly using percentages (25-50% depending on type) so clients understand the finished length.
- Document the cut with photos, notes on techniques used, and product recommendations for reference at future appointments.
Continuing Education and Growth
- Follow leading curl specialists on social media and professional platforms to stay current with evolving techniques and trends.
- Practice regularly on mannequins with curly textures before attempting new techniques on clients or yourself.
- Seek mentorship from experienced curl cutting specialists who can provide personalized feedback and guidance.
- Attend curl-specific hair shows, conferences, and workshops to network with other professionals and learn cutting-edge methods.
- Remain humble and recognize that curly hair cutting is a constantly evolving field with always more to learn.
Conclusion
Mastering How to Cut Curly Hair: Best Tips for Perfect Curls represents a journey of understanding, practice, and respect for the unique nature of textured hair.
Throughout this comprehensive guide, you’ve learned that successful curly hair cutting goes far beyond simply trimming ends—it requires understanding curl types, selecting appropriate tools, choosing between wet and dry cutting methods, and employing specialized techniques like curl-by-curl cutting and strategic layering.
The key to perfect curls lies in working with the hair’s natural pattern rather than against it, using point cutting and texturizing to create soft, defined shapes, and avoiding common mistakes that lead to pyramid shapes and frizz.
Whether you’re cutting your own curls at home or developing professional skills, remember that patience, proper preparation, and continuous learning are your greatest assets.
Every curl is unique, deserving individual attention and care to showcase its natural beauty.
By implementing the techniques and insights shared here, you’ll transform your approach to curly hair cutting and achieve the healthy, well-defined, beautifully shaped curls you’ve always wanted.