
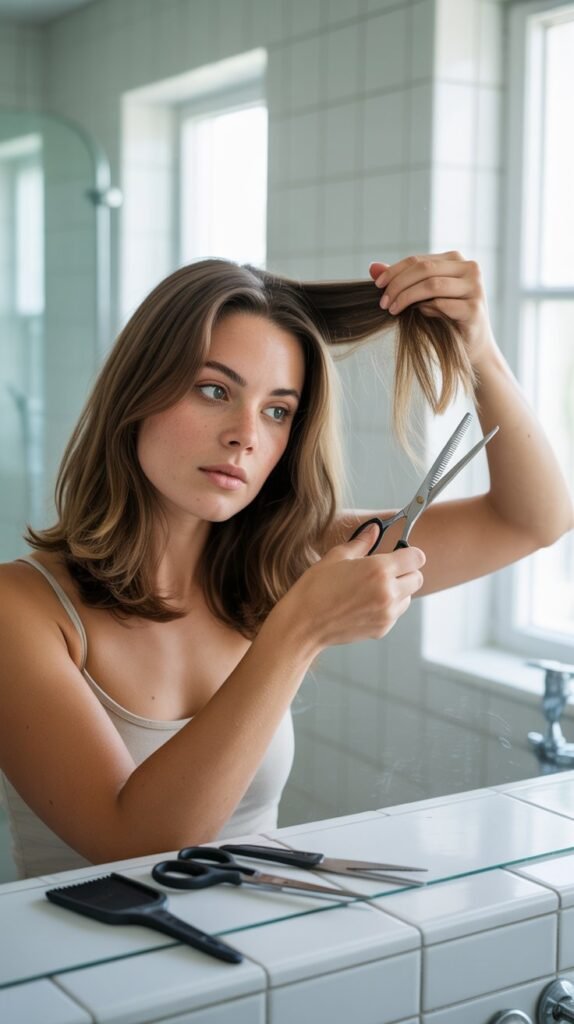
Cutting long layers at home might seem intimidating, but with the right techniques and preparation, you can achieve salon-quality results in your own bathroom.
Many people spend hundreds of dollars annually on layered haircuts, yet the process becomes surprisingly manageable once you understand the fundamental principles of sectioning, angle control, and proper tool usage.
This comprehensive guide will walk you through every step of learning How to Cut Long Layers Yourself Without Mistakes, from gathering the essential tools to executing precise cutting techniques that create beautiful, face-framing dimension.
Whether you’re looking to save money, maintain your style between salon visits, or simply gain more control over your appearance, this article provides the detailed roadmap you need.
You’ll discover how to assess your hair type, choose the right cutting method for your desired outcome, section your hair like a professional, and troubleshoot common errors before they happen.
By the end of this guide, you’ll have the confidence and knowledge to transform your long hair with layers that enhance your natural texture and complement your face shape perfectly.
1. Understanding What Long Layers Actually Are
Before you pick up scissors, understanding the structure and purpose of long layers helps you visualize your end goal and make informed decisions throughout the cutting process.
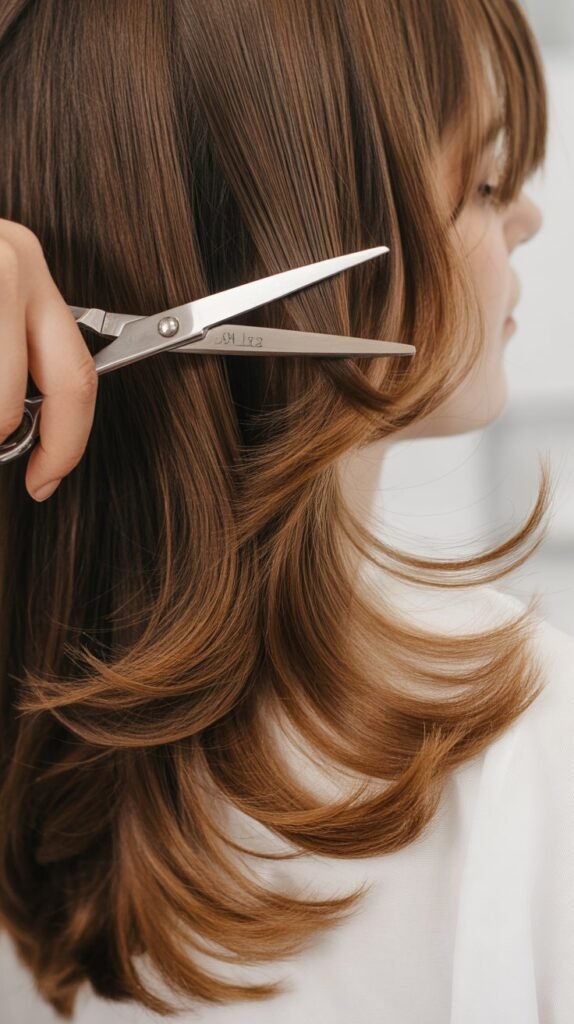
Long layers differ significantly from short, choppy layers because they create subtle movement and dimension while maintaining overall length.
The technique involves cutting hair at various lengths so that the shortest pieces typically fall around chin or shoulder level, while the longest pieces remain at or near your original length, creating a cascading effect that adds body without sacrificing the appearance of fullness.
Why Long Layers Work for Different Hair Types
- Long layers prove particularly effective for thick, heavy hair because they remove bulk from the interior sections while maintaining perimeter weight and length.
- Fine hair benefits from long layers as they create the illusion of volume and movement without making ends appear thin or wispy.
- Wavy and curly hair textures gain enhanced definition and reduced triangle-shape when long layers are strategically placed to encourage natural curl patterns.
- Straight hair receives dimension and swing from long layers that prevent the hair from appearing flat or one-dimensional.
- Long layers work across various face shapes because the gradual length variation can be customized to emphasize or minimize specific facial features.
The Difference Between Long Layers and Other Layer Styles
- Long layers maintain significant length throughout, with the shortest layer typically no higher than chin level, preserving the overall “long hair” classification.
- Medium layers feature more dramatic length variation with shorter pieces often reaching the jawline or above, creating more obvious separation between sections.
- Short layers or “shag” cuts include pieces cut significantly shorter throughout the crown and top, producing texture and volume with dramatic differences between lengths.
- Face-framing layers specifically concentrate shorter pieces around the front hairline while leaving the back relatively uniform in length.
- Long layers blend gradually without obvious demarcation lines, while step-cutting or blunt layering creates more defined, separate sections of length.
2. Essential Tools and Materials You’ll Need
Gathering professional-quality tools before beginning ensures cleaner cuts, better control, and results that actually resemble salon work rather than DIY disasters.
The investment in proper equipment pays dividends through multiple self-haircuts, and using the right tools dramatically reduces the risk of common mistakes like uneven cuts, split ends, or accidentally removing too much length.
Must-Have Cutting Tools
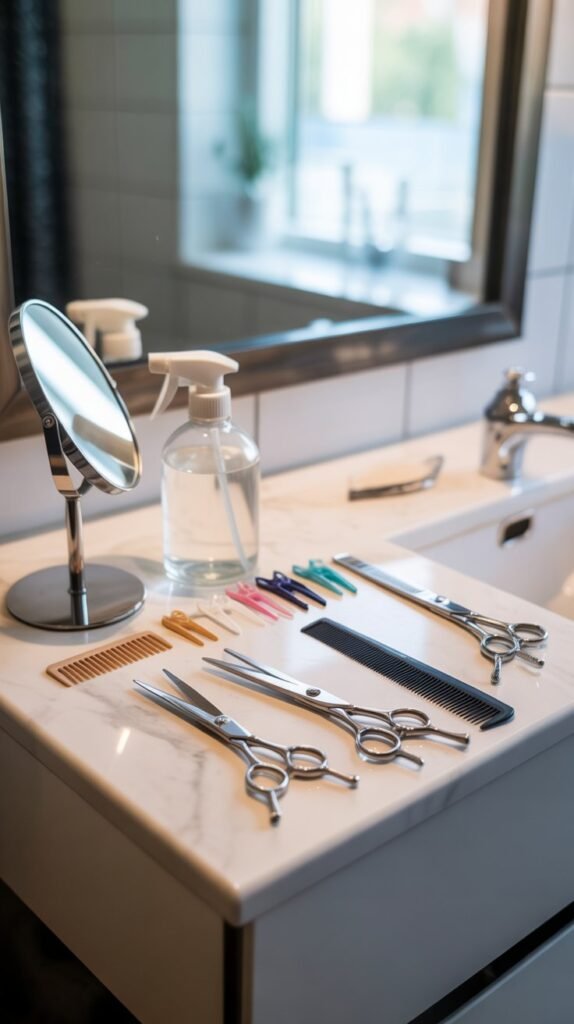
- Professional haircutting shears with blades between 5.5 to 6.5 inches provide the control and sharpness necessary for clean cuts without crushing or damaging hair fibers.
- A fine-tooth cutting comb helps create precise sections, smooths hair before cutting, and serves as a guide for maintaining consistent angles throughout the process.
- Sectioning clips or hair clamps (at least 4-6 clips) keep hair organized and prevent accidentally cutting sections you intend to leave longer.
- A handheld mirror allows you to view the back and sides of your head when used in conjunction with a wall-mounted bathroom mirror.
- A spray bottle filled with clean water keeps hair damp throughout the cutting process, as hair behaves differently when wet versus dry and cutting damp hair provides more accuracy.
- Sharp fabric scissors or kitchen shears should never be used as substitutes because they lack the precision beveling of hair shears and will create damaged, uneven ends.
Preparation Materials for Best Results
- A cape or old towel draped around your shoulders catches falling hair and keeps your clothing clean during the cutting process.
- Hair ties or elastics in various sizes help create ponytail-based cutting methods and secure sections while working on other areas.
- A well-lit space with natural light or bright overhead lighting prevents shadows that can hide uneven sections or cutting mistakes.
- A chair positioned in front of your mirror at a comfortable height allows you to sit during most of the cutting process, reducing arm fatigue and improving precision.
- Paper towels or a small brush for cleaning up fallen hair immediately after finishing prevents tracking hair throughout your home.
| Tool | Purpose | Approximate Cost | Where to Buy |
|---|---|---|---|
| Professional Hair Shears | Clean, precise cutting | $20-$50 | Beauty supply stores, Amazon |
| Sectioning Clips | Organize hair sections | $5-$15 | Beauty supply, drugstores |
| Cutting Comb | Sectioning and guiding | $3-$10 | Beauty supply, Amazon |
| Spray Bottle | Keep hair damp | $2-$5 | Dollar stores, drugstores |
| Handheld Mirror | View back of head | $5-$15 | Department stores, Amazon |
3. Preparing Your Hair Before the First Cut
Proper preparation creates the foundation for successful layer cutting and significantly reduces the likelihood of mistakes that become apparent only after your hair dries.
Taking time to wash, condition, and properly section your hair might seem tedious, but these steps directly influence how accurately you can execute cutting techniques and how well your finished layers will blend and move.
Washing and Conditioning Protocol
- Wash your hair with your regular shampoo to remove oils, products, and dirt that can interfere with how scissors glide through strands or cause hair to clump unnaturally.
- Apply conditioner from mid-shaft to ends, avoiding the root area to prevent excess slip that makes sectioning and controlling hair difficult during cutting.
- Rinse thoroughly with cool water to close the hair cuticle, which helps hair lie smoother and makes it easier to see the actual length and texture you’re working with.
- Towel-dry gently by squeezing rather than rubbing to remove excess water without creating frizz or disturbing your hair’s natural texture pattern.
- Avoid applying any styling products, leave-in conditioners, or oils before cutting, as these can alter how hair falls and create an inaccurate representation of your final result.
Strategic Sectioning Methods
- Divide your hair into four main quadrants by creating a part down the center from forehead to nape, then a second part from ear to ear across the crown.
- Secure each quadrant with a sectioning clip, twisting the hair slightly before clipping to keep sections compact and manageable.
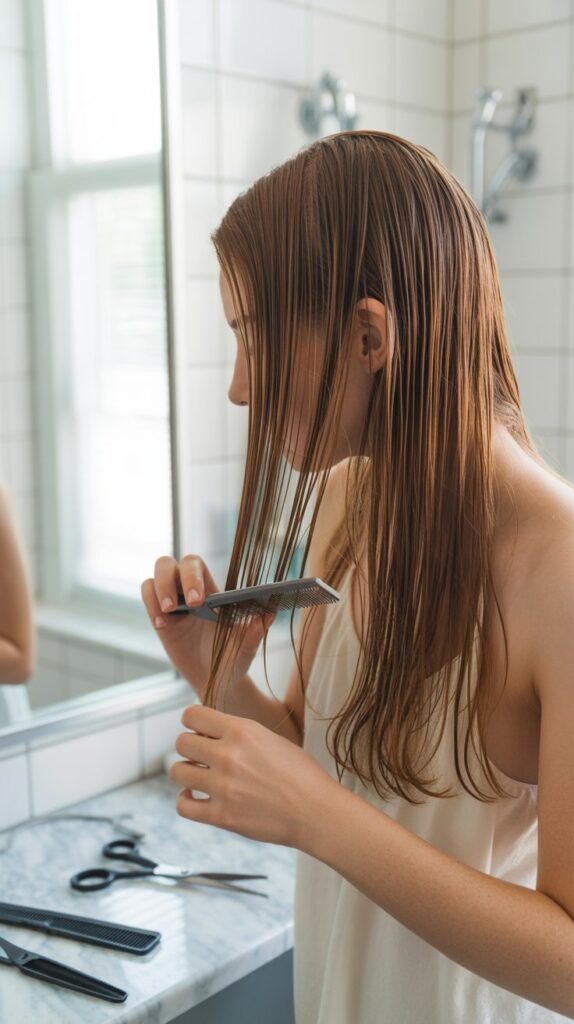
- Work with hair that’s damp but not dripping wet, as overly saturated hair stretches and appears longer than it will be when dry, leading to accidentally cutting too much length.
- Comb through each section thoroughly before cutting to identify and remove any tangles that could cause scissors to snag or create uneven lengths.
- Consider your natural part and face-framing preferences when sectioning, ensuring that front sections align with where you actually wear your hair rather than arbitrary geometric divisions.
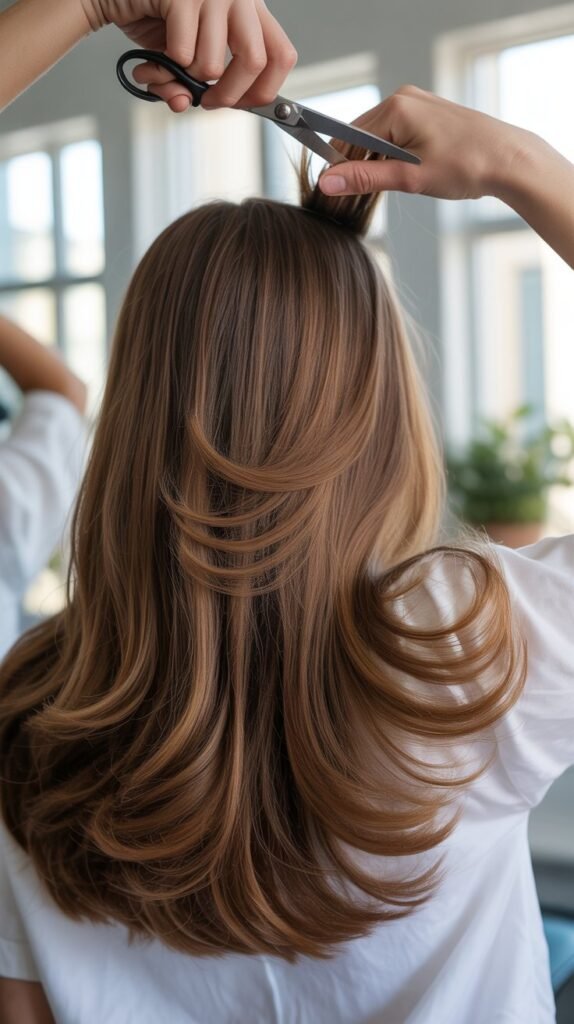
4. The Ponytail Method for Long Layers
The ponytail method offers the most beginner-friendly approach to cutting long layers yourself because it uses your own head as a guide and creates a natural graduation of length through simple geometry.
This technique has gained popularity through numerous tutorials because it requires minimal technical skill while producing reliably good results, making it ideal for first-time self-cutters who want dimensional layers without complex sectioning or advanced cutting knowledge.
Creating the Perfect Cutting Ponytail
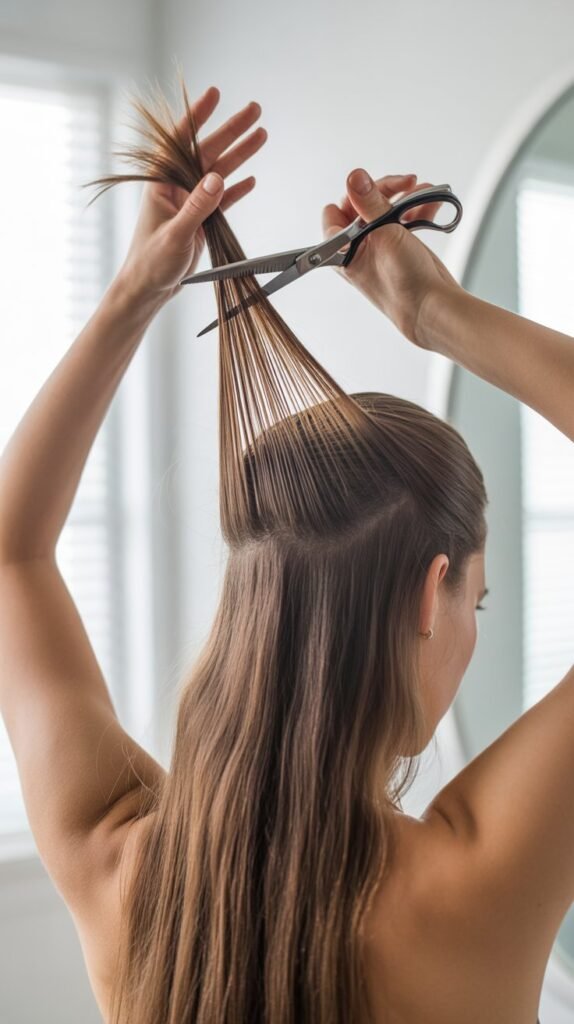
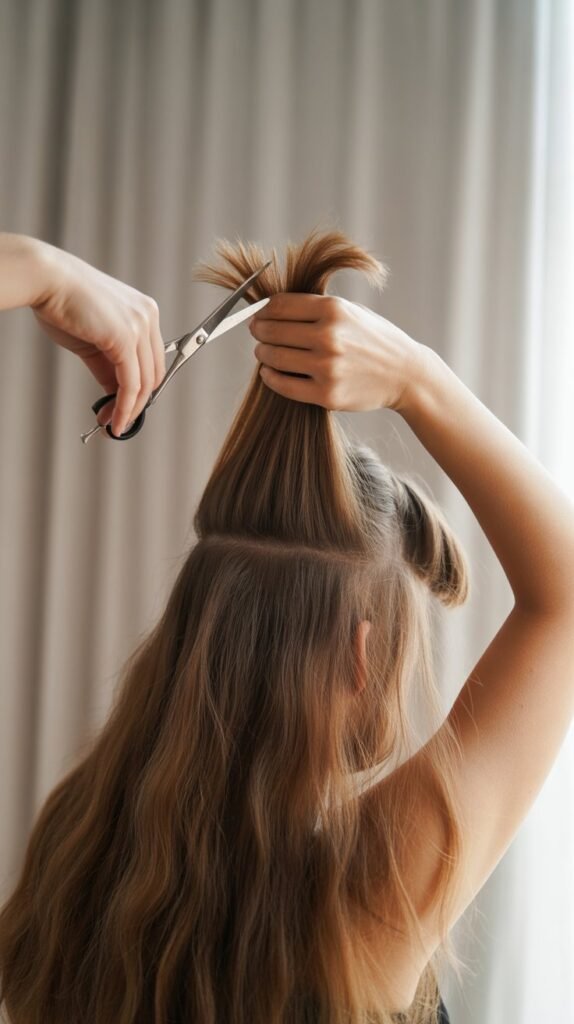
- Flip your head upside down and brush all your hair forward toward your forehead, ensuring every strand is captured and smooth without bumps or sections left behind.
- Gather all hair into a single ponytail positioned at the very top-center of your head where you might wear a unicorn horn, as this placement determines how your layers will fall.
- Secure the ponytail with a strong elastic that won’t slip, positioning it as close to the scalp as possible to maximize the layering effect and accuracy.
- Stand upright and check in the mirror that the ponytail sits perfectly centered on top of your head, adjusting if it’s positioned too far forward, back, or to either side.
- Slide the elastic down the ponytail shaft toward the ends, stopping at the point where you want your shortest layer to hit when the hair is released and hanging normally.
Executing the Ponytail Cut
- Hold the ponytail straight up perpendicular to your head with one hand while preparing scissors with the other, maintaining consistent tension without pulling too tightly.
- Position your scissors parallel to the floor and perpendicular to the ponytail, cutting straight across just above the elastic in one smooth motion for blunt layers, or at a slight angle for softer, more feathered layers.
- Cut conservatively at first, removing only 1-2 inches, as you can always cut more but cannot reattach hair once it’s removed from your head.
- Release the ponytail and shake out your hair, allowing it to fall naturally to assess the layer placement and overall effect before deciding if additional cutting is necessary.
- If you desire more dramatic layering, repeat the process by creating a second ponytail and removing additional length, gradually working toward your ideal layer intensity.
Troubleshooting Common Ponytail Method Issues
- If layers appear too short or dramatic, your ponytail was likely positioned too high or you cut too close to the elastic, so place the ponytail lower on your crown for more subtle layering next time.
- Uneven layers on one side typically indicate the ponytail wasn’t perfectly centered, so take extra time ensuring symmetrical placement before cutting.
- Layers that don’t start until very low indicate cutting with the ponytail positioned too low on the head or not sliding the elastic far enough down the shaft.
- If back sections appear unlayered while front sections are heavily layered, some hair from the back may not have been captured in the ponytail, requiring touch-up cutting on those missed sections.
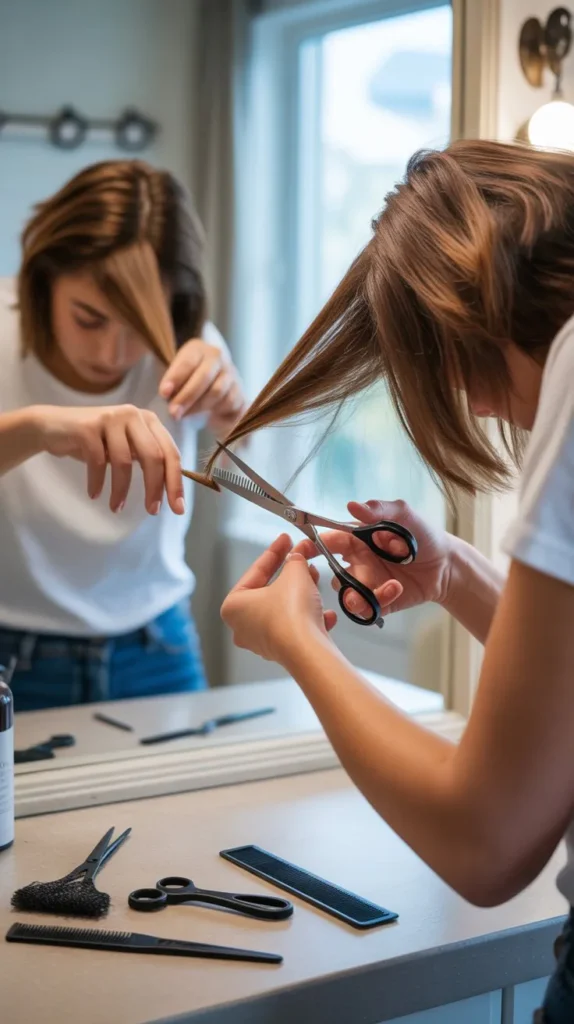
5. The Twist and Snip Technique
The twist and snip method provides more control over layer placement than the ponytail technique and works exceptionally well for creating face-framing layers while maintaining length and weight throughout the back sections.
This approach allows you to customize layer intensity by section, making it perfect for those who want subtle dimension rather than dramatic layering throughout all their hair.
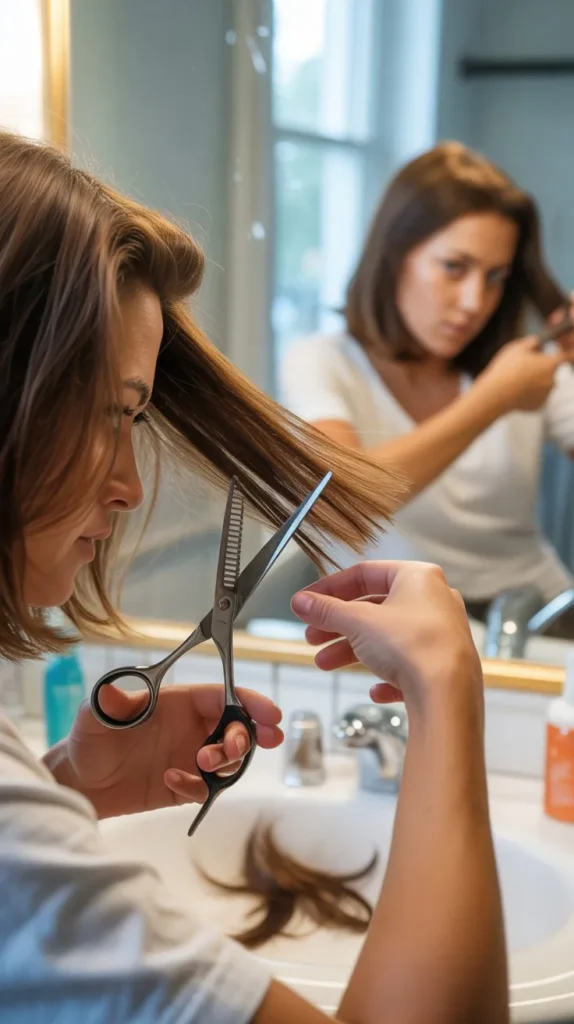
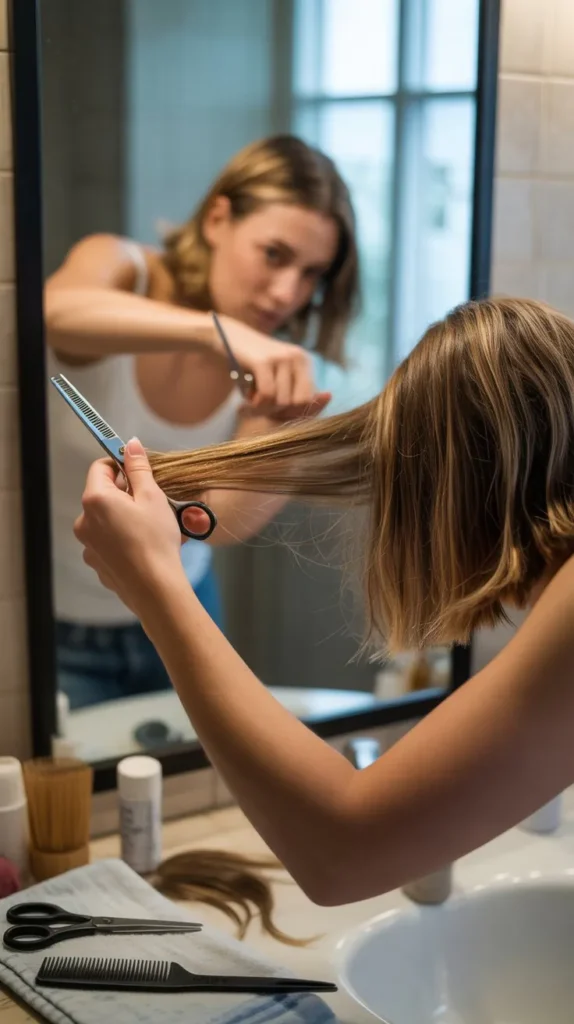
Mastering the Twist Technique
- Section hair into workable portions roughly 1-2 inches wide, starting with the front sections near your face where layers will be most visible and important.
- Twist each section tightly in one direction until the hair naturally begins to coil upon itself, creating a rope-like structure that compresses the hair strands together.
- Hold the twisted section away from your head at approximately 90 degrees (straight out perpendicular to your scalp) while maintaining steady tension to ensure even cutting.
- Position scissors pointing upward along the twisted section and make small snips into the hair rather than cutting straight across, creating textured, soft ends that blend naturally.
- Work from the bottom of the twisted section upward, removing small amounts of length through point cutting (snipping into the ends) to create graduated layers within that section.
Strategic Section Selection
- Front sections framing your face should receive the most attention and shortest layers, typically starting anywhere from chin to collarbone length depending on your face shape and preferences.
- Side sections extending from behind your ears toward the back should feature slightly longer layers that blend the shorter face-framing pieces with the longer back sections.
- Back sections can remain relatively uniform with minimal layering if you prefer volume and fullness at the rear, or receive moderate layering for all-over movement and dimension.
- Crown sections benefit from subtle internal layering that removes weight without creating obvious length variation, achieved by taking smaller snips into twisted sections in this area.
Creating Seamless Blending
- Always cut less than you think necessary on the first pass through each section, as you can make additional snips to refine but cannot replace over-cut hair.
- After completing one side of your head, carefully compare it to the opposite side in the mirror, measuring similar sections against each other to ensure symmetry.
- Blend demarcation lines between sections by taking small portions that include hair from both sections, twisting together, and point cutting to create gradual transitions.
- Dry your hair partially or completely after the initial cutting to assess how layers actually fall and appear in their styled state, making final adjustments on dry hair if necessary.
6. The Vertical Sectioning Method for Precision
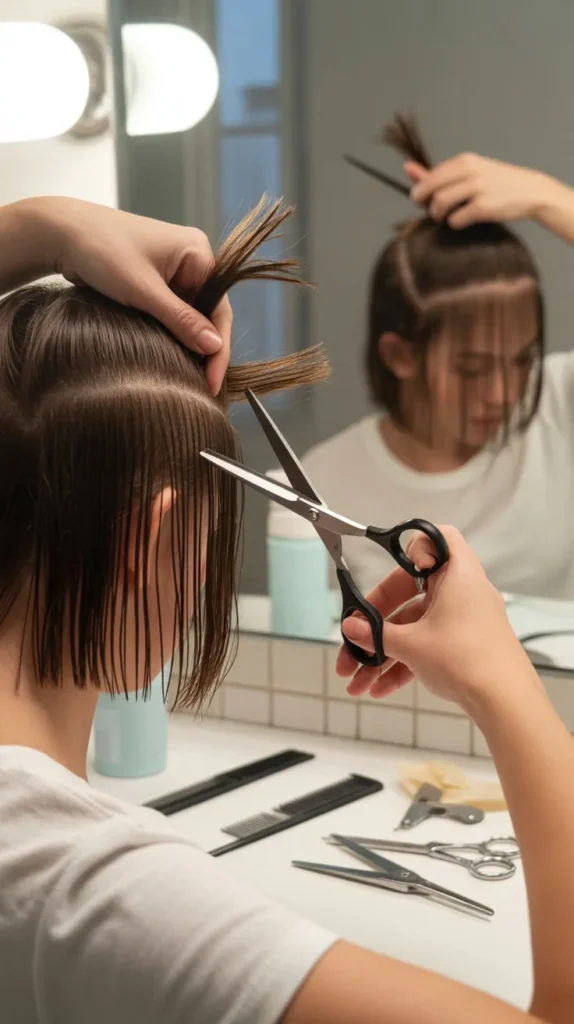
Vertical sectioning represents the professional approach to cutting long layers and provides the most control over final results, though it requires more patience and practice than simplified methods.
This technique mirrors what stylists use in salons and allows you to manipulate the degree of layering throughout different areas of your head with precision that other DIY methods cannot match.
Understanding Vertical Section Theory
- Vertical sections run perpendicular to the floor from the crown down toward the nape, creating panels of hair that can be cut individually to control layer graduation.
- Each section is elevated away from the head at specific angles (typically 90 degrees for moderate layering or 180 degrees for stronger layering) before cutting, with gravity and head position affecting the final result.
- The stationary guide method involves cutting one section to your desired length, then using it as a reference point for all subsequent sections, ensuring consistency throughout.
- Traveling guide technique allows each cut section to become the guide for the next section, creating progressively longer or shorter layers depending on the direction you work.
Step-by-Step Vertical Cutting Process
- Create a vertical section approximately one inch wide running from the center of your crown straight down toward the center of your nape, clipping all other hair out of the way.
- Comb this section smooth, hold it straight out from your head at 90 degrees (perpendicular to your scalp), and place your index and middle fingers along the hair as a cutting guide.
- Slide your fingers down to where you want the shortest layer to fall, ensuring your fingers are parallel to the floor and maintaining even tension throughout the section.
- Cut the hair extending beyond your fingers in a straight line, creating your initial guide section that will determine all subsequent layer lengths.
- Release this cut section and move to an adjacent vertical section, incorporating a small portion of the previously cut hair as your guide while adding new uncut hair.
- Hold this new combined section out at the same angle as before, position your fingers at the length of the guide hair you can see, and cut the new hair to match the guide length.
- Continue working outward from your initial center section toward the sides, then repeat the entire process on the opposite side of your head for symmetry.
Advanced Angle Manipulation
- Cutting at 90 degrees (straight out from the head) produces moderate, balanced layers that suit most hair types and style preferences.
- Elevating sections to 180 degrees (straight up toward the ceiling) creates more dramatic layering with greater length variation between the shortest and longest pieces.
- Cutting sections at 45 degrees produces subtle, gentle layers with minimal length variation, ideal for maintaining fullness while adding slight movement.
- Over-direction involves pulling sections toward a specific guide point rather than straight out from where they naturally grow, creating intentional asymmetry or additional length in specific areas.
| Cutting Angle | Layer Effect | Best For | Difficulty Level |
|---|---|---|---|
| 45 degrees | Subtle, soft layers | Fine hair, maximum fullness | Intermediate |
| 90 degrees | Moderate, balanced layers | Most hair types, all-around versatility | Intermediate |
| 180 degrees | Dramatic, obvious layers | Thick hair, maximum movement | Advanced |
| Over-direction | Customized, asymmetric layering | Specific style goals | Advanced |
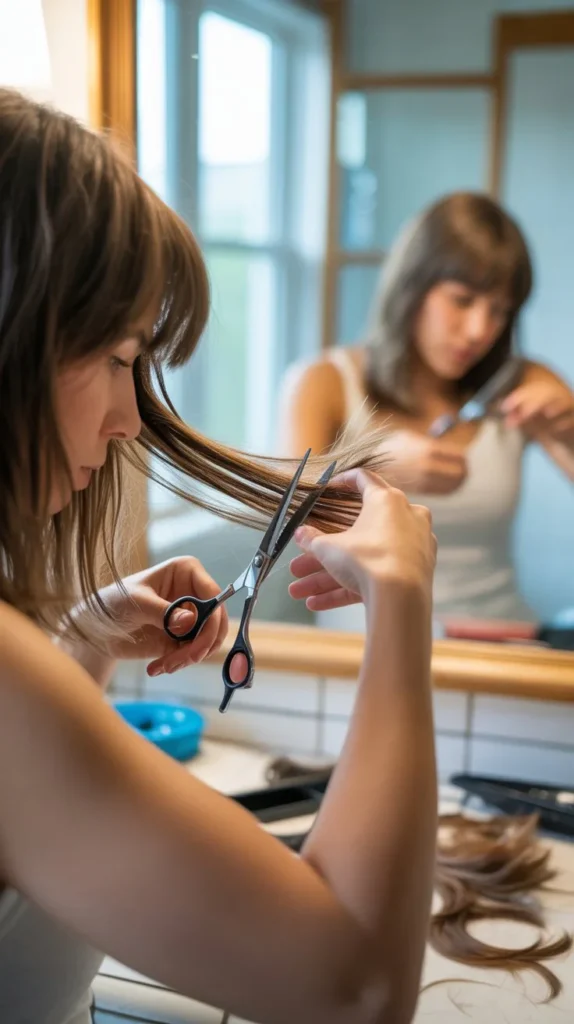
7. Face-Framing Layers Specifically
Face-framing layers deserve special attention because they dramatically impact your overall appearance and can enhance or detract from your facial features more than any other aspect of your haircut.
These strategic shorter pieces draw attention to your eyes, soften your jawline, or create balance for your face shape, making them worth the extra time to cut thoughtfully and deliberately rather than treating them as simply another section of hair.
Determining Optimal Face-Frame Length
- Round face shapes benefit most from face-framing layers that begin at or below the chin to elongate the face and create vertical lines rather than emphasizing width.
- Square or rectangular faces look best with softer, wispy face-framing layers starting at cheekbone level to soften angular jawlines and add curved movement around the face.
- Oval faces have the most flexibility and can accommodate face-framing layers at virtually any length, from cheekbone to collarbone, depending on personal style preferences.
- Heart-shaped faces particularly benefit from face-framing layers beginning at the jawline or slightly below to add width and balance to a narrow chin.
- Long or oblong faces should consider face-framing layers at cheekbone or mouth level to add horizontal visual interest and make the face appear shorter and more balanced.
Cutting Face-Framing Sections
- Section out the front portions of hair on both sides of your face, typically including all hair in front of your ears and extending back approximately two inches.
- Create a clean center part and divide these front sections evenly, ensuring equal amounts of hair on both sides for symmetrical results.
- Bring one front section forward over your shoulder where you can easily see it in the mirror, combing it smooth and removing all tangles.
- Determine your desired length for the shortest face-framing piece using your facial features as guides (chin, jawline, collarbone) rather than arbitrary measurements.
- Hold the section with minimal tension to allow for hair shrinkage when it dries and moves naturally, cutting at a slight diagonal angle for pieces that gradually lengthen as they move away from your face.
- Point cut into the ends rather than cutting blunt straight across to create soft, blended pieces that frame your face naturally rather than looking harsh or choppy.
Ensuring Perfect Symmetry
- After cutting one side, bring both face-framing sections forward over your shoulders simultaneously, comparing them directly against each other to check for matching lengths.
- If one side appears longer, position both sections against your chest at the same horizontal line, identify the discrepancy, and carefully trim the longer side to match.
- Consider your natural part and how you typically style your hair when assessing symmetry, as a strong side part means the two sides won’t actually hang identically even when cut to identical lengths.
- Test face-framing layers by pushing your hair behind your ears to see how the pieces fall naturally around your face, making adjustments if they appear too short, too long, or awkwardly positioned.
8. Dealing with Different Hair Textures
Hair texture fundamentally affects how layers will appear once cut and dried, making texture-specific adjustments essential for avoiding the disappointment of layers that looked perfect when wet but weird when styled.
Understanding your texture’s characteristics allows you to compensate during cutting, ensuring your finished layers work with your natural hair pattern rather than fighting against it.
Straight Hair Considerations
- Straight hair shows every imperfection and uneven cut with harsh clarity, requiring meticulous attention to precision and clean cutting lines throughout the process.
- Layers on straight hair appear almost exactly as cut when wet to when dry, meaning less adjustment is necessary but also less forgiveness for mistakes.
- Point cutting and texturizing techniques become especially important for straight hair to prevent blunt, heavy lines that look harsh rather than blended and natural.
- Very straight, fine hair may benefit from slightly shorter layers than intended since it lacks the volume boost that texture and curl naturally provide.
- Straight thick hair requires internal layering to remove bulk without creating visible separation between layers, focusing more on thinning shears and point cutting than dramatic length variation.
Wavy Hair Adaptations
- Wavy hair shrinks significantly as it dries and curl patterns develop, requiring you to cut longer than your desired final length to compensate for this natural contraction.
- Test a small section by cutting, allowing it to fully dry naturally, and measuring the shrinkage percentage before proceeding with the entire head.
- Wavy hair benefits from layers that work with natural wave patterns, typically requiring slightly longer layers than straight hair would need for the same visual effect.
- Consider where your waves typically start (mid-shaft, near roots, only at ends) and position layers to enhance rather than disrupt these natural patterns.
- Avoid cutting wavy hair when bone-straight from blow-drying or flat-ironing, as layers will appear far too short once natural texture returns.
Curly and Coily Hair Requirements
- Curly hair can shrink 2-4 inches from wet to dry length, with tighter curl patterns experiencing even more dramatic contraction, making conservative cutting essential.
- Cut curly hair dry or only slightly damp to see exactly how layers will fall in their natural state, as wet cutting on curls almost universally results in accidentally cutting too short.
- Consider cutting curl-by-curl if you have varied curl patterns throughout your head, allowing you to customize layer length based on how tightly each section curls.
- Curly hair layers should typically be longer than equivalent layers on straight hair to account for shrinkage while achieving the same face-framing or movement effect.
- Avoid over-layering curly hair, as too many layers remove weight that curls need to hang properly, potentially creating unwanted volume or pyramid shapes.
Texture-Specific Cutting Angles
- Straight hair can be cut at precise angles with fingers parallel to the floor without concern for texture interference.
- Wavy hair should be cut at slightly lower angles than planned since waves will naturally lift the hair and create more layering effect than the cutting angle suggests.
- Curly hair benefits from cutting individual curls rather than stretched sections, trimming the end of each curl in its natural coiled state for the most accurate results.
- Mixed texture hair (different textures in different sections) requires treating each area according to its specific texture characteristics rather than applying one universal cutting approach.
9. Common Mistakes and How to Avoid Them
Learning from others’ mistakes saves you from experiencing disappointing results and helps you anticipate problems before they occur rather than discovering them when it’s too late to fix easily.
These common errors plague both beginners and experienced self-cutters alike, but recognizing them in advance dramatically improves your chances of achieving professional-looking results on your first attempt.
Critical Pre-Cutting Errors
- Cutting dry hair without wetting it first leads to inaccurate results because dry hair’s true length and natural fall pattern differ significantly from how it behaves when slightly damp and weighted.
- Using dull scissors crushes hair fibers rather than cleanly slicing them, creating split ends and damaged-looking layers regardless of how well you execute the cutting technique itself.
- Skipping the sectioning process and attempting to cut all hair simultaneously results in uneven lengths, missed sections, and an inability to control where layers actually fall.
- Failing to remove tangles before cutting causes scissors to snag, creating choppy, uneven results and potentially pulling out hair or creating split ends above the cutting line.
- Cutting in poor lighting prevents you from seeing what you’re actually doing, leading to uneven sections, missed spots, and an inability to assess symmetry accurately.
Execution Mistakes During Cutting
- Cutting too much length on the first pass leaves no room for adjustments or corrections if you realize the layers are too short or dramatic for your preferences.
- Inconsistent tension while holding sections creates uneven results, as looser held sections appear longer when cut but become shorter when released, while overly tight sections do the opposite.
- Cutting with hair too wet causes excessive shrinkage as hair dries, resulting in layers that appear significantly shorter than anticipated when hair reaches its natural dry length.
- Moving your head position between cutting corresponding sections on opposite sides creates asymmetry since the hair’s relationship to your cutting angle changes with different head positions.
- Rushing through sections without comparing them to adjacent sections results in disconnected layers with obvious demarcation lines rather than smooth, blended transitions.
Post-Cutting Assessment Failures
- Not drying hair completely before assessing results leaves you unaware of how layers actually look in their styled state, potentially leading to over-correction or missed problems.
- Styling hair differently than normal when assessing layers provides an inaccurate picture of how the cut will work with your typical routine and styling preferences.
- Comparing your results to professional salon cuts or highly edited photos creates unrealistic expectations, as professional stylists use techniques, tools, and finishing products not available in home cutting scenarios.
- Attempting to fix perceived mistakes immediately after cutting while frustrated or disappointed often leads to over-cutting and makes problems worse rather than correcting them.
10. Fixing Mistakes if Things Go Wrong
Even experienced stylists occasionally need to correct cutting errors, so knowing how to address mistakes transforms potential disasters into manageable problems that can be resolved without resorting to a dramatic chop or expensive salon rescue.
Most layer cutting mistakes fall into predictable categories with straightforward solutions that allow you to salvage your cut and maintain the length you wanted to preserve.
Addressing Too-Short Layers
- If layers are only slightly shorter than desired, embrace them temporarily and focus on growing them out while maintaining the rest of your length, trimming the longer sections gradually to allow layers to catch up.
- Deep conditioning treatments and hair growth supplements can potentially accelerate growth rates, though expect realistic timelines of approximately half an inch per month for new growth.
- Strategic styling with volumizing products, loose waves, or updos can camouflage too-short layers by blending them into the overall hairstyle rather than allowing them to hang separately.
- Consider adding clip-in extensions that match your natural hair color and texture to temporarily add length and volume while your natural layers grow to more desirable lengths.
- Avoid the temptation to cut longer sections shorter to “match” overly short layers, as this solves the unevenness problem by creating an entirely too-short cut overall.
Correcting Uneven Sides
- Identify which side is longer by bringing front sections forward over your chest and comparing them directly against each other at identical horizontal points.
- Work on dry hair when making corrections to ensure you’re seeing accurate lengths rather than wet hair’s deceptive appearance.
- Cut conservatively from the longer side, removing small amounts incrementally and rechecking after each cut rather than attempting to match lengths in one dramatic cut.
- If unevenness appears throughout multiple layers on one side, work systematically from the shortest to longest layers, correcting each level individually for comprehensive correction.
- Consider that natural growth patterns, part placement, and head shape may cause slight asymmetry that doesn’t actually constitute a mistake but rather reflects your individual characteristics.
Blending Choppy or Disconnected Layers
- Use point cutting technique to soften harsh lines by holding scissors vertically and snipping small amounts into the blunt ends at various points along the layer line.
- Take thin sections that include hair from both the shorter and longer layers, twist them together gently, and make small cuts to create transition pieces between the two lengths.
- If you have thinning shears or texturizing scissors, run them through the harsh demarcation line several times with the blades pointing downward to create subtle blending.
- Consider scheduling a professional “blending appointment” at a salon, which typically costs significantly less than a full cut since the stylist only needs to fix specific problem areas rather than cutting your entire head.
When to Seek Professional Help
- If you’ve removed so much length that you’re approaching your desired shortest point and still have unresolved issues, stop immediately and consult a professional before making the situation worse.
- Major asymmetry where one side is multiple inches longer than the other typically requires professional correction, as attempting to fix this yourself often leads to cutting both sides progressively shorter.
- Severely damaged ends with splitting extending more than an inch up the hair shaft require professional trimming to remove damage without further compromising your length.
- If you feel emotionally distressed or attached to your mistake, stepping away and allowing a professional to assess objectively prevents making choices based on frustration rather than practical solutions.
11. Maintaining Your Layers Between Cuts
Long layers require ongoing maintenance to preserve their shape, movement, and healthy appearance, making post-cut care equally important as the cutting technique itself.
Proper maintenance extends the life of your layers, prevents damage that would require removing additional length to correct, and ensures your hair looks intentionally styled rather than grown-out and neglected.
Regular Trimming Schedule
- Plan to trim your layer ends every 8-12 weeks to remove split ends and maintain the shape of your layers without significant length removal.
- Focus trimming efforts on the shortest layers and face-framing pieces that show damage and splitting most prominently due to increased exposure and manipulation during styling.
- Use the dusting technique for maintenance trims, removing only 1/4 to 1/2 inch from ends rather than taking full inches during each trimming session.
- Watch for signs that trimming is overdue, including visible split ends, rough texture when running fingers along hair shafts, and layers that no longer move or blend as they did when freshly cut.
Deep Conditioning Protocols
- Apply deep conditioning or hair mask treatments weekly to maintain moisture balance and prevent dryness that leads to breakage and damaged-looking layers.
- Focus conditioning products from mid-shaft to ends where layers receive the most styling stress, avoiding roots to prevent oiliness and loss of volume.
- Consider protein treatments monthly if your hair shows signs of weakness, such as excessive stretching when wet, unusual breakage, or limp texture lacking body.
- Use leave-in conditioners or oils on damp hair before heat styling to protect layers from thermal damage that degrades hair quality over time.
Styling Techniques That Protect Layers
- Minimize heat styling frequency by embracing your natural texture when possible, reserving blow-drying and heat tools for occasions when styled appearance is necessary.
- Use heat protectant spray religiously before any thermal styling, applying to damp hair and allowing it to dry slightly before applying direct heat.
- Employ the lowest effective heat settings on styling tools rather than automatically using maximum heat, as excessive temperature causes cumulative damage to hair structure.
- Sleep on silk or satin pillowcases to reduce friction that creates tangles, breakage, and frizz that makes layers look messy and poorly maintained.
- Avoid elastic hair ties with metal components that catch and break hair, opting instead for spiral elastics, scrunchies, or fabric-covered ties that grip without damaging.
Product Recommendations for Layered Hair
- Volumizing mousse applied to damp roots before blow-drying helps shorter layers maintain lift and body rather than falling flat against longer sections.
- Lightweight styling cream smoothed through mid-lengths and ends defines layers and reduces frizz without weighing hair down or creating greasy appearance.
- Dry shampoo extends time between washing and helps maintain volume in layered styles without the damage and time commitment of frequent shampooing and heat styling.
- Texturizing spray or sea salt spray enhances the natural movement and separation that makes layers visible and intentional-looking rather than blending into one length.
12. Styling Your New Long Layers
Successfully cutting long layers represents only half the journey, as proper styling techniques showcase your layers’ dimension and movement while poor styling can make even professionally cut layers appear flat and shapeless.
Learning to style your new layers maximizes your investment of time and effort in cutting them yourself, ensuring you actually enjoy and can replicate the look that motivated you to learn this skill.
Blow-Drying Techniques for Maximum Impact
- Begin with damp (not soaking wet) hair that’s been towel-dried and detangled thoroughly to allow efficient drying without excessive heat exposure.
- Apply a heat protectant and volumizing product to roots and throughout lengths, ensuring even distribution before beginning the drying process.
- Flip your head upside down and rough-dry hair to about 70%
- 3:33 PM dryness while scrunching or tousling to create volume and encourage natural movement in your layers.
- Section hair and use a large round brush to dry the bottom layers first, rolling the brush toward your face for face-framing pieces and away from your face for side and back sections.
- Focus the blow dryer nozzle downward along the hair shaft from roots to ends, smoothing the cuticle while maintaining the volume created by the round brush tension.
- Finish with cool air blast to set the style and add shine by closing the hair cuticle, pointing the dryer downward from roots to ends for maximum light reflection.
Creating Waves and Curls That Showcase Layers
- Curling wand or iron techniques work beautifully with layers because the varied lengths create natural-looking, dimensional waves rather than uniform curls.
- Take sections from shortest layers to longest, curling each section away from your face for a face-framing effect or alternating directions for a more tousled, textured look.
- Leave the last inch or two of each section unwrapped around the curling tool to create modern, undone-looking ends rather than ringlet curls.
- Allow curls to cool completely in their curled shape before touching them, as this sets the curl pattern and extends the longevity of your styled look.
- Gently separate and tousle curls with your fingers rather than brushing, which preserves the texture and movement while softening the styled appearance.
Straight and Sleek Styling Methods
- Straightening layered hair reveals the precise cutting work and shows off the gradual length variation that creates movement even in straight styles.
- Apply smoothing serum or cream to damp hair before blow-drying to reduce frizz and create the sleek base necessary for successful flat iron styling.
- Use a flat iron with adjustable temperature controls set to the minimum effective heat for your hair texture, typically 300-350°F for fine hair and 350-400°F for coarse or thick hair.
- Work in small sections, clamping the flat iron at the roots and gliding smoothly down to ends in one continuous motion without pausing to prevent heat damage.
- Finish with lightweight shine spray or a small amount of hair oil smoothed over the surface (not roots) to create glossy, healthy-looking straight layers.
Updo and Half-Up Styles with Layers
- Long layers add beautiful dimension to ponytails and buns, with shorter pieces falling around the face naturally while longer pieces create fullness in the updo itself.
- Pull shorter face-framing layers out intentionally when creating updos, allowing them to soften your face and showcase the layered cutting you’ve created.
- Half-up styles work exceptionally well with long layers because the top section gathers the shorter layers while the bottom section showcases the longer lengths.
- Tease shorter layers gently at the crown before securing half-up styles to create volume and height that makes layers visible rather than flattened.
- Embrace pieces that naturally fall out of updos rather than slicking them back with gel or pins, as these escaped layers add romance and dimension to your overall look.
Conclusion
Learning How to Cut Long Layers Yourself Without Mistakes empowers you with both practical skills and confidence to maintain your hair exactly as you prefer without relying on expensive salon appointments or accepting cuts that don’t match your vision.
This comprehensive guide has walked you through understanding layer structure, gathering proper tools, preparing your hair correctly, executing various cutting techniques from beginner-friendly to advanced, addressing different hair textures, avoiding and fixing common mistakes, and styling your finished layers for maximum impact.
Remember that even professional stylists refined their skills over years of practice, so approach your first self-cut with patience and realistic expectations while celebrating the accomplishment of taking control of your own appearance.
Start conservatively with less dramatic layers that can be adjusted rather than attempting extreme transformations immediately, and always prioritize hair health through proper tools, techniques, and maintenance routines.
Whether you choose the simple ponytail method, the controlled twist and snip approach, or professional vertical sectioning, the key to success lies in thorough preparation, careful execution, and thoughtful styling that showcases your dimensional, beautiful long layers.