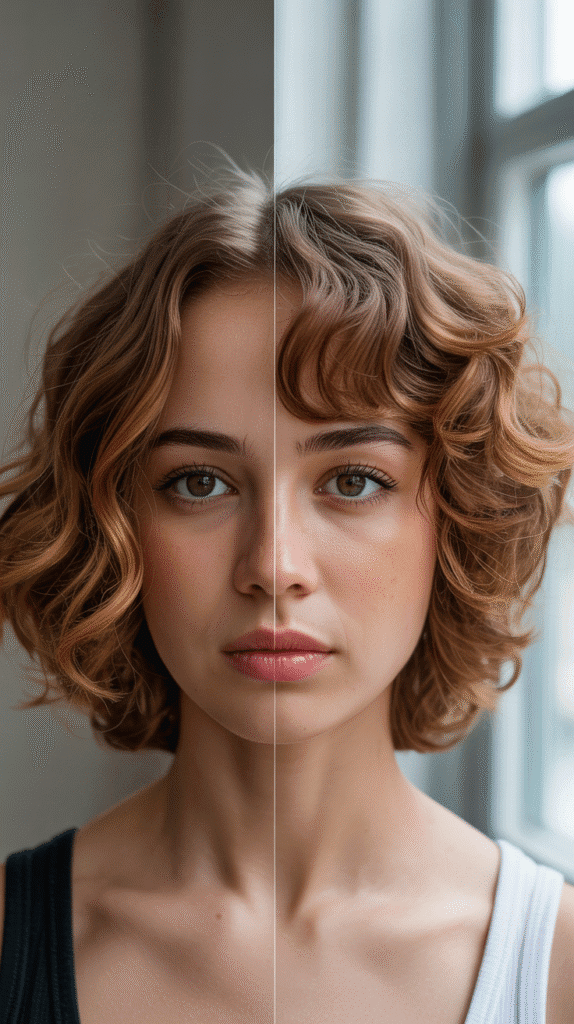
Cutting your own curly hair at home might seem intimidating, but it’s absolutely achievable with the right techniques and a bit of confidence.
If you’ve been hesitant about trimming your curls yourself, wondering whether you’ll end up with uneven layers or a style you didn’t intend, this guide is here to change that perspective.
How to Cut Short Curly Hair at Home – Easy DIY Tutorial will walk you through every essential step, from understanding your curl pattern to mastering the cutting techniques that professional stylists use.
Whether you’re looking to maintain your current short style, refresh your shape between salon visits, or completely transform your look without spending a fortune, this tutorial provides clear, practical instructions that work for all curl types.
You’ll discover how to prep your hair properly, which tools are truly necessary, and how to cut curl by curl to achieve a balanced, flattering result.
By the end of this article, you’ll have the knowledge and confidence to take control of your curly hair journey, saving both time and money while creating a style that celebrates your natural texture.
1. Understanding Your Curl Pattern Before Cutting
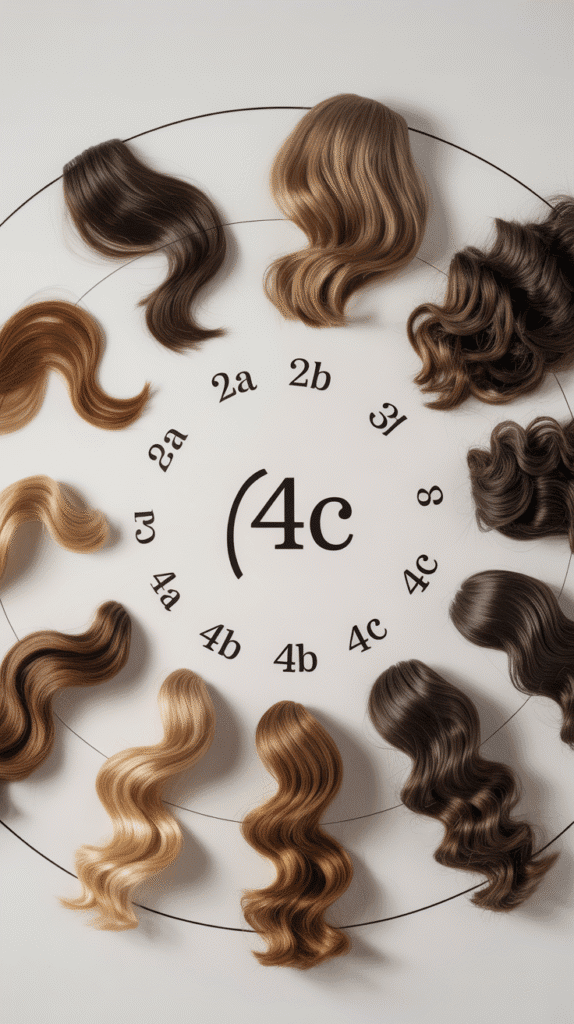
Before you pick up scissors, understanding your specific curl pattern is crucial for achieving the best results with your DIY haircut.
Curly hair ranges from loose waves to tight coils, and each type behaves differently when cut, so identifying whether you have type 2 (wavy), type 3 (curly), or type 4 (coily) hair will guide your cutting strategy.
- Different curl patterns shrink at varying rates when dry, with tighter curls experiencing up to 75% shrinkage, which means you need to account for this when determining your cutting length.
- Type 2 waves typically have less volume at the roots and may need layering techniques that create movement without removing too much length.
- Type 3 curls are springy and voluminous, requiring a cutting approach that maintains the natural curl formation while removing bulk strategically.
- Type 4 coils are the most delicate and shrink the most dramatically, demanding extremely conservative cutting to avoid going shorter than intended.
- Understanding your curl density (how many strands you have per square inch) helps determine whether you need to thin out your hair or preserve all the volume you have.
- Curl elasticity—how much your hair stretches and bounces back—affects how you should tension the hair while cutting to get accurate results.
- Mixed curl patterns on different parts of your head are common, so you’ll need to adjust your technique for each section rather than using a one-size-fits-all approach.
2. Essential Tools and Products You’ll Need
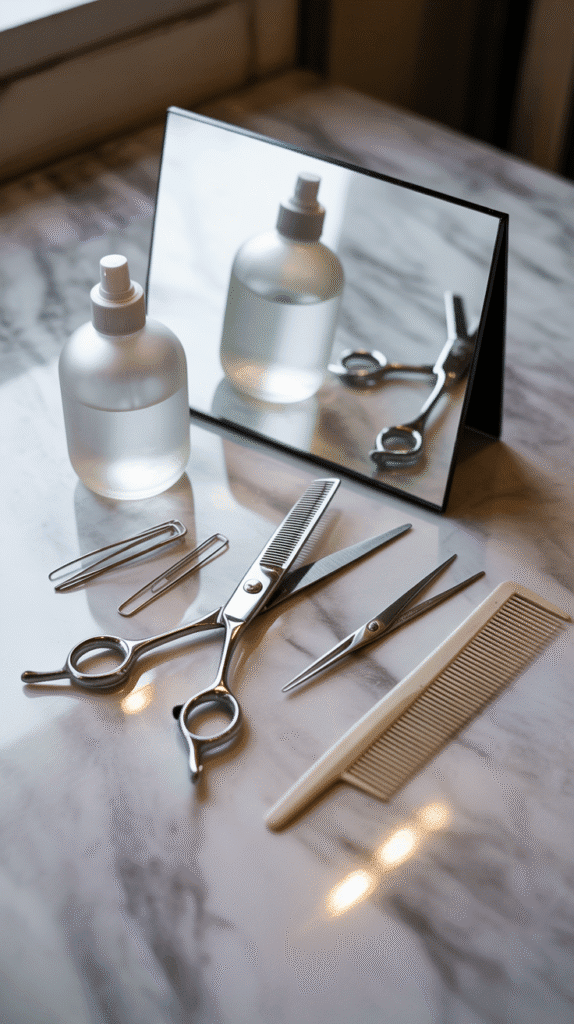
Gathering the right tools before you start cutting will make the entire process smoother and help you achieve professional-looking results at home.
Having quality equipment specifically designed for curly hair cutting makes a significant difference in both the process and the outcome.
- Professional hair-cutting shears with a blade length of 5.5 to 6.5 inches are essential—regular household scissors will create split ends and uneven cuts.
- A spray bottle filled with water or a leave-in conditioner mixture keeps your curls hydrated and defined throughout the cutting process.
- Sectioning clips (at least 6-8) help you organize your hair into manageable portions and keep cut sections separated from uncut areas.
- A wide-tooth comb or detangling brush prevents breakage while helping you section your hair without disrupting the natural curl pattern.
- A handheld mirror in addition to your bathroom mirror allows you to check the back and sides of your head for evenness.
- A hair cape or old towel protects your clothing from hair clippings and makes cleanup significantly easier afterward.
- Quality styling products like curl cream or gel help define your curls before cutting so you can see their true shape and length.
- Good lighting is crucial—natural daylight or bright white LED lights help you see every curl clearly and avoid mistakes.
3. Preparing Your Hair for the Cut
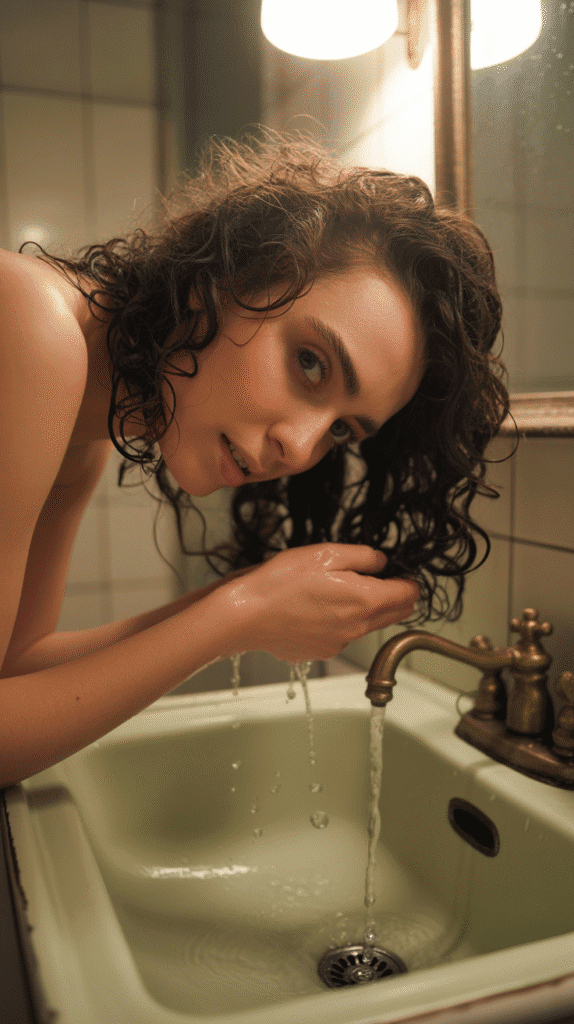
Proper preparation sets the foundation for a successful curly haircut and can mean the difference between a polished result and a choppy disaster.
The way you prepare your curls directly impacts how they’ll lay after cutting and how accurately you can assess length.
- Start with freshly washed hair using a sulfate-free shampoo that cleans without stripping your curls of essential moisture.
- Apply a generous amount of conditioner and detangle thoroughly with your fingers or a wide-tooth comb while the conditioner provides slip.
- Rinse with cool water to seal the hair cuticle and enhance your natural curl definition, which helps you see the true shape of each curl.
- Squeeze out excess water gently with a microfiber towel or cotton t-shirt—never rub, as this creates frizz and disrupts the curl pattern.
- Apply your regular styling products (curl cream, gel, or mousse) to damp hair so your curls form naturally and you can see their actual length.
- Allow your hair to air dry completely or use a diffuser if you’re short on time, ensuring curls are fully formed before cutting.
- Never cut curly hair while it’s soaking wet, as curls shrink significantly when dry and you’ll likely cut off more length than intended.
- If you prefer cutting on dry hair (the curly cut method), ensure your curls are fully defined, detangled, and styled in their natural state.
- Sit in good lighting and position yourself comfortably with both mirrors accessible before you begin the cutting process.
4. Sectioning Your Hair Properly
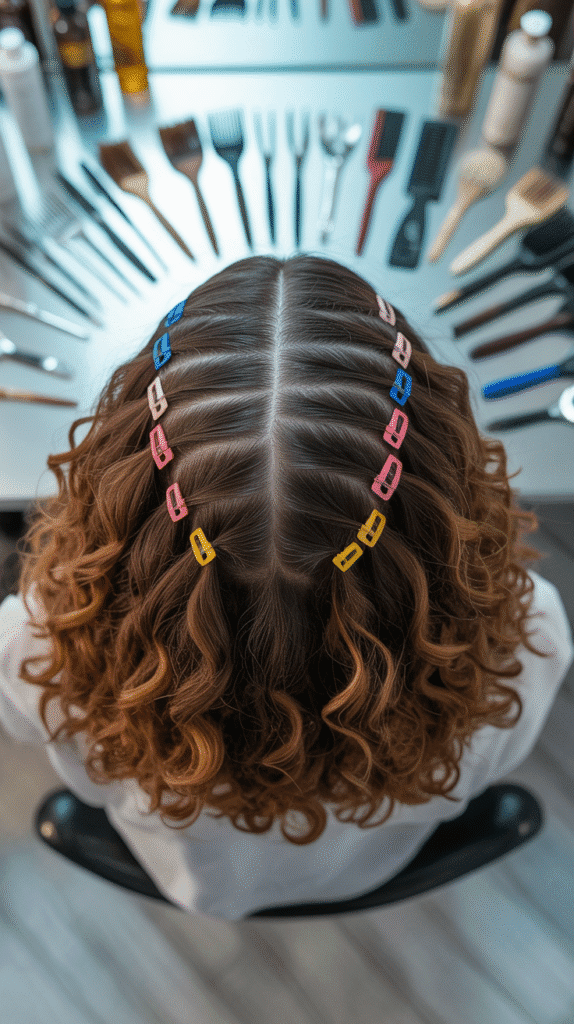
Strategic sectioning is the secret to achieving an even, balanced haircut and prevents you from becoming overwhelmed during the cutting process.
How you divide your hair determines your ability to maintain symmetry and control throughout the cut.
- Begin by dividing your hair into four main quadrants: left front, right front, left back, and right back, using your ears and the crown as reference points.
- Create a center part from your forehead to the nape of your neck, then a horizontal part from ear to ear across the crown.
- Secure each quadrant with a large sectioning clip, twisting the hair loosely to keep it out of your way without disturbing the curl pattern.
- Within each quadrant, you’ll create smaller subsections as you work, typically about 1-2 inches wide depending on your hair density.
- Always start with the back sections first since they’re hardest to see, then move to the sides, and finish with the front where you have the most visibility.
- Keep your sectioning clean and consistent—messy sections lead to uneven results and make it difficult to maintain symmetry between both sides.
- Use the natural part of your hair as a guide rather than fighting against it, as cutting with your hair’s natural direction creates more authentic results.
- If you have an undercut or specific style, section accordingly to isolate those areas from the rest of your hair for specialized treatment.
5. The Curl-by-Curl Cutting Technique
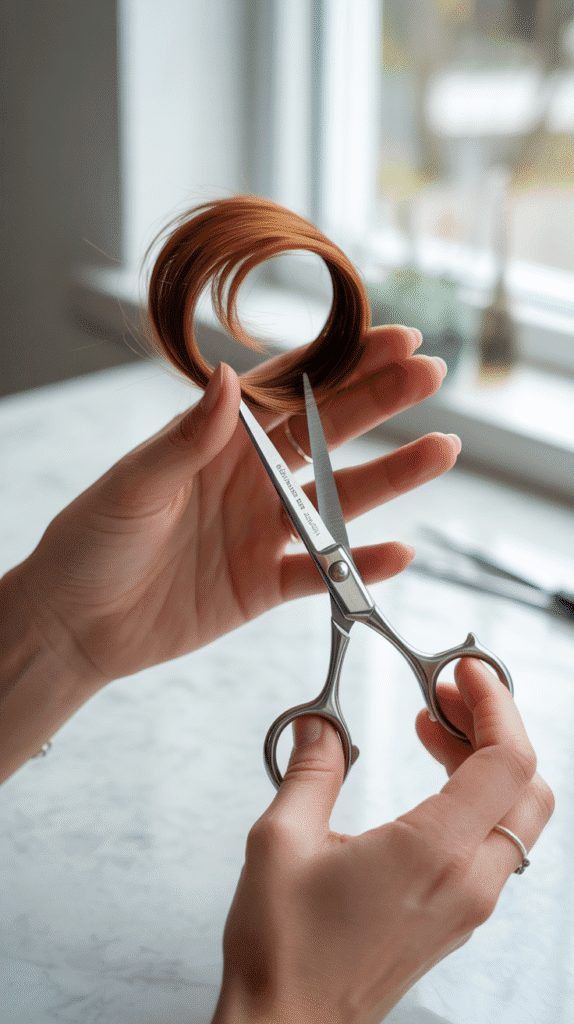
The curl-by-curl method is the gold standard for cutting curly hair at home because it works with your hair’s natural texture rather than against it.
This technique, also known as the DevaCut approach, ensures each curl is honored individually for a customized, natural-looking result.
- Select individual curls or small curl clumps (2-3 strands) and allow them to rest in their natural position without pulling or tension.
- Hold the curl gently between your fingers at the length where you want to cut, being mindful of shrinkage—cut conservatively at first.
- Cut each curl at a slight angle rather than straight across, which creates softer, more blended edges that move naturally with your other curls.
- Focus on cutting the curl at its widest point in the spiral, not when it’s stretched or pulled, to account for how it will sit when styled.
- Work systematically through each section, cutting every curl at approximately the same length relative to its natural fall.
- Step back frequently to assess your progress from a distance, checking for balance and symmetry rather than getting lost in individual curls.
- Remember that curls don’t need to be mathematically even—natural hair has organic variation, and slight differences create dimension and movement.
- If you encounter a particularly unruly curl that sticks out, cut it slightly shorter than its neighbors to encourage it to blend in.
- Be patient with this process—it’s time-consuming but produces the most natural, polished results for curly hair.
6. Creating Layers for Volume and Shape
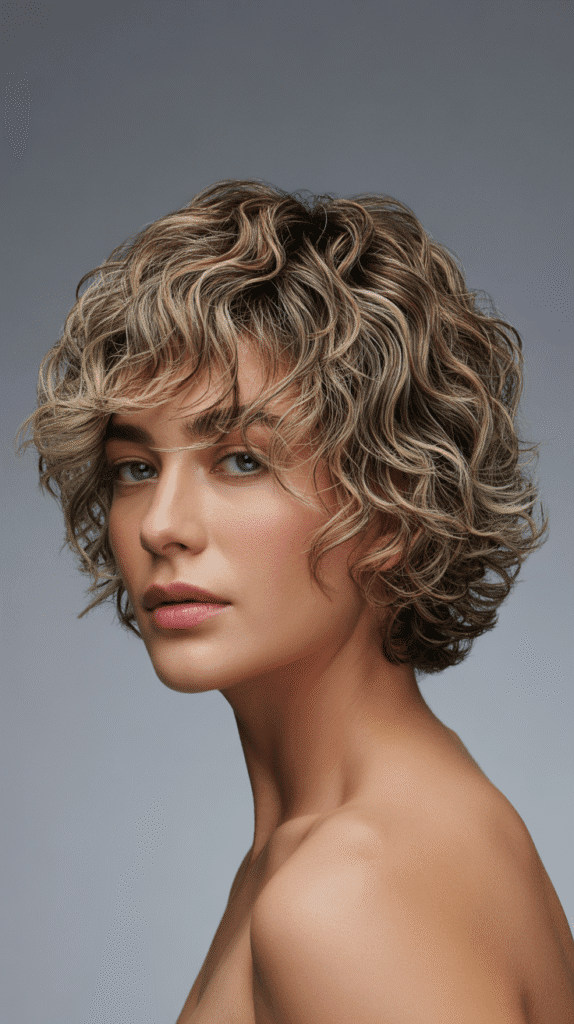
Layers add dimension, remove weight, and create movement in short curly hair, but they require careful planning to avoid a pyramid shape or losing too much volume.
Understanding where to place layers based on your face shape and curl pattern makes all the difference.
- Identify your face shape (oval, round, square, heart, or diamond) to determine which layering pattern will be most flattering for your features.
- For round faces, keep the shortest layers around the crown to create height, with slightly longer pieces around the face to add length.
- Square faces benefit from soft, wispy layers around the jawline that soften angular features and create a more feminine silhouette.
- Heart-shaped faces look best with volume at the chin level, so avoid cutting layers too short at the bottom and focus on removing weight from the top.
- Oval faces can handle almost any layering technique, so focus on what enhances your curl pattern and personal style preferences.
- Use the “twist and cut” method: twist small sections of curls gently and cut at an angle to create soft, internal layers without visible lines.
- Long layers (only 1-2 inches of difference between shortest and longest) work best for maintaining curl definition while adding movement.
- Avoid heavy layering if you have fine or thin curls, as this removes volume and can make your hair appear sparse.
- Check your layers by shaking your head and allowing curls to fall naturally—they should cascade with movement rather than sitting in distinct, separated levels.
- If you want face-framing layers, cut these pieces last when you can see how the rest of your hair has taken shape.
7. Dealing with Problem Areas and Fixing Mistakes
Even experienced stylists encounter challenges when cutting curly hair, so knowing how to address problem areas and correct mistakes is essential for DIY success.
Being prepared for common issues helps you stay calm and find solutions rather than panicking mid-cut.
- If one side appears longer than the other, identify matching reference curls on both sides and compare them in their natural state before making corrections.
- For curls that stick out awkwardly or won’t blend, try cutting them dry when they’re fully formed so you can see exactly how they’re misbehaving.
- When you’ve cut too short, resist the urge to keep cutting to “fix” it—instead, reshape the surrounding curls to blend the shorter piece.
- If your haircut looks boxy or pyramid-shaped, you’ve likely removed too much length from the bottom or not enough weight from the sides.
- Use point cutting (cutting into the ends vertically) to soften any harsh lines or blunt edges that make your cut look obvious.
- For areas that feel too bulky, use thinning shears sparingly on the interior hair, never on the surface layer where it would create frizz.
- If you notice a hole or gap in your curl pattern, you may have cut a section too short—blend it by carefully trimming neighboring curls to create gradation.
- Frizzy or stringy ends indicate you may have used dull scissors or cut the hair while too wet—these areas may need a careful recut with proper tools.
- Remember that curls need time to settle after cutting—wait 2-3 days and let your hair go through a full wash and style cycle before making additional corrections.
- If you’re truly unhappy with your DIY results, visiting a professional curl specialist can help correct mistakes without causing additional damage.
8. Styling and Maintaining Your New Cut
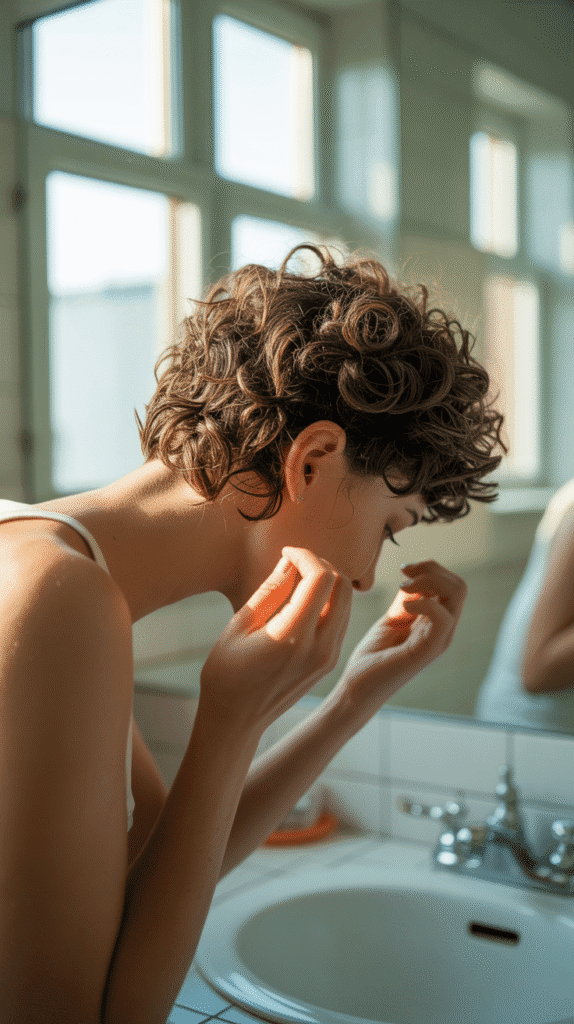
Once you’ve completed your cut, proper styling and maintenance ensure your new short curly hairstyle looks its best and grows out gracefully.
The right post-cut routine maximizes the results of your hard work and keeps your curls healthy between trims.
- After cutting, wash your hair again to remove all loose clippings that can cause itching and irritation throughout the day.
- Apply your styling products using the “praying hands” method or scrunching technique to encourage curl formation without creating frizz.
- Consider trying new products or techniques with your fresh cut, as shorter hair often needs different levels of hold or moisture than longer lengths.
- Use a diffuser on low heat and low speed to dry your curls, or air dry completely for the most natural texture and curl definition.
- Sleep on a silk or satin pillowcase to minimize friction and preserve your curl pattern overnight, reducing the need for daily restyling.
- Refresh your curls between wash days with a mixture of water and leave-in conditioner in a spray bottle, scrunching to reactivate products.
- Schedule regular trims every 6-8 weeks to maintain your short style’s shape and prevent split ends from traveling up the hair shaft.
- Deep condition weekly to keep your curls moisturized and elastic, which makes them more manageable for future trims.
- Avoid heat styling tools like flat irons or curling wands, as these can damage your curl pattern and make your cut look less polished.
- Take photos of your finished cut from all angles so you have a reference for your next DIY trim or to show a professional stylist what you achieved.
- Experiment with different styling techniques like finger coiling, brush styling, or shingling to discover what makes your new cut look its absolute best.
Conclusion
Learning How to Cut Short Curly Hair at Home – Easy DIY Tutorial empowers you to take control of your hair journey with confidence and skill.
Throughout this comprehensive guide, you’ve discovered how to identify your unique curl pattern, gathered the essential tools needed for professional results, and mastered preparation techniques that set the foundation for success.
You’ve learned the curl-by-curl cutting method that honors each individual spiral, discovered how to create flattering layers that add dimension without sacrificing volume, and gained practical strategies for addressing problem areas when they arise.
By following these detailed, step-by-step instructions, you can now maintain your short curly style between salon visits, save money on professional cuts, and develop a deeper understanding of what your hair needs to thrive.
Remember that cutting curly hair is as much an art as it is a skill, and each attempt will improve your technique and build your confidence.
Whether you’re maintaining your current style or experimenting with something new, the knowledge you’ve gained here provides a solid foundation for beautiful, healthy curls that make you feel confident and empowered.
Embrace your natural texture, trust the process, and enjoy the freedom that comes with knowing you can create salon-worthy results right in your own home.