
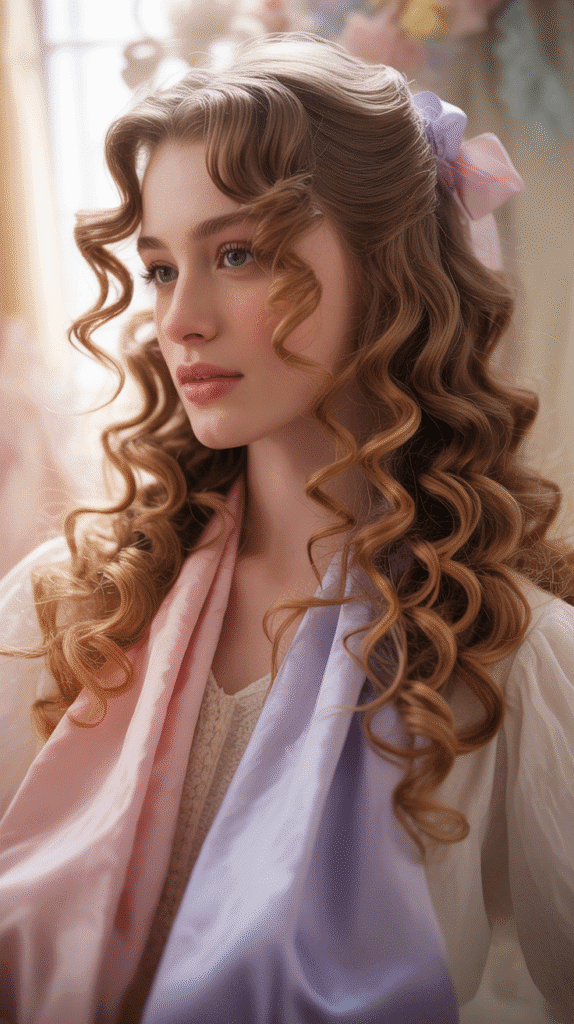
Have you ever looked in the mirror and wished you could transform your hair into something magical without spending hours in front of the vanity?
The world of whimsical hairstyles offers endless possibilities for expressing your creativity and personality through your locks.
Whether you’re heading to a casual brunch, a creative workspace, or simply want to add a touch of magic to your everyday look, these playful styles can elevate your appearance in mere minutes.
This comprehensive guide to 25 Easy Whimsical Hairstyles You Can Create in Minutes will walk you through enchanting braids, dreamy buns, fairy-tale twists, and fantasy-inspired looks that require minimal effort but deliver maximum impact.
Each style has been carefully selected for its simplicity, versatility, and ability to make you feel like you’ve stepped out of a storybook.
From beginners to seasoned hair enthusiasts, everyone will find styles that match their skill level and personal aesthetic.
Get ready to discover techniques that combine practicality with imagination, turning ordinary hair days into extraordinary ones.
1. Cloud Nine Space Buns
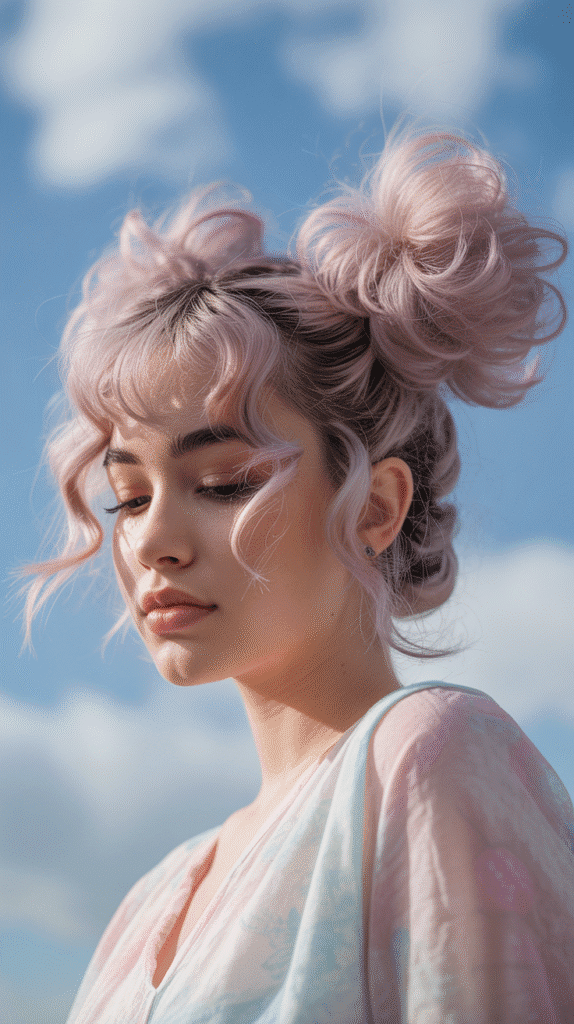
Space buns have evolved from their retro roots into a whimsical staple that channels both playfulness and modern edge.
This ethereal variation creates soft, cloud-like buns that sit atop your head like fluffy cumulus formations, perfect for anyone seeking a light-hearted yet stylish look.
How to Create:
- Part your hair down the middle from forehead to nape, creating two equal sections
- Gather each section into a high ponytail on either side of your head, positioning them slightly forward
- Twist each ponytail loosely and wrap it around the base to form rounded buns
- Secure with bobby pins while gently pulling at the edges to create a soft, voluminous texture
- Pull out small wispy pieces around your face for an effortless, dreamy finish
- Finish with a light mist of texturizing spray to maintain the airy quality
Best For:
- Casual daytime events and weekend activities
- Music festivals and creative gatherings
- Individuals with medium to long hair length
- Those seeking a youthful, playful aesthetic
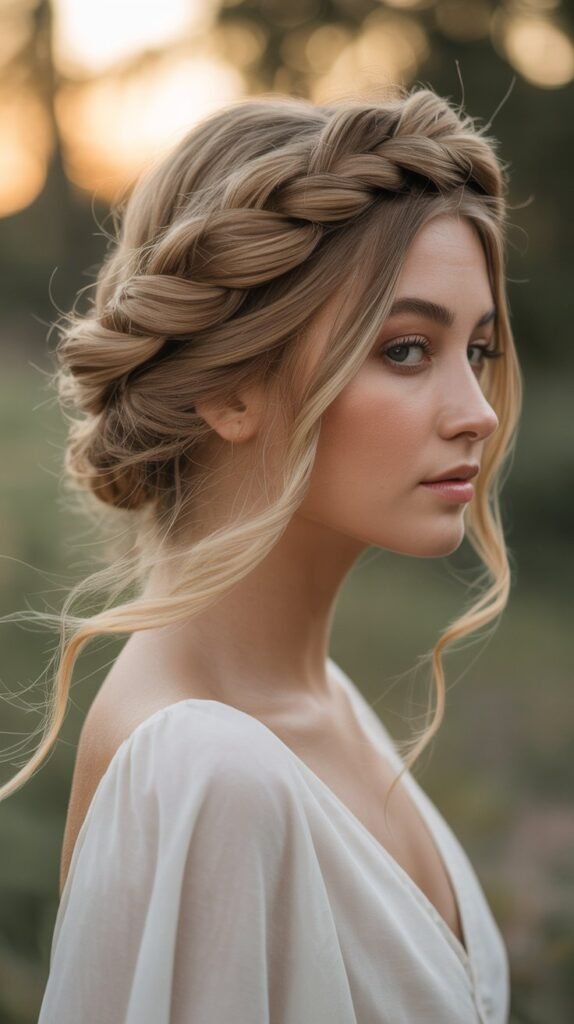
2. Mermaid Crown Braid
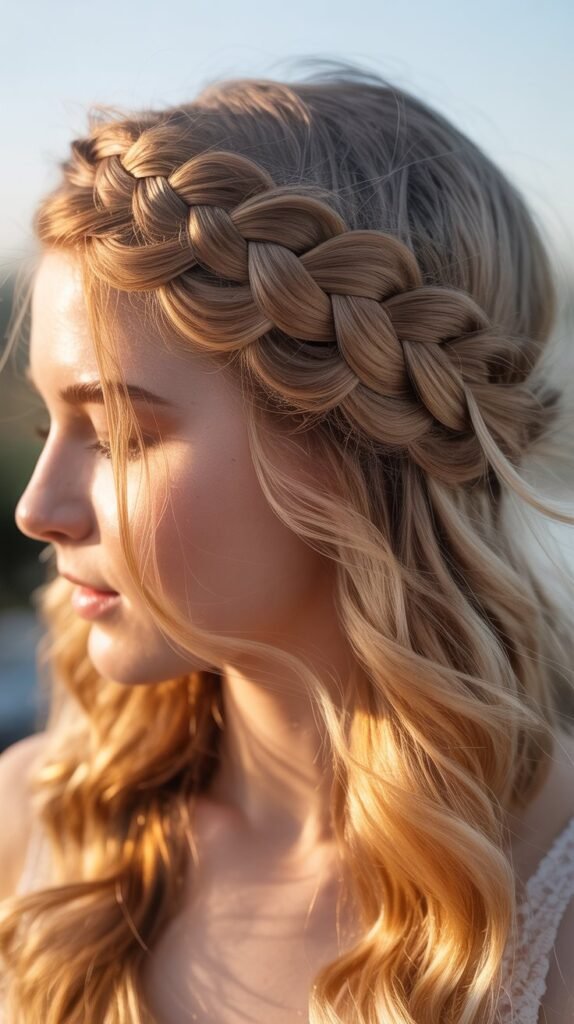
The mermaid crown braid wraps around your head like an oceanic halo, evoking images of underwater kingdoms and mythical sea creatures.
This enchanting style combines the elegance of a crown braid with the romantic, undone texture that makes it feel effortlessly whimsical.
How to Create:
- Begin with slightly textured or day-old hair for better grip and volume
- Part your hair on one side and start a Dutch braid from the deeper side of the part
- Braid along your hairline, incorporating hair as you move around the crown
- Continue the braid around to the opposite side, keeping it loose and relaxed
- Secure the end with a clear elastic and tuck it beneath the braid near your ear
- Gently pancake the braid by pulling at the edges to create width and dimension
- Leave the remaining hair loose in soft waves or curls for that mermaid effect
3. Fairy Tale Half-Up Twist
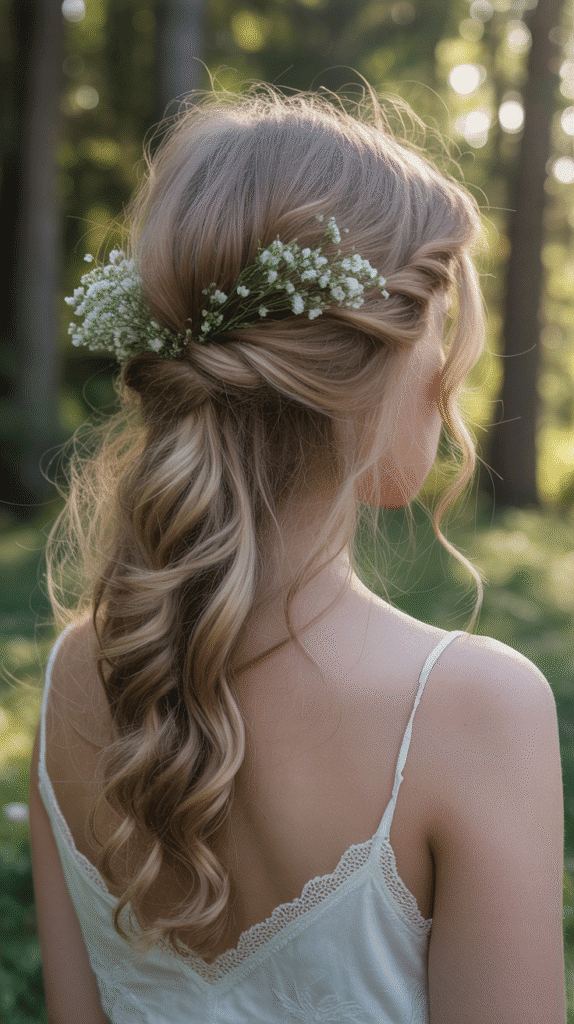
This delicate half-up style captures the essence of woodland fairies and enchanted forests through simple twisting techniques.
The beauty lies in its romantic, unstructured appearance that looks intricate but comes together in minutes.
How to Create:
- Take a small section of hair from one side of your head, near your temple
- Twist the section loosely as you move backward toward the crown
- Secure temporarily with a clip and repeat on the opposite side
- Cross the two twisted sections at the back of your head and secure with bobby pins
- Gently pull at the twists to loosen them and create texture
- Allow the remaining hair to flow naturally, adding soft curls if desired
Enhancement Options:
- Weave tiny flowers or decorative pins into the twists
- Add ribbon by twisting it alongside your hair sections
- Create multiple smaller twists for a more intricate appearance
- Incorporate small braids within the twisted sections
4. Bubble Ponytail Magic
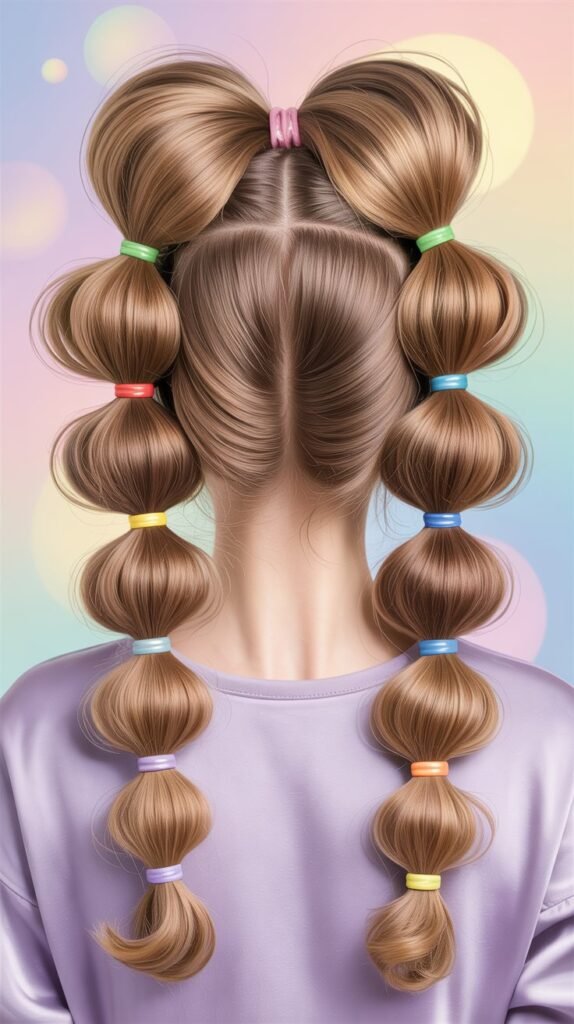
The bubble ponytail transforms an ordinary ponytail into a whimsical statement through strategic elastic placement and volumizing techniques.
This modern, playful style adds dimension and visual interest while remaining incredibly simple to execute.
How to Create:
- Gather your hair into a high or mid-level ponytail and secure with an elastic
- Add another elastic two to three inches down from the first one
- Gently pull the hair between elastics outward to create a rounded bubble effect
- Continue adding elastics at regular intervals down the length of the ponytail
- Create bubbles by pulling each section outward for volume
- Adjust each bubble to ensure uniformity or intentional variation
Customization Ideas:
- Use colorful elastics that match your outfit or mood
- Vary the bubble sizes for an asymmetrical, artistic look
- Add small accessories between bubbles for extra whimsy
- Create side bubble ponytails for a different perspective
5. Twisted Unicorn Bun
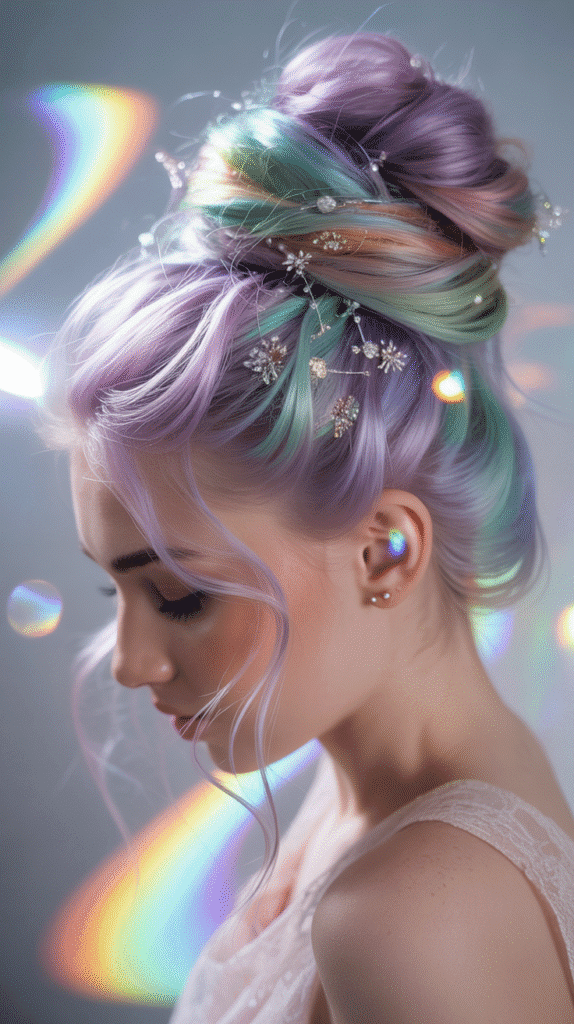
Channel mythical magic with this elevated bun that sits high on the crown like a unicorn’s horn.
The twisted rope technique creates texture and dimension while the high placement adds whimsical height and drama.
How to Create:
- Flip your head upside down and gather all hair toward the crown
- Secure a very high ponytail at the top center of your head
- Divide the ponytail into two equal sections
- Twist each section individually in the same direction until tight
- Wrap the two twisted sections around each other in opposite directions
- Coil the rope-twisted hair around the base to form a bun
- Secure with bobby pins and gently loosen for a softer appearance
Pro Tips:
- Apply texturizing spray before twisting for better hold
- Use a sock bun underneath for added volume and support
- Secure with a decorative hair tie that resembles a unicorn horn
- Add holographic or iridescent accessories for magical sparkle
6. Braided Flower Crown
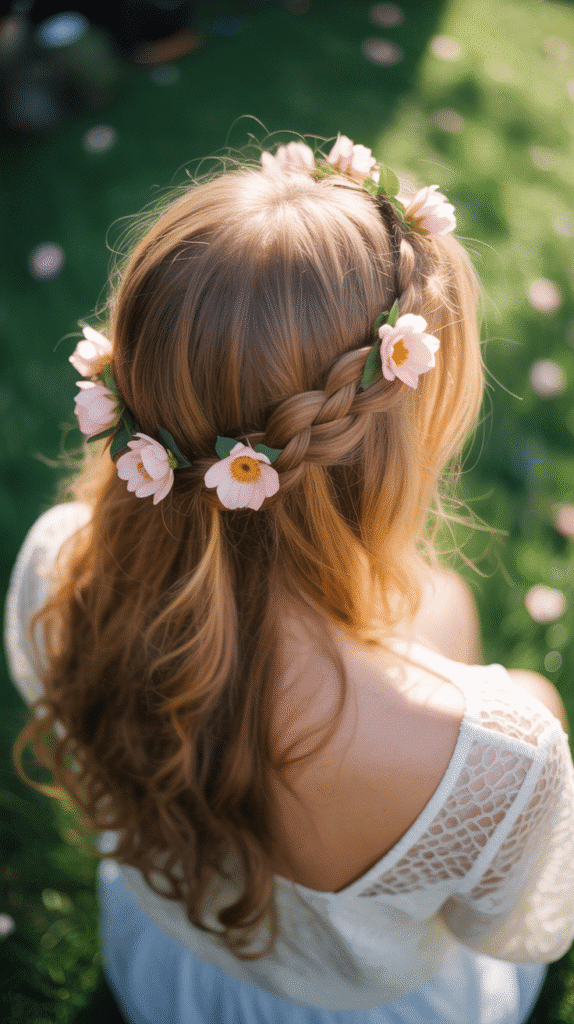
Transform your braids into wearable garden art with this flower crown technique that doesn’t require actual flowers.
The braid itself becomes the decorative element when styled correctly around the crown of your head.
How to Create:
- Create two regular three-strand braids starting from behind each ear
- Keep the braids loose and textured rather than tight and sleek
- Bring the first braid across the top of your head like a headband
- Secure with bobby pins, tucking the end behind your opposite ear
- Bring the second braid across, slightly below or above the first
- Tuck and secure the second braid, hiding all elastic ends
- Pancake both braids generously to create petal-like loops
Seasonal Adaptations:
- Spring: Add fresh flowers or floral pins throughout
- Summer: Keep it simple with just the braids for heat management
- Fall: Incorporate small leaves or warm-toned accessories
- Winter: Weave in ribbon or use jeweled pins for sparkle
7. Whimsical Waterfall Braid

The waterfall braid creates the illusion of hair cascading through your braid like a gentle stream, offering movement and visual intrigue.
This eye-catching style appears complex but follows a simple repetitive pattern once mastered.
How to Create:
- Begin with a small section at your temple and divide into three strands
- Start a regular braid but drop the bottom strand after crossing it over the middle
- Pick up a new section from the top to replace the dropped strand
- Continue this pattern of braiding and dropping strands as you move around your head
- The dropped strands create the “waterfall” effect flowing through the braid
- Secure the braid behind your ear or continue to the opposite side
- Curl the waterfall strands for enhanced texture and dimension
Difficulty Level:
- Beginner-friendly once the pattern is understood
- Practice on a friend first for easier visualization
- Watch tutorial videos for hand positioning guidance
- Expect improvement after 2-3 attempts
8. Dreamy Messy Fishtail
The messy fishtail braid embraces imperfection and creates a lived-in, bohemian look that’s perfect for whimsical styling.
Unlike traditional tight fishtails, this version celebrates texture, volume, and an undone aesthetic.
How to Create:
- Start with textured or second-day hair for optimal grip
- Divide your hair into two large sections without using elastics
- Take a small piece from the outer edge of the left section
- Cross it over to join the right section
- Repeat from the right side, crossing small pieces alternately
- Keep the sections loose and allow pieces to slip naturally
- Secure at the end and pancake aggressively to create width
- Pull out face-framing pieces and allow flyaways to remain
Texture Enhancement:
- Apply sea salt spray before braiding
- Braid slightly damp hair and allow it to air dry
- Use dry shampoo at the roots for added grip and volume
- Finish with a flexible hold spray to maintain the messy aesthetic
9. Star-Crossed Top Knot
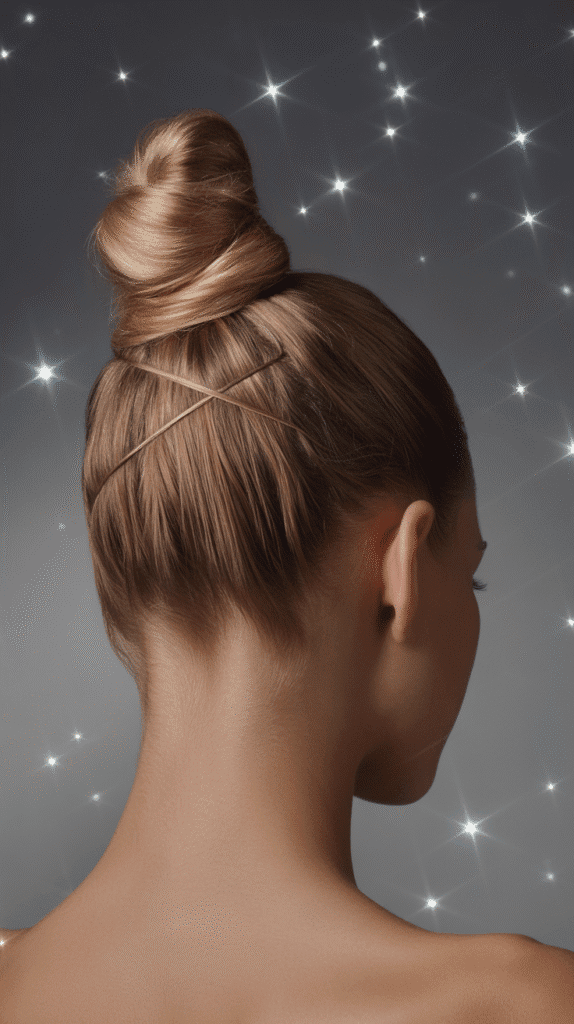
This elevated top knot sits at the crown like a celestial body, combining height with artistic wrapping techniques.
The star-crossed element comes from the crisscrossed sections that create visual interest around the base.
How to Create:
- Gather hair into a very high ponytail at the crown
- Divide the ponytail into two sections
- Wrap one section clockwise around the base while keeping it flat
- Wrap the second section counterclockwise, crossing over the first
- Continue alternating and crossing until all hair is wrapped
- Secure with bobby pins at strategic crossing points
- Pull gently at the bun to create dimension and slight messiness
Ideal For:
- Professional settings with creative freedom
- Evening events and dinner parties
- Keeping hair completely off the neck in warm weather
- Showcasing statement earrings or necklaces
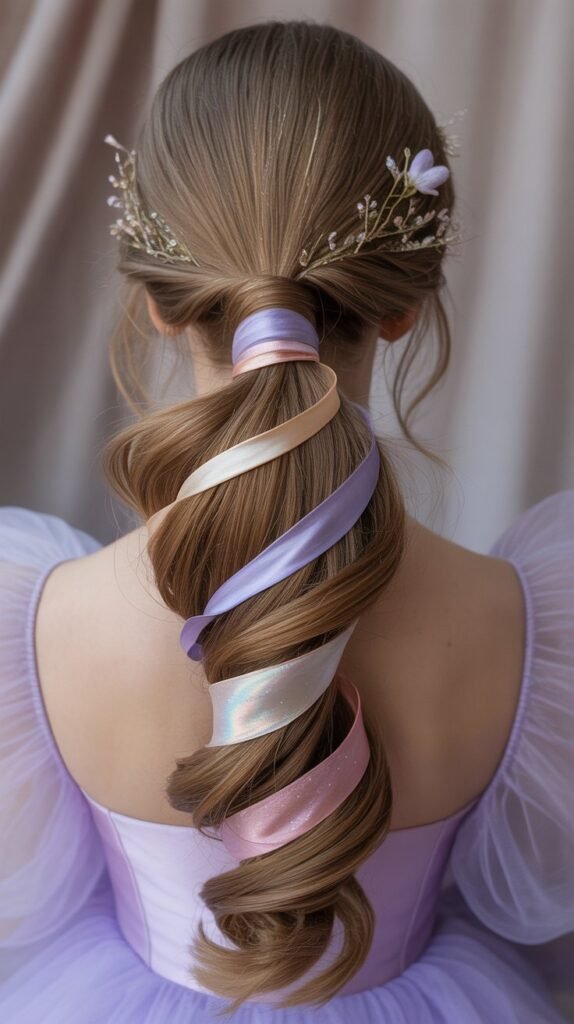
10. Rainbow Ribbon Braids
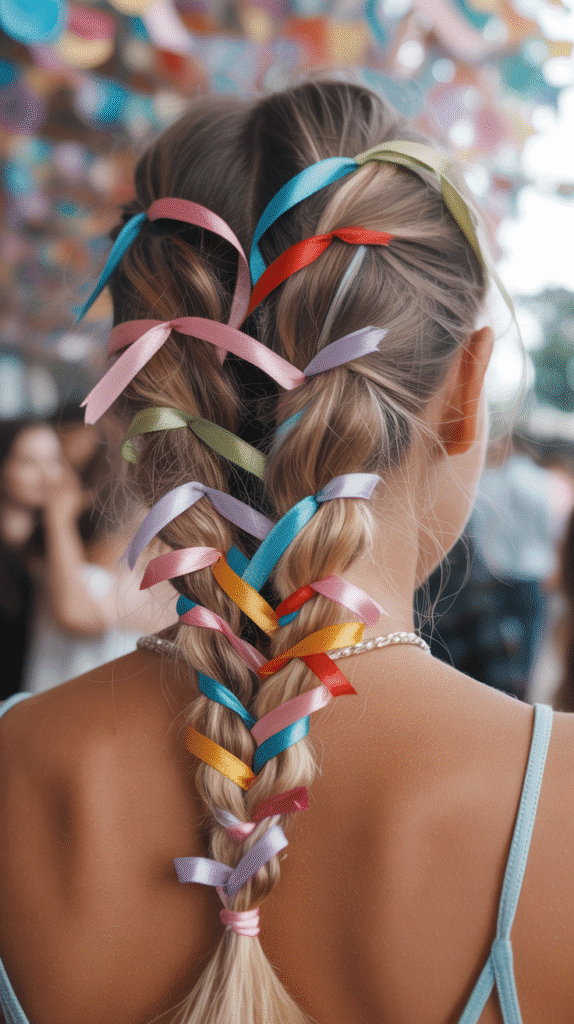
Incorporate colorful ribbons into simple braids to create a festival-ready, whimsical look that’s customizable to any color palette.
This technique adds dimension and playfulness without permanent color commitment.
How to Create:
- Select 2-4 thin ribbons in complementary or contrasting colors
- Tie the ribbons around the base of a ponytail, leaving long tails
- Divide hair and ribbons into three sections, distributing ribbons evenly
- Braid normally, treating the ribbons as part of the hair sections
- The ribbons will weave through the braid, creating colorful accents
- Secure at the end with an elastic, allowing ribbon tails to show
- Tie small bows with excess ribbon or let them flow freely
11. Ethereal Low Twisted Chignon
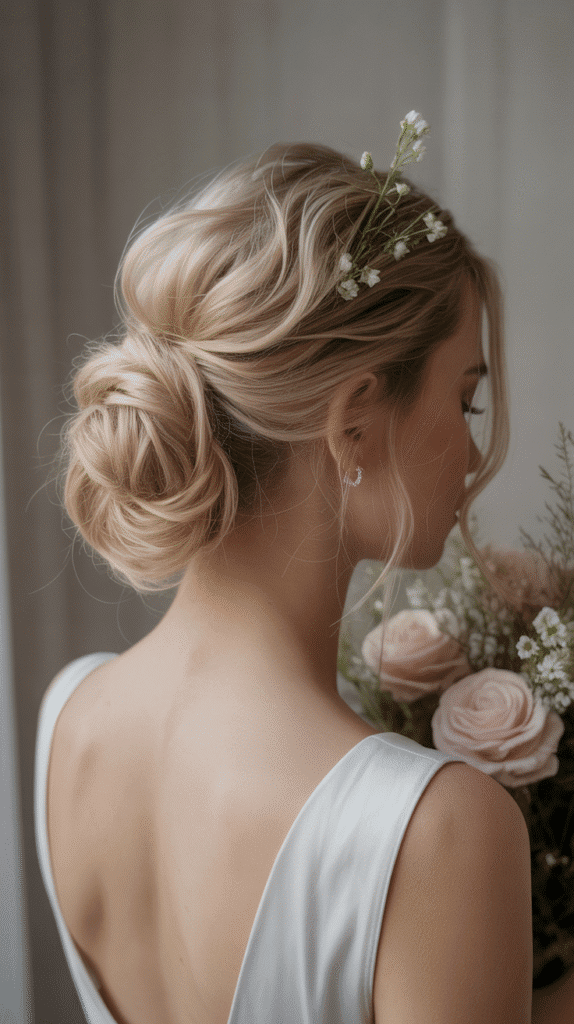
This sophisticated yet whimsical low bun combines twisted sections and loose pinning for an effortless, romantic appearance.
The ethereal quality comes from intentional messiness and soft, face-framing pieces.
How to Create:
- Part hair down the middle or on one side based on preference
- Take a section from one side and twist loosely toward the back
- Secure at the nape with bobby pins
- Repeat with the opposite side, crossing over or alongside the first twist
- Gather remaining loose hair and twist it loosely
- Wrap the twisted hair into a low, loose bun at the nape
- Pin strategically while allowing pieces to escape naturally
- Pull at the twists and bun to create soft, romantic volume
Occasion Suitability:
- Weddings as bride, bridesmaid, or guest
- Romantic date nights and special dinners
- Professional events with creative dress codes
- Garden parties and outdoor celebrations
12. Pixie-Inspired Accessory Crown
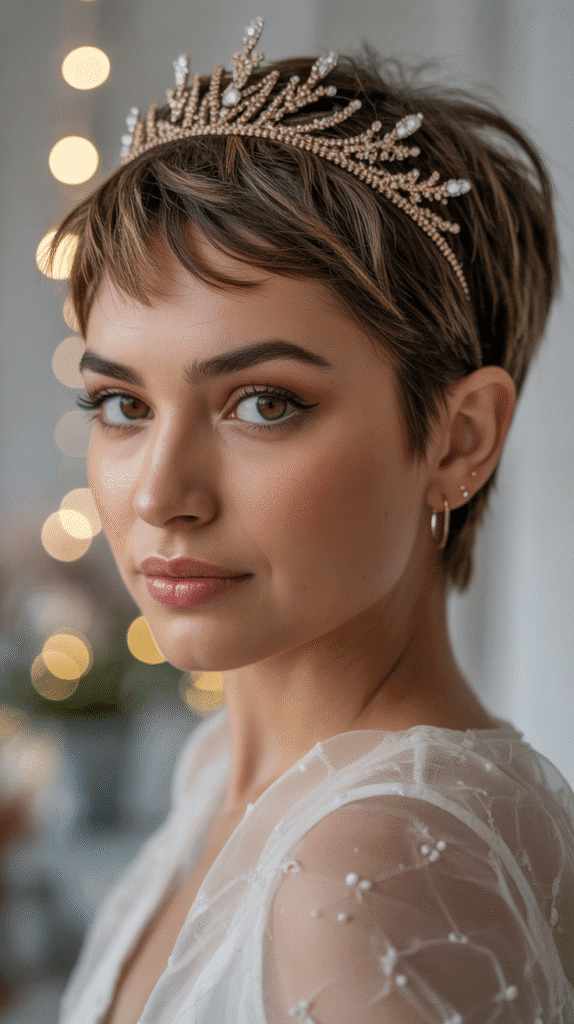
For those with shorter hair, creating whimsy comes through strategic accessory placement that mimics the effect of elaborate hairstyles.
This approach turns accessories into the main event while enhancing your natural pixie texture.
How to Create:
- Start with textured, piece-y short hair using styling products
- Select a decorative headband, jeweled clips, or floral accessories
- Position a headband slightly back from your hairline for crown effect
- Add small decorative clips throughout the crown area in artistic placement
- Tease or finger-comb sections for added volume and texture
- Apply lightweight pomade to create piece-y definition
- Allow your natural hair texture to complement the accessories
Accessory Combinations:
- Delicate chain headpieces with hanging crystals
- Fresh or faux flower clips scattered artistically
- Jeweled bobby pins in geometric patterns
- Thin metallic headbands layered at different angles
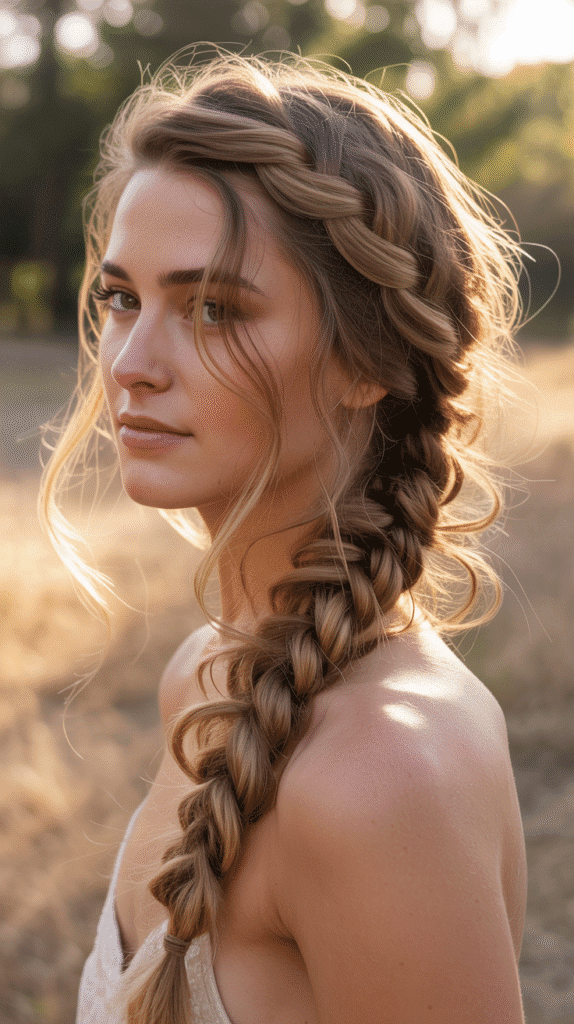
13. Bohemian Rope Braid Ponytail
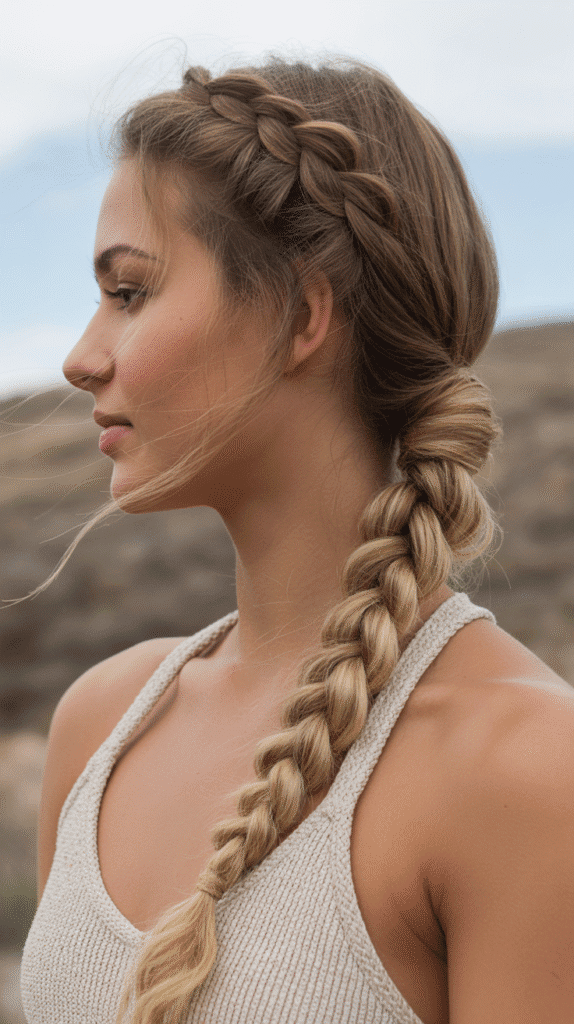
The rope braid offers a unique texture alternative to traditional braiding techniques, creating a twisted, cable-like appearance.
When combined with a ponytail, it delivers both practicality and bohemian charm.
How to Create:
- Gather hair into a ponytail at your desired height
- Secure with a strong elastic that won’t slip
- Divide the ponytail into two equal sections
- Twist the right section clockwise until it begins to coil on itself
- Hold the twisted section firmly to prevent unraveling
- Twist the left section clockwise in the same direction
- Wrap the two twisted sections around each other counterclockwise
- The opposite wrapping direction creates the rope effect
- Secure at the end and gently pull to loosen slightly
Length Requirements:
- Works best with hair shoulder-length or longer
- Shorter hair may need to be secured in sections
- Extensions can be added for dramatic length
- The technique itself adds minimal length but maximum texture
14. Celestial Constellation Pins
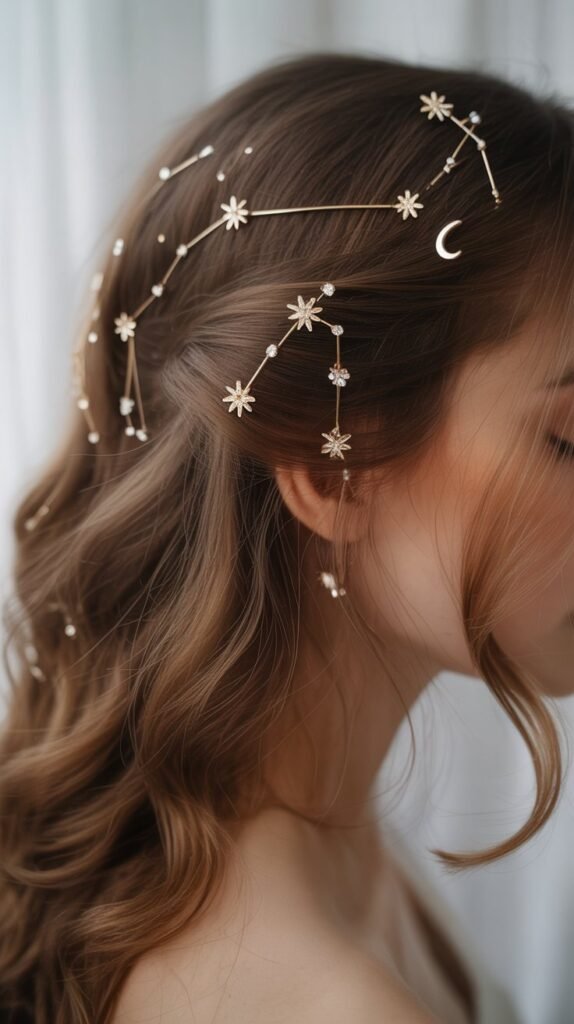
Transform a simple hairstyle into a whimsical masterpiece through strategic pin placement that mimics star patterns and constellations.
This approach works with almost any base style, adding sparkle and personalization.
How to Create:
- Choose your base hairstyle (loose waves, bun, braid, or sleek style)
- Select decorative pins, bobby pins with pearl or star ends, or jeweled clips
- Research your favorite constellation pattern or create an abstract design
- Plan your pin placement before securing them permanently
- Position pins to mimic constellation connections across your hairstyle
- Use pins of varying sizes to represent different star magnitudes
- Ensure pins are functional as well as decorative for hold
Popular Constellation Choices:
- Orion’s Belt: Three pins in a diagonal line
- Big Dipper: Seven pins in the classic dipper shape
- Cassiopeia: Five pins in a “W” pattern
- Custom abstract patterns for personal meaning
15. Whipped Cream Twist Bun
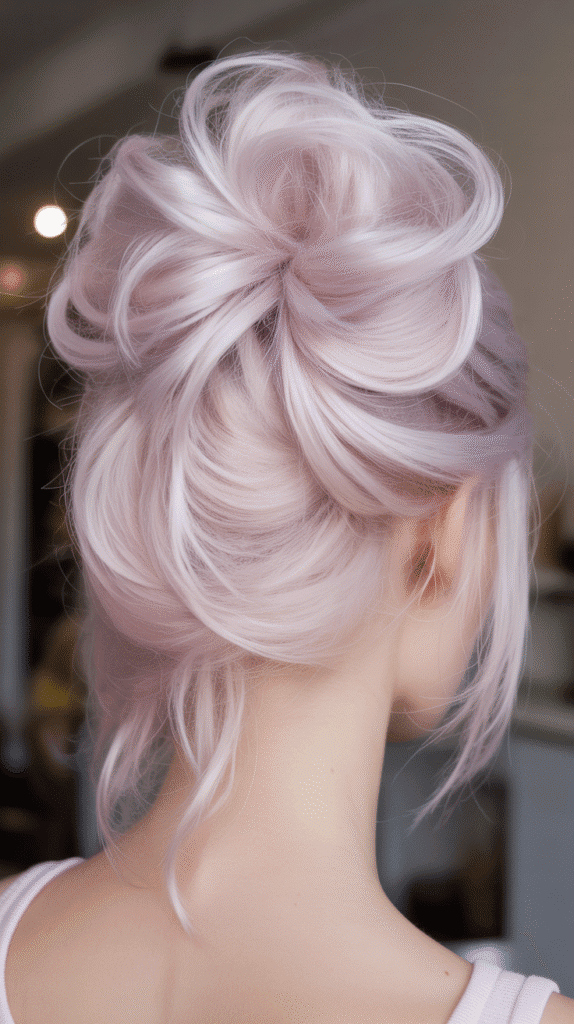
This voluminous, cloud-like bun resembles swirled whipped cream through strategic twisting and pinning techniques.
The exaggerated volume and soft texture create a dreamy, dessert-inspired aesthetic.
How to Create:
- Tease hair at the crown and throughout for maximum volume
- Gather into a high ponytail, allowing it to remain somewhat loose
- Divide the ponytail into 3-4 sections
- Twist each section individually while keeping them fluffy rather than tight
- Wrap the first twisted section around the base loosely
- Layer additional twisted sections, pinning as you go
- Arrange sections to create swirled, dimensional layers
- Pull gently at the bun to enhance the soft, whipped texture
- Finish with light-hold hairspray to maintain volume
Volume Boosters:
- Use volumizing mousse on damp hair before drying
- Tease with a fine-tooth comb at the roots
- Try velcro rollers at the crown before styling
- Apply dry texture spray throughout for grip and lift
16. Forest Nymph Loose Braid
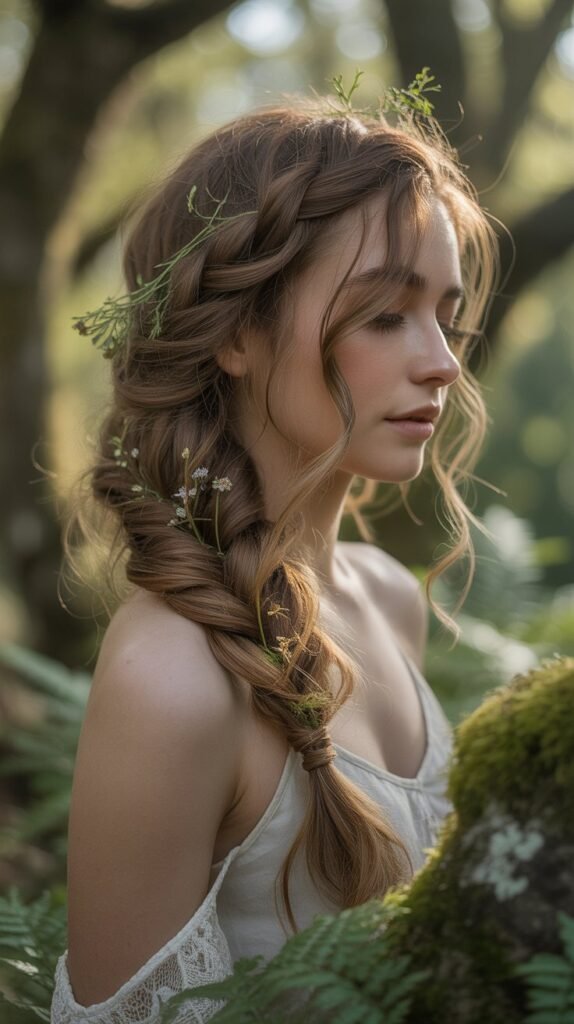
This ultra-loose, deconstructed braid appears almost unintentional, as if you’ve just emerged from an enchanted forest.
The key is creating strategic messiness while maintaining a cohesive shape that channels woodland magic.
How to Create:
- Apply texturizing spray to dry hair for grip
- Create a very loose side braid starting behind one ear
- Braid loosely with irregular tension for varied texture
- Secure with a nearly invisible elastic at the end
- Pancake the braid extensively, pulling entire sections outward
- Allow pieces to fall out naturally around your face and neck
- Secure any strategic pieces with hidden bobby pins if needed
- The final look should appear barely held together
Natural Enhancements:
- Weave small twigs or dried flowers for authentic forest aesthetic
- Add moss-colored ribbon sparingly
- Incorporate small leaves during autumn
- Keep accessories minimal and natural-looking
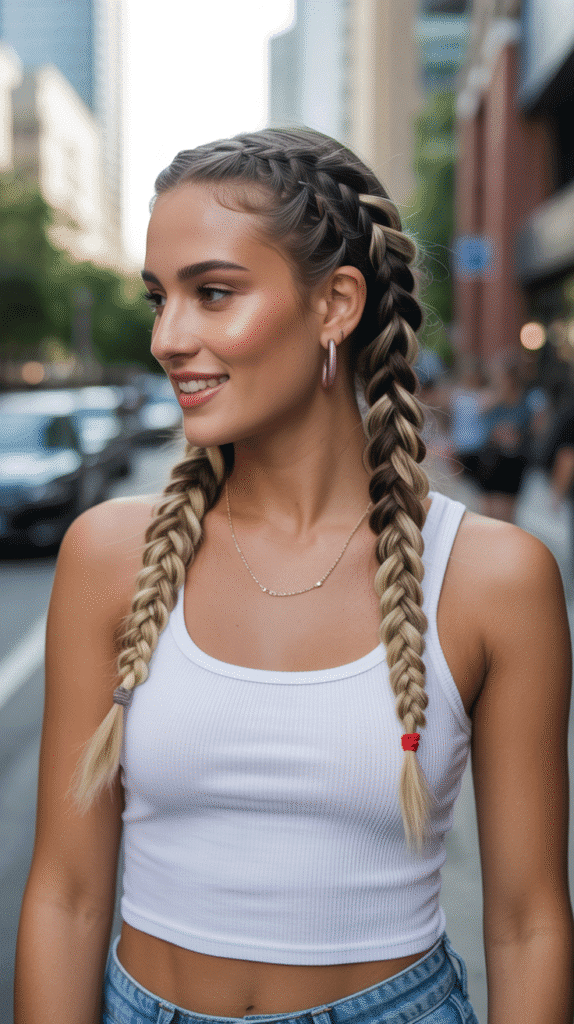
17. Double Dutch Delight
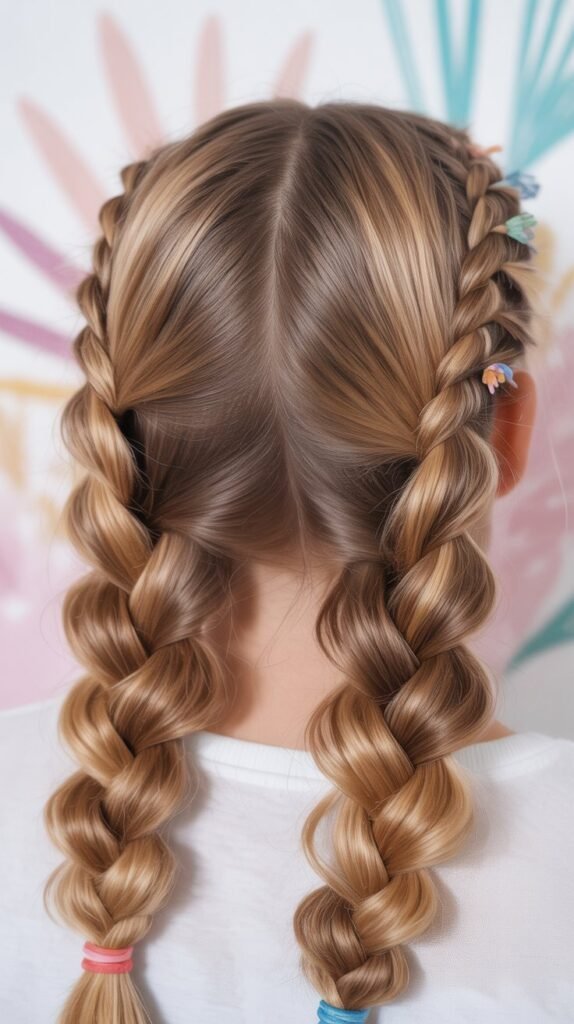
Double Dutch braids offer a sporty-meets-whimsical look that’s both practical and playful.
The symmetry and texture create visual interest while keeping hair completely secured and manageable.
How to Create:
- Part hair straight down the middle from forehead to nape
- Clip one side away while working on the other
- Begin a Dutch braid (reverse French braid) at the hairline
- Braid by crossing sections under rather than over the middle strand
- Continue adding hair from both sides as you braid down
- Keep tension even but not overly tight for comfort
- Secure at the nape or continue to the ends
- Repeat the process on the opposite side
- Pancake both braids equally for symmetrical volume
Activity Suitability:
- Exercise and sports activities
- Theme park and amusement park visits
- Traveling and long flights
- Active outdoor adventures
- School or work for long, manageable days
18. Storybook Ringlet Half-Up
Embrace vintage fairytale aesthetics with bouncy ringlets styled into a romantic half-up configuration.
This style channels classic storybook illustrations and animated princess aesthetics through careful curling and strategic pinning.
How to Create:
- Curl hair in small sections using a 1-inch curling iron or wand
- Wrap each section around the barrel and hold for 8-10 seconds
- Allow curls to cool completely in your hand before releasing
- Once all hair is curled, gently separate ringlets with fingers
- Take small sections from the crown and sides
- Twist or braid these sections loosely
- Secure at the back of the head with decorative pins or clips
- Leave the ringlets flowing freely below the half-up section
- Apply light hairspray to maintain curl definition without stiffness
19. Twisted Halo Heaven
The twisted halo creates an angelic frame around your face through simple twisting techniques that require no braiding skills.
This accessible style delivers maximum impact with minimal effort and works beautifully on various hair types.
How to Create:
- Create a deep side part on either side of your head
- Take a 2-inch section from the front on the deeper side of the part
- Begin twisting the section backward while gradually adding more hair
- Continue the twist along your hairline, moving toward the opposite ear
- Pin temporarily and repeat from the opposite side if desired
- Secure both twisted sections at the back with bobby pins
- Cross the twists over each other or pin side by side
- Allow remaining hair to hang loose or style as preferred
- Pull gently at the twists to create soft, romantic texture
Styling Variations:
- Single halo twist for simpler, faster styling
- Double halo with two parallel twists
- Twisted halo with bun for formal occasions
- Loose waves or curls for the non-twisted portion
20. Playful Pigtail Braids
Adult pigtail braids transcend childhood associations when styled with intentional texture and modern placement.
This whimsical look embraces youthfulness while maintaining sophisticated styling elements through technique and finishing.
How to Create:
- Part hair down the center, creating two equal sections
- Position ponytails slightly lower than childhood pigtails for adult sophistication
- Secure each side with elastics at mid-ear level or slightly below
- Braid each ponytail using your preferred technique (three-strand, fishtail, rope)
- Keep braids slightly loose rather than tight
- Secure ends with small elastics or decorative ties
- Pancake braids for added volume and modern texture
- Pull out a few face-framing pieces for softness
Modern Updates:
- Position pigtails asymmetrically at different heights
- Mix braid types (one regular, one fishtail)
- Wrap sections of hair around elastics to hide them
- Add colorful elastics or ties intentionally as accessories
21. Moonlight Messy Bun
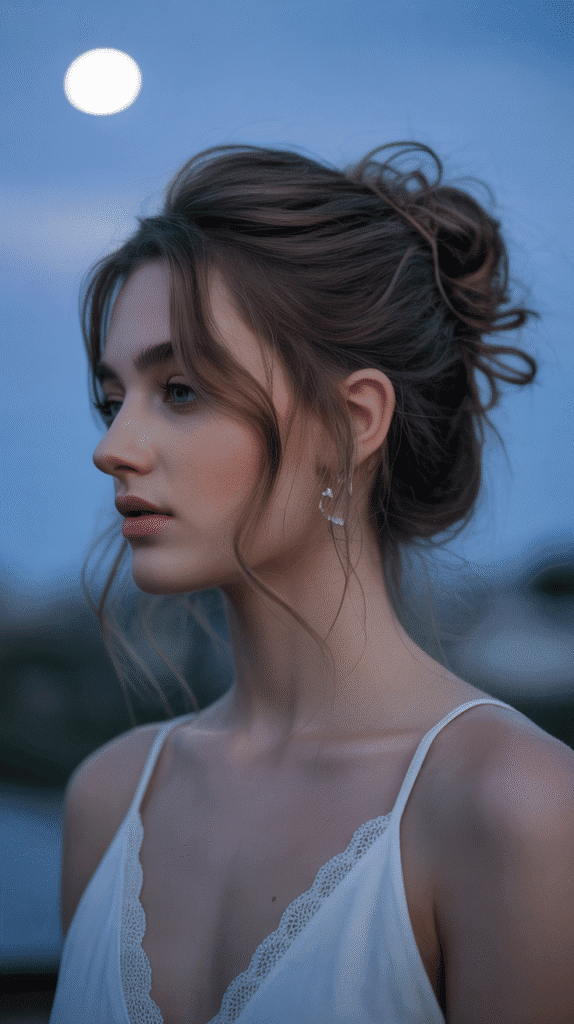
This intentionally imperfect bun captures effortless elegance through strategic messiness and soft, escaped tendrils.
The moonlight reference comes from its dreamy, romantic quality that works beautifully for both day and evening.
How to Create:
- Flip hair upside down and gather loosely at desired height
- Secure with elastic but don’t pull hair completely through on final wrap
- This creates a loop with ends hanging
- Wrap the hanging ends around the base messily
- Pin sections randomly rather than with precise placement
- Pull pieces out intentionally around face and nape
- Allow small sections to fall naturally throughout
- Don’t try to perfect it—embrace the undone aesthetic
Quick Timing:
- Achievable in literally 60 seconds with practice
- Perfect for oversleeping or last-minute preparations
- Works best on second or third-day hair
- Can be dressed up or down with accessories
22. Vintage Victory Rolls
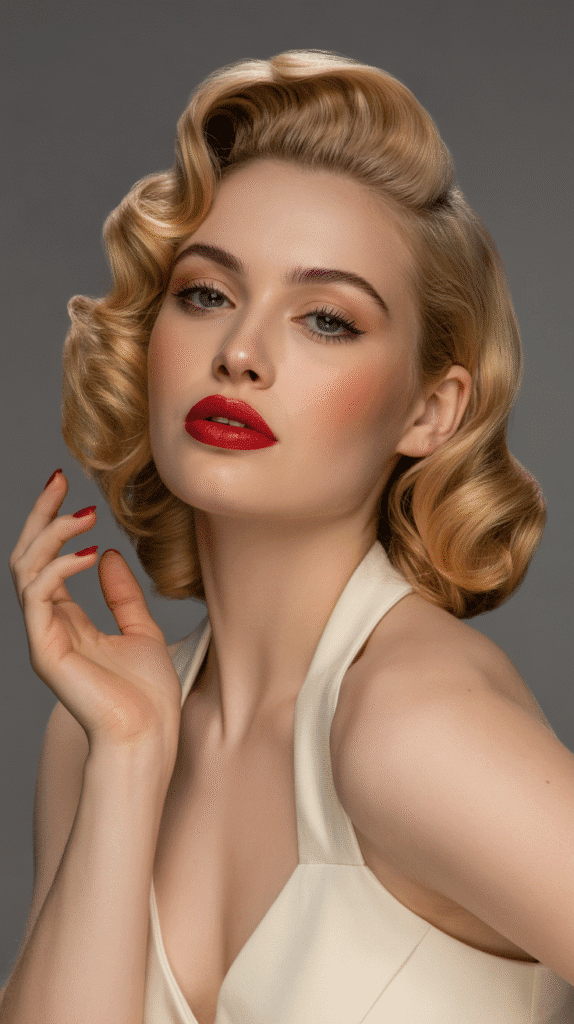
Channel 1940s glamour with modern, whimsical victory rolls that create sculptural volume at the hairline.
While associated with vintage aesthetics, these rolls deliver dramatic, playful impact that feels fresh and artistic when styled with contemporary elements.
How to Create:
- Section off the front portion of hair on both sides of a middle part
- Leave the back section down or secure it temporarily
- Take one front section and backcomb at the roots for volume
- Roll the section backward toward the crown, creating a spiral shape
- Secure the roll with bobby pins inserted from multiple angles
- Repeat on the opposite side, ensuring symmetrical height
- Smooth the outer surface of each roll while maintaining volume underneath
- Style the remaining hair as desired (curled, straight, or pinned)
Size Variations:
- Petite rolls: 1-2 inches wide for subtle vintage touch
- Classic rolls: 3-4 inches wide for authentic 1940s appearance
- Dramatic rolls: 5+ inches wide for maximum impact and modern twist
23. Enchanted Wrapped Ponytail
Elevate a basic ponytail by wrapping sections of your own hair around the elastic, creating a polished, elongated appearance.
This technique adds sophistication and whimsy through simple concealment and strategic sectioning.
How to Create:
- Create a ponytail at your desired height and secure with elastic
- Take a small section (about 1 inch) from the underside of the ponytail
- Wrap this section tightly around the elastic base
- Continue wrapping until the elastic is completely concealed
- Secure the wrapped section underneath with a bobby pin
- Smooth any flyaways around the wrapped section
- Add texture to the ponytail length with curls, waves, or braids
- Optional: Wrap multiple sections at intervals down the ponytail for added detail
Professional Polish:
- Works beautifully for business and formal settings
- Instantly elevates gym or casual ponytails
- Takes under 30 seconds once mastered
- Requires no special accessories beyond standard elastics and pins
24. Whimsical Wavy Lob
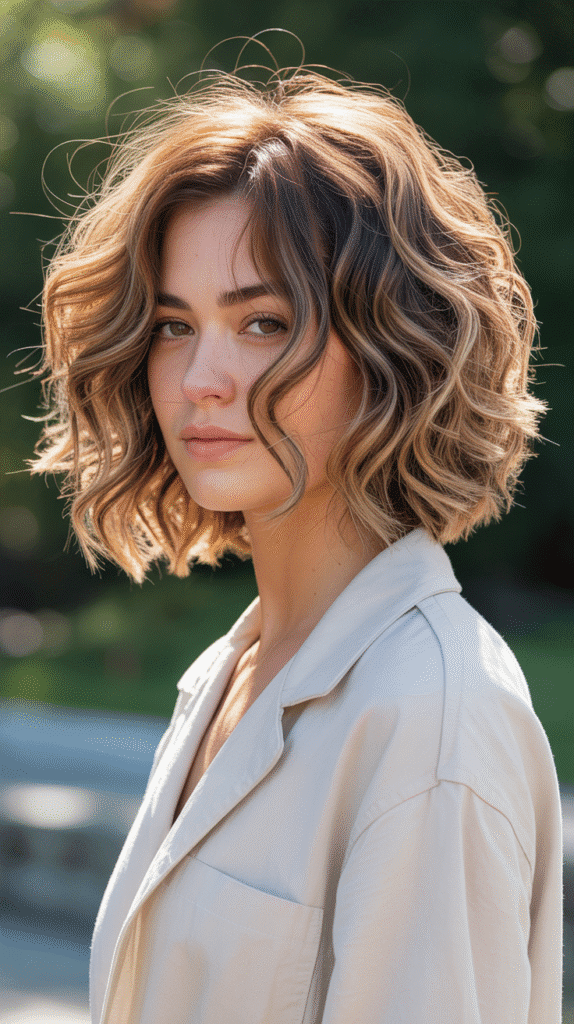
For those with shorter hair, creating whimsy comes through styling rather than elaborate updos.
This wavy lob (long bob) technique uses specific curling patterns and products to create a lived-in, magical texture that appears effortless.
How to Create:
- Start with clean, dry lob-length hair (chin to shoulder length)
- Apply heat protectant and texturizing spray throughout
- Use a 1.25-inch curling wand for versatile wave size
- Alternate curl directions: curl one section away from face, next section toward face
- Leave the last inch of each section uncurled for modern, undone ends
- Allow curls to cool completely before touching
- Run fingers through curls to break them up and create waves
- Apply sea salt spray and scrunch for beachy, whimsical texture
- Finish with dry texture spray for hold and volume
Lob Benefits:
- Versatile length for multiple styling options
- Requires less time than long hair styling
- Face-framing and universally flattering
- Low maintenance for daily wear
25. Fairy Garden Side Sweep
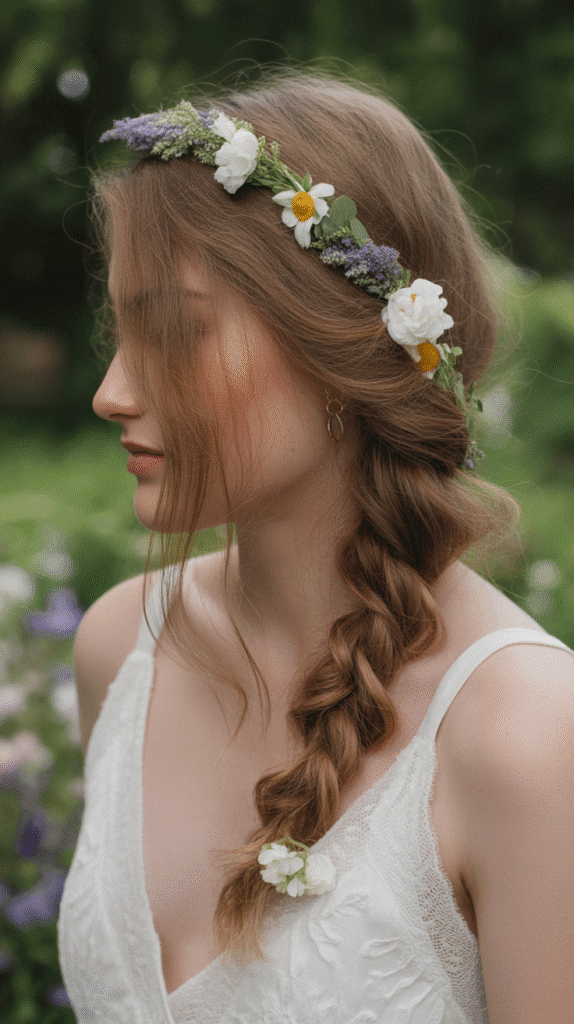
Combine elegant side-sweeping with natural, garden-inspired elements for a romantic style perfect for outdoor events.
This look brings together smoothness, texture, and organic accessories into one cohesive whimsical statement.
How to Create:
- Create a deep side part, positioning it 2-3 inches from center
- Apply smoothing serum to the smaller side of the part
- Sweep this section smoothly across your forehead and above your ear
- Secure behind the ear with bobby pins in an X-pattern for security
- Leave the larger section loose with natural texture or soft waves
- Add small fresh flowers, baby’s breath, or botanical pins along the swept section
- Position accessories to follow the sweep line naturally
- Allow a few pieces to escape around the face for softness
Garden Elements:
- Spring: Cherry blossoms, daisies, baby’s breath
- Summer: Lavender, small roses, greenery
- Fall: Dried flowers, wheat stalks, berries
- Winter: White flowers, eucalyptus, evergreen sprigs
Conclusion
Creating magical, whimsical hairstyles doesn’t require professional training, expensive tools, or hours of your precious time.
As we’ve explored throughout this guide to 25 Easy Whimsical Hairstyles You Can Create in Minutes, the key to achieving enchanting looks lies in embracing texture, being willing to experiment, and allowing yourself to play with creative techniques that express your unique personality.
From cloud-like space buns to elegant victory rolls, each style offers its own flavor of whimsy while remaining accessible for various skill levels and hair types.
The beauty of these hairstyles is their adaptability—you can dress them up with accessories, keep them simple for everyday wear, or modify them to suit your personal aesthetic preferences.
Remember that the most whimsical element of any hairstyle is the confidence and joy you bring to wearing it.
Whether you’re heading to a festival, a formal event, or simply want to add magic to an ordinary Tuesday, these styles prove that fantasy and practicality can coexist beautifully in your daily routine.
Start with the styles that speak to you, practice the techniques that challenge you, and most importantly, have fun transforming your hair into wearable art that makes you feel absolutely magical.