
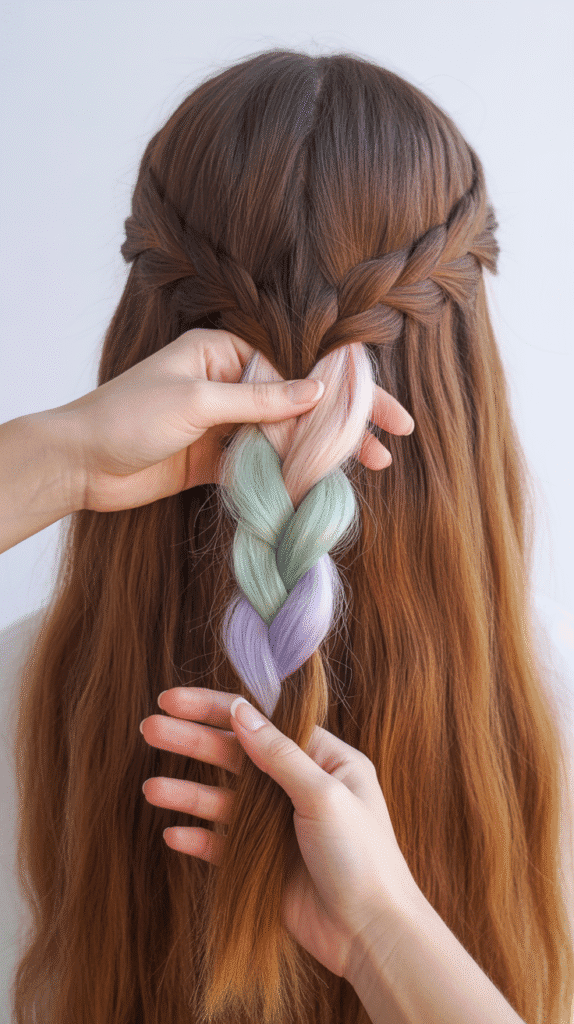
When mornings are rushed and you’re racing against the clock, having a repertoire of quick and stylish braided hairstyles can be a lifesaver for school days.
Braids are not only practical for keeping hair neat throughout the day, but they also offer endless creative possibilities that work for every hair type, length, and skill level.
Whether you’re a complete beginner who can barely manage a simple three-strand braid or someone looking to expand their braiding skills with more intricate styles, this comprehensive guide to 30 Easy Braided Hairstyles for School will transform your morning routine.
From classic looks that take just two minutes to slightly more elaborate styles that still remain school-appropriate and achievable, you’ll discover step-by-step instructions, helpful tips, and creative variations that will keep your hairstyle game strong all semester long.
These hairstyles are designed to stay secure during PE class, look polished for presentations, and most importantly, make you feel confident as you walk through the school halls.
1. Classic Three-Strand Braid
The classic three-strand braid is the foundation of all braiding techniques and the perfect starting point for beginners.
This timeless style has been worn for centuries across cultures and remains a go-to option for students who want a neat, no-fuss look that stays in place all day.
How to Create:
- Brush your hair thoroughly to remove all tangles and create a smooth base for braiding.
- Divide your hair into three equal sections at the nape of your neck or wherever you want the braid to begin.
- Cross the right section over the middle section so that the right section becomes the new middle.
- Cross the left section over the new middle section so that the left section becomes the new middle.
- Continue alternating right and left sections over the middle, keeping consistent tension throughout.
- Secure the end with an elastic band when you reach your desired length.
- Gently tug on the outer edges of the braid to create a fuller, more textured appearance if desired.
Pro Tips:
- Practice maintaining even tension throughout the braid to prevent loose or tight spots.
- Slightly dampen hair before braiding if you have flyaways or static.
- Start the braid slightly off-center for a more modern, asymmetrical look.
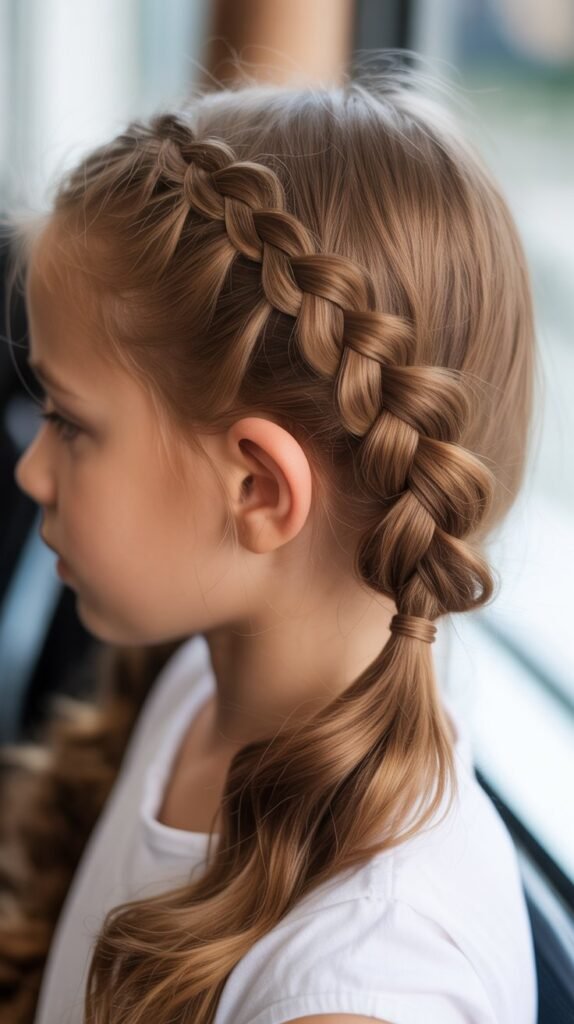
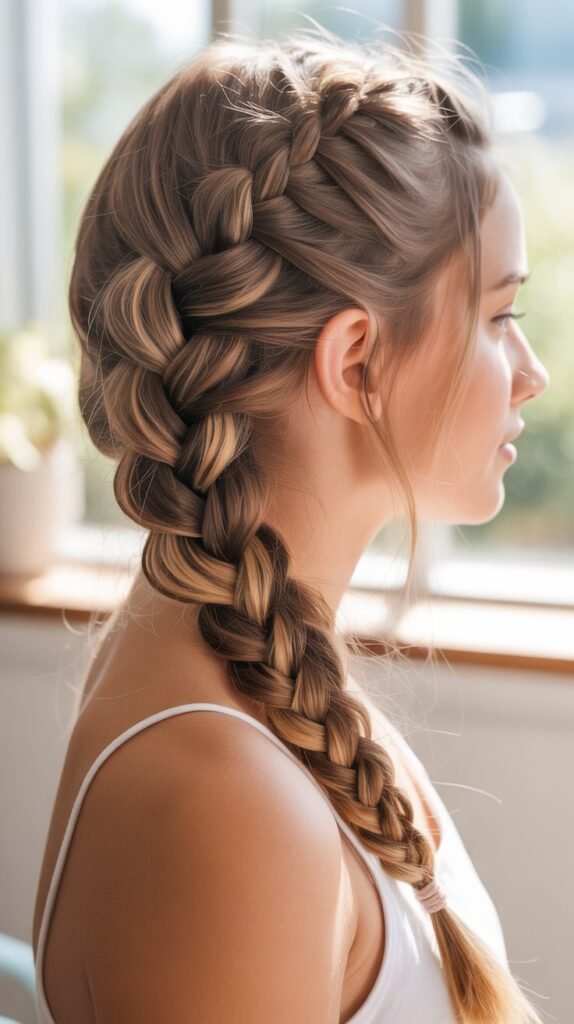
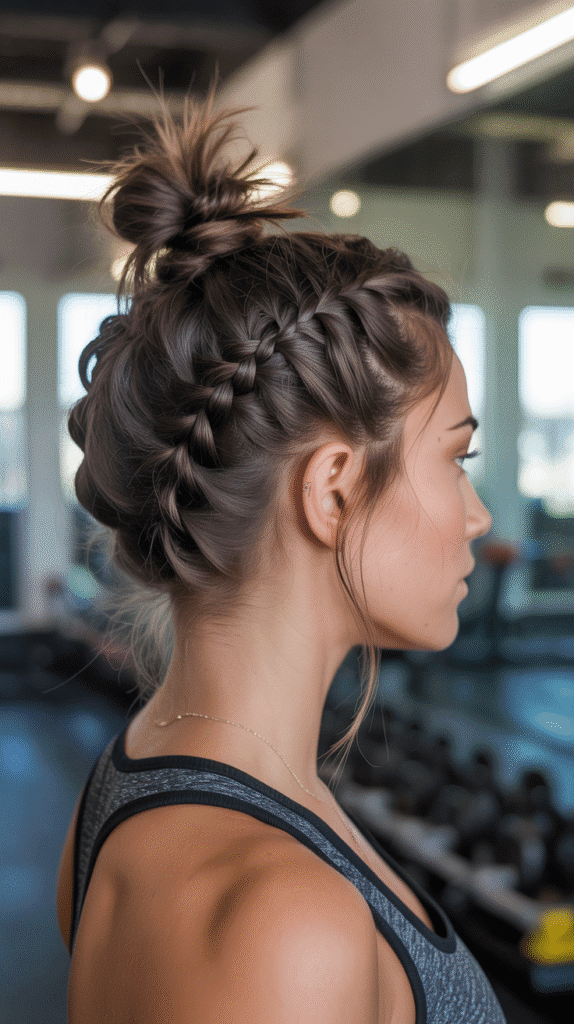
2. Dutch Braid (Inverted French Braid)

The Dutch braid creates a beautiful raised effect that sits on top of your hair rather than woven into it, making it more prominent and visually striking than a traditional French braid.
This style works exceptionally well for athletic activities since it holds hair securely against the scalp.
How to Create:
- Start with brushed, tangle-free hair and take a section from the crown of your head.
- Divide this section into three equal parts to begin your braid.
- Cross the right section under the middle section instead of over it.
- Cross the left section under the new middle section.
- Before crossing the right section under again, add a small portion of hair from the right side of your head to the right section.
- Continue this pattern of crossing under while adding hair from alternating sides as you work down your head.
- Once you’ve incorporated all available hair, continue with a regular three-strand braid to the ends.
- Secure with an elastic and gently pancake the braid by pulling on the outer edges for added volume.
Variations:
- Create two Dutch braids on either side of your head for a sporty, symmetrical look.
- Stop the Dutch braid at the crown and leave the rest of your hair loose for a half-up style.
- Incorporate small sections for a tighter, more intricate Dutch braid along your hairline.
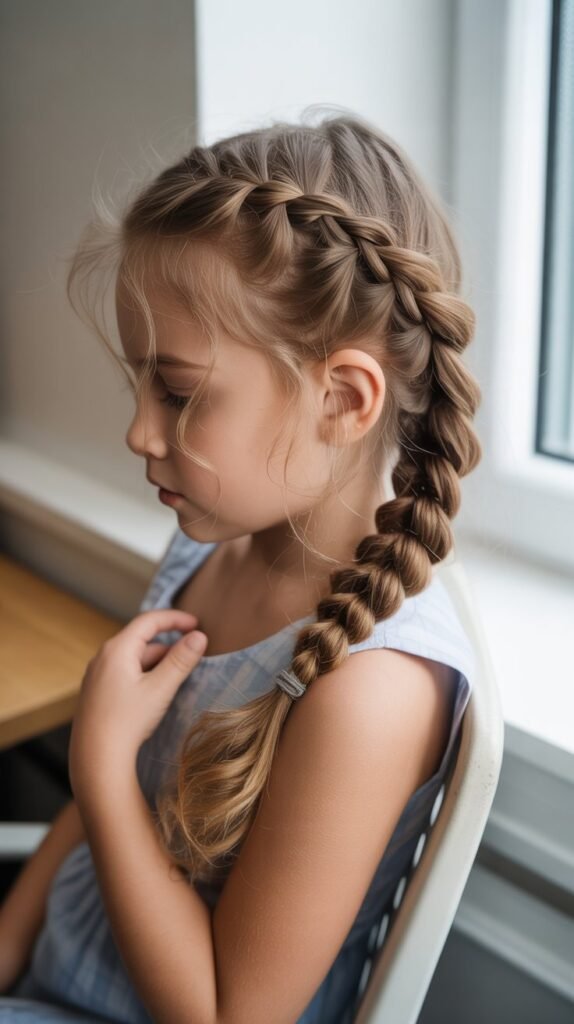
3. French Braid

The French braid is an elegant and sophisticated style that’s perfect for formal school events, presentations, or days when you want to look particularly polished.
Unlike the Dutch braid, this classic technique weaves hair into the braid for a seamless, integrated appearance.
How to Create:
- Begin with completely detangled hair and take a triangular section from the hairline at the top of your head.
- Divide this initial section into three equal strands.
- Cross the right section over the middle section.
- Cross the left section over the new middle section.
- Before crossing the right section over again, gather a small amount of loose hair from the right side and add it to the right section.
- Cross this combined section over the middle.
- Repeat on the left side by gathering hair and adding it before crossing over the middle.
- Continue this pattern of adding hair and crossing over as you work down toward the nape of your neck.
- When all hair has been incorporated, finish with a regular braid and secure the end.
Benefits for School:
- Keeps hair completely off your face during tests and classes requiring concentration.
- Stays neat and tidy throughout the entire school day without requiring adjustments.
- Works beautifully with all hair textures from straight to curly.
- Can be dressed up with ribbons or accessories for special school occasions.
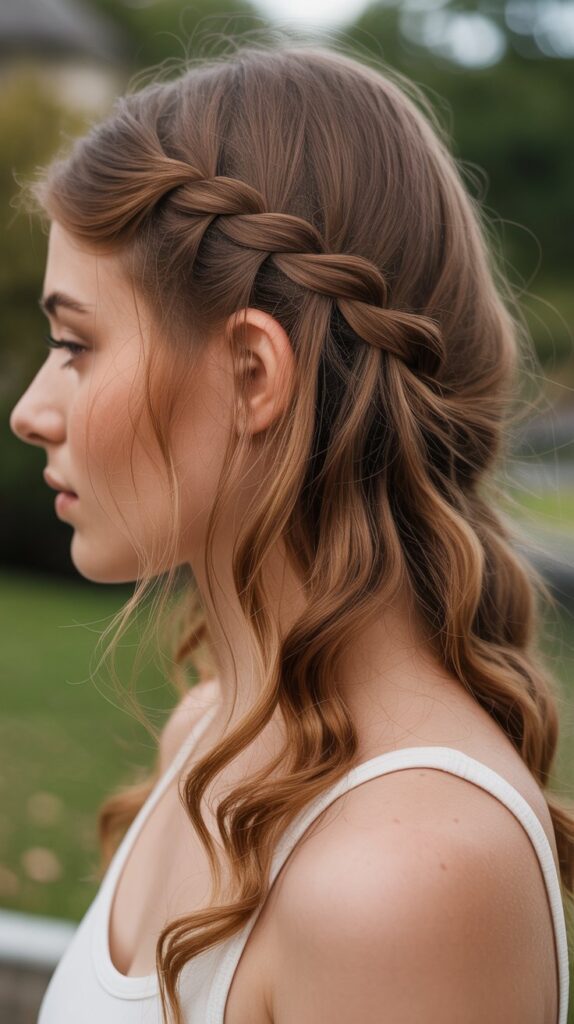
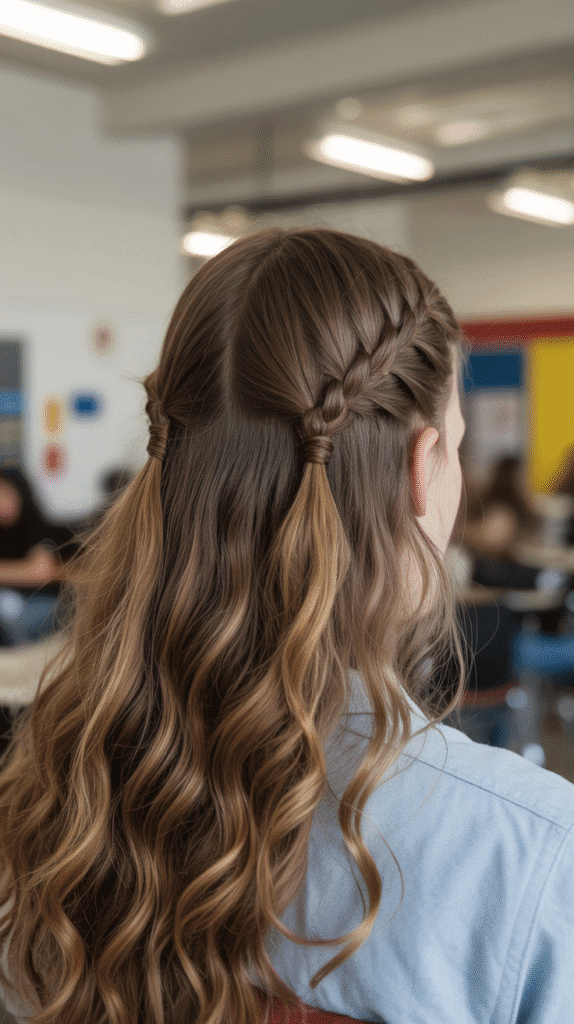
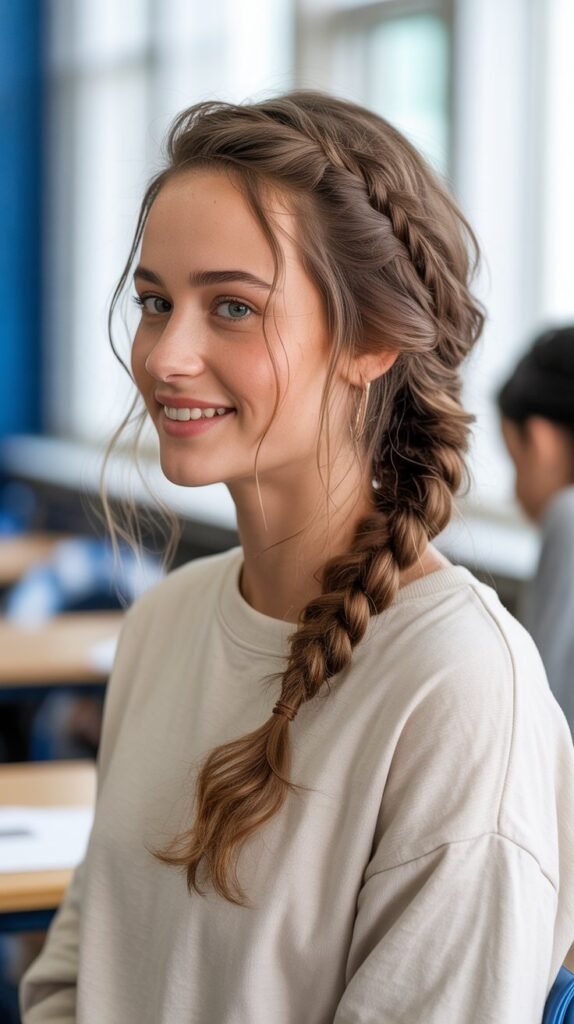
4. Side Braid

A side braid offers an effortlessly casual yet put-together look that’s perfect for everyday school wear.
This versatile style can be dressed up or down depending on how you finish it and works particularly well for asymmetrical face shapes.
How to Create:
- Brush all your hair over to one shoulder, choosing your preferred side.
- Gather all hair at the base of your neck on that chosen side.
- Create a regular three-strand braid starting from behind your ear.
- Continue braiding down the length of your hair, keeping the braid positioned over your shoulder.
- Secure the end with a hair elastic that matches your hair color or makes a statement.
- Pull gently on the braid sections to loosen and add volume for a more relaxed appearance.
- Leave a few face-framing pieces loose for a softer, more romantic effect.
Styling Options:
- Wrap a small section of hair around the elastic to conceal it for a polished finish.
- Add small flowers or decorative pins throughout the braid for special occasions.
- Start with a side part for added dimension and interest.
- Combine with loose waves in the front sections for a boho-inspired look.
5. Fishtail Braid

The fishtail braid creates an intricate, herringbone pattern that looks far more complicated than it actually is to create.
This eye-catching style is perfect for students who want to elevate their braiding game without investing hours in front of the mirror.
How to Create:
- Divide all your hair into just two large sections instead of the traditional three.
- Take a thin strand from the outer edge of the left section.
- Cross this thin strand over to join the right section.
- Take a thin strand from the outer edge of the right section.
- Cross this thin strand over to join the left section.
- Continue alternating sides, always taking thin strands from the outer edges and crossing them over.
- Keep the sections separated and avoid mixing them together for the cleanest pattern.
- Secure at the end and gently pull apart the braid for a fuller, more textured finish.
Important Tips:
- The thinner the strands you take, the more intricate and detailed your fishtail will appear.
- This braid works especially well on hair that’s second-day or slightly textured rather than freshly washed.
- Be patient as fishtail braids typically take longer than standard three-strand braids.
6. Crown Braid (Halo Braid)

The crown braid creates a regal, sophisticated look by wrapping a braid around the circumference of your head like a halo.
This style is particularly popular for formal school events, performances, or when you want to feel extra special during a regular school day.
How to Create:
- Part your hair down the middle from forehead to nape, creating two equal sections.
- Begin a Dutch braid on one side, starting behind your ear and working toward the front.
- Continue the Dutch braid around your hairline, curving it like a headband.
- When you reach the opposite ear, continue braiding the remaining length as a regular braid.
- Wrap this braid tail around the back of your head.
- Tuck the end underneath the opposite side of the crown braid and secure with bobby pins.
- Use additional pins as needed to secure the entire crown braid in place.
- Spray with light-hold hairspray to tame flyaways and maintain the style throughout the day.
7. Waterfall Braid
The waterfall braid is a stunning half-up style where sections of hair cascade through the braid like a waterfall, creating a romantic and feminine appearance.
This style beautifully combines the structure of a braid with the movement of loose hair.
How to Create:
- Begin with a small section of hair near your temple on one side.
- Divide this section into three strands as you would for a regular braid.
- Create one stitch of a regular braid by crossing the back strand over the middle.
- Cross the front strand over the middle.
- On the next stitch, drop the back strand completely and let it fall naturally.
- Pick up a new section of hair from above to replace the dropped strand.
- Continue this pattern of dropping the back strand and picking up new hair as you braid horizontally around your head.
- Secure the end behind your opposite ear with bobby pins that match your hair color.
Best Practices:
- Keep tension consistent to prevent the braid from becoming loose or sloppy.
- Work slowly at first until you master the rhythm of dropping and picking up strands.
- This style works best on hair that holds curl or has natural texture.
- Add loose curls to the dropped sections for extra dimension and romance.
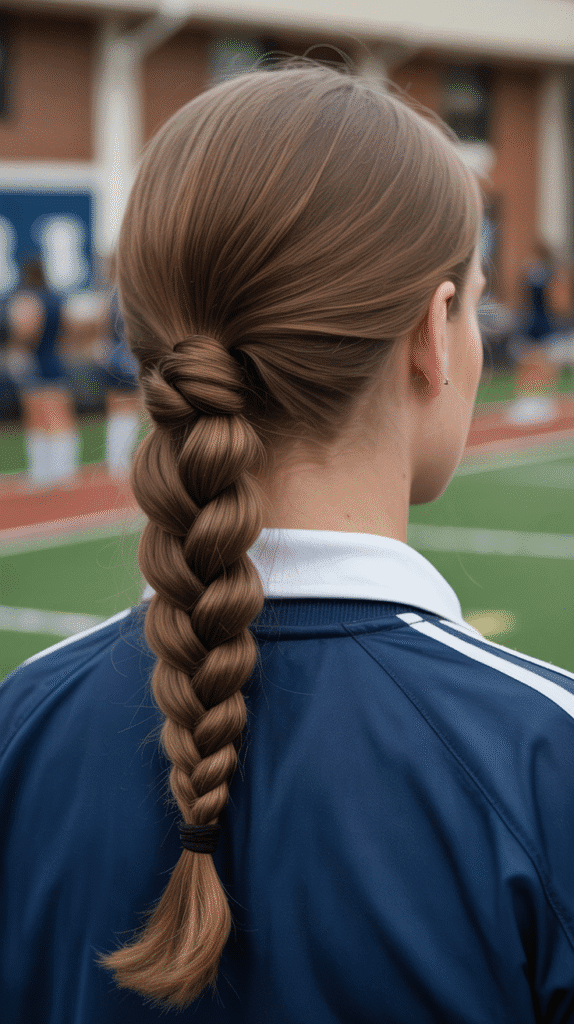
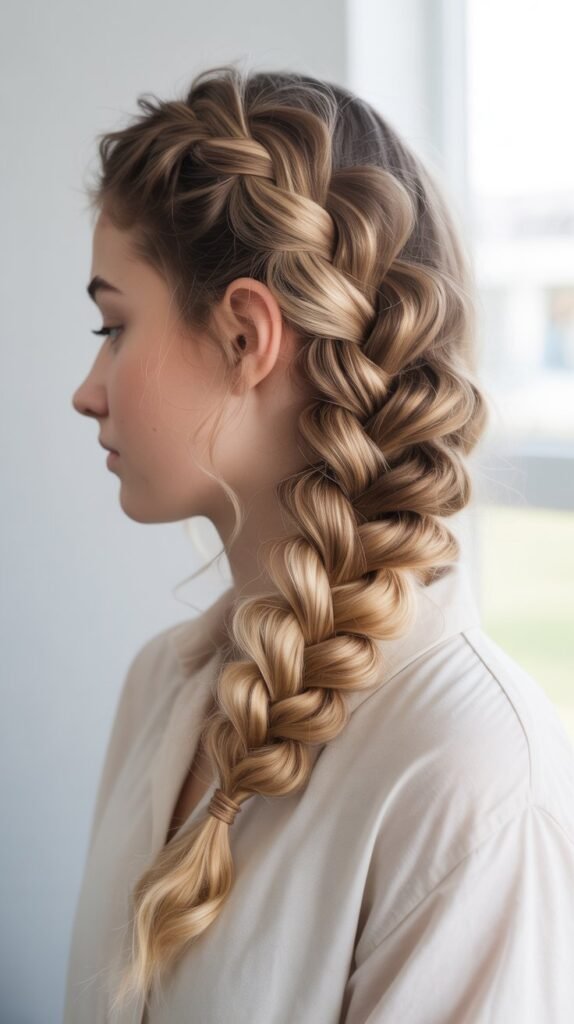
8. Rope Braid (Twist Braid)
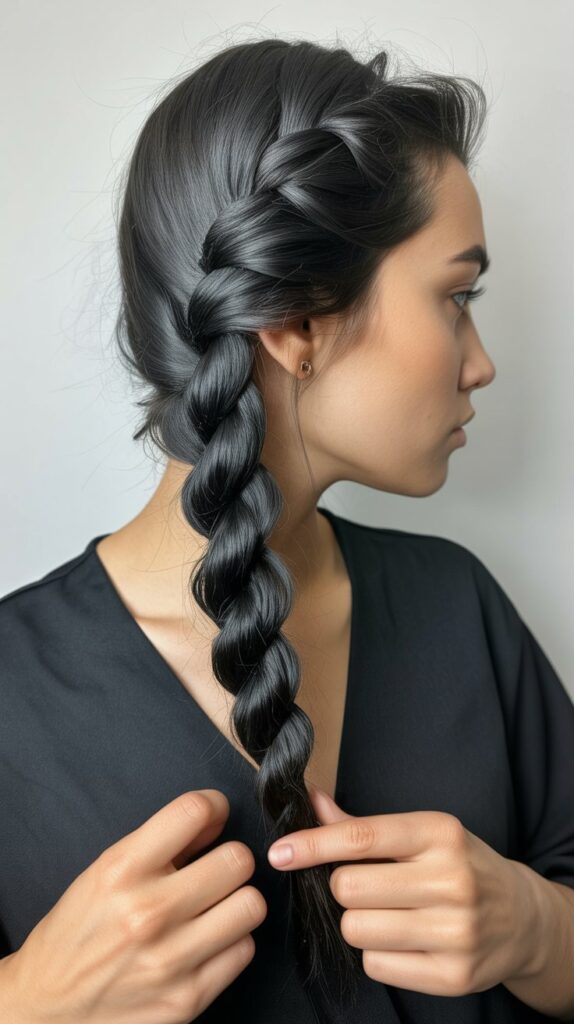
The rope braid is one of the fastest braiding techniques and creates a sleek, twisted effect that’s perfect for rushed mornings.
Despite its simple construction using only two sections, it creates an elegant, polished appearance suitable for any school setting.
How to Create:
- Gather your hair into a ponytail and secure it with an elastic at your desired height.
- Divide the ponytail into two equal sections.
- Twist the right section clockwise several times until it’s tightly twisted.
- Twist the left section clockwise the same number of times.
- Now wrap the two twisted sections around each other in a counterclockwise direction.
- The key is twisting the sections one direction and wrapping them the opposite direction.
- Continue wrapping until you reach the ends of your hair.
- Secure with an elastic and optionally wrap a small section of hair around it to conceal the elastic.
Why It Works:
- Takes less than two minutes once you’ve mastered the technique.
- Creates less tension on your scalp than tighter braiding methods.
- Works equally well on fine and thick hair types.
9. Four-Strand Braid

The four-strand braid adds an extra dimension of complexity and visual interest compared to traditional three-strand braids.
While it requires a bit more coordination, the resulting flat, wide braid with its intricate woven pattern is well worth the effort.
How to Create:
- Divide your hair into four equal sections and number them mentally from left to right as 1, 2, 3, and 4.
- Cross section 1 over section 2.
- Cross section 4 under section 3.
- Cross the current middle sections (which were originally 1 and 4) over each other.
- Repeat this pattern: outer left over, outer right under, middle sections cross.
- Maintain consistent tension and try to keep all four sections separated and organized.
- Secure the end when complete and gently tug on the outer edges for dimension.
Practice Tips:
- Use four different colored ribbons tied to sections of hair while learning the pattern.
- Start with a ponytail to make managing the four sections easier at first.
- Watch yourself in a mirror initially to ensure you’re following the pattern correctly.
10. Braided Ponytail
A braided ponytail combines the convenience of a classic ponytail with the added interest of a braid, creating a polished look that’s secure enough for even the most active school days.
This hybrid style offers the best of both worlds.
How to Create:
- Brush your hair up to your desired ponytail height and secure with a strong elastic.
- If desired, wrap a small section of hair around the elastic to conceal it.
- Divide the ponytail into three sections.
- Create a regular three-strand braid down the length of the ponytail.
- Secure the end with another elastic.
- Gently pull on the braid sections to create volume and texture.
- Apply a small amount of texturizing spray for a lived-in, effortless appearance.
Variations to Try:
- Create a fishtail braid instead of a three-strand for added intricacy.
- Start with a high ponytail for a sporty, energetic look.
- Position the ponytail low at the nape for a more sophisticated appearance.
- Add multiple smaller braids within the ponytail for extra texture.
11. Double Dutch Braids (Boxer Braids)
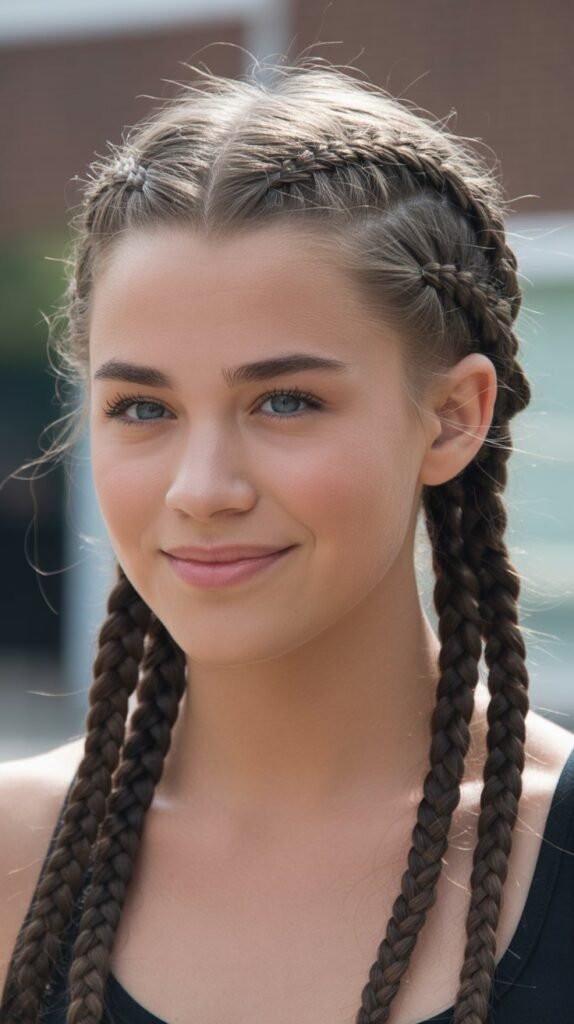
Double Dutch braids, commonly called boxer braids, create a sporty, athletic look that’s become incredibly popular in schools.
These parallel braids keep hair completely secured and off the face, making them ideal for PE class, sports, and active days.
How to Create:
- Part your hair straight down the middle from forehead to nape, creating two equal sections.
- Clip one section away while you work on the other side.
- Starting at the hairline, take a small section and divide it into three parts.
- Begin a Dutch braid by crossing sections under rather than over.
- Add hair from the sides as you work down, keeping the braid close to the part line.
- Continue braiding down until you’ve incorporated all hair on that side.
- Finish with a regular braid to the ends and secure with an elastic.
- Repeat the entire process on the opposite side, ensuring both braids are symmetrical.
Achieving Symmetry:
- Use a rattail comb to create a perfectly straight center part.
- Start both braids at exactly the same point on the hairline.
- Try to add the same amount of hair with each stitch on both sides.
- Stand between two mirrors to check your work from all angles as you braid.
12. Milkmaid Braid

The milkmaid braid creates a sweet, vintage-inspired look by wrapping braids over the crown of your head.
This style has a timeless, storybook quality while remaining practical for school days when you want to feel feminine and put-together.
How to Create:
- Part your hair down the center, dividing it into two equal sections.
- Create a regular three-strand braid on one side from behind your ear down to the ends.
- Repeat on the opposite side so you have two matching braids.
- Take the right braid and bring it over the top of your head like a headband.
- Secure it behind your left ear with bobby pins, tucking the end underneath.
- Take the left braid and bring it over your head, positioning it behind the first braid.
- Secure it behind your right ear with bobby pins.
- Adjust both braids so they sit comfortably and securely across your crown.
- Use additional pins as needed and set with hairspray for all-day hold.
13. Braided Headband

A braided headband is a charming accent style that keeps hair out of your face while adding a decorative element.
This technique creates the appearance of a headband made from your own hair, eliminating the need for accessories.
How to Create:
- Take a horizontal section of hair from behind one ear, about one to two inches wide.
- Leave the rest of your hair loose or clip it away temporarily.
- Braid this section into a regular three-strand braid.
- Bring the braid across the top of your head like a headband.
- Secure the end behind your opposite ear with bobby pins.
- Allow the rest of your hair to fall naturally over and around the braided headband.
- Adjust the braid’s position and pin it securely so it won’t shift during the day.
Styling Enhancements:
- Curl the loose hair beneath the braided headband for added texture.
- Create a fishtail braid instead of a three-strand for more intricacy.
- Pull the braid slightly to make it wider and more prominent.
- Add small decorative pins or flowers along the braided headband for special occasions.
14. Pull-Through Braid
The pull-through braid creates the illusion of a complex, voluminous braid using a series of ponytails rather than traditional braiding.
This clever technique is perfect for students who struggle with braiding but want an impressive-looking style.
How to Create:
- Create a ponytail at the crown of your head and secure with a clear elastic.
- Take a section of hair from beneath the first ponytail and create a second ponytail directly below it.
- Split the first ponytail in half.
- Bring these two halves around the sides of the second ponytail and temporarily clip them out of the way.
- Create a third ponytail below the second, incorporating any loose hair.
- Release the split sections from the first ponytail and divide the second ponytail in half.
- Bring the sections from the first ponytail over the third ponytail and secure them together with an elastic.
- Continue this pattern of splitting, pulling through, and securing down the length of your hair.
- Gently pull on each section to create volume and hide the elastics.
15. Lace Braid
The lace braid is a delicate, one-sided variation of the French braid where hair is added only from one side, creating an asymmetrical, feminine appearance.
This style works beautifully as an accent along the hairline or as a decorative element in half-up styles.
How to Create:
- Take a small section of hair near your temple or hairline.
- Divide it into three strands and create one stitch of a regular braid.
- When crossing the section closest to your hairline over the middle, add a small amount of hair from the hairline before crossing.
- Do not add any hair to the section farthest from your hairline.
- Continue this pattern of adding hair only on one side as you braid.
- The result is a braid that appears to have a decorative edge on one side.
- Secure the end with a small elastic or bobby pins.
- This style can be incorporated into various looks as an accent element.
Best Uses:
- Create a lace braid along your hairline from one temple to behind your ear.
- Use lace braids on both sides and connect them in the back for a crown effect.
- Combine with loose curls for a romantic, special occasion style.
16. Braided Bun

A braided bun combines the elegance of a bun with the texture and interest of braids, creating a sophisticated style appropriate for presentations, performances, or formal school events.
This versatile updo keeps all hair secured while looking polished and intentional.
How to Create:
- Gather your hair into a ponytail at your desired bun height.
- Divide the ponytail into two or three sections.
- Braid each section completely down to the ends.
- Wrap the first braid around the base of the ponytail in a circular motion.
- Secure with bobby pins, tucking the end underneath.
- Wrap the second braid around the growing bun, overlapping the first braid slightly.
- Continue with any remaining braids until you’ve created a full bun.
- Secure all ends with pins and spray with hairspray for lasting hold.
Variations:
- Create a single thick braid and wrap it into a low bun for a simple, classic look.
- Use a fishtail braid for added texture within the bun.
- Position the bun at the nape for a professional appearance or high on the crown for a ballet-inspired style.
17. Zigzag Part with Braids
A zigzag part adds an unexpected, playful element to any braided style, instantly making even the simplest braids look more interesting and fashion-forward.
This technique works especially well with double braids of any type.
How to Create:
- Use the pointed end of a rattail comb to create your part.
- Starting at your hairline, move the comb in a zigzag motion rather than a straight line.
- Create sharp angles for a dramatic effect or gentle waves for a subtler look.
- Continue the zigzag pattern all the way to the nape of your neck.
- Create your chosen braid style (pigtails, Dutch braids, etc.) on each side of the zigzag part.
- The contrasting part line will make your braids stand out even more.
Styling Tip:
- Practice the zigzag motion on a mannequin head or friend before doing it on yourself.
- The more contrasting your hair color and scalp, the more visible and dramatic the zigzag will appear.
- This works with virtually any two-braid style from simple pigtails to complex Dutch braids.
18. Infinity Braid (Figure-Eight Braid)

The infinity braid creates a stunning, continuous loop pattern that resembles the infinity symbol woven throughout the braid.
This advanced technique produces an eye-catching result that’s sure to receive compliments at school.
How to Create:
- Divide your hair into two main sections.
- Take a small strand from the outer edge of the right section.
- Weave this strand in a figure-eight pattern through and around both main sections.
- Bring the strand over the right section, under the left section, then back over the left section.
- Continue the strand under the right section, completing the infinity loop.
- Repeat this pattern with alternating small strands from each side.
- Maintain consistent tension to keep the infinity pattern visible and regular.
- Secure the end and gently manipulate the braid to enhance the figure-eight shapes.
Important Notes:
- This braid requires patience and practice to master the looping pattern.
- Work slowly at first and follow online video tutorials for visual guidance.
- The infinity shapes become more prominent when the braid is gently pulled apart.
19. Accent Braid in Loose Hair
An accent braid adds interest to otherwise loose hair without requiring you to braid everything.
This minimalist approach is perfect for days when you want the comfort of loose hair with just a touch of style.
How to Create:
- Leave most of your hair down and loose.
- Take a small vertical section of hair from near your temple or part line.
- Create a thin braid with this section, choosing any braid type you prefer.
- Secure the end with a tiny clear elastic.
- Position the accent braid alongside your loose hair or pin it back behind your ear.
- Create multiple accent braids for more impact or keep it simple with just one.
- This style works beautifully whether your loose hair is straight, wavy, or curly.
Creative Placements:
- Create accent braids on both sides of your part for symmetry.
- Place a single accent braid on one side only for an asymmetrical look.
- Braid small sections around your face to keep hair out of your eyes while studying.
- Use colored elastics or wrap thread around accent braids for bohemian flair.
20. Bubble Braid

Bubble braids create a fun, playful look using multiple elastics to create “bubbles” of hair down the length of a ponytail.
This trendy style is incredibly easy to create and perfect for students who want a unique look without complex braiding skills.
How to Create:
- Create a ponytail at any desired height and secure with an elastic.
- Measure down approximately two to three inches and add another elastic around the ponytail.
- Gently pull on the hair between the two elastics to create a rounded bubble effect.
- Add another elastic two to three inches below the second elastic.
- Create another bubble by gently pulling out the hair between the second and third elastics.
- Continue adding elastics and creating bubbles down the entire length of the ponytail.
- Adjust the size of each bubble by pulling more or less hair outward.
- Use matching elastics for a cohesive look or alternating colors for extra fun.
Pro Tips:
- Spray each bubble lightly with hairspray to help it maintain its shape all day.
- Vary the spacing between elastics for bubbles of different sizes.
- This style works on all hair lengths, even shorter hair can accommodate two or three bubbles.
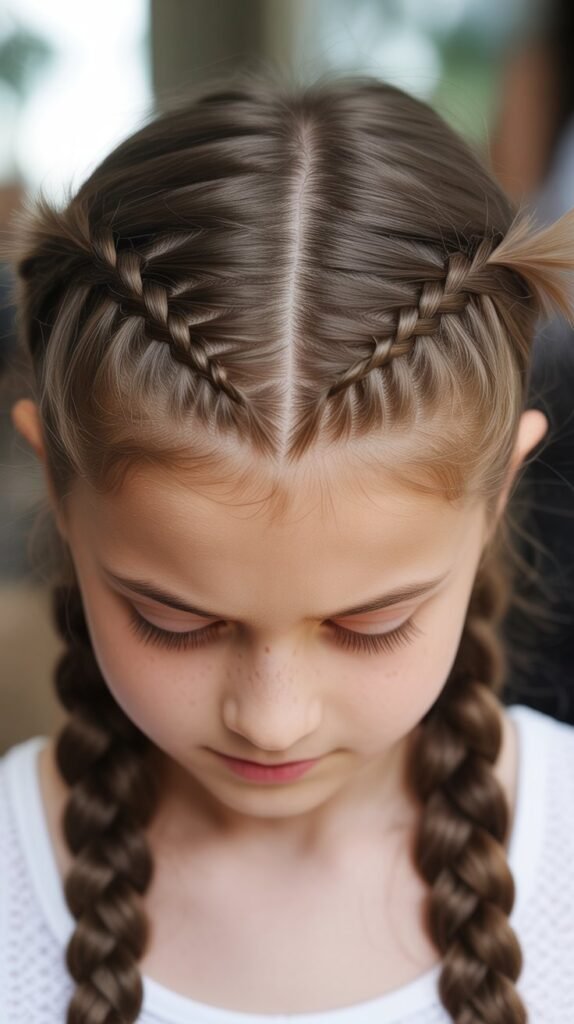
21. Braided Pigtails

Braided pigtails offer a youthful, energetic look that’s both practical and charming for school.
This classic style keeps hair completely controlled while maintaining a fun, approachable vibe that works for students of all ages.
How to Create:
- Part your hair straight down the middle from forehead to nape.
- Gather one section into a ponytail behind your ear at your desired height.
- Secure with an elastic and repeat on the opposite side, ensuring both are at the same height.
- Braid one ponytail completely down to the ends using your preferred braid type.
- Secure with an elastic and repeat on the second ponytail.
- Adjust both braids to ensure they’re symmetrical and hang at the same length.
- Gently pull on the braids to create volume and texture if desired.
Height Variations:
- Position pigtails high on the head for a playful, sporty appearance.
- Place them at ear level for a classic, balanced look.
- Create low pigtails at the nape for a more mature, subdued style.
22. Snake Braid (Sliding Braid)
The snake braid creates a unique, winding appearance by incorporating a sliding technique that makes the braid appear to slither like a snake.
This unusual style is perfect for students who want to showcase something truly different.
How to Create:
- Start with a regular three-strand braid at the crown of your head.
- After completing several stitches of regular braiding, prepare for the sliding technique.
- Hold the middle strand firmly while gently sliding the two outer strands upward toward your scalp.
- This creates bunching and texture that gives the snake-like appearance.
- Continue braiding a few more stitches and then slide the outer strands up again.
- Repeat this pattern of braiding and sliding throughout the length of your hair.
- The result is a braid with gathered, dimensional sections that create movement.
- Secure the end and adjust the bunched sections for maximum effect.
Tips for Success:
- Don’t slide the strands too tightly or the braid will become uncomfortable.
- Space the sliding sections evenly for a consistent, rhythmic pattern.
- This technique works best on hair with some natural texture or grip.
23. Half-Up Dutch Braid

A half-up Dutch braid combines the polish of an updo with the ease of wearing hair down, creating a balanced style that’s appropriate for any school setting.
This versatile look works for both casual days and more formal school events.
How to Create:
- Take a section of hair from your hairline at the crown, approximately three to four inches wide.
- Divide this section into three parts to begin your Dutch braid.
- Cross sections under the middle rather than over as you add hair from the sides.
- Continue the Dutch braid back toward the crown of your head, adding hair only from the sides.
- Stop adding hair when you reach approximately the crown or top of your head.
- Secure the Dutch braid with an elastic at that point.
- Leave the rest of your hair down to flow naturally.
- Option to curl, wave, or straighten the loose hair for different looks.
Finishing Touches:
- Hide the elastic by wrapping a small section of hair around it.
- Gently pull on the Dutch braid to create more volume and width.
- Add a decorative clip or bow at the point where the braid is secured.
24. Twist and Braid Combo
Combining twists with braids creates visual interest and dimension by mixing two different texturing techniques in one hairstyle.
This hybrid approach is perfect for students who want to experiment with more creative styling.
How to Create:
- Section your hair into the pattern you want (half-up, side style, or full head).
- Create two-strand twists in one section of hair.
- Transition into a three-strand braid in an adjacent section.
- Secure both sections and combine them if desired.
- The contrast between smooth twists and textured braids creates appealing variety.
- Experiment with different combinations to find what works for your hair and style preferences.
Popular Combinations:
- Twist both sides from the temples and connect them in the back with a braid.
- Create twists along the hairline and a braid down the center.
- Alternate between twisted and braided sections for a striped effect.
25. Y-Braid (Inverted Braided Ponytail)

The Y-braid creates an interesting geometric pattern by starting with two separate braids that merge into a single ponytail, resembling the letter Y when viewed from behind.
This eye-catching style combines symmetry with creativity.
How to Create:
- Part your hair down the middle from forehead to crown only, leaving the back section unparted.
- Create a Dutch or French braid on the left side, starting at the hairline.
- Create a matching braid on the right side, starting at the same point on the opposite side.
- Braid both sections back toward the crown of your head at an angle.
- When both braids meet at the crown, combine them with the unbraided hair from the back.
- Secure everything together into a single ponytail.
- The two braids form the arms of the Y while the ponytail forms the stem.
- Continue with a braid down the ponytail if desired or leave it loose.
26. Side Dutch Braid Ponytail

A side Dutch braid ponytail creates an asymmetrical, fashion-forward look by incorporating a Dutch braid that sweeps dramatically from one side of the head to the opposite side before transitioning into a ponytail.
This style combines edgy asymmetry with practical functionality, making it perfect for students who want to stand out while keeping hair completely secured.
How to Create:
- Take a section of hair from above one temple and divide it into three parts.
- Begin a Dutch braid by crossing sections under the middle while adding hair from both sides.
- Angle the braid diagonally across your head toward the opposite side rather than braiding straight back.
- Continue adding hair and braiding until you reach behind the opposite ear.
- Gather all remaining hair including the braid into a ponytail at that side.
- Secure with a strong elastic to hold the weight of the side ponytail.
- The Dutch braid will create a striking diagonal line across your head leading to the ponytail.
- Finish the ponytail with a braid or leave it loose according to preference.
Styling Considerations:
- This style works particularly well for students with side parts or asymmetrical haircuts.
- The diagonal braid helps distribute weight if you have thick or heavy hair.
- Switch sides regularly to avoid creating tension patterns that always pull in one direction.
27. Triple Braided Ponytail

A triple braidedponytail takes the standard braided ponytail concept and multiplies the visual interest by incorporating three separate braids within a single ponytail.
This style offers impressive texture and dimension while remaining practical for school.
How to Create:
- Gather all your hair into a ponytail at your desired height and secure with an elastic.
- Divide the ponytail into three equal sections.
- Create a separate three-strand braid with each of the three sections.
- Secure each individual braid with a small elastic at the ends.
- Leave the three braids hanging separately for maximum texture.
- Alternatively, loosely braid the three braids together for an even more complex appearance.
- Gently pull on each braid to add volume and create a fuller effect.
- Spray with light-hold hairspray to prevent the braids from unraveling during the day.
Benefits:
- The triple texture creates the appearance of much thicker, fuller hair.
- Each braid stays more secure than one thick braid would.
- Offers opportunities for creativity by using different braid types for each section.
- Perfect for showcasing hair highlights or multiple colors.
28. Braided Space Buns

Braided space buns combine the playful, youthful energy of space buns with the added sophistication of braided texture.
This trendy style has become increasingly popular and works wonderfully for creative, artistic students who want to express their personality.
How to Create:
- Part your hair down the center from forehead to nape, creating two equal sections.
- Gather the right section into a high ponytail positioned where you want the bun.
- Braid the entire ponytail down to the ends using any braid type you prefer.
- Wrap the braid around the base of the ponytail in a circular motion to form a bun.
- Secure with bobby pins and tuck the end underneath.
- Repeat the entire process on the left side, ensuring both buns are positioned symmetrically.
- Adjust both buns to make them equal in size and height.
- Pull out a few face-framing pieces for a softer, less severe appearance if desired.
Height and Position Variations:
- Place buns high on the head for a fun, energetic look.
- Position them slightly lower for a more mature interpretation.
- Make small, tight buns for a neat appearance or large, loose buns for drama.
29. Messy Side Braid
A messy side braid embraces texture, looseness, and an effortless aesthetic that looks intentionally undone.
This relaxed style is perfect for students who prefer bohemian, casual looks over perfectly polished styles.
How to Create:
- Brush your hair to remove tangles but don’t smooth it completely flat.
- Sweep all your hair over one shoulder to your preferred side.
- Begin braiding loosely from behind your ear, intentionally keeping the braid relaxed.
- Don’t worry about making the sections perfectly even or the tension consistent.
- As you braid, allow some pieces to escape and frame your face naturally.
- Secure the end with an elastic, leaving some hair unbraided at the bottom.
- Gently pull apart the braid sections significantly to create maximum volume and messiness.
- Pull out additional small pieces throughout the braid for enhanced texture.
- Avoid using hairspray so the braid maintains a soft, touchable quality.
Achieving the Perfect Messy Look:
- Start with second-day hair or hair with texture spray for better grip.
- Purposely pull out pieces rather than trying to tuck them back in.
- The more you manipulate and pull the braid, the better the messy effect.
- This style actually looks better as the day progresses and it becomes more undone.
30. Braided Top Knot
A braided top knot elevates the casual top knot by incorporating braids into the structure, creating a style that’s both practical and stylish.
This updo keeps all hair off the neck and face, making it ideal for warm weather, sports, or days when you need maximum focus.
How to Create:
- Flip your head upside down and brush all hair toward the crown of your head.
- Beginning at the nape of your neck, start a Dutch or French braid working upward.
- Continue braiding as you add hair, following the curve of your head toward the crown.
- When you reach the crown area, secure all hair including the braid into a high ponytail.
- Twist the ponytail into a rope and wrap it around the base to form a bun.
- Secure the bun with bobby pins, ensuring the braided section remains visible.
- The braid will create an interesting textured base leading up to the top knot.
- Set with hairspray for all-day hold that survives even the most active schedule.
Variations:
- Braid the ponytail before wrapping it into the knot for additional texture.
- Create two braids on either side of the head that meet at the top knot.
- Make the bun large and loose for a casual look or tight and small for athletics.
Essential Tools and Products for School Braiding
Must-Have Tools:
- A high-quality paddle brush for detangling and smoothing hair before braiding.
- A rattail comb for creating precise parts and sections.
- Clear and colored hair elastics in various sizes for different braiding needs.
- Bobby pins in colors matching your hair for securing braids invisibly.
- Small hair clips for sectioning hair while working on complex styles.
- A handheld mirror for checking the back of your head during styling.
Recommended Products:
- Texturizing spray or dry shampoo for adding grip to freshly washed hair.
- Light-hold hairspray for setting styles without making hair stiff or crunchy.
- Hair oil or serum for smoothing flyaways and adding shine to completed braids.
- Leave-in conditioner for making hair more manageable and easier to braid.
- Edge control or pomade for smoothing hairlines and controlling baby hairs.
Additional Resources:
For more detailed braiding techniques and visual tutorials, Seventeen Magazine offers extensive guides for teen hairstyles, while Teen Vogue provides trending styles perfect for school settings.
Tips for Making Braids Last All Day at School
Preparation Tips:
- Start with hair that has some texture rather than freshly washed, slippery hair for better grip.
- Apply a light texturizing product before braiding to help the style hold throughout the day.
- Ensure your hair is completely dry before braiding as damp hair can cause braids to loosen.
- Use strong, quality elastics that won’t snap or lose their grip during the school day.
During Braiding:
- Maintain consistent tension throughout the braid without pulling so tight that it causes discomfort.
- Add more sections of hair when doing French or Dutch braids to ensure everything is incorporated.
- Secure the ends properly with elastics tied multiple times if you have slippery or fine hair.
- Use bobby pins liberally on updos and styles that wrap around your head for maximum security.
Finishing and Maintenance:
- Set your completed braid with a light mist of hairspray focusing on flyaways and the hairline.
- If your braid loosens during the day, carry a small elastic and bobby pins for quick touch-ups.
- Avoid constantly touching or playing with your braid as this causes it to loosen and frizz.
- Consider braiding slightly tighter in the morning knowing it will relax throughout the day.
Environmental Considerations:
- Plan for weather conditions like humidity, wind, or rain that might affect your style.
- Bring a hood or hat if rain is expected to protect your braid from moisture.
- In humid climates, use anti-frizz products before braiding to combat environmental effects.
- For PE class or sports, choose tighter braiding styles that can withstand intense physical activity.
Conclusion
Mastering these 30 Easy Braided Hairstyles for School opens up a world of styling possibilities that combine beauty, practicality, and self-expression.
From the simplest three-strand braid that takes just minutes to create, to more elaborate styles like the crown braid or infinity braid that showcase your developing skills, there’s a perfect braided hairstyle for every student, occasion, and skill level.
The beauty of braiding lies not only in the stunning results but also in the journey of learning and improving your technique over time.
As you practice these styles, you’ll develop muscle memory that makes even complex braids feel effortless, and you’ll discover which techniques work best for your unique hair type, length, and lifestyle.
Remember that braiding is a skill that improves with practice, so don’t be discouraged if your first attempts don’t look Instagram-perfect—every expert braider started exactly where you are now.
These hairstyles offer practical solutions for busy school mornings, athletic activities, formal presentations, and everything in between, ensuring you always feel confident and put-together.
Whether you choose a quick rope braid for a rushed Monday morning, an elegant crown braid for a school performance, or playful braided space buns to express your creative personality, you now have a comprehensive toolkit of styles to carry you through the entire school year and beyond.
Embrace the versatility, enjoy the process of learning, and most importantly, have fun experimenting with these beautiful braided looks that will make you feel amazing every single school day.