
Long hair opens up a world of styling possibilities, and when it comes to creating that effortlessly chic, free-spirited look, nothing beats boho braids and hairstyles.
Whether you’re preparing for a music festival, planning a beach vacation, or simply want to add some bohemian flair to your everyday style, the right hairstyle can transform your entire appearance.
This comprehensive guide explores 27 trendy boho braids and hairstyles specifically designed for long hair, offering you a diverse collection of styles ranging from simple everyday looks to intricate designs perfect for special occasions.
Each style celebrates the carefree, romantic essence of bohemian fashion while keeping your hair manageable and beautiful.
From classic fishtail braids to elaborate crown braids adorned with accessories, you’ll discover step-by-step inspiration for creating stunning looks that capture the bohemian spirit.
Get ready to embrace your inner free spirit and learn how to achieve these gorgeous hairstyles that will have everyone asking about your secret to such effortlessly beautiful hair.
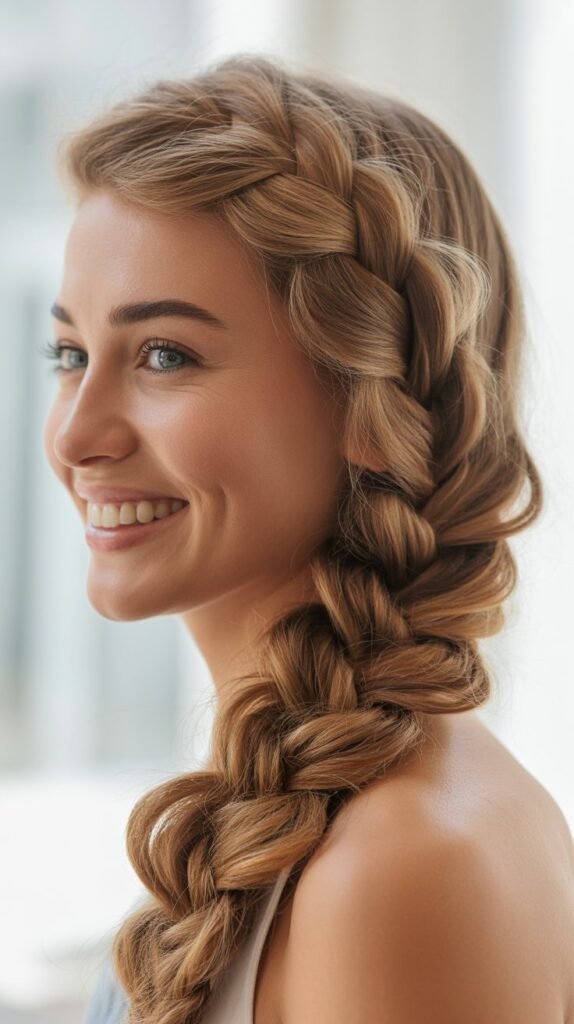
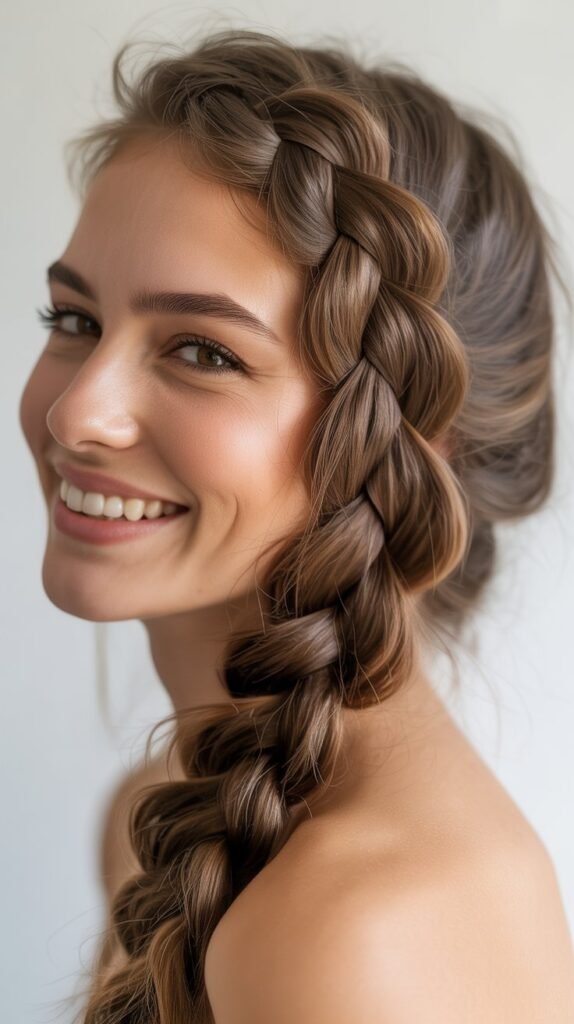
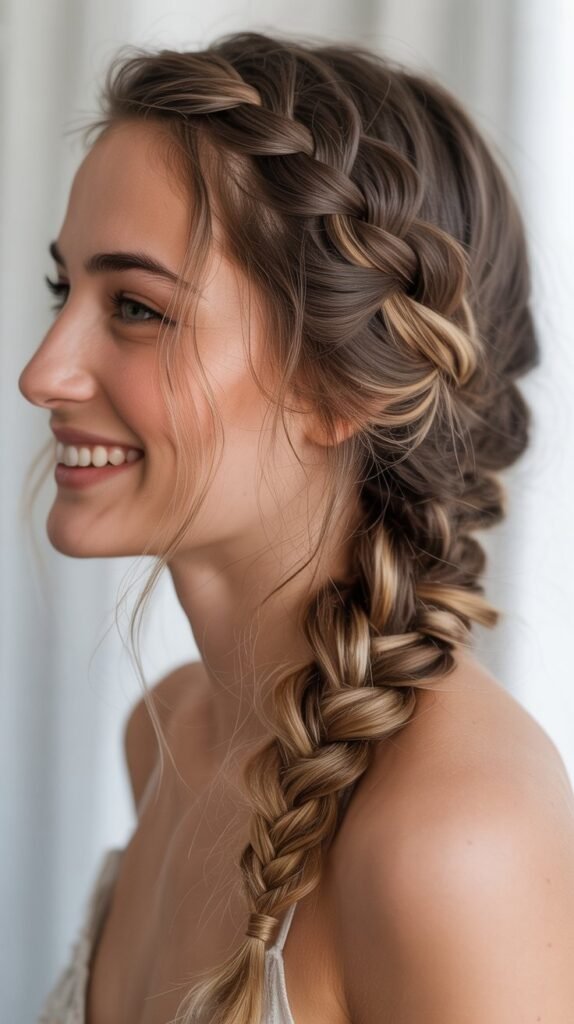
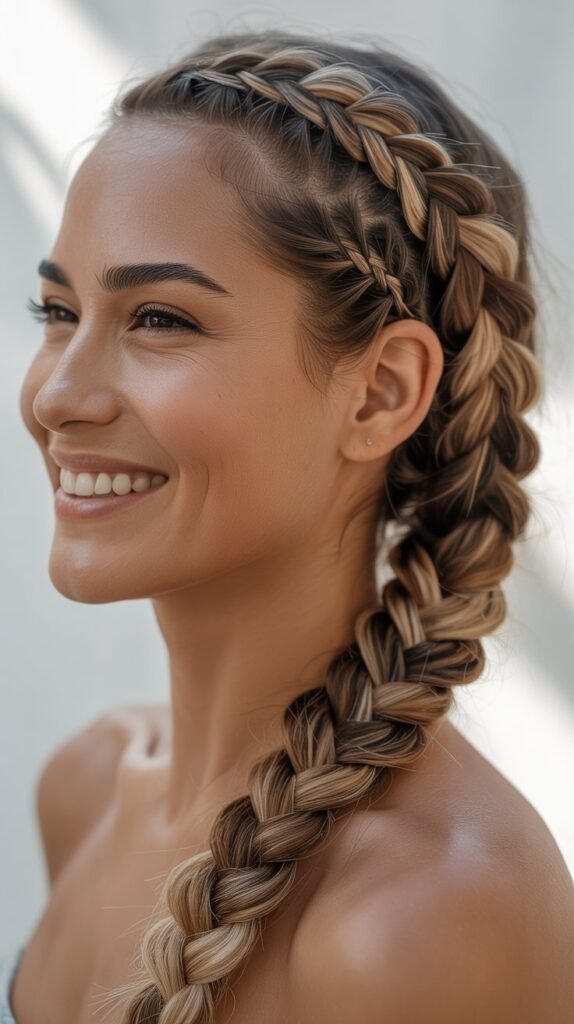
1. Classic Fishtail Braid
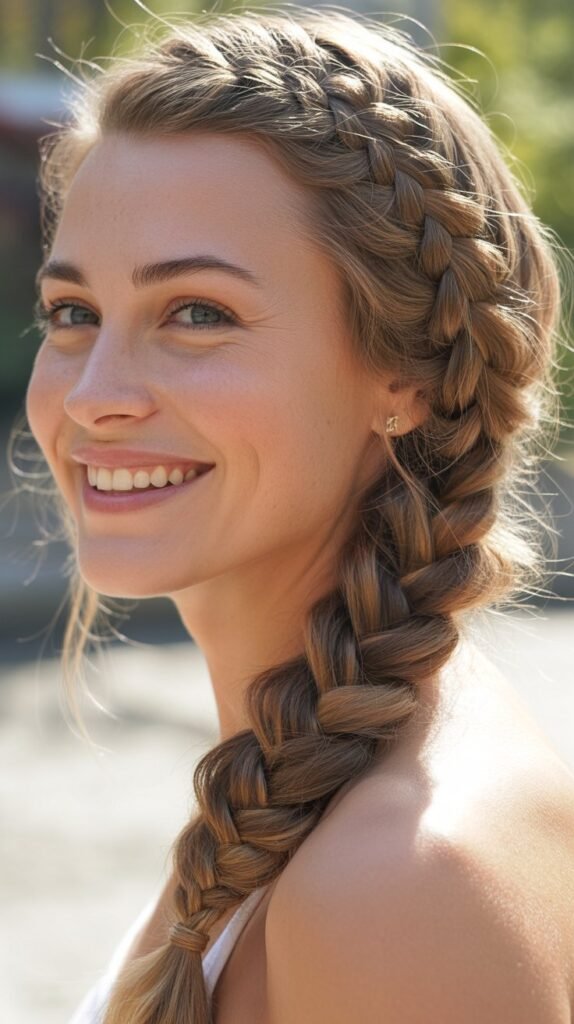
The fishtail braid serves as a foundational bohemian hairstyle that never goes out of style, offering an intricate appearance while being surprisingly simple to create.
This timeless braid works beautifully for both casual daytime wear and elegant evening events, making it one of the most versatile options in your styling repertoire.
- Divide your hair into two equal sections instead of the traditional three used in regular braids.
- Take a small piece from the outer edge of the left section and cross it over to join the right section.
- Repeat this process by taking a small piece from the outer edge of the right section and crossing it to the left.
- Continue alternating sides, keeping the sections tight for a more defined look or loose for a relaxed bohemian vibe.
- Secure the end with a clear elastic band and gently pull apart the braid to create more volume and texture.
- For added boho appeal, wrap a small section of hair around the elastic to conceal it.
- Consider leaving some face-framing pieces loose to soften the overall look.
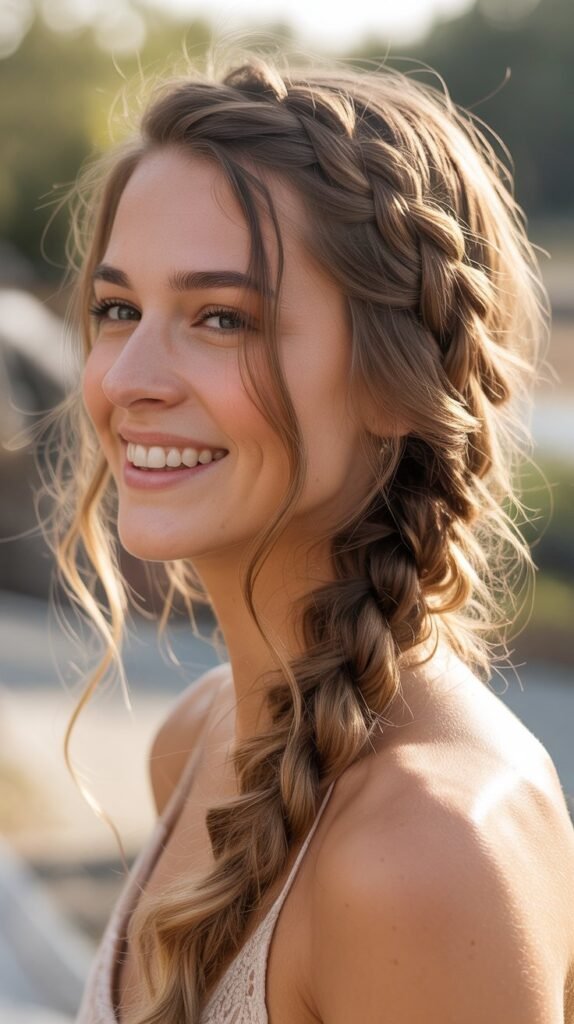
2. Messy Side Braid with Flowers
This romantic style combines effortless texture with natural elements, creating a look that’s perfect for outdoor weddings, festivals, or romantic dates.
The intentionally undone appearance paired with fresh or artificial flowers embodies the free-spirited bohemian philosophy.
- Begin by applying texturizing spray to add grip and volume to your hair.
- Sweep all your hair to one side, letting it fall over your shoulder.
- Create a loose three-strand braid, intentionally leaving it imperfect and relaxed.
- Pancake the braid by gently pulling sections apart to increase width and create a fuller appearance.
- Insert small flowers or floral clips throughout the braid at varying intervals.
- Allow several wispy pieces to escape around your face and neck for that undone aesthetic.
- Finish with a light-hold hairspray to maintain the style without making it stiff.
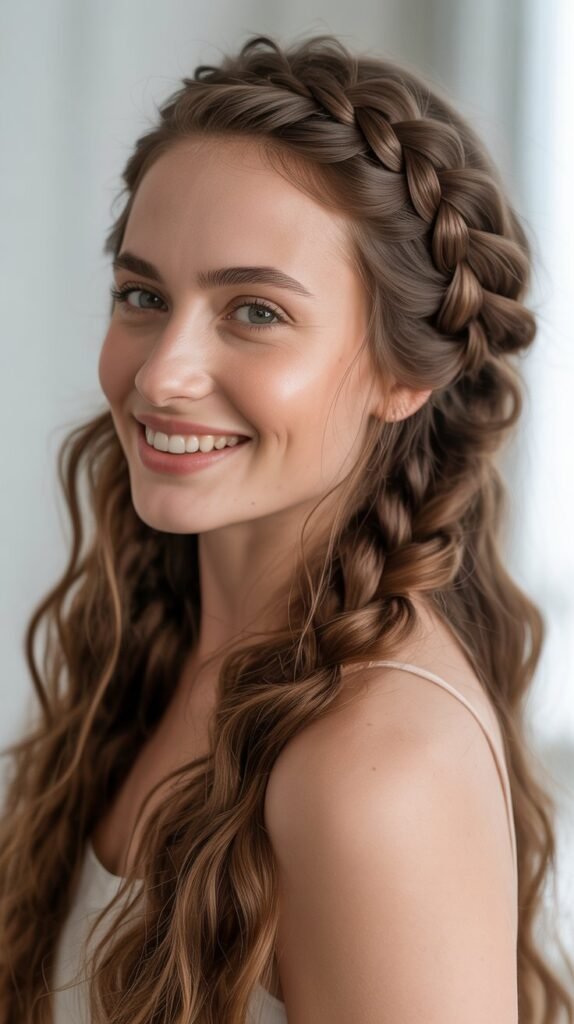
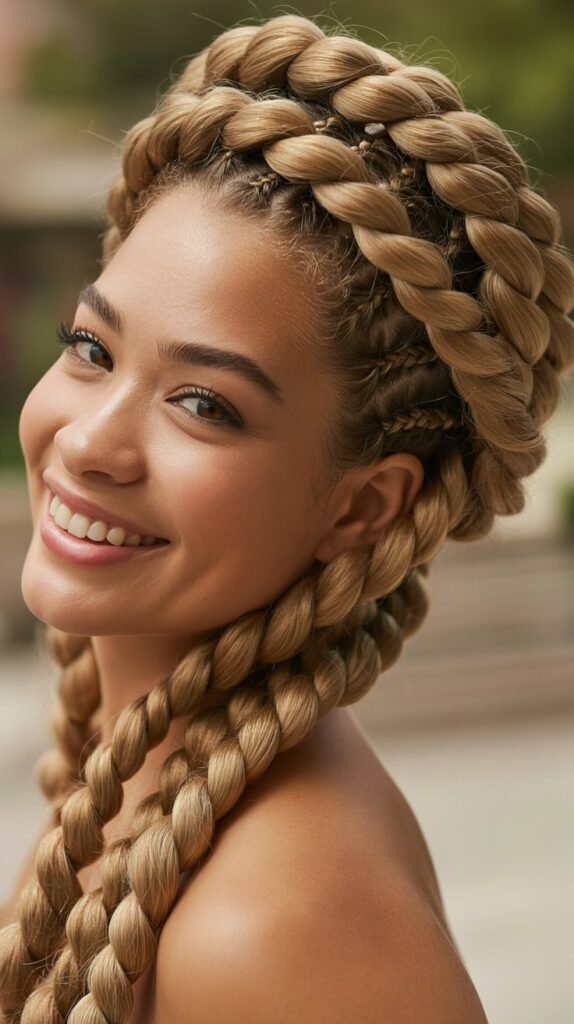
3. Dutch Crown Braid
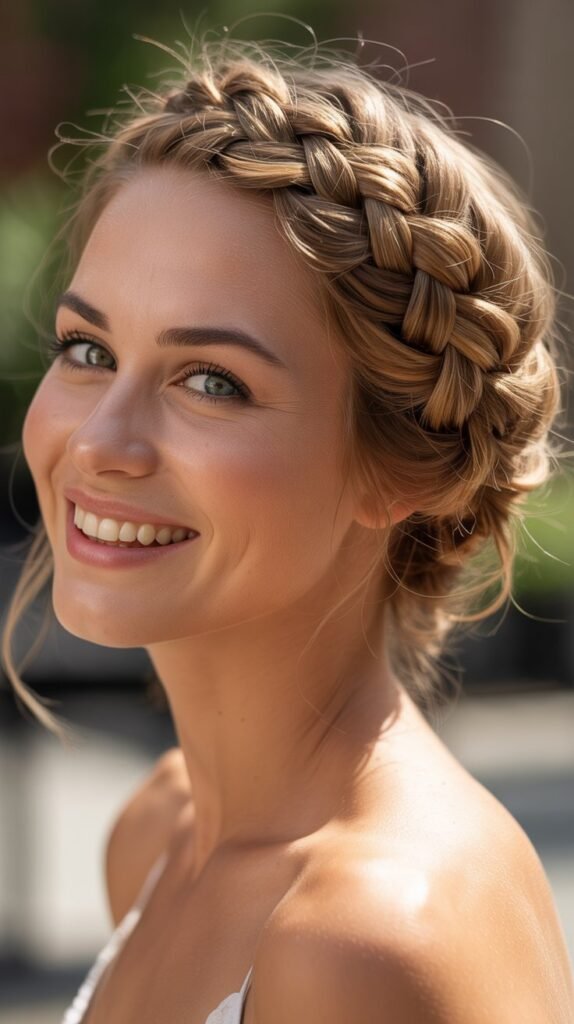
The Dutch crown braid creates a stunning halo effect that’s both practical and beautiful, keeping hair off your face while making a bold style statement.
This elevated look works exceptionally well for formal occasions or when you want to feel like bohemian royalty.
- Part your hair down the middle from forehead to nape, creating two equal sections.
- Starting at the hairline on one side, begin a Dutch braid (reverse French braid) by crossing sections under rather than over.
- Continue braiding along your hairline, incorporating new hair as you move around the head.
- When you reach the starting point, continue braiding the remaining hair without adding new sections.
- Wrap the braid around to meet the beginning and secure with bobby pins.
- Tuck the end underneath the crown braid and pin securely.
- Gently pull sections of the braid to create dimension and soften the look.
- Add small flowers, decorative pins, or leave it simple depending on the occasion.
4. Waterfall Braid Half-Up Style
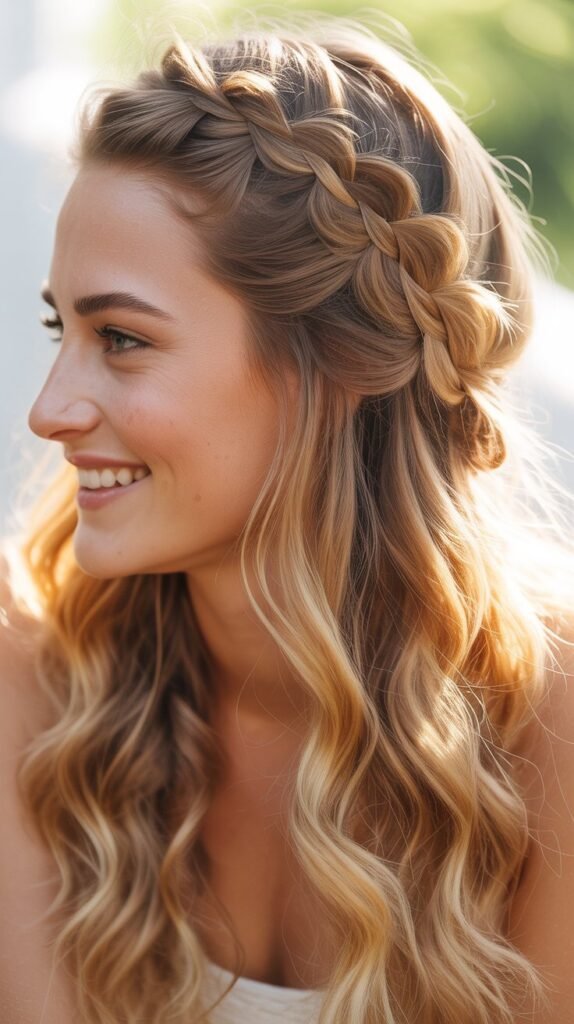
This ethereal hairstyle creates the illusion of hair cascading through a braid like a waterfall, combining the best of both worlds with hair both up and down.
The waterfall braid adds visual interest while keeping your face clear and showing off your hair’s length and texture.
- Start with a deep side part for maximum impact and asymmetry.
- Begin a regular three-strand braid near your temple on the heavier side.
- After the first stitch, drop the bottom section and let it fall, replacing it with a new section from above.
- Continue this pattern across the crown of your head, dropping sections and adding new ones.
- Each dropped section creates the waterfall effect as it cascades down.
- Secure the braid behind your ear with bobby pins or continue to the other side.
- Curl the loose hair beneath for added texture and dimension.
- Apply shine serum to enhance the flowing waterfall strands.
5. Boho Bubble Braid Ponytail
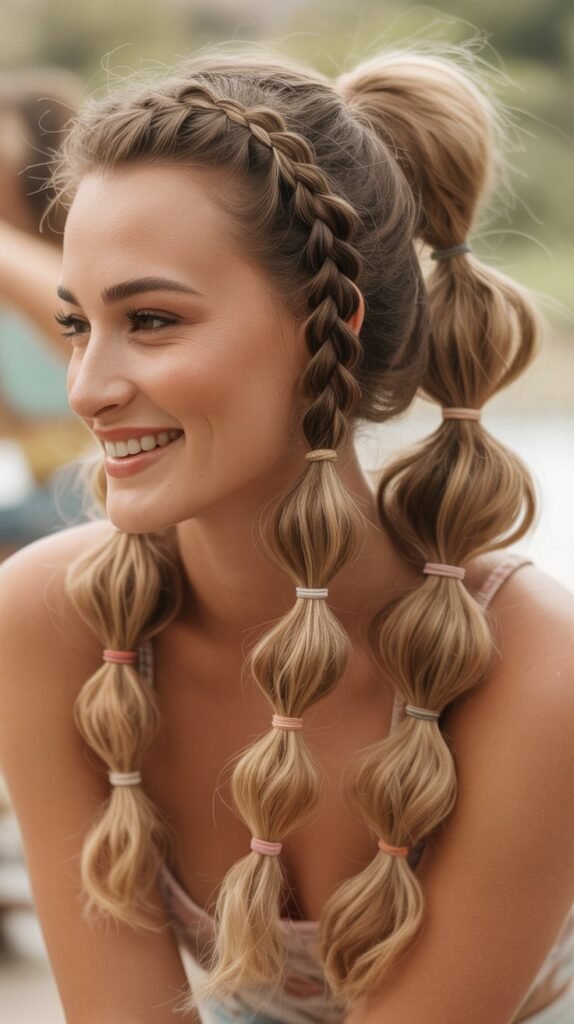
The bubble braid transforms a simple ponytail into a statement piece with its distinctive segmented appearance.
This playful yet sophisticated style works perfectly for festivals, casual outings, or adding fun to your everyday look.
- Gather your hair into a high or low ponytail depending on your preference and secure with an elastic.
- Take another elastic and place it 2-3 inches down from the first one.
- Gently pull and loosen the hair between the two elastics to create a rounded bubble effect.
- Continue adding elastics at regular intervals down the length of your ponytail.
- Create bubbles in each section by pulling the hair outward gently.
- For extra volume, lightly backcomb each section before creating the bubble.
- Wrap decorative ribbons, beads, or metallic thread around each elastic for embellishment.
- Leave the end loose or create one final bubble at the bottom.
6. Twisted Boho Half-Updo
This effortlessly romantic style uses simple twists to create an elegant half-up look that works for virtually any occasion.
The twisted sections add dimension without requiring complex braiding skills, making it perfect for those who want a boho look with minimal effort.
- Apply a volumizing mousse to damp hair and blow dry for added body.
- Take a two-inch section of hair from one side near your temple.
- Twist the section away from your face, keeping it relatively loose.
- Pin the twist at the back of your head with bobby pins crossed in an X formation.
- Repeat on the opposite side, creating a matching twist.
- Meet both twists at the center back and secure them together.
- Pull gently on the twists to add volume and create a softer appearance.
- Leave the remaining hair down in natural waves or curls.
- Add small decorative pins or a barrette at the meeting point for extra flair.
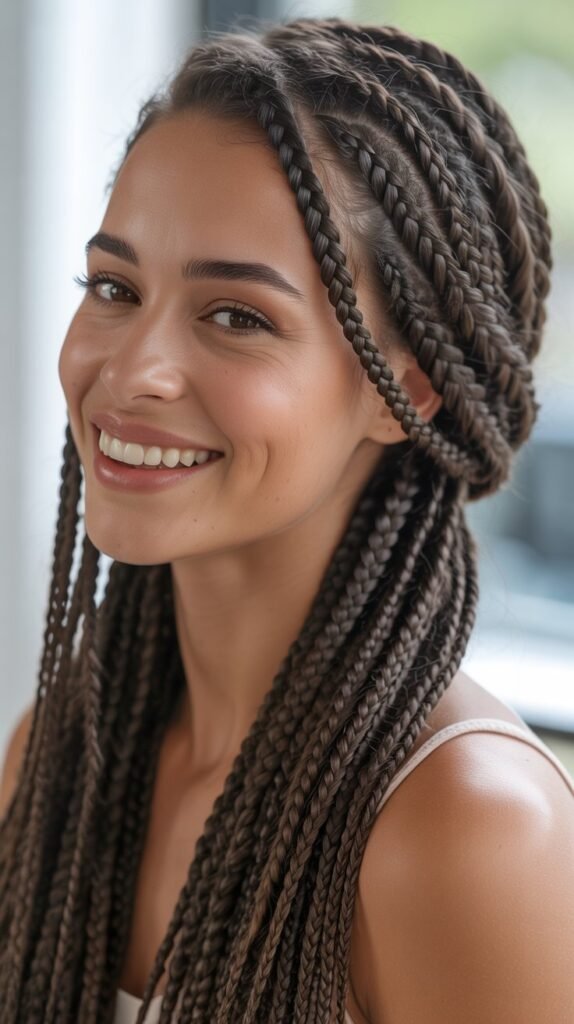
7. Multiple Mini Braids with Beads
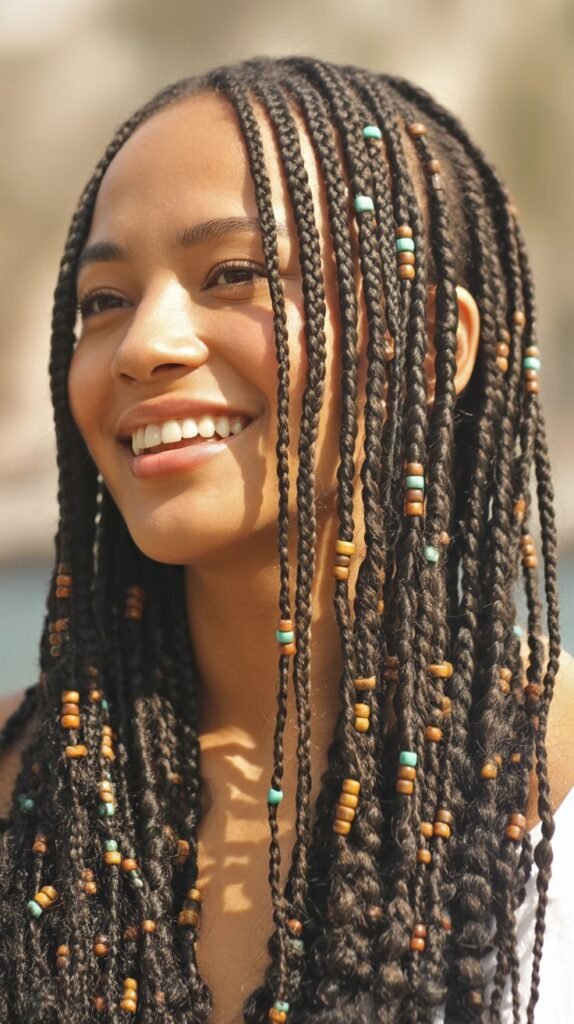
This bohemian classic incorporates several small braids throughout loose hair, creating texture, interest, and that quintessential festival vibe.
The addition of beads adds a playful, tribal-inspired element that enhances the free-spirited aesthetic.
- Start with completely dry hair that has natural texture or has been given beachy waves.
- Select random sections throughout your hair, varying in size from thin to medium thickness.
- Create simple three-strand braids with each section, keeping them loose and relaxed.
- Thread wooden, metal, or colorful beads onto each braid as you work.
- Secure beads in place by adding small elastics before and after each bead.
- Vary the placement of beads on different braids for an organic, unplanned appearance.
- Leave most of your hair down and flowing between the braided sections.
- Create anywhere from 3 to 10 mini braids depending on how bold you want the look.
- Consider placing more braids around your face for added frame and interest.
8. Rope Braid Ponytail
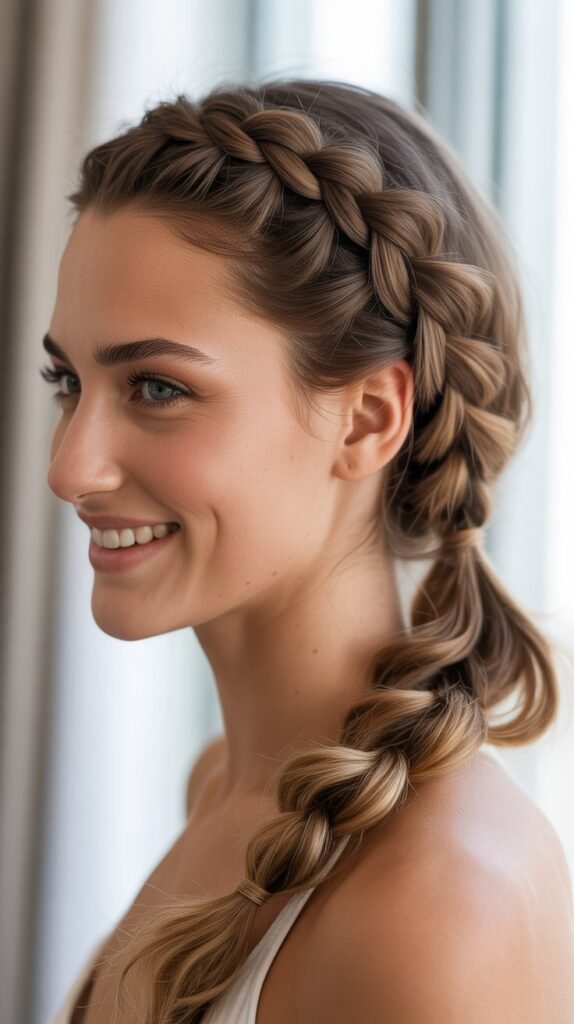
The rope braid offers a unique twisted appearance that stands out from traditional braiding techniques while being incredibly simple to execute.
This sleek yet textured style works beautifully for both active days and more polished occasions.
- Gather your hair into a ponytail at your desired height and secure firmly with an elastic.
- Divide the ponytail into two equal sections.
- Twist each section individually in the same direction (clockwise or counterclockwise).
- Then wrap the two twisted sections around each other in the opposite direction.
- This counter-twisting creates the rope effect and prevents the braid from unraveling.
- Secure the end with another elastic band.
- Gently pull on the rope braid to add width and dimension.
- Wrap a small piece of hair around the base elastic to conceal it for a polished finish.
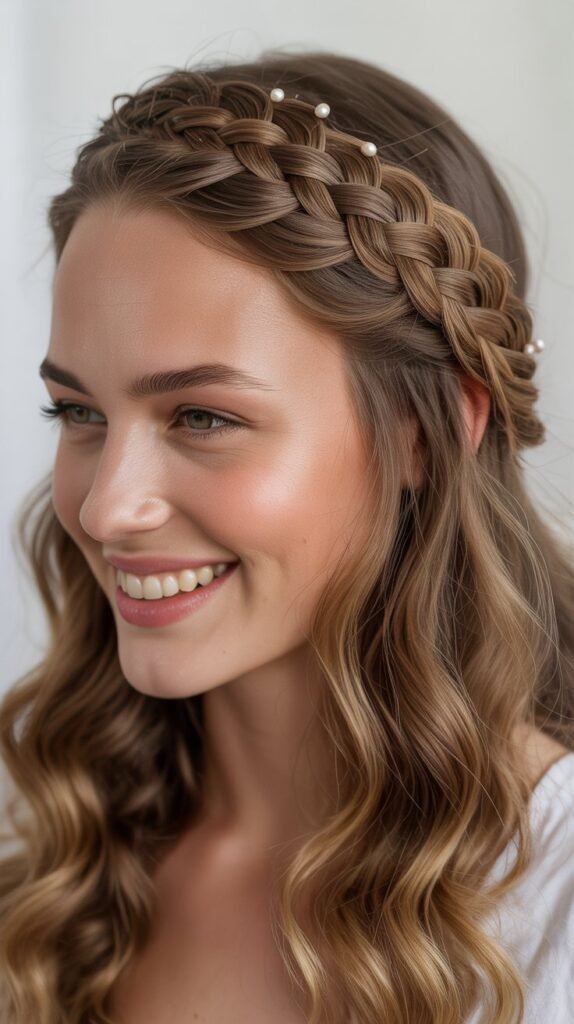
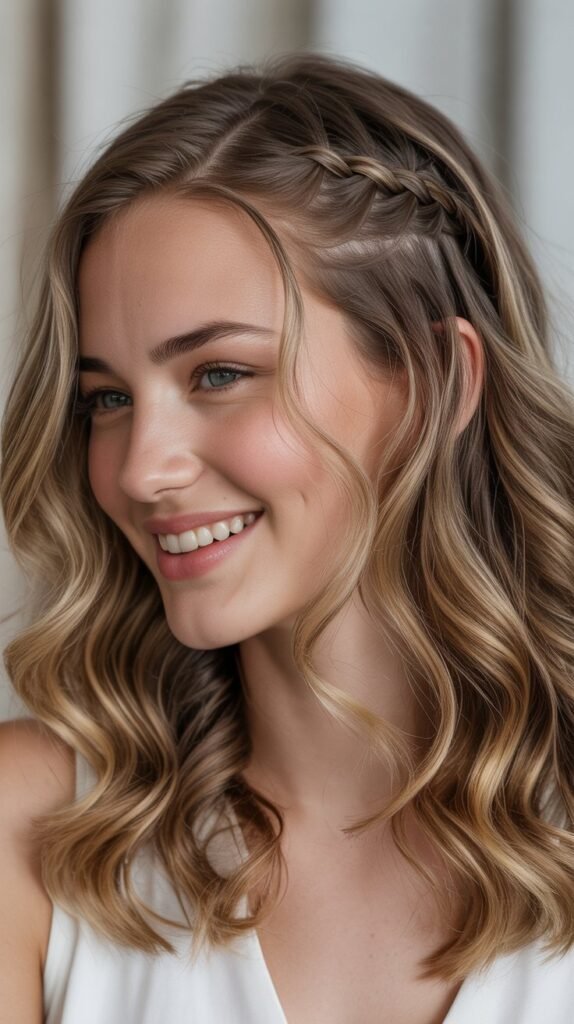
9. Bohemian Headband Braid

This style creates a natural headband effect using your own hair, combining practicality with undeniable charm.
The braided headband keeps hair off your face while adding an artistic touch that exemplifies bohemian styling.
- Part your hair deeply on one side for an asymmetrical starting point.
- On the side with less hair, take a section from behind your ear.
- Create a standard three-strand braid with this section.
- Bring the braid across the top of your head like a headband.
- Position it about an inch back from your hairline for the most flattering placement.
- Secure the braid behind your opposite ear with bobby pins, hiding the end underneath other hair.
- Leave the rest of your hair down in loose waves or add additional small braids.
- Pull gently on the headband braid to widen it and create a softer appearance.
- Tuck small flowers or decorative pins into the braid for added embellishment.
10. Infinity Braid
The infinity braid creates a figure-eight pattern that appears incredibly intricate while being achievable with practice and patience.
This show-stopping style guarantees compliments and works beautifully for special events where you want to make a lasting impression.
- Begin with a small section of hair at the crown or side of your head.
- Divide this section into two strands.
- Cross the left strand over the right to form the beginning of a figure-eight shape.
- Add a small amount of new hair to the strand that’s now on the left.
- Cross it under and through the loop created by the other strand.
- Continue this pattern, always adding hair to the working strand before crossing it through.
- The braid creates an infinity symbol pattern as you work down the hair length.
- This technique requires practice but creates a stunning dimensional effect.
- Secure at the bottom and gently adjust sections to enhance the pattern visibility.
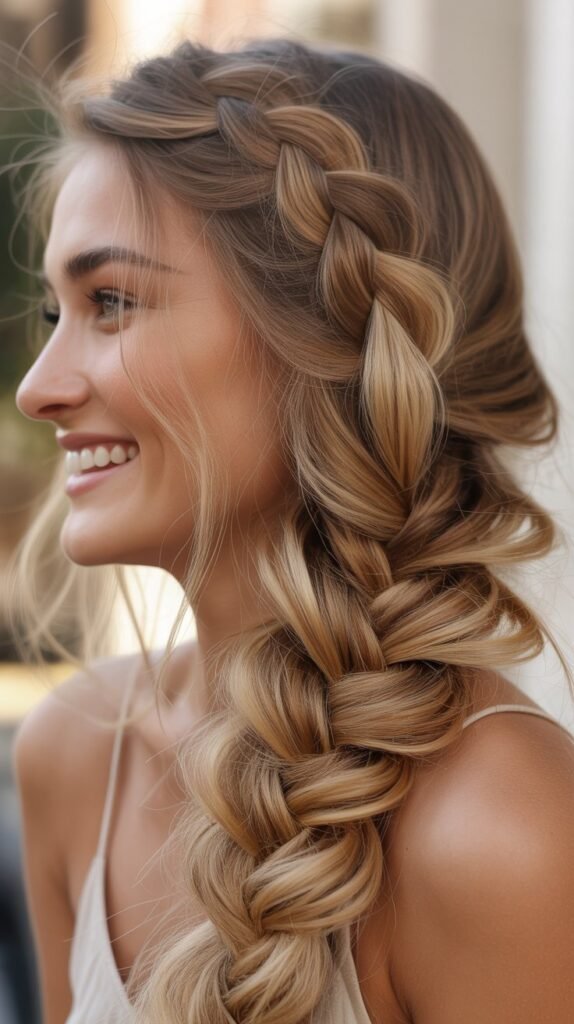
11. Loose Mermaid Braid
This dreamy, voluminous braid evokes oceanic imagery with its flowing, undone appearance and substantial width.
The mermaid braid works exceptionally well for beach settings, summer events, or anytime you want to channel mythical, ethereal energy.
- Apply sea salt spray or texturizing spray throughout your hair for grip and beachy texture.
- Create a loose three-strand or four-strand braid starting at the nape of your neck.
- Keep the braid very loose from the beginning rather than pulling it tight.
- As you braid, intentionally leave small sections sticking out for added texture.
- Once complete, aggressively pancake the braid by pulling sections apart horizontally.
- Continue pulling until the braid is 2-3 times its original width.
- The goal is a very wide, flat braid with lots of texture and dimension.
- Secure with a clear elastic and consider adding sea-inspired accessories like shells or starfish clips.
- Allow face-framing pieces to remain loose and wavy for the complete mermaid effect.
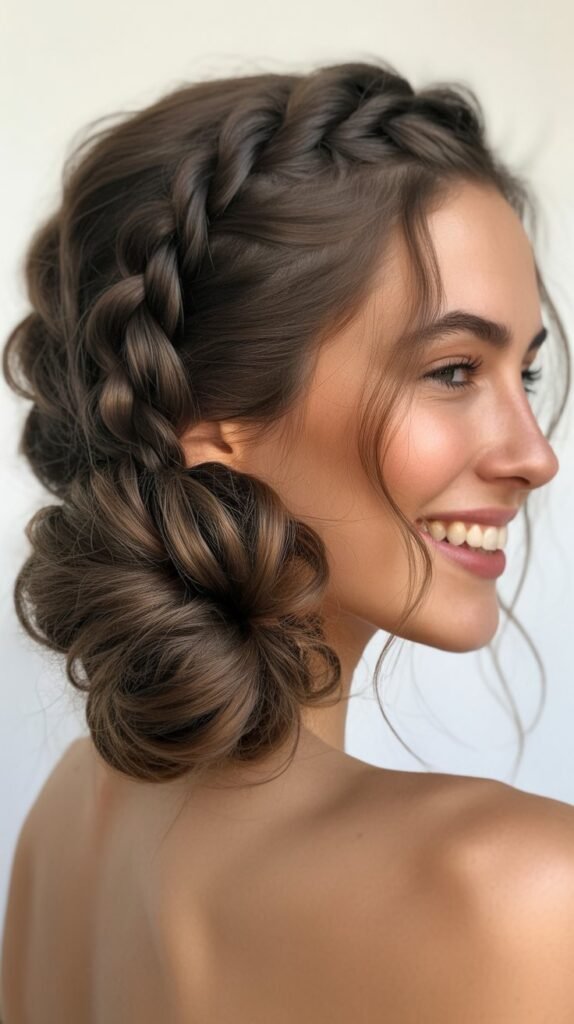
12. Braided Top Knot
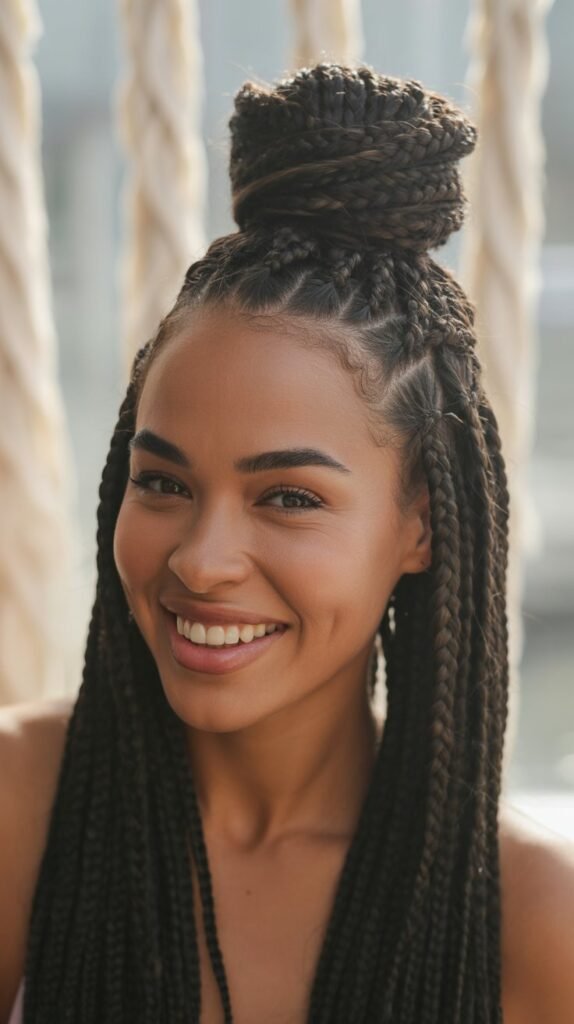
This style combines the structure of a top knot with the texture and interest of braiding, creating an elevated look that’s both practical and stylish.
The braided top knot keeps all your hair secured while maintaining that essential bohemian aesthetic.
- Flip your head upside down and begin a Dutch or French braid starting at the nape of your neck.
- Braid upward toward the crown, incorporating all hair as you work against gravity.
- When you reach the crown area, secure the braid with an elastic.
- The remaining loose hair and braid end will form your top knot.
- Twist this section into a bun shape and wrap it around the base.
- Secure the bun with bobby pins, tucking ends underneath.
- Pull gently on the braid leading up to the bun to add dimension.
- Leave a few face-framing pieces loose if desired.
- Wrap a decorative scarf or ribbon around the base of the bun for added bohemian flair.
13. Feathered Fishtail with Extensions
This dramatic variation on the classic fishtail incorporates hair extensions or naturally very long hair to create an ultra-long, statement-making braid.
The feathered technique adds exceptional texture and visual interest throughout the entire length.
- If using extensions, clip them in securely throughout your hair for added length and volume.
- Create a fishtail braid using the standard technique of crossing small outer sections.
- As you braid, deliberately pull small pieces out at intervals to create the feathered effect.
- These pulled pieces should be of varying lengths for a natural, organic appearance.
- Continue the fishtail pattern all the way down to the ends of your extended length.
- Pancake the braid generously to showcase the feathered sections.
- The resulting look should appear wild, textured, and intentionally imperfect.
- Secure at the bottom with a nearly invisible elastic.
- This style works beautifully for photoshoots, special events, or when you want maximum impact.
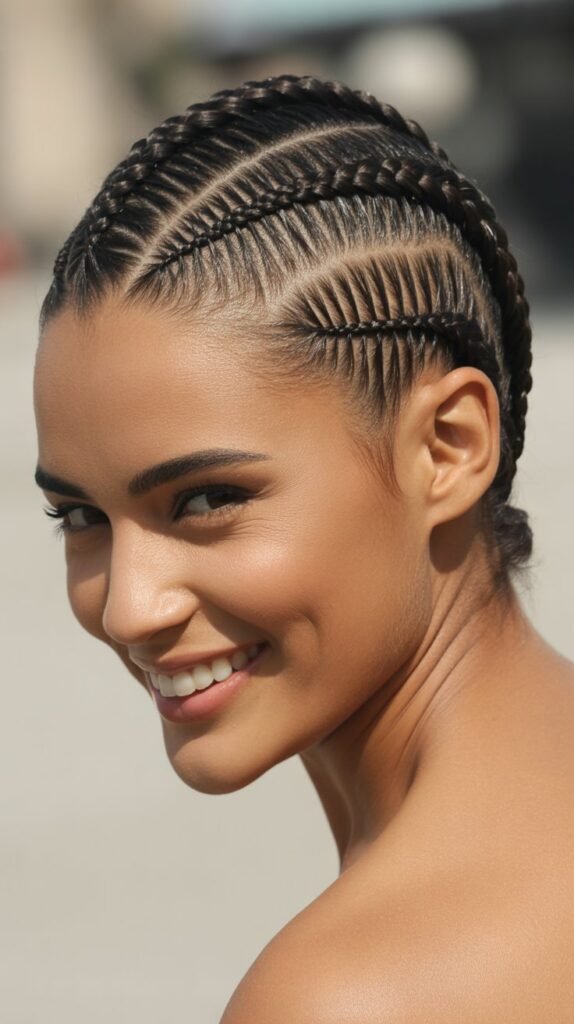
14. Zigzag Part with Double Braids
The zigzag part adds an unexpected element to the classic double braid style, creating visual interest before the braids even begin.
This playful yet polished look works well for casual settings and shows attention to styling detail.
- Use a rattail comb to create a zigzag pattern down the center of your head from forehead to nape.
- Take your time creating sharp, defined angles in the part for maximum impact.
- Divide your hair into two sections following the zigzag line.
- Create matching braids on each side using your preferred braiding technique.
- French braids, Dutch braids, or simple three-strand braids all work beautifully.
- Keep the braids relatively tight to maintain the clean zigzag part visibility.
- Secure each braid at the end with elastics that match your hair color.
- The contrast between the geometric part and flowing braids creates a striking combination.
- Add small clips or pins along the zigzag part for extra embellishment if desired.
15. Lace Braid Half Crown
The lace braid creates a delicate, one-sided appearance by only adding hair from one direction, making it perfect for a romantic half-crown style.
This feminine technique adds elegance while maintaining the relaxed bohemian spirit.
- Create a deep side part to establish an asymmetrical starting point.
- Begin at the front hairline on the heavier side of the part.
- Start with a small three-strand braid and begin the lace technique.
- Only add new sections from the top (hairline side), leaving the bottom untouched.
- This creates a braid that lies flat against your head with hair flowing beneath it.
- Continue the lace braid following your hairline toward the back of your head.
- Curve the braid around to create a half-crown effect across the back.
- Secure with bobby pins, allowing the rest of your hair to flow freely.
- The result is an elegant, one-sided crown that looks intricate but allows hair movement.
16. Stacked Braids
This dimensional style layers multiple braids at different heights and angles, creating a complex appearance that showcases advanced braiding skills.
Stacked braids work beautifully for special occasions when you want a truly unique bohemian statement.
- Section your hair horizontally into three or more layers from top to bottom.
- Begin with the top section, creating a braid along your crown area.
- Secure this first braid temporarily while you work on the next layer.
- Create a second braid in the middle section, positioning it slightly lower than the first.
- Add a third braid in the lowest section near your nape.
- The braids should stack vertically, creating a layered, dimensional effect.
- You can use different braiding techniques for each layer to add even more interest.
- Once all braids are complete, allow them to fall together naturally.
- Gently pull sections to add volume and create cohesion between the stacked layers.
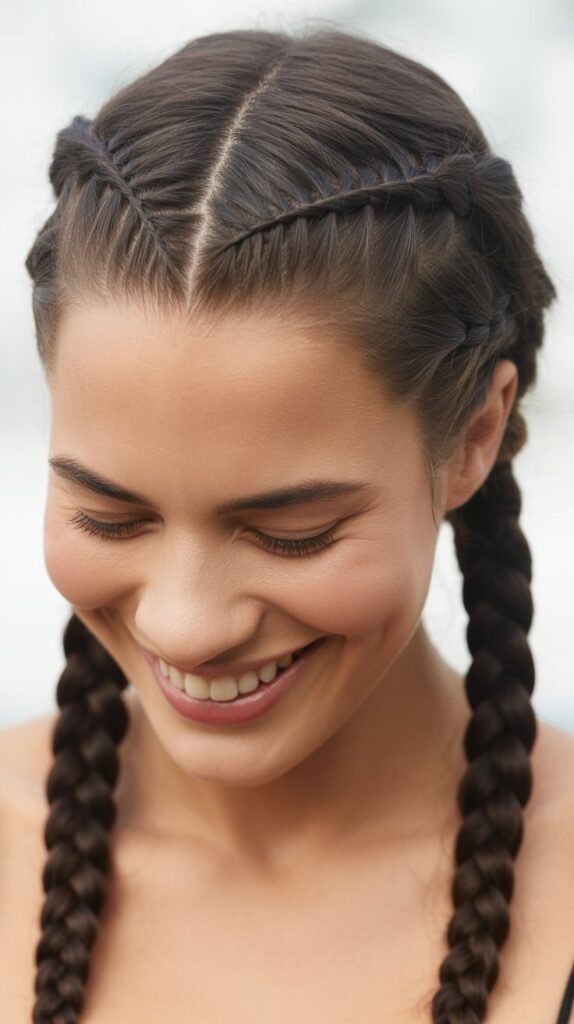
17. Boho Braided Pigtails
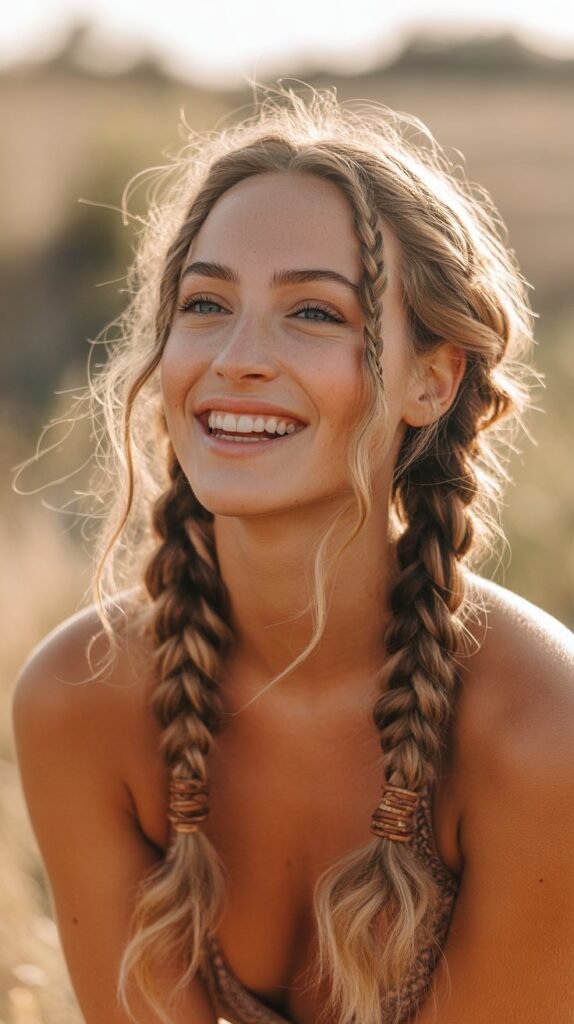
Braided pigtails offer a youthful, carefree vibe that perfectly embodies bohemian spirit while being incredibly practical for active days.
This playful style works for all ages and can be dressed up or down depending on the occasion.
- Part your hair down the center from forehead to nape, creating two equal sections.
- Decide on your pigtail placement – higher for a playful look, lower for sophistication.
- Create matching braids on each side using your preferred technique.
- Messy three-strand braids create a relaxed vibe, while Dutch braids offer more structure.
- Keep the braids loose and textured by pancaking them as you work.
- Secure each braid with elastic bands, preferably in neutral or earth-tone colors.
- Leave some face-framing pieces loose for a softer, more romantic appearance.
- Add ribbons, beads, or small flowers to the braids for extra bohemian charm.
- The key is making them look effortless rather than overly polished.
18. Pull-Through Braid
The pull-through braid creates a faux-braid appearance using ponytails that’s surprisingly simple to achieve while looking impressively complex.
This voluminous style works beautifully for those who struggle with traditional braiding techniques.
- Create a ponytail at the crown of your head and secure with a clear elastic.
- Split this ponytail in half vertically, temporarily separating the two sections.
- Create a second ponytail directly below the first using hair from beneath.
- Take the two split sections from the first ponytail and bring them around the second ponytail.
- Combine these sections beneath the second ponytail and secure with another elastic.
- Split this newly created ponytail in half and repeat the process.
- Continue down the length of your hair, creating the pull-through pattern.
- Once complete, gently pull each section outward to create dramatic volume.
- The result looks like an elaborate braid but uses a much simpler technique.
19. Twisted Rope Crown
This elegant style uses the rope braid technique to create a crown effect that’s both sophisticated and bohemian.
The twisted texture adds interest while the crown placement keeps hair beautifully off your face.
- Part your hair horizontally from ear to ear across the top of your head.
- The front section will become your crown, while the back remains down.
- Divide the front section in half vertically.
- Create a rope braid on each side by twisting two sections around each other.
- Work the rope braids from the center part toward the back on each side.
- Meet the two rope braids at the back center of your head.
- Pin them together securely, creating a crown effect across your head.
- Leave the remaining hair down in natural waves or add loose curls.
- Pull gently on the twisted sections to add width and soften the appearance.
- Tuck small flowers or decorative pins into the crown for embellishment.
20. Boho Side Swept with Small Accent Braids
This asymmetrical style combines the drama of side-swept hair with the detail of small accent braids, creating a look that’s both glamorous and bohemian.
The contrast between the volume and the intricate details makes this style truly special.
- Apply volumizing mousse and blow dry your hair with maximum volume at the roots.
- Create a deep side part for dramatic asymmetry.
- On the side with more hair, create 2-3 small braids near the part.
- These braids should be thin and delicate, serving as accent details rather than main features.
- Sweep all your hair to one side over your shoulder.
- Secure the sweep temporarily with bobby pins behind your ear on the lighter side.
- Curl or wave the swept hair for added texture and movement.
- Remove any temporary pins and let the hair cascade naturally over your shoulder.
- The small braids add visual interest without overwhelming the swept style.
21. Four-Strand Braid
The four-strand braid creates a more complex pattern than traditional three-strand braids, offering enhanced dimension and a unique woven appearance.
This technique elevates your braiding game and creates a stunning bohemian statement.
- Divide your hair into four equal sections instead of the usual three.
- Number them mentally from left to right as 1, 2, 3, and 4.
- Cross section 1 over section 2, then cross section 4 over section 3.
- Cross the middle two sections over each other.
- Continue this pattern: outer sections cross toward center, then middle sections cross.
- The rhythm becomes natural with practice, creating a distinctive woven pattern.
- Keep tension even throughout to maintain a consistent braid appearance.
- Once complete, pancake the braid to showcase the four-strand pattern.
- This braid works beautifully as a statement piece on its own or combined with other styles.
22. Braided Wrapped Low Bun
This elegant style combines braiding with a classic low bun, creating a sophisticated bohemian look perfect for formal events or professional settings.
The braided element adds interest to the otherwise simple bun shape.
- Gather your hair into a low ponytail at the nape of your neck.
- Before securing, separate out a small section from the underneath of the ponytail.
- Secure the remaining hair in a ponytail with an elastic.
- Braid the small section you separated out earlier.
- Twist the ponytail into a low bun and secure with bobby pins.
- Wrap the small braid around the base of the bun, circling it completely.
- Secure the braid with bobby pins, tucking the end underneath.
- Pull gently on the bun to create a slightly messy, relaxed appearance.
- Allow a few face-framing pieces to remain loose for softness.
23. Waterfall into Fishtail Combination
This advanced style seamlessly transitions from a waterfall braid into a fishtail, showcasing braiding versatility and creating a stunning two-in-one look.
The combination offers the best of both braiding worlds in a single cohesive style.
- Begin with a waterfall braid starting at your temple on one side.
- Create the waterfall pattern across the crown area, dropping sections as you go.
- When you reach the opposite side, secure the waterfall braid temporarily.
- Gather all the dropped waterfall sections along with the remaining loose hair.
- Transition into a fishtail braid using all this collected hair.
- The waterfall sections will integrate naturally into the fishtail pattern.
- Continue the fishtail braid down the length of your hair.
- Pancake both the waterfall section and the fishtail for dimension.
- This creates a flowing, cascading effect that’s both romantic and intricate.
24. Mohawk Braid
The mohawk braid makes a bold statement by concentrating a Dutch or French braid down the center of the head while leaving the sides smooth or shaved.
This edgy bohemian style works for those who want to push boundaries while maintaining braiding tradition.
- Create a section down the center of your head about 3-4 inches wide from forehead to nape.
- Clip or smooth the side sections out of the way temporarily.
- Begin a Dutch braid at your hairline in the center section.
- Braid down the center, incorporating only hair from the center section.
- Keep the braid raised and prominent by maintaining tension as you work.
- Continue to the nape of your neck, then braid the remaining length normally.
- Pancake the center braid dramatically to create maximum volume and width.
- The sides can be left smooth, braided into smaller braids, or styled separately.
- This creates a striking mohawk effect that’s unmistakably bohemian-meets-edgy.
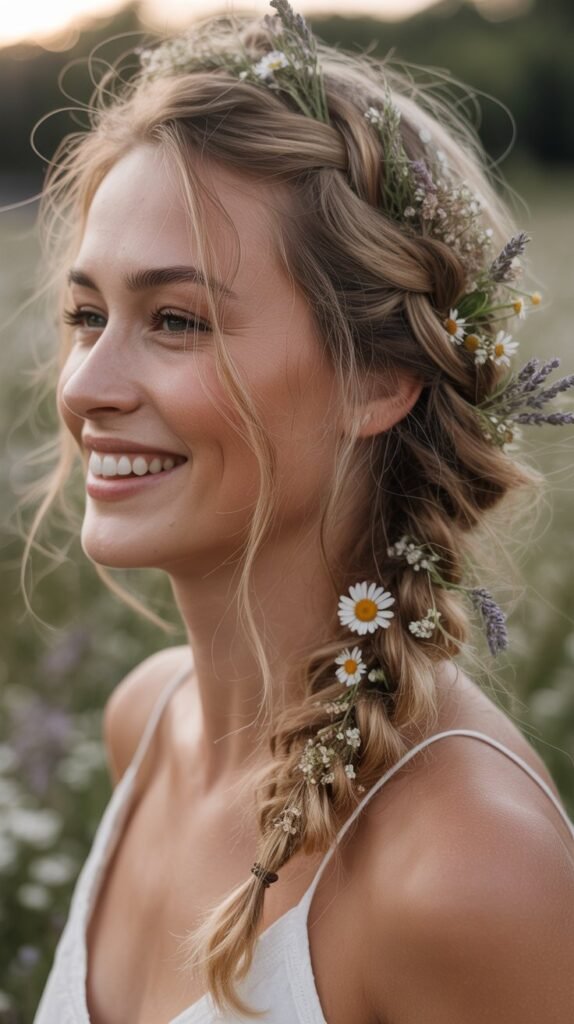
25. Flower Crown Braid with Fresh Blooms
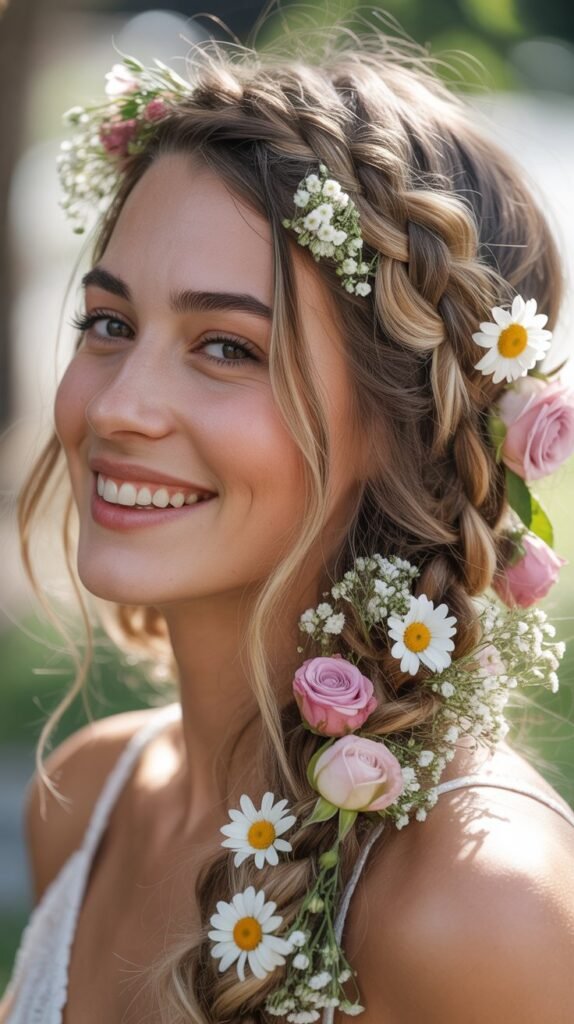
This quintessentially bohemian style incorporates fresh flowers directly into a crown braid, creating a look that’s perfect for weddings, festivals, or any celebration.
The natural blooms elevate the style from beautiful to absolutely enchanting.
- Create a Dutch or French braid crown following your hairline around your entire head.
- As you braid, have fresh flowers with trimmed stems ready nearby.
- After every few stitches, incorporate a flower by tucking the stem into the braid.
- Secure each flower by braiding over its stem, holding it in place naturally.
- Continue around the entire head, creating a flower-filled crown.
- Use a variety of flower types and colors for visual interest.
- Baby’s breath, small roses, daisies, and wildflowers all work beautifully.
- Complete the braid and secure the end underneath the starting point.
- Add extra flowers with bobby pins in any sparse areas.
26. Triple Threat: Three Braids Merged Into One
This creative style starts with three separate braids that merge into one larger braid, creating an eye-catching transition and impressive dimensional effect.
The triple-threat technique showcases advanced braiding creativity.
- Divide your hair into three vertical sections: left, center, and right.
- Create a braid in each of the three sections, working them simultaneously or one at a time.
- Continue each braid for about 4-6 inches depending on your hair length.
- At the merging point, gather all three braids together.
- Begin a new braid using the three existing braids as your three strands.
- This creates a thick, rope-like appearance as you’re essentially braiding braids.
- Continue this merged braid down the remaining length of your hair.
- Secure at the end with an elastic band.
- The transition point creates fascinating texture and dimension.
- Pancake all sections for maximum volume and visual impact.
27. Loose Waves with Hidden Braids
This style offers subtle bohemian charm through braids that are mostly concealed within loose waves, creating surprise details when hair moves.
The hidden braids add texture while maintaining an overall relaxed appearance.
- Start with naturally wavy hair or curl your hair in loose waves.
- Select random sections underneath the top layer of hair.
- Create small to medium-sized braids with these hidden sections.
- Position these braids so they’re not immediately visible from the front or sides.
- The braids should peek through when hair moves or wind blows.
- Create 3-5 hidden braids throughout your hair for optimal effect.
- Leave the top layers completely unbraided and flowing naturally.
- Apply texturizing spray to enhance the waves and create separation.
- The result is a seemingly simple wavy style with secret braided details.
- This works perfectly for those who want boho flair without obvious styling.
Styling Tips and Product Recommendations
Creating and maintaining beautiful boho braids requires the right products and techniques to ensure your hairstyles look amazing and last throughout the day.
Essential Products for Boho Braids
- Texturizing spray provides grip and enhances natural texture, making hair easier to braid and giving that essential beachy, lived-in appearance.
- Dry shampoo adds volume at the roots and absorbs oils, extending the life of your braided styles between washes.
- Leave-in conditioner keeps hair manageable and prevents frizz while maintaining moisture without weighing down your braids.
- Hair oil or serum adds shine and smooths flyaways, particularly important for sleeker boho styles that still need that glossy finish.
- Flexible hold hairspray maintains your style without creating stiffness, allowing natural movement while keeping braids intact.
- Bobby pins and clear elastics are essential tools for securing styles invisibly and maintaining a clean, professional appearance.
Hair Preparation Tips
- Start with second or third-day hair when possible, as freshly washed hair can be too slippery for braiding and styling.
- Create waves or curls first if your hair is naturally straight, as texture significantly improves braid appearance and hold.
- Section hair properly before beginning complex styles to ensure even distribution and balanced results.
- Keep a spray bottle nearby to lightly dampen hair that becomes too dry or static during the styling process.
Making Braids Last Longer
- Sleep with braids protected by wrapping them in a silk or satin scarf to prevent frizzing and maintain definition.
- Refresh braids in the morning by lightly misting with water and applying a small amount of styling product.
- Avoid touching braids excessively throughout the day, as oils from your hands can create buildup and reduce longevity.
- Use dry shampoo strategically at the roots to maintain volume and freshness without disturbing the braided sections.
For comprehensive guides on hair care and styling techniques, resources like Healthline’s hair care section offer evidence-based advice on maintaining healthy hair while experimenting with different styles.
Accessorizing Your Boho Braids
The right accessories can transform a simple braid into a stunning bohemian statement that perfectly captures your personal style and the occasion.
Flower and Natural Element Accessories
- Fresh flowers create the most authentic bohemian look but require careful selection of hardy varieties that won’t wilt quickly.
- Artificial silk flowers offer longevity and consistency, perfect for events where you need your hairstyle to last all day.
- Dried flowers provide a rustic, vintage-inspired appearance and can be kept as keepsakes after special events.
- Greenery like eucalyptus or ferns adds texture and a natural element that complements flowers beautifully.
- Feathers introduce an earthy, tribal-inspired element that works particularly well for festival settings.
Metal and Decorative Accessories
- Hair rings and cuffs slide onto braids or individual sections, adding metallic accents without requiring pins.
- Decorative bobby pins in gold, silver, or rose gold finishes elevate simple braids instantly.
- Chains and hair jewelry create a dramatic, fashion-forward bohemian statement for special occasions.
- Beads in various materials including wood, metal, and glass can be threaded onto braids for customizable decoration.
- Ribbons and fabric strips woven through braids add color and softness to the overall look.
Headband and Scarf Options
- Braided leather headbands complement hair braids while keeping flyaways controlled.
- Patterned fabric scarves tied as headbands add color and protect hairstyles from the elements.
- Metallic chain headpieces create festival-ready glamour when paired with simpler braid styles.
- Floral crown additions can be combined with braided styles for maximum bohemian impact.
Conclusion
The world of boho braids and hairstyles for long hair offers endless possibilities for self-expression, creativity, and embracing the free-spirited bohemian aesthetic.
Throughout this guide exploring 27 Trendy Boho Braids and Hairstyles for Long Hair, you’ve discovered styles ranging from simple everyday options to elaborate designs perfect for special occasions, each one celebrating the beauty and versatility of long hair.
Whether you’re drawn to the romantic simplicity of a messy side braid with flowers, the intricate beauty of an infinity braid, or the dramatic statement of a mohawk braid, there’s a bohemian hairstyle that perfectly matches your personality and skill level.
The key to mastering these looks lies in practice, experimentation, and embracing the intentionally imperfect nature of bohemian styling—perfection is never the goal, and those loose strands and textured sections are what give these styles their authentic charm.
Remember that the most important element of any hairstyle is confidence, so choose the braids that make you feel beautiful, practice the techniques that interest you most, and don’t be afraid to add your own creative touches through accessories, color, or personal modifications.
With the techniques and inspiration provided in this comprehensive guide, you now have the knowledge to create stunning bohemian looks that will turn heads, earn compliments, and help you embrace your inner free spirit every single day.
