
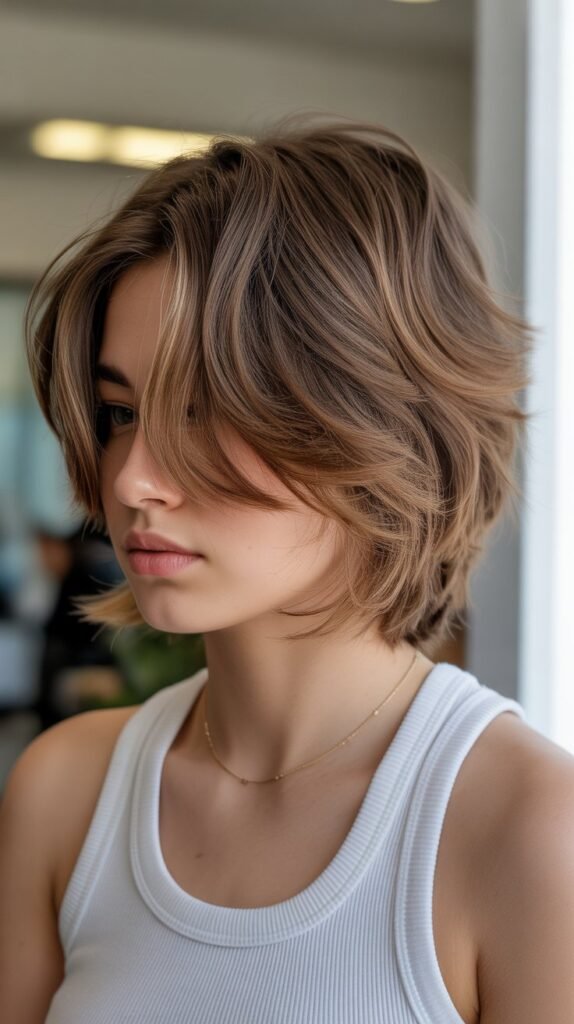
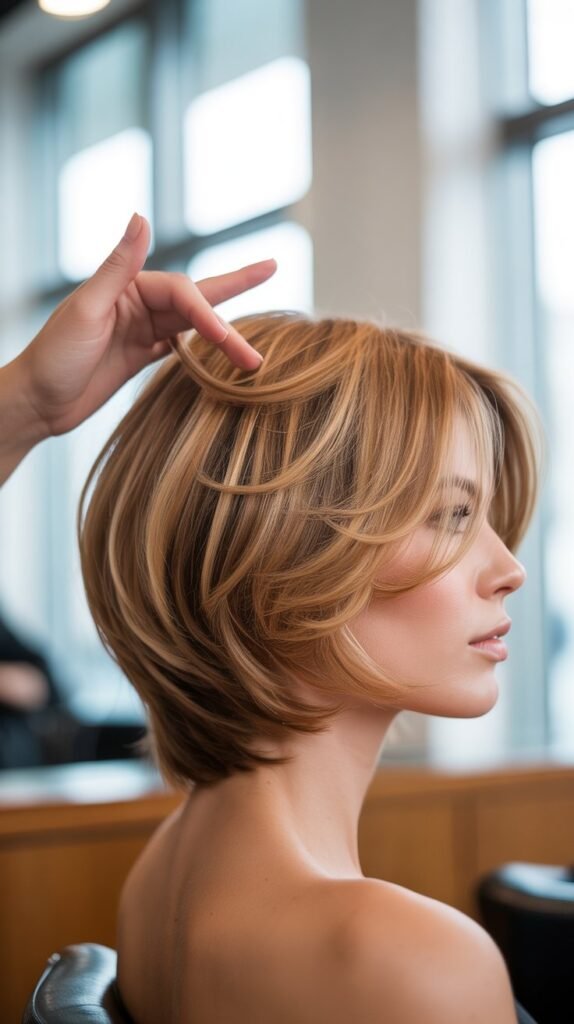
Transforming your short hair with layers can breathe new life into your style, adding volume, texture, and movement that frames your face beautifully.
Whether you’re looking to refresh a pixie cut, add dimension to a bob, or create a more modern edge to your current style, mastering the art of Short Hair Layering: Easy, Step-by-Step Guide opens up a world of styling possibilities right at your fingertips.
This comprehensive guide walks you through everything you need to know about layering short hair, from understanding the basics and gathering the right tools to executing professional techniques at home.
You’ll discover how to identify your face shape for the most flattering layers, learn foolproof cutting methods that work for various short hairstyles, and explore maintenance tips that keep your layered look fresh between salon visits.
With clear instructions, practical advice, and expert insights, you’ll gain the confidence to either DIY your layered cut or communicate effectively with your stylist to achieve the exact look you envision.
1. Understanding Short Hair Layers and Their Benefits

Before diving into the cutting process, it’s essential to understand what layers actually do for short hair and why they’ve become a staple in modern hairstyling.
Layers create depth, movement, and dimension that can transform even the simplest short haircut into something extraordinary.
What Layers Do for Short Hair
- Layers remove weight from specific sections of hair, creating movement and preventing the “heavy” look that can make short hair appear flat.
- They add visual interest by creating varying lengths throughout the hair, which catches light differently and creates dimension.
- Properly placed layers can enhance your natural hair texture, whether you have straight, wavy, or curly hair.
- Layers frame the face strategically, drawing attention to your best features like cheekbones, eyes, and jawline.
- They provide versatility in styling, allowing you to create volume at the crown or sleekness at the nape depending on your preference.
Key Benefits of Layering Short Hair
- Volume Boost: Layers lift hair away from the scalp, creating the illusion of fuller, thicker hair, especially beneficial for fine or thin hair types.
- Easy Styling: Layered short hair requires less time to style because the layers naturally fall into place with minimal effort.
- Texture Enhancement: Layers work with your hair’s natural texture rather than against it, making styling more intuitive.
- Face Framing: Strategic layers can soften angular features or add definition to rounder face shapes.
- Modern Appeal: Layers give even classic short cuts a contemporary, fresh appearance that looks current and stylish.
- Reduced Bulk: For those with thick hair, layers remove excess weight without sacrificing length, making hair more manageable.
Common Types of Short Hair Layers
| Layer Type | Best For | Effect |
|---|---|---|
| Choppy Layers | Adding edge and texture | Creates a piecy, modern look with lots of movement |
| Soft Layers | Subtle dimension | Provides gentle movement without dramatic contrast |
| Face-Framing Layers | Highlighting features | Draws attention to eyes and cheekbones |
| Crown Layers | Adding height | Creates lift at the top of the head for volume |
| Graduated Layers | Bobs and structured cuts | Builds shape from shorter to longer for architectural effect |
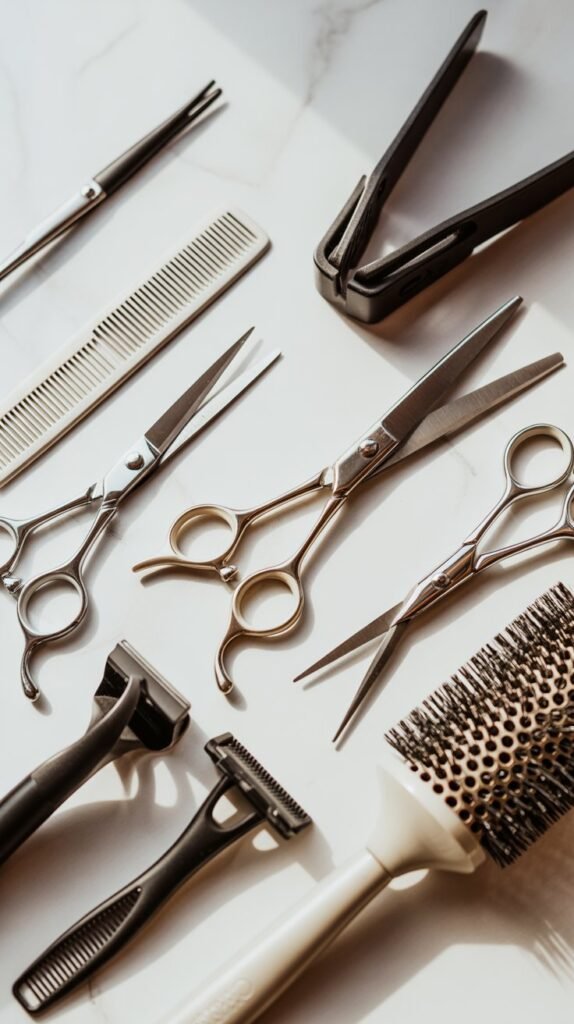
2. Essential Tools and Materials for Layering Short Hair
Having the right tools makes the difference between a professional-looking layered cut and a potential hair disaster.
Investing in quality equipment ensures precision, safety, and results you’ll be proud to show off.
Professional Cutting Tools
- Hair Cutting Scissors: Invest in professional-grade shears (6-6.5 inches for short hair) with sharp, precise blades made from stainless steel or Japanese steel.
- Thinning Shears: These specialized scissors with teeth on one or both blades help blend layers and reduce bulk without creating harsh lines.
- Fine-Tooth Comb: A carbon or metal comb with closely spaced teeth helps section hair precisely and guides your scissors for accurate cuts.
- Rat-Tail Comb: The pointed end helps create clean parts and sections, essential for precise layer placement.
- Sectioning Clips: At least 6-8 strong clips (preferably metal) hold hair out of the way while you work on specific sections.
- Spray Bottle: Filled with clean water to keep hair damp throughout the cutting process for better control and precision.
Preparation Items
- Hair Cutting Cape or Old Towel: Protects clothing from falling hair and makes cleanup easier after cutting.
- Mirror Setup: A handheld mirror plus a wall-mounted mirror allows you to see all angles of your head during cutting.
- Good Lighting: Bright, natural or white light helps you see your work clearly and identify uneven sections.
- Hair Ties or Bands: Useful for securing sections you’re not currently working on, keeping them separated and organized.
Tool Maintenance Essentials
- Keep scissors sharp by having them professionally sharpened every 6-12 months or when you notice they’re pulling rather than cutting cleanly.
- Clean your tools after each use with rubbing alcohol to prevent product buildup and maintain hygiene.
- Store scissors in a protective case to prevent damage to the blades and maintain their precision.
- Never use your hair cutting scissors for paper, fabric, or anything else, as this dulls the blades quickly.
3. Preparing Your Hair for the Layering Process
Proper preparation is crucial for achieving even, professional-looking layers. Taking time to prepare your hair correctly prevents common mistakes and ensures your layers turn out exactly as planned.
Washing and Conditioning
- Start with freshly washed hair using your regular shampoo to remove oils, product buildup, and dirt that can interfere with cutting.
- Apply conditioner focusing on mid-lengths to ends, avoiding the roots to prevent hair from becoming too slippery to hold.
- Rinse thoroughly with cool water to close the hair cuticle, which helps hair lie smoother and makes cutting more precise.
- Gently squeeze excess water from hair using a microfiber towel or old t-shirt rather than rubbing vigorously, which can cause frizz.
Detangling and Sectioning
- Comb through damp hair starting from the ends and working up to roots using a wide-tooth comb to prevent breakage.
- Remove all tangles and knots before beginning to cut, as these can cause uneven sections and imprecise cuts.
- Part hair in your natural part or the way you typically wear it, since layers should follow your natural hair flow.
- Identify any cowlicks, growth patterns, or areas where hair naturally falls differently, as these affect how layers should be placed.
Moisture Level Management
- Hair should be damp but not dripping wet for cutting—about 70-80% dry is ideal for seeing natural texture while maintaining control.
- Keep your spray bottle handy to mist sections that dry out during the cutting process, especially if you’re working slowly.
- Remember that hair shrinks as it dries, so cut conservatively and trim more if needed rather than cutting too much initially.
- For curly hair, some stylists prefer cutting dry to see the natural curl pattern, but for beginners, damp cutting is more manageable.
Creating Your Base Sections
- Divide hair into four main quadrants: top, two sides, and back, securing each with clips to keep them organized.
- The top section runs from forehead to crown, the side sections from ears forward, and the back section includes everything from crown to nape.
- Each quadrant can be further subdivided as you work, taking horizontal sections typically ½ to 1 inch thick for precision.
- Clean sections are the foundation of even layers, so take your time ensuring each parting is straight and precise.
4. Determining the Right Layer Placement for Your Face Shape
Understanding your face shape is critical for placing layers where they’ll be most flattering.
The right layer placement enhances your natural features while the wrong placement can emphasize features you’d prefer to minimize.
Face Shape Identification
- Oval Face: Balanced proportions with forehead slightly wider than chin—the most versatile shape that suits almost any layer placement.
- Round Face: Width and length are approximately equal with soft, curved lines—benefits from layers that add height and create angles.
- Square Face: Strong, angular jawline with forehead, cheeks, and jaw roughly the same width—softened by face-framing layers.
- Heart Face: Wider forehead and cheekbones with a narrow, pointed chin—balanced by layers that add width at the jawline.
- Long Face: Length is noticeably greater than width—benefits from horizontal layers that create the illusion of width.
- Diamond Face: Narrow forehead and jaw with wide cheekbones—enhanced by layers that add volume at the forehead and chin areas.
Optimal Layer Placement by Face Shape
| Face Shape | Layer Focus | Avoid |
|---|---|---|
| Oval | Anywhere works; try varying lengths | No specific restrictions |
| Round | Longer layers past chin; volume at crown | Layers at cheek level that add width |
| Square | Soft, wispy layers around jawline | Blunt, straight lines at jaw |
| Heart | Chin-length and longer layers | Short layers at temples that widen forehead |
| Long | Horizontal layers at cheekbones | Long, vertical layers without width |
| Diamond | Layers at forehead and chin | Heavy layers at cheekbone level |
Measuring and Marking Key Points
- Use your fingers to measure from your ear to determine where chin-level, jaw-level, and cheekbone-level layers will fall.
- Face-framing layers typically start somewhere between the cheekbone and chin, depending on what you want to emphasize.
- Crown layers should begin at the highest point of your head (usually where you’d balance a book) to create maximum lift.
- Mark reference points with clips or by holding sections with your fingers before cutting to ensure consistency on both sides.
Consulting Professional Resources
- For detailed face shape analysis, visit Matrix’s Face Shape Guide which offers professional insights into cutting for different facial structures.
- Many beauty websites offer virtual try-on tools where you can upload your photo and test different layer placements digitally before cutting.
- Consider taking photos of your face from different angles and comparing them to face shape guides to accurately identify your shape.
- When in doubt, consulting a professional stylist for a face shape analysis before attempting to layer at home can prevent costly mistakes.
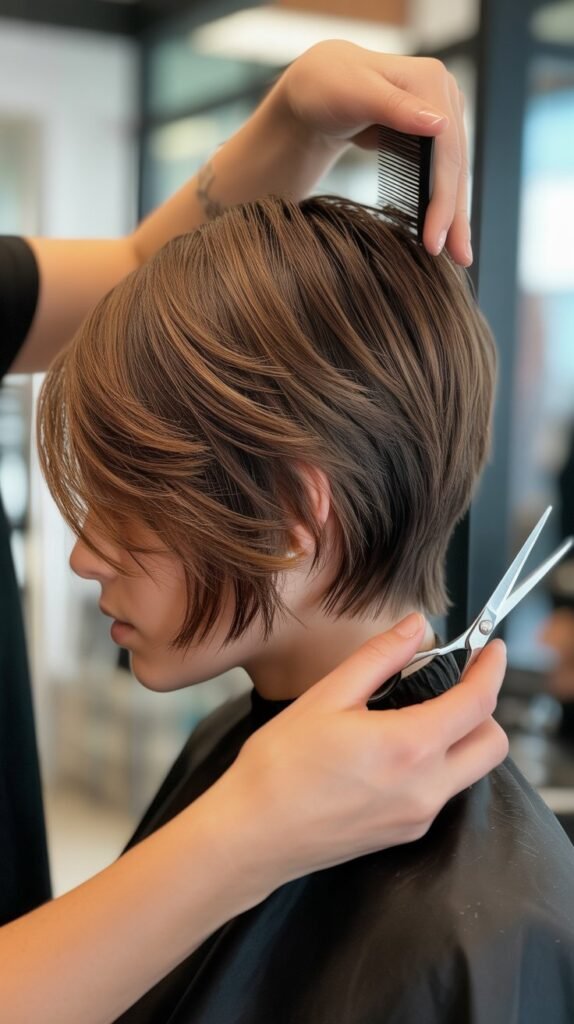
5. Basic Layering Technique for Short Hair
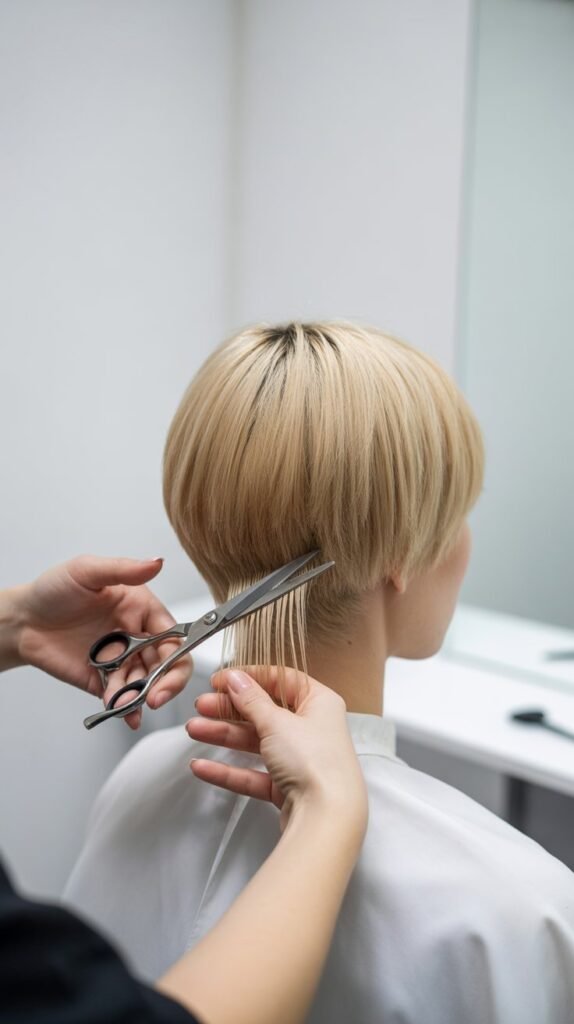
This fundamental layering method works for most short hairstyles including pixie cuts, short bobs, and cropped styles. Master this technique before moving on to more advanced methods.
The Point-to-Point Method
- Begin with the bottom section at the nape, releasing a horizontal section about ½ inch thick while keeping the rest clipped away.
- Comb this section straight down and determine your baseline length—this is your longest layer and everything else will be shorter.
- Hold the section between your index and middle fingers, keeping your fingers parallel to the floor for a straight, horizontal cut.
- Cut straight across using small, deliberate snips rather than one long cut, which gives you more control and prevents mistakes.
- Release the next horizontal section above the first, comb it down, and cut it slightly shorter than the previous section (about ¼ inch).
- Continue working up the head in horizontal sections, each one progressively shorter, creating a graduated effect.
Angle and Elevation Techniques
- Zero Elevation: Hair is held straight down against the scalp—creates subtle, blended layers with minimal height.
- 45-Degree Elevation: Lift hair at a 45-degree angle from the head—creates moderate layering with noticeable movement.
- 90-Degree Elevation: Hold hair straight out from the head perpendicular to the scalp—creates dramatic, high layers with maximum volume.
- Keep your elevation consistent within each section to ensure even layers throughout that section.
- Your guide finger (the finger nearest the scalp) should be kept flat and steady, acting as your cutting guide.
- Always cut in front of your fingers, never behind them, positioning scissors parallel to your fingers for the safest, most accurate cuts.
Creating Seamless Transitions
- After completing all horizontal sections, take vertical sections to check for any unevenness or disconnections between layers.
- Blend harsh lines by taking small vertical sections where layers meet and using point-cutting (snipping into the ends vertically).
- Cross-check your work by combing hair in different directions and looking for any pieces that stick out or appear longer than intended.
- Use thinning shears sparingly at the connection points between layers to soften transitions and remove bulk without losing length.
Common Mistakes to Avoid
- Cutting too much at once—always cut less than you think you need since you can always trim more but cannot add length back.
- Inconsistent tension when holding sections—pulling some tightly and others loosely creates uneven layers.
- Cutting hair at different moisture levels—sections that have dried will appear longer when wet again, creating unevenness.
- Rushing through sections—take your time with each section to ensure accuracy, as precision is more important than speed.
6. Advanced Layering Techniques for Short Hairstyles
Once you’ve mastered basic layering, these advanced techniques allow you to create more sophisticated, customized looks with added texture and dimension.
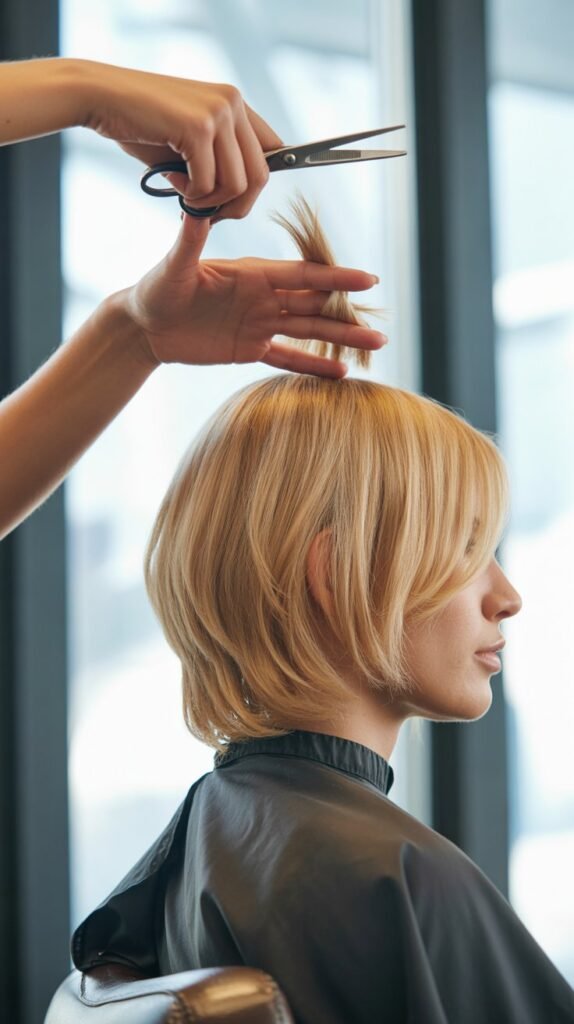
Point Cutting for Texture
- Point cutting involves holding scissors vertically and cutting into the hair ends at an angle rather than straight across horizontally.
- This technique creates a softer, more textured edge that’s less blunt and more modern-looking than straight-cut layers.
- Point cut into hair ends at varying depths—shallow cuts (just ¼ inch) for subtle texture, deeper cuts (½ to 1 inch) for more pronounced texture.
- Work through the perimeter and layer edges, making small, controlled snips rather than large cuts for a natural, piecy effect.
- Point cutting is especially effective on thick or coarse hair to reduce weight and create movement without traditional thinning.
Slide Cutting (Slithering)
- Hold closed scissors at an angle and slide them down the hair shaft from mid-length to ends, creating graduated layers.
- This technique removes weight and creates internal layering without changing the overall length dramatically.
- Keep scissors nearly closed, opening slightly as you slide to remove small amounts of hair and create seamless blending.
- Slide cutting works best on damp hair and should be done with very sharp scissors to prevent snagging and damage.
- Use this technique to soften blunt lines, blend layers more naturally, or remove bulk from specific areas without obvious cutting lines.
Channeling and Notching
- Channeling: Cut small vertical sections (channels) throughout the layers at varying lengths to create intentional, visible texture and separation.
- Position scissors vertically and make several quick snips at different depths within a small section to create varied lengths.
- This technique is perfect for creating a modern, choppy look with lots of movement and dimension.
- Notching: Similar to point cutting but more aggressive, cutting deeper into the hair to create more dramatic texture.
- Both techniques work well on thick hair and create styles that look intentionally textured rather than accidentally uneven.
The Twist and Cut Method
- Take small vertical sections, twist them loosely, and cut horizontally through the twisted section at varying heights.
- This creates natural, irregular layering that looks organic and prevents harsh, obvious cutting lines.
- The amount of twist determines the texture intensity—loose twists create subtle variation, tight twists create more dramatic texture.
- Work randomly throughout the hair rather than systematically to achieve the most natural-looking, lived-in texture.
- This method is particularly effective for creating beachy, tousled looks in short hair.
7. Layering Specific Short Hairstyles
Different short hairstyles require tailored approaches to layering. Understanding the unique requirements of each style ensures your layers enhance rather than detract from the intended look.
Pixie Cut Layering
- Pixie cuts require short layers on top with gradually longer length toward the crown to create lift and height.
- Start with the nape area, cutting very short (often ½ to 1 inch), then increase length as you move toward the crown and top.
- Create face-framing pieces by leaving slightly longer sections around the ears and at the temples for softness.
- Use point-cutting throughout to create texture and prevent the pixie from looking too “done” or rigid.
- The top section should be the longest (typically 2-4 inches) to allow for styling versatility and volume.
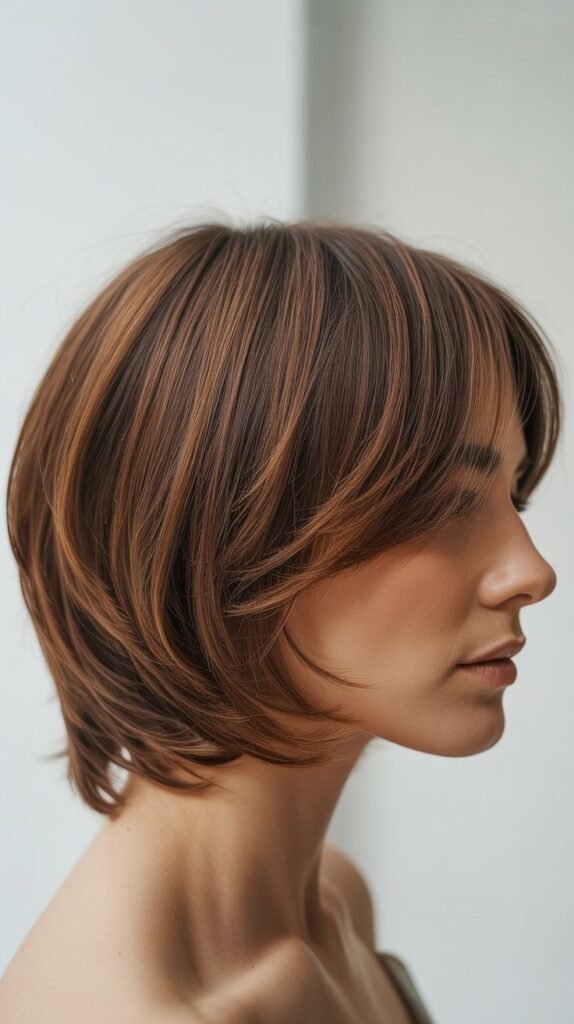
Bob Layering Variations
- Classic Layered Bob: Create subtle internal layers while maintaining a relatively uniform perimeter length that falls at jaw or chin level.
- Stacked Bob: Build dramatic graduation at the back with very short nape layers that get progressively longer toward the front.
- Textured Bob: Add choppy, irregular layers throughout using point-cutting and channeling for a modern, undone appearance.
- Keep face-framing pieces at or slightly longer than the overall length to frame the face without disrupting the bob shape.
- Balance is critical in bobs—ensure both sides are equal length by constantly cross-checking measurements from the center part.
Asymmetrical Cut Layering
- Asymmetrical cuts have intentionally different lengths on each side, requiring careful planning before layering.
- Determine your longer side (typically 2-4 inches longer than the short side) and layer it independently from the shorter side.
- The shorter side often benefits from minimal layering to maintain its strong, graphic line.
- Blend the transition area where short meets long carefully using point-cutting and slide-cutting to avoid harsh lines.
- These cuts require more frequent maintenance as they lose their dramatic asymmetry quickly as hair grows.
Short Shag Layering
- Shags rely on multiple short layers throughout, creating maximum texture, volume, and movement.
- Begin with a longer baseline, then create numerous layers of varying lengths throughout the entire head.
- Concentrate shorter layers at the crown for height and longer face-framing pieces around the perimeter.
- Use heavy texturizing with point-cutting, notching, and channeling throughout for the signature shaggy appearance.
- Shags work beautifully with natural texture—wavy and curly hair types showcase shag layering particularly well.
8. Texturizing and Finishing Your Layered Cut

The final texturizing and finishing steps transform your layered cut from simply short to truly polished and professional-looking.
Using Thinning Shears Effectively
- Thinning shears should only be used after all length cutting is complete to refine and perfect your layers.
- Position thinning shears about 1-2 inches from the scalp (never at the roots) and close once, then remove before repositioning.
- Work through thick areas where layers feel bulky, making 2-3 cuts per section maximum to avoid creating holes or over-thinning.
- Focus on mid-lengths rather than ends—over-thinning ends can create a wispy, damaged appearance even on healthy hair.
- Check your progress frequently, as it’s easy to remove too much hair with thinning shears, and the effects can’t be undone.
Removing Bulk Strategically
- Identify areas where hair feels heavy or doesn’t move naturally—these typically benefit from thinning and texturizing.
- For thick hair at the nape, use thinning shears in horizontal sections to remove weight without affecting visible length.
- Internal thinning (cutting into layers beneath the surface) reduces bulk while maintaining the outer style’s integrity.
- Avoid thinning the perimeter excessively, as this area frames your face and needs some density to look polished.
Softening Hard Lines
- Use point-cutting along the perimeter of your cut to soften any blunt edges that look too harsh or severe.
- Pay special attention to the hairline around ears and at the nape, where hard lines are most noticeable and unflattering.
- Blend layers at the crown where they can sometimes appear disconnected by taking small vertical sections and point-cutting the connection points.
- Cross-check from multiple angles in good lighting to identify any harsh lines you may have missed during cutting.
Styling Your New Layers
- Apply a lightweight mousse or styling cream to damp hair, distributing evenly from roots to ends for hold and texture.
- Blow-dry using a round brush to direct layers away from the face and create volume at the roots where desired.
- For a more textured, piecey look, apply a small amount of pomade or wax to dry hair, working through with fingers.
- Set your style with a flexible-hold hairspray that maintains movement while keeping layers in place throughout the day.
- For information on styling products best suited for layered short hair, visit Allure’s styling guides for professional product recommendations.
9. Troubleshooting Common Layering Mistakes
Even experienced cutters encounter problems occasionally. Knowing how to identify and fix common layering mistakes can save your haircut when things don’t go as planned.
Identifying Uneven Layers
- Comb hair in different directions and look for pieces that stick out or appear longer than surrounding sections—these indicate uneven cutting.
- Check both sides simultaneously by pulling equivalent sections forward and comparing their lengths in front of a mirror.
- Look for “steps” in your layers where one layer is noticeably shorter than the next rather than gradually transitioning.
- Have someone look at the back of your head or use a handheld mirror to check angles you can’t see yourself.
Fixing Over-Layered or Too-Short Sections
- If layers are shorter than intended but still workable, embrace the texture and style it with products that enhance a choppy, textured look.
- Use hair extensions or clip-ins strategically for special occasions until the over-cut areas grow to a more manageable length.
- Adjust your part or styling direction to camouflage areas that were cut too short by using longer sections to cover them.
- Consider visiting a professional stylist who can assess the situation and reshape the cut to work with what remains.
- Remember that hair grows approximately ½ inch per month, so most mistakes will grow out within 6-8 weeks.
Addressing Bulky or Heavy Sections
- Return to areas that feel heavy with thinning shears, making conservative cuts to remove bulk without creating holes.
- Use the twist and cut method on bulky sections to create internal texture that reduces weight naturally.
- Point-cut heavily into thick areas to remove density while maintaining length in those sections.
- Sometimes bulk is actually caused by too many short layers underneath—growing these out slightly can paradoxically reduce heaviness.
Correcting Disconnected Layers
- Disconnected layers have obvious gaps between length sections rather than smooth transitions, creating a choppy, unfinished appearance.
- Identify where the disconnection occurs and take vertical sections through that area, cutting to create gradual transitions.
- Use slide-cutting through the disconnected area to blend layers seamlessly without removing significant length.
- If disconnections are severe, you may need to sacrifice some length from longer layers to create proper connections.
When to Seek Professional Help
| Situation | DIY Fix Possible | Professional Needed |
|---|---|---|
| Minor unevenness (less than ¼ inch) | Yes | Optional |
| Moderate bulkiness | Yes | Recommended |
| Severe asymmetry | Risky | Strongly recommended |
| Disconnected layers throughout | Difficult | Yes |
| Extremely short, unfixable cut | No | Yes—for damage control |
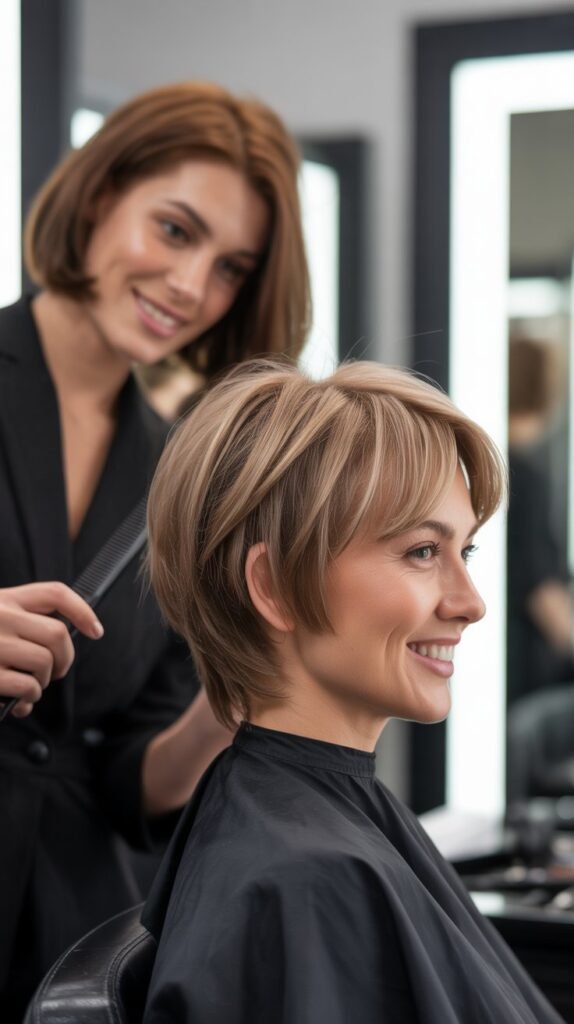
10. Maintaining Your Layered Short Haircut
Proper maintenance keeps your layered cut looking fresh, professional, and intentional between salon visits or touch-ups.
Regular Trimming Schedule
- Short layered hair requires trimming every 4-6 weeks to maintain shape, as even small amounts of growth noticeably affect the style.
- Schedule your next trim before leaving the salon or immediately after cutting at home to ensure you don’t let it go too long.
- Between professional cuts, do minor touch-ups at home on the nape and around ears where growth is most visible.
- Keep your cutting tools clean and sharp specifically for these maintenance trims to ensure clean cuts that don’t damage hair.
At-Home Maintenance Techniques
- Invest in a small pair of detail scissors or trimmers for touching up the nape and around ears every 2-3 weeks.
- Use clippers with guards on the back and sides if you have an undercut or very short sections that need regular maintenance.
- Trim flyaways and split ends as soon as you notice them by carefully snipping individual hairs with sharp scissors.
- Point-cut your perimeter every 3-4 weeks to maintain texture and prevent your layers from looking grown-out and blunt.
Product Recommendations for Layered Short Hair
- Lightweight Mousse: Apply to damp hair before styling for volume and hold without weighing layers down.
- Texturizing Spray: Creates separation and definition in layers, enhancing the cut’s dimension and movement.
- Styling Cream: Provides control and shine for smoother styles while maintaining natural movement in layers.
- Dry Shampoo: Extends time between washes while adding volume and texture at roots where layers begin.
- Hair Oil: Apply sparingly to ends only to prevent dryness and frizz that makes layers look messy rather than textured.
Protecting Your Cut Between Trims
- Sleep on silk or satin pillowcases to reduce friction that causes frizz and disrupts your styled layers overnight.
- Avoid over-washing hair, which strips natural oils—layered short hair typically looks best washed 2-3 times weekly.
- Use heat protectant spray before blow-drying or using hot tools to prevent damage that makes layers look frizzy and undefined.
- Deep condition weekly to maintain hair health, focusing treatment on mid-lengths and ends where layers are most visible.
Growing Out Layers Gracefully
- If you decide to grow out your layers, regular trims are still necessary to remove split ends and maintain healthy hair.
- Ask your stylist (or plan yourself) to gradually reduce the distinction between layers while maintaining some shaping.
- Be patient—growing out a pixie to a bob takes approximately 6-9 months, and growing a bob to shoulder length takes 8-12 months.
- Use headbands, clips, and styling products to manage the awkward in-between stages when layers are growing out.
- Consider getting a completely new cut rather than growing out if you become frustrated—fresh starts often look better than poorly grown-out styles.
Conclusion
Mastering the art of Short Hair Layering: Easy, Step-by-Step Guide empowers you to take control of your hairstyle, whether you’re refreshing your look between salon visits or creating an entirely new style from scratch.
Throughout this comprehensive guide, you’ve learned the essential techniques for understanding how layers work, gathering the right tools, preparing your hair properly, and executing professional cutting methods that create dimension, movement, and style.
From identifying your face shape and determining optimal layer placement to troubleshooting common mistakes and maintaining your cut long-term, you now have the knowledge to approach short hair layering with confidence.
Remember that layering is as much an art as it is a technique—practice makes perfect, and even professionals continue learning throughout their careers. Start conservatively, cutting less than you think necessary, and always prioritize the health of your hair throughout the process.
Whether you achieve the perfect layered cut on your first attempt or gradually improve with each trim, the skills you’ve gained here will serve you well for years to come, saving you time and money while giving you the freedom to experiment with your style whenever inspiration strikes.