
Long hair offers endless styling possibilities, but finding the perfect updo that’s both elegant and easy to create can feel overwhelming.
Whether you’re preparing for a wedding, heading to the office, or attending a casual brunch, the right hairstyle can transform your entire look and boost your confidence.
This comprehensive guide to 30 Elegant Easy Updo Hairstyles for Long Hair Perfect for Any Event will walk you through stunning styles that work for every occasion, skill level, and hair texture.
From classic buns to romantic twists, you’ll discover step-by-step techniques, styling tips, and professional secrets that make achieving salon-worthy updos at home completely achievable.
These carefully selected hairstyles strike the perfect balance between sophistication and simplicity, ensuring you’ll always have the ideal look ready for whatever event comes your way.
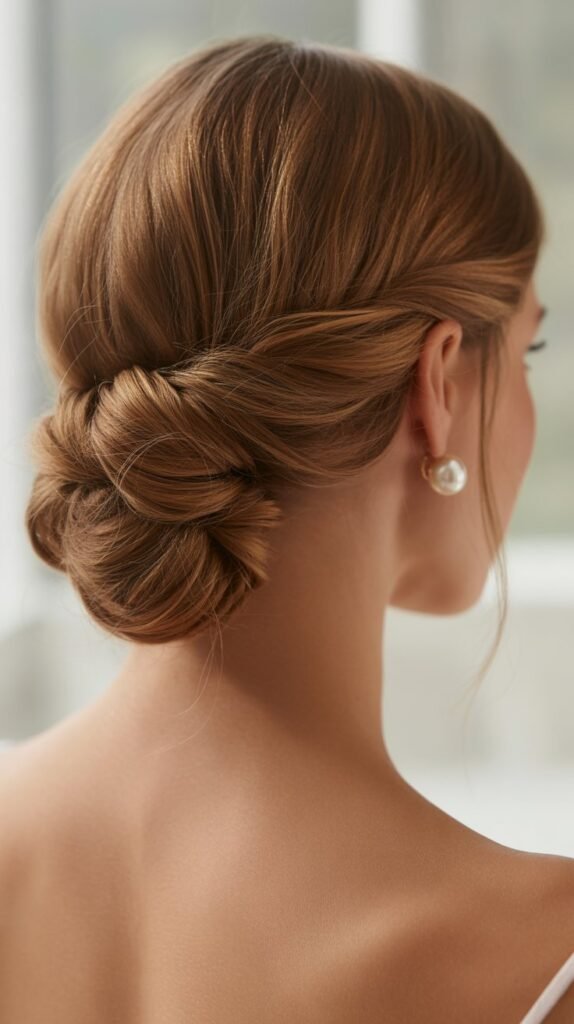
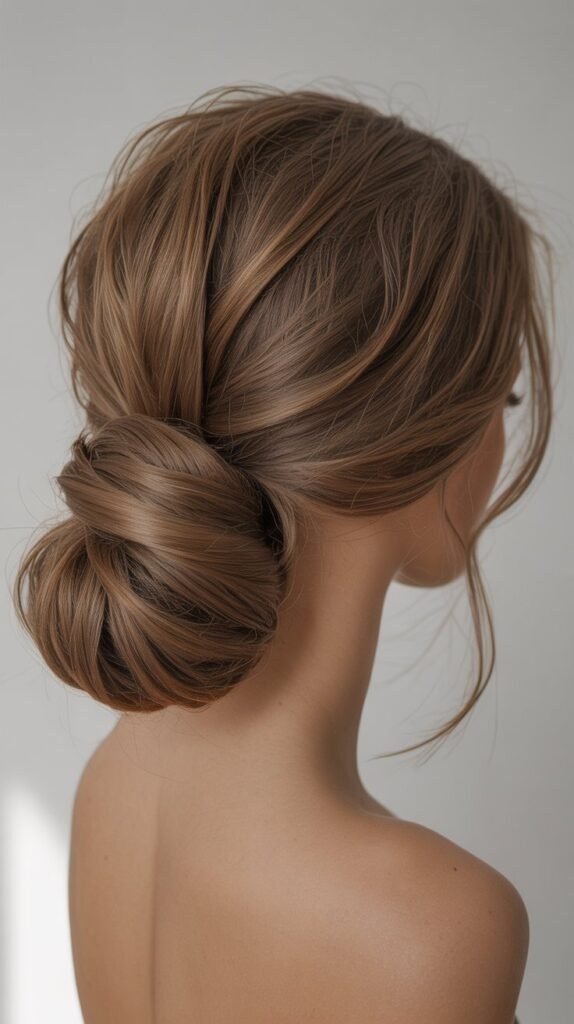
1. Classic Low Bun

The classic low bun remains timeless for good reason—it’s sophisticated, versatile, and incredibly easy to master.
This elegant style works beautifully for professional settings, formal events, and everyday wear, making it an essential technique in every long-haired person’s styling repertoire.
Steps to Create:
- Brush your hair thoroughly to remove all tangles and create a smooth foundation for styling.
- Gather your hair at the nape of your neck and secure it with a hair tie to form a low ponytail.
- Twist the ponytail gently around its base, wrapping it in a circular motion to create a bun shape.
- Secure the bun with bobby pins, inserting them at angles to ensure the style stays firmly in place.
- Apply a light mist of hairspray to tame flyaways and add lasting hold throughout the day.
Best For: Professional meetings, formal dinners, weddings, and any occasion requiring polished elegance.
2. Messy Top Knot

The messy top knot brings effortless chic to your everyday look while keeping hair completely off your face and neck.
This relaxed style has become a fashion statement that perfectly balances casual comfort with intentional style, ideal for busy days when you want to look put-together without spending significant time on your hair.
Steps to Create:
- Flip your head upside down and gather all your hair at the crown to create instant volume and texture.
- Secure the hair with an elastic band, pulling it through only halfway on the final wrap to create a loop.
- Wrap the remaining hair around the base of the loop loosely, allowing pieces to fall naturally for texture.
- Pull out a few face-framing strands intentionally to soften the look and create dimension.
- Use your fingers to gently tug at the bun to create more volume and achieve that perfectly imperfect appearance.
Best For: Casual outings, weekend brunches, gym sessions, running errands, or relaxed social gatherings.
3. Braided Crown Updo

The braided crown updo creates a romantic, ethereal look that turns heads at any special occasion.
By incorporating braids that wrap around your head like a crown, this style combines the elegance of an updo with the intricate beauty of braiding techniques, resulting in a truly showstopping hairstyle.
Steps to Create:
- Part your hair down the middle to create two equal sections for balanced braiding.
- Create a Dutch braid on each side starting from the front, braiding tightly to ensure the crown stays secure.
- Bring both braids to meet at the back of your head, crossing them over each other.
- Tuck the ends of the braids under the opposite braid and secure with bobby pins hidden from view.
- Gently pull at the edges of the braids to create a fuller, more romantic appearance with added dimension.
Best For: Weddings, garden parties, spring and summer events, festivals, and romantic date nights.
4. Twisted Chignon
The twisted chignon offers understated elegance with a modern twist that elevates this classic style.
This sophisticated updo creates beautiful texture through simple twisting techniques, making it appear far more complex than it actually is to achieve.
Steps to Create:
- Divide your hair into two equal sections down the middle for symmetrical styling.
- Twist each section tightly in the same direction until the hair naturally begins to coil on itself.
- Cross the two twisted sections at the nape of your neck, wrapping them around each other.
- Tuck the ends under the twisted base to create a seamless finish without visible ends.
- Secure everything with bobby pins placed strategically throughout the chignon, then finish with hairspray for hold.
Best For: Business events, cocktail parties, theatre performances, upscale dinners, and sophisticated gatherings.
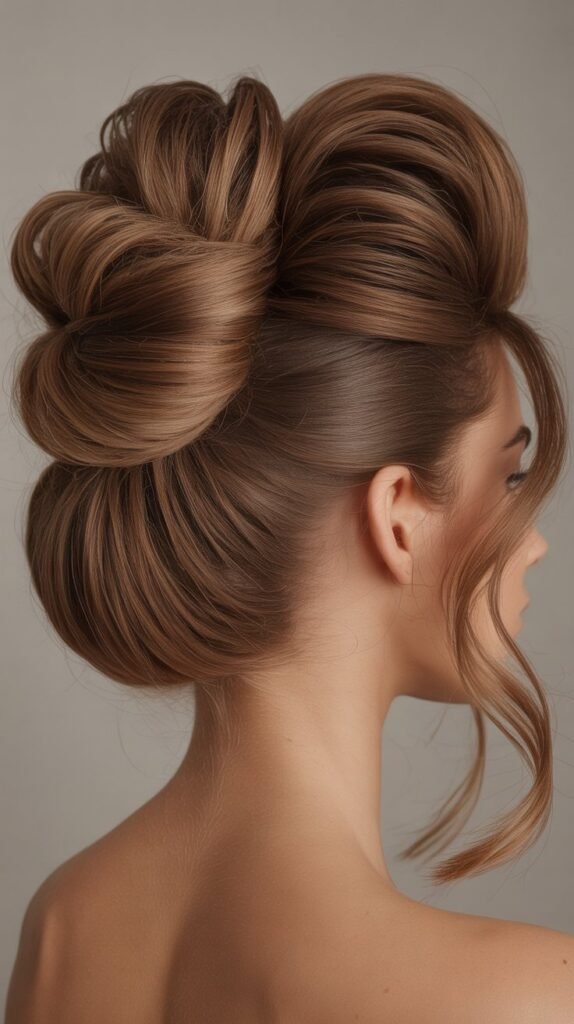
5. High Ballerina Bun

The high ballerina bun delivers drama and elegance while showcasing your facial features beautifully.
Positioned at the crown of your head, this style elongates the neck and creates a graceful silhouette that’s been favored by dancers for generations.
Steps to Create:
- Brush your hair into a high ponytail at the crown, ensuring a smooth base without bumps.
- Tease the ponytail gently with a comb to create volume and fullness in the finished bun.
- Twist the teased ponytail and wrap it around the base in a tight spiral formation.
- Secure the bun with multiple bobby pins inserted from different angles for maximum stability.
- Smooth any flyaways with a small amount of gel or pomade, then set with strong-hold hairspray.
Best For: Ballet performances, formal galas, black-tie events, and occasions demanding maximum elegance.
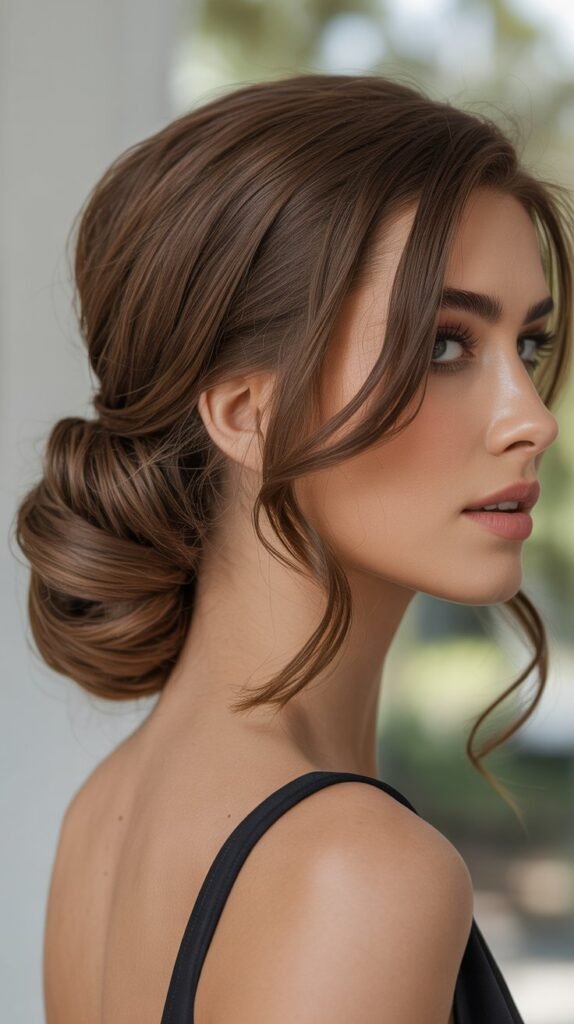
6. Side-Swept Low Bun
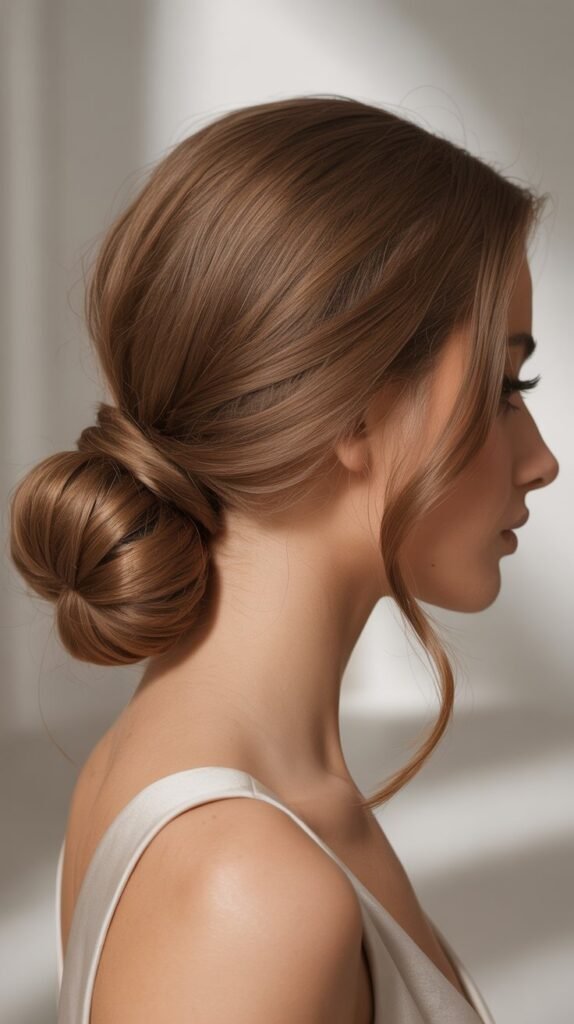
The side-swept low bun adds asymmetrical interest to a classic style, creating a modern romantic look.
By positioning the bun off-center, this variation brings visual interest and a soft, feminine quality that photographs beautifully from every angle.
Steps to Create:
- Create a deep side part on your preferred side to establish the asymmetrical foundation.
- Sweep all your hair to one side at the nape of your neck, gathering it smoothly.
- Create a low ponytail on that side, securing it with an elastic band that matches your hair color.
- Twist or roll the ponytail upward and tuck it under itself to form a soft bun shape.
- Pin securely with bobby pins and pull out a few wisps around your face for softness.
Best For: Weddings, prom, anniversary dinners, engagement photos, and romantic occasions.
7. French Twist

The French twist epitomizes timeless sophistication and has remained a staple of elegant hairstyling for decades.
This vertical roll of hair creates a sleek, polished appearance that works for the most formal occasions while being surprisingly simple to execute.
Steps to Create:
- Brush your hair smooth and gather it loosely at the back as if creating a low ponytail.
- Twist the gathered hair vertically upward along the back of your head in one continuous motion.
- Tuck the ends into the twist fold, creating a seamless rolled appearance without visible ends.
- Secure the entire twist with bobby pins inserted vertically along the center of the roll.
- Set the style with firm-hold hairspray to ensure it lasts throughout your event.
Best For: Corporate events, award ceremonies, opera nights, formal weddings, and high-profile gatherings.
8. Bubble Ponytail Updo
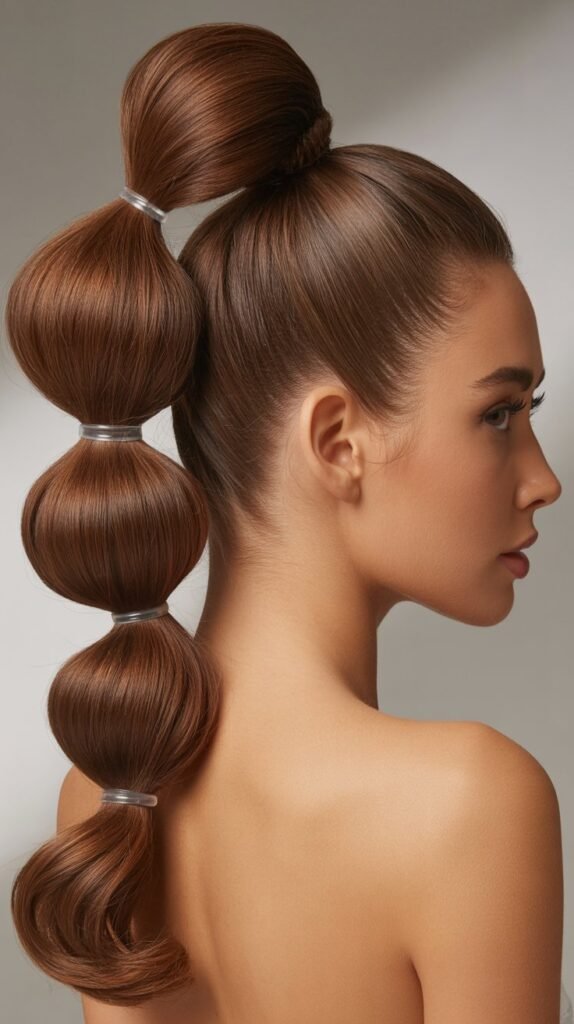
The bubble ponytail updo brings playful elegance to your hairstyle repertoire with its distinctive segmented appearance.
This modern style creates visual interest through evenly spaced sections that puff out like bubbles, offering a fresh take on traditional updos.
Steps to Create:
- Create a high or low ponytail depending on your preference, securing it tightly with an elastic.
- Place additional elastics down the length of the ponytail at equal intervals, typically every two to three inches.
- Gently pull at each section between the elastics to create the characteristic bubble effect.
- Wrap the end of the ponytail under and pin it to create an updo rather than leaving it hanging.
- Adjust each bubble to ensure even sizing and fullness throughout the style.
Best For: Modern events, fashion-forward parties, contemporary weddings, and trendy social gatherings.
9. Gibson Tuck

The Gibson tuck offers vintage glamour with a technique that’s remarkably straightforward to master.
This rolled updo creates the illusion of elaborate styling while actually being one of the quickest elegant updos you can achieve, perfect for when time is limited but style is essential.
Steps to Create:
- Create a low ponytail but don’t pull it too tight, leaving some looseness at the crown for volume.
- Separate the hair above the elastic to create an opening at the base of the ponytail.
- Flip the ponytail up and through the opening, rolling it under in a tucking motion.
- Continue tucking the remaining length of the ponytail into the roll until all hair is secured.
- Pin the tucked hair in place with bobby pins and adjust the roll for even fullness.
Best For: Vintage-themed events, afternoon tea parties, garden weddings, and retro-inspired occasions.
10. Braided Bun

The braided bun combines two beloved techniques into one stunning hairstyle that showcases intricate texture.
By incorporating braids into the bun structure, you add visual complexity and dimension that elevates a simple bun into something truly special.
Steps to Create:
- Create one or more braids with your hair, choosing from three-strand, fishtail, or Dutch braiding techniques.
- Secure the end of each braid with a small, clear elastic band to hold it in place.
- Wrap the braided length around itself in a circular motion to form a bun shape at your desired position.
- Tuck the end of the braid under the bun and secure it invisibly with bobby pins.
- Pull gently at the braid sections to create a fuller, more voluminous appearance with enhanced texture.
Best For: Bohemian weddings, music festivals, outdoor events, artistic gatherings, and creative celebrations.
11. Half-Up Top Knot
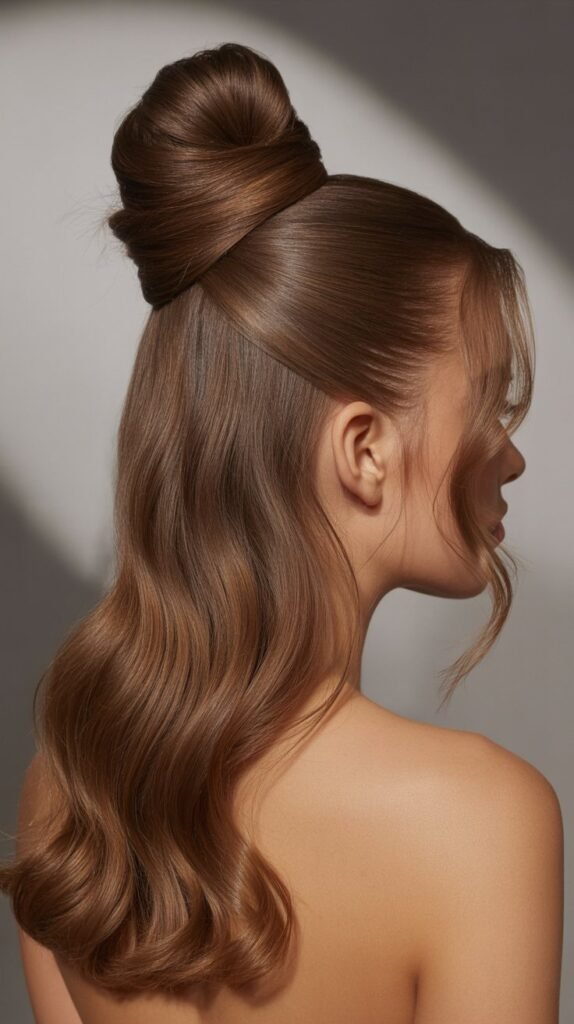
The half-up top knot strikes the perfect balance between wearing hair down and creating an updo.
This versatile style keeps hair away from your face while allowing the length to flow freely, offering the best of both styling worlds.
Steps to Create:
- Section off the top half of your hair from ear to ear, leaving the bottom section down.
- Gather the top section at the crown of your head and secure it with an elastic band.
- Twist the secured section and wrap it around the base to create a small top knot.
- Secure the knot with bobby pins, ensuring it sits firmly at the crown position.
- Style the remaining loose hair with curls or leave it straight, depending on your preference and the occasion.
Best For: Casual dates, daytime events, brunch gatherings, shopping trips, and everyday elevated styling.
12. Rope Braid Updo

The rope braid updo creates a unique twisted texture that stands out from traditional braiding techniques.
This style uses a two-strand twisting method that’s actually easier than conventional braiding while delivering equally impressive visual results.
Steps to Create:
- Divide your hair into two equal sections for the rope braid technique.
- Twist each section individually in the same direction (clockwise or counterclockwise) until tight.
- Wrap the two twisted sections around each other in the opposite direction to create the rope effect.
- Continue the rope braid to the ends, then secure with an elastic band.
- Wrap the rope braid into a bun shape at your desired position and pin it securely in place.
Best For: Beach weddings, nautical-themed events, summer parties, and relaxed yet polished occasions.
13. Low Twisted Ponytail Updo

The low twisted ponytail updo adds sophisticated detail to a simple ponytail base.
By incorporating twists before securing the updo, you create visual interest and elegance that transforms an everyday style into something event-worthy.
Steps to Create:
- Create a clean center part or side part according to your face shape preference.
- Take small sections from each side near your face and twist them back toward the center.
- Gather all hair including the twisted sections into a low ponytail at the nape.
- Wrap the ponytail upward and tuck it under itself to create an updo shape.
- Secure with pins and allow a few face-framing pieces to remain loose for softness.
Best For: Office settings, business lunches, professional conferences, and polished daytime events.
14. Fishtail Braid Updo

The fishtail braid updo showcases intricate braiding artistry that looks incredibly complex but becomes manageable with practice.
This detailed braid creates a woven appearance that adds texture and visual interest to any updo configuration.
Steps to Create:
- Divide your hair into two equal sections to begin the fishtail braiding technique.
- Take a small piece from the outer edge of one section and cross it over to the other section.
- Repeat this process alternating sides, consistently taking small pieces from the outer edges.
- Continue the fishtail braid to the ends, creating a detailed woven pattern throughout.
- Wrap the completed fishtail braid into a bun or fold it into an updo shape, securing with pins.
Best For: Formal events, fashion shows, upscale parties, and occasions where you want to showcase styling skills.
15. Sleek Low Ponytail Updo

The sleek low ponytail updo delivers modern minimalism with sophisticated polish.
This ultra-smooth style emphasizes clean lines and glossy finish, creating a contemporary look that’s both professional and fashion-forward.
Steps to Create:
- Apply smoothing serum or cream to damp hair before blow-drying for maximum sleekness.
- Use a flat iron to create perfectly straight, smooth hair without any texture or wave.
- Brush hair into a low ponytail using a fine-tooth comb to eliminate any bumps or irregularities.
- Wrap a small section of hair around the elastic to conceal it, pinning the end underneath.
- Fold or roll the ponytail upward, tucking it under and securing it for a sleek updo finish.
Best For: Modern art events, minimalist weddings, contemporary fashion events, and sleek professional settings.
16. Knotted Updo

The knotted updo creates dimension through a series of knots that build upon each other.
This technique offers a unique alternative to traditional buns and twists, creating sculptural interest in your hairstyle.
Steps to Create:
- Divide your hair into two sections as if you’re starting a basic ponytail.
- Tie the two sections into a simple overhand knot, pulling it snug but not overly tight.
- Continue knotting the sections down the length until you’ve created multiple knots in sequence.
- Wrap the knotted length into an updo shape at the nape or wherever you prefer the placement.
- Secure with bobby pins throughout the knotted structure and finish with light hairspray.
Best For: Creative events, artistic gatherings, unconventional weddings, and fashion-forward occasions.
17. Voluminous Updo with Teasing
The voluminous updo with teasing brings dramatic height and fullness to your hairstyle.
By incorporating strategic backcombing techniques, you create impressive volume that makes a bold statement at any formal event.
Steps to Create:
- Section your hair into layers, starting with the crown section for maximum volume.
- Backcomb each section at the roots using a fine-tooth comb, building texture and height.
- Smooth the outer layer over the teased sections to hide the backcombing while maintaining volume.
- Gather the teased hair into your chosen updo shape, whether a bun, twist, or roll.
- Secure with numerous bobby pins and generous hairspray to maintain the volume throughout your event.
Best For: Formal galas, red carpet events, pageants, and occasions requiring dramatic glamorous styling.
18. Tucked and Pinned Updo

The tucked and pinned updo offers customizable elegance that works with various hair textures.
This freeform technique involves strategically tucking sections of hair and pinning them in place to create a soft, romantic updo that looks effortlessly beautiful.
Steps to Create:
- Begin with hair that has some texture, either natural waves or curls added with a curling iron.
- Take random sections of hair and twist or roll them loosely toward the back of your head.
- Pin each section in place with bobby pins, building the updo organically without a rigid structure.
- Continue tucking and pinning sections until all hair is incorporated into the updo shape.
- Allow some pieces to remain loose or pull out strategically for a soft, romantic finish.
Best For: Garden weddings, romantic dinners, soft feminine events, and naturally elegant occasions.
19. Wrapped Ponytail Bun

The wrapped ponytail bun combines the security of a ponytail with the elegance of a bun.
This reliable style stays in place throughout active events while maintaining a polished, sophisticated appearance.
Steps to Create:
- Create a ponytail at your desired height, securing it tightly with a strong elastic band.
- Divide the ponytail into two or three sections for easier wrapping and better control.
- Wrap each section around the ponytail base in the same direction, layering them over each other.
- Tuck the ends under the wrapped sections and secure everything with bobby pins inserted at multiple angles.
- Apply hairspray around the entire bun to set the style and control flyaways.
Best For: Active events, dancing, weddings where you’ll be moving frequently, and long-duration occasions.
20. Asymmetrical Updo
The asymmetrical updo breaks traditional symmetry to create modern artistic interest.
By intentionally placing elements off-center, this style delivers contemporary edge while maintaining formal elegance.
Steps to Create:
- Create a deep side part to establish the asymmetrical foundation of the style.
- Sweep most of your hair to one side, leaving more volume on the heavier side.
- Create your chosen updo technique (bun, twist, or tuck) positioned off-center on the fuller side.
- Allow the lighter side to remain sleeker or incorporate a braid or twist for added interest.
- Secure everything with pins and embrace the intentional imbalance that defines this modern style.
Best For: Contemporary weddings, modern art galleries, fashion events, and trend-setting occasions.
21. Criss-Cross Updo

The criss-cross updo creates geometric interest through overlapping sections that form a lattice-like pattern.
This technique adds visual complexity while remaining surprisingly achievable for home styling.
Steps to Create:
- Divide your hair into multiple small sections across the back of your head.
- Take two adjacent sections and cross them over each other, securing where they intersect with bobby pins.
- Continue crossing sections in an alternating pattern, creating a woven appearance across the back.
- Gather all the crossed sections at the nape and form them into a bun or tucked updo.
- Secure the final updo shape with pins and set the entire style with hairspray.
Best For: Intricate formal events, detail-oriented occasions, and when you want to showcase hairstyling artistry.
22. Romantic Side Bun

The romantic side bun delivers soft femininity with its off-center placement and loose styling.
This dreamy hairstyle works beautifully for events where you want to appear effortlessly elegant and approachable.
Steps to Create:
- Create loose curls or waves throughout your hair before beginning the updo for added texture.
- Sweep all hair to one side, gathering it loosely at ear level or slightly lower.
- Twist the gathered hair loosely, allowing some sections to remain free and soft.
- Wrap the twisted hair into a loose bun shape, keeping the texture visible and organic.
- Pull out face-framing pieces and soften the bun by gently tugging at sections for a romantic finish.
Best For: Spring weddings, romantic dates, baby showers, bridal showers, and soft feminine celebrations.
23. Braided Ponytail Updo

The braided ponytail updo incorporates braiding throughout the ponytail before wrapping it into an updo shape.
This technique adds incredible texture and dimension while keeping the style secure and long-lasting.
Steps to Create:
- Create a ponytail at your preferred height, securing it firmly with an elastic band.
- Braid the entire length of the ponytail using your preferred braiding technique (three-strand, fishtail, or Dutch).
- Secure the end of the braid with a small elastic that matches your hair color.
- Wrap the braided ponytail around the base or fold it under to create an updo configuration.
- Pin the braided updo securely in place and gently pull at the braid sections for added volume.
Best For: Active formal events, outdoor weddings, sports-elegant occasions, and styles needing extra security.
24. Pinned Curls Updo

The pinned curls updo showcases vintage Hollywood glamour through carefully arranged pin curls.
This timeless technique creates structured elegance that photographs beautifully from every angle.
Steps to Create:
- Curl your hair in small sections using a curling iron, creating defined ringlets throughout.
- Allow the curls to cool completely before manipulating them to set the curl pattern.
- Take individual curls and pin them against your head in desired positions using bobby pins.
- Arrange the pinned curls to create a structured yet soft updo shape across the back and sides.
- Finish with strong-hold hairspray to ensure the pinned curls maintain their shape throughout the event.
25. Twisted Half-Up Bun

The twisted half-up bun offers casual sophistication that’s perfect for transitional styling.
This effortless look works for both daytime and evening events by keeping some hair down while creating structure on top.
Steps to Create:
- Section the top half of your hair from temple to temple, leaving the bottom section free.
- Twist the top section as you bring it toward the crown of your head.
- Wrap the twisted section into a small bun at the crown, keeping it relatively loose and textured.
- Secure the bun with bobby pins inserted from multiple directions for stability.
- Leave the bottom section straight, wavy, or curled depending on your desired level of formality.
Best For: Versatile everyday events, casual parties, daytime weddings, and transitional day-to-night styling.
26. Looped Chignon

The looped chignon creates dimension through folded loops rather than tight twisting.
This softer approach to the classic chignon offers romantic volume while maintaining the elegance of this timeless style.
Steps to Create:
- Gather your hair into a low ponytail but don’t pull it completely through on the final wrap.
- Create a loop with the ponytail, leaving the ends extending from the base.
- Wrap the ends around the loop base, tucking them under to conceal them completely.
- Adjust the loop to create even fullness and a rounded shape that appears intentional.
- Secure with bobby pins throughout and finish with hairspray for hold.
Best For: Formal afternoon events, business dinners, elegant daytime occasions, and sophisticated gatherings.
27. Textured Low Bun
The textured low bun embraces natural texture and movement rather than smooth perfection.
This modern approach to the classic low bun creates effortless elegance that feels contemporary and accessible.
Steps to Create:
- Add texture to your hair first by braiding it while damp and allowing it to dry for natural waves.
- Gather the textured hair loosely at the nape without smoothing away all the natural texture.
- Twist or wrap the hair into a low bun while maintaining visible texture and movement.
- Allow pieces to fall naturally from the bun rather than pinning everything tightly in place.
- Use minimal products to maintain the organic, textured appearance of the finished style.
Best For: Bohemian events, casual weddings, relaxed formal occasions, and natural beauty aesthetics.
28. Infinity Bun

The infinity bun uses a figure-eight wrapping technique that creates unique visual interest.
This mathematical approach to bun styling delivers a distinctive look that stands out from traditional circular buns.
Steps to Create:
- Create a ponytail at your desired height and secure it firmly with an elastic band.
- Divide the ponytail into two equal sections for the figure-eight wrapping process.
- Wrap the first section in a loop to one side, securing it with pins.
- Wrap the second section to create the other loop of the figure-eight shape on the opposite side.
- Adjust both loops to create balanced, even sizing that clearly shows the infinity pattern.
Best For: Modern events, unique styling moments, contemporary celebrations, and when you want a conversation-starting hairstyle.
29. Rolled Updo

The rolled updo creates smooth, continuous rolls of hair that build upon each other.
This technique offers structured elegance while showcasing the length and thickness of your hair through visible rolling.
Steps to Create:
- Section your hair horizontally into three or four layers from bottom to top.
- Take the bottom section and roll it upward toward your head, securing it with pins.
- Continue with each subsequent section, rolling and pinning them to stack upon the previous roll.
- Ensure each roll is secure before moving to the next section for a stable finished style.
- Smooth the outer surface and apply hairspray to maintain the structured rolled appearance.
Best For: Structured formal events, military balls, diplomatic functions, and traditional elegant occasions.
30. Bouffant Updo

The bouffant updo brings dramatic retro glamour with impressive height at the crown.
This vintage-inspired style creates striking visual impact through strategic teasing and careful shaping that commands attention.
Steps to Create:
- Focus on the crown section first, dividing it from the rest of your hair.
- Backcomb the crown section aggressively at the roots to create significant volume and height.
- Smooth the outer layer of the crown section over the teasing while maintaining the lifted height.
- Gather the remaining hair into your chosen updo shape at the back, keeping it smooth.
- Secure everything with pins and generous hairspray, ensuring the bouffant height remains throughout your event.
Best For: Retro theme parties, 1960s inspired events, formal galas, and when you want maximum dramatic impact.
Conclusion
Mastering these 30 Elegant Easy Updo Hairstyles for Long Hair Perfect for Any Event empowers you with versatile styling options for every occasion life brings your way.
From the timeless sophistication of a French twist to the modern edge of an asymmetrical updo, you now have a comprehensive collection of techniques that balance elegance with achievability.
Each style offers unique characteristics suited to different events, personal styles, and skill levels, ensuring you’ll never struggle to find the perfect hairstyle again.
Remember that practice makes perfect, and even the most intricate-looking updos become simple with repetition and patience.
These hairstyles prove that long hair is truly a blessing, offering endless creative possibilities that let you express yourself beautifully.
Whether you’re preparing for a wedding, heading to work, or attending any event in between, you now have the knowledge and techniques to create stunning updos that make you feel confident, elegant, and absolutely beautiful.
Embrace your long hair and enjoy experimenting with these gorgeous styles that celebrate both your hair and your personal style.
