
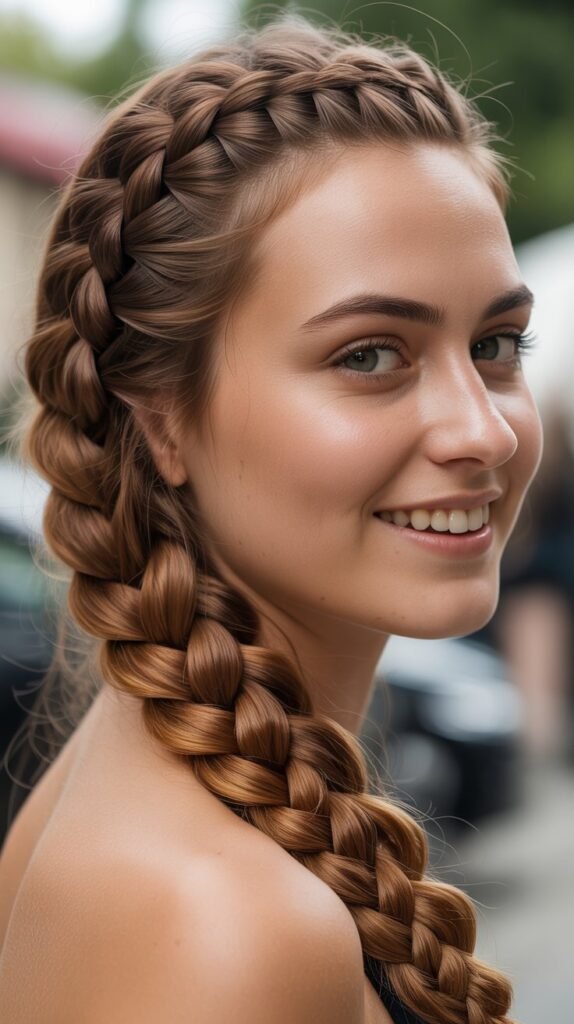
Medium-length hair offers the perfect canvas for braided hairstyles that are neither too intricate nor too simple.
Whether you’re preparing for a casual day out, a professional meeting, or a special evening event, braided hairstyles for medium hair provide versatility, elegance, and practicality all at once.
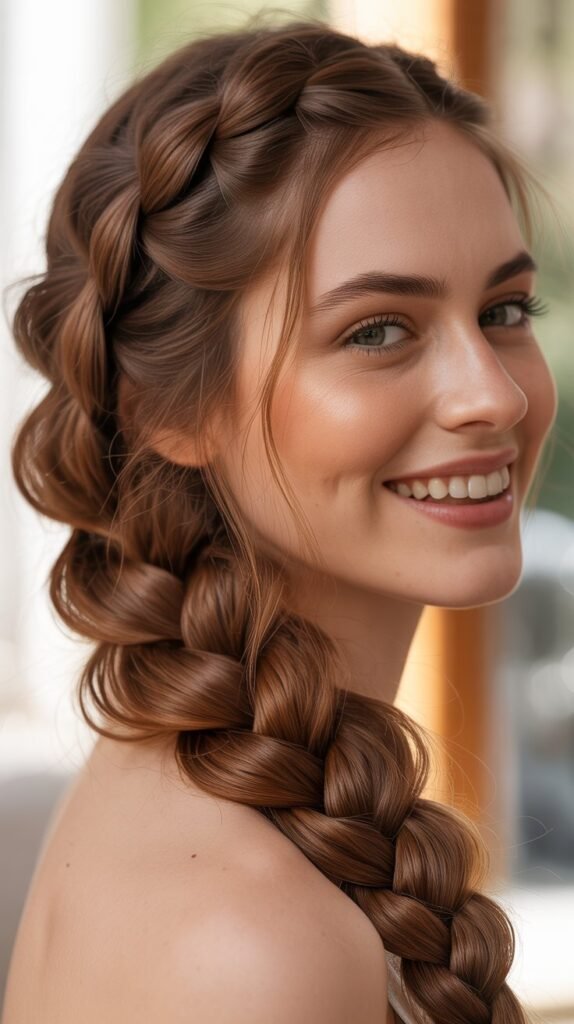
This comprehensive guide to 33 Gorgeous Medium Braided Hairstyles will walk you through a diverse collection of braiding techniques, from classic three-strand braids to modern bohemian styles that can transform your look in minutes.
You’ll discover options suitable for every hair texture, face shape, and personal style preference, along with practical tips for creating and maintaining each look.
Get ready to explore braided crowns, waterfall braids, fishtails, Dutch braids, and innovative combinations that will inspire your next hairstyle choice and help you master the art of braiding medium-length hair.
1. Classic Three-Strand Braid
The classic three-strand braid is the foundation of all braiding techniques and remains timelessly beautiful for medium-length hair.
This versatile style works for any occasion and can be worn sleek and polished or loose and textured for a more relaxed appearance.
It’s the perfect starting point for beginners and a go-to option when you need a quick, reliable hairstyle.
Styling Steps:
- Brush your hair thoroughly to remove all tangles and create a smooth base for braiding.
- Divide your hair into three equal sections at the nape of your neck or wherever you want the braid to begin.
- Cross the right section over the middle section, then cross the left section over the new middle section.
- Continue this alternating pattern, keeping consistent tension throughout for an even braid.
- Secure the end with a hair elastic and gently pull on the braid sections to add volume if desired.
Best For:
- All hair textures and types, from straight to curly hair.
- Professional settings, casual outings, gym sessions, and everyday wear.
- People new to braiding who want to master fundamental techniques.
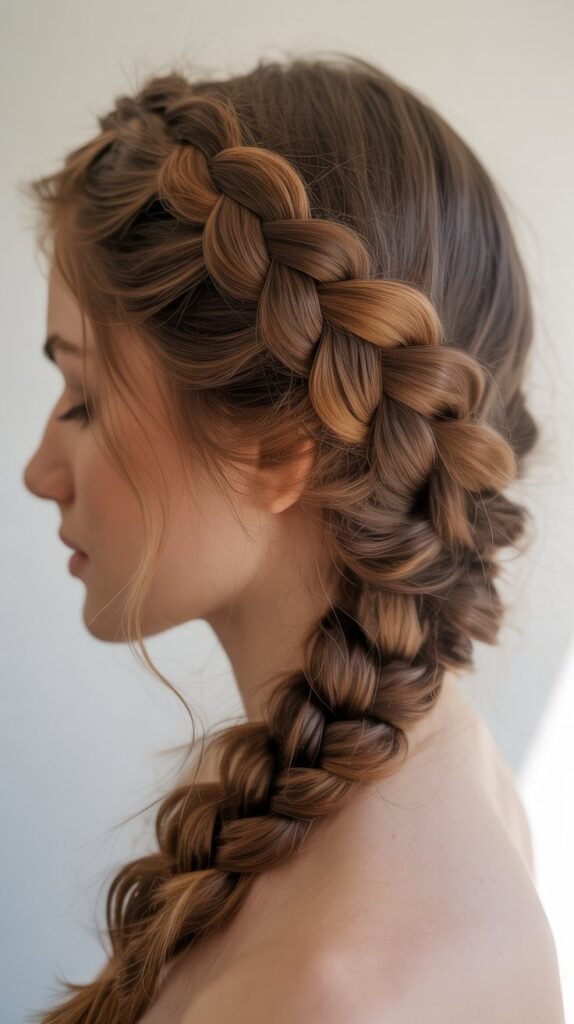
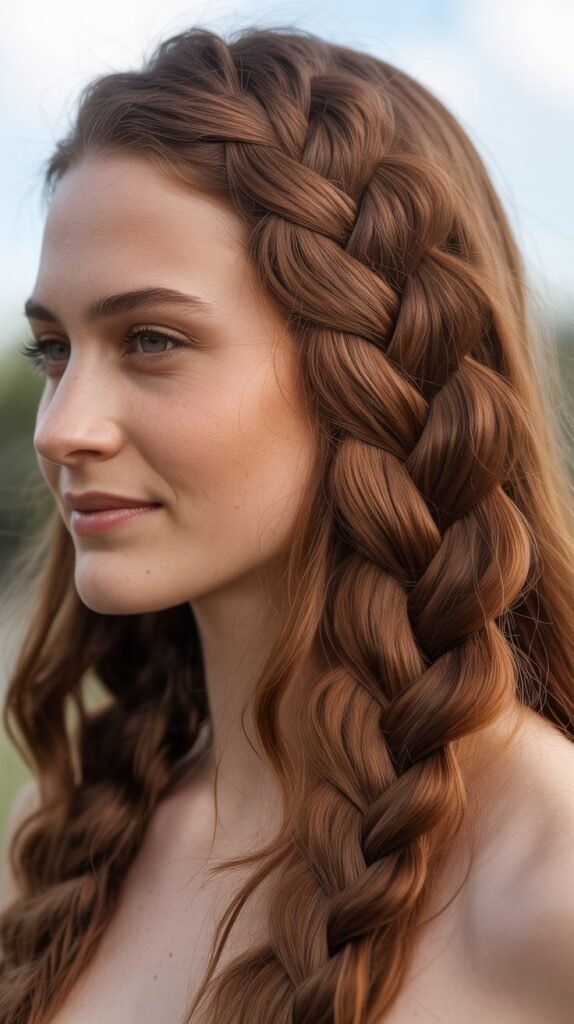
2. Dutch Braid (Inverted Braid)

The Dutch braid creates a beautiful raised effect that sits on top of your hair rather than lying flat.
This inside-out braiding technique adds dimension and visual interest to medium-length hair, making it appear fuller and more textured.
The braid stands out prominently, creating a statement look that’s perfect for both casual and formal occasions.
Styling Steps:
- Start with brushed hair and take a section from the crown of your head.
- Divide this section into three equal parts to begin the braiding process.
- Cross the right strand under the middle strand instead of over it as in regular braiding.
- Cross the left strand under the new middle strand, then add small sections of hair from the sides.
- Continue braiding by crossing strands under and incorporating hair until you reach the nape.
- Finish with a regular three-strand braid and secure with an elastic band.
Maintenance Tips:
- Apply a light texturizing spray before braiding to help hair grip better and prevent slipping.
- Sleep with your braid wrapped in a silk scarf to maintain its shape overnight.
- Use a small amount of edge control or gel on flyaways for a polished finish.
3. French Braid

The French braid is an elegant and practical hairstyle that keeps medium-length hair secure while looking sophisticated.
This technique involves gradually incorporating hair sections as you braid, creating a seamless look that follows the contour of your head.
It’s a timeless choice that never goes out of style and works beautifully for both professional and social settings.
Styling Steps:
- Begin by taking a triangular section of hair from the front hairline to the crown.
- Divide this section into three equal strands to start your braid.
- Cross the right strand over the middle, then cross the left strand over the middle.
- Before each subsequent cross, add a small section of loose hair from that side.
- Continue braiding down the head, incorporating all hair until you reach the nape.
- Complete with a regular three-strand braid and fasten with an elastic.
Styling Variations:
- Create two French braids for a sporty, symmetrical look perfect for active days.
- Try a diagonal French braid that sweeps across your head for an asymmetrical style.
- Loosen the braid after securing it to create a softer, more romantic appearance.
4. Fishtail Braid
The fishtail braid delivers an intricate, detailed appearance that looks complex but is surprisingly simple to create.
This four-section technique produces a unique herringbone pattern that adds texture and sophistication to medium-length hair.
The finished braid has a delicate, feminine quality that works beautifully for both daytime and evening events.
Styling Steps:
- Divide your hair into two large, equal sections instead of the traditional three.
- Take a thin strand from the outer edge of the left section and cross it over to join the right section.
- Take a thin strand from the outer edge of the right section and cross it over to join the left section.
- Continue alternating sides, always taking thin strands from the outer edges for a detailed pattern.
- Keep consistent tension throughout to maintain the braid’s distinctive texture.
- Secure at the end and gently pull on the edges to widen and soften the braid.
Pro Tips:
- Thinner strands create a more intricate, detailed fishtail pattern.
- Starting with slightly damp or texturized hair makes the braid easier to manipulate.
- This style looks particularly stunning when pancaked or pulled apart gently for volume.
5. Waterfall Braid

The waterfall braid creates a cascading effect where strands of hair fall through the braid like a waterfall.
This romantic, feminine style is perfect for medium-length hair as it showcases both the braided and loose sections beautifully.
It’s an ideal choice for weddings, date nights, or any occasion where you want to make a soft, elegant impression.
Styling Steps:
- Take a section of hair near your temple and divide it into three strands.
- Begin with a regular braid pattern by crossing the right strand over the middle.
- Cross the left strand over the middle, then drop the right strand and let it fall.
- Pick up a new section of hair from the top to replace the dropped strand.
- Continue this pattern of dropping and replacing strands as you braid around your head.
- Secure the braid with a small elastic or bobby pins behind your ear or at the back.
Styling Occasions:
- Romantic dates, weddings, proms, and formal evening events.
- Garden parties, baby showers, and spring or summer celebrations.
- Photo sessions where you want a soft, feminine aesthetic.
6. Crown Braid (Halo Braid)
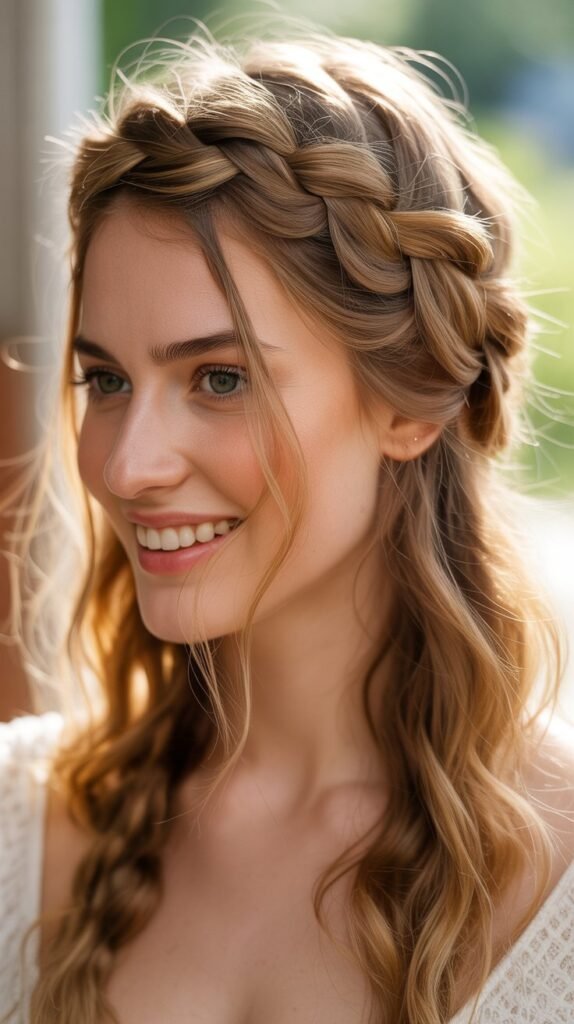
The crown braid wraps around your head like a halo, creating a regal and sophisticated appearance.
This elegant style is perfect for medium-length hair as it keeps all hair secured while maintaining a soft, romantic look.
It’s particularly flattering as it draws attention to your face and works beautifully for formal occasions or when you want to feel like royalty.
Styling Steps:
- Part your hair down the middle from forehead to nape, creating two equal sections.
- Start a Dutch or French braid on one side, beginning at the part near your forehead.
- Braid along your hairline, following the natural curve of your head toward the back.
- Continue braiding around the opposite side, incorporating all hair as you work.
- When you meet the starting point, tuck the end of the braid under the beginning and secure with pins.
- Gently pull on the braid to add volume and create a fuller, softer appearance.
Accessorizing Ideas:
- Weave small flowers throughout the crown braid for a bohemian or wedding look.
- Add delicate pearl pins at intervals for an elegant, sophisticated touch.
- Incorporate a thin ribbon in a complementary color woven through the braid.
7. Side Braid

The side braid is an effortlessly chic style that brings all your medium-length hair to one side for an asymmetrical, romantic look.
This versatile option can be styled sleek and polished or loose and textured depending on your preference.
It’s perfect for showcasing statement earrings and adds a touch of elegance to any outfit.
Styling Steps:
- Brush all your hair to one side, deciding which side best complements your face shape.
- Gather your hair over your chosen shoulder and secure temporarily if needed.
- Choose your preferred braiding technique—three-strand, fishtail, or Dutch all work beautifully.
- Begin braiding at the nape of your neck or slightly higher for a different look.
- Secure the end with a clear elastic or decorative hair tie.
- Pull gently on sections of the braid to loosen and add romantic volume.
Face Shape Recommendations:
- Round faces benefit from side braids that add length and create angles.
- Heart-shaped faces look great with side braids that add width at the jawline.
- Oval faces can wear side braids starting at any height with flattering results.
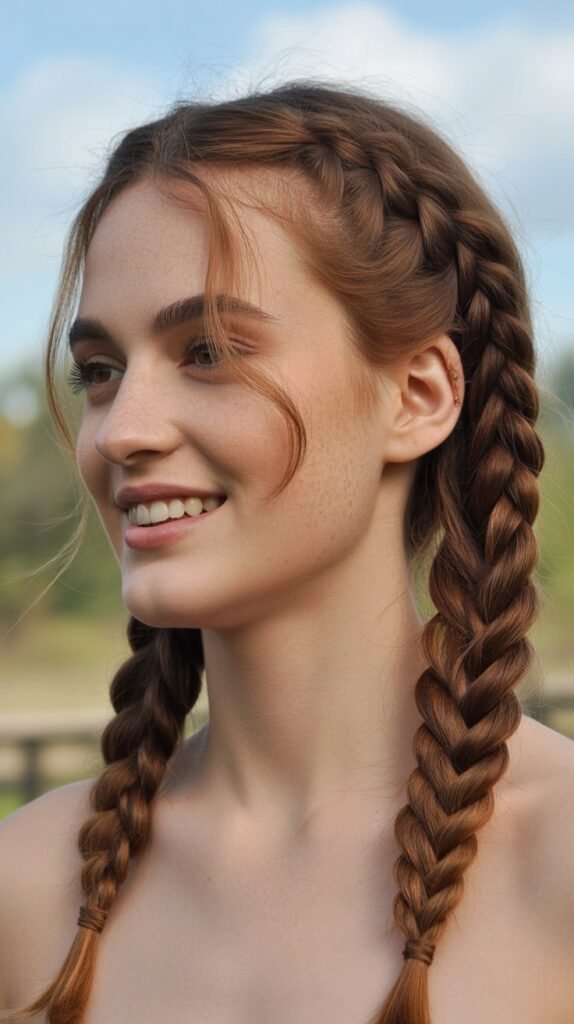
8. Boxer Braids (Double Dutch Braids)

Boxer braids consist of two Dutch braids running parallel down your head, creating a sporty yet stylish appearance.
These braids have gained popularity beyond athletic settings and are now a fashion statement suitable for various occasions.
They keep medium-length hair completely secured while looking bold and contemporary.
Styling Steps:
- Part your hair straight down the middle from forehead to nape, creating two equal sections.
- Clip one section away while you work on the first side to keep it separate.
- Start a Dutch braid on one side, beginning at the front hairline near the part.
- Cross strands under rather than over, adding hair from the sides as you progress down.
- Secure the first braid at the end, then repeat the entire process on the other side.
- Apply a light holding spray to keep flyaways controlled and maintain sleekness.
Activity Recommendations:
- Workouts, running, yoga, and any athletic or fitness activities.
- Music festivals, outdoor concerts, and casual social events.
- Busy days when you need hair completely out of your face but still styled.
9. Pull-Through Braid

The pull-through braid creates an illusion of a thick, voluminous braid without traditional braiding techniques.
This style uses a series of ponytails that are pulled through each other, making it perfect for those who struggle with coordination required for regular braiding.
It’s an excellent option for medium-length hair as it maximizes the appearance of fullness and length.
Styling Steps:
- Create a ponytail at the crown of your head and secure it with a clear elastic.
- Make a second ponytail just below the first one, leaving some space between them.
- Split the first ponytail in half and bring the two sections around the second ponytail.
- Secure these split sections with the hair below using another elastic to create a third ponytail.
- Continue this pattern of splitting, wrapping around, and securing down the length of your hair.
- Gently pull on each section to create volume and the characteristic puffy appearance.
Volume-Boosting Tips:
- Tease each ponytail section slightly before pulling through for maximum fullness.
- Use a texturizing spray throughout your hair before starting for better grip and body.
- Pull generously on each segment to create dramatic volume and hide the elastics.
10. Braided Ponytail

The braided ponytail combines the convenience of a ponytail with the elegance of braiding.
This hybrid style offers numerous variations depending on where and how you incorporate the braid, making it suitable for both casual and dressy occasions.
It’s perfect for medium-length hair as it adds interest to a classic style while keeping hair secure and manageable.
Styling Variations:
- Create a French or Dutch braid from the crown that transitions into a ponytail at the crown or mid-head.
- Make a regular ponytail, then braid the ponytail itself in your preferred braiding style.
- Add small braids to the sides of your head that feed into a central ponytail.
- Braid from the nape upward toward a high ponytail for an edgy, unexpected look.
- Wrap a small braid around the base of your ponytail to hide the elastic.
Styling Steps for Classic Version:
- Start with a French or Dutch braid at your hairline, braiding toward your crown.
- When you reach your desired ponytail placement, gather all hair including the braid.
- Secure everything together with a hair elastic to create the ponytail.
- You can leave the ponytail loose or continue braiding it for additional texture.
11. Milkmaid Braid
The milkmaid braid consists of two braids wrapped over the top of your head, creating a sweet, vintage-inspired crown effect.
This charming style is perfect for medium-length hair as it provides an elegant updo alternative without requiring excessive length.
It evokes a romantic, pastoral aesthetic while being practical enough for everyday wear.
Styling Steps:
- Part your hair down the center and create two equal sections on each side.
- Braid each section using your preferred technique—three-strand braids work perfectly.
- Bring the right braid up and over your head, laying it across the crown area.
- Secure the end of this braid behind your left ear using bobby pins that match your hair color.
- Take the left braid and bring it up and over your head, positioning it in front of the first braid.
- Secure this braid behind your right ear, tucking and pinning to hide all ends.
- Gently pull on the braids to soften them and create a fuller, more romantic appearance.
Historical Context:
- This style has roots in traditional European hairstyles, particularly Scandinavian and Alpine regions.
- It experienced a revival in recent years thanks to festival fashion and bohemian style trends.
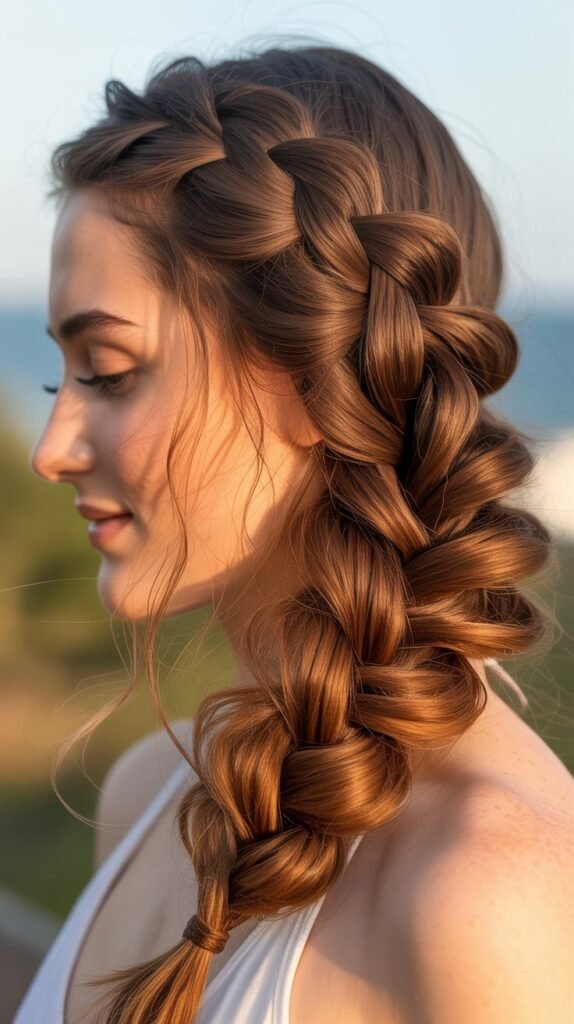
12. Rope Braid (Twist Braid)

The rope braid creates a spiral effect through twisting rather than traditional braiding techniques.
This simple yet striking style requires only two sections of hair twisted around each other, making it one of the easiest braided looks to achieve.
It’s perfect for medium-length hair and adds an interesting texture that differs from conventional braids.
Styling Steps:
- Gather your hair into a ponytail at your desired height or leave it loose for a side rope braid.
- Divide all hair into two equal sections.
- Twist the right section clockwise (to the right) several times until it holds its twist.
- Twist the left section clockwise in the same direction.
- Now wrap the right twisted section over the left twisted section counterclockwise (to the left).
- Continue wrapping the sections around each other, always maintaining the individual twists.
- Secure at the end with an elastic and apply light hairspray to prevent unraveling.
Technical Tips:
- The key is twisting both sections in the same direction, then wrapping them together in the opposite direction.
- Maintain consistent tension throughout to keep the rope braid tight and defined.
- This style works best on second-day hair or hair with some texture for better grip.
13. Four-Strand Braid
The four-strand braid creates an intricate, dimensional pattern that appears more complex than it actually is.
This advanced technique produces a wider, more textured braid that stands out from simpler three-strand versions.
It’s an excellent choice for medium-length hair when you want to showcase your braiding skills and create something unique.
Styling Steps:
- Divide your hair into four equal sections arranged side by side.
- Take the rightmost strand and cross it under the strand next to it, then over the third strand.
- Now take the leftmost strand and cross it under its neighboring strand, then over the next one.
- Continue alternating between the right and left sides, always following the under-over pattern.
- Keep consistent tension to maintain the braid’s structure and prevent sections from loosening.
- Secure at the end and gently stretch the braid for added width and dimension.
Pattern Breakdown:
- Think of the four strands as positions 1, 2, 3, and 4 from left to right.
- The pattern is: rightmost strand goes under, then over; leftmost strand goes under, then over.
- With practice, this pattern becomes natural and you can complete it quickly.
14. Braided Bun
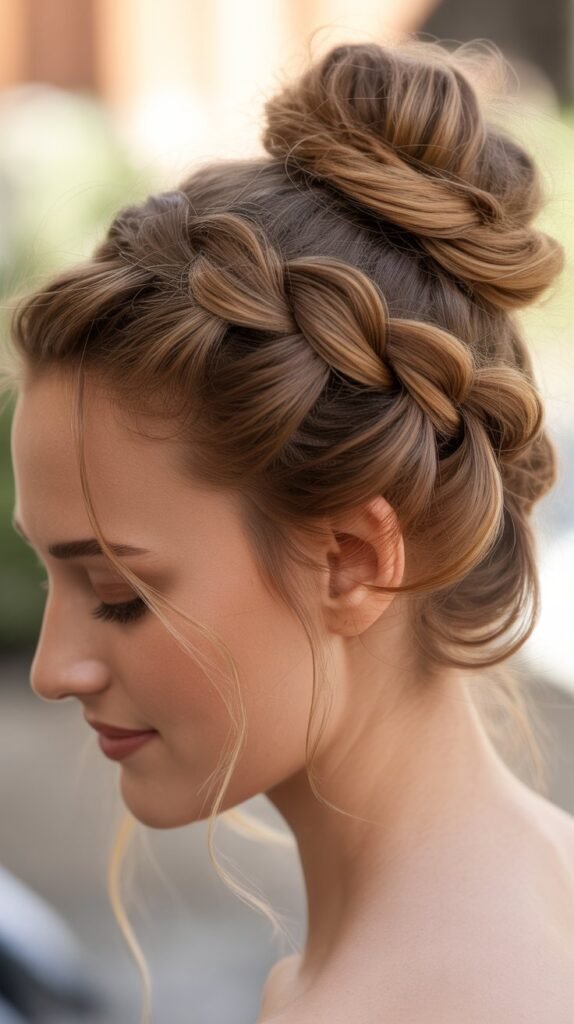
The braided bun combines the elegance of an updo with the texture and interest of braiding.
This sophisticated style is perfect for professional settings, formal events, or when you want medium-length hair completely secured in a polished manner.
The braiding adds dimension that elevates a simple bun into something special.
Styling Variations:
- Braid all your hair first, then wrap the braid into a circular bun and pin it.
- Create a regular bun, then wrap small braids around the exterior for decoration.
- Make multiple small braids throughout your hair, then gather them all into a messy bun.
- Dutch braid from the nape upward, then twist the remaining hair into a high bun.
- Create a side-swept braid that wraps into a low bun at the nape.
Styling Steps for Classic Version:
- Braid your hair using your preferred technique, securing the end with a clear elastic.
- Coil the braid around itself at your desired bun placement (high, mid, or low).
- Secure the bun with bobby pins, inserting them through the braid and into the base.
- Wrap the end of the braid around the base to hide it and pin securely.
- Apply hairspray and smooth any flyaways with a light gel or cream.
15. Snake Braid

The snake braid features a diagonal or zigzag pattern across your head, creating a unique, eye-catching design.
This creative style showcases advanced braiding technique and works wonderfully for medium-length hair.
It’s perfect for those who want to stand out and aren’t afraid to wear an unconventional, artistic hairstyle.
Styling Steps:
- Part your hair on one side to create an asymmetrical starting point.
- Begin a Dutch braid near the part, braiding at an angle toward the opposite ear.
- When you reach a few inches above the ear, change direction and braid back diagonally.
- Continue changing direction every few inches, creating the characteristic zigzag pattern.
- Each time you change direction, be mindful of maintaining consistent braid size for a uniform appearance.
- When you run out of hair to incorporate, finish with a regular braid and secure.
- Pin the remaining braid against your head or let it hang freely depending on your preference.
Design Considerations:
- The number of zigzags depends on your hair length and how tight you make each turn.
- Keeping the diagonal angles consistent creates a more polished, intentional look.
- This style requires patience and possibly a mirror or help to see the back clearly.
16. Infinity Braid

The infinity braid creates the illusion of a figure-eight pattern woven through your hair.
This stunning technique produces a complex-looking result that draws attention and compliments.
While it appears intricate, with practice it becomes manageable and is perfect for showcasing medium-length hair in a unique way.
Styling Steps:
- Divide your hair into two sections as you would for a rope braid.
- Take a small piece from the outer edge of the right section.
- Bring this piece over the right section, under the left section, and join it to the right section.
- Take a small piece from the outer edge of the left section.
- Bring it over the left section, under the right section, and join it to the left section.
- Continue this over-under pattern, creating the infinity or figure-eight weave.
- Maintain consistent tension and strand thickness for a uniform appearance throughout.
Practice Tips:
- Start with a simple rope braid before attempting the infinity braid.
- Use different colored ribbons or hair extensions in each section while learning to visualize the pattern.
- This braid looks particularly impressive when slightly loosened to show the weaving pattern.
17. Lace Braid

The lace braid is essentially a French braid where hair is added only from one side, creating a delicate, lace-like edge.
This elegant technique is perfect for medium-length hair and creates a beautiful accent rather than gathering all hair.
It’s wonderful for adding a romantic touch to otherwise loose hairstyles.
Styling Steps:
- Take a small section of hair near your temple or hairline where you want the lace braid.
- Divide this section into three strands to begin a standard braiding pattern.
- Cross the strands as in a regular braid, but only add new hair from the side closer to your face.
- The other side of the braid receives no additional hair, creating the asymmetrical lace effect.
- Continue along your desired path, which could follow the hairline, go across the crown, or curve along the side.
- Secure with a small clear elastic or bobby pins when you reach your desired endpoint.
Styling Applications:
- Create a lace braid along one side of a half-up hairstyle for a romantic touch.
- Use it as a decorative headband element across the front of loose hair.
- Incorporate it into updos to add texture and interest to the style.
18. Bubble Braid

The bubble braid features a series of rounded, puffy sections separated by elastics, creating a playful, contemporary look.
This trendy style is extremely popular and perfect for medium-length hair as it adds visual length and volume.
It’s one of the easiest “braided” looks to achieve since it doesn’t require actual braiding technique.
Styling Steps:
- Create a ponytail at your desired height using a hair elastic.
- Add another elastic about two inches down from the first elastic.
- Gently pull on the hair between the elastics, tugging it outward to create the first bubble.
- Continue adding elastics at regular intervals down the length of the ponytail.
- Create bubbles by pulling on each section, making them as full and round as possible.
- For the most polished look, ensure all bubbles are approximately the same size.
- Hide the elastics by wrapping small sections of hair around them if desired.
Creative Variations:
- Use colorful or decorative elastics as a fashion statement.
- Create two bubble braids in a boxer braid pattern for a playful look.
- Vary the bubble sizes for a more organic, artistic appearance.
19. Scarf Braid

The scarf braid incorporates a ribbon, scarf, or fabric strip into your braid, adding color and texture.
This creative styling option transforms a simple braid into an accessorized statement piece.
It’s perfect for medium-length hair and offers endless customization possibilities depending on the scarf you choose.
Styling Steps:
- Choose a scarf, ribbon, or fabric strip that complements your outfit and is long enough.
- Tie the scarf around a small section of hair at the starting point of your braid.
- Divide your hair into three sections, with the scarf becoming the middle or one side section.
- Braid normally, treating the scarf as one of the strands throughout the entire process.
- The scarf will weave through your braid, adding its color and texture to the finished look.
- Secure at the end, and either tie the scarf into a bow or wrap it around the elastic.
- Adjust the tightness and positioning to show off the scarf pattern beautifully.
Scarf Selection:
- Silk scarves create an elegant, sophisticated appearance perfect for formal occasions.
- Cotton bandanas provide a casual, bohemian vibe ideal for festivals or everyday wear.
- Ribbon in coordinating colors subtly enhances the braid without overwhelming it.
20. Braided Headband

The braided headband uses your own hair to create a braid that acts as a headband across the front of your head.
This practical yet stylish option keeps hair away from your face while adding an interesting textural element.
It’s ideal for medium-length hair and works beautifully with both curly and straight textures.
Styling Steps:
- Part your hair deeply on one side, creating a small section from the part to behind your ear.
- Begin a regular or Dutch braid with this section, starting near the part.
- Braid along your hairline toward the opposite ear, working horizontally across your head.
- Secure the end of the braid with a small elastic when you reach the other side.
- Tuck the end behind your ear or pin it to blend with the rest of your loose hair.
- Adjust the tightness of the braid and gently pull on sections for a softer, fuller appearance.
- Leave the remaining hair down, curled, straight, or styled as desired.
Styling Occasions:
- Casual daily wear when you want hair away from your face.
- Outdoor activities, gardening, or casual sports where you need practical styling.
- Summer events where you want to keep cool while looking put together.
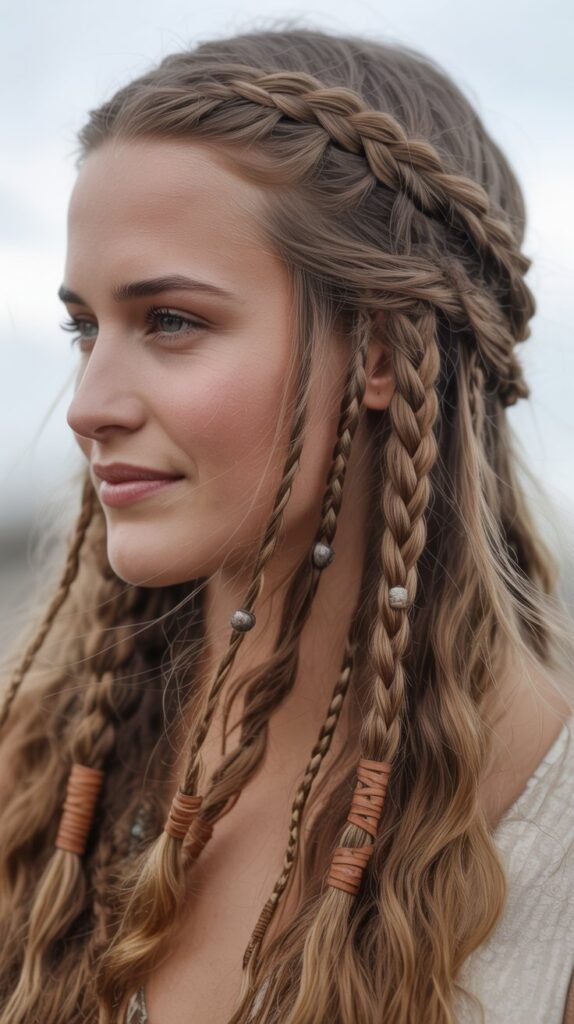
21. Viking Braid

The Viking braid is inspired by historical Norse hairstyles and typically features small, tight braids combined with larger sections.
This edgy, warrior-inspired style has gained popularity through media representation and is perfect for those wanting a bold, distinctive look with medium-length hair.
Styling Steps:
- Section off the sides of your hair from temple to behind the ears on both sides.
- Create multiple small, tight braids in these side sections.
- Leave the center section loose or gather it into a ponytail at the crown or back.
- The small side braids can be left hanging or incorporated into the main hairstyle.
- Add accessories like metal rings, beads, or leather cords for an authentic Viking aesthetic.
- Consider creating a mohawk-style effect by pulling the center section up and securing it.
Cultural Considerations:
- While inspired by historical styles, modern Viking braids are fashion interpretations.
- The style has been popularized by television shows and fantasy media.
- It works particularly well on medium-length hair that has some natural texture.
22. Mermaid Braid
The mermaid braid combines multiple braiding techniques to create a flowing, textured look reminiscent of ocean waves.
This romantic, bohemian style is perfect for medium-length hair and creates a soft, ethereal appearance.
It typically involves loose braiding, pancaking, and often incorporates both braided and twisted sections.
Styling Steps:
- Start with wavy or textured hair for the best mermaid braid effect.
- Create a loose fishtail or regular braid, intentionally keeping it relaxed rather than tight.
- As you braid, add in small twisted or braided sections from the sides.
- Generously pull on the braid sections to create maximum width and a soft, undone appearance.
- Leave pieces of hair out around your face for a romantic, effortless look.
- The finished braid should appear loose, voluminous, and slightly messy for that beachy effect.
Enhancing the Look:
- Add small flowers, shells, or beach-themed accessories throughout the braid.
- Use sea salt spray before styling to create texture and enhance the ocean-inspired aesthetic.
- Consider temporary hair chalk or color sprays in ocean hues for special events.
23. Twisted Crown Braid

The twisted crown braid uses twisting rather than traditional braiding to create a crown effect around the head.
This elegant style is perfect for medium-length hair and offers a softer, more romantic alternative to the traditional braided crown.
It’s ideal for weddings, formal events, or whenever you want to feel elegant and put-together.
Styling Steps:
- Part your hair down the center from forehead to nape.
- Take a section from one side near the front and divide it into two parts.
- Twist these sections around each other while adding hair from below as you progress.
- Continue twisting along the hairline toward the back of your head.
- Repeat the process on the other side, creating a matching twisted section.
- Meet both twisted sections at the back and secure them together with bobby pins.
- Tuck and pin any remaining ends to create a seamless crown appearance.
Styling Tips:
- This style works beautifully on hair with some texture or second-day hair.
- Gently pull on the twists to add volume and create a softer, more romantic effect.
- Perfect for showcasing statement earrings or a delicate necklace.
24. Half-Up Braided Crown
The half-up braided crown combines the elegance of a crown braid with the practicality of wearing hair partially down.
This versatile style is perfect for medium-length hair as it shows off both your braiding skills and your natural hair texture.
It creates a beautiful frame for your face while keeping the front sections secured.
Styling Steps:
- Section off the top portion of your hair from ear to ear across the crown.
- Divide this section in half and create a braid on each side, working toward the back.
- These can be Dutch braids, French braids, or simple three-strand braids depending on preference.
- Bring both braids to meet at the center back of your head.
- Secure them together with bobby pins or wrap one braid over the other for a more intricate look.
- Leave the remaining hair down, and consider curling or waving it for added texture.
- Gently pull on the braids to soften them and create a fuller crown effect.
Versatility:
- Perfect for transitioning from day to night—start with curls down, pin them up later.
- Works beautifully for both professional settings and social events.
- Easy to adjust throughout the day without completely redoing the style.
25. Diagonal Braid

The diagonal braid travels across your head at an angle rather than straight down, creating an asymmetrical, modern look.
This creative styling option is perfect for medium-length hair and adds visual interest through its unexpected direction.
It’s an excellent choice for those who want something different from traditional vertical braids.
Styling Steps:
- Start your braid at one temple or the side of your hairline near the part.
- Choose your braiding technique—
Dutch or French braids work particularly well for diagonal styles.
- Braid at a diagonal angle toward the opposite shoulder, incorporating hair as you progress.
- Maintain a consistent angle throughout to create a clean, intentional diagonal line.
- When you run out of hair to incorporate, finish with a regular braid.
- Secure at the end and position the braid over your shoulder for maximum visual impact.
- Gently pull on the braid sections to add dimension and showcase the diagonal pattern.
Design Variations:
- Create multiple thin diagonal braids for a geometric, contemporary appearance.
- Start high on one side and braid diagonally down and across for dramatic effect.
- Combine with loose waves in the remaining hair for a romantic contrast.
26. Braided Pigtails
Braided pigtails feature two braids positioned symmetrically on either side of the head.
This youthful, playful style works wonderfully for medium-length hair and can be adapted from casual to sophisticated depending on the braiding technique and placement.
They’re practical, cute, and keep all hair securely styled throughout the day.
Styling Steps:
- Part your hair straight down the center from forehead to nape, creating two equal sections.
- Secure one section temporarily with a clip while working on the other side.
- Choose your preferred braiding style—three-strand, Dutch, or fishtail all work beautifully.
- Braid one side completely and secure with an elastic at the desired length.
- Repeat the exact same process on the other side, ensuring both braids match.
- Position the braids at matching heights—low, mid, or high depending on your preference.
- For a polished look, ensure both braids are the same tightness and thickness.
Age-Appropriate Styling:
- Lower placement and looser braids create a more mature, sophisticated appearance.
- Higher placement with tight braids offers a youthful, energetic look.
- Adding accessories like ribbons or cuffs can elevate the style for different occasions.
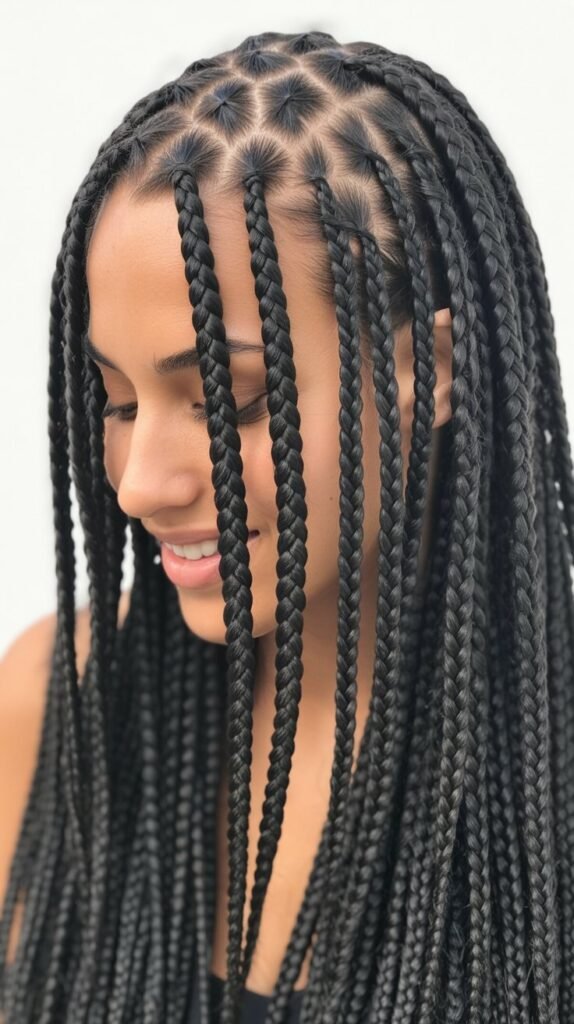
27. Cornrow Braids

Cornrow braids are tight, close-to-the-scalp braids that form neat rows across the head.
This protective style has deep cultural roots in African hair traditions and works beautifully for medium-length hair.
Cornrows can be styled in straight lines, curves, or intricate geometric patterns, offering both protection and stunning visual appeal.
Styling Steps:
- Section your hair into rows using a rat-tail comb, creating clean, precise parts.
- Apply a light oil or moisturizer to each section before braiding for hair health.
- Take a small section at the front of the first row and divide it into three strands.
- Braid using the underhand technique, adding hair from that row as you progress.
- Keep the braid tight and close to the scalp for the characteristic cornrow appearance.
- Continue braiding along the entire row until you reach the nape or end of the section.
- Repeat for each row, maintaining consistent size and tension throughout.
- Secure the ends with small elastics or leave them loose depending on your hair length.
Cultural Respect:
- Cornrows have significant cultural history in African and African American communities.
- When wearing this style, it’s important to acknowledge and respect its origins.
- Consider supporting Black hair care businesses and braiders for authentic technique.
Maintenance:
- Cornrows can last 2-6 weeks depending on hair type and care.
- Protect them at night with a silk or satin bonnet or pillowcase.
- Keep your scalp moisturized by applying light oils along the parts.
28. Messy Bohemian Braid

The messy bohemian braid embraces an intentionally undone, relaxed aesthetic.
This effortless-looking style is perfect for medium-length hair and creates a romantic, carefree appearance.
The key is creating a braid that looks naturally tousled rather than perfectly structured, ideal for festivals, casual outings, or beach days.
Styling Steps:
- Start with textured or second-day hair for the best bohemian effect.
- Create a loose side braid without worrying about perfection or symmetry.
- Intentionally pull out small pieces around your face and throughout the braid.
- Pull generously on the braid sections to create width and a soft, undone appearance.
- Allow some strands to fall naturally rather than tucking everything into the braid.
- The looser and more relaxed the braid, the better it embodies the bohemian aesthetic.
- Finish with a loose elastic and consider leaving some hair at the end unbraid for added softness.
Achieving the Look:
- Avoid using a mirror for a more naturally imperfect result.
- Don’t worry about bumps or uneven sections—they add to the charm.
- Use minimal product to maintain the soft, touchable texture.
29. Ladder Braid

The ladder braid creates a unique effect where horizontal strands appear to weave through a vertical braid like rungs on a ladder.
This intricate style is perfect for showcasing your braiding expertise on medium-length hair.
It requires patience and precision but creates a stunning, conversation-starting result.
Styling Steps:
- Take a small section of hair from one side near your temple and set it aside.
- Create a regular or lace braid down that side, leaving the small section out.
- As you braid, periodically wrap the separated small section horizontally around the braid.
- These horizontal wraps create the “rungs” of the ladder effect.
- Continue braiding and wrapping at regular intervals down the length of your hair.
- The wrapped section should pass over the front of the braid and tuck behind it.
- Secure everything at the end, ensuring the ladder effect is visible and well-defined.
Technical Tips:
- Keep the horizontal wrapping strand separate and tension-controlled throughout.
- Space the “rungs” evenly for the most visually appealing result.
- This style works best on straight or slightly wavy hair where the pattern shows clearly.
30. Crisscross Braid

The crisscross braid features two braids that weave over and under each other, creating an interlaced pattern.
This creative style is perfect for medium-length hair and adds dimension through the interaction between the two braids.
It’s an excellent choice for those who want something visually interesting and unique.
Styling Steps:
- Divide your hair into two sections, creating two separate braids on each side.
- Begin braiding both sections using your preferred technique.
- After a few inches, cross the right braid over the left braid.
- Continue braiding both sections for a few more inches.
- Cross the left braid over the right braid this time.
- Continue alternating which braid crosses over, creating the crisscross effect.
- Secure both braids together at the end or keep them separate depending on preference.
Pattern Planning:
- Decide in advance how many crossovers you want based on your hair length.
- Keep the spacing between crossovers consistent for a polished appearance.
- The crossover points can be secured with small elastics or bobby pins if needed.
31. Heart-Shaped Braid
The heart-shaped braid creates a romantic heart design using braiding technique and strategic placement.
This adorable style is perfect for medium-length hair and makes a statement for Valentine’s Day, date nights, or any time you want to express a romantic aesthetic.
It requires some skill but creates an impressive visual impact.
Styling Steps:
- Part your hair down the center from forehead to crown, stopping where the heart’s point will be.
- Create a Dutch or French braid on one side, curving it outward to form half of the heart.
- When you reach the midpoint (the heart’s bottom point), stop adding new hair.
- Repeat the process on the other side, creating a matching curve for the other half.
- Bring both braids together at the bottom point of the heart and join them.
- Continue braiding the joined hair down in a single braid from the heart’s point.
- Secure with an elastic and adjust the curves to perfect the heart shape.
Perfecting the Shape:
- The key is creating symmetrical curves on both sides that meet at a point.
- Gently pull on the outer edges of the curves to emphasize the heart shape.
- Practice the shape first by sketching it or using temporary clips to plan the curves.
32. Braided Updo with Twists

The braided updo with twists combines multiple techniques into one sophisticated hairstyle.
This elegant style is perfect for medium-length hair at formal events, weddings, or professional occasions.
It incorporates both braiding and twisting to create texture and visual interest while keeping all hair secured.
Styling Steps:
- Section your hair into multiple parts—typically four to six sections work well.
- Create small braids or twists with some sections while leaving others loose initially.
- Begin pinning the braids in a circular pattern at your desired updo placement.
- Take the remaining loose sections and twist them before wrapping them into the updo.
- Layer the braids and twists, securing each with bobby pins as you build the style.
- Tuck all ends underneath the updo to hide them and create a seamless finish.
- Apply hairspray and smooth any flyaways for a polished, elegant appearance.
Styling Variations:
- Low nape placement creates a classic, timeless look.
- Side-swept updos offer a romantic, asymmetrical appearance.
- Adding accessories like pearl pins or flowers enhances the elegance.
33. Micro Braids
Micro braids are extremely small, delicate braids that can be created throughout the hair or as accent pieces.
This intricate style works beautifully with medium-length hair and offers both protective styling benefits and stunning visual detail.
While time-intensive, micro braids can last for weeks and provide versatile styling options.
Styling Steps:
- Section your hair into small, precise parts using a rat-tail comb.
- Take one tiny section at a time—typically pencil-width or smaller.
- Braid each section tightly using the three-strand technique from root to tip.
- Apply light tension to ensure the braids are secure but not painfully tight.
- Continue section by section throughout your entire head if doing a full micro braid style.
- For accent micro braids, create just a few placed strategically throughout loose hair.
- Seal the ends with small elastics or by carefully burning synthetic hair extensions.
Time Investment:
- Full head of micro braids can take 4-8 hours or more depending on hair density.
- Accent micro braids take just 15-30 minutes for a few decorative pieces.
- The investment pays off with a style that lasts 6-8 weeks with proper care.
Maintenance:
- Keep your scalp moisturized by applying light oils along the parts.
- Protect micro braids at night with a satin bonnet or pillowcase.
- Refresh edges and hairline every 2-3 weeks as needed.
Essential Tools and Products for Braided Hairstyles
Tools You’ll Need:
- Rat-tail comb for precise sectioning and parting.
- Paddle brush or wide-tooth comb for detangling before braiding.
- Hair elastics in various sizes—clear ones for invisible hold, colored for decoration.
- Bobby pins that match your hair color for securing braids and hiding ends.
- Hair clips for sectioning and keeping hair separated while working.
- Small mirror or dual mirror setup to see the back of your head clearly.
Recommended Products:
- Texturizing spray for grip and hold, making braiding easier on slippery hair.
- Light hairspray for finishing and controlling flyaways without stiffness.
- Leave-in conditioner or detangling spray for smooth, manageable hair.
- Edge control or light gel for sleek hairlines and polished finishes.
- Hair oil or serum for shine and smoothness, particularly on finished braids.
- Dry shampoo for second-day hair texture that’s perfect for bohemian styles.
Tips for Long-Lasting Braided Hairstyles
Preparation:
- Start with clean hair that’s been properly conditioned for manageability.
- Second-day hair often holds braids better than freshly washed hair due to natural oils.
- Apply texturizing products to give hair grip if it’s naturally silky or slippery.
- Completely detangle hair before beginning any braiding to prevent breakage and snags.
During Styling:
- Maintain consistent tension throughout the braid for even appearance and longevity.
- Secure braids properly with quality elastics that won’t slip or damage hair.
- Use bobby pins that match your hair color and insert them properly for invisible hold.
- Work in sections to avoid overwhelming yourself, especially with complex styles.
Maintenance:
- Sleep on a satin or silk pillowcase to reduce friction and preserve the braid.
- Wrap delicate braids in a silk scarf at night for maximum protection.
- Apply light hairspray in the morning to refresh and control any loosened sections.
- Avoid touching or playing with braids throughout the day to maintain their structure.
- For multi-day braids like cornrows, keep your scalp moisturized with light oils.
Removal:
- Never forcibly pull out elastics—cut them carefully with scissors instead.
- Gently unravel braids from bottom to top to minimize tangling.
- Apply a detangling product before combing out braided hair.
- Be patient with your hair after removing long-term protective braids.
Adapting Braids for Different Hair Textures
Straight Hair:
- Benefits from texturizing spray or dry shampoo for better grip.
- Shows braid patterns most clearly, making it ideal for intricate designs.
- May need more securing pins as it tends to slip more than textured hair.
- Pancaking (pulling on braid sections) adds necessary volume and dimension.
Wavy Hair:
- Naturally provides good grip and texture for braiding.
- Creates a soft, romantic appearance in most braid styles.
- Works beautifully for bohemian and messy braid aesthetics.
- Requires less product than straight hair for hold and texture.
Curly Hair:
- Offers excellent natural grip and hold for braids.
- Braids appear fuller and more voluminous without additional styling.
- May need detangling products to prevent breakage during braiding.
- Showcases beautiful texture when braids are loosened or pancaked.
Coily/Kinky Hair:
- Perfect for protective braiding styles like cornrows and micro braids.
- Requires proper moisturizing before and during braiding.
- Holds braids exceptionally well for extended periods.
- Benefits from working in smaller sections for easier management.
- Edge control helps create sleek, polished parts and hairlines.
Common Braiding Mistakes to Avoid
Tension Issues:
- Braiding too tightly causes scalp pain, headaches, and potential hair damage.
- Braiding too loosely results in braids that fall apart quickly or look messy unintentionally.
- Inconsistent tension creates uneven braids with varying thickness throughout.
- Always aim for firm but comfortable tension that doesn’t pull on your scalp.
Sectioning Errors:
- Uneven sections create asymmetrical braids that lack professional appearance.
- Skipping proper sectioning leads to messy braids with hair going in multiple directions.
- Take time to part and section hair properly before beginning any braid.
- Use a rat-tail comb for precise, clean sections especially in complex styles.
Product Mistakes:
- Using too much product makes hair heavy, greasy, and difficult to braid.
- Not using any product on slippery hair results in braids that don’t hold.
- Applying products unevenly creates inconsistent texture throughout the braid.
- Less is more—start with small amounts and add more only if necessary.
Technical Errors:
- Not securing braids properly leads to them unraveling prematurely.
- Forgetting to detangle first causes painful pulling and potential breakage.
- Rushing through the process results in messy, imperfect braids.
- Practice basic techniques before attempting advanced styles.
Accessorizing Your Braided Hairstyles
Hair Jewelry:
- Metal cuffs and rings can be threaded onto braids for an edgy, modern look.
- Pearl or crystal pins add elegance perfect for weddings and formal events.
- Colored beads create playful, bohemian aesthetics ideal for festivals.
- Hair chains draped across braids provide trendy, fashion-forward appeal.
Natural Elements:
- Fresh flowers woven into braids create romantic, garden-party beauty.
- Dried flowers offer similar aesthetics with longer-lasting results.
- Leaves and greenery add whimsical, nature-inspired touches.
- Ensure natural elements are securely attached and won’t wilt quickly.
Ribbons and Fabrics:
- Silk ribbons in coordinating colors elevate simple braids elegantly.
- Leather cords create bohemian or edgy aesthetics depending on styling.
- Lace ribbons add vintage, romantic charm perfect for weddings.
- Patterned fabrics like bandanas provide casual, fun accents.
Application Tips:
- Less is often more—choose one or two accent pieces rather than overwhelming the style.
- Ensure accessories complement your outfit and the occasion appropriately.
- Secure accessories properly so they don’t slip or fall out during wear.
- Consider the weight of accessories and avoid anything that pulls uncomfortably.
Professional Resources and Learning
Online Learning:
- Video tutorials on platforms like YouTube provide visual step-by-step guidance for all skill levels.
- Hair styling courses on platforms like Udemy and Skillshare offer comprehensive braiding education.
- Instagram and Pinterest provide endless inspiration and quick technique demonstrations.
- Join online communities dedicated to hair styling for tips, troubleshooting, and support.
Professional Services:
- Visit professional hairstylists for complex styles like cornrows and micro braids.
- Many salons offer braiding services and can teach you techniques during appointments.
- Specialized braiding salons focus exclusively on various braiding styles and protective styling.
- Consider booking a one-on-one tutorial session with a professional braider.
Practice Tips:
- Practice on mannequin heads before attempting complex styles on yourself.
- Start with basic braids and gradually progress to more advanced techniques.
- Work with friends or family members to practice on different hair types.
- Take photos of your progress to track improvement and identify areas for growth.
- Be patient with yourself—braiding is a skill that improves significantly with practice.
Conclusion
Exploring these 33 Gorgeous Medium Braided Hairstyles opens up a world of styling possibilities for your medium-length hair.
From timeless classics like the three-strand braid and French braid to trendy options like bubble braids and pull-through braids, there’s a braided style for every occasion, skill level, and personal aesthetic.
Medium-length hair provides the ideal canvas for braiding—long enough to create intricate designs yet manageable enough to style without frustration.
Whether you’re seeking protective styles like cornrows, romantic looks like waterfall braids, or playful options like braided pigtails, these techniques empower you to transform your hair daily.
Remember that mastering braiding takes practice, patience, and experimentation to discover which styles work best for your unique hair texture and lifestyle.
With the right tools, products, and techniques outlined in this guide, you can confidently create salon-worthy braided hairstyles at home.
Embrace the versatility of your medium-length hair and enjoy the creative journey of discovering your favorite braided looks that make you feel beautiful and confident every day.
