
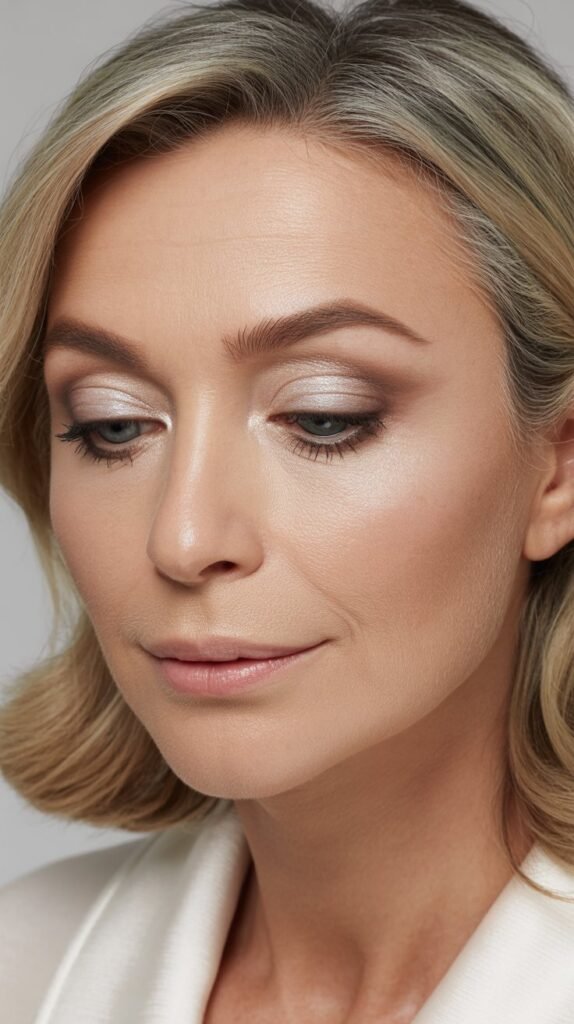
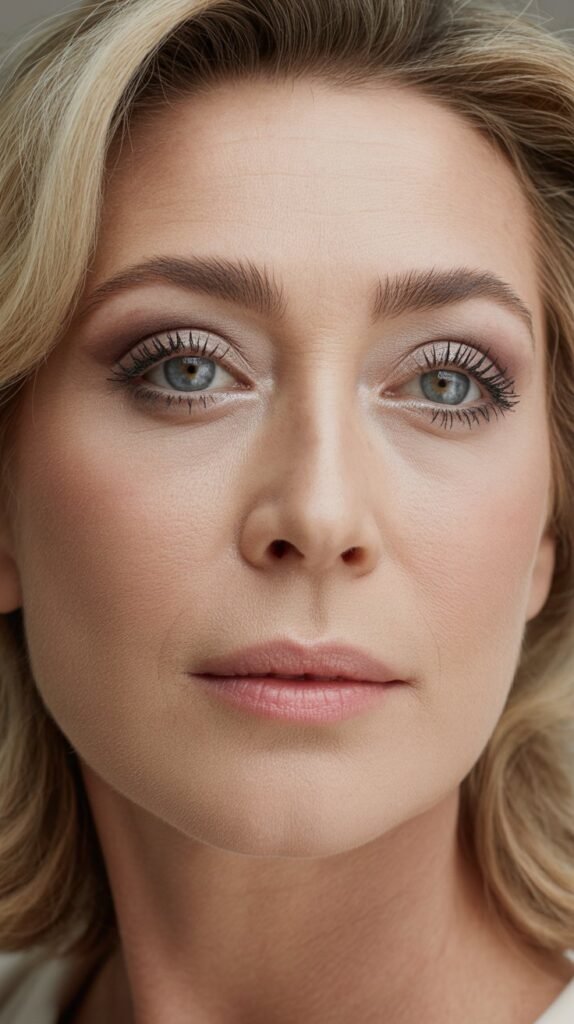
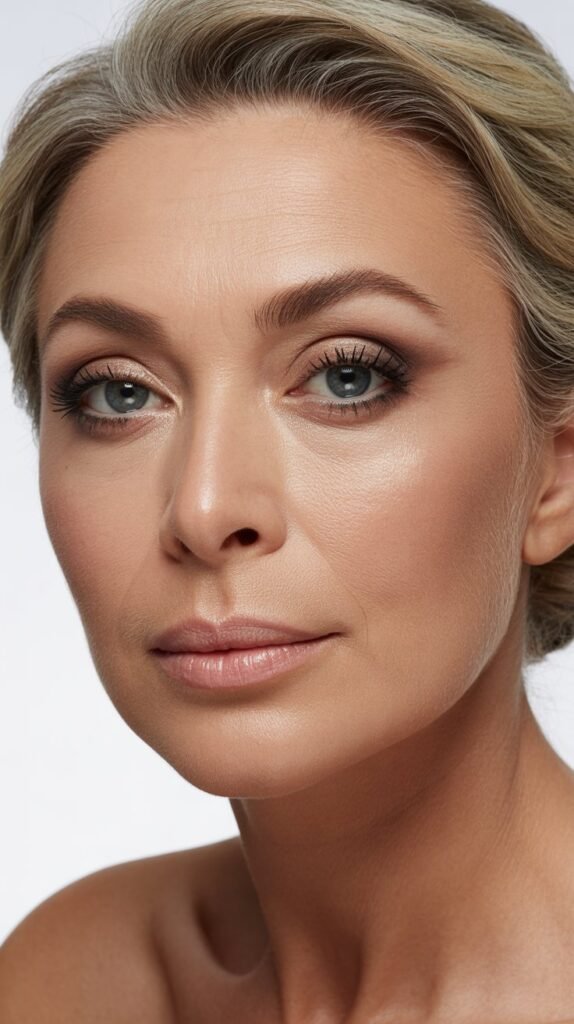
Turning 50 opens a beautiful new chapter where confidence meets elegance, and your eye makeup should reflect that radiance.
As skin matures, it changes texture, elasticity, and tone around the delicate eye area, which means the makeup techniques that worked in your 20s and 30s need thoughtful updates to truly make your eyes sparkle.
This comprehensive guide on 38 Eye Makeup Tips for Women Over 50 That Make Eyes Pop will walk you through expert-backed strategies, from choosing the right primers and shadows to mastering eyeliner application and lash enhancement.
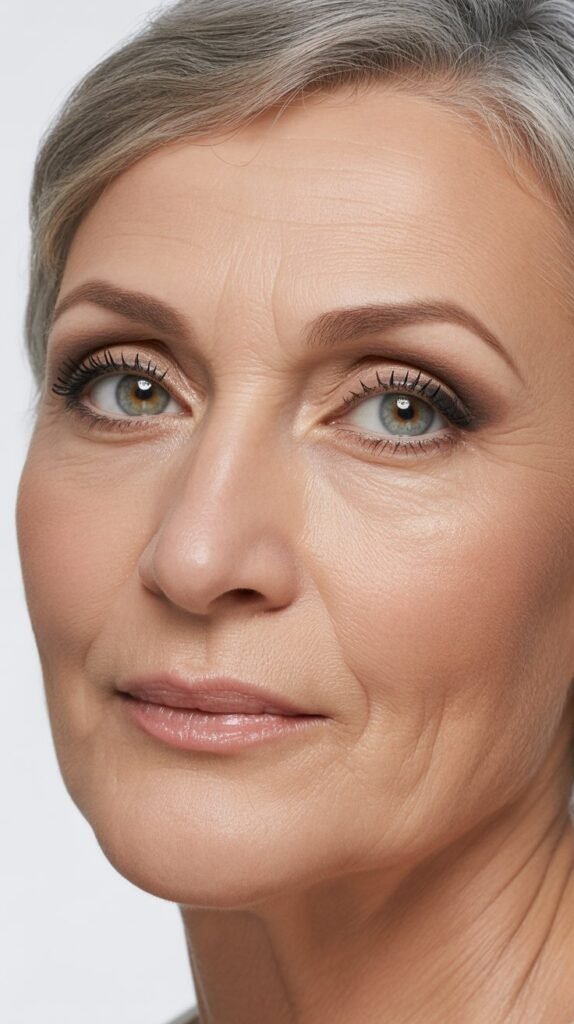
Whether you’re dealing with hooded lids, fine lines, or simply want to refresh your routine, these tips will help you create looks that brighten, lift, and celebrate your natural beauty.
You’ll discover how to work with your skin’s changing needs, select flattering colors, and apply products in ways that enhance rather than settle into creases.
Get ready to transform your eye makeup game with techniques specifically designed for mature beauty.
1. Start With Hydrating Eye Cream Before Makeup
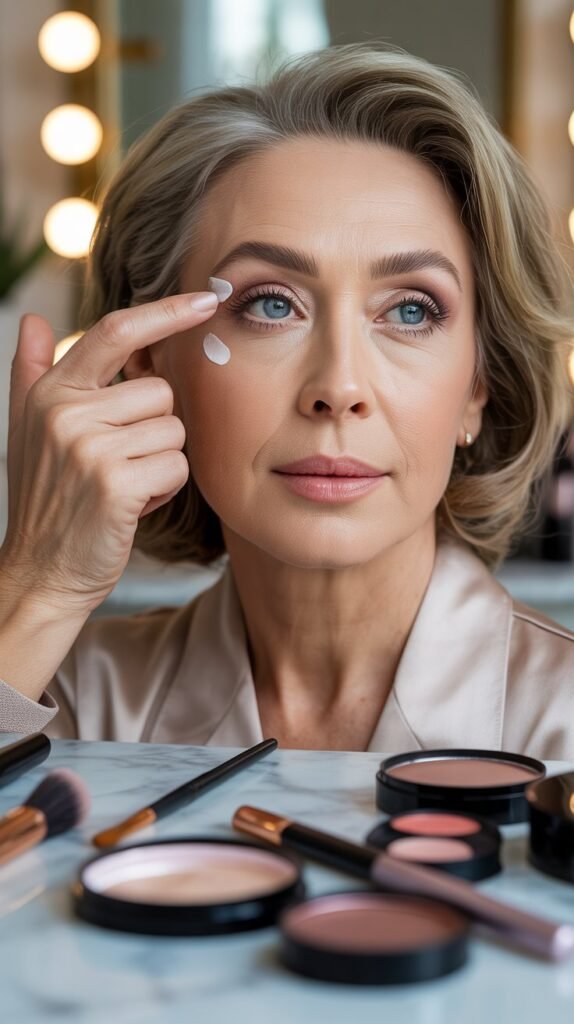
Preparing the eye area with proper hydration creates a smooth canvas that helps makeup glide on effortlessly and last longer throughout the day.
Mature skin around the eyes tends to be drier and thinner, making this step absolutely essential for flawless application.
- Apply eye cream at least 5-10 minutes before starting your makeup routine to allow complete absorption
- Choose formulas with hyaluronic acid, peptides, or ceramides that plump and smooth the delicate skin
- Gently pat the cream using your ring finger, which applies the least pressure on fragile skin
- Avoid heavy, oil-based creams immediately before makeup as they can cause products to slide
- Let the cream fully sink in; if the area feels tacky, blot gently with a tissue before proceeding
- Consider caffeine-infused eye creams that reduce puffiness and create a tighter surface for makeup
- This foundation step prevents makeup from settling into fine lines and creases throughout the day
2. Use Eye Primer to Prevent Creasing
Eye primer acts as a protective barrier between your skin and makeup, ensuring shadows stay vibrant and crease-free from morning to night.
This product is non-negotiable for mature eyes where natural oils and fine lines can cause makeup to break down quickly.
- Apply a pea-sized amount of primer across the entire eyelid from lash line to brow bone
- Choose primers specifically formulated for mature skin with added skincare benefits
- Allow the primer to dry completely for 30-60 seconds before applying any shadow
- Primer fills in fine lines and creates an even texture for smoother color application
- Look for formulas with light-reflecting particles that counteract discoloration
- Avoid silicone-heavy primers if you have very dry skin, opting instead for hydrating formulas
- Set the primer with a light dusting of translucent powder for extra staying power
- Quality primers prevent the muddy, faded look that often occurs by midday
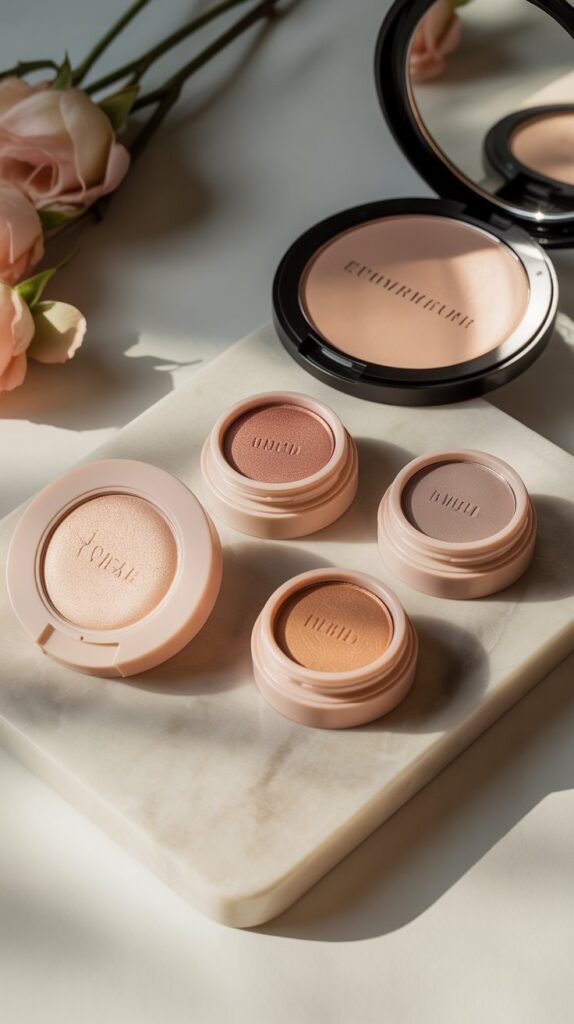
3. Choose Cream Shadows Over Powder for Mature Skin
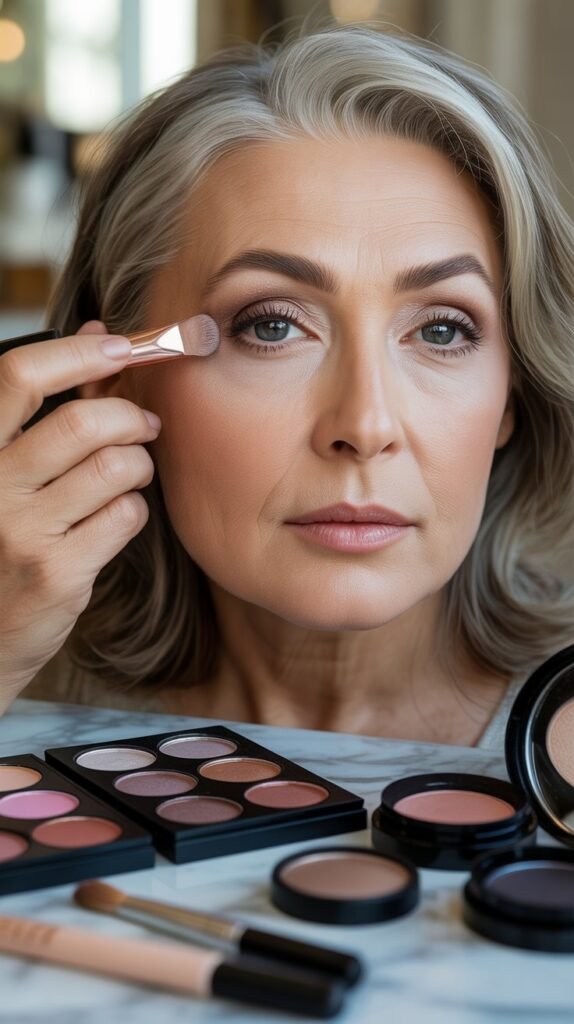
Cream eyeshadows offer superior adherence and luminosity on mature skin compared to powder formulas that can emphasize texture and settle into lines.
The emollient nature of creams provides a youthful sheen while keeping the delicate eye area moisturized.
- Cream shadows blend seamlessly into skin without accentuating wrinkles or crepiness
- Apply with fingertips for warmth-activated blending or use synthetic brushes for precision
- These formulas contain moisturizing ingredients that benefit aging skin throughout wear
- Build color gradually with cream shadows as they’re easier to control than powders
- Choose satin or subtle shimmer finishes rather than matte, which can appear flat
- Cream products won’t kick up fallout that settles into under-eye lines like powder can
- Set cream shadows lightly with coordinating powder only if you have very oily lids
- The luminous finish of creams reflects light beautifully, making eyes appear more awake
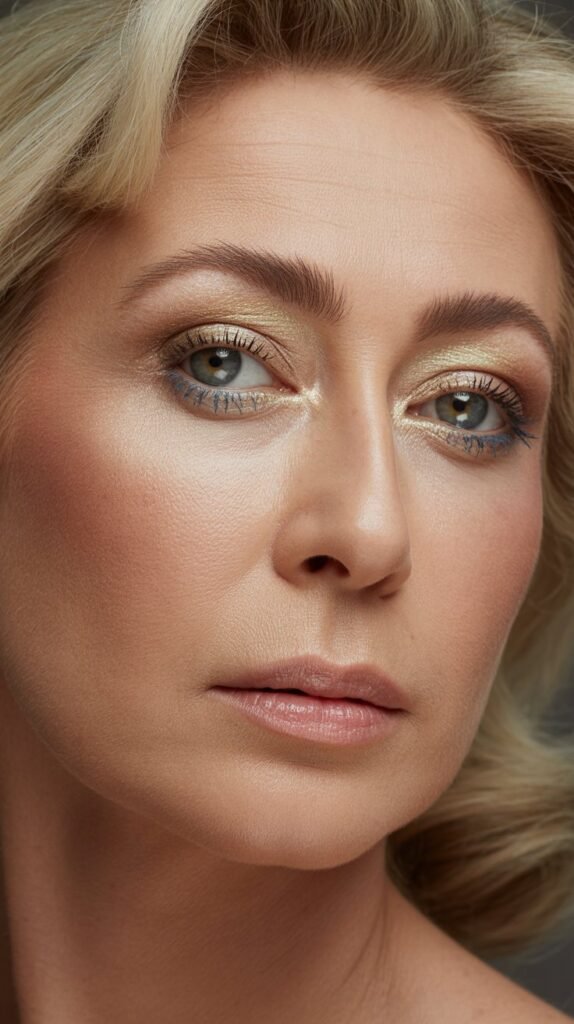
4. Avoid Heavy Shimmer and Glitter Formulas
While shimmer can be beautiful, overly glittery or chunky metallic shadows tend to emphasize skin texture, fine lines, and crepiness around mature eyes.
Strategic shimmer placement works better than all-over sparkle for sophisticated, age-appropriate looks.
- Large glitter particles settle into creases and draw attention to texture rather than the eye itself
- Opt for finely-milled satin or pearl finishes that provide subtle luminosity without obvious sparkle
- If you love shimmer, apply it only to the center of the lid or inner corner for strategic brightening
- Matte or satin formulas in the crease and outer corner create depth without texture issues
- Modern sophisticated looks favor soft dimension over disco-ball sparkle for mature beauty
- Micro-shimmer provides enough reflection to catch light without looking costume-like
- Reserve heavily glittered looks for special occasions and apply with extra primer underneath
- Remember that less reflective product allows the natural beauty of your eyes to shine through
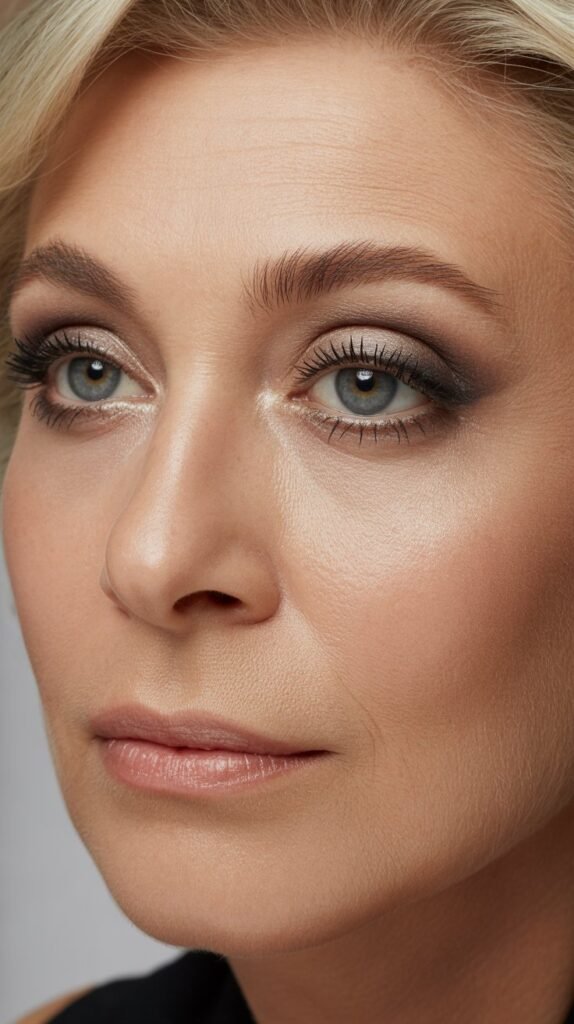
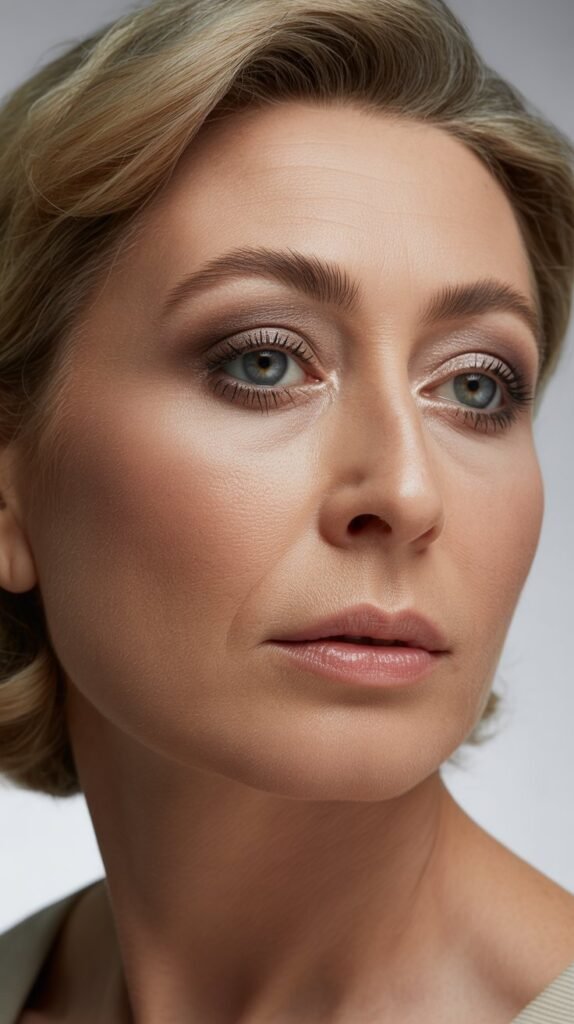
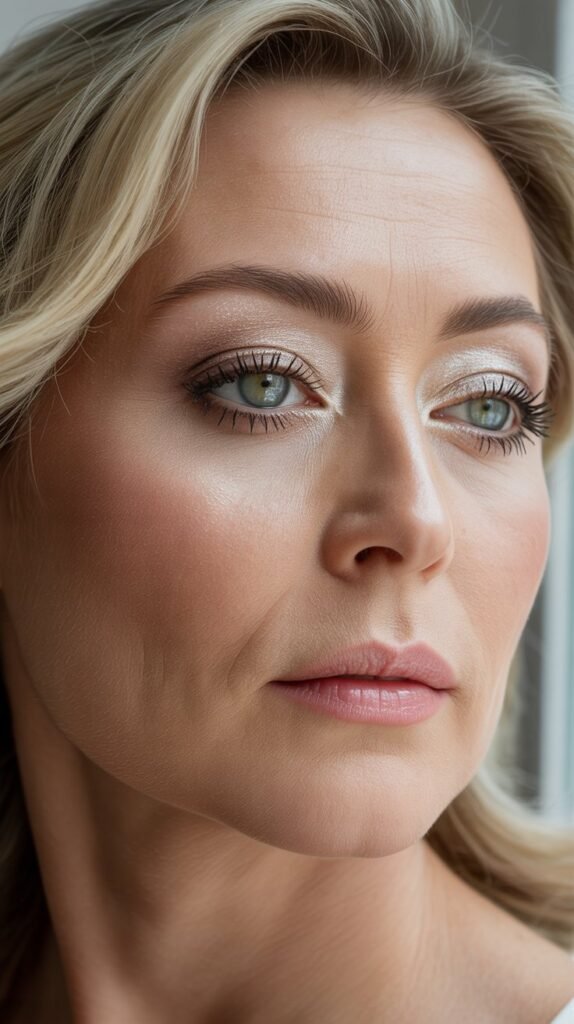
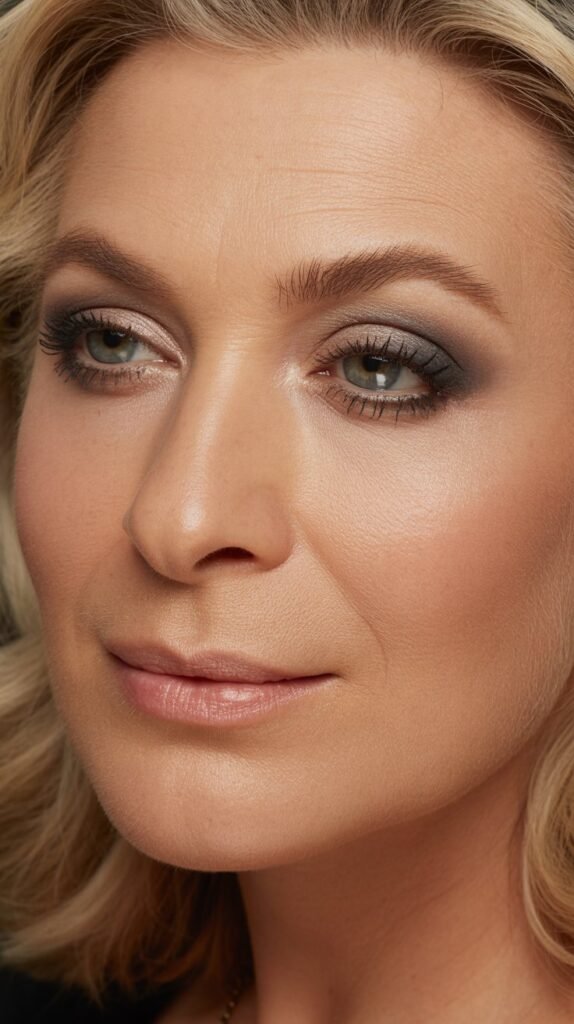
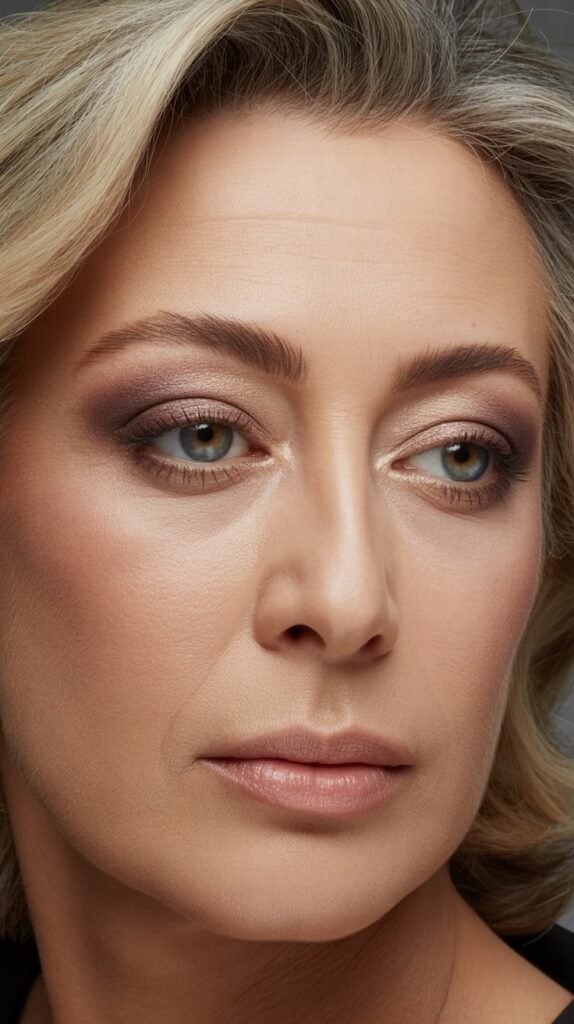
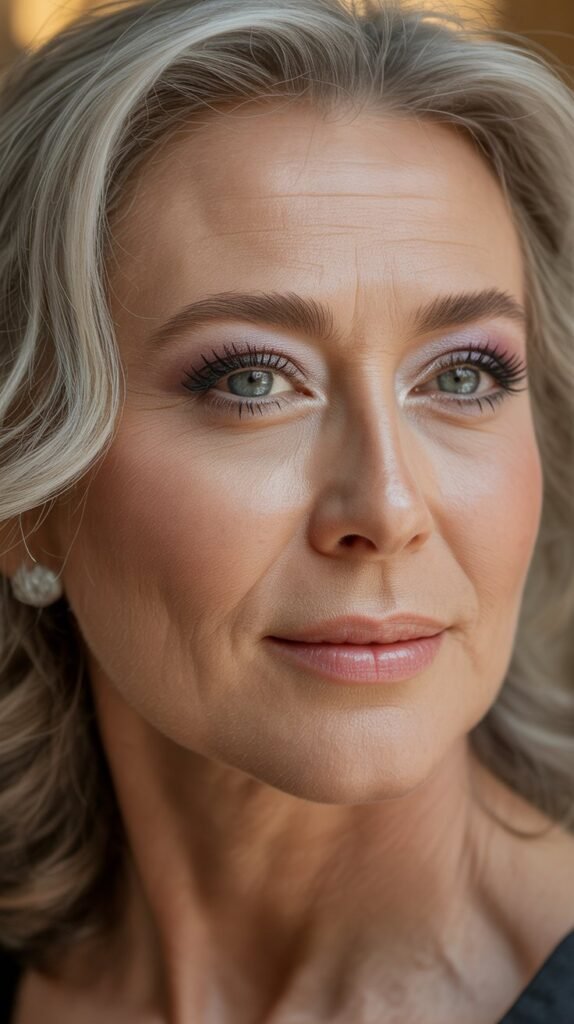
5. Stick to Neutral and Warm Tone Color Palettes

Neutral and warm-toned eyeshadows complement mature skin’s changing undertones beautifully, creating harmonious looks that enhance rather than compete with your natural coloring.
Cool or overly bright shades can make skin appear sallow or tired.
- Warm browns, taupes, bronzes, and soft golds universally flatter women over 50
- These shades work with the natural warmth that develops in mature skin
- Peachy, champagne, and rose-gold tones brighten without harsh contrast
- Avoid stark cool grays, icy silvers, and blue-toned purples that can appear aging
- Terracotta, copper, and burnt sienna shades add warmth and dimension beautifully
- Neutral doesn’t mean boring; layering various warm tones creates sophisticated depth
- Test shadows on your skin in natural light to ensure they complement your undertone
- Warm neutrals coordinate effortlessly with any outfit while making eyes the focal point
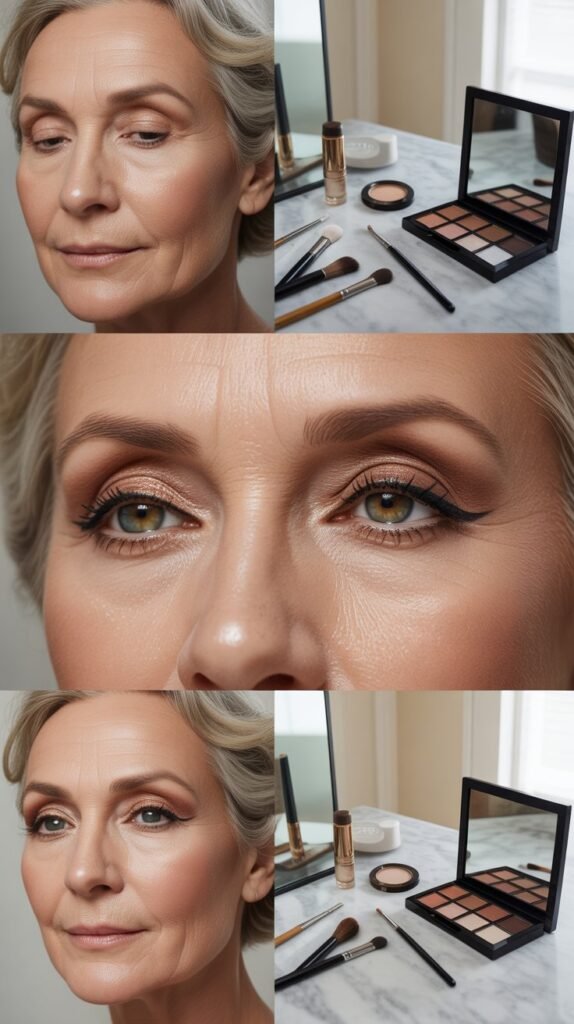
6. Apply Lighter Shades to Hooded Lids
Hooded eyelids, which become more common with age, benefit from strategic light shade placement that creates the illusion of more visible lid space.
Light colors bring forward and open up areas that naturally recede.
- Use light, luminous shades across the entire mobile lid to maximize visible space
- Lighter colors make the lid appear to come forward, counteracting the hooded effect
- Apply the lightest shade right at the center of the lid for extra dimension
- Avoid placing dark colors on the lid itself when dealing with significant hooding
- Champagne, vanilla, ivory, and soft beige work beautifully for this purpose
- The contrast between light lid and deeper crease creates the appearance of more defined eyes
- Shimmer or satin finishes in light shades further enhance the lid-opening effect
- This technique works even on deeply hooded eyes to create more visible makeup area
7. Define the Crease Above the Natural Fold
When eyes become hooded, applying crease color in your natural fold becomes invisible once the eye opens, making it essential to place transition and contour shades slightly above where you’d expect.
This creates visible definition and lift.
- Look straight into a mirror with eyes open to identify where color will actually be visible
- Apply your transition and crease shades slightly above the natural fold
- This technique ensures your carefully blended work remains visible when eyes are open
- Use windshield-wiper motions to blend color upward and outward
- The goal is creating a gradient that lifts the eye shape optically
- Practice finding your ideal placement, as everyone’s eye shape differs slightly
- This adjustment makes the difference between invisible and impactful eye makeup
- Blend thoroughly so there are no harsh lines, just seamless dimension
8. Use Matte Shades in the Crease for Depth
Matte eyeshadows in the crease create natural-looking dimension without adding texture or emphasizing lines, making them the perfect choice for defining and shaping mature eyes.
The absence of shimmer allows for buildable depth.
- Matte shadows provide definition through color contrast rather than reflective particles
- Choose shades 2-3 tones deeper than your skin tone for natural-looking contour
- Soft browns, taupes, and mauves work universally well in the crease
- Build the color gradually, blending between applications for seamless results
- Matte formulas don’t settle into fine lines the way shimmer can throughout the day
- This technique mimics natural shadow and creates a lifted, sculpted appearance
- Use a fluffy blending brush to diffuse edges for a soft, professional finish
- The matte crease grounds your eye look and provides structure for shimmer elsewhere
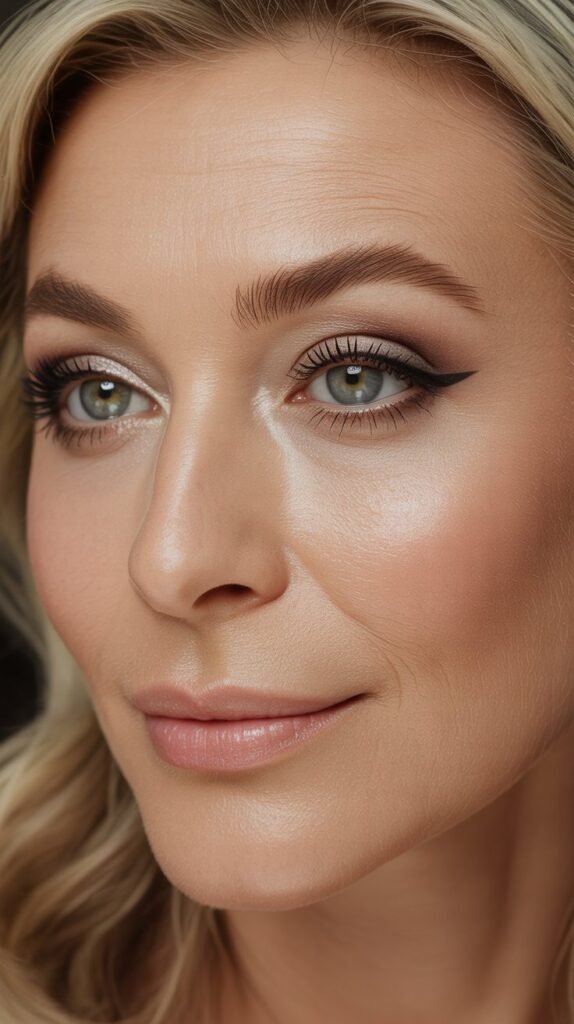
9. Brighten Inner Corners With Champagne or Ivory
A touch of light, luminous color in the inner corners instantly opens up eyes and creates a youthful, wide-awake appearance that’s especially flattering on mature faces.
This simple trick is universally transformative.
- Apply a small amount of champagne, ivory, or soft gold shadow to the innermost corner of each eye
- This placement catches light and makes the entire eye area appear brighter and more open
- Use your fingertip or a small precise brush for accurate placement
- The highlight should extend just slightly onto the inner lid for maximum impact
- This technique counteracts shadowing that naturally occurs in the inner corner
- Choose shades with subtle shimmer rather than heavy glitter for sophisticated results
- The inner corner highlight works with any eye look from natural to dramatic
- Even on makeup-free days, this single step makes a noticeable difference in alertness
10. Skip Lower Lash Line Darkness to Avoid Shrinking Eyes
Dark shadow or liner on the lower lash line can close in the eyes and emphasize under-eye concerns, making this area best left light or strategically highlighted on mature eyes.
Opening up the lower area creates a lifted, youthful effect.
- Avoid lining the entire lower lash line with dark colors, which visually shrinks the eye
- Instead, use a soft brown or taupe only on the outer third of the lower lash line
- Leave the inner two-thirds bare or apply a light, skin-toned shade
- This selective approach defines without closing in the eye space
- Smudge any lower liner slightly so it appears soft rather than harsh
- Consider using a flesh-toned or white pencil on the waterline to open eyes further
- The contrast between an unlined lower area and defined upper eye creates lift
- This simple adjustment makes eyes appear significantly larger and more youthful
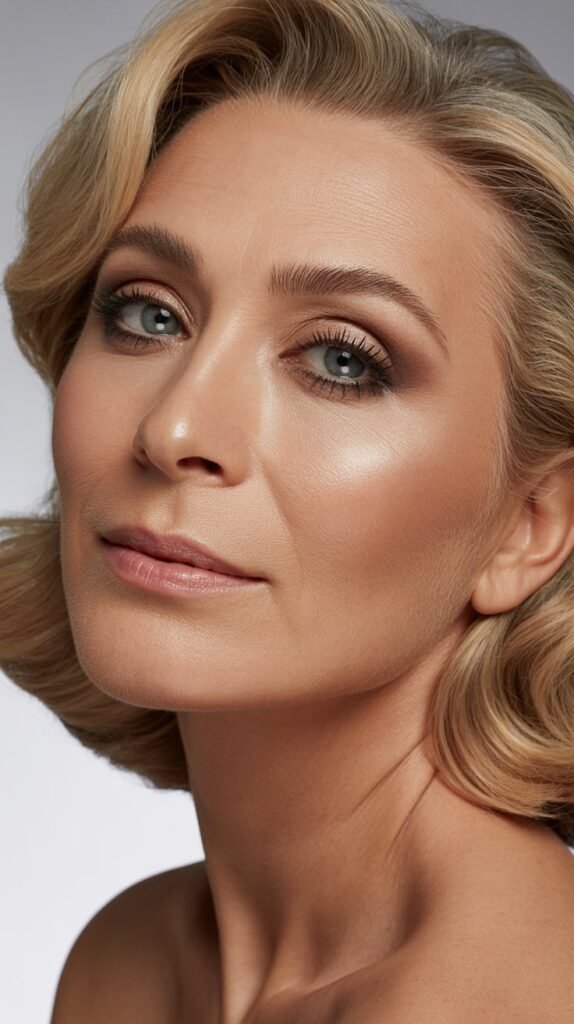
11. Master the Soft Smoky Eye Instead of Dramatic
A softened, diffused version of the classic smoky eye provides sophisticated drama without the harsh lines or heavy darkness that can overwhelm mature features.
This modern approach flatters while remaining age-appropriate.
- Use medium-toned browns, soft charcoals, or mauves rather than stark black
- Blend extensively to create soft gradients without visible edges or harsh lines
- Keep the darkest color concentrated at the lash line, fading as you move upward
- The key is diffusion; the more you blend, the more sophisticated the result
- Apply with a light hand and build gradually rather than starting too dark
- This technique provides impact without overwhelming mature features
- Pair soft smoky eyes with neutral lips to maintain balance
- The diffused approach suits both daytime elegance and evening glamour
12. Blend, Blend, and Blend Some More
Thorough blending is the single most important technique for beautiful eye makeup on mature skin, as harsh lines and unblended edges can emphasize texture and appear aging.
Seamless transitions create polish and sophistication.
- Invest in quality fluffy blending brushes that diffuse color without removing it
- Use circular and windshield-wiper motions to meld colors seamlessly together
- Spend twice as long blending as you do applying the initial color
- Well-blended eyeshadow appears professional and polished regardless of color choices
- Blend upward and outward toward the temples for a lifted effect
- Each new shade should fade imperceptibly into the previous one
- If you see distinct lines between colors, continue blending until they disappear
- Perfect blending makes even simple two-shade looks appear expertly crafted
13. Avoid Harsh Black Eyeliner
Stark black eyeliner can appear too severe against mature skin, creating harsh contrast that draws attention to fine lines and emphasizes aging rather than enhancing natural beauty.
Softer alternatives provide definition with elegance.
- Replace solid black liner with dark brown, charcoal, or soft black alternatives
- These softer shades define beautifully while appearing more natural and forgiving
- If you prefer black, choose gel or pencil formulas that can be smudged for softness
- Apply liner in short strokes rather than one continuous hard line
- Softer colors blend more easily if application isn’t perfect
- Dark brown works universally well regardless of eye color or skin tone
- Reserve true black liner only for evening looks or special occasions if desired
- The goal is definition without harshness, which softer shades accomplish perfectly
14. Tight-Line the Upper Water Line for Subtle Definition
Tight-lining, the technique of applying liner to the upper waterline between the lashes, creates the illusion of fuller, darker lashes while remaining virtually invisible and incredibly natural-looking.
This insider trick defines without obvious makeup.
- Gently lift the lid and apply waterproof gel or pencil liner to the upper waterline
- This fills in the spaces between lash roots, making lashes appear thicker
- The definition appears natural because there’s no visible liner line on the skin
- Use short, gentle strokes rather than trying to line the entire waterline at once
- Choose a waterproof formula to prevent smudging throughout the day
- This technique works perfectly for those who find traditional liner too obvious
- Tight-lining subtly defines eyes without any risk of an aging harsh line
- The result is naturally defined eyes that look like you’re not wearing liner at all
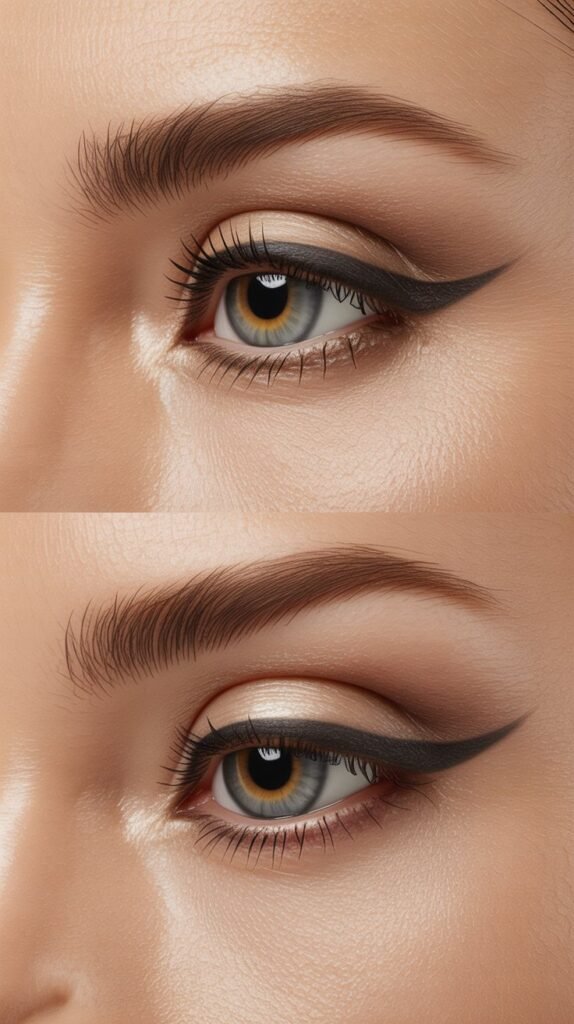
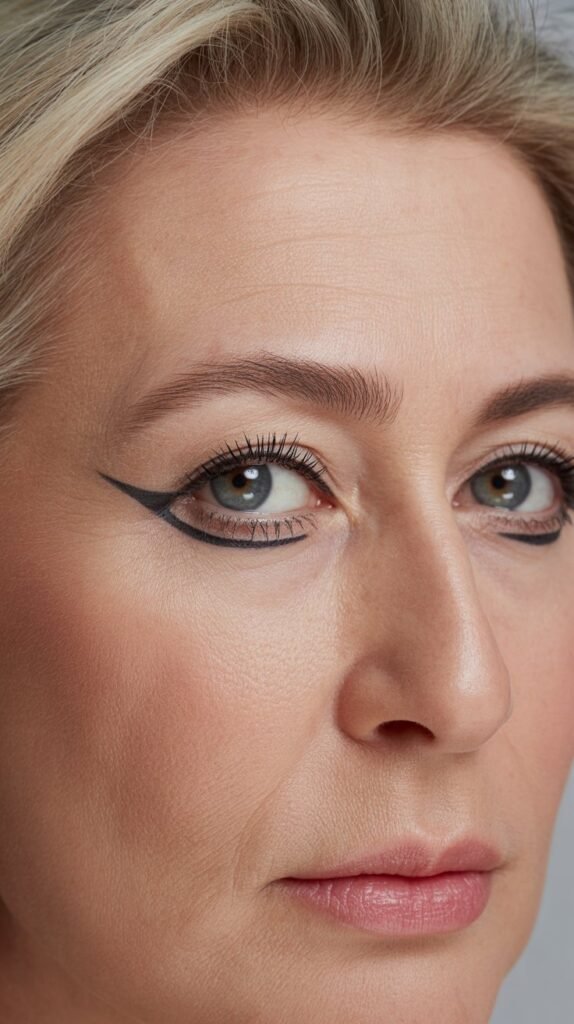
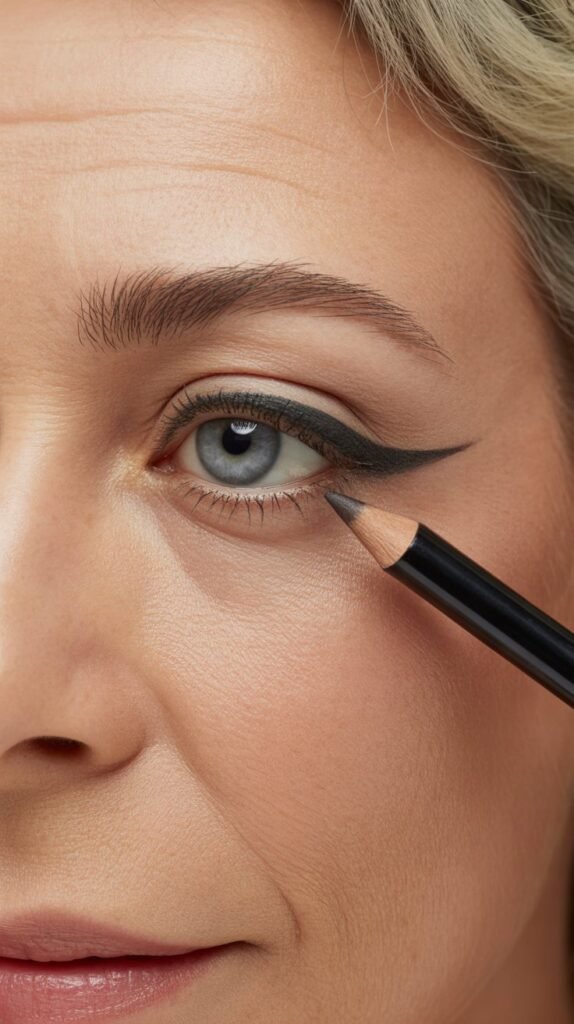
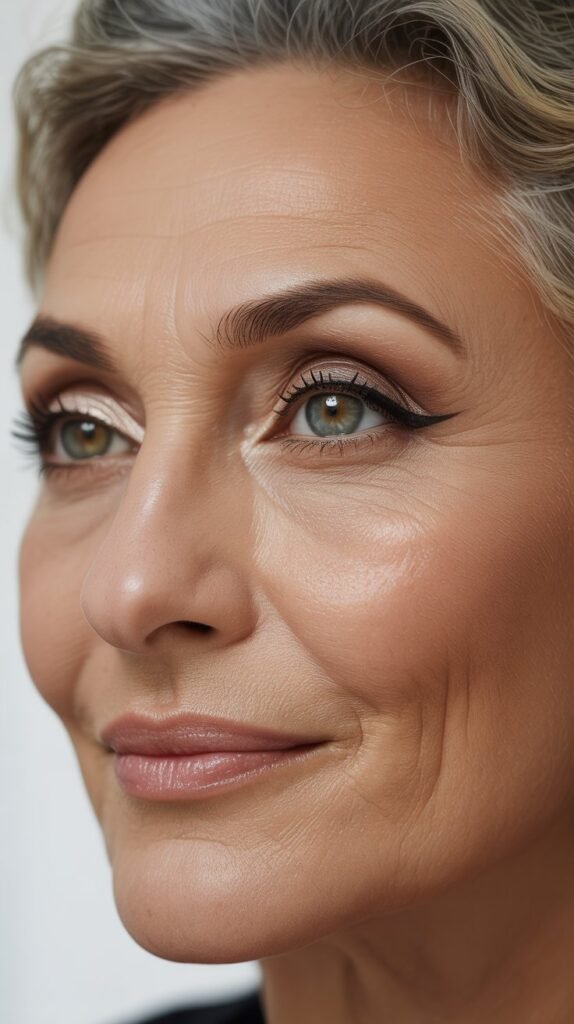
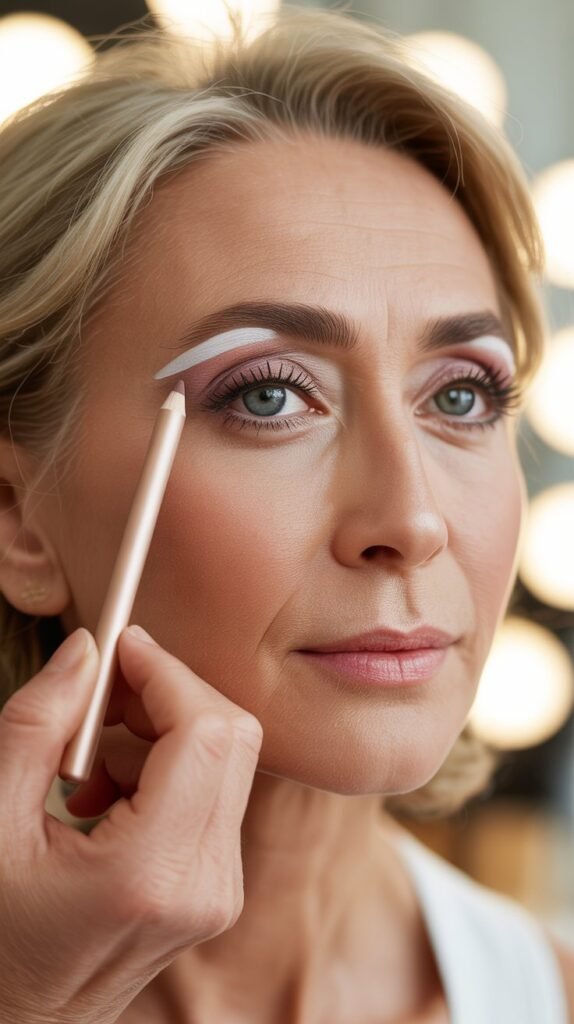
15. Create a Subtle Wing to Lift Drooping Corners
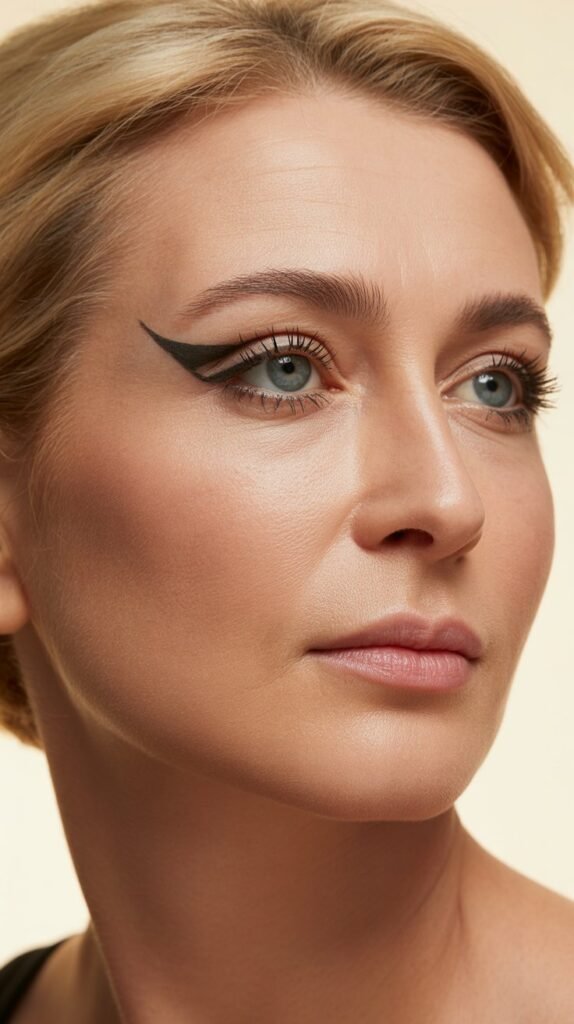
A gentle upward flick at the outer corner of the upper lash line creates a lifting effect that counteracts the natural downward turn that often occurs with age.
This subtle wing opens and brightens the entire eye area.
- Extend liner slightly beyond the outer corner, angling upward toward the brow tail
- Keep the wing short and subtle rather than dramatic for age-appropriate elegance
- The upward angle optically lifts eyes that may have started to droop at the corners
- Follow the natural angle of your lower lash line when creating the wing direction
- Use a felt-tip liner pen or angled brush for the most controlled application
- Start with a thin wing and gradually increase if desired rather than beginning too bold
- The wing should enhance your eye shape, not overpower your features
- This small adjustment makes a significant difference in overall eye lift and openness
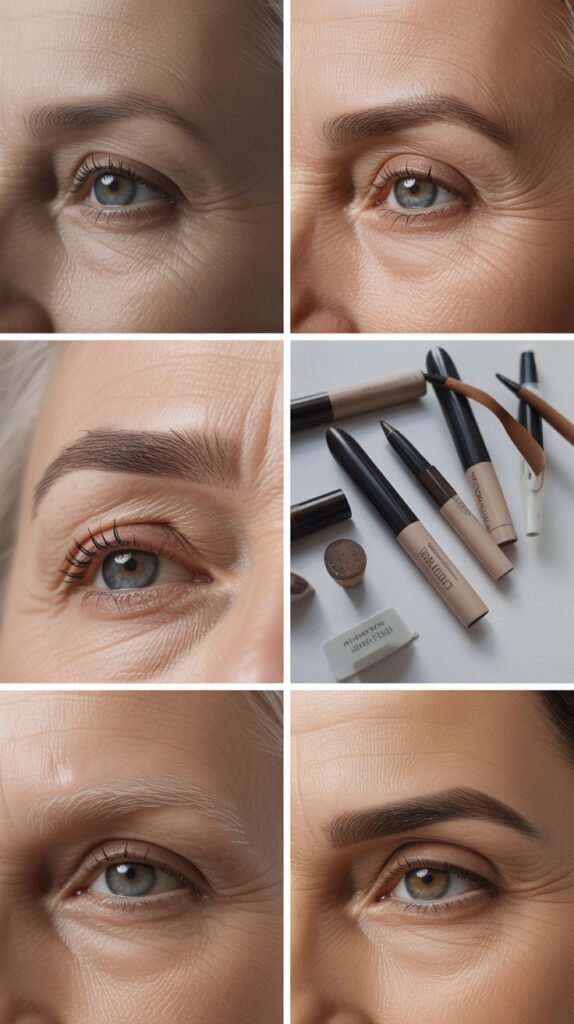
16. Use Gel or Pencil Liners Instead of Liquid
Gel and pencil eyeliners offer more forgiveness and versatility than liquid formulas, allowing for softer application and easy smudging that flatters mature eyes beautifully.
The slightly imperfect finish actually appears more youthful than precise liquid lines.
- Gel and pencil formulas glide smoothly without tugging delicate skin
- These formulas allow for deliberate smudging that creates soft, smoky definition
- If your hand isn’t perfectly steady, these liners appear intentionally soft rather than mistaken
- Apply liner and immediately blend slightly with a smudge brush before it sets
- Gel liners provide the intensity of liquid with the workability of pencil
- Choose waterproof versions that set after a few seconds to prevent migration
- The softer effect of gel and pencil complements mature features better than stark liquid
- These formulas are easier to remove without aggressive rubbing that can damage skin
17. Focus on Lifting the Outer Corner
Concentrating color and definition on the outer third of the eye creates an instant lifting effect that counteracts the natural downward pull of aging skin.
This strategic placement reshapes the eye optically.
- Apply your deepest shadow shade to the outer corner, blending upward and outward
- This creates depth where it’s most effective for lift rather than all over the lid
- Keep the inner two-thirds of the lid lighter to maximize the lifting contrast
- Extend the outer corner color slightly beyond the actual eye edge
- Angle all outer corner application upward toward the tail of the brow
- This technique works with any color scheme from neutral to bold
- The concentrated outer definition creates a subtle cat-eye effect naturally
- Avoid bringing dark color too far into the center, which can make eyes appear smaller
18. Set Cream Products With Powder for Longevity
While cream products are excellent for mature skin, setting them lightly with coordinating powder shadows ensures they stay fresh and crease-free throughout the day.
This hybrid technique combines the best of both formulas.
- Apply cream shadow or base first, allowing it to set for 30-60 seconds
- Lightly dust coordinating powder shadow over the cream using a soft brush
- This locks the cream in place while maintaining its luminous finish
- The powder layer absorbs any excess oils that could cause creasing
- Use a light hand; too much powder negates the cream’s beautiful texture
- This technique provides the staying power of powder with the luminosity of cream
- Focus setting powder particularly in the crease where creasing is most likely
- The combination lasts significantly longer than cream products alone
19. Don’t Neglect Your Eyebrows
Well-groomed, defined eyebrows frame the eyes and can take years off your appearance, making brow maintenance and filling essential components of eye makeup for mature women.
Sparse or thin brows can make the entire face appear older.
- Fill in sparse areas with short, hair-like strokes using a pencil or powder
- Choose a shade matching your natural brow color or slightly lighter, never darker
- Sparse brows are common with age; filling them restores youthful definition
- Brush brows upward and outward with a spoolie to create lift and fullness
- Set brows with a clear or tinted brow gel to keep them in place all day
- Avoid overly drawn or harsh brows; the goal is natural-looking fullness
- Well-defined brows reduce the need for heavy eye makeup to achieve impact
- Consider professional shaping if you’re unsure about your ideal brow shape
20. Use a Nude or White Pencil on the Waterline
Applying a flesh-toned or white pencil to the lower waterline is an instant eye-opening trick that makes eyes appear larger, brighter, and more awake.
This simple technique counteracts the natural redness that can make eyes look tired.
- Choose a creamy nude or white eyeliner pencil specifically formulated for the waterline
- Gently apply the pencil to the lower waterline from inner to outer corner
- This neutralizes the natural red tone of the waterline that can make eyes appear smaller
- The technique creates the illusion of larger, more alert eyes instantly
- Reapply once or twice during the day as needed for continuous brightening
- Avoid dry, dragging pencils that feel uncomfortable on the sensitive waterline
- This works especially well when combined with minimal or no lower lash liner
- The brightening effect is most noticeable in natural and office lighting
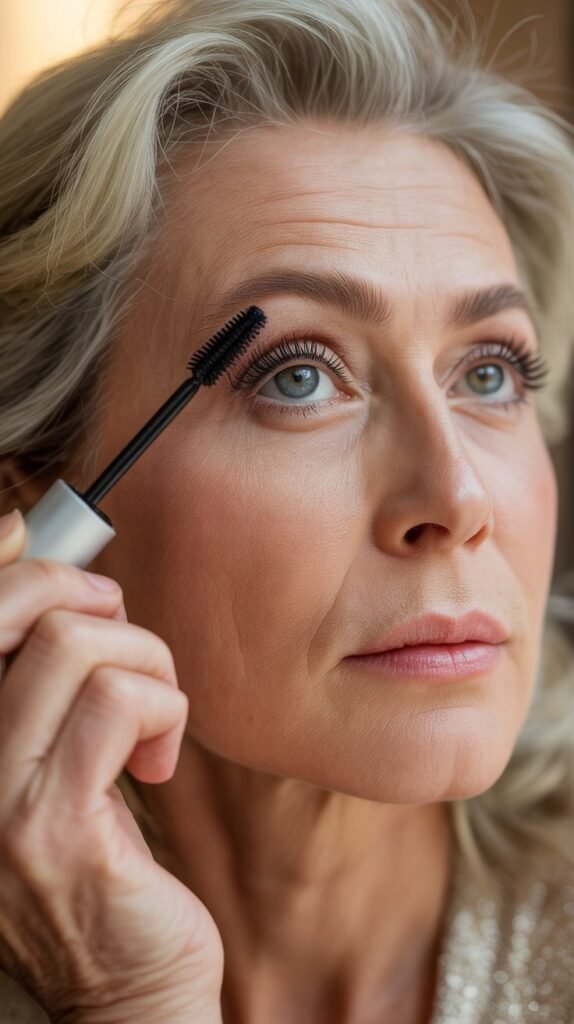
21. Curl Lashes Before Applying Mascara
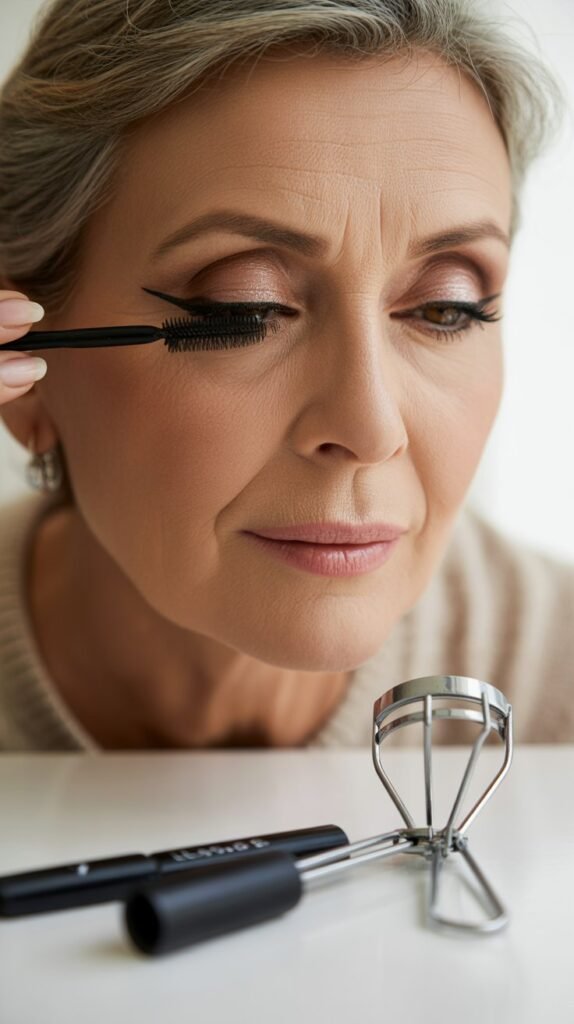
Curling lashes opens up the entire eye area and creates a lifted, youthful appearance that’s especially important as lashes naturally tend to droop with age.
This simple step makes a dramatic difference.
- Use a quality eyelash curler at the base of clean, dry lashes before any mascara
- Hold the curler in place for 10-15 seconds with firm but gentle pressure
- Pump the curler 2-3 times while slowly moving toward the lash tips for natural curl
- Curled lashes make eyes appear more open and awake regardless of mascara
- The lift created by curling draws attention to the eyes rather than drooping lids
- Replace your eyelash curler pad every 3-6 months for optimal curl and safety
- If you use heated curlers, apply them carefully on low heat after mascara dries
- Never curl lashes with mascara already on, as this can cause breakage
22. Choose Lengthening Over Volumizing Mascara

Lengthening mascaras create a more natural, lifted look on mature eyes compared to volumizing formulas that can appear heavy, clumpy, or emphasize sparse lashes.
Length opens eyes without overwhelming them.
- Lengthening formulas extend lashes upward and outward, creating visible lift
- These mascaras typically contain fibers that attach to lash tips for added length
- Volumizing formulas can appear too heavy or dramatic on mature, fine lashes
- Apply lengthening mascara with upward strokes, wiggling at the base
- The extended lashes draw the eye upward rather than weighing down the lid area
- Choose waterproof or water-resistant formulas to prevent smudging throughout the day
- One or two coats of lengthening mascara provides definition without clumping
- This creates the lifted, wide-eyed effect that’s most flattering after 50
23. Apply Mascara Only to Upper Lashes
Skipping mascara on lower lashes prevents the raccoon-eye effect, smudging, and the visual shrinking that can occur when bottom lashes are too defined.
This keeps the focus on the beautiful upper eye area.
- Concentrate mascara application solely on upper lashes for maximum lift and definition
- Lower lash mascara can smudge onto under-eye skin, emphasizing fine lines and darkness
- Bare lower lashes create a cleaner, more modern look that opens eyes
- If you prefer some lower definition, use a tiny amount only on the outer corners
- This approach prevents the “closed-in” effect that all-around dark lashes can create
- Your upper lashes become the focal point, drawing attention upward
- The technique reduces the chance of raccoon eyes as the day progresses
- This simple change creates a fresher, more youthful overall appearance
24. Remove Mascara Gently Each Night

The delicate eye area requires careful makeup removal to prevent lash loss, skin damage, and irritation that’s especially problematic on mature, thinning skin.
Gentle removal protects both lashes and the surrounding skin.
- Use an oil-based or bi-phase eye makeup remover designed for waterproof formulas
- Soak a cotton pad with remover and hold it against closed eyes for 20-30 seconds
- Gently wipe downward without rubbing or tugging, which can damage delicate skin
- Never pull or rub aggressively, as this causes premature wrinkles and lash loss
- Remove all traces of mascara before bed to prevent irritation and keep lashes healthy
- Follow with a hydrating eye cream to replenish moisture in the delicate area
- Replace mascara every 3 months to prevent bacterial buildup that can cause infections
- Proper removal maintains lash health and prevents the breakage that naturally increases with age
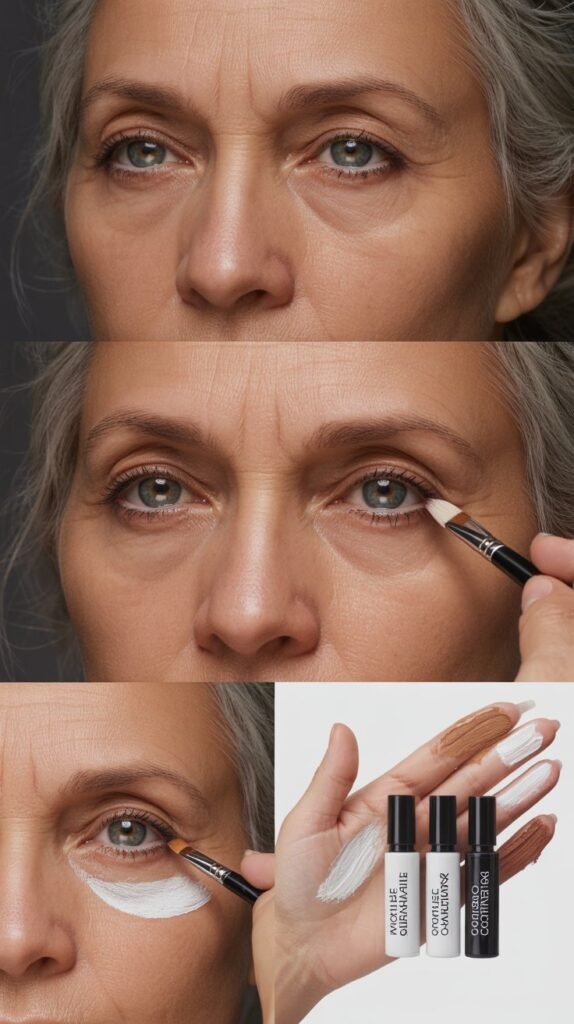
25. Use Concealer Strategically Under Eyes
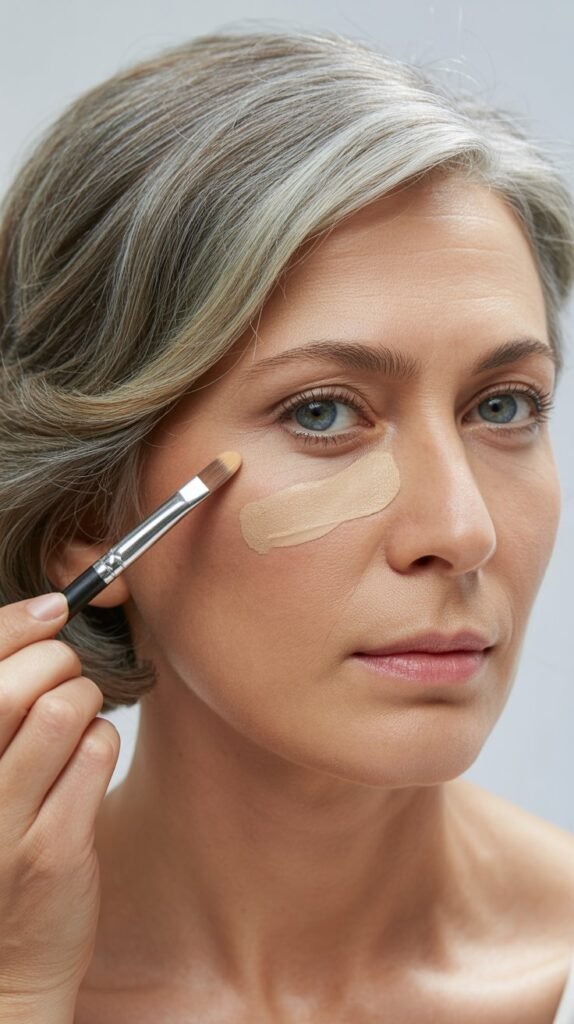
The right concealer application brightens dark circles without settling into fine lines, creating a fresh canvas that makes your eye makeup truly pop.
Strategic concealing technique matters more than the product itself.
- Choose a hydrating concealer one shade lighter than your skin tone
- Apply in an inverted triangle shape under the eye, with the point at the pupil
- This shape brightens the entire area and creates a lifted appearance
- Blend gently with a damp beauty sponge, tapping rather than dragging
- Set very lightly with translucent powder only on the high points to prevent creasing
- Avoid heavy concealing that can settle into lines; less is often more
- Color correctors can neutralize severe darkness before concealer application
- Proper concealing makes the entire eye area appear more youthful and awakened
26. Highlight the Brow Bone for Added Dimension
A subtle highlight just below the brow bone lifts the eye area, creates beautiful dimension, and draws light to the upper face in a flattering way.
This professional technique enhances any eye look.
- Apply a matte or satin light shade just beneath the brow arch
- This creates contrast that makes the brow appear more lifted and defined
- The highlight catches light and draws attention upward away from any lid concerns
- Choose a shade 2-3 tones lighter than your skin tone for natural dimension
- Blend well so there’s no obvious stripe, just subtle illumination
- Avoid overly shimmery highlighters that can emphasize skin texture
- This step frames your eye makeup beautifully and creates professional polish
- The technique works whether you’re wearing elaborate or minimal eye makeup
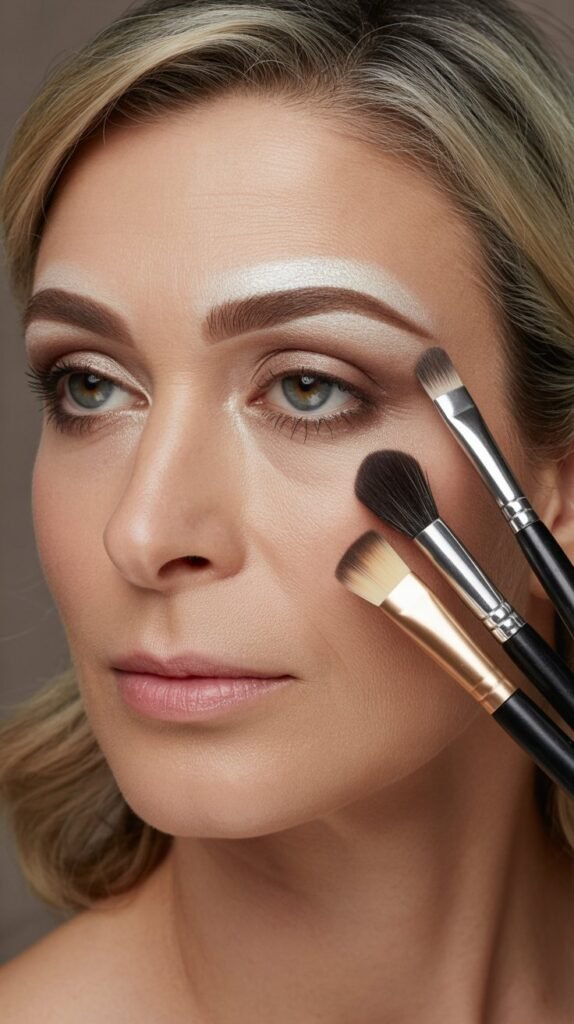
27. Invest in Quality Brushes for Better Application
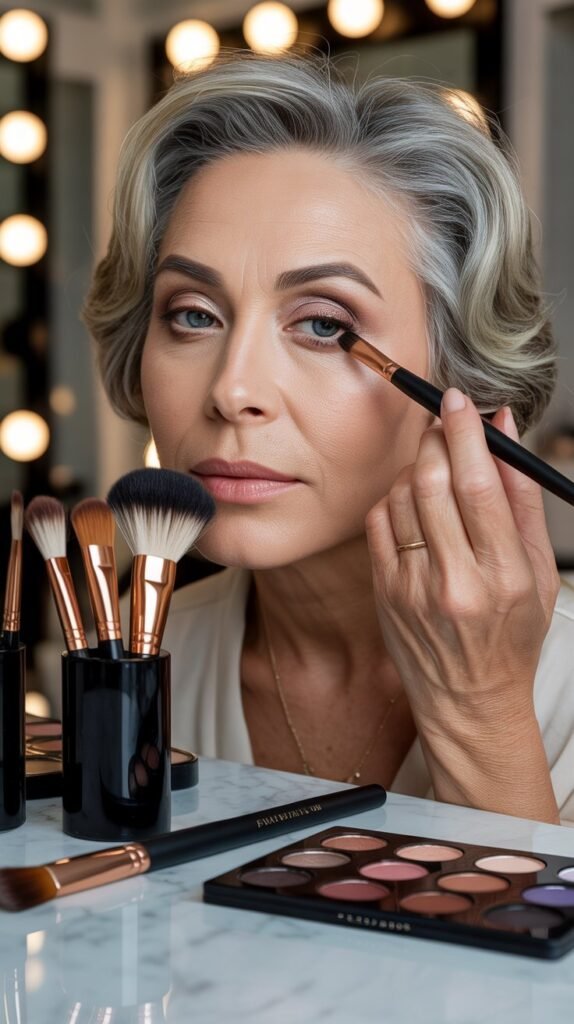
Professional-quality brushes make application easier, blending more seamless, and results significantly more polished on mature skin that shows every imperfection.
Quality tools are worth the investment.
- Soft, dense synthetic brushes work best with cream products without absorbing them
- Natural hair brushes pick up and blend powder shadows beautifully
- A fluffy blending brush is essential for seamless color transitions
- Precision brushes allow detailed work in small areas like the inner corner
- Quality brushes apply product more evenly without irritating delicate skin
- Clean brushes weekly to prevent bacteria buildup and ensure optimal performance
- Good brushes last years with proper care, making them cost-effective long-term
- The right tools make achieving professional results at home genuinely achievable
28. Practice the “Less Is More” Philosophy
Mature eyes look most beautiful with refined, edited makeup rather than heavy, obvious application that can emphasize age.
Strategic placement and restraint create sophistication.
- Build color gradually rather than applying too much product initially
- Focus on one or two eye features rather than trying to define everything heavily
- Subtle, well-blended makeup appears more expensive and sophisticated than obvious application
- You can always add more product, but removing excess is difficult
- Elegant restraint allows your natural beauty to shine through the makeup
- Heavy makeup can settle into lines and actually draw attention to aging concerns
- The goal is enhanced, refreshed eyes, not a mask of color
- Modern mature beauty celebrates finesse over heavy-handed application
29. Adjust Makeup for Your Lighting Environment
Different lighting requires adjusted application intensity, with natural daylight needing subtler application than artificial evening lighting.
Understanding this prevents makeup from appearing too light or too heavy.
- Apply daytime makeup near a window for accurate natural light assessment
- Office and indoor lighting can make makeup appear more muted, requiring slightly more intensity
- Evening looks under warm lighting can handle deeper colors and more definition
- Check your makeup in the lighting where you’ll spend most of your time
- Natural light is most honest; if makeup looks good here, it works anywhere
- Artificial lighting can be forgiving of heavier application that would look overdone in daylight
- Adjust intensity based on your destination and primary lighting environment
- Test your finished look in multiple lighting conditions when learning new techniques
30. Keep Makeup Tools and Products Clean
Bacteria buildup in makeup and tools can cause infections, breakouts, and irritation that mature skin struggles to heal from quickly.
Regular cleaning is essential for eye health and skin wellness.
- Wash brushes weekly with gentle brush cleaner or baby shampoo
- Replace sponges monthly as they harbor bacteria even with regular cleaning
- Sharpen eye pencils before each use to expose fresh, clean product
- Wipe down compacts and packaging regularly to prevent contamination
- Never share eye makeup products with others due to infection risk
- Replace mascara every 3 months regardless of remaining product
- Clean lash curlers after each use with alcohol wipes
- Proper hygiene prevents eye infections that become more serious with age
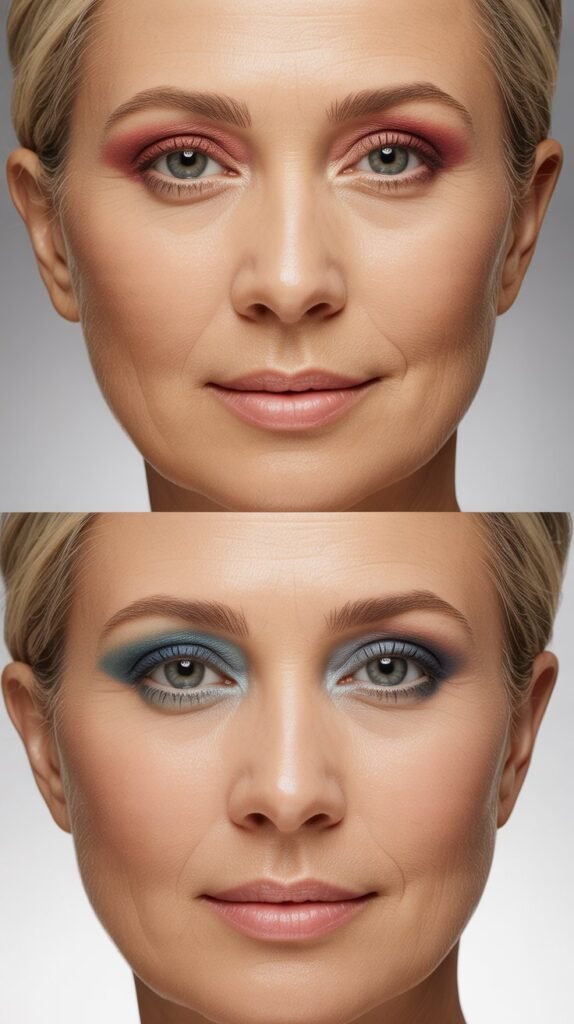
31. Consider Your Eye Color When Choosing Shades
Selecting eyeshadow colors that complement your specific eye color makes them appear brighter, more vibrant, and creates beautiful harmonies that enhance rather than compete with your natural coloring.
For Blue Eyes:
- Warm copper, bronze, peach, and rust tones make blue eyes appear more brilliant
- Soft browns and taupes create beautiful, wearable contrast
For Green Eyes:
- Plum, mauve, rose gold, and burgundy shades intensify green beautifully
- Warm browns with red undertones complement green eyes perfectly
For Brown Eyes:
- Nearly all colors work wonderfully with brown eyes’ versatility
- Purple, navy, teal, and gold create particularly stunning depth
For Hazel Eyes:
- Green-based shades bring out the green flecks while golds emphasize amber tones
- Plum and bronze create beautiful dimension that highlights hazel’s complexity
| Eye Color | Most Flattering Shades | Colors to Avoid |
|---|---|---|
| Blue | Copper, bronze, peach, warm browns | Blue, silver (creates washing out) |
| Green | Plum, mauve, burgundy, rose gold | Green (creates muddiness) |
| Brown | Purple, navy, teal, gold, any warm tone | None (most versatile) |
| Hazel | Gold, bronze, purple, olive green | Flat browns (can look muddy) |
32. Master the “Five Shade” Rule for Depth
Using five coordinated shades creates professional dimension and depth that flatters mature eyes beautifully without appearing complicated or overdone.
This systematic approach ensures balanced, sophisticated results every time.
- Start with a light base shade all over the lid from lash line to brow
- Apply a medium transition shade in the crease to create initial depth
- Place your darkest shade at the lash line and outer corner for definition
- Use a highlight shade on the inner corner and brow bone for brightness
- Add a mid-tone shimmer to the center of the lid for dimensional pop
- Each shade should blend seamlessly into the next without visible lines
- This formula works with any color family from neutral to bold
- The graduated intensity creates professional, lifted results that enhance mature eyes
33. Don’t Skip Makeup on “Lazy” Days
Even minimal eye makeup makes a noticeable difference in how awake and polished you appear, making quick, simple routines valuable for maintaining confidence on casual days.
A three-minute routine still transforms.
- Apply tinted eye primer or cream shadow in a neutral tone all over lids
- Add mascara to curled upper lashes for instant definition and lift
- Dab a touch of highlighter in inner corners and on brow bones
- This simple routine takes minutes but makes you look refreshed and intentional
- Skip elaborate blending but ensure whatever you apply looks deliberate
- A quick brow fill adds structure that frames your entire face
- Minimal makeup still protects your confidence and how others perceive your presentation
- Having a streamlined routine removes excuses for skipping makeup entirely
34. Adjust Your Routine for Glasses Wearers
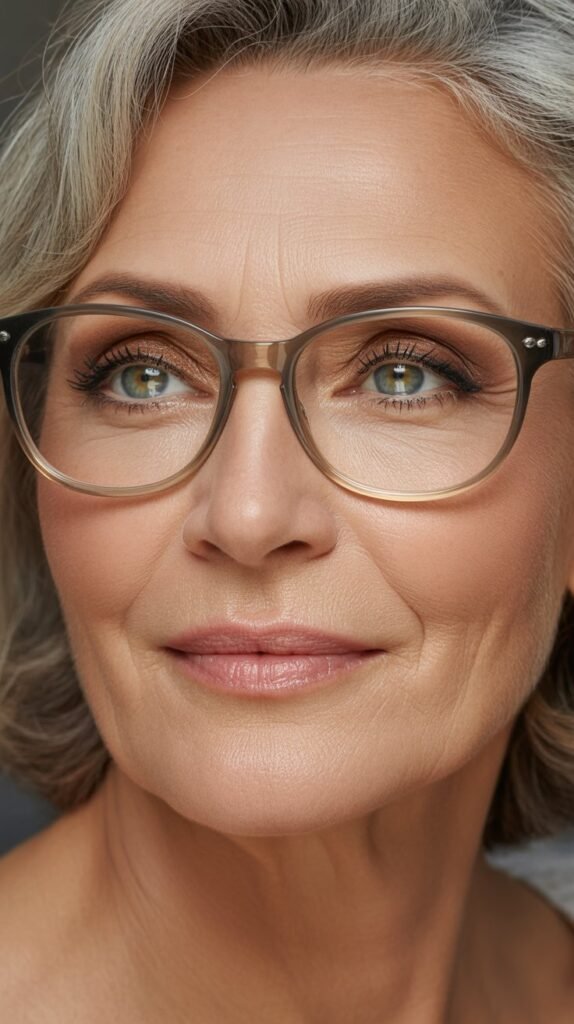
Eyeglasses change how your eye makeup appears, requiring slight adjustments to ensure your efforts remain visible and flattering behind lenses.
Different lens types need different considerations.
- Apply slightly more intense eyeshadow as glasses can mute color intensity
- Skip heavy lower liner as glasses already create visual weight below eyes
- Curl lashes extra well so they don’t hit the lenses when blinking
- Define brows thoroughly as they frame both your eyes and glasses
- For reading glasses that magnify, use lighter application as everything appears larger
- For distance glasses that minimize, apply slightly more definition for visibility
- Ensure mascara is completely dry before wearing glasses to prevent smudging on lenses
- Choose waterproof formulas to prevent transfer to glasses throughout the day
35. Understand How Skin Tone Affects Color Choices
Your skin’s undertone significantly impacts which eyeshadow shades appear most harmonious and flattering, making undertone awareness essential for selecting your best colors beyond just personal preference.
For Warm Undertones:
- Golden, peachy, coral, warm brown, and bronze shades harmonize beautifully
- Avoid cool-toned purples, blues, and silvers that can clash
For Cool Undertones:
- Rose, mauve, plum, cool taupe, and true gray create lovely harmony
- Avoid orange-based shades that can appear muddy against cool skin
For Neutral Undertones:
- Most shades work well, offering the widest range of flattering options
- Both warm and cool tones can be worn successfully
- Determine your undertone by checking vein color: blue indicates cool, green indicates warm
- Gold jewelry flattering suggests warm undertones while silver suggests cool
- Most mature skin develops warmer undertones over time regardless of youth coloring
36. Layer Products for Professional Staying Power
Strategic layering of similar-toned products in different formulas creates makeup that lasts from morning to night without touch-ups, essential for mature skin where frequent reapplication can emphasize texture.
- Start with primer to create a gripping base for subsequent products
- Apply cream shadow first for rich color and luminosity
- Set the cream with coordinating powder shadow for extended wear
- Layer gel liner over pencil for intensity that doesn’t budge
- This technique prevents the fading and creasing that often occurs by afternoon
- Each layer should be thin rather than heavy for a natural finish
- The products work together to create lasting power exceeding any single formula
- Professional makeup artists use this technique for all-day events and photo shoots
37. Take Progress Photos to Track What Works
Photographing your makeup in various lighting helps you objectively assess what’s working, identify areas for improvement, and track your skill development over time.
The camera reveals what mirrors sometimes miss.
- Take photos in natural daylight, indoor lighting, and flash to see all perspectives
- The camera often shows settling, creasing, or blending issues your eye misses
- Compare photos over time to see your improvement and identify successful looks
- Note which techniques and products photograph well versus appearing flat
- Photos help you make objective decisions about color intensity and placement
- Share photos with trusted friends or makeup communities for constructive feedback
- Keep a makeup journal pairing photos with product lists for reference
- This practice accelerates your learning and helps you refine your personal style
38. Embrace Your Unique Beauty Journey
Every woman’s aging process and features are unique, making it essential to adapt general advice to your specific needs while celebrating the wisdom and confidence that come with age.
Your beauty evolves beautifully.
- Use these tips as guidelines, not rigid rules, adjusting for your features
- What works for one mature eye shape may need modification for another
- Celebrate the character and expression in your eyes that only comes with living
- Experiment fearlessly; makeup is temporary and mistakes wash off
- Your confidence and self-assuredness make any makeup look beautiful
- Aging is a privilege denied to many; enhance your beauty with joy
- The goal is feeling like your best self, not conforming to arbitrary standards
- Your eyes tell your story; makeup should enhance, not hide, your journey
Conclusion
The journey through these 38 Eye Makeup Tips for Women Over 50 That Make Eyes Pop reveals that beautiful, captivating eyes at any age come from understanding and working with your skin’s natural evolution rather than fighting against it.
You’ve discovered that the secret isn’t about applying more makeup but about applying it smarter—choosing hydrating formulas over drying ones, embracing warm tones that complement mature skin, and mastering placement techniques that lift and brighten rather than weigh down.
These strategies transform common concerns like hooded lids, fine lines, and thinning lashes into opportunities to showcase your eyes in their best light.
The techniques you’ve learned prioritize elegance over drama, blending over harsh lines, and strategic enhancement over heavy coverage.
Your eyes have witnessed decades of life’s beautiful moments, and now you have the tools to ensure they remain vibrant, expressive, and absolutely stunning.
Confidence shines brighter than any eyeshadow, and armed with these expert tips, you can face each day knowing your eye makeup enhances the wisdom, grace, and natural beauty that define this incredible chapter of your life.
Embrace these techniques, make them your own, and let your eyes continue to be the captivating windows to your beautiful soul.
