
When it comes to styling children’s curly hair, braids offer the perfect combination of beauty, protection, and practicality that every parent dreams about.
Curly hair is a gorgeous gift, but it can also present unique challenges when trying to create hairstyles that last throughout busy school days, playdates, and family adventures.
This comprehensive guide to 27 Beautiful Braided Hairstyles for Kids with Curls will transform the way you approach your child’s hair routine, offering creative solutions that celebrate their natural texture while keeping those precious curls healthy and manageable.
From classic cornrows to trendy bubble braids, you’ll discover styles suitable for every occasion, skill level, and hair length. Each hairstyle has been carefully selected to work harmoniously with curly hair patterns, ensuring your little one feels confident and comfortable while looking absolutely adorable.
Whether you’re a braiding beginner or looking to expand your styling repertoire, these ideas will inspire you to create beautiful looks that your child will love to wear.
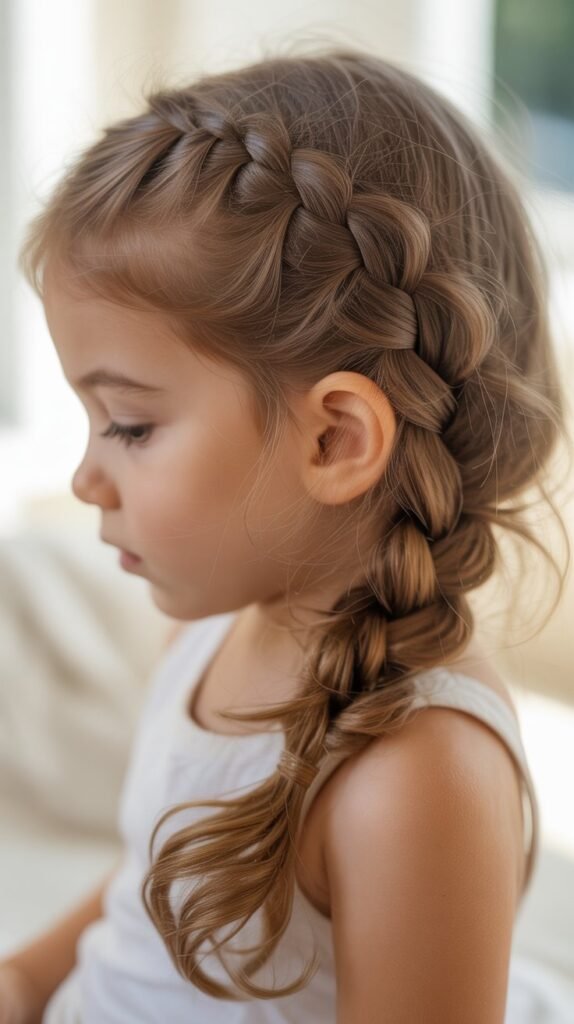
1. Classic Three-Strand Side Braid

The three-strand side braid is the perfect starting point for parents new to braiding curly hair, offering simplicity without sacrificing style.
This timeless technique works beautifully with curls because it allows the natural texture to add volume and character to the finished look.
The side placement keeps hair away from your child’s face while maintaining an effortlessly chic appearance.
Styling Instructions:
- Dampen the hair slightly with water or a leave-in conditioner spray to make the curls more manageable and reduce frizz during braiding.
- Part the hair deeply on one side, creating a dramatic side section that adds visual interest to the overall style.
- Gather all the hair to the preferred side and divide it into three equal sections, ensuring each section contains a balanced amount of curls.
- Cross the right section over the middle, then cross the left section over the new middle, maintaining consistent tension throughout the braid.
- Continue this pattern down to the ends, allowing some curls to peek out for a softer, more romantic finish.
- Secure with a colorful elastic band that complements your child’s outfit or personality.
2. Double Dutch Braids

Double Dutch braids create a sporty and practical style that keeps curly hair secure during even the most active play sessions.
This technique involves braiding underneath rather than over, which creates raised braids that stand out beautifully against the scalp.
For children with thick, curly hair, Dutch braids provide excellent tension distribution that prevents breakage while showcasing the hair’s natural volume.
Styling Instructions:
- Create a clean center part from the forehead to the nape of the neck using a rat-tail comb or your fingers.
- Begin on one side by taking a small section at the hairline and dividing it into three strands.
- Cross the outer strands under the middle strand instead of over it, which creates the distinctive raised appearance of Dutch braids.
- Add small sections of hair to each outer strand as you work down the head, keeping the additions consistent in size.
- Maintain firm but gentle tension to ensure the braids stay neat without causing discomfort to your child’s sensitive scalp.
- Repeat the exact process on the other side, trying to match the tightness and positioning for a symmetrical look.
- Secure both braids at the nape with elastics and optionally wrap small sections of hair around the elastics to hide them.
3. Crown Braid Halo
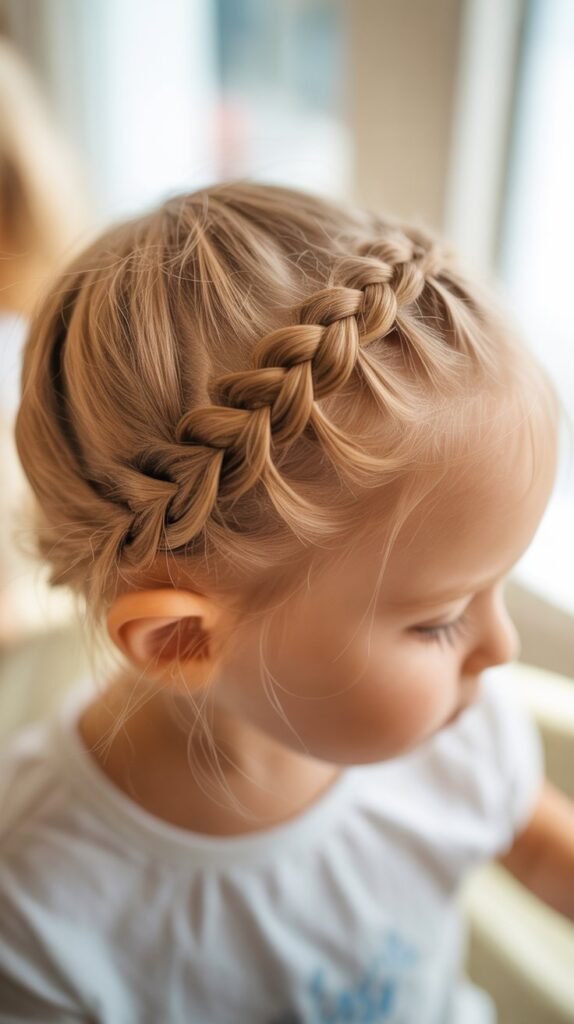
The crown braid halo transforms your child into a little princess, creating an elegant circular braid that frames the face beautifully.
This sophisticated style works exceptionally well with curly hair because the natural texture adds fullness to the braid, making it appear more substantial and impressive.
The halo braid is perfect for special occasions like birthday parties, family photos, or holiday celebrations.
Styling Instructions:
- Part the hair in a circular pattern around the crown, leaving the center section free for now.
- Begin braiding at one ear, taking three sections and incorporating hair from the circular part as you work around the head.
- Follow the hairline closely, maintaining an even distance from the face to create a consistent halo effect.
- Continue braiding all the way around the head until you return to the starting point near the ear.
- Carefully tuck the end of the braid under the beginning section and secure it with bobby pins that match your child’s hair color.
- Gently pull at the edges of the braid to create a fuller, more voluminous appearance that showcases the curls.
- Set the style with a light-hold hairspray designed for children’s sensitive skin and hair.
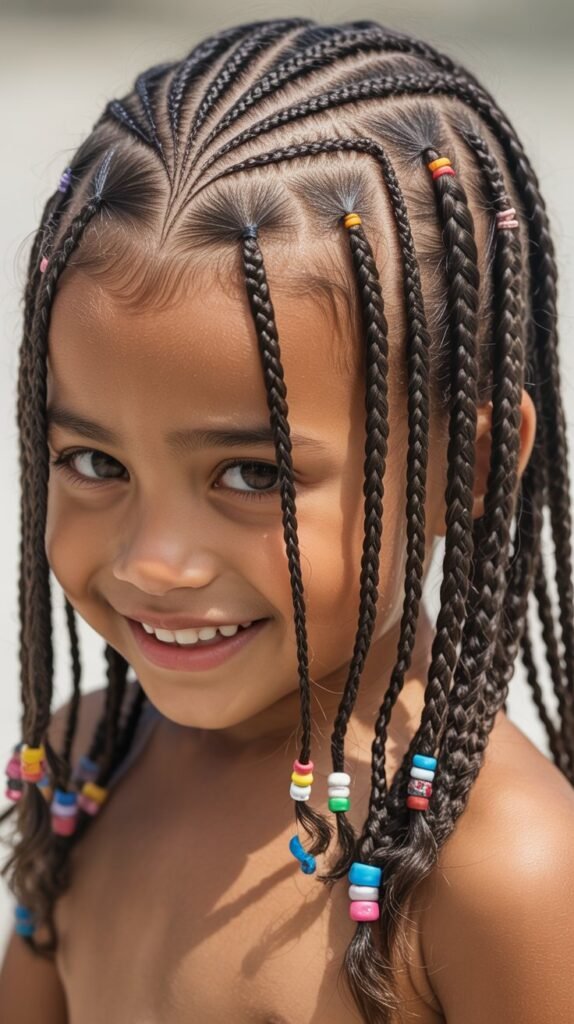
4. Cornrows with Curly Ends

Cornrows with curly ends combine the protective benefits of tight braiding with the playful bounce of loose curls at the ends.
This versatile style allows you to keep the majority of the hair braided close to the scalp while celebrating your child’s natural curl pattern where it matters most.
The contrast between sleek braids and voluminous curls creates a dynamic look that turns heads wherever your child goes.
Styling Instructions:
- Section the hair into the desired number of rows, using clips to keep unworked sections out of the way.
- Apply a small amount of braiding gel or edge control to each section before braiding to ensure smooth, neat cornrows.
- Begin each cornrow at the hairline, picking up small sections and braiding tightly against the scalp in straight lines.
- Continue each cornrow down to approximately ear level or mid-length, depending on how much curl you want to leave loose.
- Secure each cornrow with a small elastic band, ensuring it’s tight enough to hold but not so tight it damages the hair.
- Leave the remaining length unbraided, allowing the natural curls to spring free and create a beautiful contrast.
- Use a curl-defining cream on the loose ends to enhance the curl pattern and reduce frizz.
- Consider adding decorative beads or cuffs at the transition point between braids and curls for extra flair.
5. Fishtail Braid Ponytail

The fishtail braid ponytail offers a trendy twist on the traditional ponytail, creating an intricate-looking style that’s surprisingly simple to achieve.
When executed on curly hair, the fishtail technique produces a beautifully textured braid that appears fuller and more dimensional than on straight hair.
This style strikes the perfect balance between casual and polished, making it suitable for school days and weekend outings alike.
Styling Instructions:
- Gather all the hair into a high, medium, or low ponytail depending on your child’s preference and secure it with a strong elastic.
- Divide the ponytail into two equal sections, smoothing each section to identify all the curls within it.
- Take a small strand from the outer edge of the right section and cross it over to join the left section.
- Take a small strand from the outer edge of the left section and cross it over to join the right section.
- Repeat this alternating pattern all the way down the ponytail, keeping the strands thin for a more intricate appearance.
- The curly texture will naturally create a fuller, more voluminous fishtail that looks complex and artistic.
- Secure the end with another elastic and gently pull at the edges of the braid to create an even fuller, more relaxed appearance.
6. Braided Mohawk with Curls

The braided mohawk creates an edgy, fashion-forward look that allows your child to express their unique personality while keeping hair manageable.
This style features braids along both sides of the head with a strip of loose, voluminous curls running down the center from front to back.
The mohawk silhouette is bold and playful, perfect for confident kids who love to stand out from the crowd.
Styling Instructions:
- Create a center section approximately two to three inches wide running from the forehead to the nape of the neck.
- Clip this center section away and focus on one side first, dividing it into several horizontal sections.
- Braid each side section tightly against the scalp, angling the braids slightly toward the center mohawk section.
- Secure each braid with a small clear elastic or one that matches the hair color.
- Repeat the braiding process on the opposite side, ensuring the braids mirror each other in size and positioning.
- Release the center section and use your fingers or a pick to lift the curls at the roots for maximum volume.
- Apply a curl-enhancing mousse to the center section to define the curls and make them pop against the sleek braided sides.
- Optionally add decorative elements like metallic thread woven into the braids or temporary hair color for extra impact.
7. Bubble Braids

Bubble braids have taken the hair world by storm with their playful, dimensional appearance that looks complicated but is actually incredibly simple to create.
This style works wonderfully with curly hair because the natural texture adds extra fullness to each “bubble,” creating an impressive visual effect.
Children absolutely love the fun, bouncy nature of this style that moves with them throughout the day.
Styling Instructions:
- Start with a ponytail positioned at the desired height, securing it firmly with a strong elastic band.
- Measure approximately two to three inches down from the first elastic and add another elastic band at that point.
- Gently pull at the hair between the two elastics, teasing it outward to create a rounded bubble shape.
- Add another elastic two to three inches below the second one and repeat the pulling process to create the next bubble.
- Continue adding elastics and creating bubbles all the way down the ponytail until you reach the ends.
- The curly texture will naturally make each bubble appear fuller and more dramatic than it would on straight hair.
- Adjust the size of each bubble to ensure they’re relatively uniform and evenly spaced throughout the style.
- Finish with a small amount of anti-frizz serum to keep the style looking polished throughout the day.
8. French Braid into Low Bun

The French braid into low bun combination creates a sophisticated updo that’s perfect for formal occasions while remaining comfortable for all-day wear.
This style elegantly showcases curly hair texture in the braid before gathering everything into a voluminous, curly bun at the nape.
The refined appearance makes children feel grown-up and special while keeping hair completely off the face and neck.
Styling Instructions:
- Begin with damp, detangled hair that has been treated with a leave-in conditioner for easier manipulation.
- Start a French braid at the crown by taking a section at the hairline and dividing it into three strands.
- Cross the outer strands over the middle while gradually adding small sections from each side as you work down the head.
- Continue French braiding down to the nape of the neck, incorporating all the hair from both sides.
- Once you reach the nape, secure the braid temporarily with an elastic while you prepare for the bun.
- Gather the braided ponytail and the remaining loose curls together, twisting them gently into a coiled bun shape.
- Secure the bun with bobby pins inserted in various directions to ensure it stays put during active movement.
- Allow a few curly tendrils to frame the face for a softer, more romantic finish to the overall style.
9. Zigzag Part Cornrows

Zigzag part cornrows add an artistic twist to traditional cornrows by featuring creative parting patterns that turn the scalp into a canvas.
This eye-catching style allows for endless creativity in design, from simple zigzags to more complex geometric patterns.
The unique parting catches the light and draws attention to the skillful braiding work, making your child’s hairstyle a true work of art.
Styling Instructions:
- Use a rat-tail comb to create a zigzag pattern down the center of the head, taking your time to make clean, sharp angles.
- Section off one side completely with clips while you work on the other to maintain the pattern clearly.
- Begin cornrowing along each section created by the zigzag part, following the angles precisely.
- Apply edge control or braiding gel to keep the parts clean and prevent frizz from obscuring the design.
- Braid each cornrow tightly and neatly, ensuring the rows are even in width for a professional appearance.
- Continue the pattern down to the nape, maintaining consistency in tension and size throughout all the braids.
- Secure each cornrow end with a small elastic and optionally add beads that click together for a fun auditory element.
10. Half-Up Braided Crown

The half-up braided crown style offers the best of both worlds by securing the top section in an elegant braid while allowing the bottom curls to flow freely.
This versatile style works beautifully for any occasion, from casual playdates to family portraits, and takes only minutes to complete once you’ve mastered the technique.
The crown braid keeps hair away from the face while showcasing the full beauty of loose curls below.
Styling Instructions:
- Section the hair horizontally from ear to ear, clipping the bottom section away to work on later.
- Take a small section near one ear and divide it into three strands to begin a Dutch or French braid.
- Braid across the crown of the head, adding hair from the top section as you work from one ear to the other.
- Keep the braid relatively close to the part line to create a defined crown effect that frames the face.
- When you reach the opposite ear, secure the braid with a small elastic that blends with the hair color.
- Release the bottom section and use your fingers to separate the curls for maximum volume and definition.
- Optionally tuck the end of the crown braid under itself and pin it for a seamless, polished appearance.
- Add a decorative hair accessory at the point where the braid ends for a finishing touch.
11. Twisted Rope Braids

Twisted rope braids offer a unique alternative to traditional braiding techniques, creating a beautiful spiral effect that looks intricate but is actually quite simple to achieve.
This style involves twisting two sections of hair around each other rather than weaving three strands, resulting in a cleaner, more defined rope-like appearance.
Curly hair adds wonderful texture and dimension to rope braids, making them appear thicker and more substantial.
Styling Instructions:
- Divide the hair into two equal sections, either in a ponytail or starting directly from the scalp for rope braid cornrows.
- Twist each section clockwise (or in the same direction) several times to create tension within each section.
- Cross the two twisted sections over each other in the opposite direction (counterclockwise), which prevents the twists from unraveling.
- Continue twisting each section individually and then crossing them over each other all the way down the length.
- The curly texture will naturally create a fuller, more voluminous rope braid with interesting texture variations throughout.
- Secure the end tightly with an elastic, as rope braids have a tendency to unravel more easily than traditional braids.
- Apply a small amount of holding gel at the start and end points to increase the longevity of the style.
12. Braided Pigtails with Curly Ends

Braided pigtails with curly ends create an adorable, youthful style that perfectly balances structure and playfulness.
This classic look keeps the majority of hair controlled in neat braids while allowing the natural curl pattern to shine at the ends, creating a bouncy, energetic appearance.
Children love how this style moves with them, and parents appreciate how long-lasting and practical it is for everyday wear.
Styling Instructions:
- Create a clean center part from the forehead to the nape, using a comb to ensure the sections are equal.
- Secure one side with a clip while working on the other to maintain the clean part line.
- Gather one section into a ponytail at the desired height, typically near the ears for classic pigtails.
- Begin a three-strand braid from the ponytail base, braiding down to approximately two-thirds of the length.
- Secure the braid with a colorful elastic, leaving the bottom third unbraided to showcase the natural curls.
- Repeat the exact process on the other side, trying to stop the braid at the same length for symmetry.
- Use a curl cream or light oil on the unbraided ends to define the curls and add shine.
- Optionally add matching bows, ribbons, or decorative elastics for extra charm and personality.
13. Waterfall Braid

The waterfall braid creates a cascading effect that looks ethereal and romantic, perfect for special occasions when you want your child to feel extra special.
This advanced technique involves dropping strands as you braid, allowing sections of curls to fall through the braid like water over a waterfall.
The combination of structured braiding and flowing curls creates a stunning contrast that photographs beautifully.
Styling Instructions:
- Begin with a small three-strand section near the temple on one side of the head.
- Braid once normally, crossing the back strand over the middle, then the front strand over the new middle.
- On the next cross, drop the front strand completely and pick up a new section from the hair below to replace it.
- Continue this pattern across the head, always dropping the front strand and picking up new hair to add to the braid.
- The dropped strands will create the waterfall effect, flowing down through the braid and joining the loose curls below.
- Maintain even tension and consistent strand sizes to create a uniform waterfall pattern that looks intentional and polished.
- Secure the braid behind the opposite ear with bobby pins or continue it into a regular braid and hide the end.
14. Lemonade Braids

Lemonade braids, popularized by Beyoncé, feature sleek cornrows that sweep dramatically to one side, creating a bold and fashionable statement.
These long-lasting braids typically start small at the hairline and gradually become thicker as they move toward the swept side.
This protective style is excellent for curly hair, keeping it safely braided while allowing for creative patterns and designs in the parting.
Styling Instructions:
- Part the hair deeply on one side, creating the distinctive swept appearance that defines lemonade braids.
- Create diagonal sections from the deep part that angle toward the opposite side and slightly back.
- Begin each cornrow small at the hairline, braiding tightly against the scalp with consistent tension throughout.
- Gradually make the braids thicker as you work through the sections, creating a tapered effect from small to large.
- All cornrows should flow in the same direction, creating clean, parallel lines that sweep across the head.
- Continue each braid down to the ends or leave some length unbraided to showcase curls, depending on preference.
- Apply edge control at the hairline to keep the style looking fresh and neat for several weeks.
- Add decorative elements like gold cuffs, beads, or colored thread woven into select braids for personalization.
15. Boxed Braids with Curly Ends

Box braids with curly ends combine the iconic protective style of box braids with the playful bounce of loose curls at the bottom.
This style typically uses braiding hair extensions to add length and thickness, with the child’s natural curls left out at the ends or curly synthetic hair added for the desired effect.
The result is a versatile, long-lasting style that can be worn for weeks while protecting the natural hair underneath.
Styling Instructions:
- Section the hair into square or rectangular “boxes” of uniform size across the entire head for consistency.
- Begin each braid at the scalp, optionally adding extension hair for length and fullness if desired.
- Braid each section tightly and neatly down to the desired length, typically stopping a few inches from the ends.
- Leave the natural curls at the ends loose, or if using extensions, leave the curly synthetic ends unbraided.
- Secure each braid with a small elastic at the transition point between braided and curly sections.
- The combination creates a uniform, neat appearance in the braids with playful, bouncy movement at the ends.
- Dip the curly ends in hot water if using synthetic hair to set the curl pattern and create a more natural appearance.
- Maintain the style by wrapping hair at night and refreshing the curls with a light moisturizing spray.
16. Milkmaid Braid

The milkmaid braid creates a charming, vintage-inspired look by wrapping braids around the crown of the head like a halo or headband.
This romantic style has a timeless, storybook quality that makes children look sweet and angelic while keeping all hair securely off the face and neck.
The fullness of curly hair makes the milkmaid braid appear especially lush and impressive.
Styling Instructions:
- Create a clean center part and divide the hair into two equal sections, one on each side.
- Braid each section into a traditional three-strand braid, starting at the nape and braiding down to the ends.
- Secure both braids with elastics, ensuring they’re tight enough to hold when lifted and pinned.
- Take one braid and lift it up and over the top of the head, positioning it like a headband across the crown.
- Secure the braid with bobby pins tucked underneath, hiding the pins within the hair for a seamless look.
- Take the second braid and lift it over the head, positioning it parallel to the first braid or slightly behind it.
- Pin this braid securely as well, tucking the ends under the braids to hide them completely.
- Gently pull at the braids to create a fuller, more voluminous milkmaid crown that showcases the curly texture.
17. Feed-In Cornrows

Feed-in cornrows create a more natural-looking protective style by gradually adding extension hair as you braid, rather than starting with a large knot at the base.
This technique reduces tension on the hairline and creates seamlessly thin-to-thick braids that look like they’re growing directly from the scalp.
For children’s sensitive scalps and delicate edges, feed-in cornrows offer a gentler alternative to traditional cornrow methods.
Styling Instructions:
- Section the hair into the desired cornrow pattern, using clips to separate sections clearly.
- Begin each cornrow with only the natural hair, creating a small, tight braid at the hairline.
- Gradually feed in small amounts of extension hair with each stitch, adding it to the outer strands as you braid.
- Continue adding extension hair progressively, allowing the braid to naturally increase in thickness as you work down the head.
- This gradual addition creates less tension at the roots compared to starting with all the extension hair at once.
- Maintain consistent size additions to ensure the braid thickness increases smoothly and uniformly.
- Braid down to the desired length, securing with elastics or leaving ends loose depending on the desired final look.
- Apply edge control and use a styling foam to smooth the braids and ensure they last for several weeks.
18. Heart-Shaped Braided Design
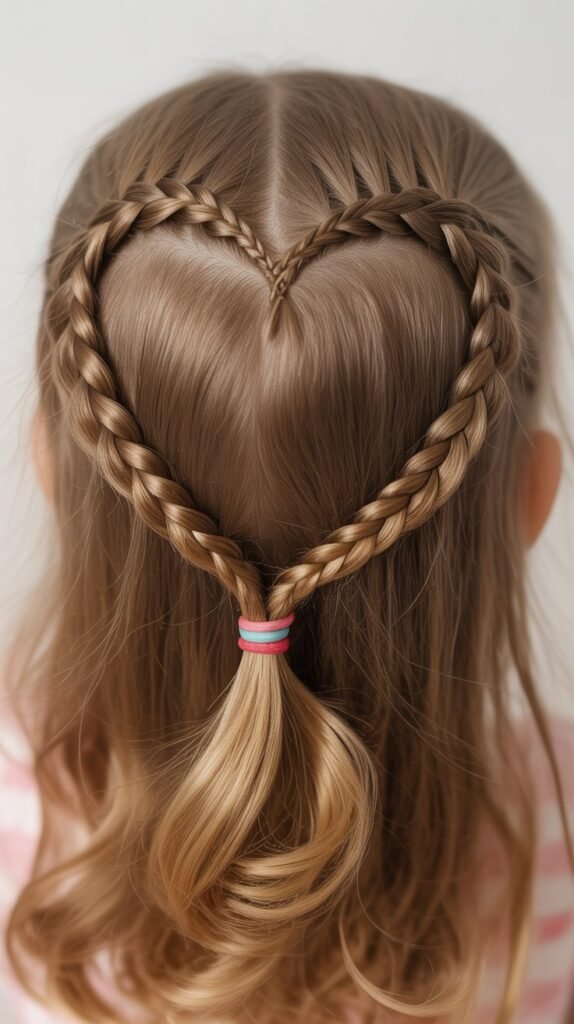
Heart-shaped braided designs add a sweet, whimsical element to your child’s hairstyle by creating cornrows or twisted sections that form heart shapes on the scalp.
This creative style is perfect for Valentine’s Day, birthdays, or any time you want to make your child feel extra loved and special.
The heart design becomes a focal point that draws compliments and admiration from everyone who sees it.
Styling Instructions:
- Plan the heart design location, typically at the crown or upper back section where it will be most visible.
- Create the heart outline using precise parting, forming two curved lines that meet in a point at the bottom.
- Begin cornrowing or twisting from the top center of the heart, working along one curved side of the heart shape.
- When you reach the point of the heart, secure the braid temporarily and return to the center to create the other side.
- Braid along the second curved side of the heart, meeting the first braid at the point and continuing down together.
- The remaining hair can be styled in complementary cornrows, left loose and curly, or gathered into a ponytail.
- Use contrasting colors of beads or thread in the heart design to make it stand out even more prominently.
- Take photos from above to capture the full heart design, as this angle best showcases the creative braiding work.
19. Goddess Braids

Goddess braids are larger, thicker cornrows that create a bold, statement-making protective style requiring less installation time than smaller braids.
These chunky braids typically use extension hair for added length and fullness, creating a dramatic look that still remains age-appropriate and playful for children.
The larger size makes them more comfortable for tender-headed kids while still providing excellent hair protection.
Styling Instructions:
- Section the hair into fewer, larger sections compared to traditional cornrows—typically four to six braids total.
- Add extension hair at the start of each section if desired, using a substantial amount to create thick, impressive braids.
- Braid each section tightly against the scalp initially, but slightly looser than thin cornrows to prevent discomfort.
- The braids can follow straight lines down the head, curve artistically, or create geometric patterns depending on preference.
- Continue each braid down the full length, incorporating all the extension hair for maximum dramatic effect.
- The thicker braids will naturally show more texture and detail, so take care to keep the sections uniform and neat.
- Secure the ends with elastics and optionally seal them by dipping in hot water if using synthetic hair.
- This style can last two to three weeks with proper nighttime wrapping and occasional moisturizing of the scalp.
20. Diagonal Cornrows with Curly Ponytail

Diagonal cornrows with a curly ponytail create dynamic visual interest by angling the braids across the head rather than straight back.
This style directs all the hair to one side, where it’s gathered into a voluminous, curly ponytail that becomes a beautiful focal point.
The angular lines of the cornrows contrast beautifully with the soft, round curls of the ponytail.
Styling Instructions:
- Decide which side will hold the ponytail and plan the diagonal direction of the cornrows accordingly.
- Create sections that angle from the opposite side of the head toward the ponytail side, all flowing in the same direction.
- Begin each cornrow at the hairline, braiding tightly against the scalp while following the diagonal angle precisely.
- Continue all the cornrows until they meet at the designated ponytail location, typically above or behind one ear.
- Gather all the cornrow ends together along with any unbraided hair and secure with a strong elastic.
- The ponytail should be full of natural curls, which you can enhance with curl-defining products for maximum volume.
- Fluff the curly ponytail to create a rounded, fuller shape that balances the sleek cornrows.
- Add decorative elements like a scrunchie, bow, or hair jewelry at the ponytail base for added style.
21. Braided Updo with Curl Accents
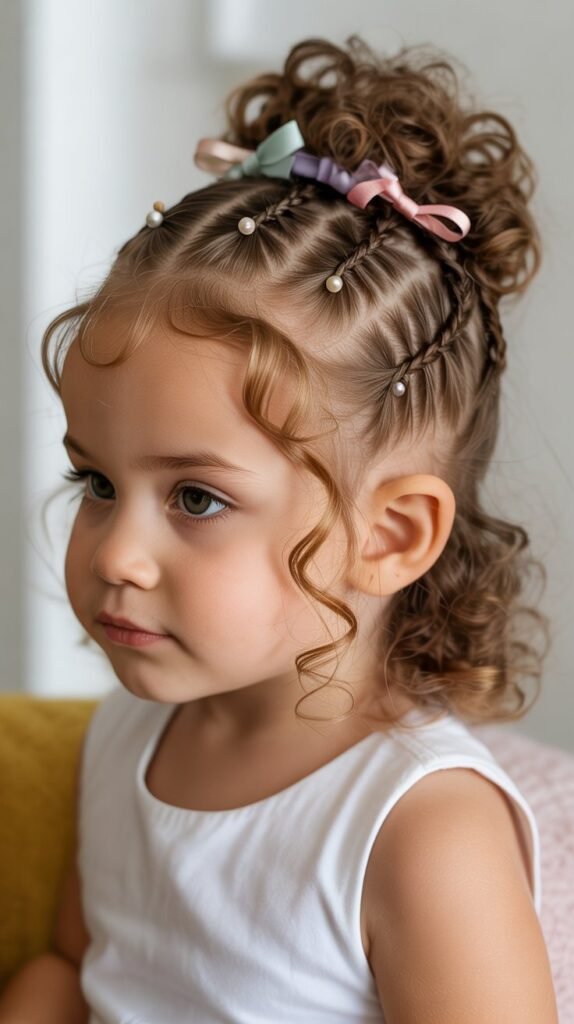
The braided updo with curl accents creates an elegant, sophisticated style perfect for formal events like weddings, recitals, or holiday celebrations.
This versatile style combines multiple braiding techniques—perhaps French braids, Dutch braids, or rope braids—all gathered into an updo with strategic curls left out to soften and feminize the overall look.
The combination feels grown-up while remaining age-appropriate and comfortable.
Styling Instructions:
- Begin by creating one or two braids starting from the front hairline, choosing either center or side braids depending on the desired design.
- Braid down to the nape area, incorporating hair from the sides as you work to create French or Dutch braid effects.
- Gather all hair at the nape, including the braided sections and any remaining loose hair.
- Twist or coil the gathered hair into an updo shape, whether a bun, twist, or folded style.
- Secure the updo firmly with multiple bobby pins placed in various directions for maximum hold.
- Pull out a few small sections of curls around the face and nape to create soft, romantic framing.
- Use hairspray to set the updo while applying curl cream to the loose accents for definition.
- Add decorative elements like flower pins, sparkly clips, or a decorative headband to complete the formal look.
22. Tribal Braids
Tribal braids feature intricate patterns and designs that pay homage to traditional African braiding techniques, often incorporating geometric shapes, triangular parts, and creative sectioning.
These artistic styles transform the scalp into a canvas, showcasing the braider’s skill and creativity while providing excellent hair protection.
For children, tribal braids offer a connection to cultural heritage while keeping their curly hair manageable and stylish.
Styling Instructions:
- Plan the design carefully, perhaps sketching it first, as tribal braids require precision in parting and sectioning.
- Create the unique parting pattern using a rat-tail comb, which might include triangles, diamonds, curves, or zigzags.
- Apply edge control to each part to keep the lines sharp and clearly defined throughout the braiding process.
- Cornrow each section following the shape created by the parting, keeping the braids tight and uniform.
- The braids may vary in size according to the design, with some sections featuring thinner braids and others thicker ones.
- Consider incorporating different braiding directions within the design for added visual complexity and interest.
- Ends can be secured with elastics, left loose as curls, or adorned with cultural beads and accessories.
- This style requires more time to install but can last several weeks with proper care and maintenance.
23. Braided Bob with Curly Texture

The braided bob combines the timeless appeal of a bob haircut with the protective benefits of braiding, creating a chic, manageable style perfect for active children.
This style uses individual braids or box braids installed to a uniform bob length, typically ending at jaw or shoulder level.
The curly texture at the ends adds softness and movement to the geometric precision of the bob cut.
Styling Instructions:
- Section the hair into small to medium squares across the entire head, maintaining uniform size for consistency.
- Begin braiding each section from the scalp, adding extension hair if needed to achieve the desired bob length.
- Braid each section down to approximately jaw or shoulder length, stopping at the same point for all braids to create the bob shape.
- Leave the last one to two inches unbraided, allowing natural or synthetic curls to create texture at the ends.
- Trim the braids carefully with scissors if necessary to ensure all braids end at exactly the same length for a clean bob line.
- The curly ends should all fall at the same level, creating a uniform hemline that defines the bob silhouette.
- Style the bob by brushing or finger-combing the curly ends forward for a sleek look or outward for more volume.
- This protective style can last three to four weeks and can be styled in different ways—straight down, behind the ears, or with a side part.
24. Crisscross Cornrows

Crisscross cornrows create a mesmerizing woven effect by braiding sections that intersect and overlap each other in an artistic pattern.
This advanced technique requires planning and precision but results in a stunning style that looks like fabric woven directly onto the scalp.
The interlocking pattern provides secure, long-lasting hold while creating visual depth and dimension.
Styling Instructions:
- Plan the crisscross pattern in advance, deciding how many braids will intersect and at what angles.
- Begin with the base layer of cornrows, braiding them in one direction (for example, straight back or diagonal).
- Stop each base cornrow at the point where another braid will cross over it, securing temporarily with a small clip.
- Create the crossing cornrows in a perpendicular or contrasting angle, weaving them over and under the base braids.
- Carefully lift the base braids where needed to thread the crossing braids underneath, creating the woven effect.
- Once all crossings are complete, continue each cornrow to its end point and secure with elastics.
- The finished pattern should show clear over-under weaving, similar to a basket weave or lattice design.
- Use generous edge control and take your time to ensure the pattern remains visible and doesn’t blur together.
25. Side-Swept Braided Style
The side-swept braided style creates romantic, asymmetrical appeal by gathering all the hair to one side through a combination of braiding techniques.
This glamorous look works beautifully for special occasions and photographs, as the side placement creates elegant lines and showcases the face beautifully.
The style keeps hair secure while maintaining a soft, feminine aesthetic.
Styling Instructions:
- Create a deep side part, positioning it far to one side for maximum dramatic effect.
- On the side with more hair, begin a French or Dutch braid starting at the part line.
- Braid along the hairline, curving around the ear and continuing down the side of the head.
- Incorporate all the hair from both sides as you braid, directing everything toward the chosen side.
- When all hair is incorporated, continue with a regular three-strand braid down the length.
- Position the braid over one shoulder, allowing it to drape elegantly across the front of the body.
- Leave the end portion unbraided to showcase the natural curl pattern and add softness to the geometric braid.
- Secure with a decorative elastic or wrap a small section of hair around the elastic to conceal it.
- Gently pull at the braid edges on the thicker side to create more volume and a fuller appearance.
26. Micro Braids with Curly Highlights

Micro braids with curly highlights combine the sleek, intricate beauty of tiny braids with strategic sections of loose curls left throughout the style.
This creative approach adds dimension and texture variation while reducing installation time compared to a full head of micro braids.
The contrast between the smooth, uniform braids and the bouncy, free-form curls creates visual interest and movement.
Styling Instructions:
- Section the hair into a grid pattern, deciding which sections will be braided and which will remain curly.
- Create micro braids (very thin braids) in the designated sections, working methodically to ensure uniform size.
- Leave strategic sections completely unbraided—perhaps around the face, at the crown, or scattered throughout—to showcase natural curls.
- The micro braids can be done with or without extensions, depending on whether added length is desired.
- Braid each micro section all the way down to the ends for sleek, uniform tiny braids.
- Apply curl-defining products to the unbraided sections to enhance and separate the curls for maximum definition.
- The combination creates a unique texture contrast that adds depth and dimension to the overall style.
- This partially braided style reduces tension on the scalp compared to a full head of braids while still providing styling versatility.
27. Infinity Braid Ponytail

The infinity braid ponytail creates a stunning mathematical pattern that resembles the infinity symbol woven throughout the braid.
This show-stopping technique involves a figure-eight braiding pattern that looks incredibly complex but becomes manageable with practice.
When executed on curly hair, the texture adds fullness to the intricate pattern, making it even more impressive and eye-catching.
Styling Instructions:
- Gather all hair into a ponytail at the desired height and secure it firmly with a strong elastic band.
- Divide the ponytail into two equal sections, which will remain separate throughout the braiding process.
- Take a small strand from the outer edge of the right section and cross it in a figure-eight pattern to the left section.
- Take a small strand from the outer edge of the left section and cross it in the opposite figure-eight direction.
- Continue this alternating figure-eight pattern all the way down the ponytail, keeping the crosses consistent.
- The curly texture will naturally create a fuller, more dimensional infinity braid with beautiful texture throughout.
- Take your time with this braid, as the pattern requires concentration to maintain the distinctive infinity shape.
- Secure at the end with an elastic and gently pull at the edges to enhance the fullness and showcase the pattern.
- This braid looks especially impressive in photos and is perfect for children who want a unique, conversation-starting style.
Essential Products for Braiding Curly Hair
Achieving beautiful, long-lasting braided styles on curly hair requires the right products to ensure manageability, shine, and hold.
Using appropriate products designed for textured hair makes the braiding process smoother and helps the finished style maintain its beauty longer.
Here are the essential product categories every parent should have in their hair care arsenal:
Detangling Products:
- Leave-in conditioners provide slip and moisture that make combing through curls much easier and less painful for children.
- Detangling sprays offer quick moisture boosts and can be applied between braiding sessions to refresh and soften hair.
- Wide-tooth combs and detangling brushes specifically designed for curly hair prevent breakage while working through knots.
Styling Products:
- Edge control gels keep hairlines smooth and neat, preventing frizz from disrupting clean parts and braid starts.
- Braiding gels or creams provide hold without flaking, keeping braids tight and defined for extended periods.
- Curl-defining creams enhance the natural curl pattern on any hair left loose at the ends or throughout the style.
- Light holding sprays set styles without making hair stiff or crunchy, maintaining natural movement and softness.
Moisture and Maintenance:
- Hair oils (such as coconut, jojoba, or argan oil) seal in moisture and add shine to both braided and loose sections.
- Scalp moisturizers prevent dryness and itching during extended protective styling periods.
- Satin or silk bonnets protect hairstyles during sleep, significantly extending the life of braided styles.
External Resource: For detailed guidance on caring for children’s natural hair, visit NaturallyCurly’s Kids Section for expert tips and product recommendations.
Tips for Maintaining Braided Styles on Curly Hair
Proper maintenance ensures braided hairstyles remain beautiful, neat, and healthy for the hair underneath throughout their lifespan.
Children’s active lifestyles can be tough on hairstyles, but with the right care routine, braids can stay fresh and attractive for days or even weeks.
Following these maintenance guidelines protects both the style and the natural hair beneath.
Nighttime Protection:
- Always cover braided hair with a satin or silk bonnet before bed to prevent frizz and preserve the style’s neatness.
- Satin or silk pillowcases provide an alternative to bonnets for children who resist wearing head coverings while sleeping.
- Gently gather longer braids into a loose, high ponytail before covering to prevent them from becoming tangled during sleep.
Daily Care:
- Lightly mist braids with water or a water-based spray in the morning to refresh and revive the style.
- Apply a small amount of oil to the scalp every few days to prevent dryness and itching, especially with long-term protective styles.
- Gently pat down any frizzy edges with edge control or a small amount of gel to maintain a polished appearance.
- Avoid excessive manipulation of the braids, as constantly touching and playing with them can cause frizz and reduce longevity.
Cleaning and Hygiene:
- Cleanse the scalp weekly with a diluted shampoo applied with a spray bottle or applicator bottle, even while braids are installed.
- Focus on the scalp rather than the braids themselves, massaging gently to remove buildup without disturbing the braid pattern.
- Rinse thoroughly and allow braids to dry completely—preferably air-drying or using a hooded dryer on low heat.
- Use dry shampoo or cleansing foam between washes for quick refreshment without the full washing process.
Removal and Recovery:
- Never leave protective braids in longer than recommended (typically 4-6 weeks maximum) to prevent matting and breakage.
- Remove braids carefully by cutting the elastic at the end and unraveling gently from bottom to top, never pulling or rushing.
- Deep condition hair immediately after braid removal to restore moisture and soften hair before detangling.
- Allow hair to rest for at least a week between intensive braiding sessions to let the scalp and hair recover.
External Resource: The American Academy of Dermatology provides dermatologist-approved tips for maintaining healthy hair in protective styles.
Conclusion
The journey through these 27 Beautiful Braided Hairstyles for Kids with Curls reveals endless possibilities for celebrating and protecting your child’s natural hair texture.
From simple everyday styles like the classic three-strand braid to elaborate protective styles like lemonade braids and tribal designs, there’s a perfect option for every occasion, skill level, and personal preference.
These versatile braiding techniques do more than just create beautiful hairstyles—they protect delicate curls from damage, reduce daily styling time, and help children embrace their natural beauty with confidence.
Whether you’re preparing for a special event, seeking a low-maintenance style for busy school weeks, or simply wanting to try something new and creative, these braided styles offer practical solutions that work harmoniously with curly hair’s unique needs.
Remember that practice makes perfect, and even the most complex braiding techniques become easier with repetition and patience.
By mastering these styles and maintaining them properly with the right products and care routines, you’ll empower your child to feel beautiful, confident, and proud of their gorgeous curls every single day.
