
Getting ready for school doesn’t have to mean spending hours in front of the mirror struggling with complicated hairstyles.
Braids offer the perfect solution for busy mornings, combining style, practicality, and durability that lasts through gym class, lunch breaks, and after-school activities.
Whether you’re a complete beginner or someone looking to expand your hairstyling repertoire, this comprehensive guide to 33 Simple Braided Hairstyles for School will transform your daily routine.
From classic three-strand braids to trendy Dutch braids and creative combinations, you’ll discover styles suitable for every hair type, length, and skill level.
These hairstyles not only keep hair neat and manageable throughout the school day but also allow students to express their personal style while adhering to school dress codes.
Get ready to learn step-by-step techniques, time-saving tips, and creative variations that will make you excited to style your hair every morning.
1. Classic Three-Strand Braid
The three-strand braid is the foundation of all braiding techniques and the perfect starting point for beginners.
This timeless style works beautifully for school because it’s quick to create, keeps hair secure all day, and looks polished without being overly formal.
How to Create:
- Brush your hair thoroughly to remove all tangles and knots.
- Divide your hair into three equal sections at the nape of your neck.
- Cross the right section over the middle section, so it becomes the new middle.
- Cross the left section over the new middle section.
- Continue alternating right and left sections over the middle until you reach the ends.
- Secure with an elastic band, leaving about an inch of hair at the bottom.
Styling Tips:
- Pull the braid gently from both sides to create a fuller, more voluminous look.
- Use a small amount of styling cream or leave-in conditioner before braiding to reduce flyaways.
- Position the braid at different heights—low for a sophisticated look or high for a sporty style.
- Add colorful elastics or ribbon woven through the braid for extra personality.
Best For: All hair types, lengths past shoulders, beginners, quick morning routines.
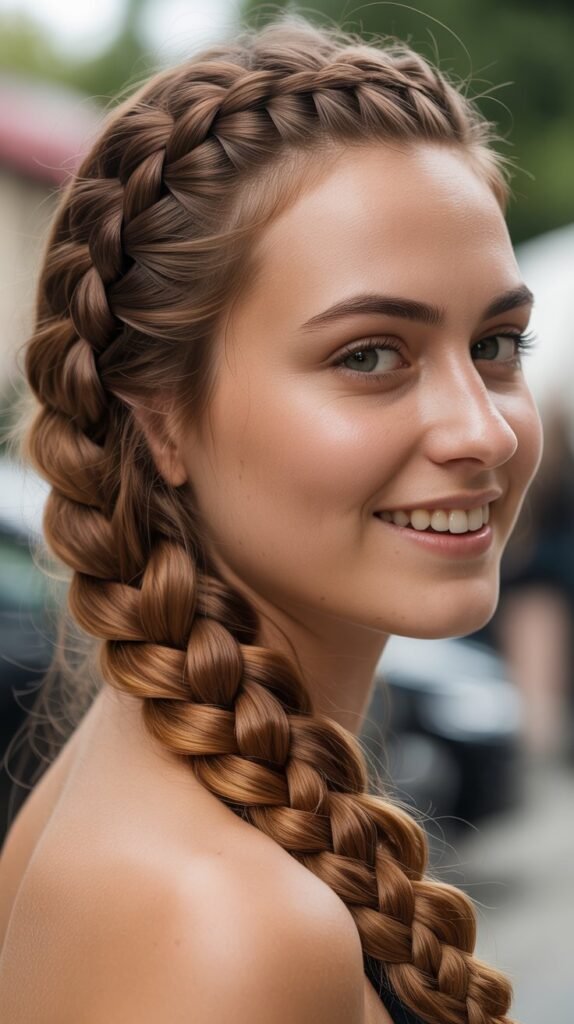
2. French Braid

The French braid elevates the basic three-strand technique by incorporating hair gradually as you work down the head.
This style is incredibly popular for school because it keeps all hair, including shorter layers, neatly contained from the crown to the ends.
Step-by-Step Instructions:
- Start with brushed, tangle-free hair at the crown of your head.
- Take a small section of hair from the top and divide it into three strands.
- Begin with one cross of a regular braid (right over middle, left over middle).
- Before crossing the right section over again, pick up a small amount of hair from the right side and add it to the right section.
- Cross this combined section over the middle.
- Repeat on the left side: pick up hair from the left, add it to the left section, and cross over the middle.
- Continue this pattern, picking up new hair with each cross, until all hair is incorporated.
- Finish with a regular three-strand braid and secure with an elastic.
Pro Techniques:
- Keep consistent tension throughout to create an even, professional-looking braid.
- Pick up equal-sized sections of hair each time for a uniform appearance.
- Angle the braid slightly to one side for an asymmetrical, modern twist.
- Practice on someone else first, as it’s easier to learn the technique before attempting on yourself.
Best For: Medium to long hair, athletic activities, keeping bangs and layers in place, all skill levels with practice.
3. Dutch Braid (Reverse French Braid)

The Dutch braid creates a beautiful raised effect that sits on top of the hair rather than blending in like a French braid.
This “inside-out” technique produces a bold, dimensional look that’s become extremely popular in schools and on social media.
Creating the Dutch Braid:
- Begin with smooth, detangled hair at the crown of your head.
- Section out a small portion at the top and divide into three equal strands.
- Cross the right strand under the middle strand (opposite of French braid).
- Cross the left strand under the new middle strand.
- Before the next cross, gather a small section of hair from the right side.
- Add this new hair to the right strand and cross it under the middle.
- Repeat on the left: gather hair, add to left strand, cross under middle.
- Continue this under-crossing pattern until reaching the nape of the neck.
- Complete with a regular braid crossed under, or switch to over-crossing for variety.
Styling Variations:
- Create two Dutch braids for a trendy double-braid look perfect for sports.
- Pancake the braid by gently pulling sections outward for a fuller, bohemian appearance.
- Start the Dutch braid from one side temple and angle it diagonally across the head.
- Combine with a ponytail by stopping the Dutch braid at the crown and gathering remaining hair.
Best For: Making fine hair appear thicker, athletic activities, all-day hold, intermediate skill level.
4. Fishtail Braid
The fishtail braid looks intricate and complicated but is surprisingly simple once you understand the two-section technique.
This stylish braid creates a beautiful herringbone pattern that works perfectly for school, offering a more sophisticated alternative to traditional braids.
Technique Breakdown:
- Brush hair smooth and gather into a low ponytail position (elastic optional for beginners).
- Divide all hair into two large, equal sections.
- Take a thin strand from the outer edge of the right section.
- Cross this thin strand over to join the left section.
- Take a thin strand from the outer edge of the left section.
- Cross this strand over to join the right section.
- Continue alternating sides, always taking from the outer edge and crossing to the opposite section.
- Keep tension consistent and strands relatively thin for a defined pattern.
- Secure at the bottom with an elastic band.
Enhancement Ideas:
- Gently pull apart the braid sections to create a wider, more relaxed bohemian look.
- Start with a side fishtail that drapes over one shoulder for an asymmetric style.
- Combine with a half-up style by fishtail braiding only the top section.
- Add small flowers, pins, or clips throughout the braid for special school events.
Best For: Medium to long hair, creating texture in straight hair, impressive-looking yet simple style, all skill levels.
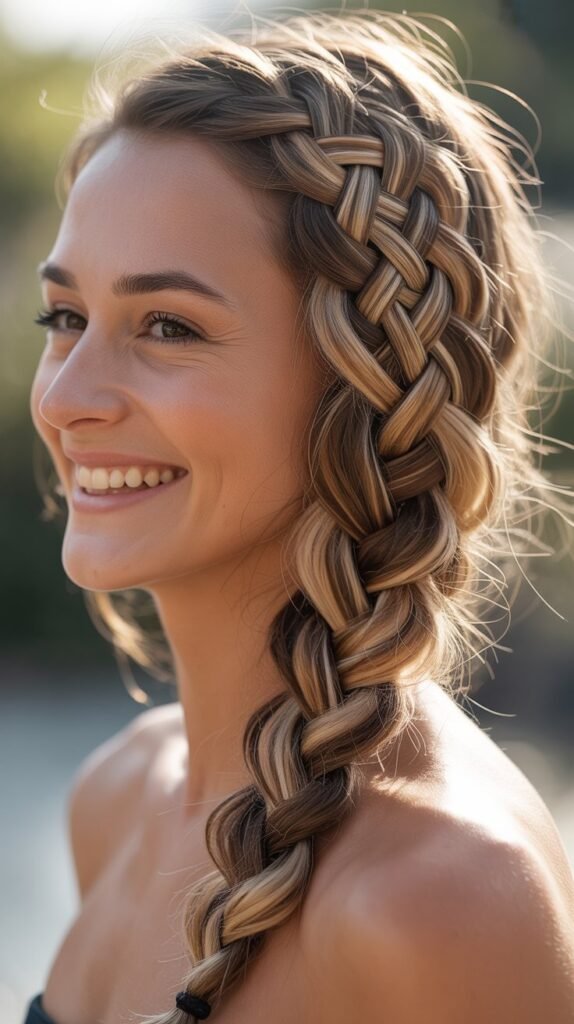
5. Side Braid
The side braid offers a romantic, effortless look that keeps hair off your face while maintaining a soft, approachable style.
This versatile option works with any basic braiding technique positioned to drape over one shoulder.
Creating Your Side Braid:
- Brush all hair to one side of your head, over either shoulder.
- Use a small amount of texturizing spray or dry shampoo for grip if hair is very smooth.
- Gather hair at the nape of the neck on your chosen side.
- Select your preferred braiding technique (three-strand, fishtail, or rope braid).
- Begin braiding, keeping the braid positioned toward the front of your shoulder.
- Work down the length of hair, maintaining even tension.
- Secure at the ends and gently loosen sections for a softer appearance.
Styling Options:
- Leave some face-framing pieces out at the front for a softer, more romantic look.
- Wrap a small section of hair around the elastic to conceal it.
- Incorporate the side braid into a low side ponytail for added interest.
- Mix braiding techniques within one side braid—start with Dutch braid, transition to fishtail.
Best For: Long hair, creating asymmetry, softer romantic style, very quick morning styling.
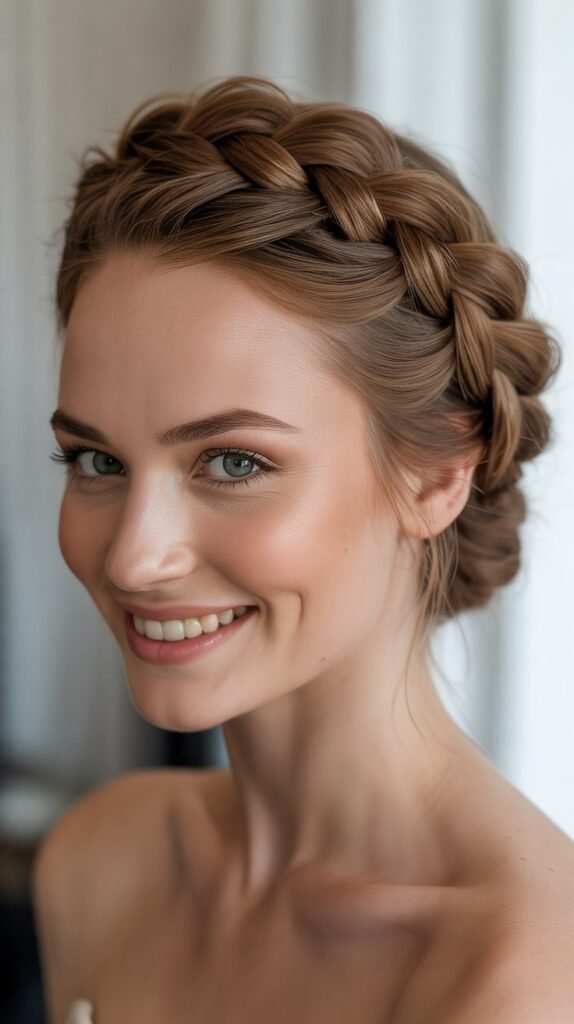
6. Crown Braid

The crown braid wraps around the head like a halo, creating an elegant, princess-like appearance perfect for special school days.
This style works wonderfully for keeping hair completely off the face and neck while looking polished and put-together.
Construction Method:
- Part hair down the center from forehead to nape, creating two equal sections.
- Begin a Dutch braid on one side, starting just above the ear.
- Braid along the hairline, following the natural curve of your head.
- Continue the Dutch braid technique, picking up hair as you work around the back of the head.
- When you reach the opposite ear, continue regular braiding with remaining hair.
- Wrap this tail section around to meet the starting point.
- Tuck the end under the beginning of the braid and secure with bobby pins.
- Use additional pins along the braid to secure it firmly to the head.
Perfecting the Crown:
- Keep the braid close to the hairline for a true crown effect.
- Use a mirror system (handheld plus wall mirror) to see the back while braiding.
- Have someone help with the back section until you master the technique.
- Spray with light-hold hairspray to keep flyaways controlled throughout the day.
Best For: Medium to long hair, special school events, dance or choir performances, keeping hair completely secured.
7. Waterfall Braid

The waterfall braid creates a cascading effect where strands of hair fall through the braid like a flowing waterfall.
This partially braided style keeps the top section controlled while leaving length flowing freely, perfect for students who want style with their hair down.
Technique Explanation:
- Start with a small section of hair near the temple on one side.
- Divide this section into three strands and begin a regular braid.
- After the first complete braid sequence, drop the bottom strand and let it fall.
- Pick up a new section of hair from above to replace the dropped strand.
- Cross the top strand over the middle as usual.
- Continue this pattern: drop the bottom strand, pick up new hair from the top, cross over.
- Work the waterfall braid across the head toward the opposite ear.
- Secure the end with a small clear elastic or bobby pins hidden behind the ear.
Creative Variations:
- Create a double waterfall braid by adding a second braid below the first.
- Angle the waterfall braid diagonally from temple to opposite-side nape.
- Combine with curled or waved hair for enhanced cascading effect.
- Use the waterfall braid across a half-up style with the bottom half in a ponytail.
Best For: Long hair, special occasions, showcasing hair color or highlights, intermediate to advanced skill level.
8. Rope Braid
The rope braid is one of the easiest braiding techniques that creates a twisted, rope-like appearance.
This two-strand method is perfect for school mornings when you’re running late but still want a polished look that holds all day.
Simple Instructions:
- Gather hair into a ponytail (high, low, or side) and secure with an elastic.
- Divide the ponytail into two equal sections.
- Twist the right section clockwise several times until it begins to coil slightly.
- Hold this twisted section firmly to maintain the tension.
- Twist the left section clockwise the same number of times.
- Now wrap the right twisted section over the left in a counterclockwise direction.
- Continue wrapping, always moving in the opposite direction from the individual twists.
- The counterclockwise wrapping keeps the individual twists from unraveling.
- Secure at the bottom with an elastic band.
Making It Work:
- Keep consistent tension on both sections throughout the process.
- Always twist sections in the same direction (both clockwise or both counterclockwise).
- Wrap sections in the opposite direction from the individual twists for proper rope effect.
- This style works especially well on second-day hair with natural texture.
Best For: All hair lengths past shoulders, quickest braiding method, sporty look, beginners.
9. Double Dutch Braids

Double Dutch braids, also known as boxer braids, feature two raised braids running parallel down either side of the head.
This athletic, trendy style has become incredibly popular and keeps hair completely secured during even the most active school days.
Step-by-Step Process:
- Create a clean center part from forehead to nape, dividing hair into two equal sections.
- Clip one section away to keep it separate while working on the first braid.
- Starting at the hairline on one side, take a small section and divide into three strands.
- Begin a Dutch braid by crossing strands under the middle instead of over.
- Add small sections of hair to each strand before crossing under, working down toward the nape.
- Keep the braid close to the part line for a neat, symmetrical appearance.
- Secure the first braid at the nape or continue braiding to the ends.
- Repeat the entire process on the second side, matching tension and placement.
- Secure both braids with elastics.
Styling Tips:
- Use a rat-tail comb to create a perfectly straight center part.
- Apply edge control or gel along the hairline for a sleek, polished start.
- Keep both braids at equal tension for matching thickness and appearance.
- Pancake both braids equally if you want a fuller, voluminous look.
Best For: All hair types, athletic activities, long-lasting style, trending looks for school.
10. Braided Ponytail
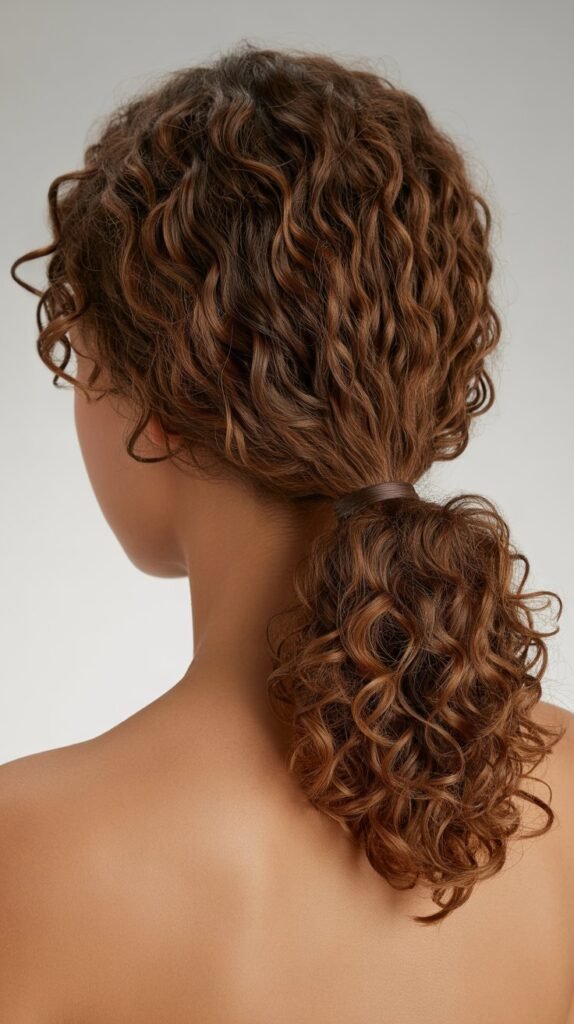
The braided ponytail combines the practicality of a ponytail with the interest of a braid, creating a style that’s both functional and fashionable.
This versatile option works for any school activity and takes just minutes to create.
Basic Construction:
- Brush hair thoroughly and gather into a ponytail at your desired height.
- Secure the ponytail with a strong elastic band.
- Divide the ponytail into three equal sections.
- Create a regular three-strand braid down the length of the ponytail.
- Secure at the ends with another elastic band.
- Optional: wrap a small section of hair around the base elastic to hide it.
Elevation Ideas:
- Create a Dutch braid down the ponytail for added dimension and texture.
- Make a fishtail braid in the ponytail for a more intricate appearance.
- Add a rope braid before the ponytail, starting from the crown.
- Combine two braids at the base and merge them into one ponytail.
Best For: All hair lengths, sports and physical education, quick styling, maintaining a neat appearance all day.
11. Half-Up Braided Crown
This style combines the best of both worlds—hair down with a braided crown element that keeps the top section controlled.
The half-up braided crown works beautifully for school, offering a put-together look without fully committing to an updo.
Creation Steps:
- Section hair horizontally from ear to ear across the crown.
- Clip the bottom section away temporarily.
- Divide the top section into two parts with a center part.
- Create a small Dutch or French braid starting from one temple, working toward the back center.
- Repeat on the opposite side, creating a matching braid.
- Bring both braids together at the back center of the head.
- Secure together with bobby pins or a small elastic.
- Release the bottom section to flow freely.
- Optional: curl or wave the loose bottom section for added texture.
Customization Options:
- Make the braids thicker or thinner depending on your preference.
- Create more than two braids for a more intricate crown.
- Add small decorative pins or clips where the braids meet.
- Incorporate the waterfall technique into the crown braids.
Best For: Medium to long hair, semi-formal school events, showcasing length while controlling top section.
12. Bubble Braid Ponytail

The bubble braid creates a fun, segmented look using multiple elastics to form “bubbles” down a ponytail.
This playful style is incredibly popular among students and requires no actual braiding skills, making it perfect for beginners.
How to Create Bubbles:
- Gather hair into a ponytail (works at any height) and secure with an elastic.
- Smooth the ponytail with a brush or comb.
- Place another elastic about 2-3 inches down from the first elastic.
- Gently pull and loosen the hair between the two elastics to create the first bubble.
- Pull evenly on all sides to create a rounded, symmetrical bubble shape.
- Place another elastic 2-3 inches below the second elastic.
- Create another bubble by gently pulling the section outward.
- Continue this pattern down the entire length of the ponytail.
- Each bubble should be roughly the same size for a uniform appearance.
Enhancement Techniques:
- Use colorful elastics that match your outfit for added fun.
- Make bigger or smaller bubbles by adjusting the distance between elastics.
- Create a Dutch braid leading into the ponytail before starting bubbles.
- Add ribbon woven through the center between elastics for special occasions.
Best For: All hair types, beginners with zero braiding experience, fun casual school days, medium to long hair.
13. French Braid Pigtails

French braid pigtails offer a youthful, sporty look that keeps hair completely controlled on both sides of the head.
This classic style works wonderfully for younger students and anyone with an active lifestyle.
Detailed Instructions:
- Create a clean center part from forehead to nape, dividing hair into two sections.
- Secure one section with a clip while working on the first pigtail.
- Starting at the hairline, take a small section and divide into three strands.
- Begin a French braid, picking up new hair with each cross.
- Work down the side of the head, keeping the braid close to the part.
- Continue French braiding past the nape and down the length of hair.
- Secure with an elastic at the ends.
- Repeat the entire process on the opposite side, matching the placement and tension.
Balancing Tips:
- Use a mirror to check that both braids start at the same height.
- Count your pick-up sections on the first braid and match on the second.
- Keep consistent tension so both braids appear equally tight.
- Position both braids equidistant from the center part.
Best For: All hair lengths, elementary and middle school students, sports activities, long-lasting hold.
14. Ladder Braid

The ladder braid creates a striking vertical pattern that resembles a ladder running down the braid.
This decorative technique adds visual interest to a standard braid and makes a impressive statement for school.
Construction Technique:
- Gather hair into a ponytail at your desired height and secure.
- Take a thin strand from underneath the ponytail near the elastic.
- Set this strand aside temporarily—this is your “ladder” strand.
- Divide the rest of the ponytail into three sections.
- Begin a regular three-strand braid.
- After 2-3 crosses, bring the ladder strand up and over the braid.
- Split the ladder strand in half.
- Bring each half down on either side of the braid.
- Add these halves to the outer strands of your main braid.
- Continue braiding for 2-3 more crosses.
- Repeat the ladder technique by bringing a new thin strand up and over.
- Continue this pattern down the entire length.
Perfecting the Ladder:
- Keep ladder strands consistently thin for a delicate, defined appearance.
- Use clips to hold ladder strands temporarily while braiding the main section.
- Practice this technique several times as it requires coordination.
- Consider adding small gems or beads where ladder strands cross over.
Best For: Long hair, special school events, advanced skill level, showcasing intricate styling ability.
15. Twisted Side Braid

The twisted side braid combines twisting and braiding techniques for a unique textured appearance.
This style offers more dimension than a simple twist while being easier than complex braiding patterns.
How to Execute:
- Brush all hair to one side over your preferred shoulder.
- Divide hair into two large sections near the nape of the neck.
- Twist each section individually in a clockwise direction 2-3 times.
- Cross the right twisted section over the left.
- Before twisting again, add a small amount of loose hair to each section.
- Twist each section again in the same clockwise direction.
- Cross the right over the left again.
- Continue this pattern of adding hair, twisting sections, and crossing.
- Work down the side until all hair is incorporated.
- Continue with regular rope braid technique to the ends.
Styling Enhancements:
- Gently pancake the twisted sections for a fuller, romantic appearance.
- Secure small sections with decorative pins as you work down.
- Leave some face-framing pieces loose for a softer look.
- Finish with a decorative hair cuff or wrapped elastic.
Best For: Medium to long hair, adding dimension to one-length hair, intermediate skill level, romantic style.
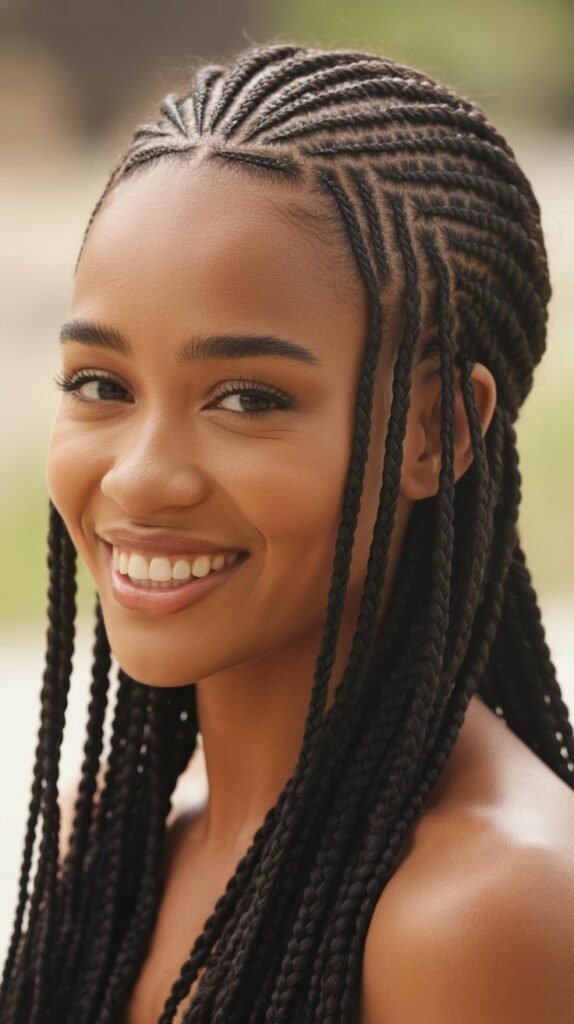
16. Micro Braids Accent

Micro braids are tiny, thin braids incorporated into otherwise loose hair as accent pieces.
These small details add interest without the commitment of a full braided style, perfect for students who want subtle style enhancement.
Creating Micro Accents:
- Section out a very thin strand of hair (about pencil-width or smaller).
- Choose a location: near the temple, behind the ear, or scattered throughout.
- Create a tight, small three-strand braid with this thin section.
- Braid all the way to the ends for maximum definition.
- Secure with a very small, clear elastic.
- Repeat with additional sections as desired (2-5 micro braids typically).
- Leave the rest of your hair down and styled normally.
- The micro braids can remain in place for several days.
Placement Ideas:
- Create one micro braid on each side framing the face.
- Make several scattered throughout for a bohemian festival look.
- Place micro braids only on one side for asymmetrical interest.
- Combine micro braids with a half-up style, incorporating them into the gathered section.
Best For: All hair lengths, minimal styling time, adding interest to straight hair, all skill levels.
17. Pull-Through Braid

The pull-through braid creates the illusion of a thick, voluminous braid without any actual braiding technique.
This style uses multiple ponytails pulled through each other, making it accessible for those who struggle with traditional braiding.
Step-by-Step Method:
- Gather a section of hair from the crown and create a small ponytail with a clear elastic.
- Divide this ponytail in half and pin each half to the sides temporarily.
- Gather a new section of hair from below the first ponytail.
- Create a second ponytail directly below the first.
- Bring the halves of the first ponytail down around the second ponytail.
- Secure these halves together with a new elastic below the second ponytail.
- Divide the new combined ponytail in half and pin to the sides.
- Create a third ponytail from new hair gathered below.
- Repeat the process: bring down previous halves, secure below new ponytail.
- Continue this pattern down the head and length of hair.
Volume Enhancement:
- Gently pull and loosen each section after securing for maximum fullness.
- Use texturizing spray before starting for better grip and volume.
- The more you pancake each section, the fuller the braid appears.
- This technique works especially well for fine or thin hair needing volume.
Best For: Fine or thin hair, creating volume, no braiding skills required, impressive-looking results.
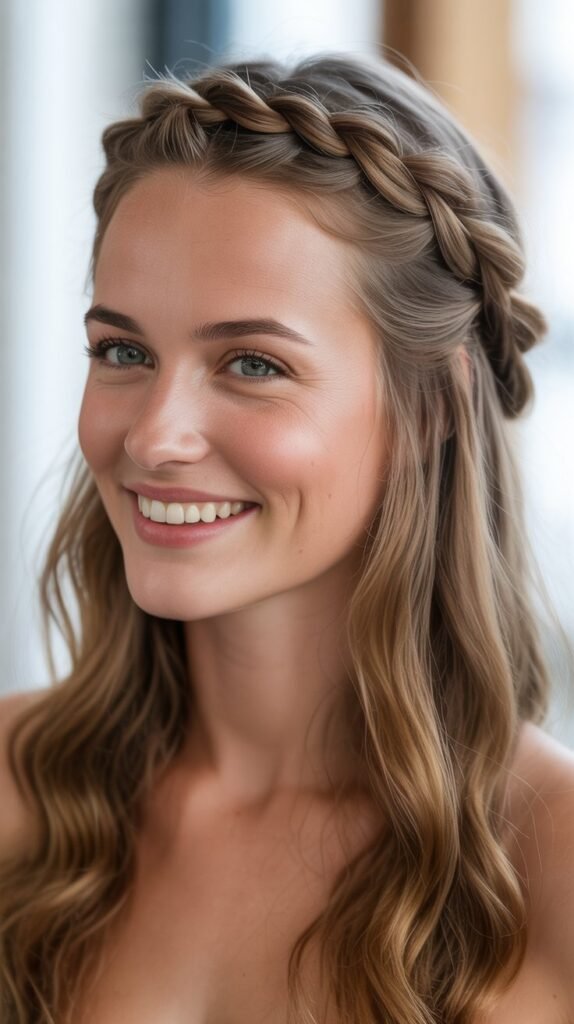
18. Braided Headband

The braided headband uses your own hair to create a braid that functions as a headband, keeping hair off your face while maintaining a natural, cohesive look.
This style works perfectly for controlling bangs and fringe layers.
Creation Process:
- Section hair horizontally from ear to ear along the hairline.
- The front section should be about 1-2 inches deep.
- Clip the back section away temporarily.
- Starting above one ear, begin a small three-strand or Dutch braid.
- Work the braid along the hairline toward the opposite ear.
- Keep the braid close to the hairline for a true headband effect.
- When you reach the opposite ear, continue braiding the tail without adding hair.
- Tuck the end of the braid behind the ear and secure with bobby pins.
- Release the back section to flow freely or style as desired.
Variation Options:
- Create a rope twist instead of a braid for simpler execution.
- Make a thicker braided headband for more dramatic effect.
- Combine with a low ponytail or bun for the back section.
- Add small flowers or decorative pins along the braided headband.
Best For: All hair lengths, controlling bangs, casual bohemian style, keeping hair off face during class.
19. Four-Strand Braid

The four-strand braid creates a more complex, dimensional pattern than traditional three-strand braids.
While it requires more skill and practice, this impressive technique produces a sophisticated result perfect for special school occasions.
Detailed Technique:
- Divide hair into four equal sections at the starting point.
- Number the sections mentally from left to right: 1, 2, 3, 4.
- Cross section 1 over section 2.
- Cross section 4 under section 3.
- Cross the new middle-left section over the new middle-right section.
- Repeat this pattern: outer left over, outer right under, middles cross.
- Keep consistent tension throughout for even results.
- The pattern creates a more intricate weave than three-strand braiding.
- Secure at the ends with an elastic.
Learning Tips:
- Practice with four different colored ribbons first to understand the pattern.
- Work slowly and deliberately until the pattern becomes natural.
- Use clips to hold sections you’re not actively working with.
- This braid looks especially beautiful when pancaked for width.
Best For: Long hair, special events, showcasing advanced skills, creating dimension in solid-colored hair.
20. Messy Side Braid

The messy side braid embraces an intentionally undone, relaxed aesthetic that’s become incredibly popular.
This effortless style looks like you didn’t try too hard while still appearing put-together for school.
Creating Effortless Texture:
- Start with second-day hair or hair with texturizing spray applied.
- Loosely gather hair to one side without brushing it perfectly smooth.
- Leave some shorter layers and face-framing pieces loose intentionally.
- Create a loose three-strand braid, maintaining relaxed tension throughout.
- Don’t worry about the braid being perfectly even or tight.
- Secure at the ends with a loose elastic.
- Gently pull apart sections of the braid to create more volume and texture.
- Pull out a few small pieces around the face for a softer frame.
- Use fingers to slightly rough up the crown area for added texture.
Achieving “Undone” Perfection:
- The key is looking naturally messy, not sloppy or unkempt.
- Use dry shampoo at the roots for texture and grip.
- Sea salt spray enhances the casual, beachy texture.
- Don’t over-pancake; keep some sections tighter for dimension.
Best For: Medium to long hair, casual school days, textured or wavy hair types, relaxed bohemian aesthetic.
21. Infinity Braid

The infinity braid creates a figure-eight pattern that appears to weave endlessly through itself.
This visually stunning technique makes a memorable impression and showcases advanced braiding ability.
Complex Construction:
- Divide hair into two main sections at the starting point.
- Take a thin strand from the outside of the right section.
- Weave this strand over the right section, under the left section, and back over to the right.
- This creates the first loop of the infinity symbol.
- Take a thin strand from the outside of the left section.
- Weave this strand over the left section, under the right section, and back over to the left.
- This completes the figure-eight pattern.
- Continue alternating sides, always taking from the outside and weaving in a figure-eight.
- Keep strands thin and tension consistent for a defined pattern.
Mastery Tips:
- This is an advanced technique requiring significant practice.
- Watch tutorial videos multiple times before attempting.
- Work on someone else first to understand the pattern from an easier angle.
- Consider using different colored extensions while learning to track the pattern.
Best For: Long hair, special occasions, advanced braiders, making a dramatic style statement.
22. Diagonal Dutch Braid
The diagonal Dutch braid travels across the head at an angle rather than straight back, creating an eye-catching asymmetrical look.
This modern twist on traditional Dutch braiding adds visual interest and contemporary style.
Angled Execution:
- Start at one temple near the hairline with a small section of hair.
- Divide into three strands and begin a Dutch braid (crossing under).
- Instead of working straight back, angle the braid diagonally across the head.
- Aim toward the opposite-side nape area as your end destination.
- Pick up hair sections as you work, maintaining the diagonal direction.
- Keep the braid close to the head for a sleek appearance.
- When you reach the opposite side, continue with a regular braid or secure.
- The remaining loose hair can hang free or be styled separately.
Directional Variations:
- Angle from left temple to right nape or right temple to left nape.
- Create two diagonal braids crossing each other for an X pattern.
- Stop the diagonal braid at the back center and gather into a ponytail.
- Combine with a messy bun placed at the braid’s ending point.
Best For: Medium to long hair, asymmetrical modern style, standing out at school, intermediate skill level.
23. Braided Top Knot
The braided top knot combines a Dutch or French braid leading into a high bun at the crown.
This style keeps all hair secured and off the neck, perfect for warm days, athletic activities, or achieving a ballet-inspired look.
Construction Steps:
- Flip your head upside down for easier access to the nape area.
- Start a Dutch braid at the nape of your neck with a small section.
- Work the Dutch braid upward toward the crown, picking up hair as you go.
- When you reach the crown area, stop braiding and gather all hair.
- Flip your head back to normal position.
- The Dutch braid should now run from nape to crown.
- Gather the braid and all remaining loose hair into a high ponytail at the crown.
- Twist the ponytail and wrap it around the base to form a bun.
- Secure the bun with bobby pins, tucking the ends underneath.
- Use additional pins to secure any loose sections of the braid.
- Spray with hairspray for all-day hold.
Styling Refinements:
- Keep the Dutch braid tight and close to the head for a sleek, polished appearance.
- Make the top knot messy and loose for a more casual, relaxed vibe.
- Wrap a small section of hair around the bun base to conceal the elastic.
- Add a decorative scrunchie or hair accessory around the bun for extra flair.
Best For: Long hair, dance or athletic activities, keeping hair completely off neck and face, ballet-inspired looks.
24. Twisted Crown with Braid

The twisted crown with braid combines twisting techniques around the hairline with a braid element, creating a romantic, whimsical style.
This combination offers the elegance of a crown braid with added textural interest from the twisting.
Creation Method:
- Section hair horizontally from ear to ear across the top of the head.
- Clip the bottom section away temporarily.
- Starting at one temple, take a small section and divide into two strands.
- Twist the two strands around each other while picking up new hair from the hairline.
- This creates a twisted rope effect that follows the hairline like a headband.
- Work the twist across the forehead toward the opposite temple.
- When you reach the opposite side, transition into a three-strand braid.
- Braid the remaining length of this section.
- Wrap the braid around the back of the head and secure with bobby pins.
- Release the bottom section to flow freely or incorporate into the crown.
Enhancement Ideas:
- Pancake the twisted section gently for a fuller, softer crown.
- Add small flowers or decorative pins along the twisted crown portion.
- Create matching twists on both sides that meet at the back.
- Combine with loose curls in the bottom section for maximum romance.
Best For: Medium to long hair, special school events, prom or formal occasions, romantic feminine aesthetic.
25. Zigzag Braid

The zigzag braid creates a playful pattern by changing the braid’s direction multiple times as you work down the head.
This fun, geometric style stands out at school and showcases creative braiding skills.
Zigzag Technique:
- Start a Dutch braid on one side of the head near the temple.
- Work the braid at a diagonal angle toward the opposite side.
- After incorporating 3-4 sections of hair, change direction sharply.
- Angle the braid back toward the original side, creating the first “zig.”
- Continue braiding at this new angle for another 3-4 sections.
- Change direction again, creating the “zag” of the pattern.
- Continue alternating directions down the head in a zigzag pattern.
- The number of zigzags depends on your hair length and desired effect.
- Finish with a regular braid once all hair is incorporated.
Pattern Perfection:
- Use a mirror to ensure your zigzags are evenly spaced and sized.
- Mark where you want to change direction with small clips before starting.
- Keep consistent tension despite the directional changes.
- This style works best with Dutch braids as they show the pattern more clearly.
Best For: Long hair, making a bold statement, fun casual school days, advanced braiding skills.
26. Braided Mohawk

The braided mohawk features braids on both sides of the head that leave the center section raised or styled differently.
This edgy yet school-appropriate style offers a bold look that’s surprisingly practical.
Building the Mohawk:
- Create three vertical sections: one center section from forehead to nape, and one on each side.
- Clip the center section up and away.
- Starting at the hairline on one side, create a tight Dutch or French braid.
- Keep this side braid very close to the head, working straight back.
- Secure the side braid at the nape area.
- Repeat on the opposite side, matching the placement and tightness.
- Release the center section.
- Style the center section: leave smooth and raised, tease for volume, or create a center braid.
- Use bobby pins to secure where the side braids meet the center section.
Center Section Options:
- Leave the center smooth and flat for a sleek, modern mohawk.
- Tease and volumize the center for a dramatic raised effect.
- Create a center Dutch braid for a triple-braid mohawk style.
- Twist the center section and pin for a twisted mohawk variation.
Best For: Medium to long hair, making a bold style statement, alternative aesthetic, keeping sides controlled.
27. Pancake Braid

The pancake braid refers to any braid that has been gently pulled apart to create width, volume, and a softer appearance.
This technique transforms regular braids into romantic, fuller styles perfect for special school days.
Pancaking Technique:
- Create any type of braid first (Dutch braids pancake most dramatically).
- Complete the entire braid and secure the end with an elastic.
- Starting from the bottom, gently pull on the outer edges of each braided section.
- Pull evenly on both sides to maintain symmetry.
- Work your way up the braid, pancaking each section gradually.
- Pull more for maximum volume or less for subtle enhancement.
- The braid should widen significantly while maintaining its structure.
- Use your fingers to adjust and perfect the pancaked appearance.
- Finish with light hairspray to hold the fuller shape.
Maximizing Effect:
- Dutch braids show pancaking more dramatically than French braids.
- Spray with texturizing spray before braiding for better hold when pulled.
- Pull each section multiple times to achieve desired fullness.
- This technique makes thin hair appear much thicker and fuller.
Best For: Fine or thin hair, creating romantic volume, special occasions, enhancing any braid style.
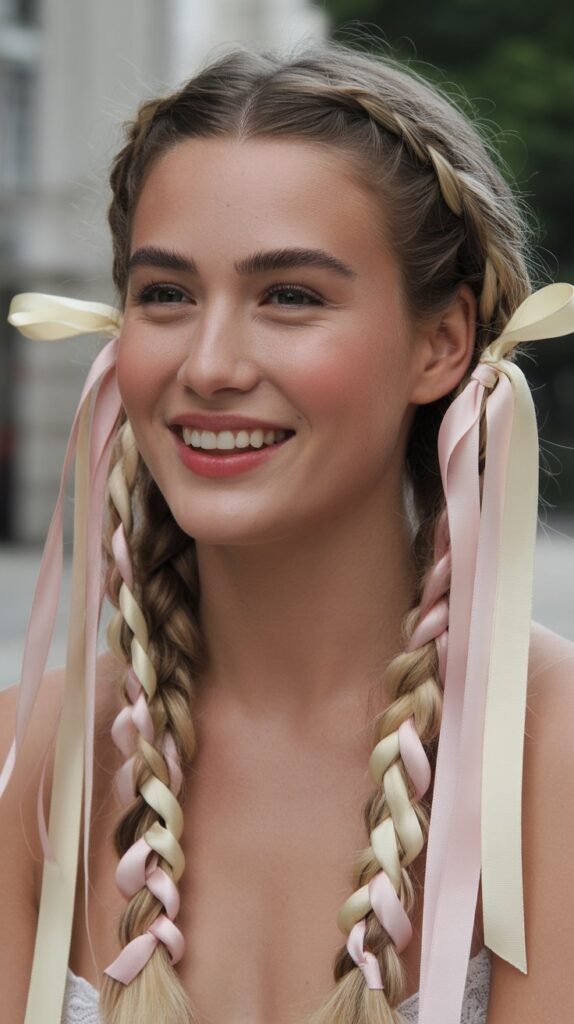
28. Braided Pigtails with Ribbons

Adding ribbons to classic braided pigtails elevates a simple style into something special and personalized.
This customizable option allows students to incorporate school colors or personal style preferences.
Ribbon Integration:
- Create a center part dividing hair into two equal sections.
- Choose ribbons in your preferred colors (school colors work great).
- Starting on one side, take a small section at the hairline.
- Place the center of the ribbon under this section against the scalp.
- Divide hair into three strands, incorporating ribbon ends into two of the strands.
- Begin a three-strand braid with the ribbon woven into two sections.
- As you braid, the ribbon will appear as colored strands within the braid.
- Continue braiding down the length and secure with an elastic.
- Repeat the process on the opposite side with matching ribbon.
- Tie the ribbon ends into bows at the bottom or leave them flowing.
Ribbon Variations:
- Use different colored ribbons on each side for asymmetry.
- Try patterned ribbons (polka dots, stripes) for added interest.
- Use wider satin ribbons for special occasions.
- Coordinate ribbon colors with your school uniform or outfit.
Best For: All hair lengths, school spirit days, adding personalization, younger students, special events.
29. Snake Braid

The snake braid creates a unique slithering effect by incorporating a contrasting strand that weaves back and forth through a standard braid.
This eye-catching technique adds dramatic visual interest perfect for standing out at school.
Complex Method:
- Divide hair into four sections: three for the main braid and one thin “snake” strand.
- Set the thin snake strand aside temporarily.
- Begin a regular three-strand braid with the three main sections.
- After 2-3 crosses, bring the snake strand across the front of the braid horizontally.
- Continue braiding the main three strands for 2-3 more crosses.
- Bring the snake strand back across the braid in the opposite direction.
- The snake strand should zigzag back and forth across the braid’s face.
- Continue alternating: braid main sections, snake crosses, braid, snake crosses.
- Keep the snake strand visible on the braid’s surface throughout.
- Secure at the ends, incorporating the snake strand into the final elastic.
Snake Styling:
- Use a brightly colored clip-in extension as the snake strand for maximum contrast.
- The snake strand should be thinner than the main braid sections for clear definition.
- Practice maintaining tension on the snake strand while braiding the main sections.
- This advanced technique requires patience and coordination.
Best For: Long hair, creative expression, advanced skill level, making a memorable style statement.
30. Heart Braid

The heart braid creates an adorable heart shape at the crown using braiding and pinning techniques.
This sweet, romantic style works wonderfully for Valentine’s Day, school dances, or anytime you want an extra-special look.
Heart Creation:
- Section out hair from temple to temple across the top of the head.
- Create a center part within this section, dividing it into two parts.
- Starting on one side, create a Dutch braid curving outward from the center.
- Angle the braid to create one half of a heart shape.
- When you reach the back center, secure with a small elastic.
- Repeat on the opposite side, creating the matching heart half.
- Both braids should curve outward then meet at a point in the back center.
- Join both braids together with bobby pins, forming the bottom point of the heart.
- Adjust the curves to perfect the heart shape.
- Leave remaining hair down or gather into a ponytail below the heart.
Perfecting the Shape:
- Use a mirror to check the heart shape from behind.
- Pancake the outer edges of the braids to widen the heart.
- Keep the curves gentle and rounded for a proper heart shape.
- Pin securely where the two braids meet to maintain the point.
Best For: Medium to long hair, Valentine’s Day, school dances, romantic occasions, intermediate to advanced skill.
31. Five-Strand Braid

The five-strand braid creates an intricate, woven appearance that’s wider and more complex than traditional braids.
This advanced technique produces stunning results perfect for showcasing exceptional braiding skills at school.
Intricate Technique:
- Divide hair into five equal sections at the starting point.
- Number sections mentally from left to right: 1, 2, 3, 4, 5.
- Cross section 1 over section 2, then under section 3 (1 is now in the middle).
- Cross section 5 under section 4, then over the middle section.
- Repeat this pattern: far left goes over-under to middle, far right goes under-over to middle.
- Keep consistent tension and equal sections for even results.
- The pattern creates a wide, flat, intricate weave.
- Continue down the length of hair and secure with elastic.
Learning Strategy:
- This is the most complex braid in this list requiring significant practice.
- Use five different colored ribbons tied to a surface while learning.
- Work very slowly, verbalizing the pattern (over-under, under-over).
- Watch slow-motion tutorials multiple times before attempting.
- Consider having someone else create this braid on you for special events.
Best For: Long hair, special occasions, advanced braiders only, showcase events or competitions.
32. Scarf-Wrapped Braid

The scarf-wrapped braid incorporates a fabric scarf or bandana into the braiding, adding color, pattern, and bohemian flair.
This accessorized style allows for endless customization while keeping hair neatly secured.
Scarf Integration:
- Choose a long, narrow scarf or fold a square bandana into a long strip.
- Gather hair at your desired starting point (side, center, or low).
- Place the center of the scarf at the base against your scalp.
- Divide hair into three sections.
- Integrate both scarf ends into the two outer hair sections.
- The center section remains just hair, while outer sections include scarf.
- Braid normally, with the scarf being braided into the outer strands.
- The scarf will be visible throughout the braid, adding color and texture.
- Secure at the end with an elastic.
- Tie the scarf ends into a bow or leave them trailing.
Scarf Selection:
- Choose silk scarves for a sophisticated look.
- Use cotton bandanas for casual, everyday style.
- Select patterns that complement your outfit or school colors.
- Coordinate scarf colors with your clothing for a cohesive appearance.
Best For: All hair lengths, adding color without dye, bohemian aesthetic, personalizing school look.
33. Combo Braid (Multiple Techniques)

The combo braid combines multiple braiding techniques within one hairstyle, creating a unique, customized look.
This creative approach allows you to showcase various skills and design a truly original style for school.
Creative Combinations:
- Start with a Dutch braid from the crown to mid-head.
- Transition to a fishtail braid for the middle section.
- Finish with a rope braid at the ends.
- Each transition point adds visual interest and texture variation.
- Alternatively, combine French braid with waterfall elements.
- Mix regular three-strand sections with four-strand sections.
- Incorporate bubble braid sections between traditional braided sections.
- The possibilities are limited only by your imagination and skill level.
Transition Tips:
- Make clean transitions between braid types for a polished look.
- Use small elastics at transition points if needed (can be hidden).
- Practice each braid type individually before combining them.
- Sketch your planned combo braid before starting to visualize transitions.
Design Ideas:
- Dutch braid to side fishtail transition for dimension.
- Crown braid into rope braid ponytail combination.
- Half-up with multiple mini braids of different types.
- Alternating Dutch and regular braid sections down the length.
Best For: Long hair, advanced braiders, creative expression, making a unique statement at school.
Essential Braiding Tips for School Success
Preparation Makes Perfect:
- Always start with brushed, tangle-free hair for smoother braiding.
- Second-day hair often braids better than freshly washed hair due to natural texture.
- Apply leave-in conditioner or light styling cream to reduce flyaways.
- Keep a spray bottle of water nearby to dampen sections that become too dry.
Tools and Products:
- Invest in quality hair elastics that won’t damage hair or snap easily.
- Keep bobby pins in matching hair colors for invisible securing.
- Use a rat-tail comb for creating clean, precise parts.
- Texturizing spray or dry shampoo adds grip to slippery, fine hair.
- Clear elastics work best for minimalist looks where you don’t want visible bands.
Timing Strategies:
- Practice new braids on weekends when you have extra time.
- Set your alarm 10 minutes earlier on school days for braiding time.
- Perfect 2-3 reliable “go-to” braids for rushed mornings.
- Prep hair the night before by detangling and applying products.
Making Braids Last:
- Sleep on a satin or silk pillowcase to reduce friction and frizz.
- Use a light hairspray for all-day hold without stiffness.
- Carry extra elastics and bobby pins in your backpack for touch-ups.
- Refresh braids the next day by smoothing flyaways with water or styling cream.
Conclusion
Mastering these 33 Simple Braided Hairstyles for School opens up a world of styling possibilities that combine practicality with personal expression.
From quick everyday options like the classic three-strand braid and rope braid to more elaborate styles like the five-strand braid and heart braid, there’s a perfect braided hairstyle for every school day, skill level, and hair type.
The beauty of braiding lies not only in keeping hair neat and manageable throughout busy school days but also in the confidence that comes from wearing a hairstyle you created yourself.
Whether you’re rushing to catch the bus with a simple side braid or spending extra time on a special waterfall braid for school pictures, these techniques empower you to take control of your appearance and develop a valuable life skill.
Remember that every expert braider started as a beginner, and practice truly does make perfect. Start with the simpler techniques, gradually work your way up to more complex styles, and don’t be discouraged by initial imperfections.
With the comprehensive instructions, styling tips, and creative variations provided in this guide, you now have everything you need to transform your school hair routine and discover the joy of braiding.
